Mixed Media Art Fundamentals

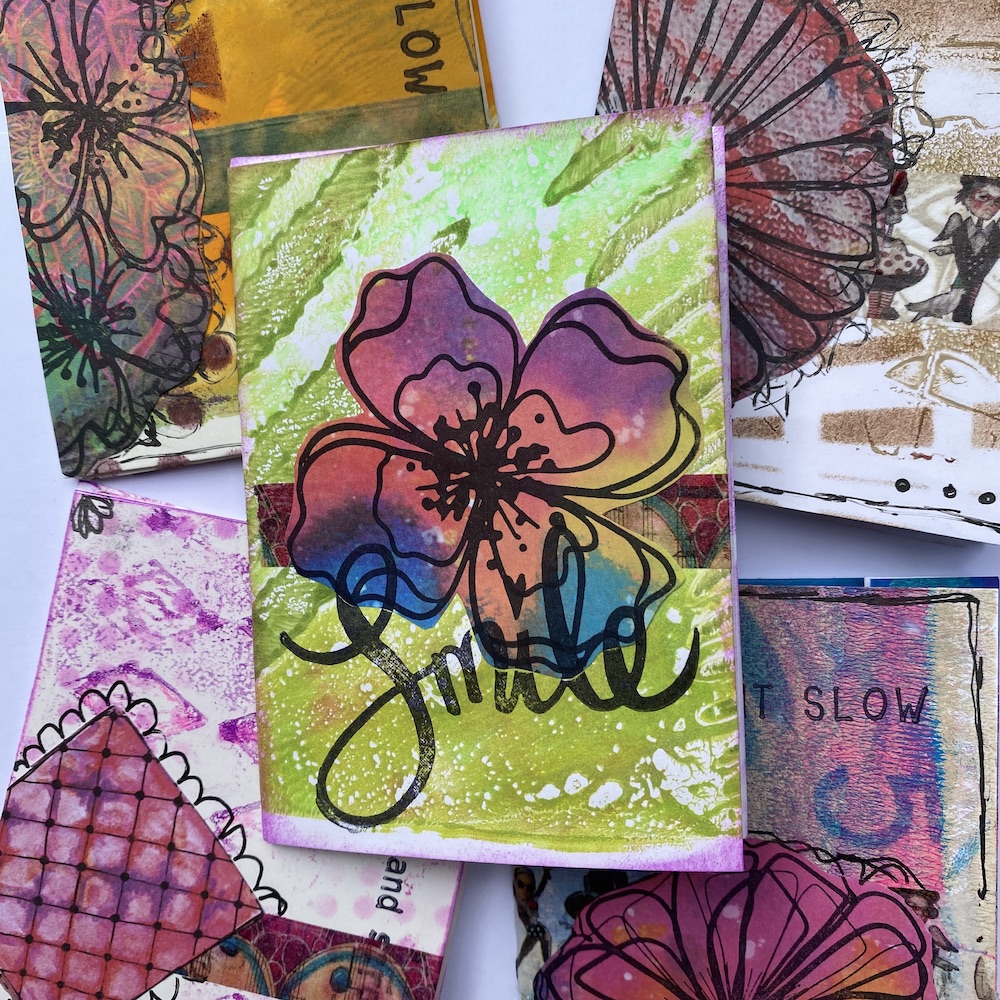
Get hands on and learn the fundamentals of mixed media art in this fun class. Based on the Mixed Media Art Fundamentals series on YouTube, Michelle will run through the basics to get you started plus her 5 steps to art journaling so you can learn the rules before breaking them as you experiment with your own style!

Saturday 23 March, 2024, 1pm to 4:30pm

What to bring:

  • Art journal (if you don’t already own one, you can buy one before the class OR elect to work on pieces of mixed media card)
  • ephemera for collage
  • favourite paints
  • paint brushes
  • water pot
  • gel medium
  • stamps and block
  • water-resistant inks
  • stencils & your favourite sponge for stencilling
  • markers; colours plus black and white
  • water soluble pencil or crayon
  • your preference of kitchen towel, cloth or baby wipes
  • apron or painty clothes

Where:

Mixed Media Art Studio
Urban Acres – Unit 135
Gilby Road
Mount Waverley, Melbourne, Australia
[find us here]

Please arrive at the Mixed Media Art studio 10 minutes before the beginning on your class.
Maximum 6 crafters per session.

Beginners to intermediate level.
Click HERE to book

Create a mini book from A4 gel print

Creating your own mini book is so much fun and easy for any age to master! Let’s turn these colourful A4 gel prints into a mini book, ready to decorate with your favourite mixed media techniques.

What you need to create a mini book:

Materials:
• A4 Gel Print
• spare gel prints
• gel print circles
• ephemera
• Art by Marlene Die Cut image

Tools:
• Scissors
• Circle Punches
• Glue Stick
• Washi tape
• Dina Wakley Scribble Sticks
• paint brushes
• mini ink pads
• ink blenders and handles
• stencils

Step-by-step instructions to create a mini book

Take 1 piece of A4 gel print.

Fold in half; use finger nail to crease fold

Open paper

Turn over and fold the opposite way, along the same fold. Crease well with fingernail.

Fold in half, long ways; use finger nail to crease fold

Open paper

Turn over and fold the opposite way, along the same fold. Crease well with fingernail.

Open paper; it should look like this

Fold one of the short ends into middle; Crease well with finger nail

Turn around and fold other end

Open folds

Turn over and fold the opposite way, along both folds. Crease well with fingernail.

Fold in half, along short side

Use scissors to cut one segment, along the folded edge.

Pinch middle section and fold out bottom flaps

Pull middle section forward and backward

Fold Flat

Juggle to get mini book to fold flat and close.

Finished mini book.

Now you are ready to decorate your mini book


Decorating your mini book

All of your mixed media and papercraft techniques can come into play to decorate your mini book!

Mini book cover ideas

Here we have added washi tape to create a horizon, about a third of the way up. Then we have added an image, stamped a sentiment and finished off the cover with doodles and markings using a black Fudeball pen to finish off our mini book covers.


Decorating the inside of our mini book

The two ideas we used here to decorate our mini book included using a circle punch to create a window, then adding an image of interest behind it. We also created a mini picket by sealing the base of the opening with washi tape and using a smaller circle punch to create a finger pull at the top.

We hope you have enjoyed making your mini book from A4 gel printed paper!

Please SHARE your creation in our Facebook Group / Mixed Media Studios Australia

Or on Instagram with the hashtag #MMAStudio

Happy creating,
Michelle

Access All Areas @ MMA Studio in June 2022

It’s the ULTIMATE crafter’s day out! ACCESS ALL AREAS  give you access to all of Mixed Media Art Studio supplies PLUS guidance from our talented resident artist Michelle Brown.

With your Access All Areas studio pass, you get:

  • access all of the Mixed Media Art studio supplies, including paints, stamps, stencils, ephemera, inks, mediums, foils, gel plates, journal dies, cutting dies, die cutting machines and more
    (bring your own art journals, cardstock and canvases, or purchase them from the store)
  • access one-on-one tuition with Michelle, covering gel printing, art journaling, making an handmade journal and more
  • create in a wonderfully supporting atmosphere
  • small group and fantastic facilities (max 6 people)
  • plus a $10 voucher to spend in the MMA store on the day (min spend $30)
  • a relaxed creative Saturday 10am to 4pm

CLICK HERE for details and to book – places limited

Mixed Media Mermaid Painting

This article was written by Michelle Brown

I’ve signed up for a tip-in page round robin with one of the groups I belong to over the internet. We are to create a layout of 2 pages each month to send to another on our list.

Last month the assignment theme was mermaids and sea creatures and I had heaps of fun creating this layout. I also love the method and formula that seems to be developing for this project and that’s what I wanted to share with you today.

mixed media art with mermaids

Firstly I take a piece of water colour paper and tape it to a backing sheet, covered in cereal box plastic (as shown in MMA Tips Video #1), add some ephemera with PVA glue then cover with a layer of gesso.

ephemera and gesso base

Then I started adding acrylic paints. I was after an effect of looking up into the sunlight from depth of the ocean, so I wanted to use teals and blues and phase them into white. I build up each layer, blending al title between colours and allowing it to dry a little before I add another layer.

white, blue and greens paints

I painted the rock for the mermaid with  a little brown and dark blue. I avoided using black as I wanted it to be dark but not too solid, so the brown and navy washes worked well.

blues and browns for rock

I found a great quote via Google and typed in up in nice font, printed it out then for it into strips. These got stuck onto the background along with the mermaid, with gel medium. The mermaid image was found over at Paper Street Supplies (no longer available.)

computer generated text to add to the story

Then some more blues were added to make the border darker and stencilling, with white paint, and highlighting words, with water coloured pencils, were added.

paints and pastels

After varnishing the layout, I realised it needed a few highlights, Since I couldn’t find my gold thread to add hand stitching, I chose to use a textured stamp and add a free area with Gold Brilliance ink. I heat set the stamping  with a heat gun as I was worried it may not dry properly over the varnish (and I was in a hurry!)

gold highlights added

Then I cut out the pages with a cart knife and metal ruler, added gold edging with metallic pens. i also added a few little gold sticker and some german scrap to finish it off.

right side of layout

left side of layout

~*~*~*~*~*~*~*~*~*~*~*~*~*~*~*~*~*~*~*~*~*~*~*~*~

Michelle Brown is passionate about mixed media art and enjoys sharing her knowledge and techniques with you to allow you to express your own creativity. Michelle understands that many of us have an inner need to create. By learning a few basic techniques the amazing world of mixed media art is accessible to everyone! You can see more of her work at Mixed Media Art.

~*~*~*~*~*~*~*~*~*~*~*~*~*~*~*~*~*~*~*~*~*~*~*~*~
.

.