~ * ~
This article is written by Kathi Rerek
My father used to smoke cigars that were packaged in wooden cigar boxes. He reused those boxes to store various items like nails, screws, keys, and batteries. When he passed away, I claimed many of those boxes.
My Upcycled cigar box will feature colored stamped images, a painted surface, and seashells from my collection.
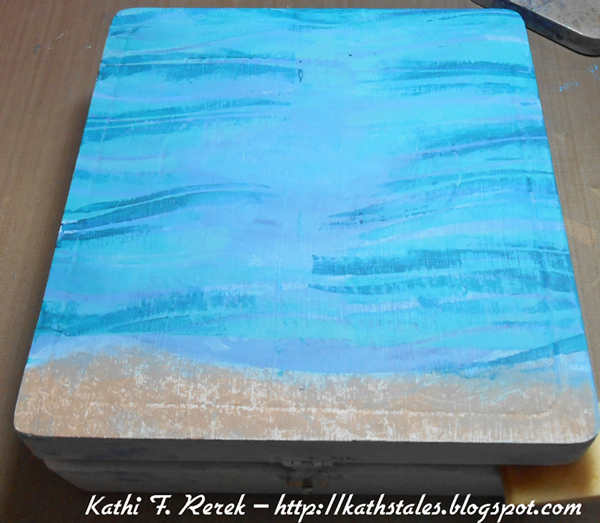
The first step is to smooth the wooden surface with sandpaper so that there are no splinters or jagged bits. When done, the exterior was coated with a layer of gesso to seal the wood and provide some tooth for the acrylic paint. The gesso was left to dry overnight.
The surface of the box was painted with Mermaid, Bora Bora, Sky, and Beach Hut Fresco Finish acrylic paints by Paper Artsy as well as Salty Ocean and Chipped Sapphire Distress paints by Ranger Industries. The paint was applied top and sides of the box and blended using Cut n’ Dry Foam and heat set between layers.
Inky Pool and South Pacific Fresco Finish acrylic paints were sponged over the Waves stencil by Memory Box
A paintbrush was used to apply Nougat and Irish Cream Fresco Finish to the bottom of the top of the box.
Leaf Green Archival ink by Ranger and Forest Green StazOn ink were sponged over a Club Scrap vine stencil to both sides of the top of the box.
Bone Stone Effects paint by Art Anthology was thickly applied over this using a palette knife, left to dry, then the same colors of Fresco Finish paints were used to add definition to the “sand”.
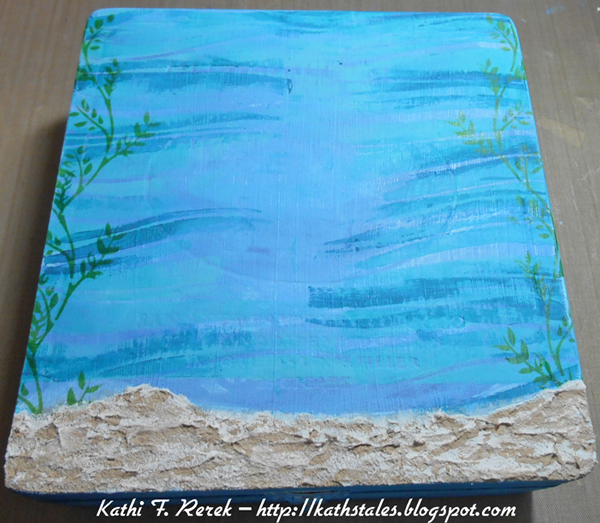
A Flourish Trim Spellbinders die was used to die-cut white cardstock, which was then sponged with Leaf Green Archival ink by Ranger and Forest Green StazOn ink. Gel medium was used to adhere it to the top of the box.
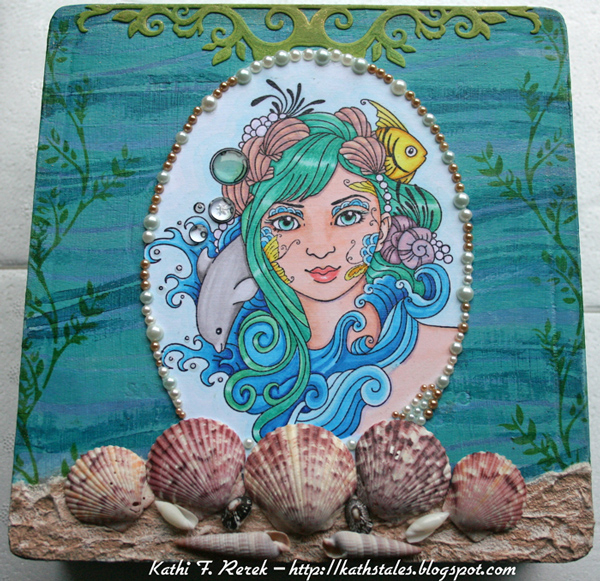
Water from The Elements collection by Susana Loves Stamps was stamped with Tuxedo Black Memento ink onto white cardstock and colored with Copic markers. The image panel was cut into an oval and adhered to the box with gel medium.
Gel medium was sponged over the die-cut, image panel, and the top of the box, excluding the “sand area”.
Shells from my collection were adhered to the sand area of the box using Best Glue Ever by ScrapPerfect.
Pearls were adhered around the oval to finish the top of the box.
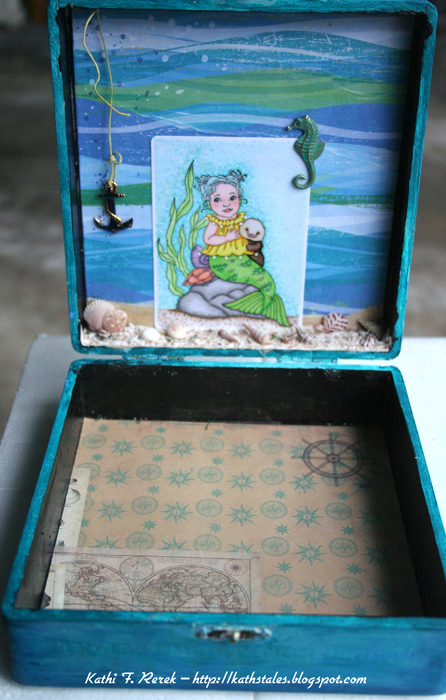
The inside of the box was painted with black acrylic paint and the rims were painted with Beach Hut Fresco Finish acrylic paint.
Water Babies, a stamp by Susana Loves Stamps, was stamped with Tuxedo Black Memento ink onto white cardstock and colored with Copic markers. White Gelly Roll Glaze pen was used to highlight the pearls on the mermaid’s outfit. The stamped image was die-cut using a Die-Namics die.
Patterned paper from my stash was cut to fit the interior of the box. The stamped panel was held along the bottom and a continuation line was marked on the patterned paper. Nougat and Irish Cream Fresco Finish acrylic paint was painted along the bottom of the patterned paper. The stamped panel was adhered to the patterned paper, which was in turn adhered to the inside top cover of the box using gel medium.
Bone Stone Effects paint by Art Anthology was thickly applied to the bottom of the inside of the box using a palette knife, left to dry, then Nougat and Irish Cream Fresco Finish paints were used to add definition to the “sand”. More shells from my collection were glued to the “sand”.
A sea horse metal charm was painted with Verdigris, Jade, Moss Patina by Ranger and Nougat Fresco Finish acrylic paint, and then sanded when dry. It still was missing something, so it was smooshed into a Champagne Dazzle VersaMark pad and heat embossed with clear embossing powder. The seahorse was adhered on the right side of the stamped image panel.
A brass anchor charm was colored with blue Sharpie marker and suspended from the top with some waxed floss.
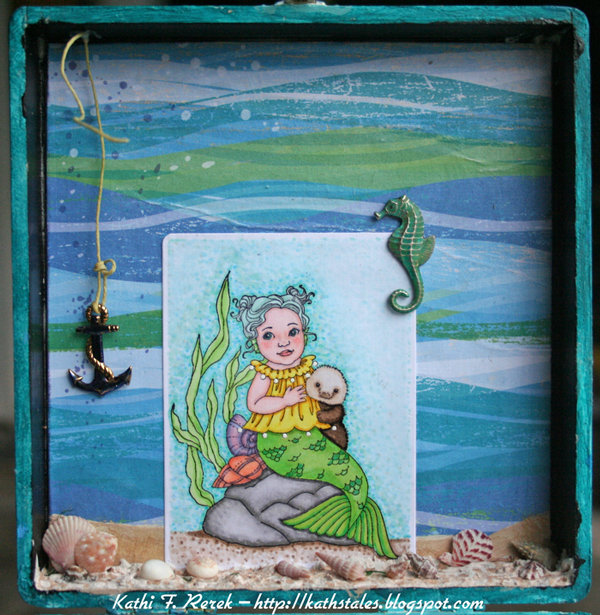
Patterned paper from the Maritime 6×6 pad by 7 Gypsies was adhered to the inside base of the box.
~*~*~*~*~*~*~*~*~*~*~*~*~*~*~*~*~*~*~*~*~*~*~*~*~
Kathi F. Rerek is a mixed media artist who lives in New Jersey with her husband, daughter, and two cats. She’s been crafting for almost fourteen years and has been lucky to have served on several design teams.
Her blog, Kat’s Tales of Stamping and Scrapping can be found at kathstales.blogspot.com
Water and Water Babies are stamps by Susana Loves Stamps. They can be found at susanascustomartandcarddesign.com
~*~*~*~*~*~*~*~*~*~*~*~*~*~*~*~*~*~*~*~*~*~*~*~*~
.
.


Recent Comments