Michelle G Brown | Mixed Media Art

Last-minute Gift Card Wrappers

~ * ~

This article is written by Katja Blum

It took me a while to like gift cards. In my family, gift cards, certificates and all kinds of “pick your own” gift promises were seen as an afterthought, proof that the giver didn’t remember until the last minute or put much thought into your gift. I don’t think that’s true. In my mind, a gift cards says “I think you deserve a treat, please pick exactly what would make you smile right now”. Whereas very sensible and frugal people might use a check or cash to do sensible and frugal things, a gift card is fun. It doesn’t look like “real” money, and it’s perfectly okay to spend it on something entirely frivolous.

Hurray for gift cards – but let’s be honest: Sometimes we do buy them at the last moment. So here are a few ideas for some mixed media flavored presentation ideas for holiday gift cards.

General tip: You shouldn’t glue, staple or otherwise directly attach a gift card to anything, because you might damage the strip on the back. Many cards come with a small envelope anyway.

If you have a day

If you still have a day, anything is possible! How about making a collage or mixed media painting and using the envelope as part of the background? Just affix it to whatever paper or canvas you are using and paint, stencil and decorate right over it. Just make sure you have the flap facing out, so the card can be inserted and removed without ripping the envelope off the painting. And don’t glue the flap shut with gel medium. Or make your own simple card pocket by gluing a piece of paper, card or fabric to the piece on three sides, leaving the top open. While painting, you can slip a piece of freezer paper into the pocket to avoid pasting it shut.

If you have a few hours

I like felt ornaments. They are easy to make – and felt can be decorated with anything. The coffee shop card I’m giving this Christmas is going in a little mug ornament, which I plan to slip on the recipient’s tree, so she can find it later.
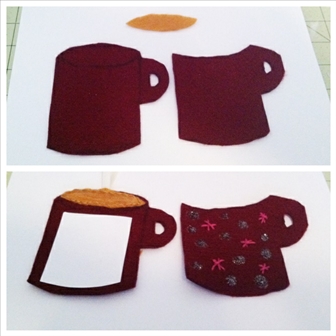
Cut out parts of the felt ornament

  1. Cut out the mug shape and oval “coffee”. Use the shape as a template to cut out the mug again, but without the top. This will be the pocket for the gift card. You can do this with any shape. If you want to make a snowman, for instance, just cut out the bottom snow balls. Or you could cut out your ornament and put a rectangular pocket on the back – but I like the card peeking out in the front.
  2. If your ornament is a bit on the big or your felt is on the thin side, you can make it less floppy by gluing a piece of cardstock to the base ornament.
  3. Sew the coffee to the bigger mug shape, also attaching a ribbon loop for hanging, and decorate the front pocket – beads, embroidery, paint, glitter glue … The back of the pocket won’t be visible later, so it doesn’t have to be super neat.
  4. Sew the front pocket to the mug base. If, like me, you are not very good at sewing, thin thread in a similar color and a regular sewing needle works best, as your stitches will not be very visible.
  5. Place the card in the pocket. Give away.

If you have an hour or less

The second item on my art to-do list for 2015 is “Learn origami”. I’m fascinated by the possibilities, especially in combination with fabric. If you are really pressed for time, a simple origami envelope can be folded in minutes. Almost any kind of rectangular paper works for the envelope here – and you can, of course, decorate it as much as time allows. Using a piece of fabric gives an unexpected twist – lightweight to medium fabrics work best, my favorite is quilting cotton.

The fabric needs to be stiffened to hold the creases better. You can spray it with a thin coat of varnish or laundry starch. The one thing I always have in the house is white glue, so I dunked the fabric rectangle in a solution of two parts water and one part white glue. Smooth the fabric out on a sheet of freezer paper or plastic. It will peel off when dry. The fabric is going to be stiff, but can still be decorated with needle and thread, if desired.

I used paper to demonstrate the folding steps – a rectangle of about 8″ x 11.5″ makes an envelope big enough for most cards.
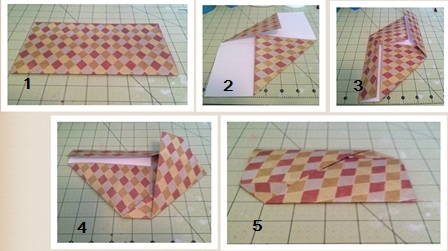
Folding steps for the origami envelope.

Folding instructions:

  1. Fold the paper in half, make a sharp crease and unfold.
  2. Fold the top right and bottom left corners down to the center crease.
  3. Fold the top left and bottom right sides inward so that they meet the vertical triangle edges.
  4. Turn the paper 90° and fold the right side down to meet the bottom edge. Tuck the edge into the flap at the bottom.
  5. Fold the left side to the top edge and tuck it into the flap as well.

Slide the gift card into the slit in the center. The envelope has two layers of folds. Slip the card into the bottom layer, because the short sides are open in the layer above.
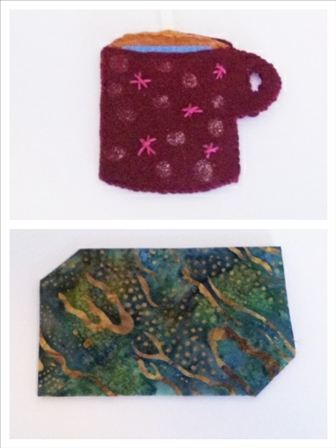
Finished ornament and fabric envelope

Enjoy giving a gift card to someone special this holiday season!

(Oh, and just in case this article is giving my family some festive ideas – remember the mantra, guys: books, crafts, coffee!)

~*~*~*~*~*~*~*~*~*~*~*~*~*~*~*~*~*~*~*~*~*~*~*~*~

Katja Blum is a writer and translator from Tulsa, OK. As an artist, she started with yarn, fabric and papier mache (rarely together), branching out into collage and other paper arts about ten years ago. Her latest obsession is making soft stuffies and art dolls – to the delight of her toddler. She also likes to find creative solutions for ugly or broken things around the house – to the delight of her husband.

You can see more of her work with fiber, paper and words at www.thewaywardsheep.com

~*~*~*~*~*~*~*~*~*~*~*~*~*~*~*~*~*~*~*~*~*~*~*~*~

.

.
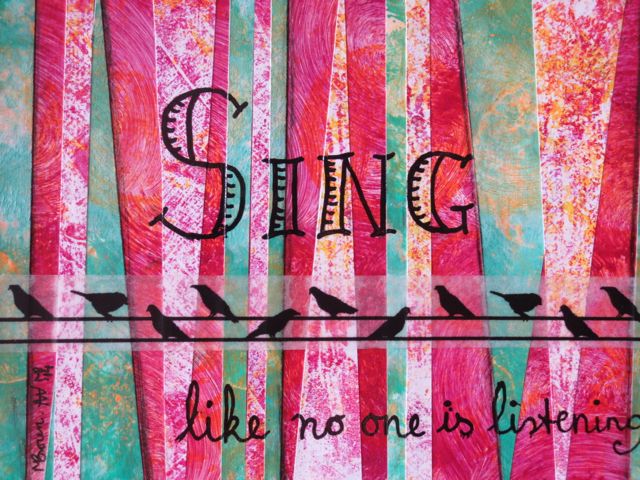
Turn your Gelli Prints into Inspiring Framed Gifts

~ * ~

This article is written by Michelle G. Brown

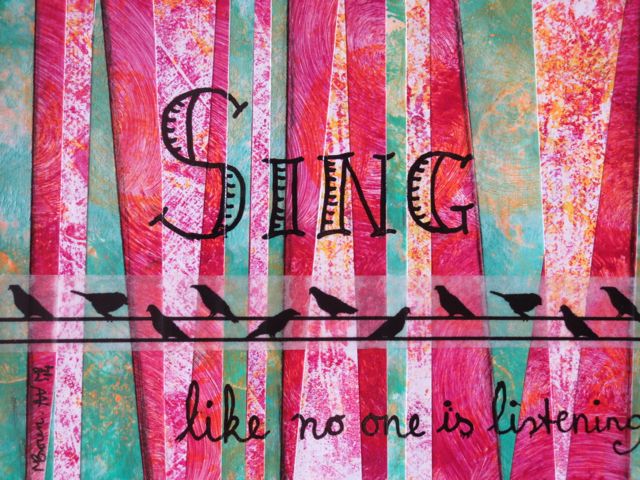
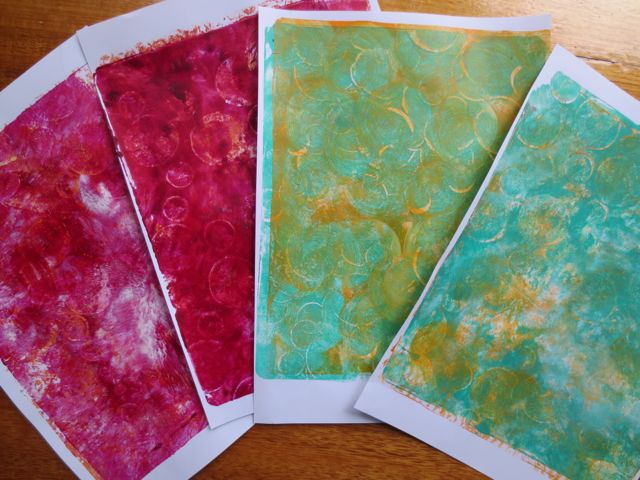
Mono-printing with GelliArts Gelli Plates has become one of my favourite mixed media art techniques for creating backgrounds (you can see some of my first attempts and step-by-step guide here and once you get into the swing of things, the prints pile up quickly! So I decided to take a second-hand photo frame and up-cycle it into an inspiring piece of mixed media art.

Use background papers into a handmade gift

Materials

– Background papers or Gelli prints

– Photo frame; here I used a 5” x 7” frame

– piece of cardboard to fit frame

– glue; PVA or Gel Medium

– Washi tape

– Black Marker; here I’ve used my Golden Black pen Montana Marker with Golden Fluid Acrylic

Create your Framed Gift

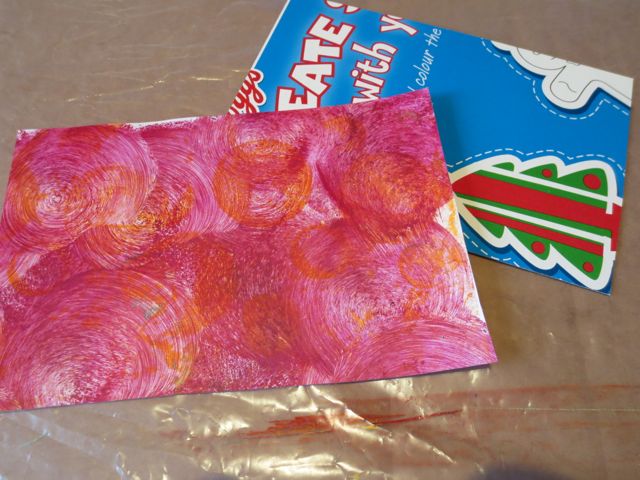
1. Gather your materials and a few pieces of background paper in colors that work well together

Using Gelli prints to make handmade gifts

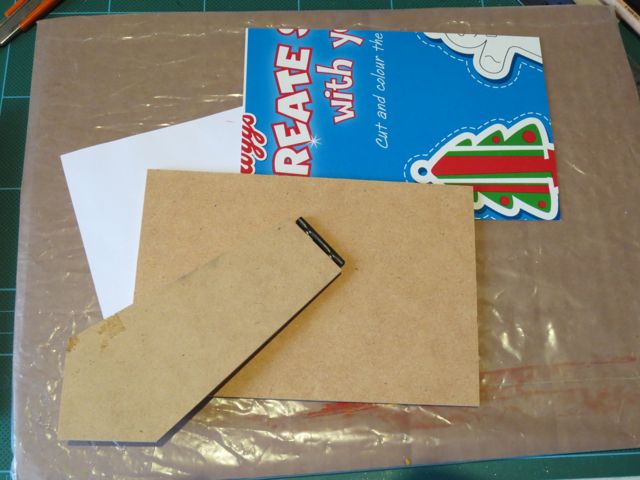
2. Take the back off your photo frame and use it to cut a piece of cardboard to size so it will fit into the frame. I used a piece of cereal box cardboard. Check that it does fit into the frame and trim if needed.

Gelli prints to create mixed media gifts

3. Use the cardboard to cut a piece of background paper to size.

Gelli prints to create mixed media gifts

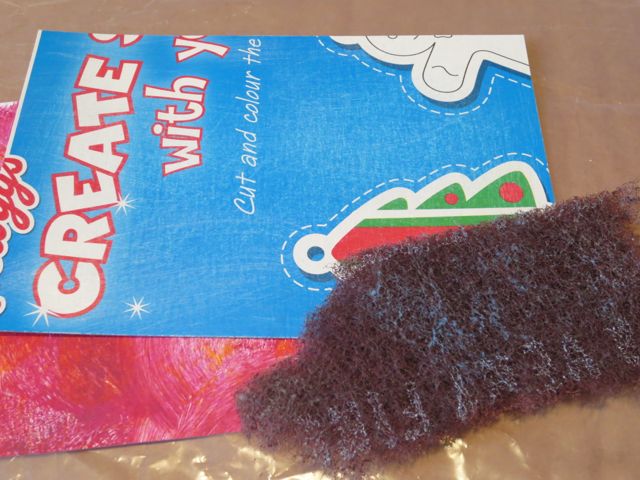
4. Use a piece of scotch brite or sandpaper to rough up the cereal box cardboard. Then stick the background paper to the cardboard. Flatten out any wrinkles.

Gelli prints to create mixed media gifts

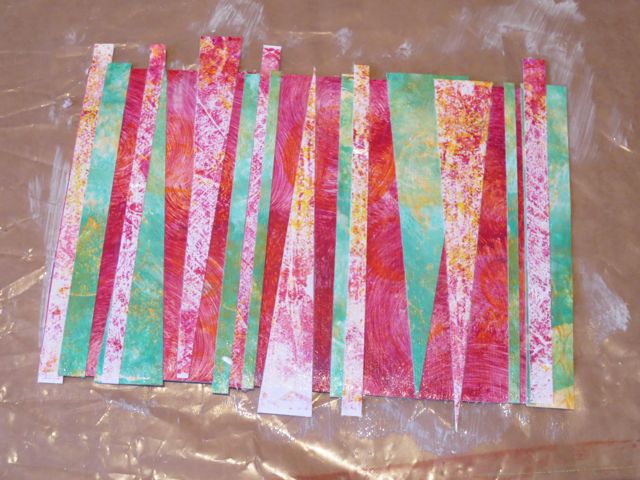
5. Cut two contrasting background papers into strips and thin triangles. Stick these to the background piece. Leave to dry and trim the ends to size.

Gelli prints to create mixed media gifts

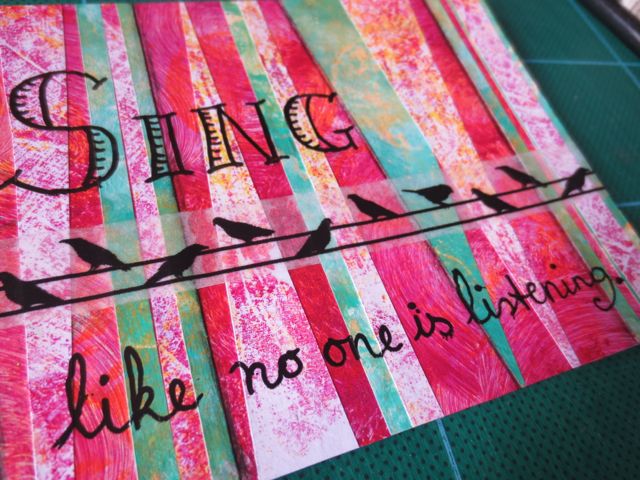
6. Add a strip of Washi tape and write in your inspiring quote with the black marker. Seal with Gel medium or varnish. Leave to dry.

Gelli prints to create mixed media gifts

7. Place your mixed media art into the frame, replace the back and your gift is ready to give!

(I forgot to take a final photo of my piece in the frame but here it is finished!)

Gelli prints to create mixed media gifts

I hope this has inspired you to get out those Gelli prints or dive into your stash of background papers and put them to good use!

Happy creating,

Michelle

~*~*~*~*~*~*~*~*~*~*~*~*~*~*~*~*~*~*~*~*~*~*~*~*~

Michelle G. Brown is passionate about mixed media art and enjoys sharing her knowledge and techniques with you to allow you to express your own creativity. Michelle understands that many of us have an inner need to create. By learning a few basic techniques the amazing world of mixed media art is accessible to everyone!

Michelle lives with her husband and two boys in Melbourne, Australia. When she is not creating or on Facebook, she’s at karate training. Just to make sure she’s properly busy, she has also adopted the From Picture to Page Scrapbooking and Papercrafts Show

~*~*~*~*~*~*~*~*~*~*~*~*~*~*~*~*~*~*~*~*~*~*~*~*~

.

.
UmWow Studios and their Chipboard Confetti

~ * ~

This article is written by Anjuli Johnson

UmWow Studios main banner

As an art supply junkie, I have to confess that walking into an art supply store or surfing the internet can be pretty dangerous.  I usually try to keep my browsing and searching to a minimum for the sake of my bank account.  However, every once in a while something new comes along that is not just hard to resist, it’s the perfect supply I’ve been missing and just what I need to finish multiple projects.

I recently had such a moment when I discovered UmWow Studios.  They sell a variety of scrapbooking supplies, but their main product is laser cut chipboard.

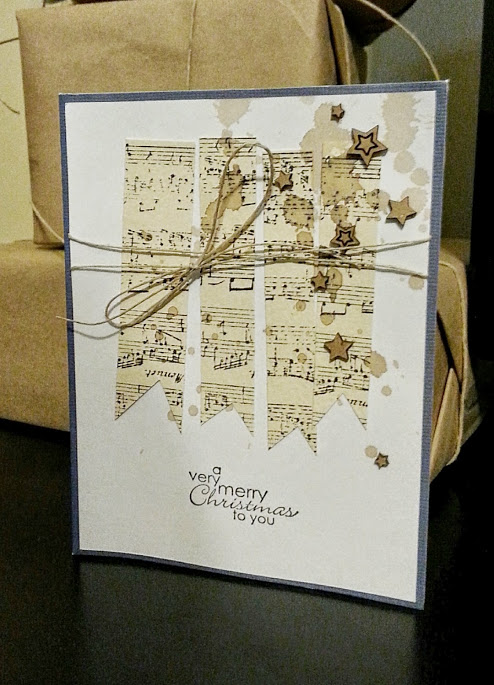
This year’s Christmas card I designed

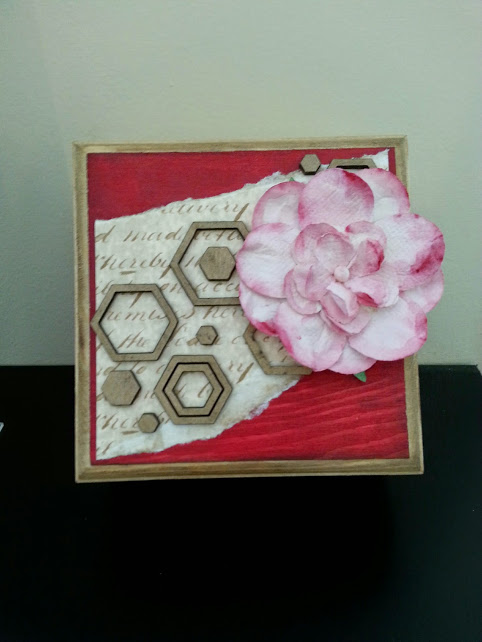
I’ve been working on a variety of things lately- Christmas cards, altering some small wooden boxes, and of course my mixed media canvases and scrapbook layouts.  UmWow’s chipboard embellishments are perfect for any and all of these projects, and really anything else you could think of.  I began with an order of their confetti , which comes in several shapes and sizes, and I love that they can cut so neatly and still have extremely tiny pieces.  All of the edges are finished and it’s rare to find any rough paper on the edge from an unfinished cut.

Flower box with hexagon confetti

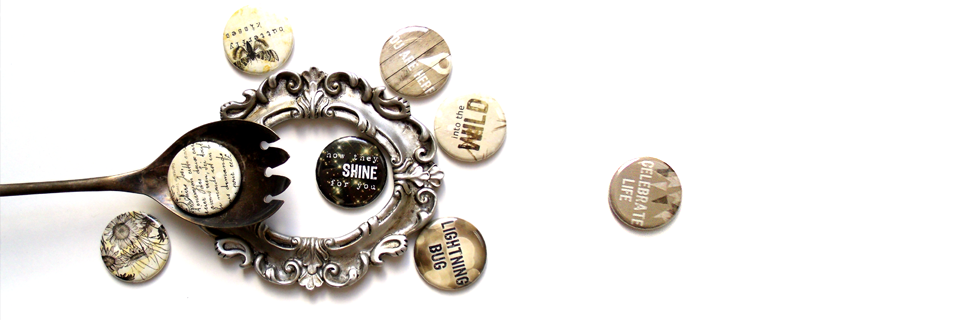
With my first order they included a piece of their flair; I’ll be adding a few of those to my next order as well.  Maybe it’s my desire to keep my spending to a minimum, but I’ve never seen the type of flair they have anywhere else.

UmWow Studio’s flair banner

Give UmWow Studios a shot and follow their blog.  I am so happy I stumbled upon them and can’t wait for my newest order to arrive.  My husband will have to do all the dishes for next couple weeks since I’m already brainstorming more ways I can use all my new chipboard.

You can find their Star Conffetti here

And their Hexagon Confetti here

~*~*~*~*~*~*~*~*~*~*~*~*~*~*~*~*~*~*~*~*~*~*~*~*~

Anjuli Johnson is a Mixed Media Artist form Raleigh, NC.  She began her art career as a scrapbooker, and it’s been an evolutionary process ever since.  She loves all things mixed media- paper, paint, pens, wire, gears, clay… the list goes on and on.  She is constantly trying to push through her fears to discover and develop her talents, meet new people, and learn from those around her.  To see more of Anjuli’s art and techniques, check out her website at www.thefarpavilion.com  and like her Facebook page. Don’t forget to follow her blog! www.thefarpavilion.blogspot.com

~*~*~*~*~*~*~*~*~*~*~*~*~*~*~*~*~*~*~*~*~*~*~*~*~

.

.
Create your own Hide-away Doll House Play Set

~ * ~

This article is written by Gloriann Irizarry

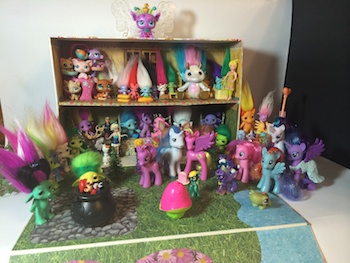
From a gift box to a one of a kind hide away doll house in a few easy steps.

Gloriann Irizarry creates a hide away doll house

This article will help you unlock hours and hours of play time for any toy enthusiastic ages 0 to over 100. Step by step instructions will guide you through to the final steps of your own one of a kind hide away box doll house play set, with some simple materials

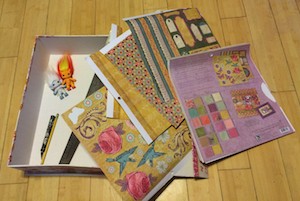
Materials for the Hide-away Doll House Play Set

Gloriann Irizarry creates a hide away doll house

  • Decorative gift box in this project  17 ½ x 12 x 5 ½ by Abbigton Park ™
  • White foam board
  • K & Company Specialty 12 x 12 Specialty Scrapbook Paper
  • DCWV The photo Stack 2 for grass, stone, flowers and water
  • Xacto or hobby craft knife
  • Scissors
  • Pencil
  • Metal ruler
  • Hot glue gun
  • Mounting repositionable spray
  • Pick your favorite size toys like Funko My Little Ponies, MLP blind bags,  Littlest Petshops, Polly Pockets, Frozen mini dolls also Zelfs and Shopkins by Moose Toys.

Gloriann Irizarry creates a hide away doll house

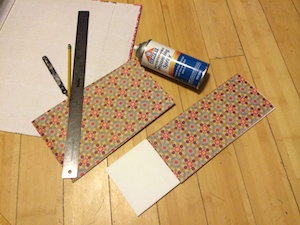
With the metal ruler measure the foam board to 5 inches to 16 ¼  with the pencil. Now with the your Xactor or hobby crafts knife and your metal ruler cut your foam board exactly at the 5 x16 ¼  pencil markings.

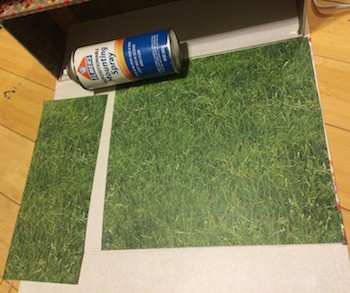
Do the same with your favorite scrapbook paper of choice . You will have to layer the papers since the flooring is a little longer than the paper stack. Choose your favorite glue to adhere the flooring. The glue used here was Mounting repositionable spray as it’s a lot easier to use than the permanent kind. If glued wrong repositionable adhesive can be adjusted.

Spray the glue by holding the can  6 inches away from the  flooring paper  and wait a little tfor the glue to get a little tacky and secure it to the foam board.

Gloriann Irizarry creates a hide away doll house

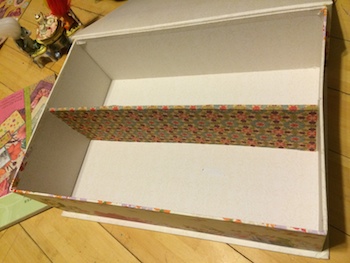
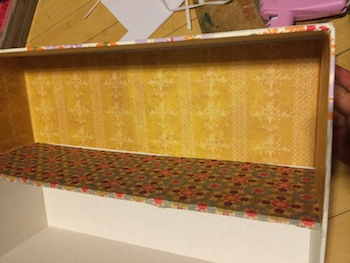
Measure and mark in half your gift box for the second floor for your doll house playset. Use the hot glue gun to adhere the paper covered foam board to the gift box. Make sure enough hot glue is used to secure it in place.

Gloriann Irizarry creates a hide away doll house

Now measure the upper half and choose your favorite specialty paper.  For this house 2 sheets of 12 x 12 papers were used and layered to create a seamless wallpaper effect. Once the paper is cut to size use the Mounting repositionable spray  and spray a even coat of glue. Let it get tacky and carefully place it inside the box and secure it. Rub to remove any air bubbles out.

Gloriann Irizarry creates a hide away doll house

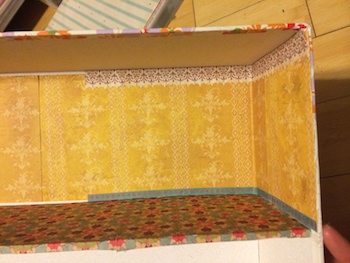
Now to finish the walls the Specialty Paper by K & Company stack comes with borders stickers that will work wonderful to finish the wallpaper on the top and the bottom of the walls. It is recommended to choose contrasting colors.

Gloriann Irizarry creates a hide away doll house

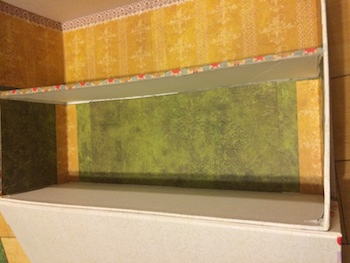
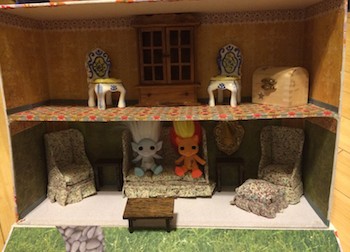
For the lower level floor you will follow the same steps as described above. You can choose the same color or a different color to give the doll house some character. That’s why a nice hunter green pattern was used.

Gloriann Irizarry creates a hide away doll house

If you want to make sure everything looks nice you can add corner strips to the lower lever in the same paper use on the top.  Now finish the wallpaper with some border stickers to cover any imperfections and creates a nice finish.

Gloriann Irizarry creates a hide away doll house

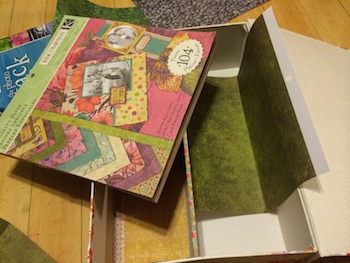
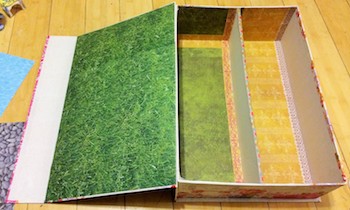
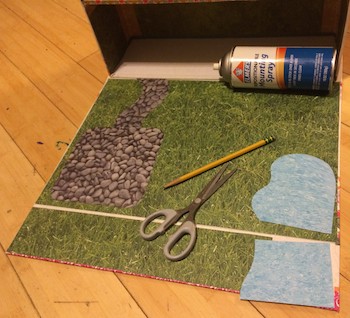
Now the opening of the gift box is going to be use has a garden. The Photo Stack 2 has nice natural patterns. 2 sheets of the grass were used to give the effect of an open outside garden.

Measure and cut to fit and use the Mounting repositionable spray to adhere to the top of the gift box.

Gloriann Irizarry creates a hide away doll house

Rub any air bubbles out and let it dry.

Gloriann Irizarry creates a hide away doll house

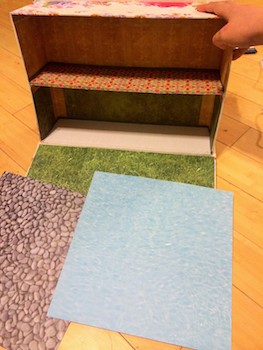
Now the garden is ready but it seem like it need it something. In the same Photo Stack 2 we can find another interesting patterns like this water and river rock .

Gloriann Irizarry creates a hide away doll house

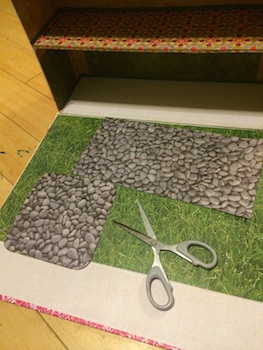
Use the river rock pattern to create a garden path with a seating area.

Cut with the scissors or hobby craft knife the shape you want them to look. Now spray an even coat of Mounting repositionable spray and place them on your garden.

Gloriann Irizarry creates a hide away doll house

Use the Photo Stack 2 water pattern to create a side pond. You can draw the shape on the back with the pencil and cut it off with the scissors or the hobby crafts Knife. Apply a nice layer of Mounting repositionable spray to the cut outs and secure them in place.

Gloriann Irizarry creates a hide away doll house

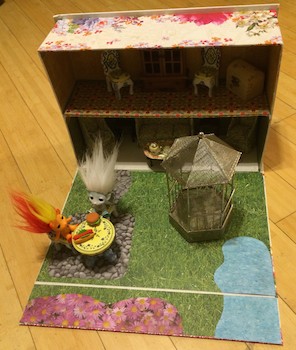
Now every garden needs to have some pretty flowers. Now the Photo Stack 2 we found a nice batch of them ready to be cut to shape and again secure it with the repositionable mounting spray.  Now that the flowers are in place the garden is ready for the Zelfs Angelala and Little D play date.

Gloriann Irizarry creates a hide away doll house

Add some doll furniture and your Gift Box Doll House Play Set is ready to be played with.

Gloriann Irizarry creates a hide away doll house

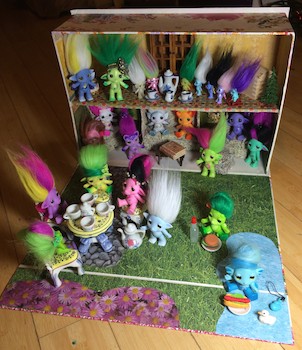
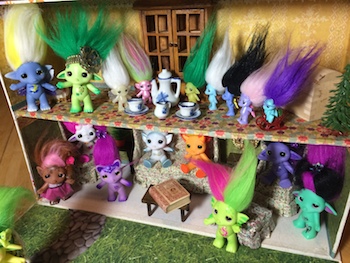
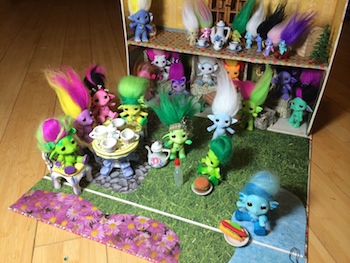
Invite a few of your good Zelfs friends like Tressa, Fluttershy, Elsa, Vampula, Frostette, Flamy and Snap Jack. Now lets start the tea party.

Gloriann Irizarry creates a hide away doll house

Gloriann Irizarry creates a hide away doll house

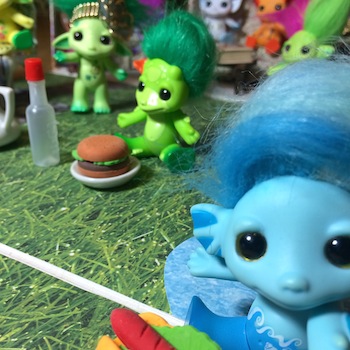
All the little Zelfs Troll having a blast in their new one of a kind Doll House Play Set.

Gloriann Irizarry creates a hide away doll house

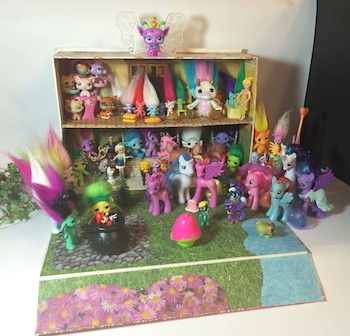
This size house works wonderful for any Mini, medium or large Zelfs. Also Shopkins, Littlest Petshop, Polly Pockets, Frozen Elsa, Olaf, Kristoff, Sven, Funko, My little ponies, MLP blind bags and even lego Mario Bros.

Gloriann Irizarry creates a hide away doll house

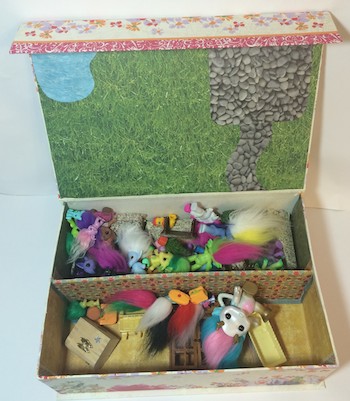
Once you’re done with play time all you have to do is pack all the dolls and accessories in.

Gloriann Irizarry creates a hide away doll house

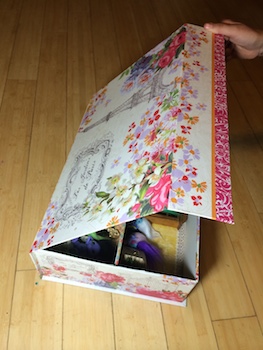
After play time is over all you need to do is close your box and it is ready to go.

Easy way to spark any kids imagination and the fun in this project is you can customized your play set to your favorite colors and style.

Gloriann Irizarry creates a hide away doll house

~*~*~*~*~*~*~*~*~*~*~*~*~*~*~*~*~*~*~*~*~*~*~*~*~

My name is Gloriann Irizarry. I was born and raised in the beautiful Caribbean island of Puerto Rico. Ever since I can recall, I always had my hands on crayons, scissors and paper. My parents knew from the start how much I love to create!

As a mother of three young wonderful daughters, I find myself working, caring for my family, and taxiing kids from here to there for various sporting events.  I have to say I’m never bored!  I enjoy every little moment I spend with my girls, but will always continue to work time to create art into my daily schedule as that means doing what I love the most. My girls are learning the joys of creating also!

I love to sculpt and will never stop creating. I was born this way and for that I thank GOD every day. Art has been a great way to be creative and to express myself.  I like to keep my hands busy creating – whether it is unique jewelry, art dolls, oak sculpture figures, fairy wings for all your project needs, or even wigs and clothing for your sculptures.  I love all the variety in art! Why? because ART is so rewarding. Seeing your creation take form is an awesome feeling.

You can see more of my work on my website – ByGlori

~*~*~*~*~*~*~*~*~*~*~*~*~*~*~*~*~*~*~*~*~*~*~*~*~

.

.