Michelle G Brown | Mixed Media Art

Small Gift Bag

~ * ~

This article is written by Sandra Parés 

Today I am going to show you an easy way to make a small gift bag, an ideal bag to cover a gift for someone special on the Christmas day.
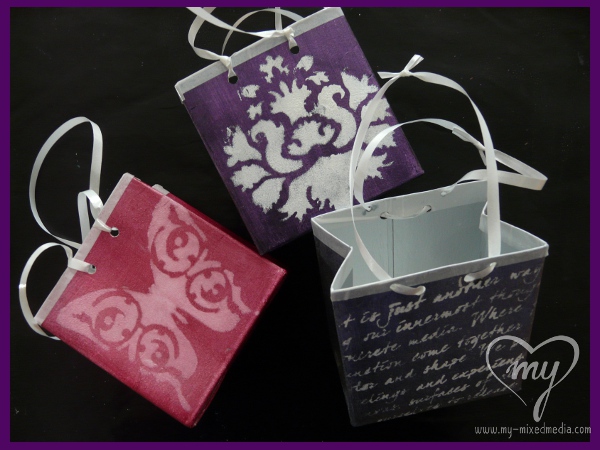
Three examples of the small mixed media gift bag.

  1. 1 recycled tetra brik that we will have cleaned before
  2. Scissors
  3. Black gesso
  4. Sponge
  5. Acrylic paint: Acrylic Glaze Silks, in my case I will use the violet colour of Irresistible Iridescence
  6. 1 Brush
  7. An adhesive tape, like washi tape or colored tape. I will use a white adhesive tape
  8. A regular white acrylic paint
  9. 1 template
  10. Crop-a-dile or some tool to make holes.
  11. Ribbon to make the handles.

Preparing and painting the surface of the tetra brik

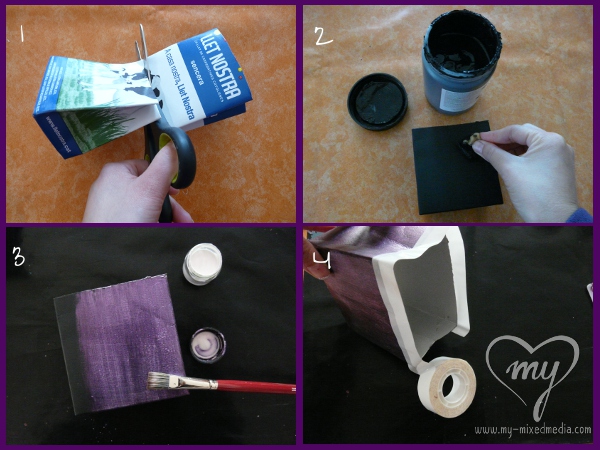
Step 1 – We start cutting the tetra brik. We cut the tetra brik in a half and we get a small bag. We can make it larger or smaller according our personal idea.

Step 2 – Then, with a sponge, we will cover the whole outer surface of the tetra brik with black gesso. If you want, you can also cover it with white gesso, depends on the type of paint you will use after and the result you want to obtain. In my case, as I will use the Silks Acrylic Glaze Irresistible Iridescence to colour the bag, I prefer the black gesso. The Irresistible Iridescence paint works good on dark backgrounds and gives a beautiful bright.

Step 3 – Once gesso is dry, we can paint the whole surface of gesso with the acrylic paint. The colour I choose is a metallic violet with a very nice metallic shine.

Step 4 – When the paint is dry, we can polish the edges of the tetra brik with the adhesive tape.
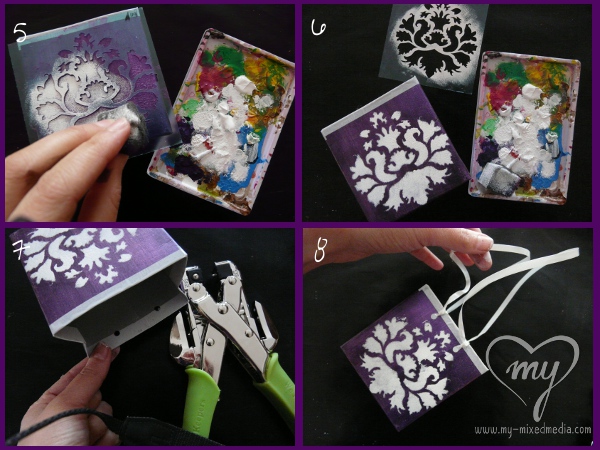
Stenciling the template and making the holes to make the handles.

Steps 5 & 6 – Then we take a template to add a picture on the bag. In this step we will stencil the template with a sponge onto one side or both. If we stencil onto both sides, we have to wait to have the first side dry before to stencil onto the other side.

Step 7 – And we only need to make some holes with the crop-a-dile to get a place where we can put a ribbon to make the handles

Step 8 – add ribbon to make handles

With this simple way we will have a beautiful small bag for a gift for this Christmas!

Three examples of the small mixed media gift bag.

~*~*~*~*~*~*~*~*~*~*~*~*~*~*~*~*~*~*~*~*~*~*~*~*~

Sandra Parés loves working with mixed media. The colors and textures leave her amazed and she enjoys creating and getting their hands dirty with paint and gesso. She lives near Barcelona and works in her art workshop. On her site My mixed media you can find a mixed media online store, art and craft products, mixed media workshops in Spanish, tutorials, ideas and mixed media techniques.

~*~*~*~*~*~*~*~*~*~*~*~*~*~*~*~*~*~*~*~*~*~*~*~*~

.

.
Make your Own Faux Metal Embellishments

~ * ~

This article is written by Ann Strecko Koeman

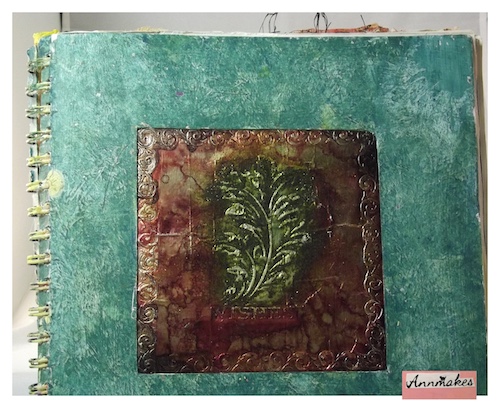
Making your own mixed media embellishments for your crafting and art making can be satisfying to one’s creative soul and also to one’s wallet!  In this article I am sharing my mixed media technique tip on how to make some of your own Faux Metal embellishments with your glue gun and some cardboard.

faux metal mixed media embellishments

The examples I have to show you are rustic looking which is what I like when making such embellishments.   I like the look of old and worn even rusty metals and sometimes I want to add such a piece to one of my projects but I find myself limited by certain constraints.  If I do not have such a piece in my studio stash and I am pressed for time then I will make something up.  Also, sometimes I may have a piece of real metal but it is just so heavy that it would not be supported properly on my project.  So here again is when making something light weight comes in handy.

faux metal mixed media

One of the ways I make such mixed media embellishments is by stamping an image such as this one in the picture, of a decorator’s foam stamp intended for painting on walls, but I use ink and cardboard.  Once the ink has dried I heat up my glue gun, add a stick of glue and trace over the design with the hot glue.  I try to make the glue design fairly thick.  Once the glue has cooled and is hard I spread some PVA or Tacky glue onto a piece of kitchen aluminum foil (cut to about twice the size of my stamped image).  I also cut the cardboard around the stamped image to the desired shape and size.  Then, I place the glue coated foil over the dry and hardened glue tracing and press into all the cavities.  I start from the centre of the image and rub with my fingers and the eraser end of a pencil the foil so it sticks to the cardboard.  Aluminum foil is thin and may tear but that is okay because another piece can be patched over any tears.  Colouring the foil afterwards will also hide any imperfections.  Once I am satisfied with the adhesion of the foil I let the piece dry completely.  Once dry, I have fun with inks, paints, embossing powders and more to achieve the look I want.

The process is pretty simple and yet can give such intricate designs!  These light weight faux metal decorations can be used on so many different types of surfaces and will not add too much weight to your project.

~*~*~*~*~*~*~*~*~*~*~*~*~*~*~*~*~*~*~*~*~*~*~*~*~

Ann Strecko Koeman is a busy mom and artist trying to stay warm in the cold cold winters of Canada!  To stay warm she creates something just about every day.  Whether the creation is a painting, a sewn project, a written article for this site, a post for her blog, and even making videos on Youtube!  She is often found with her hair up in a twist , her hands stained with inks, and her clothes with paint splatters underneath her long goose down parka!  She even owns gloves that have flaps so her fingers are free to type away and there is a warm mug of hot beverage close by to warm up those digits.  For more of Ann’s craftiness you can visit her blog here: annmakes.blogspot.com

~*~*~*~*~*~*~*~*~*~*~*~*~*~*~*~*~*~*~*~*~*~*~*~*~

Personalized Gift Tags – On the Gelli Plate

This article was written by Martice Smith II

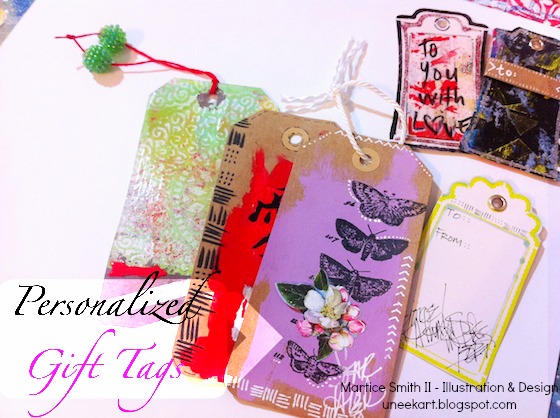
Personalized Gift Tags

Who says small details don’t matter?! Not us mixed-media artists! As a mixed-media collage artist, I love building upon several layers of paint, doodles and various mark-making techniques to set my work apart from the rest.

If you’re looking to develop your own approach, try these ideas to create your own, personalized gift tags. There’s no need to spend a fortune on commercially made products when you can add a unique touch of your own- using what you already have. Just the extra spark needed for a one-of-a-kind gift!

Here are a few supplies to help get you started:

  • Gelli plate
  • acrylic paints
  • paintbrush
  • brayer
  • white ink pen (for doodling)
  • cardstock / kraft paper
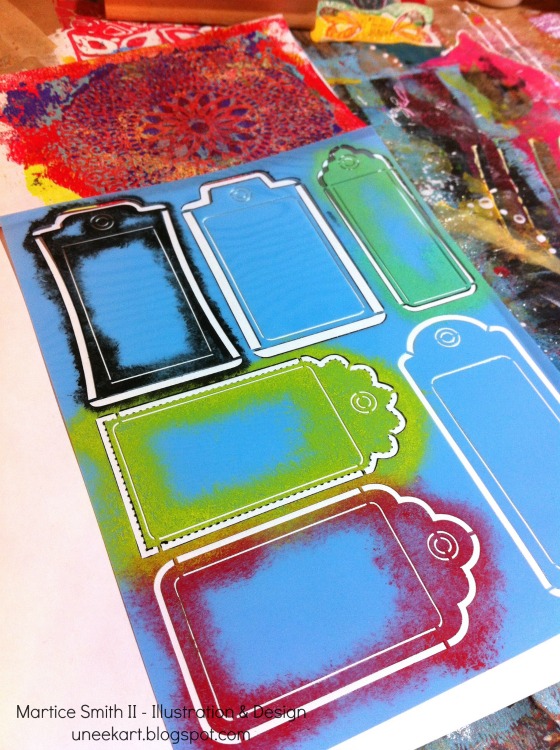
  • stencils (I used Tags & Labels stencil from DecoArt)
  • metal eyelets
  • embroidery floss / twine

Personalized Gift Tags – on the Gelli Plate

1. Create the gelli prints, use prints from your stash, or paint directly onto paper.

Using acrylic paints, use a brayer and roll an even, smooth layer to the Gelli plate. You can also use a round tip paintbrush and paint directly on top of the Gelli plate. Make sure to paint loose brushstrokes, going in various directions. This will give you visual interest.

2. Next, lay down a sheet of cardstock (or your choice of paper) and pull a print.

Photo of Tags and Labels stencil by DecoArt, Inc.

3. Use stencils.

Create a large tag template to use or trace through and cut out the Tags & Labels stencil from DecoArt.

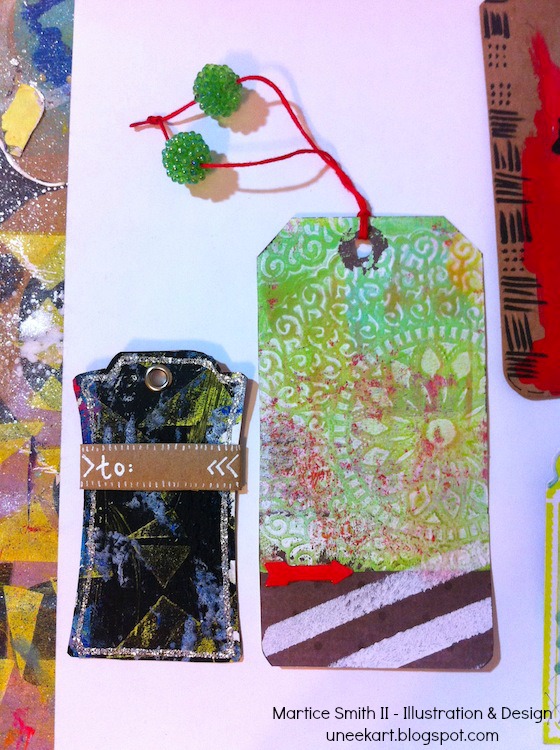
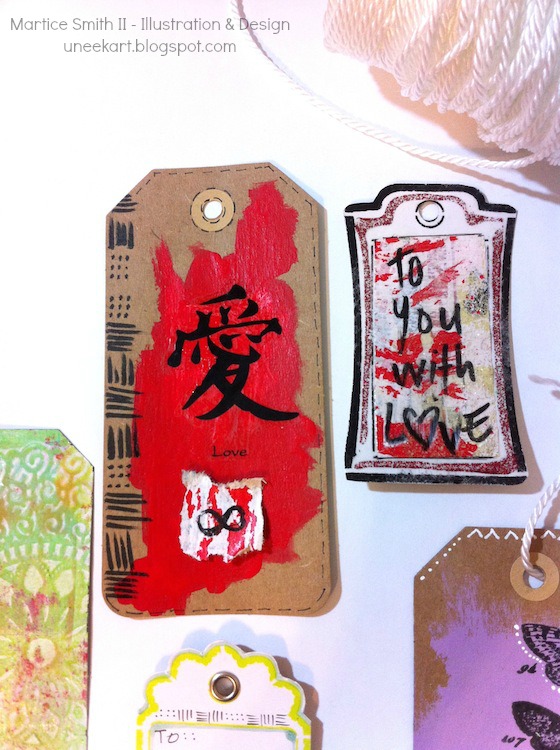
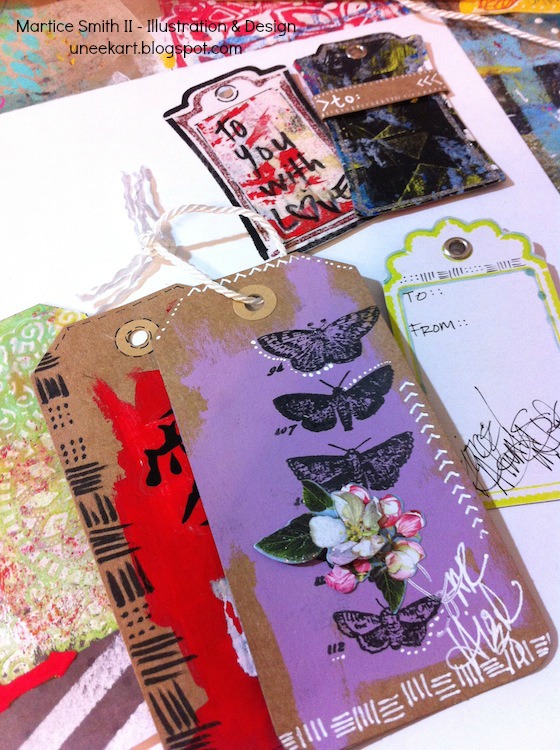
Example of embellished Gelli plate gift tags by Mixed media artist and designer, Martice Smith II

Example of embellished Gelli plate gift tags by Mixed media artist and designer, Martice Smith II

4. Preserve your work!

It’s important to seal the paintings on your tags, especially if there’s any water soluble media. I like to use a spray varnish first. (Remember to do this in a well-ventilated area, to avoid any irritation.)

For one of my tags, I’ve brushed on a thin layer of Crackle Glaze to give a cracked, eggshell appearance.

After drying for several minutes, I brushed on a layer of Triple Thick Gloss Glaze to keep my colors intensely vibrant and shiny. (Both products are from DecoArt.) 

5. Add the finishing touches. 

Eyelets, embroidery floss and twine makes these tags look more polished and really sets the tone for the special gift inside. I love things that twinkle, so I used Sheer Shimmer Spritz in Sparkle (from Imagine Crafts) for some drama.

Add other embellishments to underscore the theme of your tags and you’re done!

Check out these one-of-a-kind gift tags!

Example of embellished Gelli plate gift tags by Mixed media artist and designer, Martice Smith II

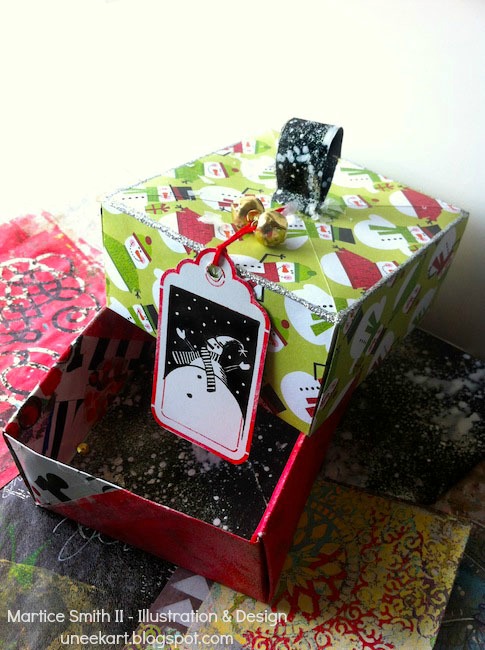
Example of gift tag on box by Mixed media artist and designer, Martice Smith II

I’ve used a combination of different elements and techniques, such as:

Acrylic paints and rub-on stickers on Kraft paper, DecoArt’s chalky finish paint (Remembrance), gelli paper scraps on foam dots, threading glass beads, faux stitching, and a cute snowman stamp from RubberMoon

Other ideas to try:

▪   Think about how the tag ‘feels’ in your hands. You may want your tags to have a smooth, velvety feel to them. If so, try Dura Clear – Soft Touch Varnish (from DecoArt). This stuff is really impressive!

▪   Incorporate symbols and doodles.

There’s nothing like the repetition of shapes to add dimension and rhythm to your tags. I’ll be sharing more doodling and intuitive painting techniques in my online, art course ‘Cultivate Your Symbology.

Check out sneak peeks of the lesson I’ll be teaching in the ‘My Color is Beautiful Art’ workshop HERE and HERE

Do you include gift tags on your presents? If so, do you prefer making them yourself or spending a little extra money for the pre-made ones? 

Happy creating!

~*~*~*~*~*~*~*~*~*~*~*~*~*~*~*~*~*~*~*~*~*~*~*~*~

Mixed media artist and designer, Martice Smith II

Martice Smith II is creative director of Martice Smith II – Illustration & Design Studio, based in Missouri and owner of Uneek Art Boutique. She established herself as a freelance Illustrator and graphic designer after receiving her Bachelor of Arts Degree. Her stunning illustrations reveals her love for fashion, typography and wildlife- using a combination of traditional and digital techniques

You can see more of her work via her Facebook page or The Uneek Art blog.

Be sure to join the Uneek Art Letter, -Martice’s monthly newsletter- that offers art biz tips, advice and more digital goodness that will keep you inspired to be the artist you envision yourself to be!

~*~*~*~*~*~*~*~*~*~*~*~*~*~*~*~*~*~*~*~*~*~*~*~*~

.

.
One Altered Domino, Many Holiday Uses

~ * ~

This article is written by Shari Welch

We all get so busy around the holidays, but we can still add a little handmade charm to your gift giving. I am hoping this project will inspire you to make a little something for your friends and loved ones. It’s simple but a gift they will always remember.

This altered domino project is simple and can be used in many ways.

You will need to find images that will fit on your domino.

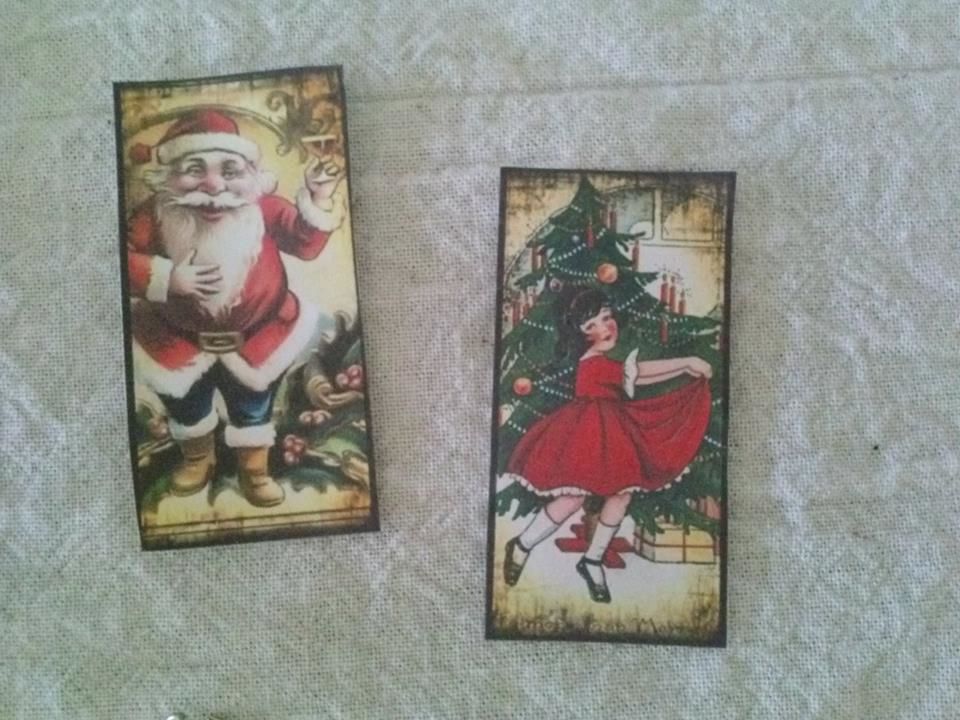
To save time I used an online company that sells images you can download and use right away. Another plus is they are already sized for my project. My favorite place to buy these images is Retro Cafe Art; they have a range of 1” x 2” Domino sized images, in a range of themes. You can buy the file to download immediately or have them posted to you on a range of mediums.

Shari Welch creates these domino handmade gifts

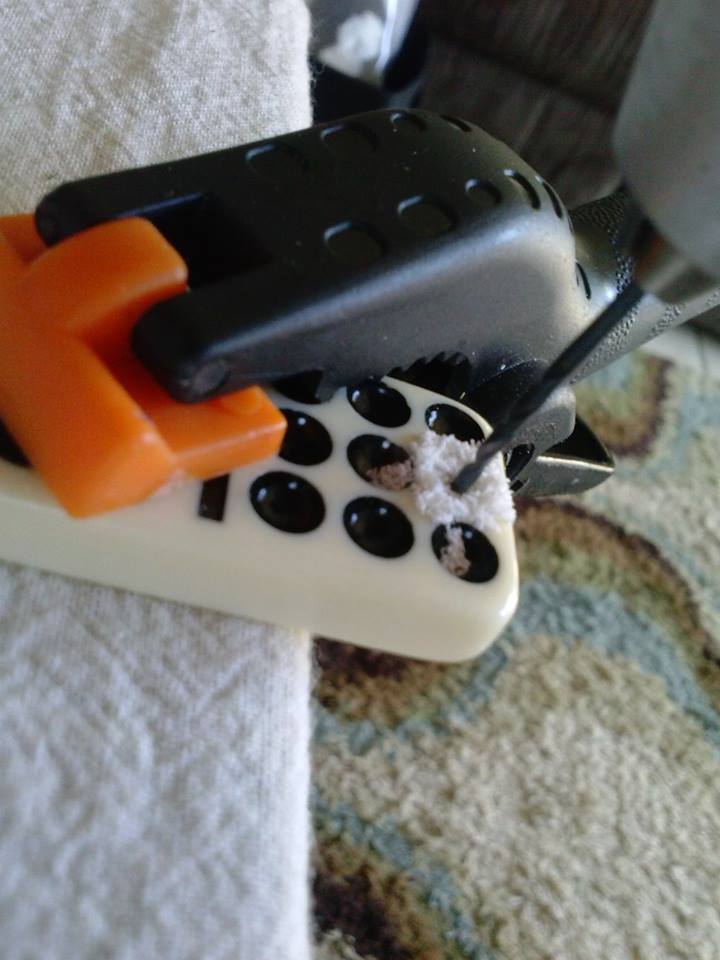
Attach the domino, dotted side up, with a clamp to a flat table surface leaving some hanging over the edge. Use a hand drill with a small bit and drill a hole through the dot of the domino. Please use appropriate safety precautions here!

Shari Welch creates these domino handmade gifts

Make a few sets of stringed beads. Attach bakers twine to the one you will be wanting to use as the top and set aside.

Shari Welch creates these domino handmade gifts

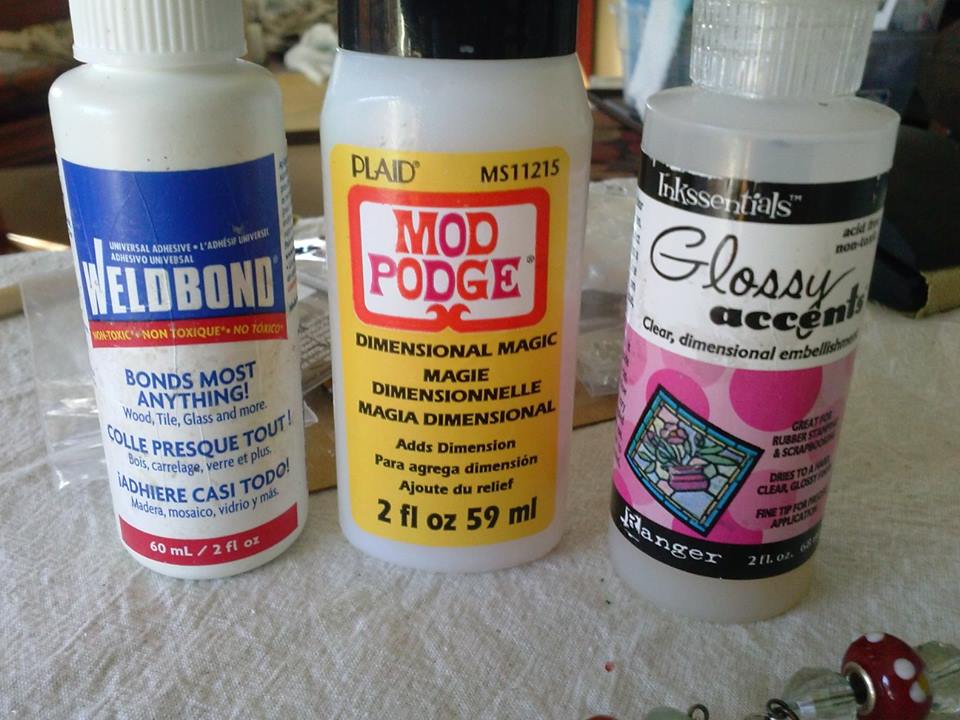
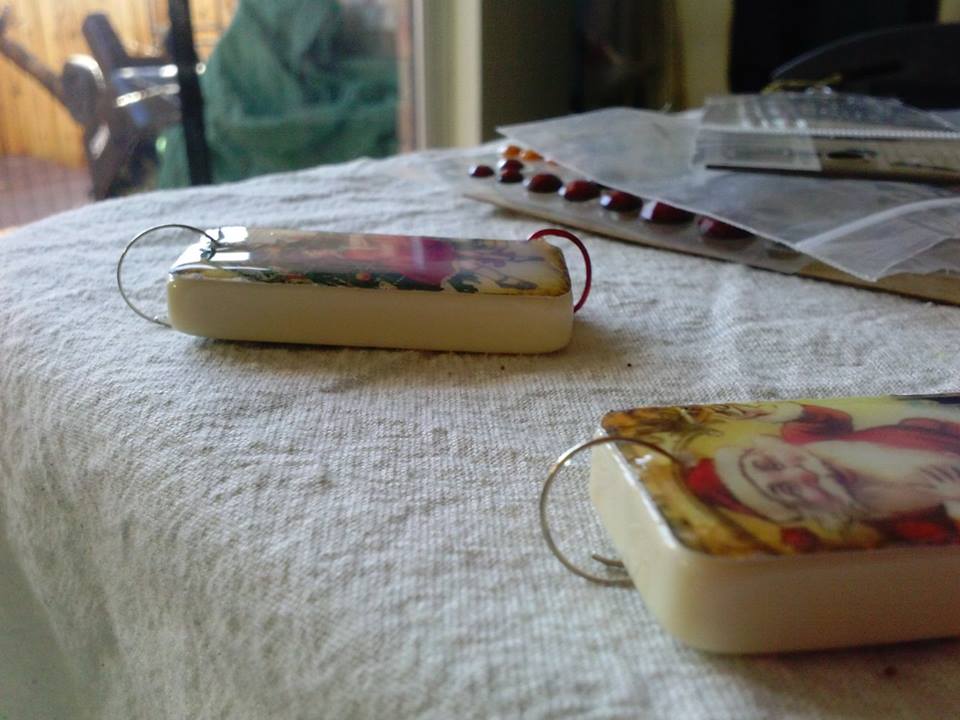
Use glue to attach the paper to the domino, let dry, then add a dimensional effect product over the top of your paper surface. I have used glossy accents and dimensional magic with good results. Leave them sit to dry completely!

Shari Welch creates these domino handmade gifts

Insert a ring through the top hole in the domino

Shari Welch creates these domino handmade gifts

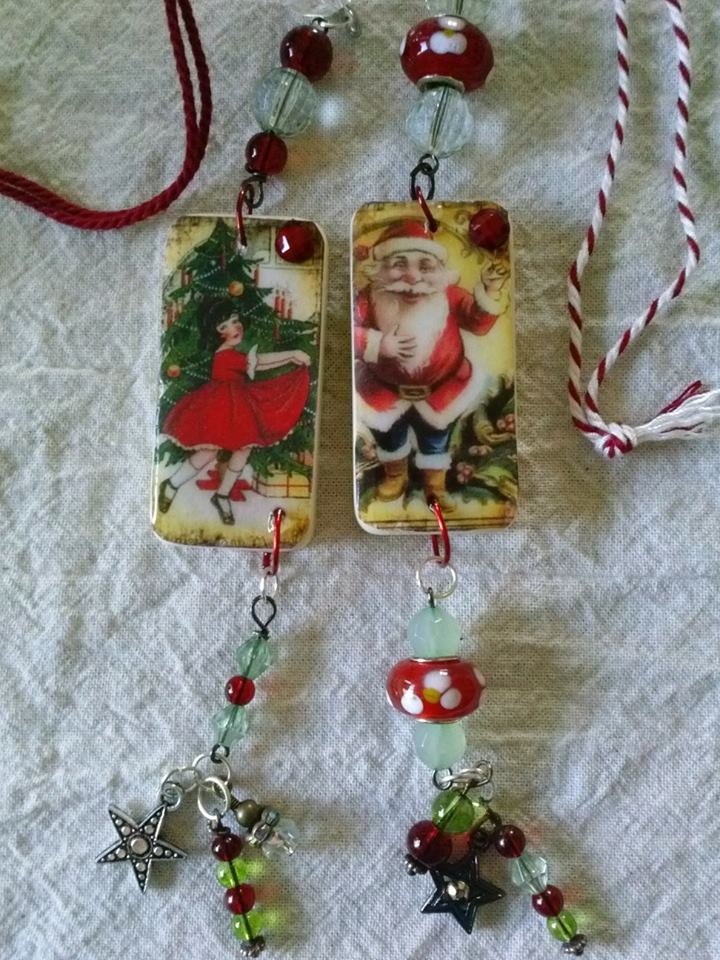
Attach the beads onto the domino and you are done.

Shari Welch creates these domino handmade gifts

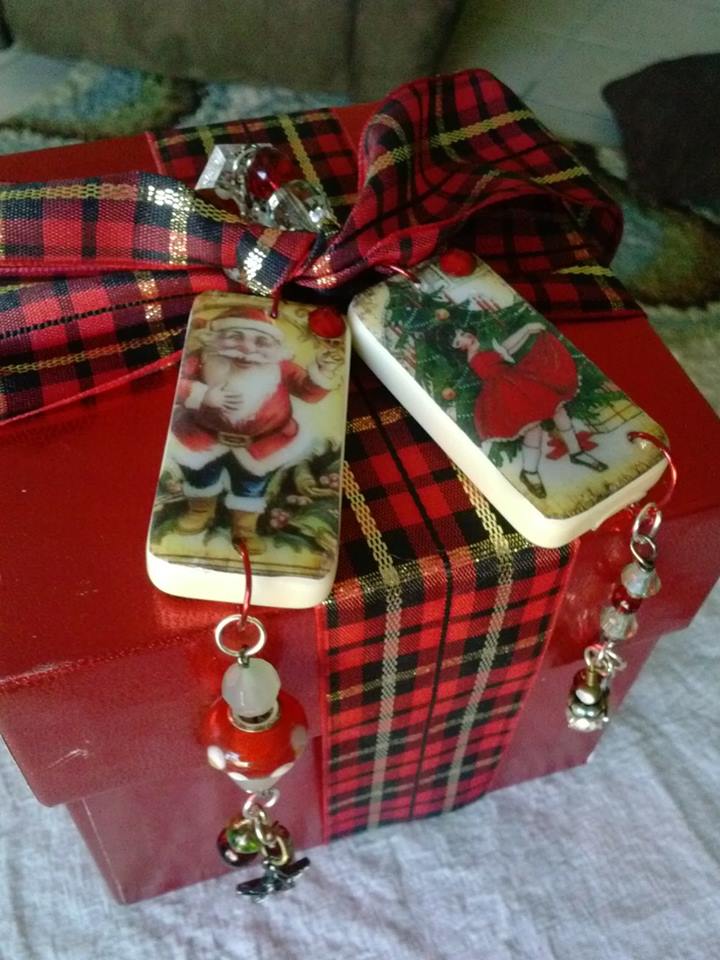
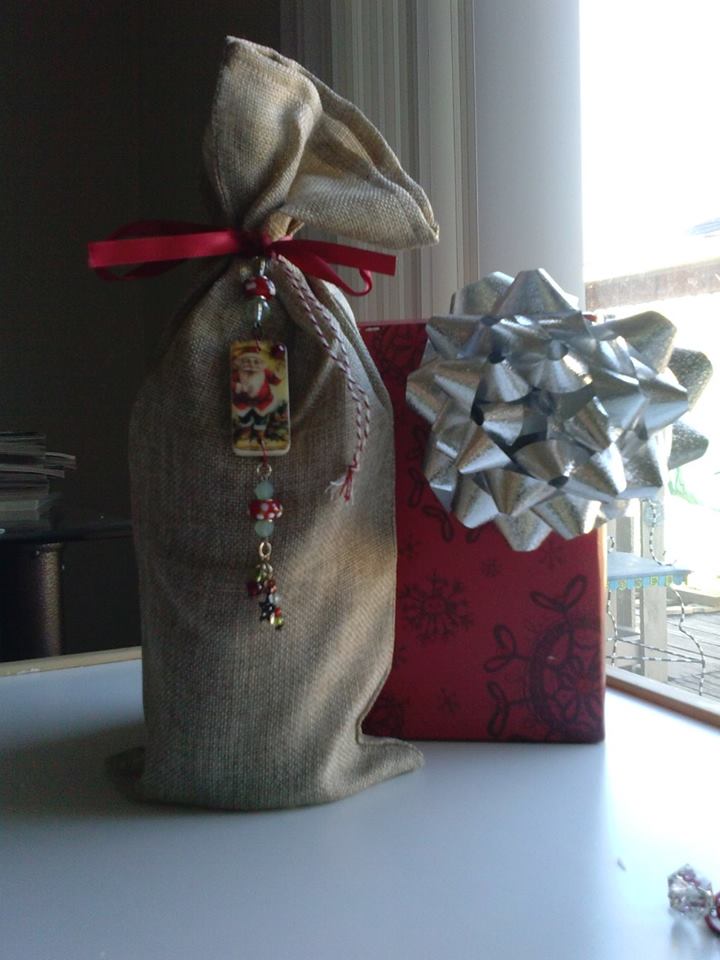
Below I have shown two different uses. The first for an ornament, on a gift box, and attached to a wine bottle bag.

Shari Welch creates these domino handmade gifts

Shari Welch creates these domino handmade gifts

~*~*~*~*~*~*~*~*~*~*~*~*~*~*~*~*~*~*~*~*~*~*~*~*~

Shari Welch is a mixed media artist living in Denton Texas. She is known for using reuse and recycle materials in her artwork. She volunteers for SCRAP Denton where she is on the education committee, teaches workshops, art camps, and performs art demos. She is passionate about mixed media art and enjoys helping others discover their creativity. 
Shari studied graphic design in Portland, Oregon before moving to Denton. Besides writing for mixed media art, she is currently a blogger for DecoArt, was featured in Mixed Media May, and has been in a number of art shows in her hometown of Denton including GDAC “It’s in the bag”, Thirty for thirty art show, and 3arthwurks gallery show.

You can see more of Shari’s artwork at www.facebook.com/my.altered.life and on her blog shariwelch.blogspot.com

~*~*~*~*~*~*~*~*~*~*~*~*~*~*~*~*~*~*~*~*~*~*~*~*~

.

.