Mixed Media Layering

This article is written by Jon Webb

I am a beginner and my work so far has been simple. Much of what I have done has been altered imagery from my own photographs and images that I have downloaded from the internet. I have used a lot of photoshop techniques in this type of work. I am just beginning to learn the process of layering and using various mixed media techniques in the layering process.

My artistic style, if I have one yet, tends to be weird to put it bluntly.  I like to use humor in my art.  I believe humor, more than anything else, fuels my creativity. I go to great lengths, however to keep it clean and hopefully non-offensive.

Here’s an example of my work which I have created. This is an image I call, “Can’t Name That Tune”.

Mixed Media Art Layering

It features a fellow named Hugo who has a song playing in his head that he can’t remember the name of. I created this from:

  • a piece of musical print
  • specialty paper
  • a piece of cardstock.

Procedure

  • I cut the specialty paper into the head shape.
  • I then cut the question mark out of cardstock.
  • I laid the specialty paper face down on my scanner and placed the question mark shape on top of it.
  • I scanned everything with the lid of the scanner open to let in the light – This created the transparency effect of the musical print paper over the question mark.
  • I then used computer graphics from the jpeg file menu to create the eyes, ears, and upper body areas.

Creating artworks from simple materials is really fun and exciting. Being resourceful will let you discover things and will certainly boost your creativity.

You are welcome to visit my blog anytime jonfwebb.blogspot.com. I hope you get a good laugh out of it if anything else. Thank you, once again.

~*~*~*~*~*~*~*~*~*~*~*~*~*~*~*~*~*~*~*~*~*~*~*~*~

Hi! My name is Jon Webb. I am a mild-mannered grocery store employee, who lives in a world of weird, ridiculous, and sometimes serious art which is represented here. Although my artwork is warped and twisted much of the time, it is G-rated and not meant to insult anybody, though I do reserve the privilege to poke fun at myself. I now live in the Dallas/Fort Worth Metroplex after spending most of my life in the western U.S. I am also a jack-of-a-few trades who mastered none of them. My greatest joy in life was the 25 years that I spent with my dear wife, Renee, who passed away in 2010.

I now invite you to visit my bizarre and sometimes serious world, and I hope you enjoy the experience. Come back as many times as you wish. To get the picture of what I am doing here, I recommend that you start at the beginning and work up to the current date. Remember, art saves!

~*~*~*~*~*~*~*~*~*~*~*~*~*~*~*~*~*~*~*~*~*~*~*~*~

.


.

Create Your Own Original Backgrounds While You Play

This article is written by Linda Giese

For the past year I’ve been putting papers over my plastic covered workspace. It began when I found a roll of thermofax for a dollar at a thrift store.  I put it on my workspace and soon it filled up with random stamps, paint splatters, doodles and notes.  I tore off another sheet and saved the first for collage fodder. I progressed to large sheets of newsprint that came as packing material in boxes.  A friend even gave me old architectural plans she was going to throw away.

making backgrounds while you play

This is an easy way of making original collage papers to make your art unlike anyone else, and it won’t even take extra time!  Now I glory in messing up my surface papers with ideas and oversprays.  Since I teach at my dining room table, there are class notes and ideas for what my students want to learn next.  I test out new stamps and “stamp off” ones I’m using.  There are scribbles trying to get a pen to write or see what color it is.  Sometimes there is even a random fruit label!

making backgrounds while you play

I’m not likely to run out of clean papers to mess up, but thought of an idea if I did.  I’d take sheets of junk mail with clean backs and tape them together.  Or as I’ve done, use sheets of scrapbook paper I don’t like that perhaps came in a stack of paper.  If you take a class, perhaps you can mess up newspapers under your work there too!  Good luck and happy splatters!making backgrounds while you play

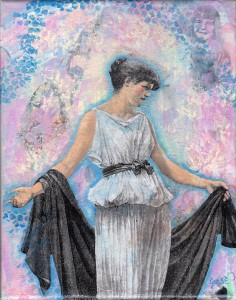
Materials I used for my canvas:
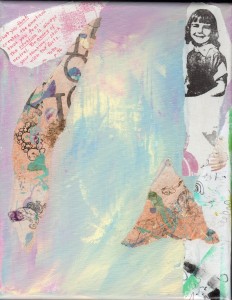
Underpainting is blended background of Americana orchid, butter and baby blue
I applied the torn collage papers with Americana DecouPage as well as the Dover clip art woman image
I used the above paints plus Americana cad red, bright yellow(to make the flesh color) and true blue for shading

making backgrounds to add to your mixed media art collage

use backgrounds to create layers to mixed media art

using backgrounds to create layers in mixed media art


~*~*~*~*~*~*~*~*~*~*~*~*~*~*~*~*~*~*~*~*~*~*~*~*~*~*~*~*~*~*

Linda Giese encourages comments, questions, and sharing your art journey at linda.giese@yahoo.com

She teaches classes privately and at a local scrapbook store, The Stamp Addict

~*~*~*~*~*~*~*~*~*~*~*~*~*~*~*~*~*~*~*~*~*~*~*~*~*~*~*~*~*~*


MMAT02 – Credit Card Painting Technique

Mixed Media Art Technique 02 was all about credit card painting and here is what I did
with the completed background.

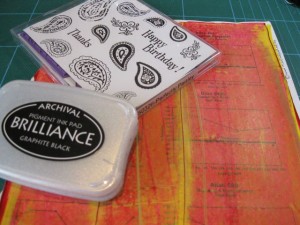
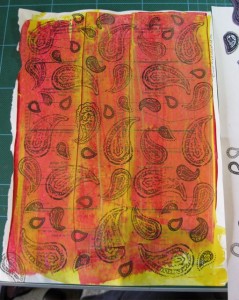
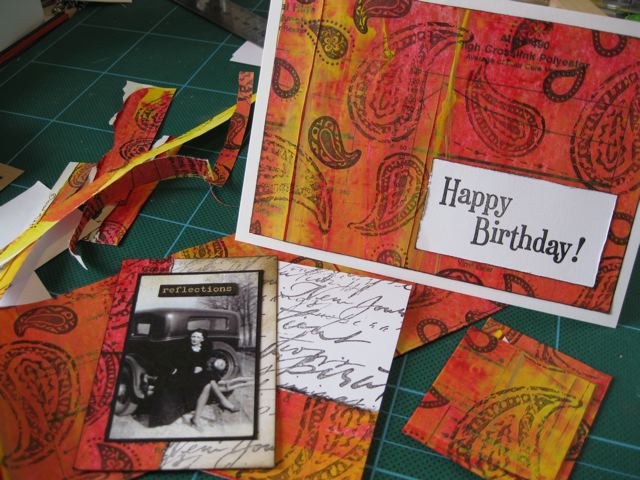
As I wanted to credit card painting and the brilliant colours to show through, I chose to decorate
the background with simple stamping, using black ink. My preference is to use
Brilliance Ink in Graphite Black for this project as it is a juicy inkpad, which is good for the more
solid designs and also because it will dry on most surfaces. As I has a thin coating of metallic gold
paint as the top layer, I needed to use an ink that would dry on the non-porous surface. I chose a
paisley design with stamps by See-Ds and used different sizes to cover my background.

Once dry, I cut up the sheet to make a simple birthday card, an ATC and mini handmade book covers (still to be turned into a book) And I have still got a little left over. Image on ATC from Art-e-zine – my favourite place to go for vintage images.

I hope this inspires you to get creating.

~*~*~*~*~*~*~*~*~*~*~*~*~*~*~*~*~*~*~*~*~*~*~*~*~*~*~*~*~*~*~*~*~*~*~*~
Get your own copy of the Credit Card Painting Technique sheet for
99 cents
and get started on your Christmas card backgrounds NOW!
** use discount code Homemade at the checkout **

Mixed Media Art Techniques

Get your NOW!

The credit card painting technique is great for getting colour onto lots of paper fairly quickly,
which makes it an ideal technique for large swaps or large journal pages.

~*~*~*~*~*~*~*~*~*~*~*~*~*~*~*~*~*~*~*~*~*~*~*~*~*~*~*~*~*~*~*~*~*~*~*

Happy Creating!

.

.

~*~*~*~*~*~*~*~*~*~*~*~*~*~*~*~*~*~*~*~*~*~*~*~*~*~*~*~*~*~*~*~*~*~*~*

Mixed Media Art Techniques 01 Painted Background

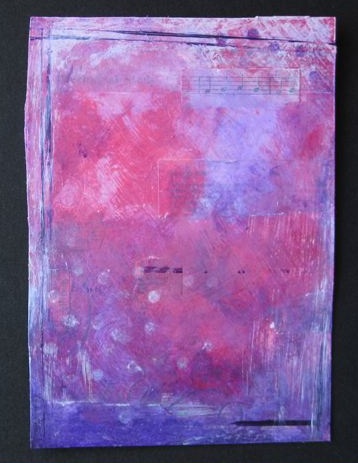
We hope you have as much fun with this background technique as we did. Here is the final background:

Pink and Purple background by Michelle Brown

We would also love to see your work – the backgrounds you have created with this technique and the work you have made using the background sheet as a starting point. Leave a comment below and a link to your blog, showing us your artwork. Please make sure you point us to your post with the artwork, not just your blog in general.

Adding the pink paint to the painted backgroundTexture the paint using an old toothbrushUsing a dry brush apply purple paint over stencil

If you want your own copy of this technique sheet, it is now available tor immediate download!

$2.97

Add to Cart

Here we create a simple background with many layers to add texture and visual interest to our Mixed Media Art piece, even before adding the collage elements. These techniques can be used with different colours to create all sorts of backgrounds.

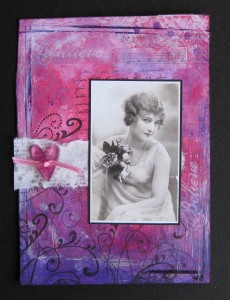
My final mixed media piece;

pink and purple background mixed media collage

So get creating!