Michelle G Brown | Mixed Media Art

Decluttering for the New Year; Which Supplies?

The start of a New Year always seems like a good time to reflect in the year just past and set some goals for the year ahead. The art / crafting area of your life is no different; it is needed to balance your lift and needs as much attention as your health, job/career and family.

Which Supplies?
Now we have considered what crafts we want to focus on, it makes it easier to determine which supplies, material and tools we need to create these crafts. One of the (many) great things about mixed media art is that we can turn supplies for nearly every other craft into being useful for mixed media art. No longer doing cross stitch? Then we can use the cotton as fibres embellishments in our books and use the fabric for image transfers. Not going to sew anymore? We can still use the materials to add texture to our art journals or tear into strips as an embellishment or use to bind a book. And of course the sewing machine can be used to stitch paper and journals and book sections.

The sorting can begin now that we know where our focus will be. I realise this will be hard for some – feeling like we are abandoning projects that had captured our hearts at one stage. If you can’t bear to hand them onto someone who can complete them or repurpose the materials, pack these projects into a box and move them away from your crafting area (into your wardrobe or storage). When we repeat this exercise in 12 months time and you hadn’t even thought about those projects, then it will be time to pass them on or repurpose then.

Choose one area to start sorting; pick a box or drawers or pile. Pull everything out, sorting it into keep or give away / sell, depending on if it relates to the few crafts we have decided to continue. If it is junk or dried out and won’t work, throw it away. Now group the like things together and put them back. Just focus on one area or drawer. You may find other items that could be stored with these ones but that can be part of the second review.
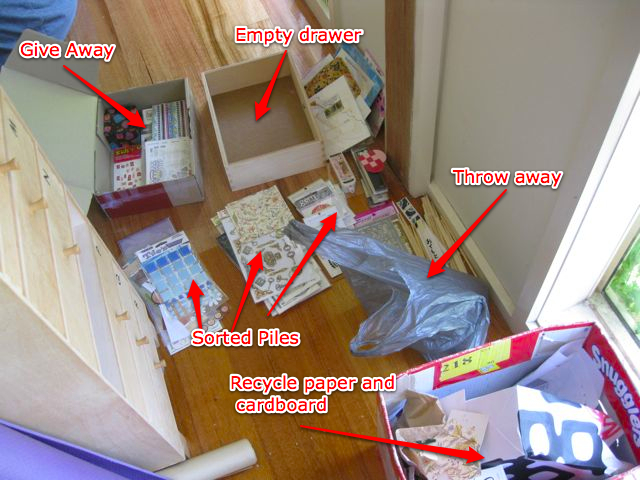
sort one drawer at the time to declutter your crafting area

The aim here is to move quickly through each area of your crafting area and remove the junk and items no longer needed. This will begin to create space. If we pull everything out it can easily become overwhelming, so stick to small areas and put things back. Even if we just do one or two areas each day, we will slowly progress through the entire room, finding all sorts of things we had forgotten about. Continue to put things back that you want to keep and remove things you don’t.

If you find some fantastic things you had forgotten about and inspiration hits, make notes in your art journal so you will remember them when it’s crafting time again – for now it’s decluttering time!

.

.
A Vintage Valentines Collage

~ * ~

This article is written by Debbie Davis of Artful Explorations.

I’m not very good at cutting paper to fit a background.  Even with a paper cutter and ruler, I usually manage to cut the edges uneven or smaller than I intended.  Because of this, I have to find ways to make the uncovered area and the paper merge so it all comes together nicely.

There are a number of techniques that can be used to accomplish this.  One of my favorites is to use oil pastel crayons.  I love the water soluble kind, even though I don’t always use water with them.

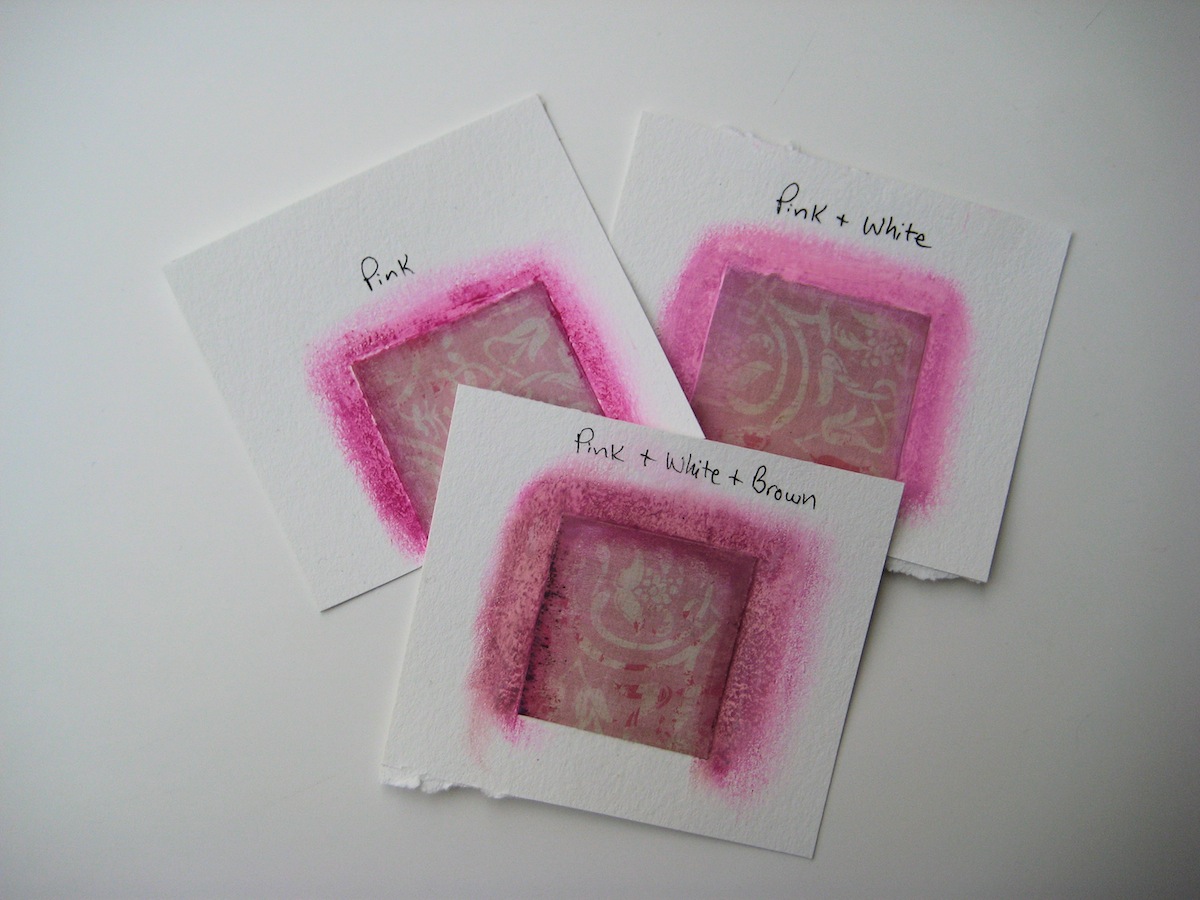
covering edges with pink pastel crayons

I decided to make a Vintage Valentines collage on a canvas panel.  After gluing the paper down, I needed to fill in the edges with some color.  I thought the oil pastel crayons would work well here because they blend together so nicely.

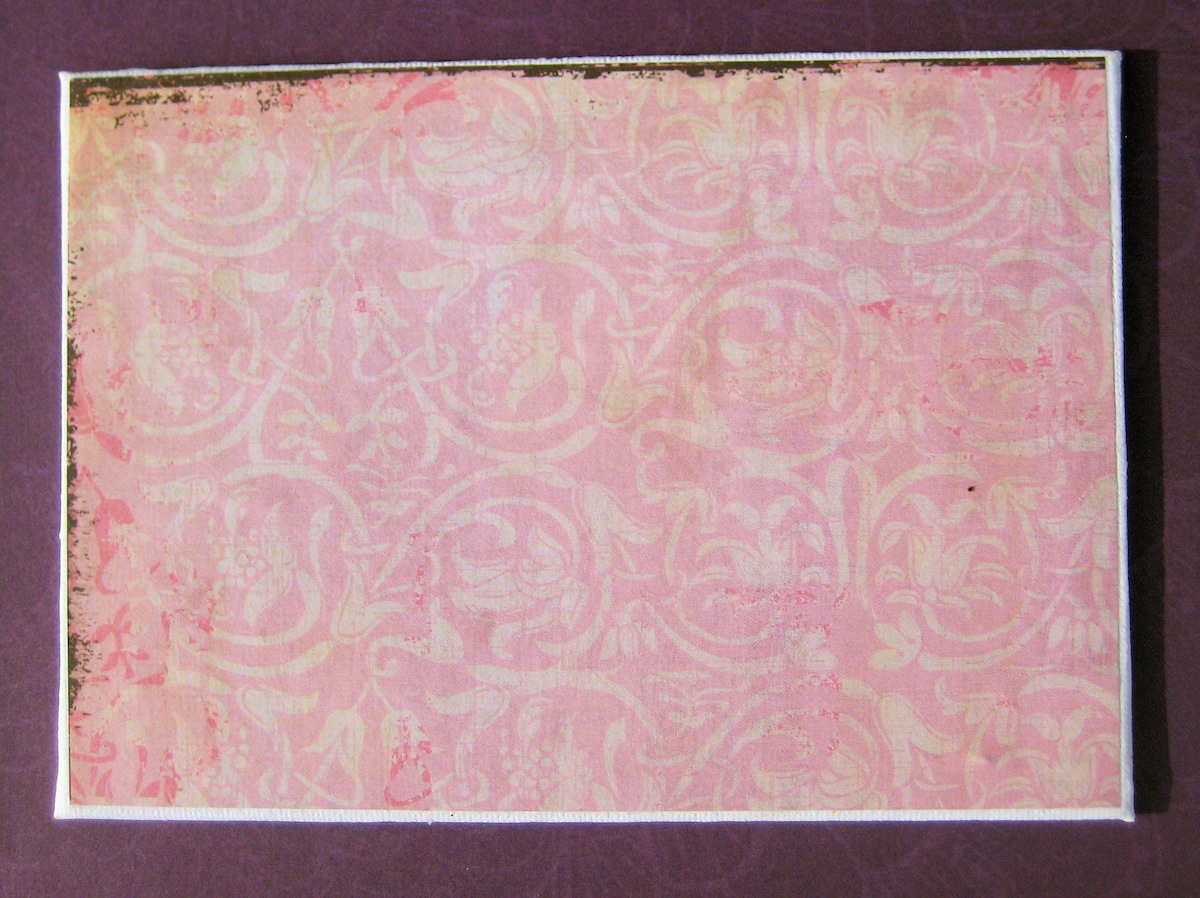
First I used a pink oil pastel crayon and colored all around the edge and sides of the panel.  I then rubbed and smudged the color into the panel and over onto the edges of the paper with my finger.   The pink color was a bit too bright so I used a white oil pastel crayon to tone it down.  I colored over the pink with the white and blended it with my finger until the color was fairly close to the color of the pink paper.  The paper had a vintage look to it and some distressed areas that were somewhat brown in color.  I thought using a bit of the brown oil pastel might help tie it all together.  I added a small amount of the brown crayon to the canvas edges and lightly rubbed it in until I liked the way it looked.

covering canvas board edges with pink pastel crayons

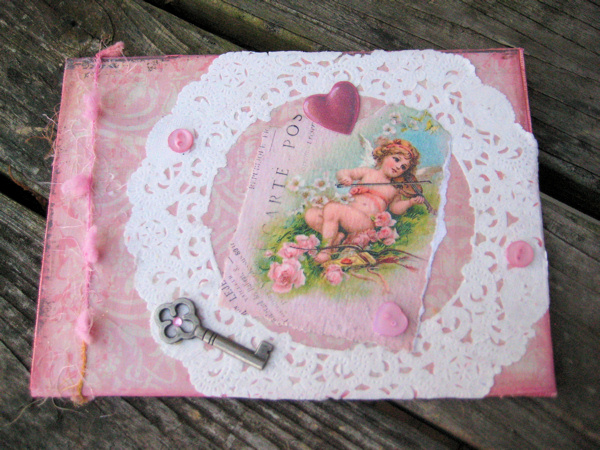
Next I tore the center out of a paper doily so that I could use the lacey part as a frame for my image.  I used gel medium to glue the doily down and also quickly but carefully applied the medium to the top of the doily.  I let the doily dry and then used the gel medium to glue down the image.  I then added a paper heart, a key, and a few little buttons along with a scrap piece of yarn to give it some texture.

vintage valentines mixed media collage technique

I really like the way this collage came together so I think I will see if I can get a good image of it to use to create some Vintage Valentines cards, and maybe some magnets for the fridge.

Happy Valentines Day!

Debbie

~*~*~*~*~*~*~*~*~*~*~*~*~*~*~*~*~*~*~*~*~*~*~*~*~

You can see more of Debbie’s work at her Etsy Shop Artful Explorations

~*~*~*~*~*~*~*~*~*~*~*~*~*~*~*~*~*~*~*~*~*~*~*~*~

.

.

Decluttering for the New Year; Which Craft?

The start of a New Year always seems like a good time to reflect in the year just past and set some goals for the year ahead. The art / crafting area of your life is no different; it is needed to balance your lift and needs as much attention as your health, job/career and family.

Over the next few weeks we will look at  a few tips to review last year and get ready for the creative year ahead!

Which Craft?

Before we begin the decluttering, we need to spend a little more time reflecting on the last 12 months. We have reviewed how our projects, techniques and materials have developed over the year. And we have thought about the time we spent, or intended to spend and didn’t quite get there!

Today we want to take a step further back and REALLY as ourselves which crafts have served us well with the projects we have completed. Which crafts are still fun and you look forward to? These are the crafts, along with their materials and techniques that we want to embrace and continue to develop.

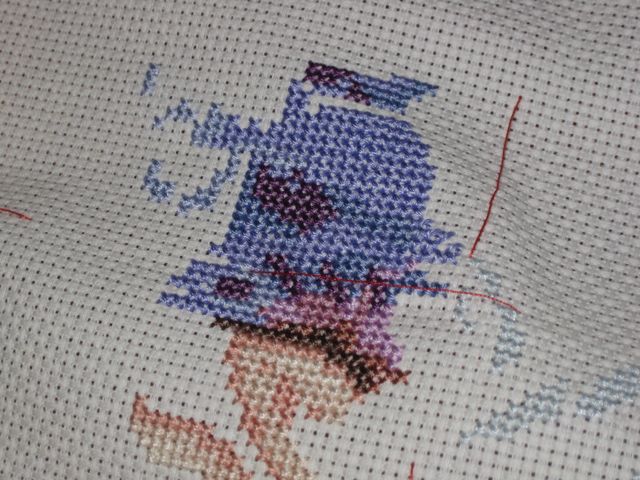
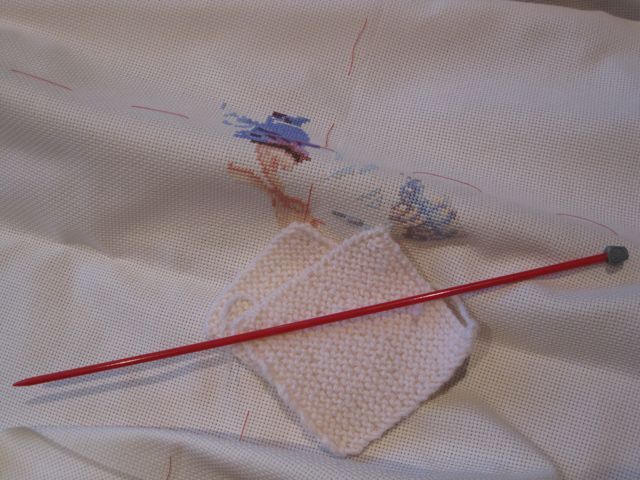
Many crafters seem to turn their hands to an assortment of crafts over the years. I know I have at least one started (but no where near finished) cross stitch. I may have even thought about sewing or started trying to learn to knit. Not only do these projects take up space in your crafting area, they also take up mental space. Whenever we come across an unfinished project whose prospects of ever being finished are pretty slim, we start to beat ourselves up about it; “I should get that finished”, “Mum was so pleased when I asked her to help get started with knitting; she’ll be disappointed if I don’t finish it”.

Now is the time to decide whether it is worth what little time you have worrying about these projects. My guess is that it isn’t. So let’s make the decision RIGHT NOW that we will never finish that cross stitch or what ever project it is. (I did start this over 10 years ago, before my first son was born, with a slim hope that if  have a girl the purple fairy would look lovely in her room). And will my mother be disappointed that I won’t get that knitted quilt finished; maybe but I’m sure she would much prefer me to be happy with what I am doing than abusing the wool and needles any longer (and it looks like I’ve lost a needle, anyway!)

Mixed media art

Let’s focus on what we DO love to do. For me it’s painting and collage and stamping and using all sorts of embellishments and techniques and materials to do that. It may be on canvas or in an altered book or an art journal. It may be to make greeting cards or artist trading cards (ATCs) or book pages for a collaborative project. That is what excites me! I can feel my brain thinking about new projects already!

So, what excites you?

.

.

Crop, Rotate, Retouch: Best Free Photo Editing Apps

This article is written by Stephanie Saunders.

~ * ~ * ~ * ~ * ~ * ~ * ~ * ~ * ~ * ~ * ~ * ~ * ~ * ~ * ~ * ~ * ~
If you’ve ever taken digital pictures, you probably have some photos in your collection that are absolutely perfect except that the dog has red eyes or the horizon is tilted. Or maybe you’re interested in adding text, frames, or other cool effects to your creations. Fortunately, you don’t have to shell out tons of money for photo editing software; there is a host of sites that allow you to edit your photos for free online. Downloading software isn’t needed. Just enter the site, edit the photo, and you’re ready to roll.

Pixlr
The Pixlr “Grabber” is available for both Firefox and Chrome browsers, and lets you grab images and content straight from any website. According to the Pixlr website, professionals and nonprofessionals alike can use the program. At their website, you can choose from three Pixlr versions: Pixlr Editor, Pixlr Express, and Pixlr-o-matic.
See pixlr.com for more information.

Mixed Media digital online editing software

Phixr
Phixr touts itself as easy to use, with an undo button that at some point you’ll be glad was there. It has both basic and advanced features, and pre-set effects that you can alter as you wish.
See www.phixr.com for more information.

flauntR
According to its website, flauntR features loads of one-click options, fonts, and effects. One interesting effect is PicasR, which blends famous paintings with your photos. flauntR integrates with social networking sites, allowing you to easily share your photos with others.
See www.flauntr.com for more information.

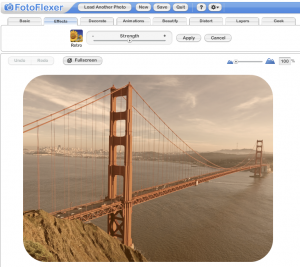
FotoFlexer
The FotoFlexer website proclaims this program to be “the world’s most advanced online digital photo editor.” With FotoFlexer you can import photos from social networking sites or from your own collection. It features layering, effects, and a wide assortment of one-click tools.
See fotoflexer.com for more information.

Mixed Media digital photo editing


Picnik
Its official website declares Picnik “fast, easy, and fun.” There are one-click fixes, as well as a broad selection of fonts, shapes, and special effects. For $25 a year, you can use Picnik Premium, but the free online version will cover the needs of most users.
See www.picnik.com for more information.

Picnik Mixed media digital editing software

Phoenix
Phoenix is part of the Aviary suite of creative online tools that also includes an audio editor and a music creator, to name just two. According to the Aviary website, Phoenix allows you to work with layers, groups, and layer masks, and collaborate with other users.
See Aviary Phoenix for more information.

LunaPic
LunaPic is one of the sites that require you to register to use the sites. But once you’ve done that, you can open your LunaPic account within several social networking and photo sharing sites so you can edit your photos on the fly. Its photo and animation effects are available right on the front page of LunaPic’s website.
See www.lunapic.com for more information.

Adobe Photoshop Express

Adobe’s Photoshop is one of the premier photo editing programs available for purchase, but now you can use Photoshop Express online for free. Photoshop Express offers many of the photo editing features that folks love in Photoshop. Some of the features touted on the Adobe website include filters, effects, borders, and auto correct.
See www.photoshop.com for more information.

Online editors can be used to edit any of your photos, but are especially helpful with photo sharing. They give you a great deal of freedom in fixing and changing photos to put on your photo sharing site, social networking site, or blog. Give them a try and see how simple your photo editing can become. And remember, they’re free, so you’ve got nothing to lose by trying.

~ * ~ * ~ * ~ * ~ * ~ * ~ * ~ * ~ * ~ * ~ * ~ * ~ * ~ * ~ * ~ * ~
Author Stephanie Sanders is a communications consultant and writes
for a mobile phone site in the UK.
~ * ~ * ~ * ~ * ~ * ~ * ~ * ~ * ~ * ~ * ~ * ~ * ~ * ~ * ~ * ~ * ~

.

.