Michelle G Brown | Mixed Media Art

Reading Between The Lines with Altered Books

This article is written by Laura Thykeson from Taz’s Corner

Many people have asked me to explain how I pick out and put together the “Altered Text” on the pages of the altered books I create. I am hoping that I can explain a few things and make it a little less confusing for the person new to “altered text” and found poetry. In essence, “Altered text” is made when certain words or phrases are chosen, highlighted and connected by “rivers” in the order they are printed on the page. Then the rest of the words are marked out or painted over, making it where you can only read the selected text. “Rivers” are dark lines connecting the words on the page in the order you want them read for added effect. This is a different technique than “Found Poetry” which is when words and phrases are cut out of a page or pages of separate text, then rearranged and attached to a new substrate such as an altered book page, cardboard, a collage or an ATC (Artist Trading Card) or other artwork.
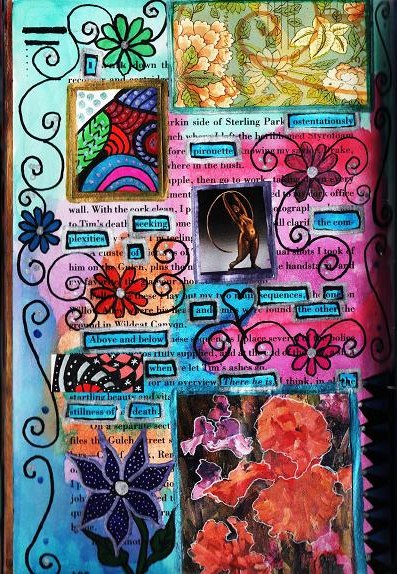
artwork by Laura Thykeson  artwork by Laura Thykeson

When you are ready to start a new altered book page, before you do anything else, let your eyes skip over the text on the page lightly a few times and see if any words or phrases catch your attention. If so, write them down on a scrap piece of paper (I use separate “altered text workbooks”, made from composition notebooks, for each altered book I create). Keep rereading the page, picking out other words or phrases to go with what you have and write them down, until you have made a sentence or until the wording suits you and “says something” to you. For instance,  the altered text I have chosen in the first picture I have included reads – “I ostentatiously pirouette, seeking the complexities of sequences, one and the other, above and below, when there he is, the stillness of death”. I really like the way this page reads. It “speaks” to me in a way, with a larger meaning than just how the text reads. It makes me think of how short life is, and how we often go through life so quickly, distracted by the things life throws at us, then suddenly – the end of our life looms near and we wonder where the time went so quickly!

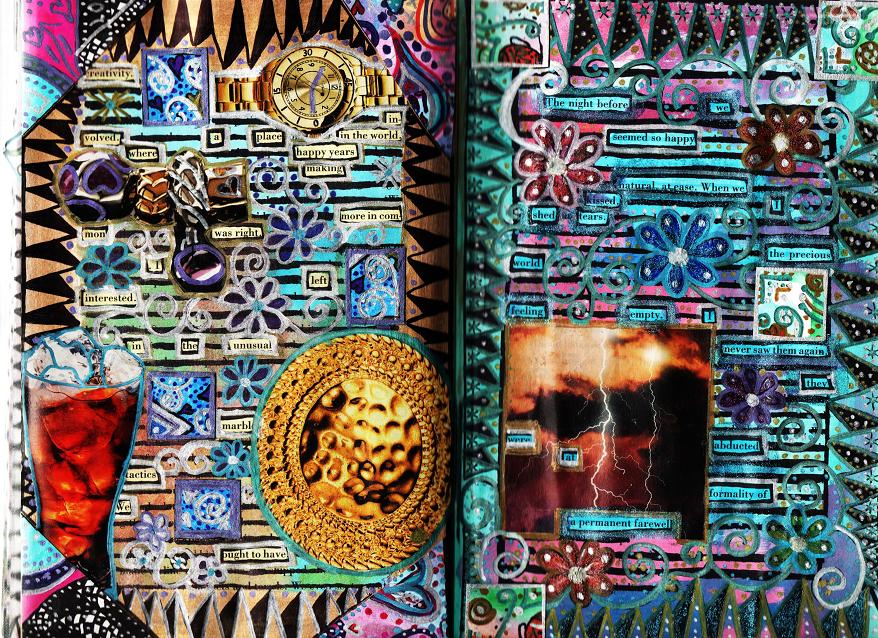
Once I have picked out my “altered text”, I then draw black boxes in permanent ink around each word(Sharpies work well for this), then use a colored highlighter to really set them off where they will show well up on the page. Now I am ready to start creating my layers of artwork, beginning with watercolors,  then layering acrylics, collage elements, permanent inks, markers, colored pencil, etc., making sure to not cover up the words I have chosen with my artwork as I go. One other tip – I also glue together 3 pages, then leave a two-page spread, then glue 3 more pages together and so on, to give myself a sturdy base for my artwork.  I am including a couple more pictures of my pages I have finished, so you can see some examples. Hopefully, this has helped you to add another dimension to your mixed media and altered book art! Once you get the hang of it, it can become quite addicting to see what “Altered Text” sentences you can come up with on each page. After you have gotten the hang of finding your words on the pages, you can also create your art to match or compliment your “altered text” and add a whole new aspect of additional meaning to your altered book art! You can create a whole new “story within the story” with the sentences and phrases you discover when you “read between the lines”!
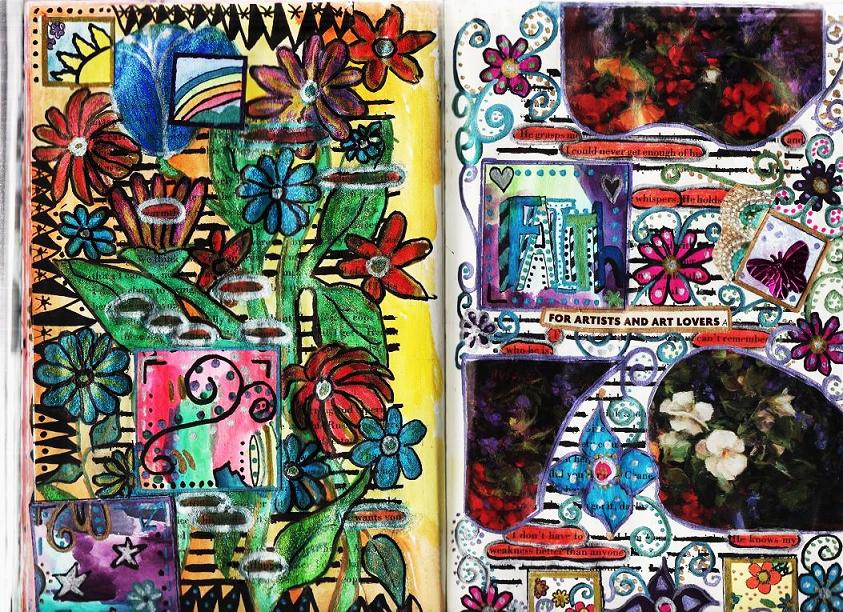
artwork by Laura Thykeson

artwork by Laura Thykeson  artwork by Laura Thykeson


~*~*~*~*~*~*~*~*~*~*~*~*~*~*~*~*~*~*~*~*~*~*~*~*~

Laura Thykeson has been totally immersed in mixed media art for many years. If it will “take paint”, she has probably painted on it!

Laura discovered altered books and art journals about a year ago and have been hooked ever since! She has always loved mixed media art because of the variety and the “no rules” aspect! Starting out a fine art oil artist, she soon transitioned into her own line of wearable art, purses and jewelry, along with decorative items for the home.

Laura lives in Granbury, Texas USA.

You can see more of Laura’s work at at her blog Taz’s corner

~*~*~*~*~*~*~*~*~*~*~*~*~*~*~*~*~*~*~*~*~*~*~*~*~

.

.
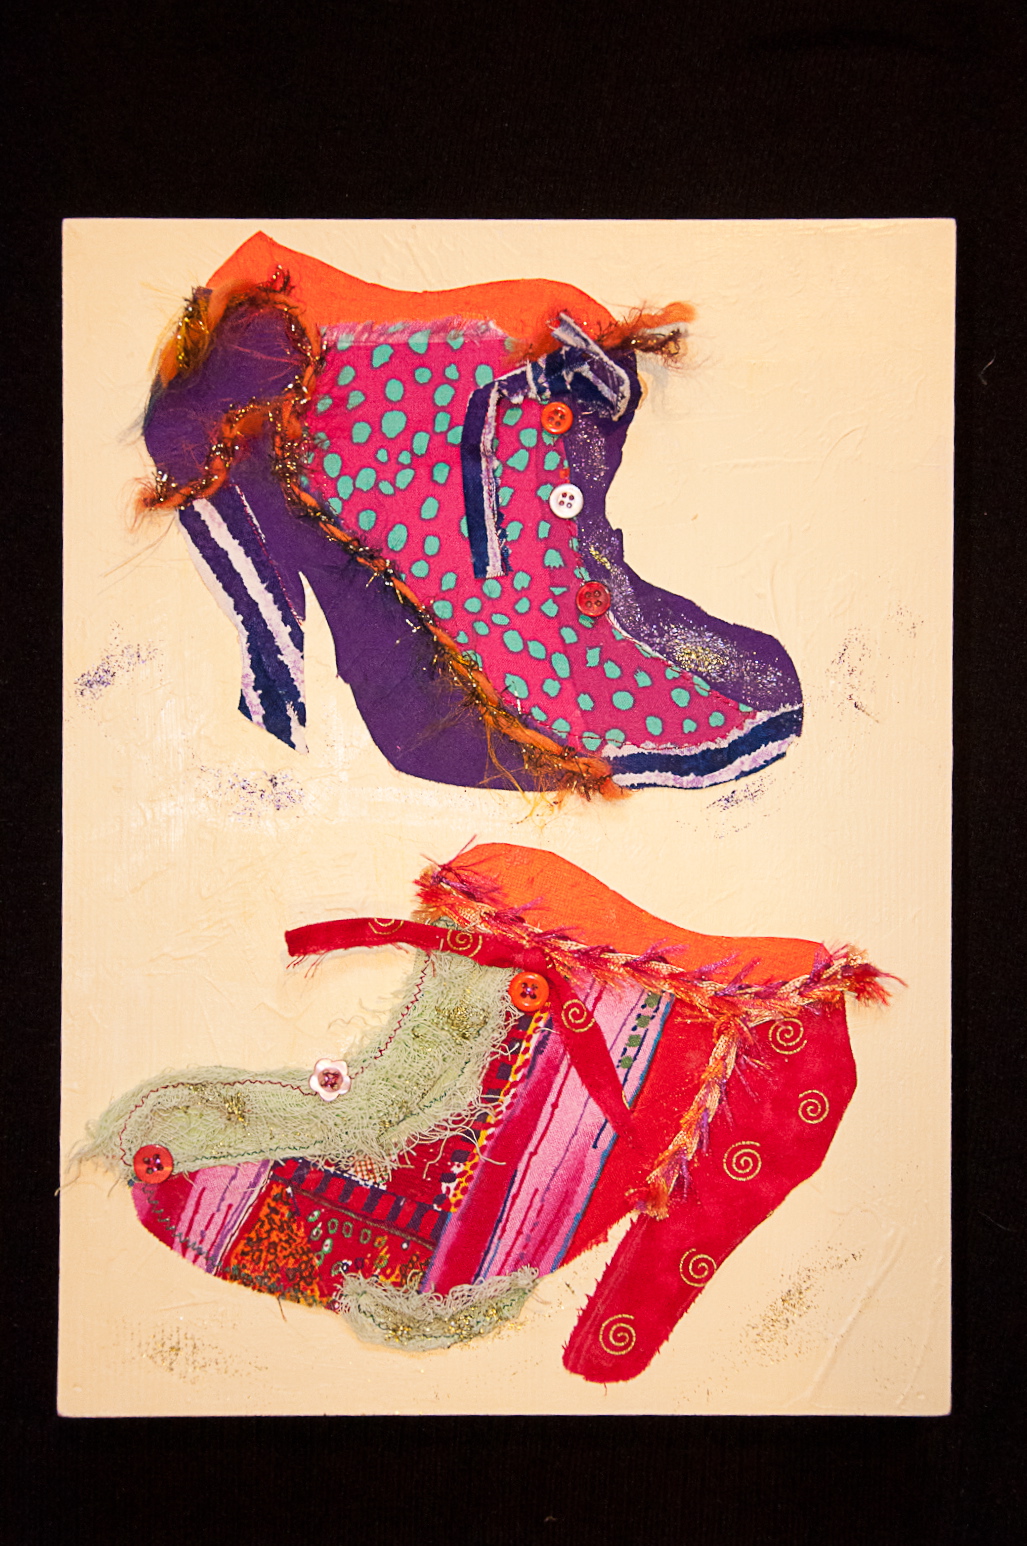
Shoe Canvas

~ * ~

The shoe canvas was created by Eileen Murray

Eileen Murray canvas

This is what Eileen tells us about her canvas:

I have been fascinated by creating funky shoes.  While in an store that was a combination of ladies clothing and shoes, I spotted a pair of very funky ladies heeled shoes.  I took a photograph, came home printed the image and then created my own version.

When I created the house turns into what I term as a creative endeavor…and it can be that since I have no one I need to tidy up for.

I used canvas as the base, fabric, ribbon, buttons, paint,  and painted cheese cloth.


~*~*~*~*~*~*~*~*~*~*~*~*~*~*~*~*~*~*~*~*~*~*~*~*~

You can contact Eileen through her website The Living Connection

~*~*~*~*~*~*~*~*~*~*~*~*~*~*~*~*~*~*~*~*~*~*~*~*~

.

Junk mail art and homemade gesso

This article is written by Francesca Albini

Looking at the speed at which my paper recycling box fills up every week, I’ve been exploring various ways of making art with junk mail. The simplest way is to use it is as an interesting background for mixed media work.

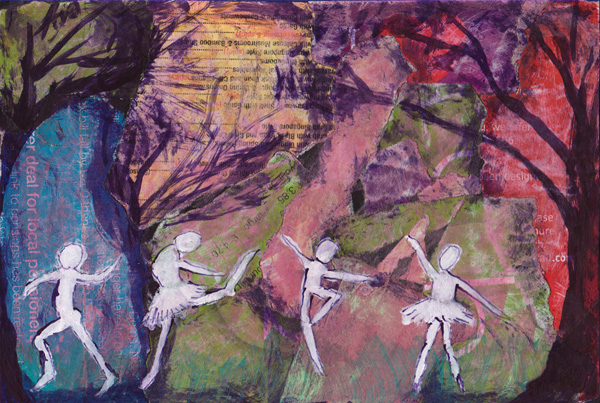
In this picture of dancers in the woods, I glued torn pieces of coloured junk mail to a board. When the glue was dry, I sanded the whole surface to make it blend together more and take the excessive gloss out of the paper. I then added glazes of my home made pink gel pen ink. I also made a rough contour of the pieces with my ball point ink and a very dry brush. The trees are also painted with ball point ink. I gave the impression of grass with children’s green day-glo paint. Lastly, I painted the dancers in gesso and contoured them with a toothpick dipped in ball point ink. The sun through the branches is done with a yellow highlighter spread with a wet brush.

Francesca Albini mixed media art collage

Another way of using junk mail is to cover it in gesso and then paint, write, collage over it. Of course, while junk mail is free, gesso is very expensive. So here’s how to make your own super cheap one. Next time you decorate, keep your unused water based white wall paint (or use white acrylic paint). Mix the paint with baby powder (possibly unscented!) and pva. Now you are ready to cover in gesso tons of useless leaflets. I make as much gesso as I need on the day, so I don’t know if it can be stored.

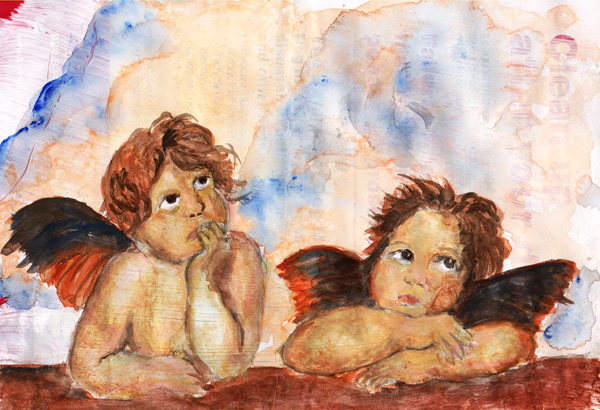
You can use the paper to make single artworks, or sew them together into a junk mail journal. I wanted to challenge myself here and decided to do a “Raphael” on a gessoed leaflet. I used washes of children’s gouache and was quite pleased with the way in which the support received the paint. I found it sturdier and more forgiving than watercolour paper, and I like the little bit of texture coming through the gesso.

Francesca Albini mixed media art collage

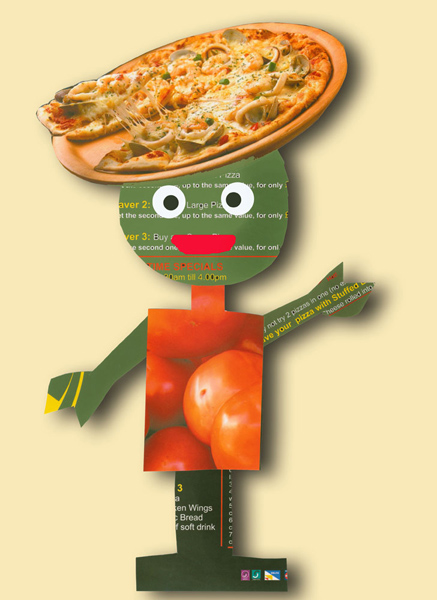
Of course, junk mail can be used to do fun collages, as well. I seem to receive a lot of pizza leaflets, so I made a pizza-man out of them. The funny character was then scanned into the computer and given a digital background.

Francesca Albini mixed media art collage

Enjoy your junk mail, and make great art with it!


~*~*~*~*~*~*~*~*~*~*~*~*~*~*~*~*~*~*~*~*~*~*~*~*~

Francesca is a visual artist using pretty much everything she finds around her to record and relive feelings and memories of places and emotions. She collages, paints, draws, photographs. Francesca loves mixing modern technology, such as mobile phone apps, with the simplest of tools such as glitter glue, crayons and other children’s art supplies. Read her blog at http://franjournal.blogspot.com/

~*~*~*~*~*~*~*~*~*~*~*~*~*~*~*~*~*~*~*~*~*~*~*~*~

.

.
“Art at the Speed of Life”

.
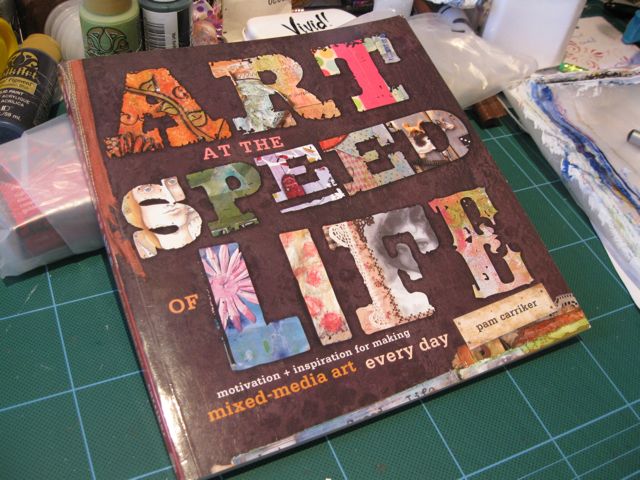
Today we are reviewing Art at the Speed of Life by Pam Carriker. Published by Interweave Press 2010

Overview of book:

In Art at the speed of life, Pam has outlined how to fit our creativity into our busy lives. She, along with 18 contributing artists, present mini essays on different aspects of this; narrowing down our supplies, setting limits with computer time, giving ourselves permission to create rather than work/clean/other tasks.

Mixed Media art team reviews Pam Carrick book

Each of the 7 chapters contains a range of these essays, along with a contributing artist project. Pam then uses these project prompts to create a simpler method to produce similar results. Each of these projects are lovely and continue in Pam’s usual style of rich colours and multiple layers.

Favourite part:

There are two elements of this book that will stay with me and I have already adopted into my creating:

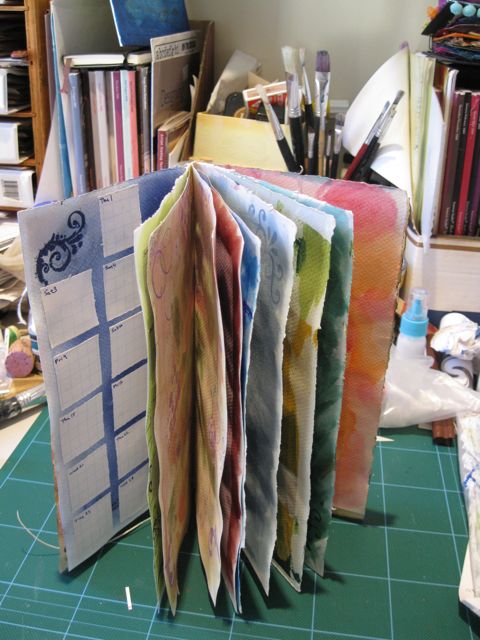
1. the first is making your own art journal from a large piece of watercolour paper. I had a lot of fun making my first two and have already bought another two sheets of paper to make a few more. The idea of using any leftover paint or ink on a stamp while having it out to add colour to this journal is a great idea. But I do need to do this with conscious effort; at times I am so focused on my main artwork that I move through the layers, rather than pausing to add colour and layers to the journal. I will continue to practice.

Pam Carrick Mixed Media art journal

2. the second aspect is to be working on more than one piece at a time. I have tried this with two pieces and found that it work okay but I still find the disruption between pieces a little frustrating. Now I have three bland canvases, ready for a larger project.

Pam Carrick Mixed Media book

Least favourite part:

For a couple of the projects, I felt there could have been a few more photos to accompany the steps. Some needed re-reading a few times to understand the process being used.

Overall recommendation:

I would definitely recommend this book. Each section is easy to read and the projects are a good range of mixed media art techniques.


~ * ~ * ~ * ~ * ~ * ~ * ~ * ~ * ~ * ~ * ~ * ~ * ~ * ~ * ~ * ~ *

.