Michelle G Brown | Mixed Media Art

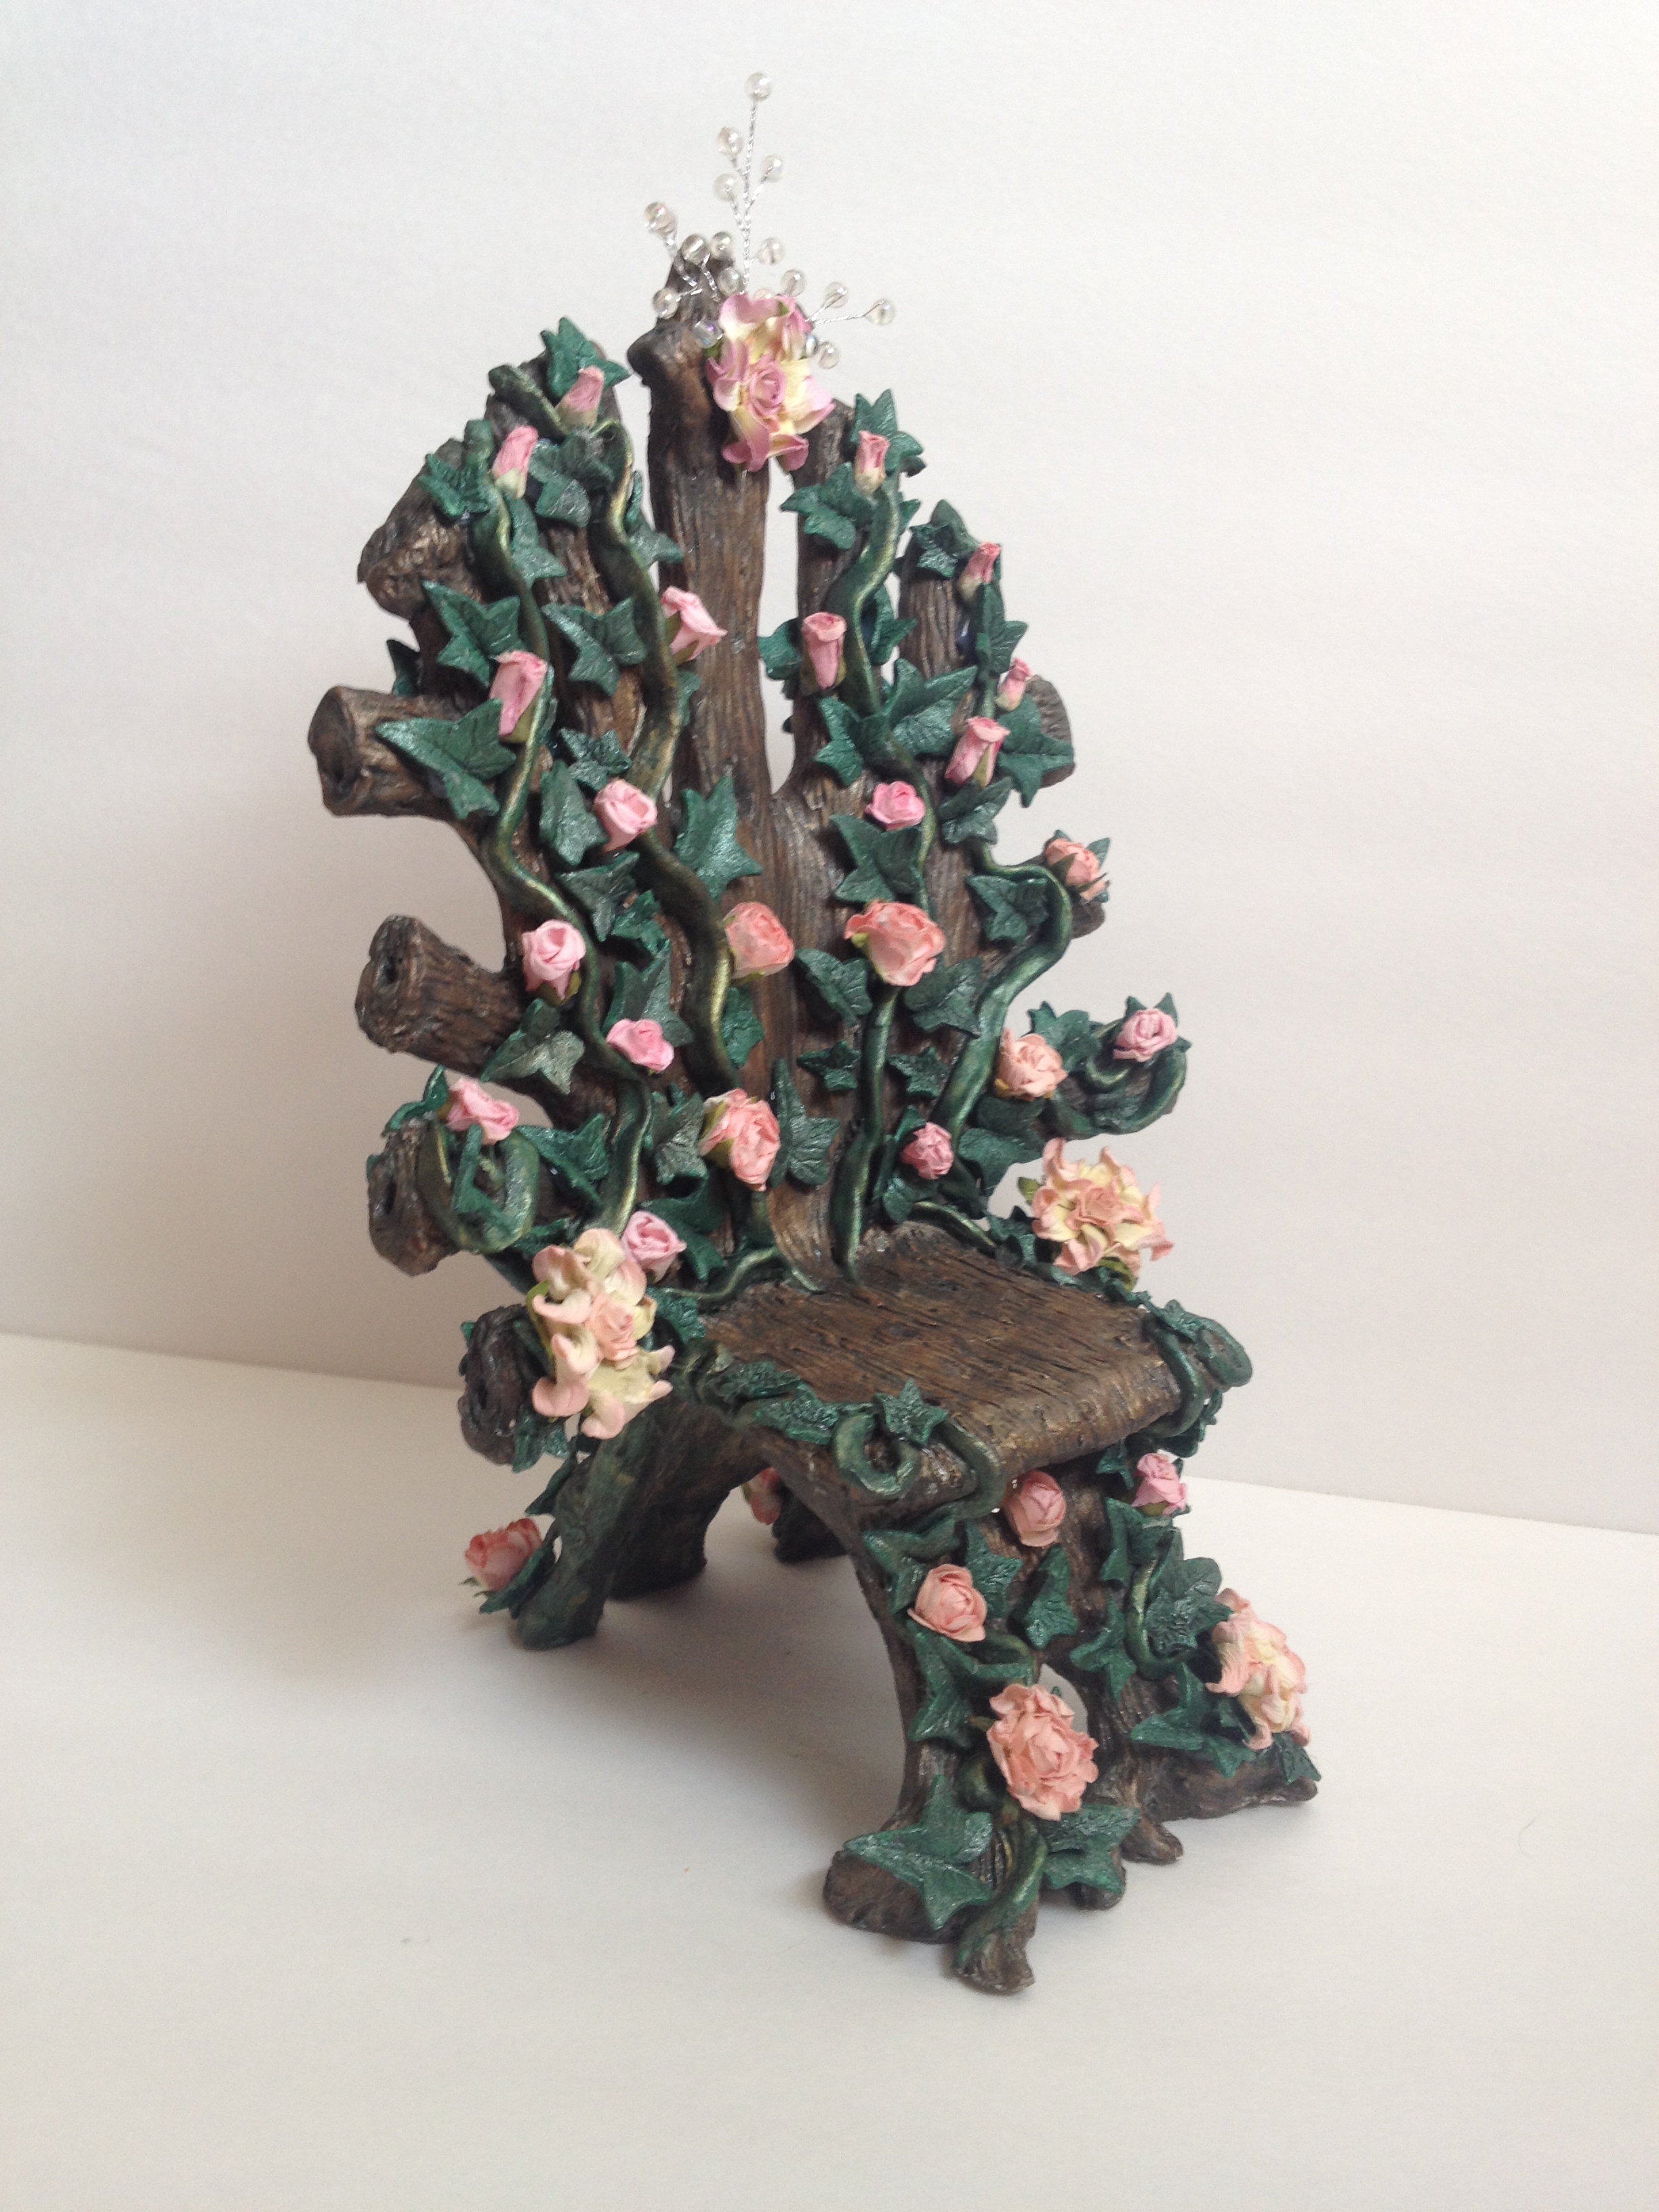
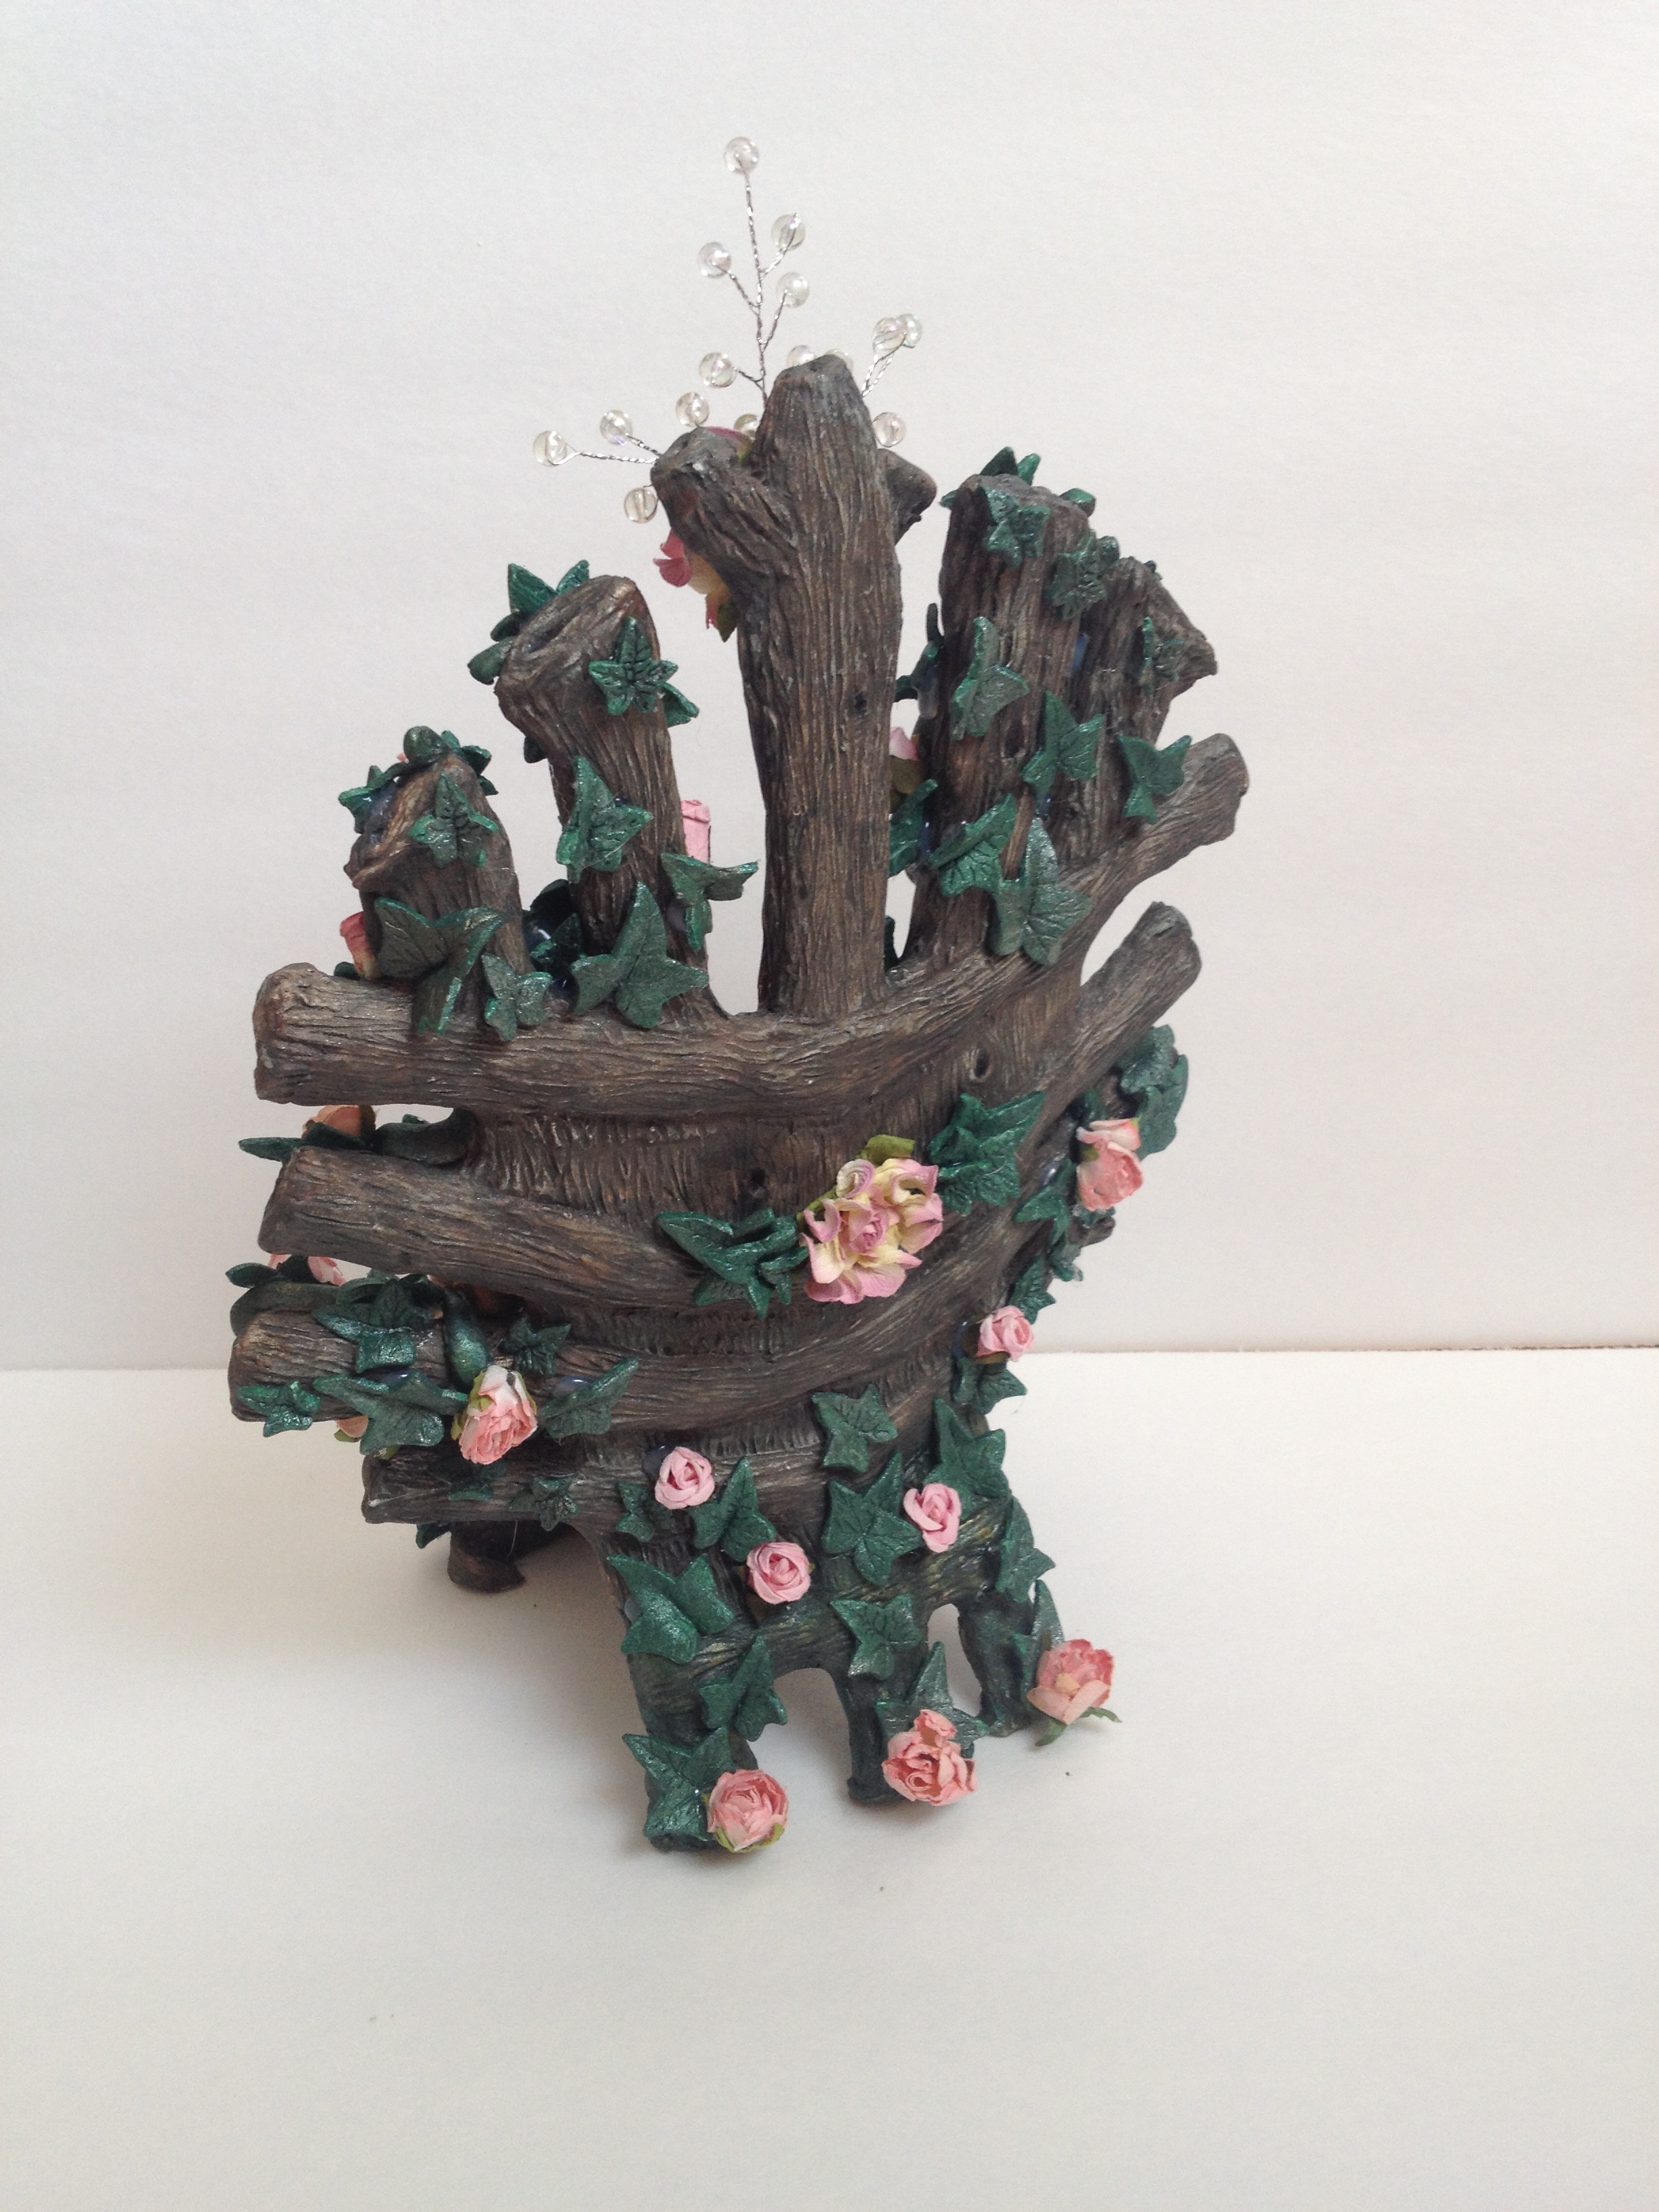
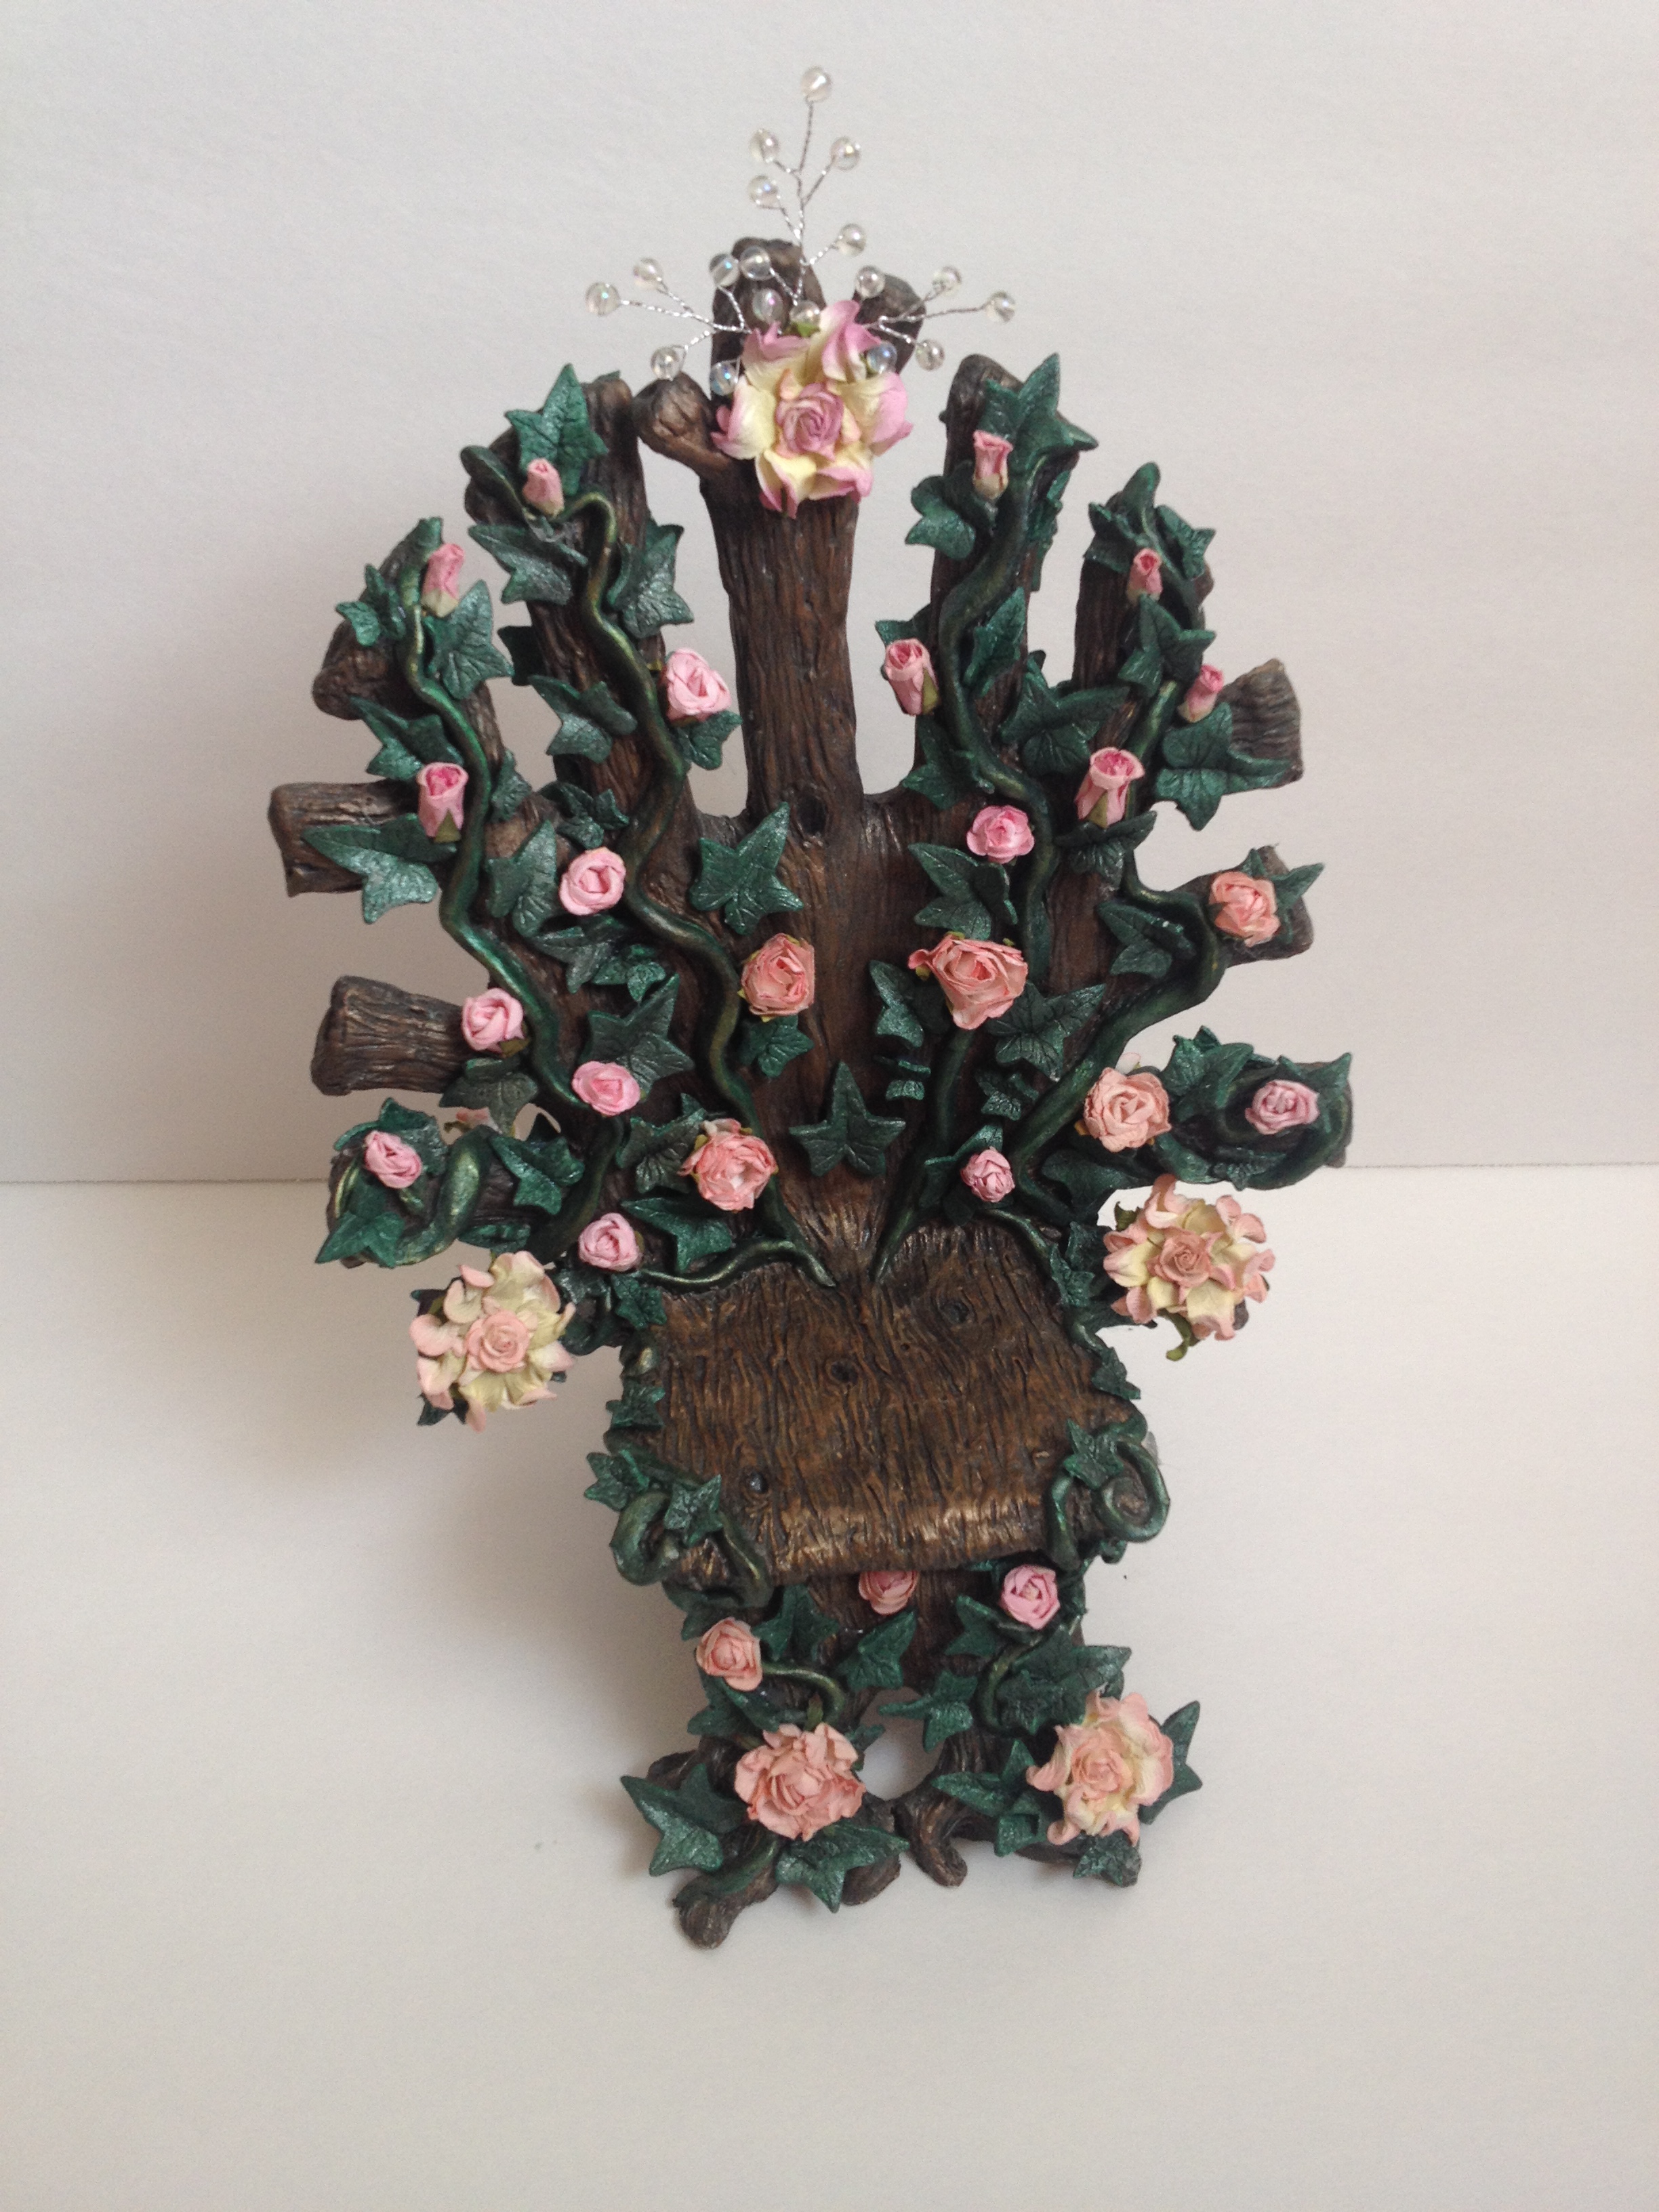
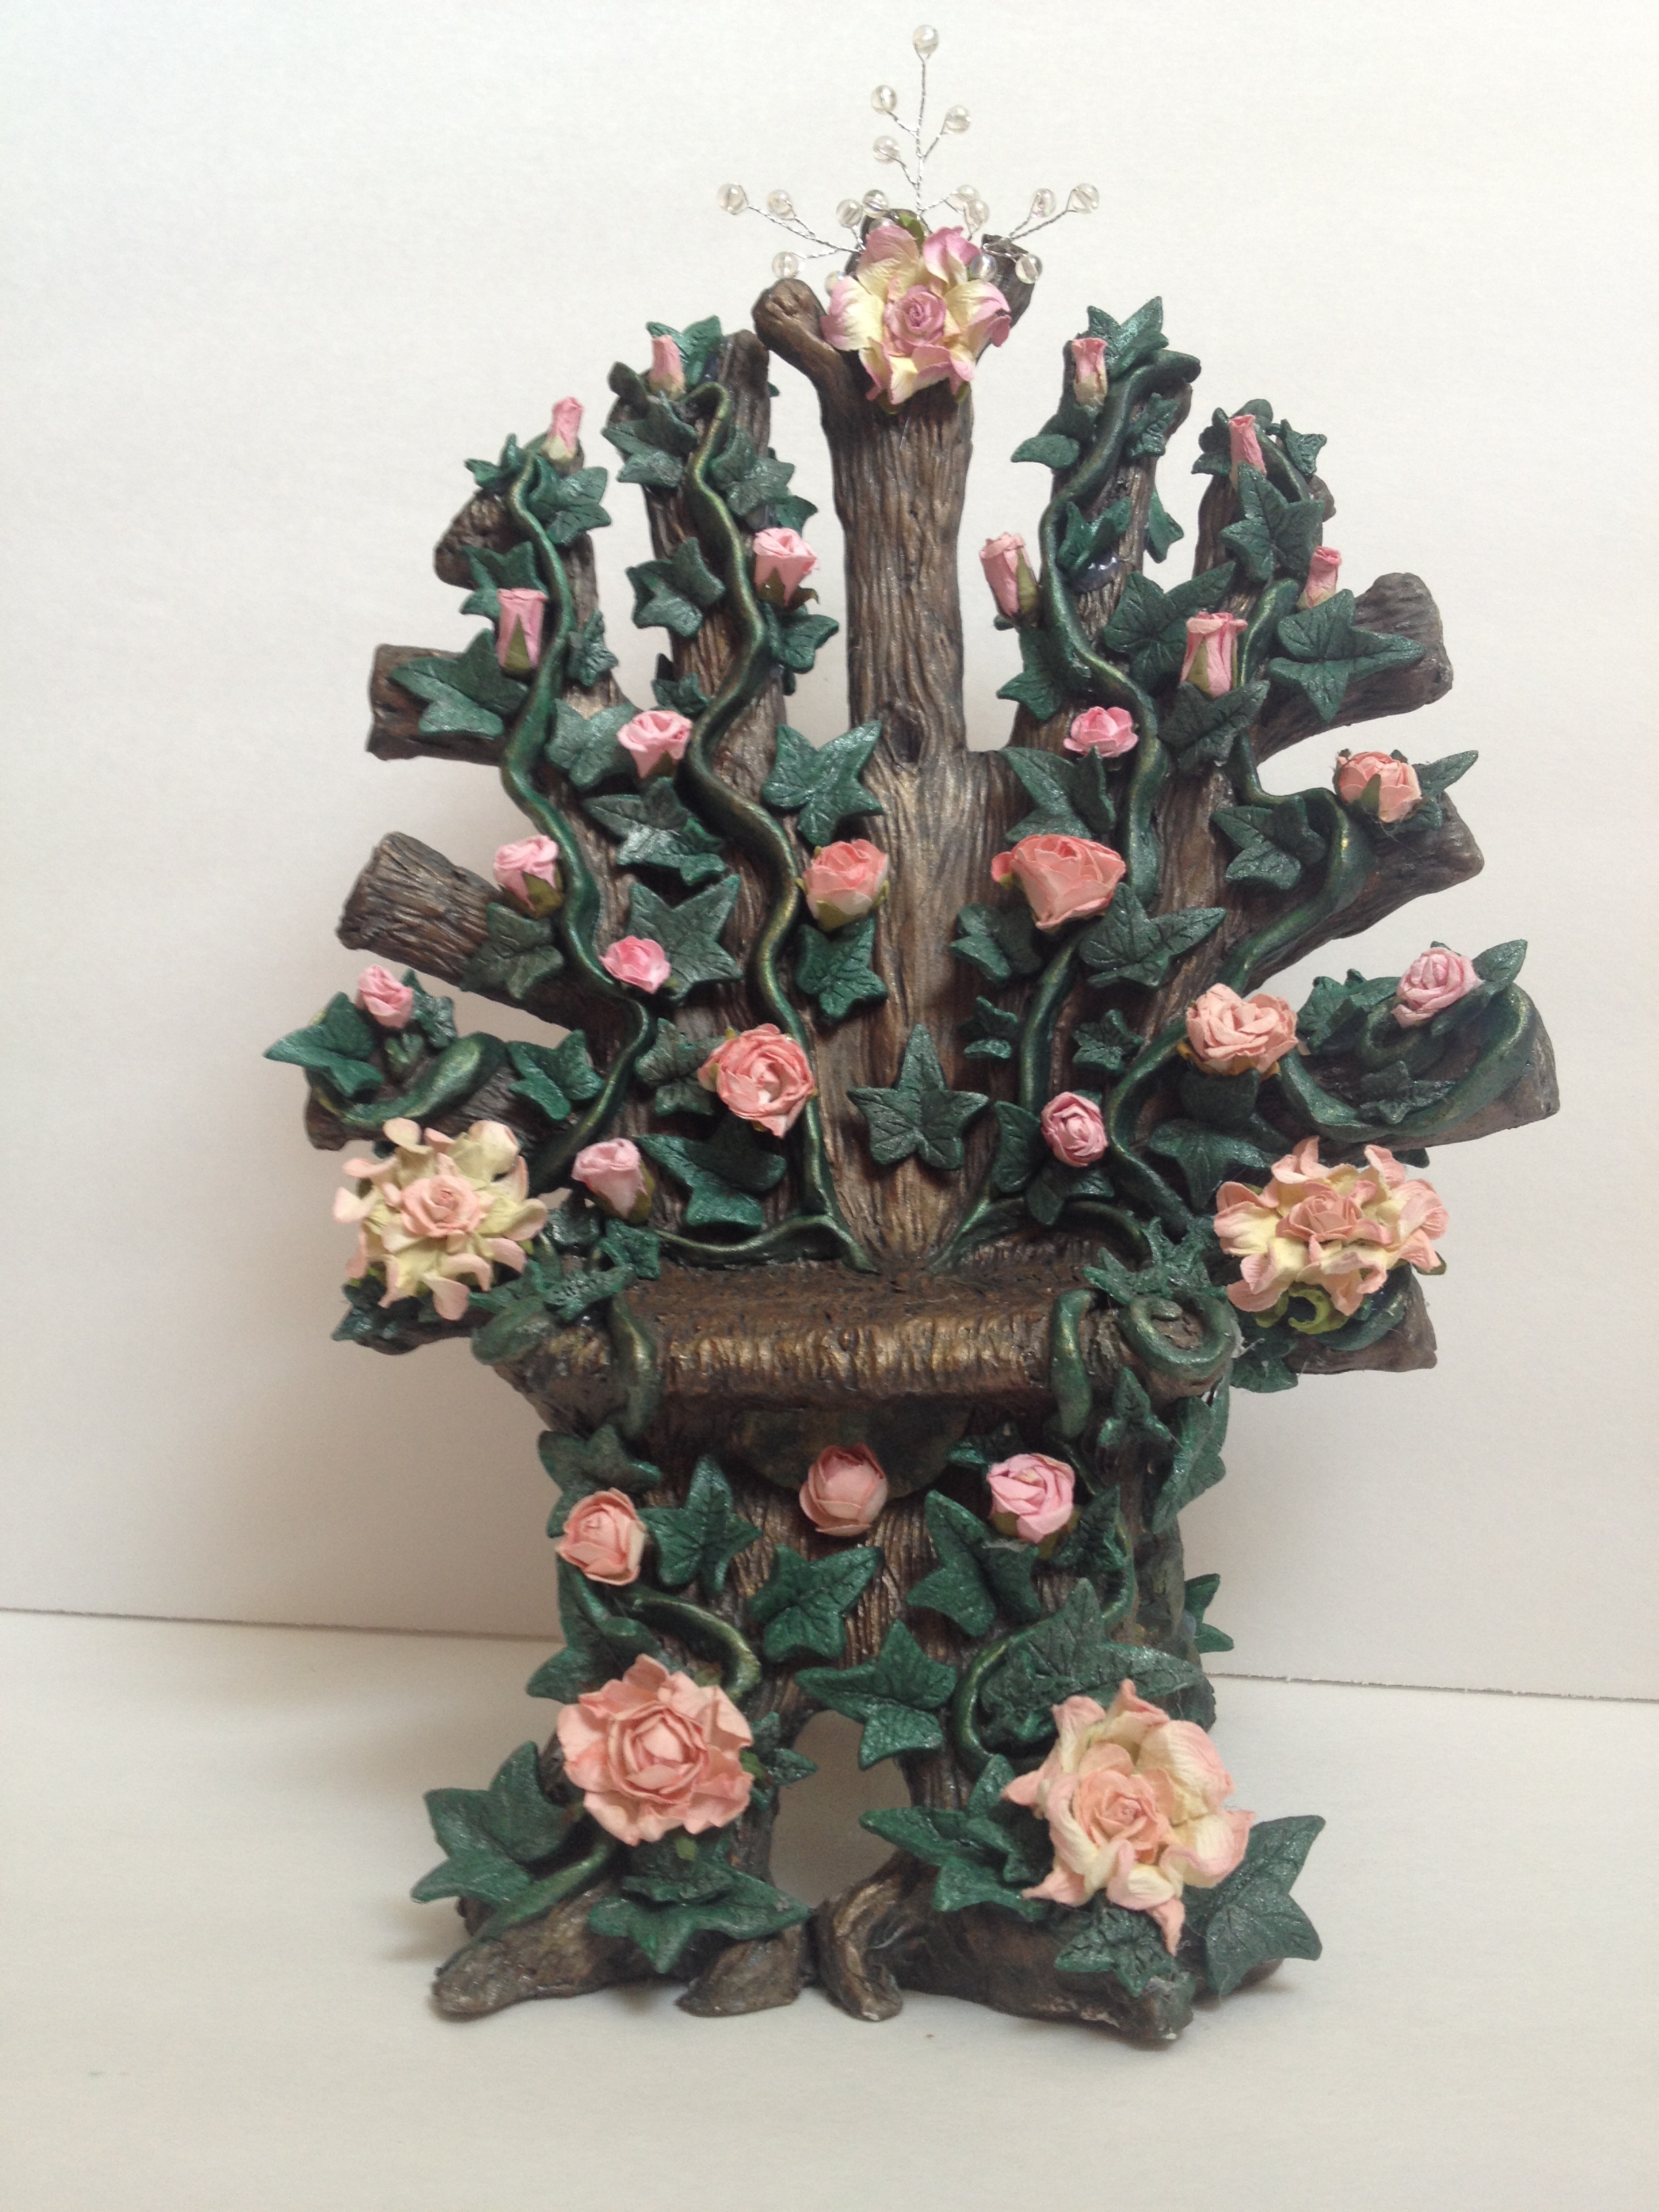
Paperclay Hand Sculpted Elf Fairy Throne

~ * ~

This article was written by Gloriann Irizarry
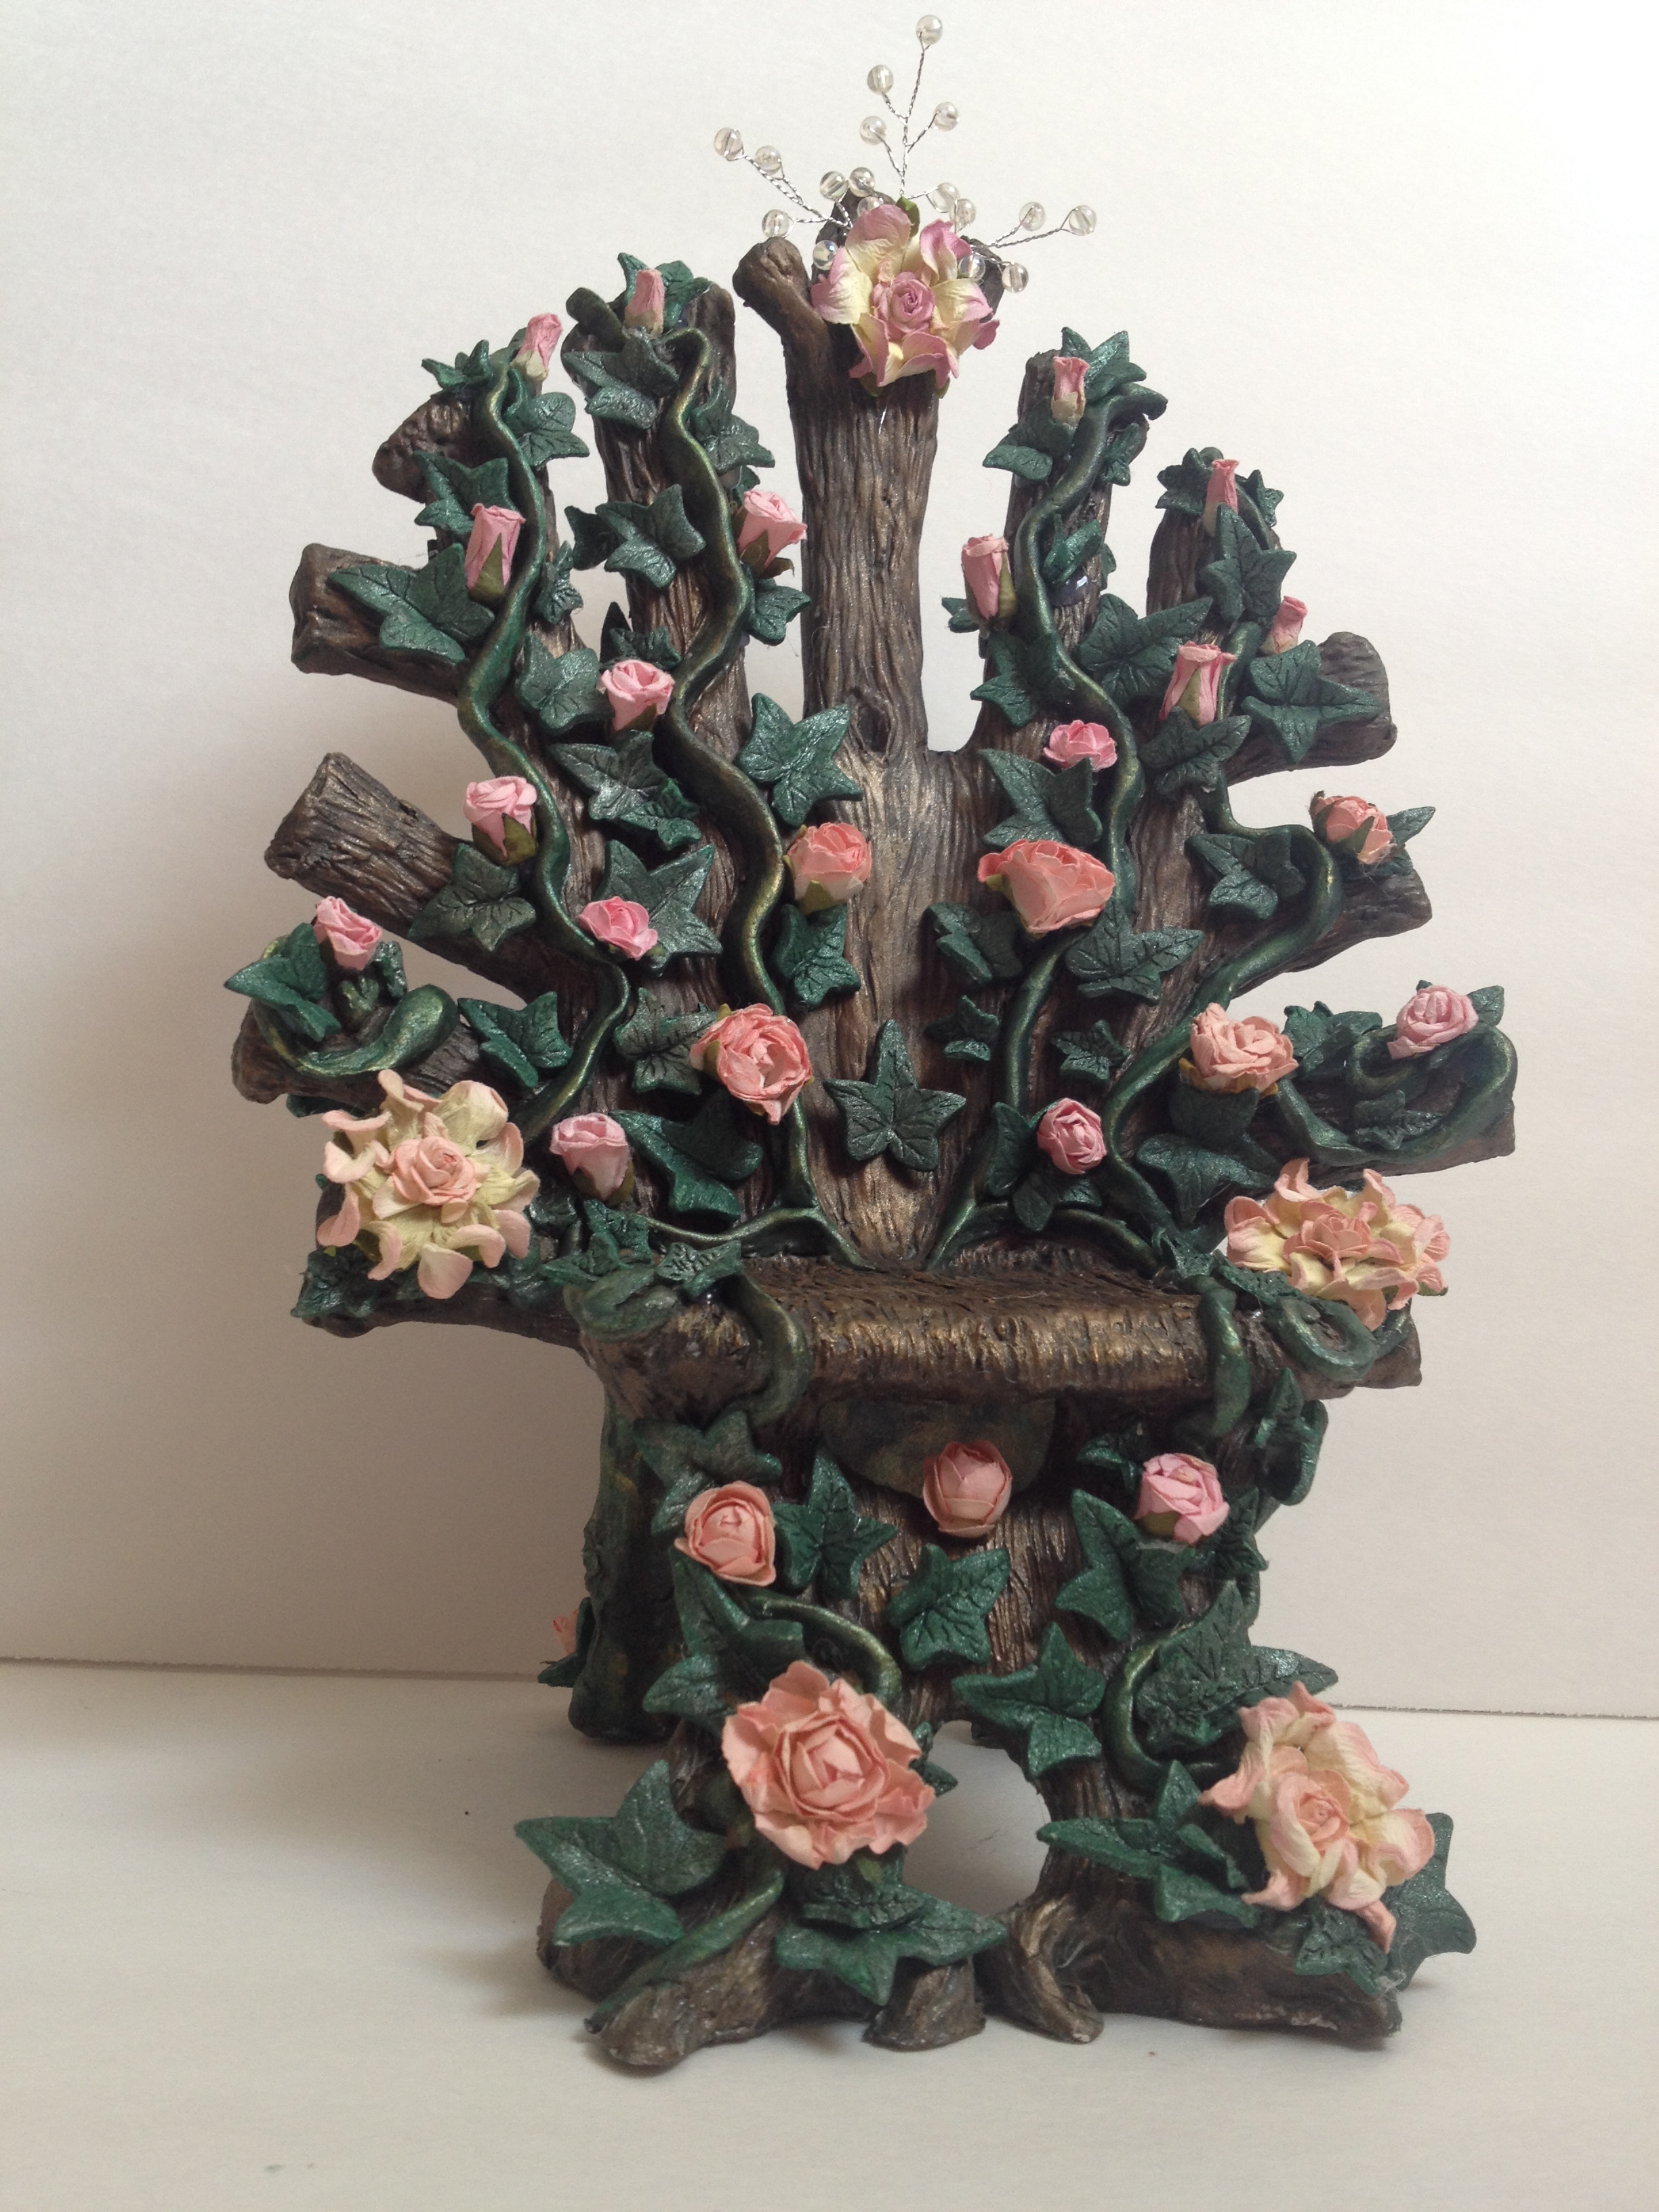
Gloriann Irizarry has created this amazing paper clay fairy throne with vines and roses

Hi my dear friends. It is Gloriann Irizarry once more with a nice one of a kind tutorial. I notice how much my little girls love to play with theirs dolls and letting their imagination go to far away magical lands. This gave me an idea. Why not make a Magical Throne.  Yes something really mystical and beautiful.

Well I created another Paper clay tutorial. It will include the full instructions and easy steps to follow to  complete this project.

Materials

1 Foam board

Ruler

Xacto Knife

Eraser

Pencil

Scissors

Hot glue gun and refills

Mulberry paper roses

2 Bags of Creative Paperclay Material

Clay roller

Ivy leaf cutter

Water spray bottle

Acrylic paints ( Dark brown, Pearl hunter green, Gold and black)

Paint brushes

Embossing tool also know found on nail art to add small details

Cotton Balls

These are some of the materials I use but feel free to add more items is you prefer to.

Instructions for Paperclay Fairy Throne
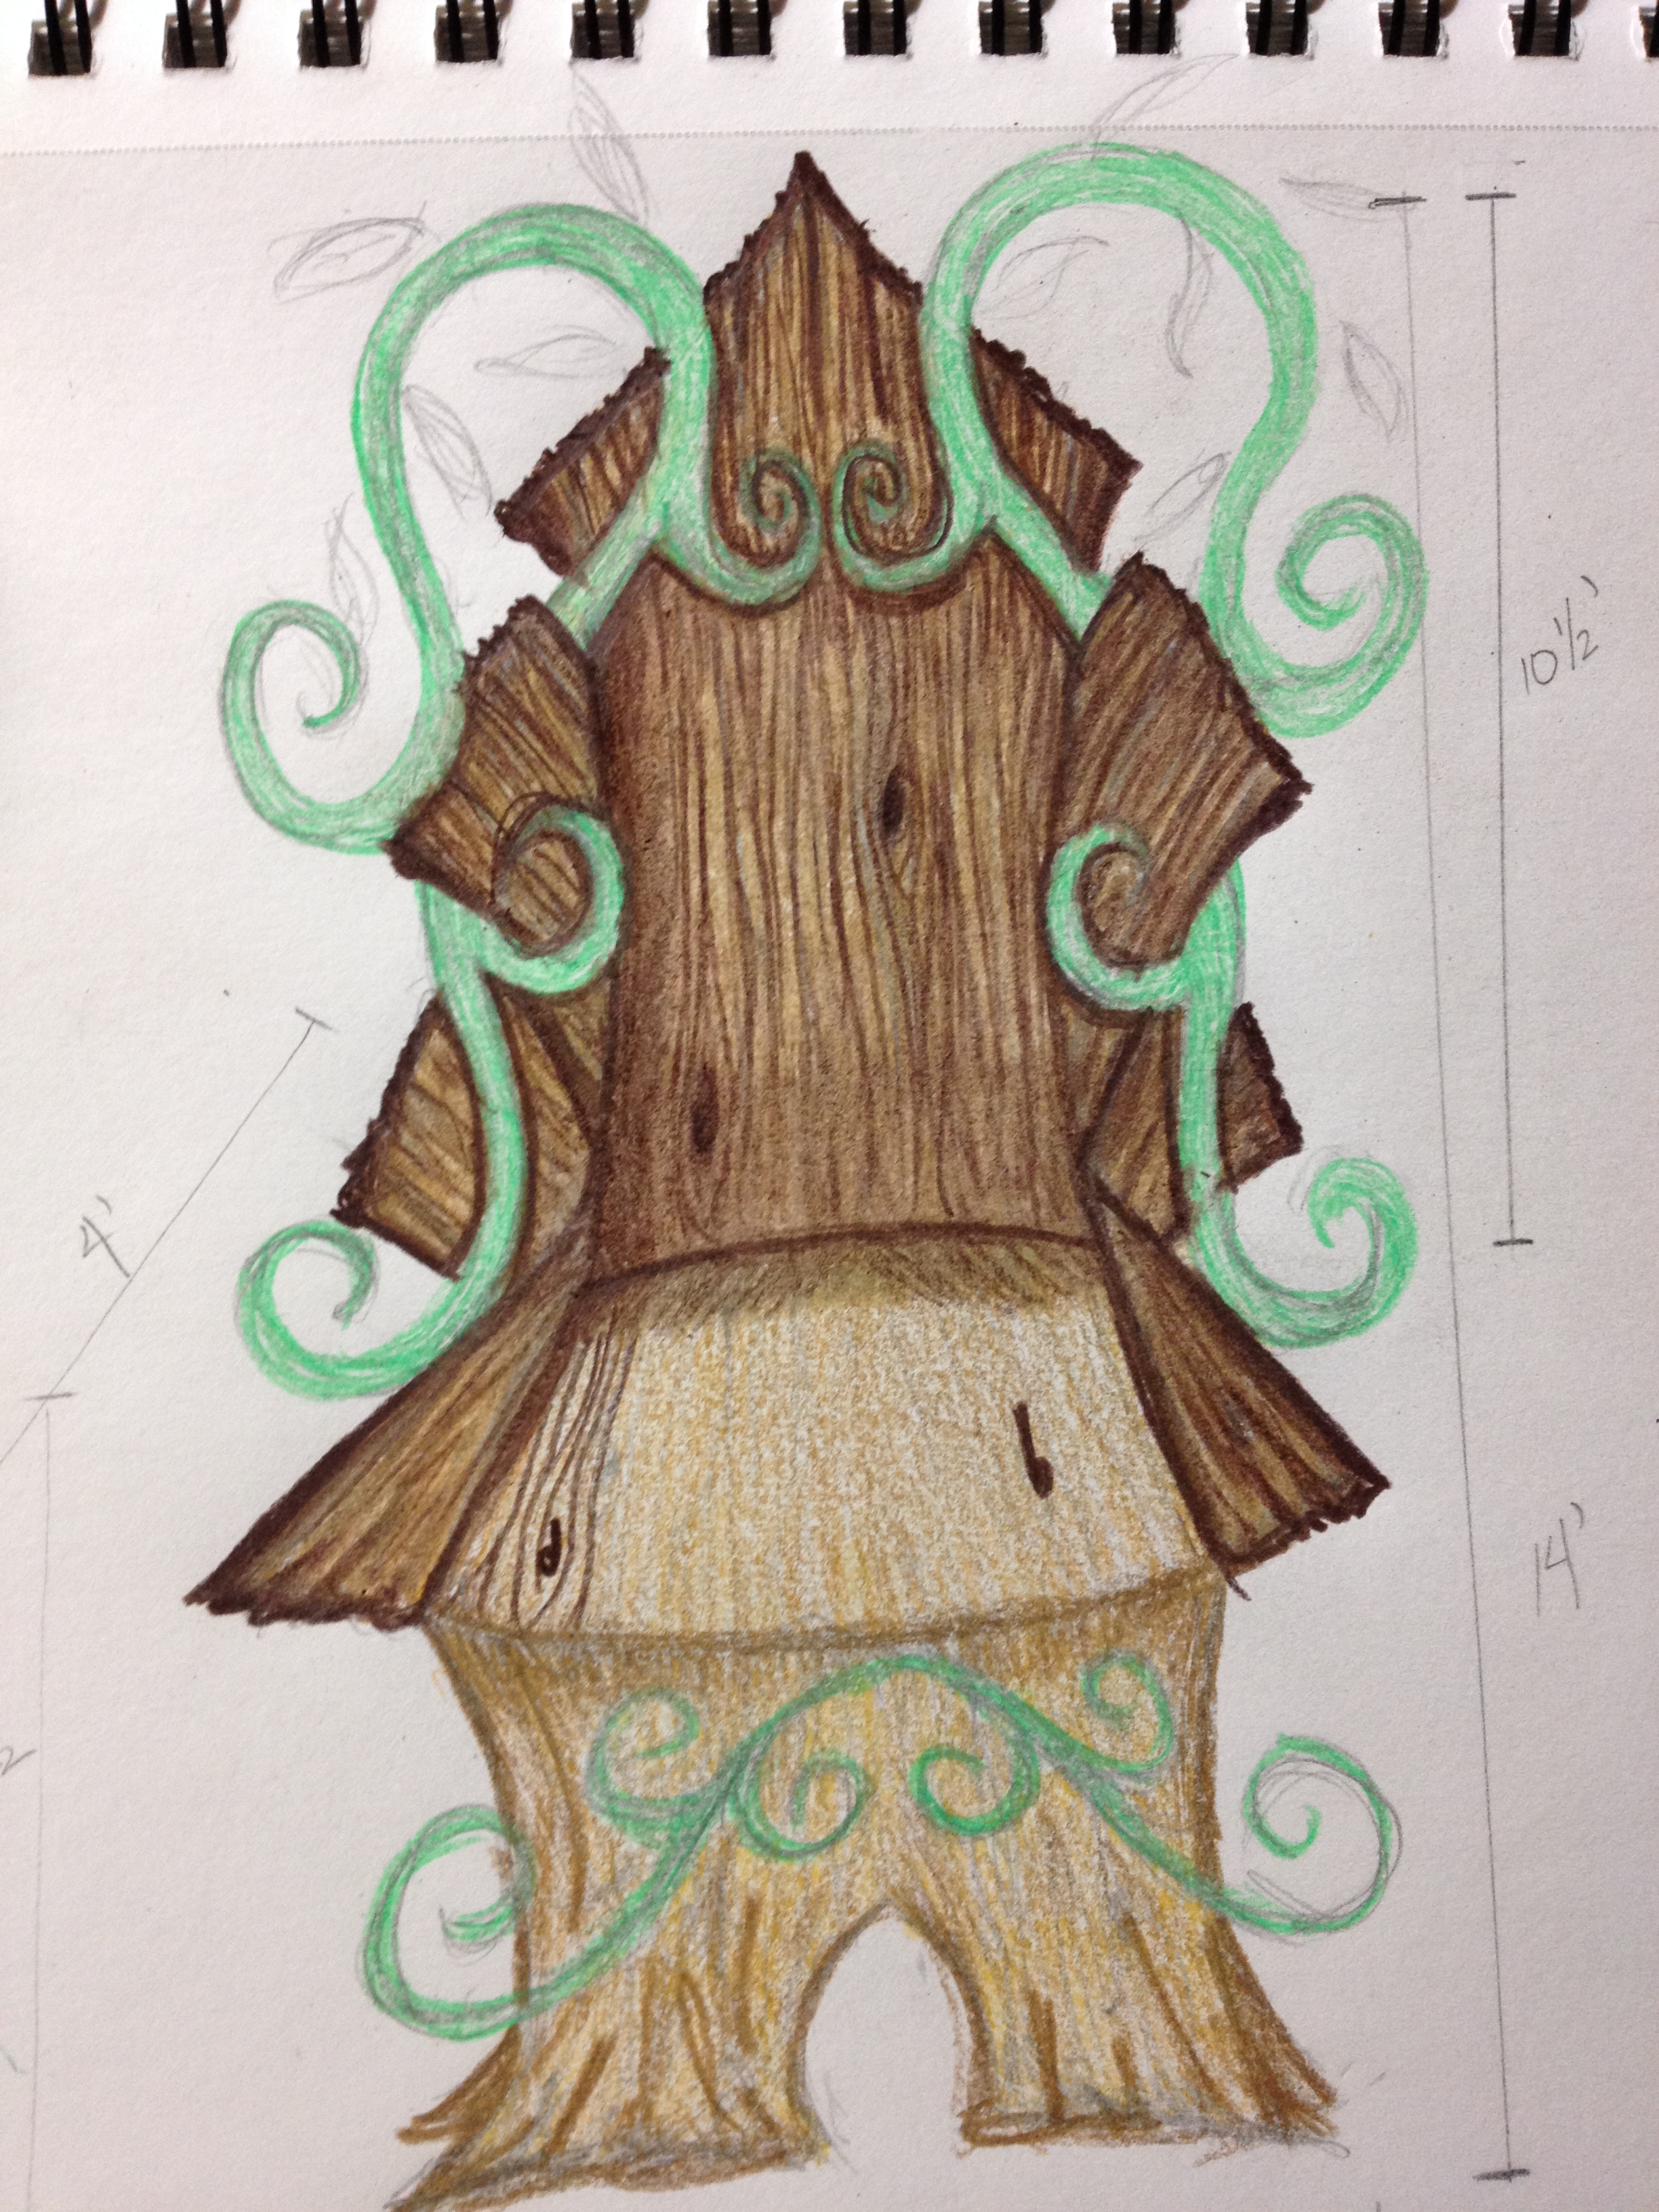
Gloriann Irizarry has created this amazing paper clay fairy throne with vines and roses

I like to start the creative process with a sketch out. This will give me a guide to how the final project should look like and allow me to get the measurement just right before the final piece is complete.
Gloriann Irizarry has created this amazing paper clay fairy throne with vines and roses

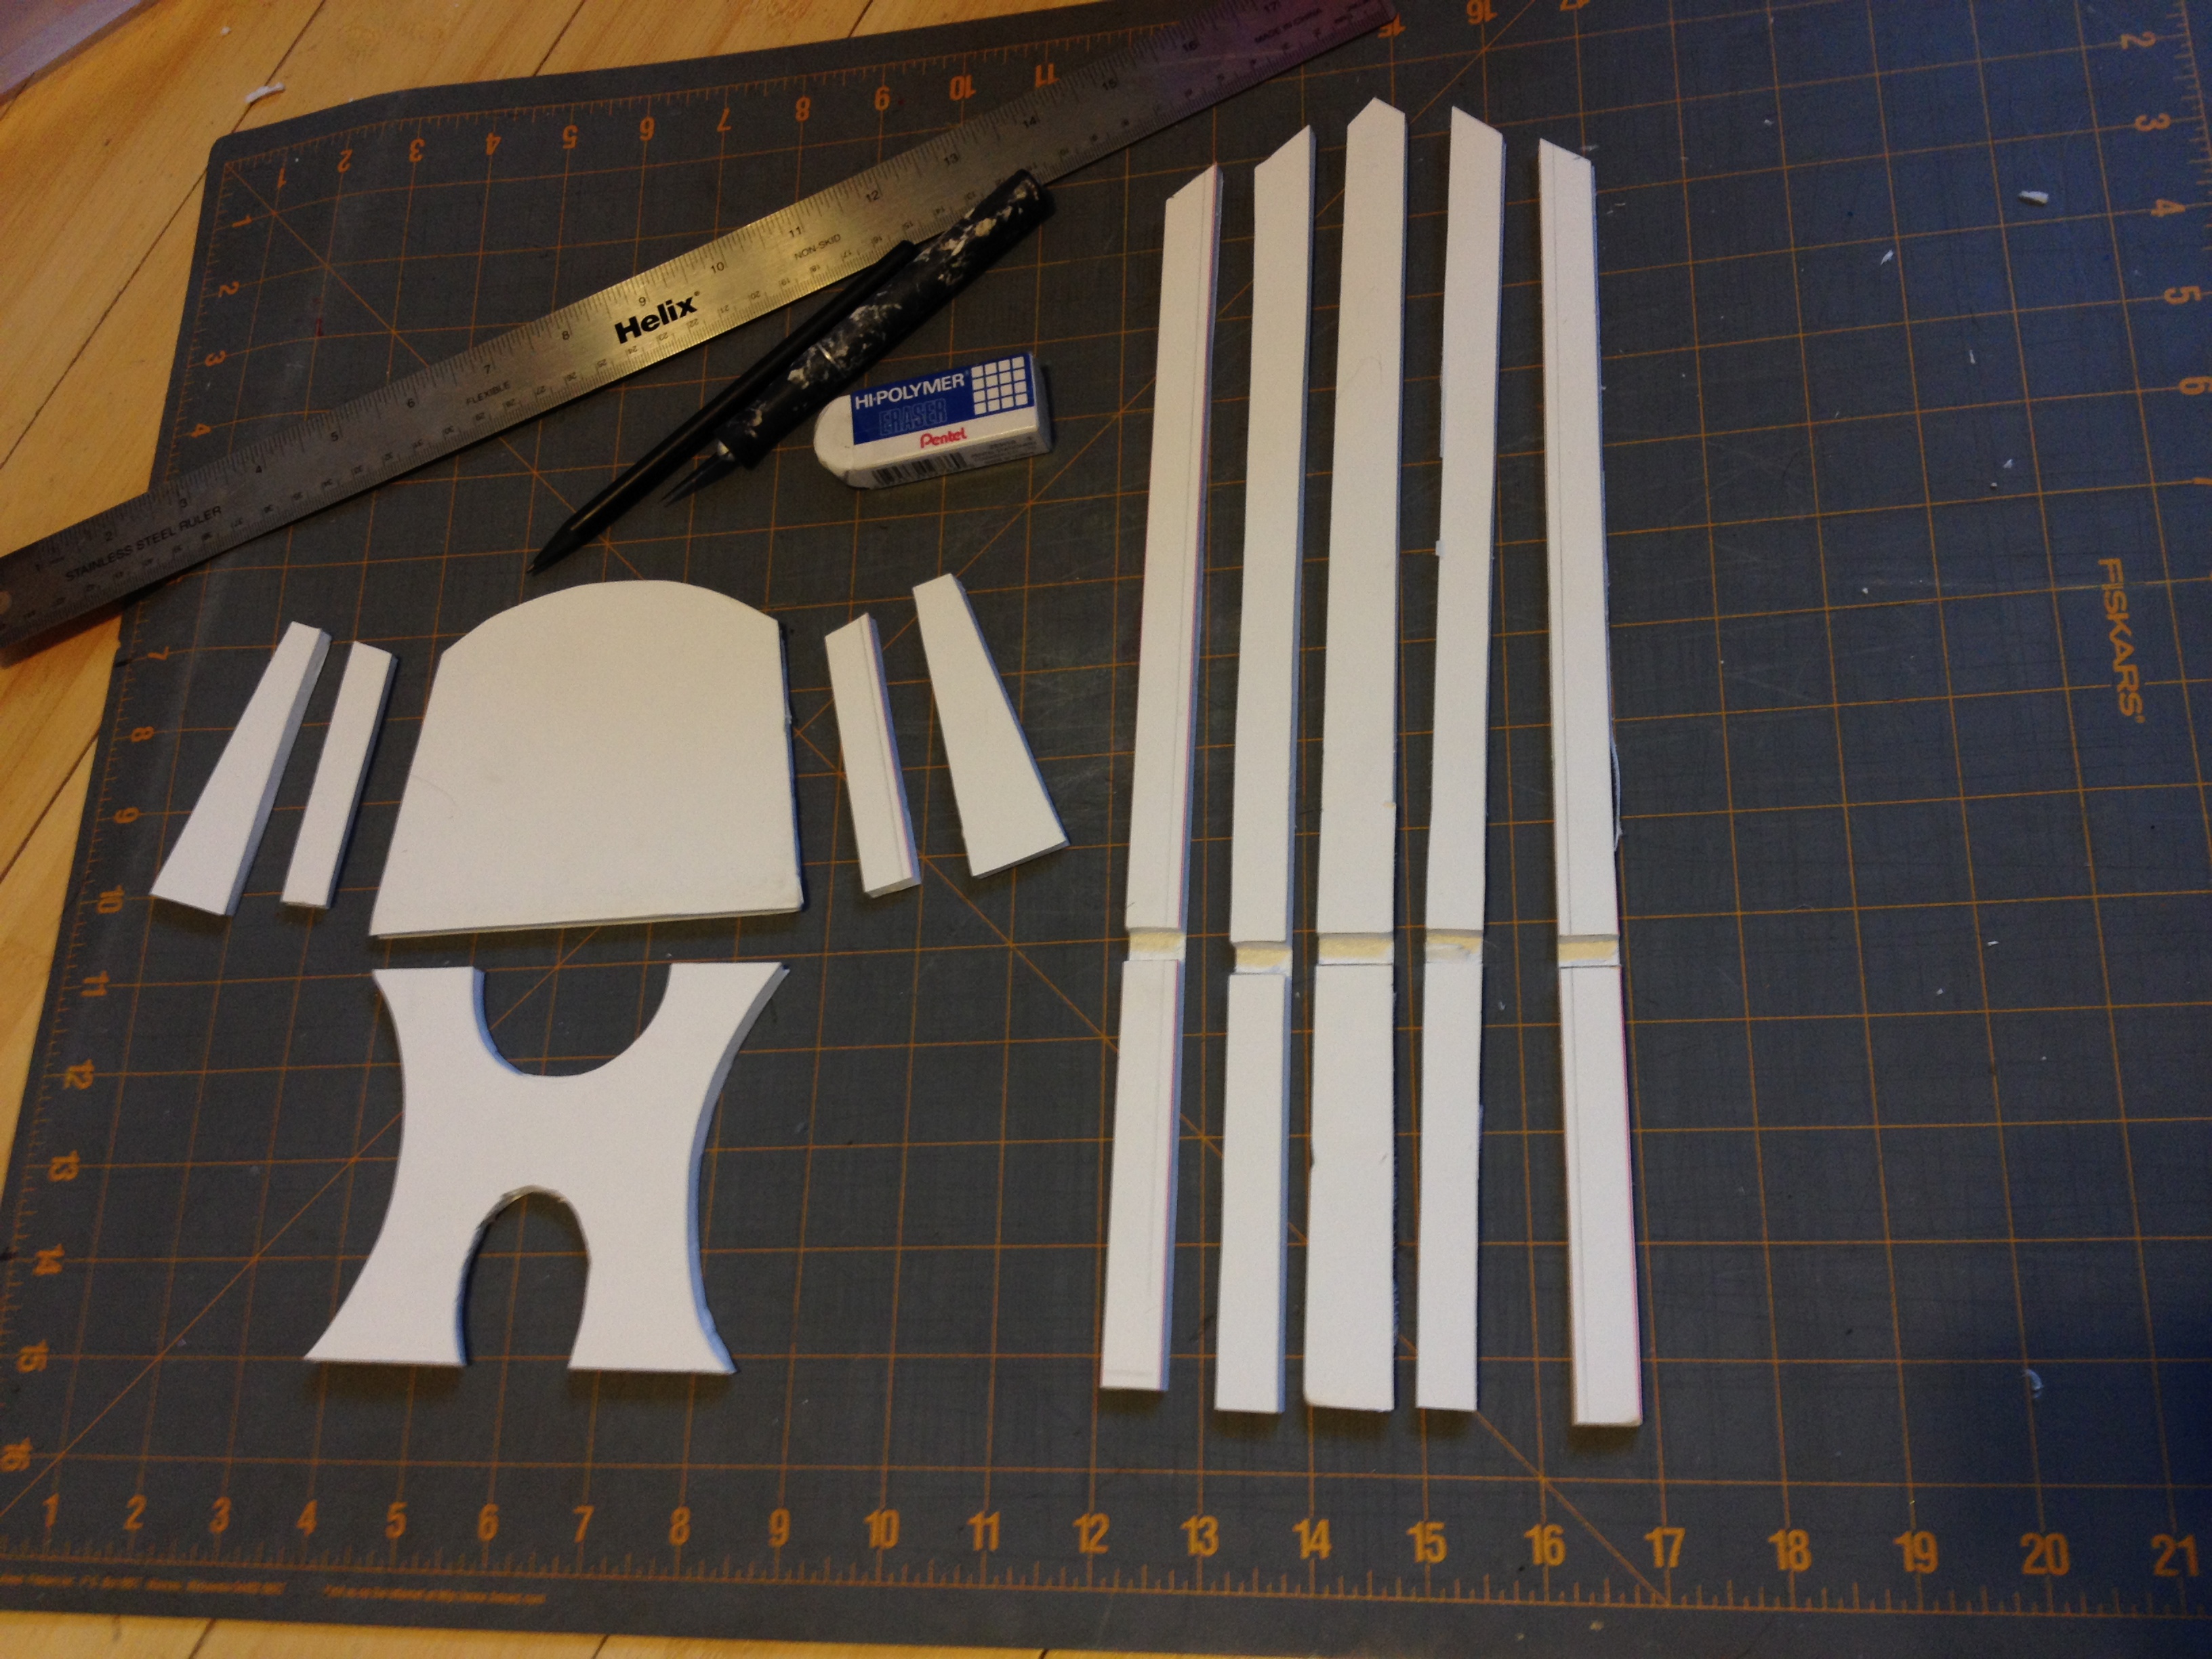
I used the sketch and create a template following the doll measurements so the throne will fit her just right once the sculpture is complete. Trace the pieces down to your foam board and carefully cut with a sharp Xacto knife blade. Line them up for easy assembly with the hot glue.
Gloriann Irizarry has created this amazing paper clay fairy throne with vines and roses

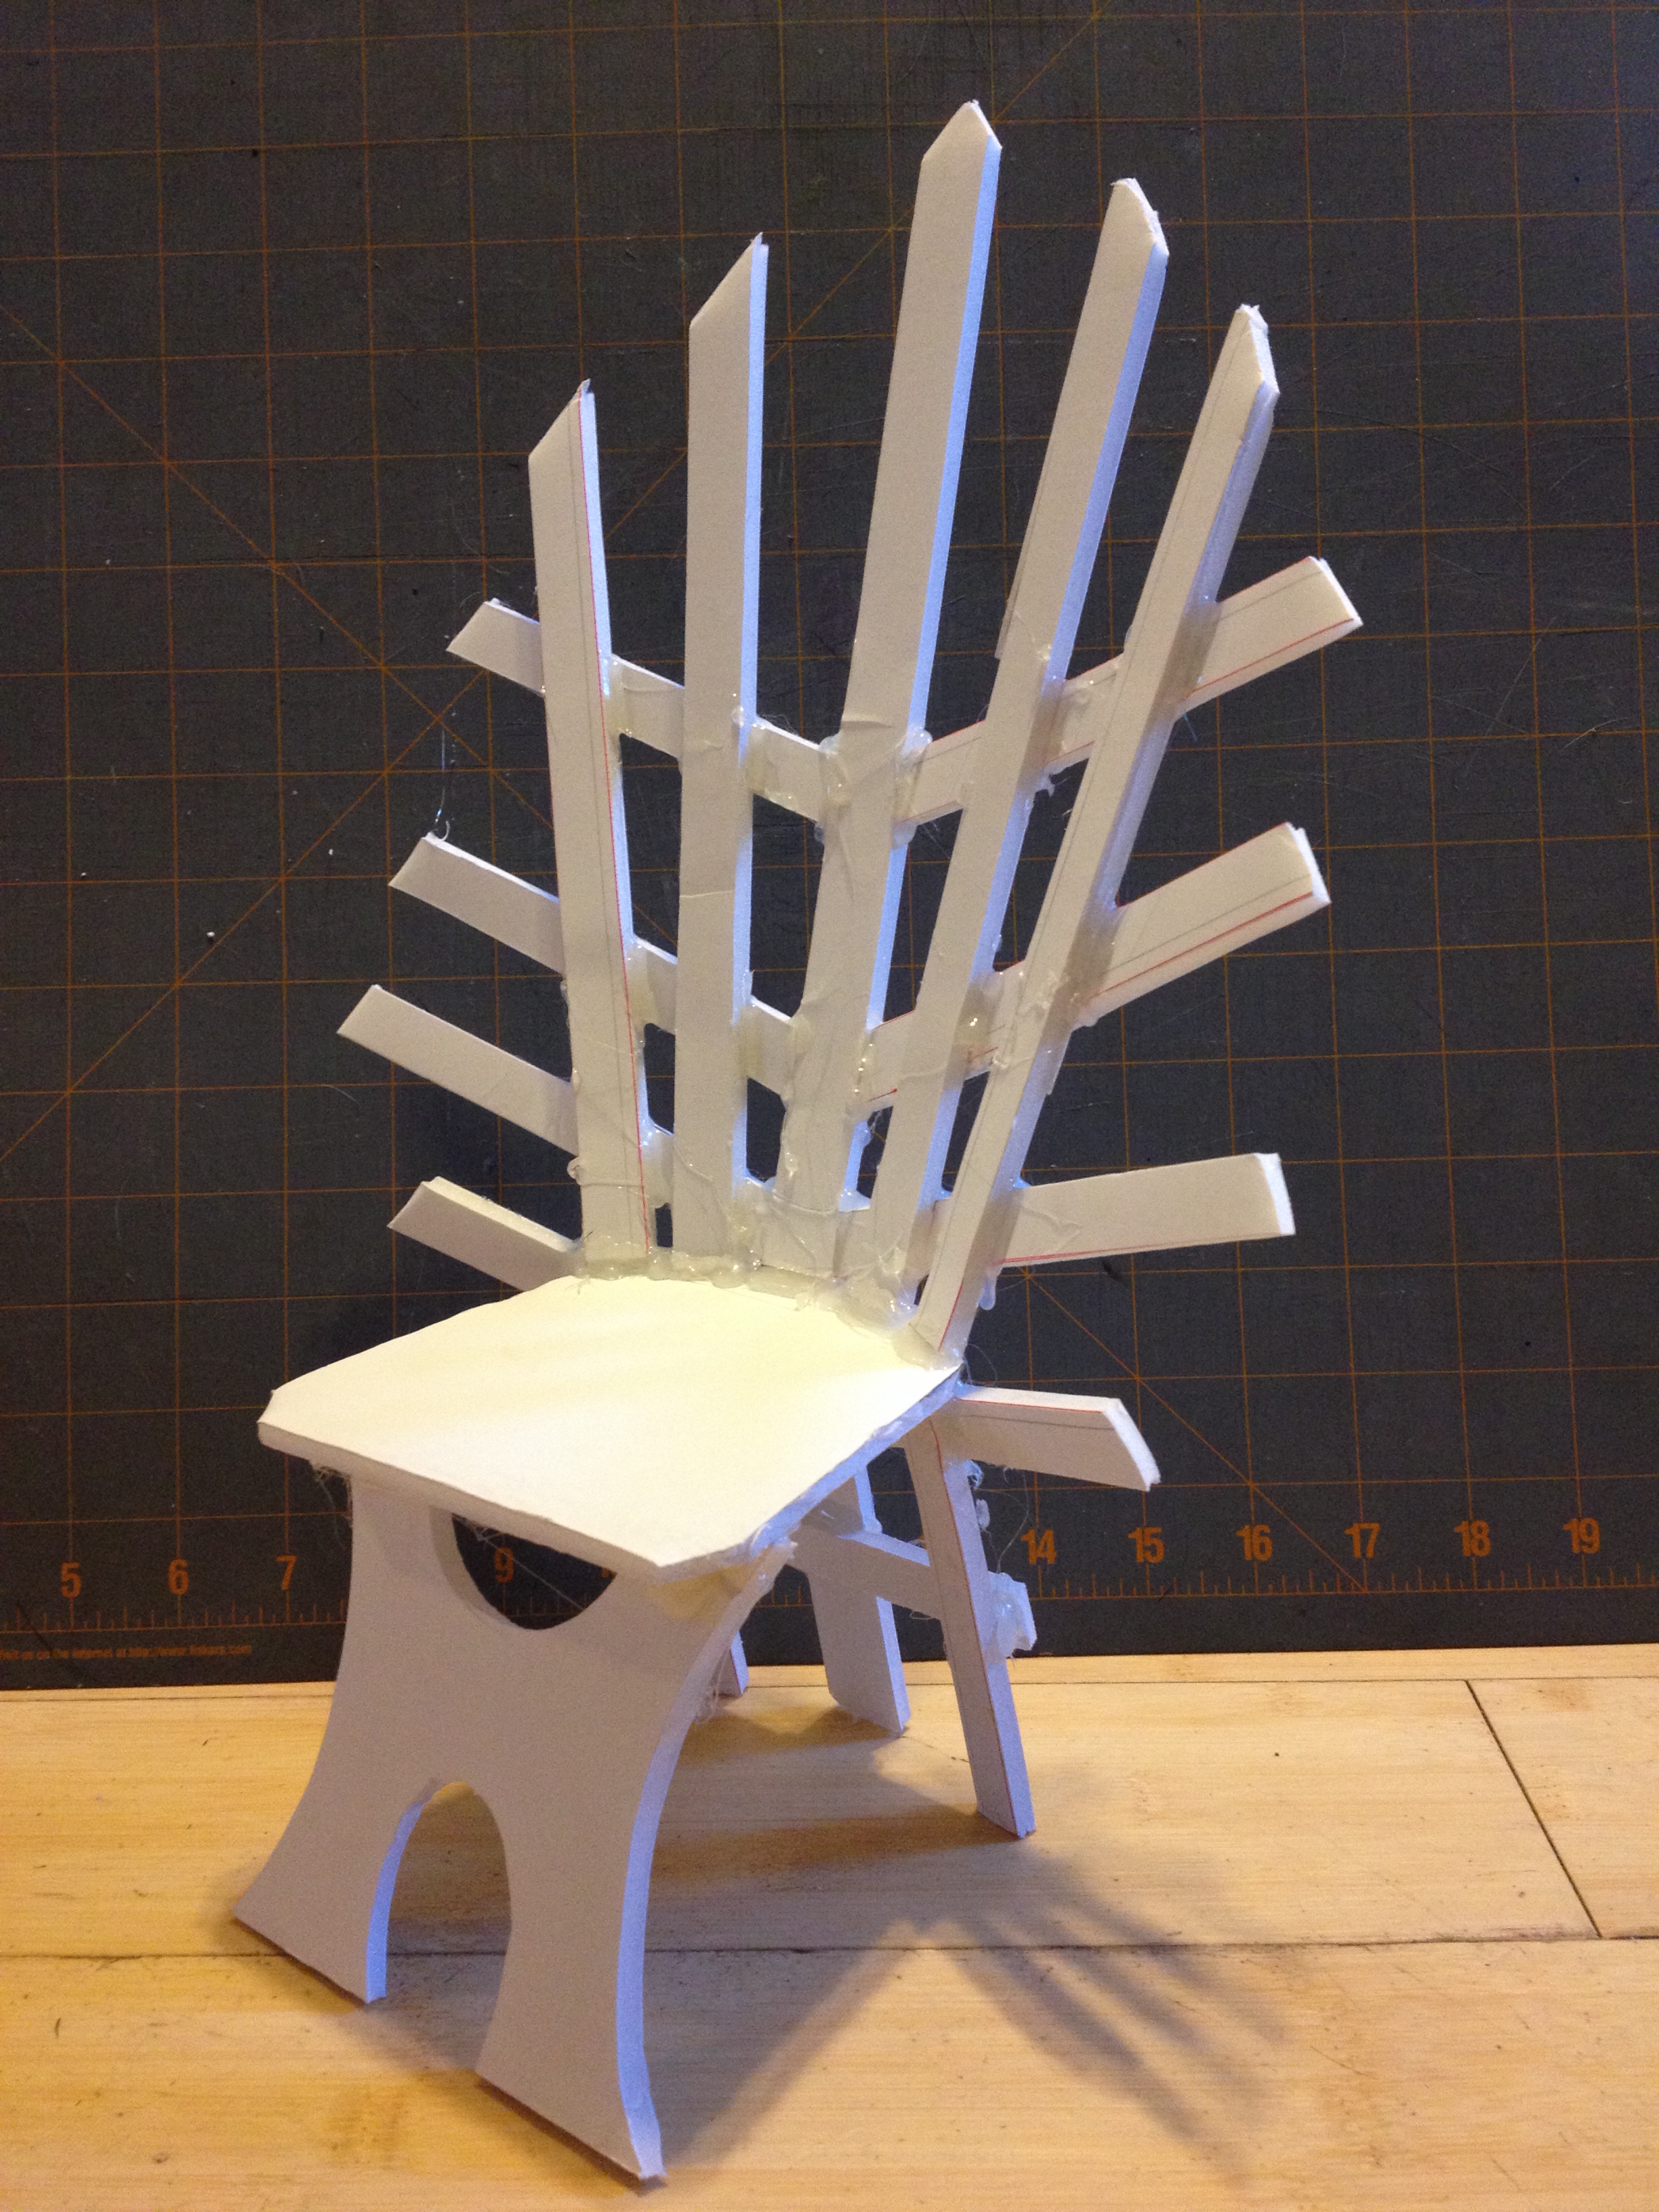
Use the hot glue gun to piece them up. I like the hot glue due to be stronger and faster bond for the foam boards.
Gloriann Irizarry has created this amazing paper clay fairy throne with vines and roses

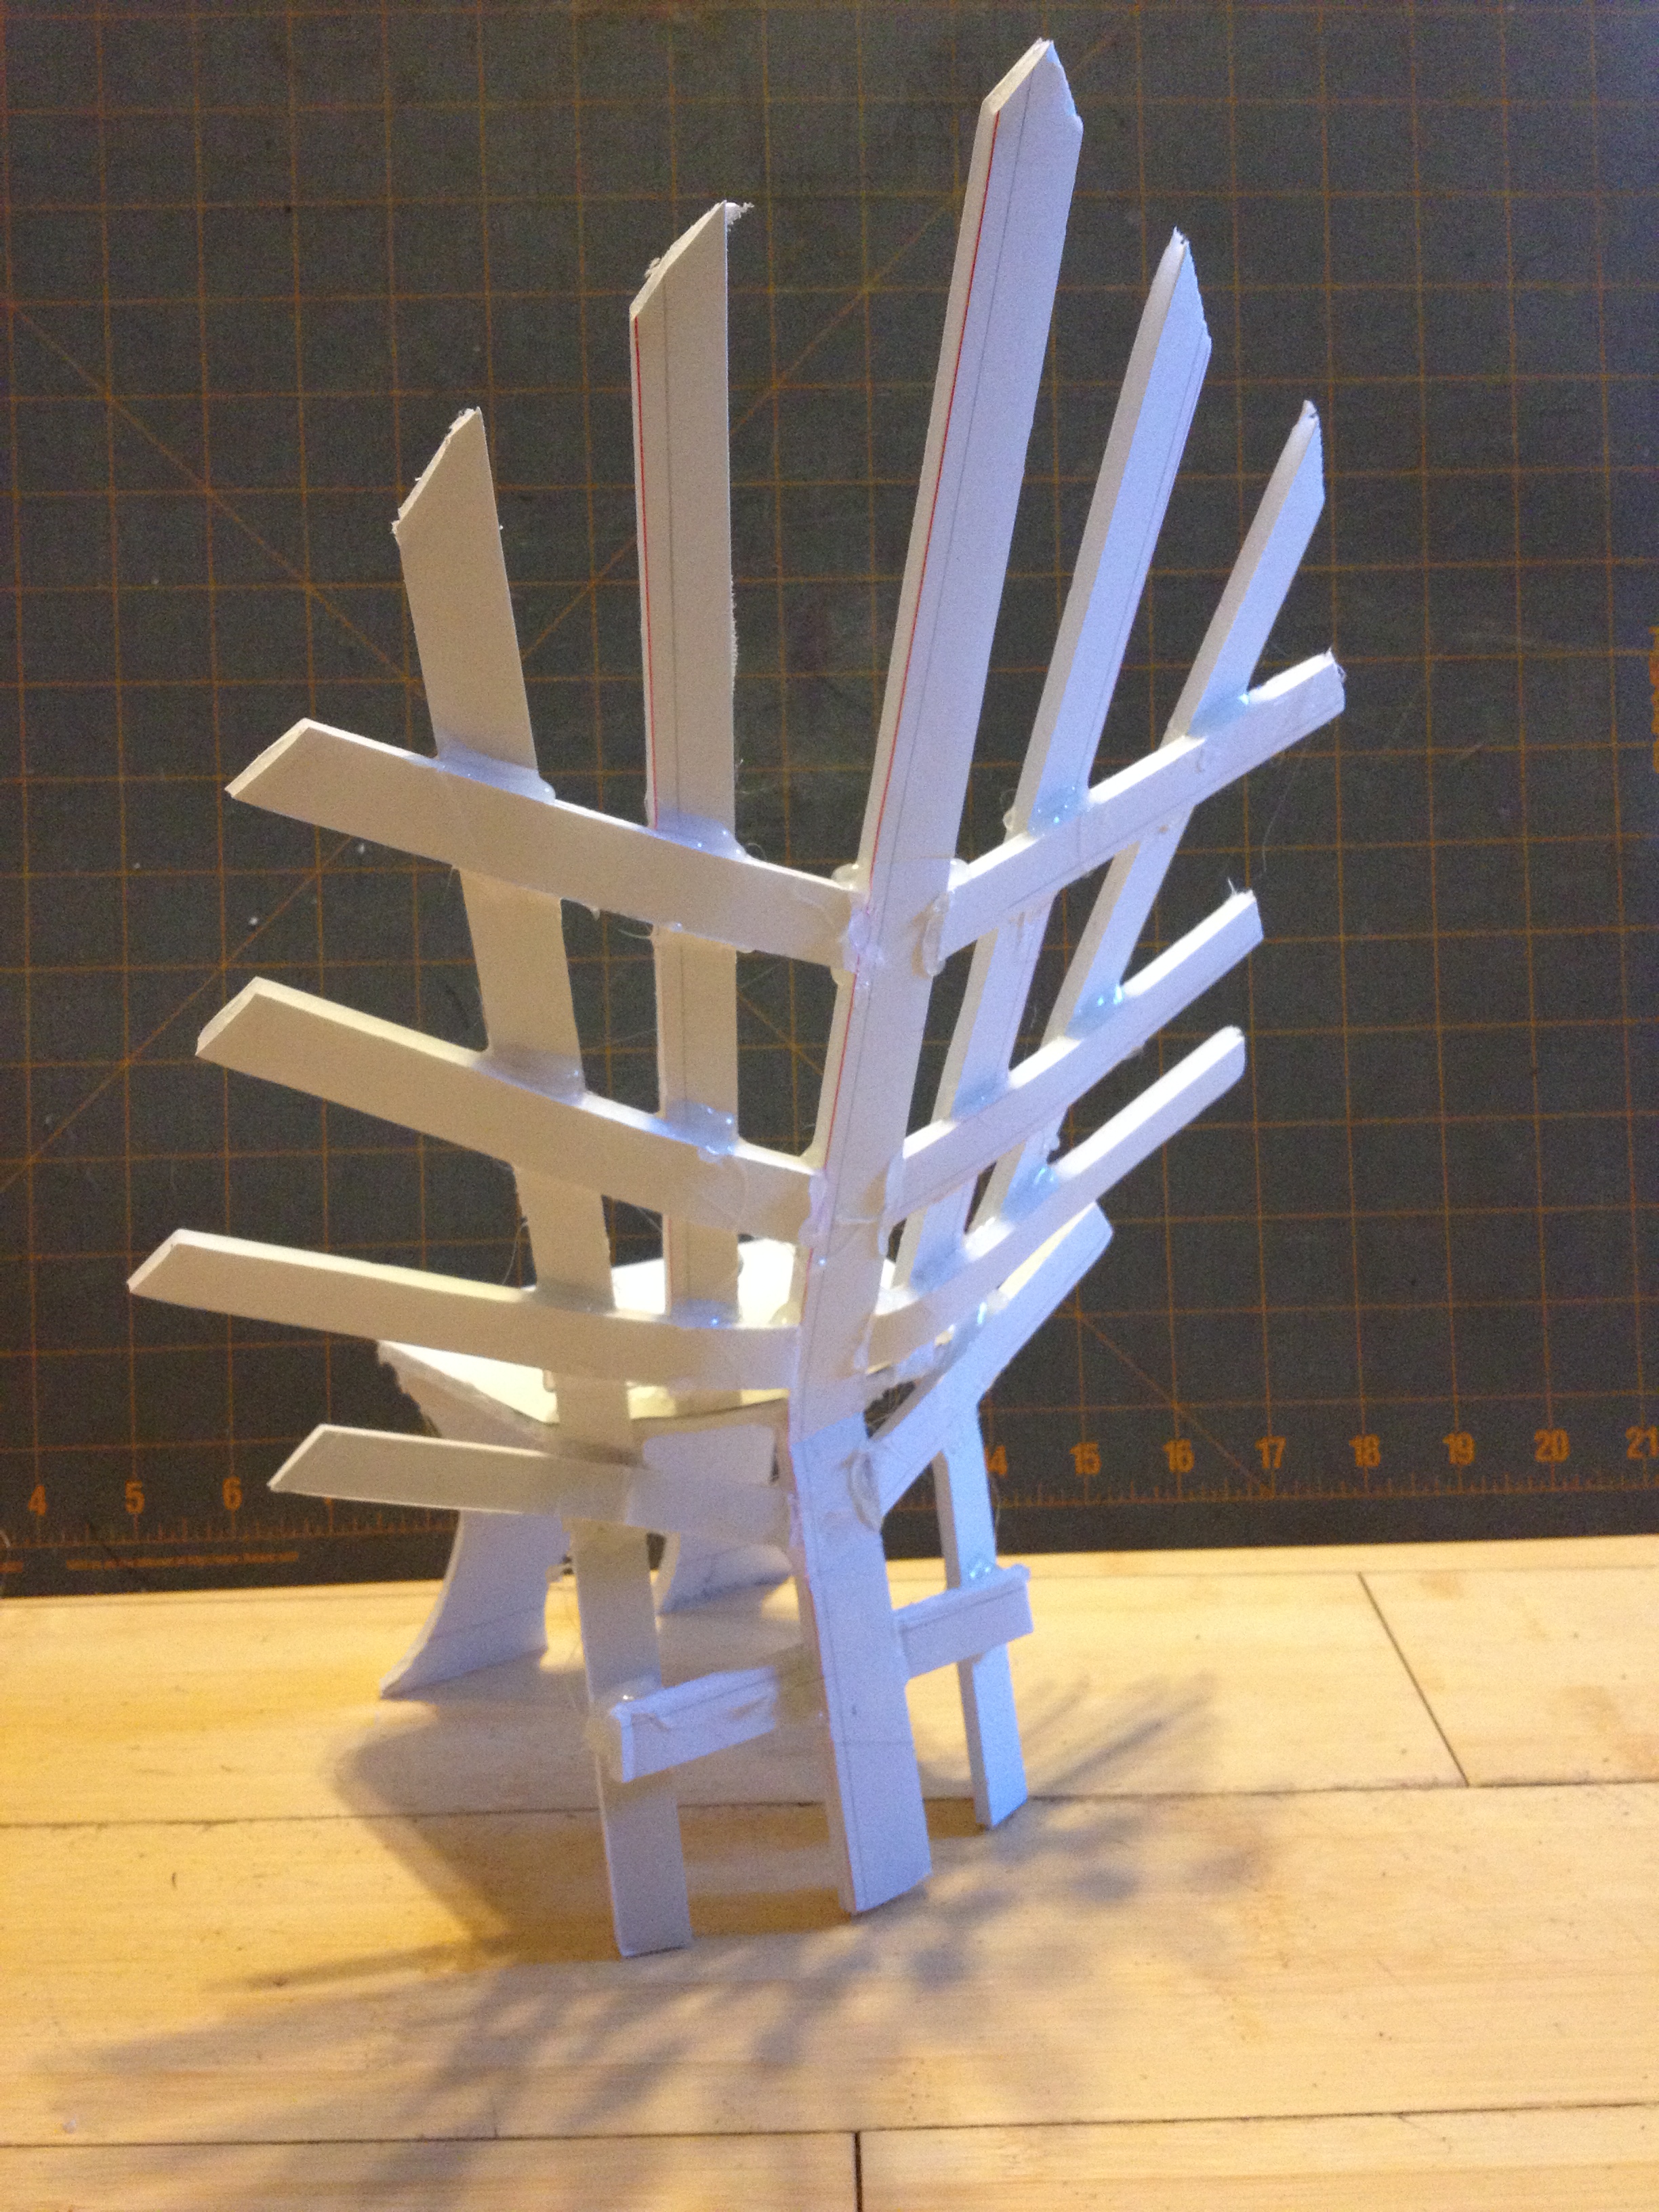
Fell free to use has much glue that you want. This is going to be out armature so do not worry about drips or over glued seems.

We  are  going to cover all of the foam board later with the Creative Paperclay.
Gloriann Irizarry has created this amazing paper clay fairy throne with vines and roses

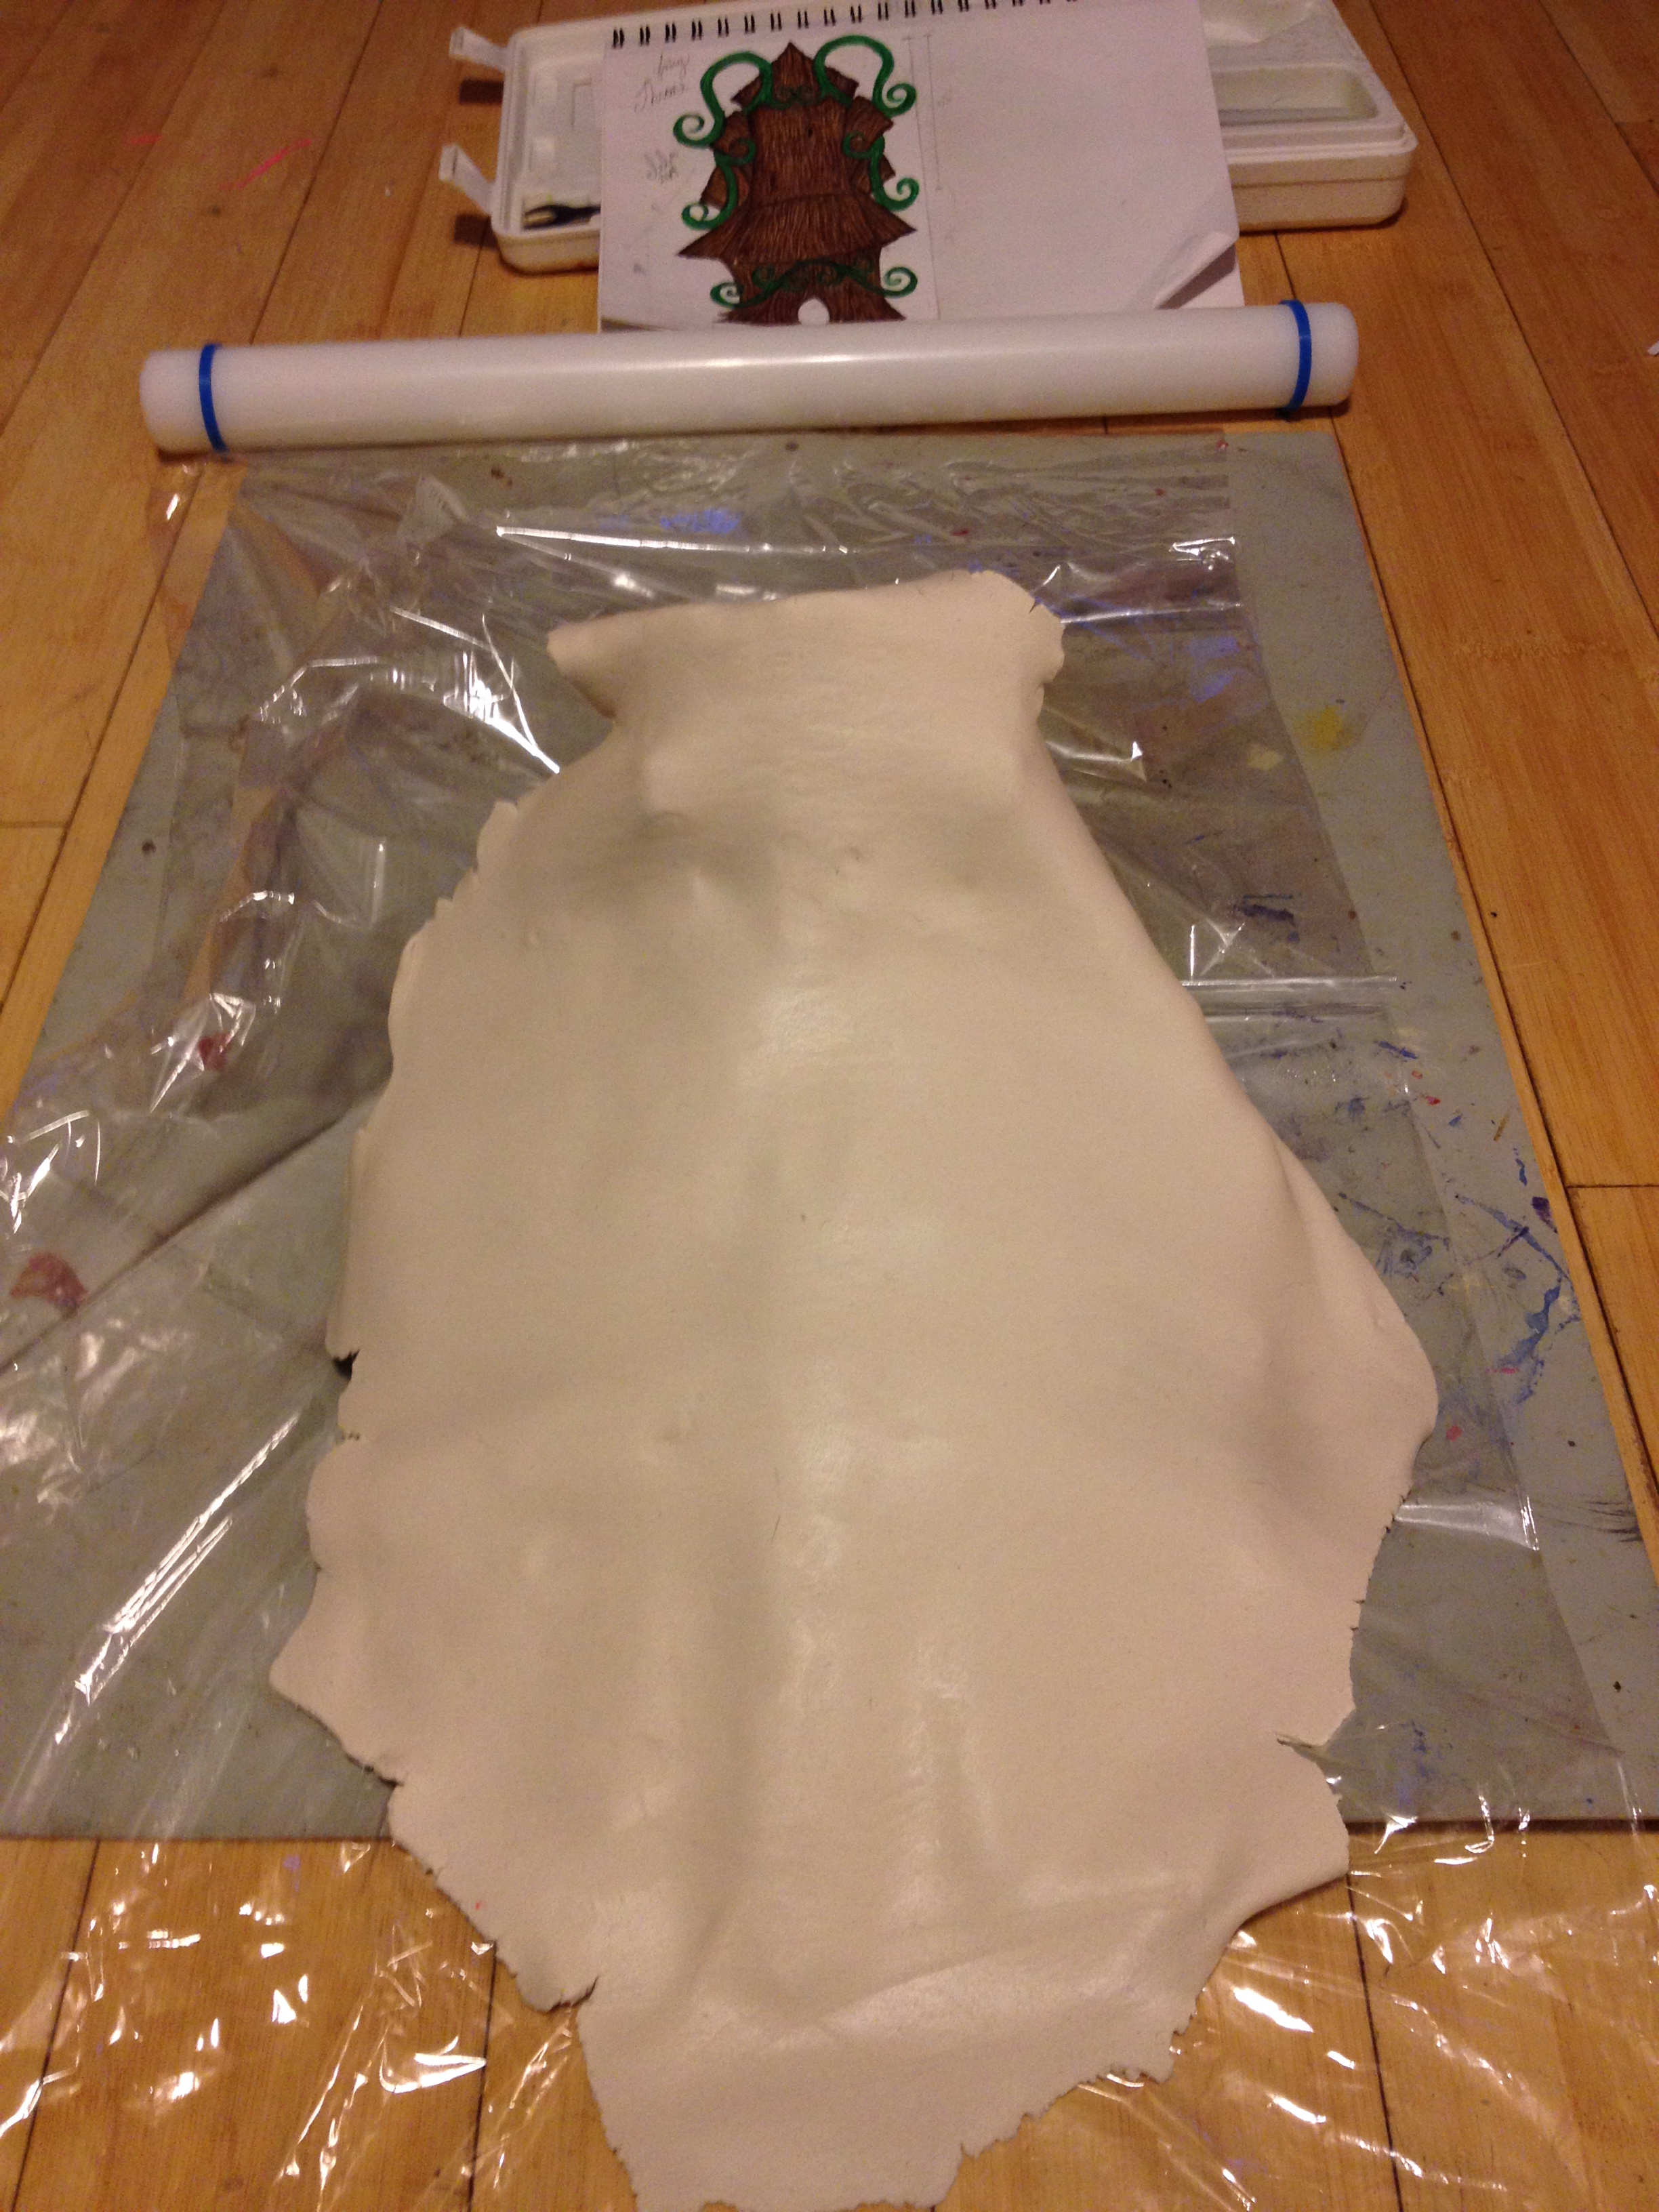
Once the hot glued item is all dry and you had confirm the armature has all the dimensions and measurements just right  I start by rolling our the Creative Paperclay material out ins a 1/4 thickness sheet. I used my really big roller to complete this project faster but the smaller roller will also work  just make many smaller sheets and layer the foam board little by little.
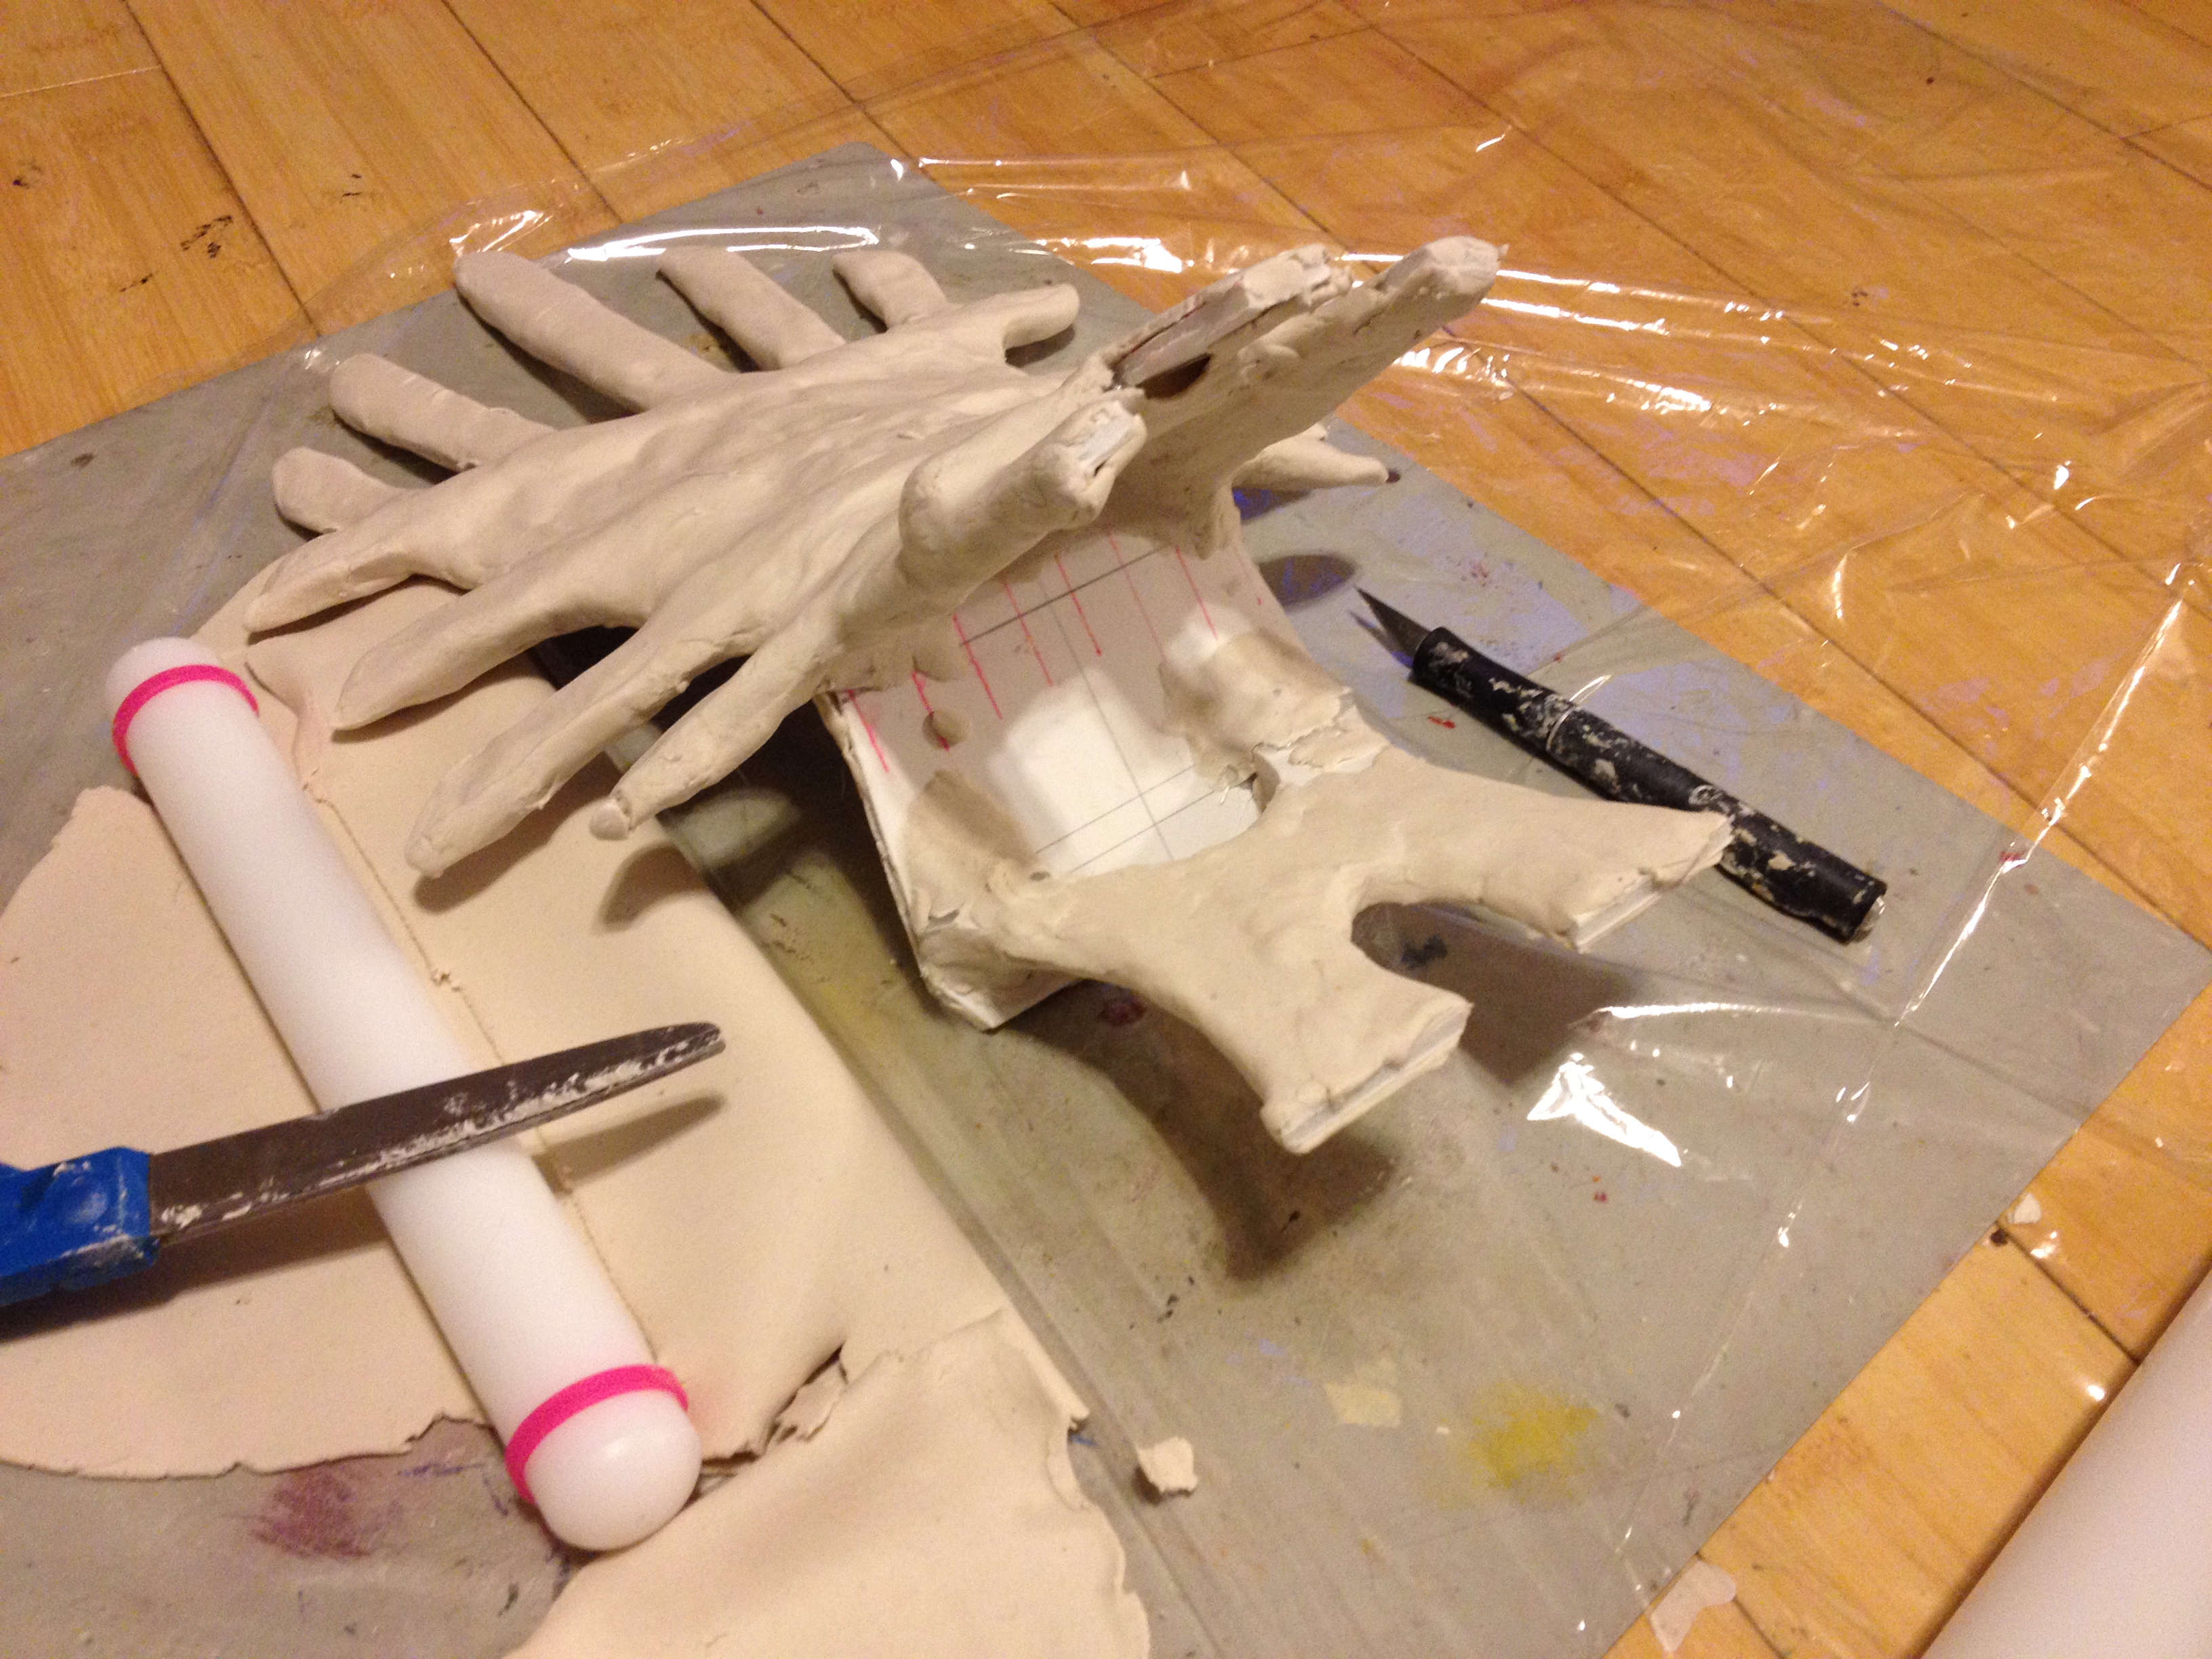
Gloriann Irizarry has created this amazing paper clay fairy throne with vines and roses

Make sure the entire foam armature is entirety cover from head to feet with the 1/4 thickness sheet of the Creative Paperclay. Use your scissors to cut any clay excess and your water spray to smooth the out.
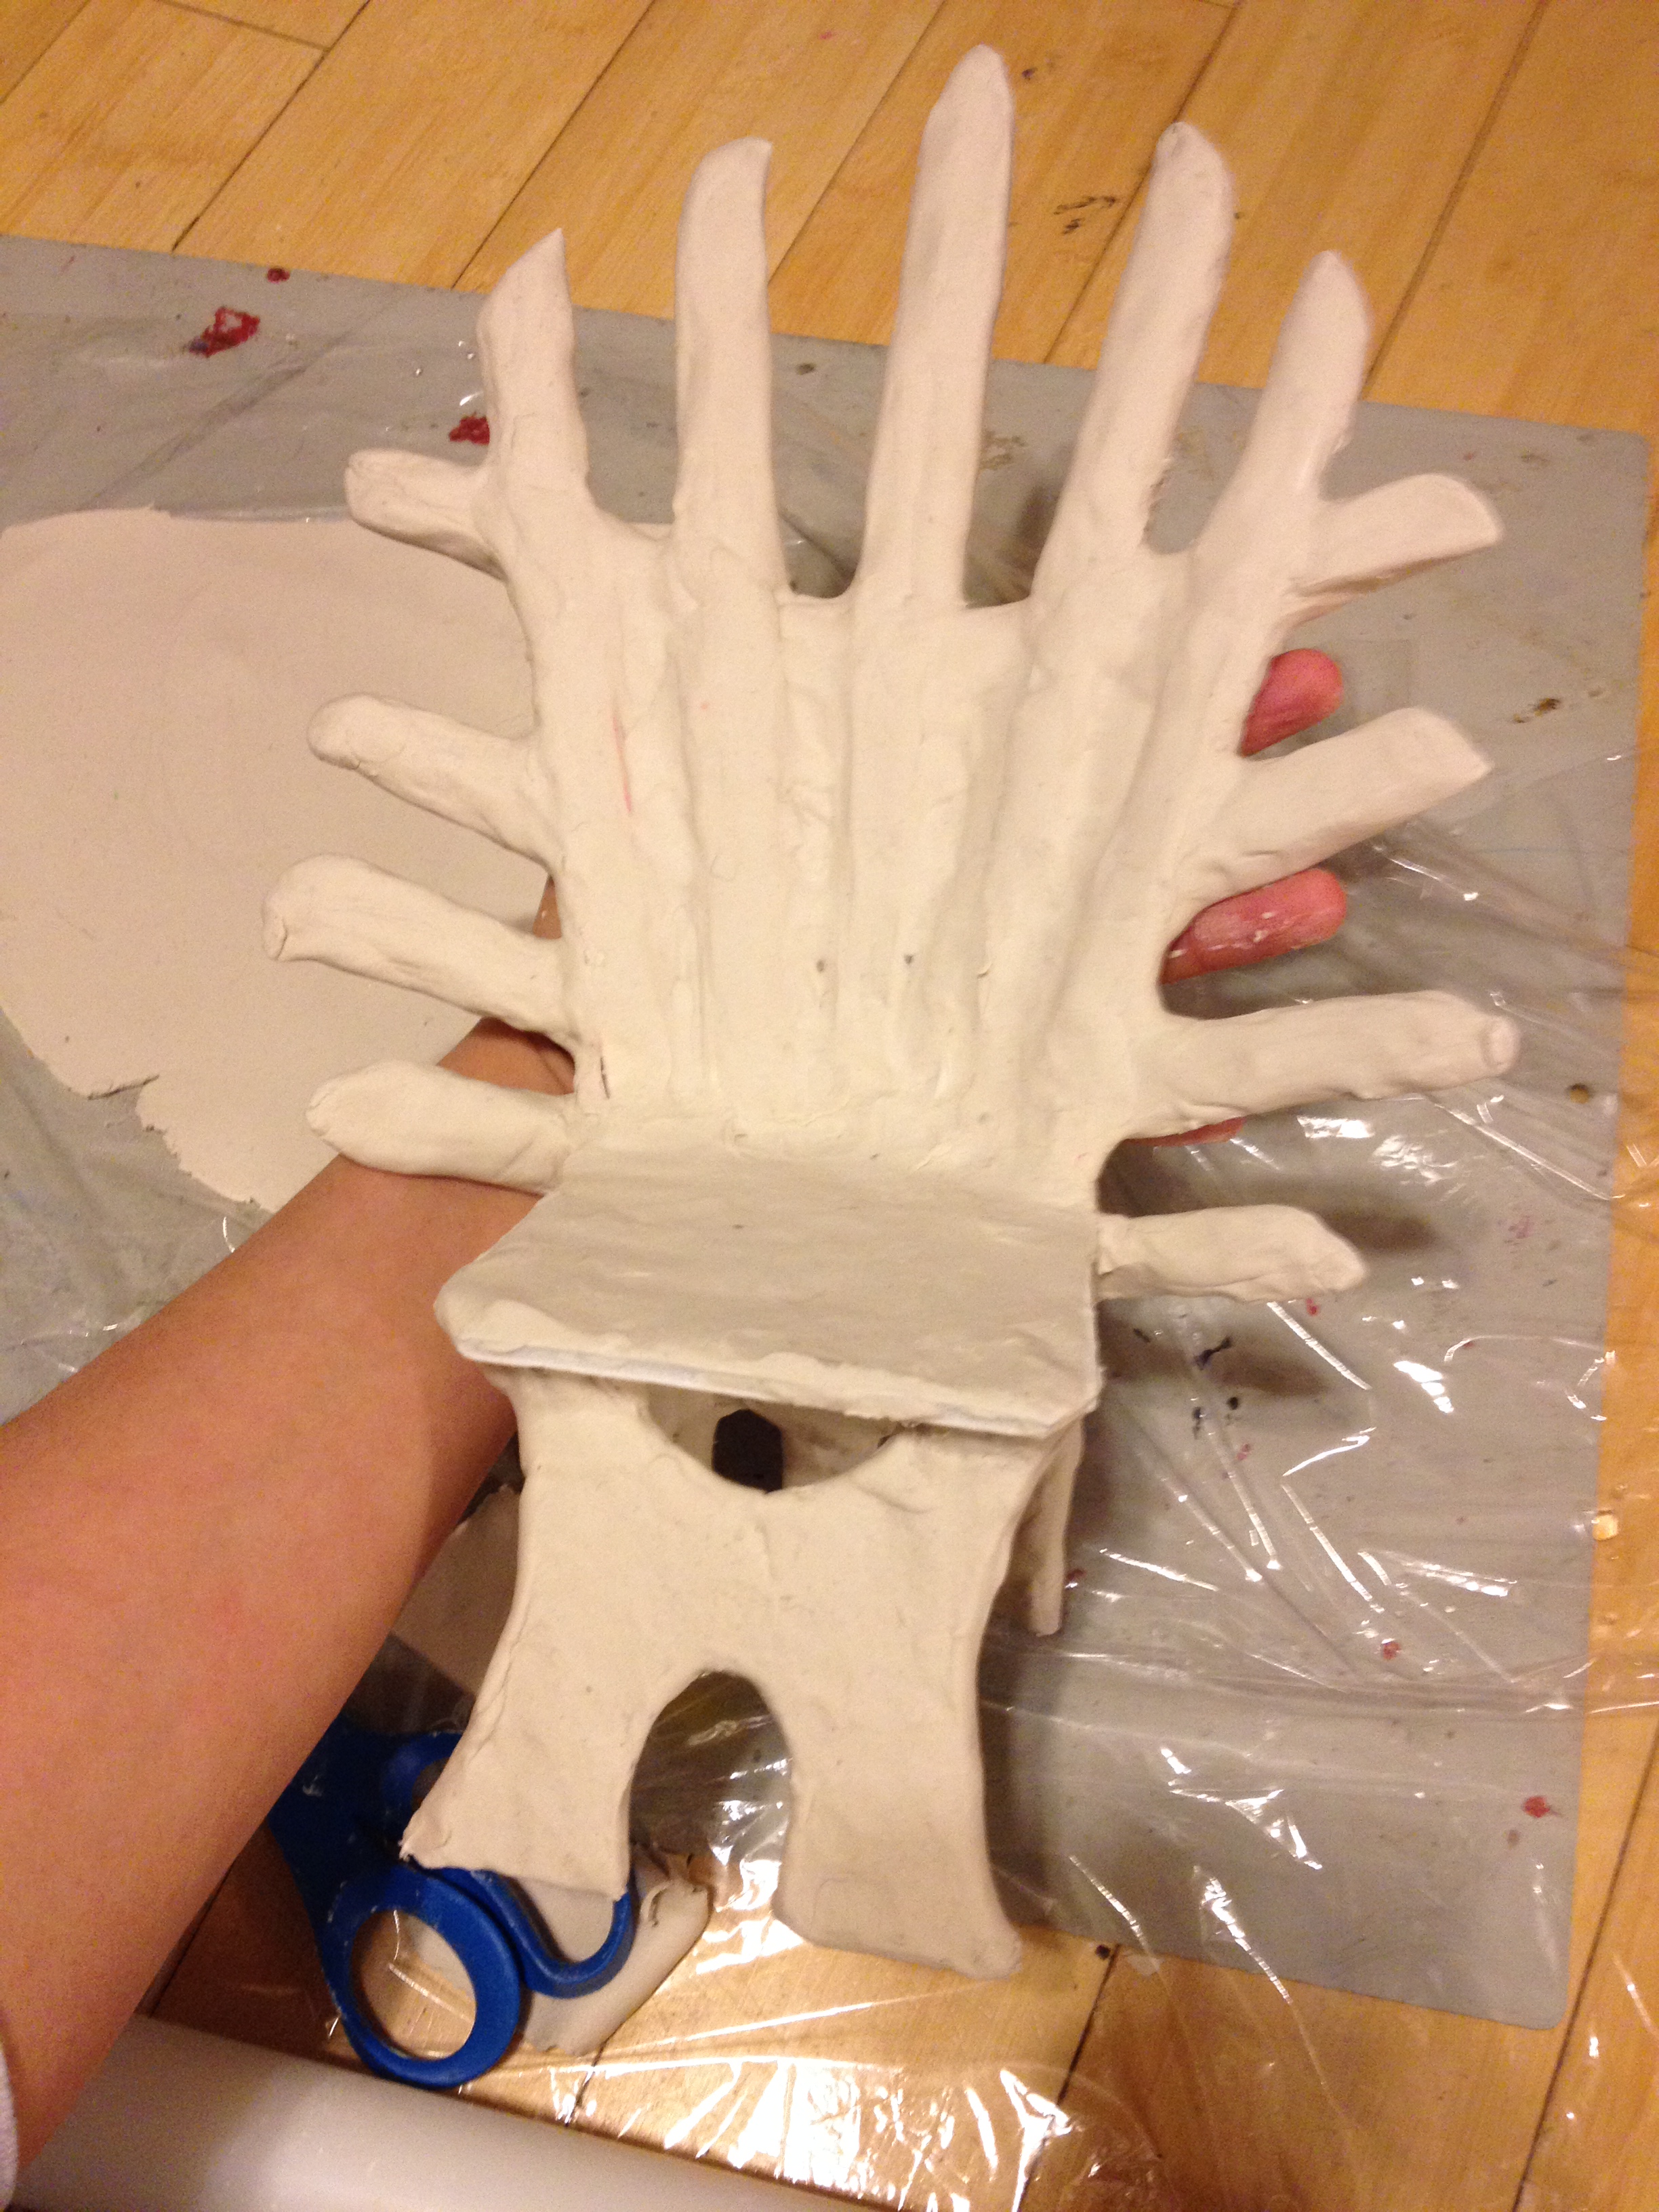
Gloriann Irizarry has created this amazing paper clay fairy throne with vines and roses

Once the entire Throne is all covered with the first layer of 1/4 Creative Paperclay sheet layer carefully to dry. Yes the piece will be heavy and fragile due to the clay  moisture so make sure it is carefully placed in a safe spot and wait for the clay to be completely dry.

During the winter I lay my sheet in front of the heater vent so the warm air will dry the whole first layer.
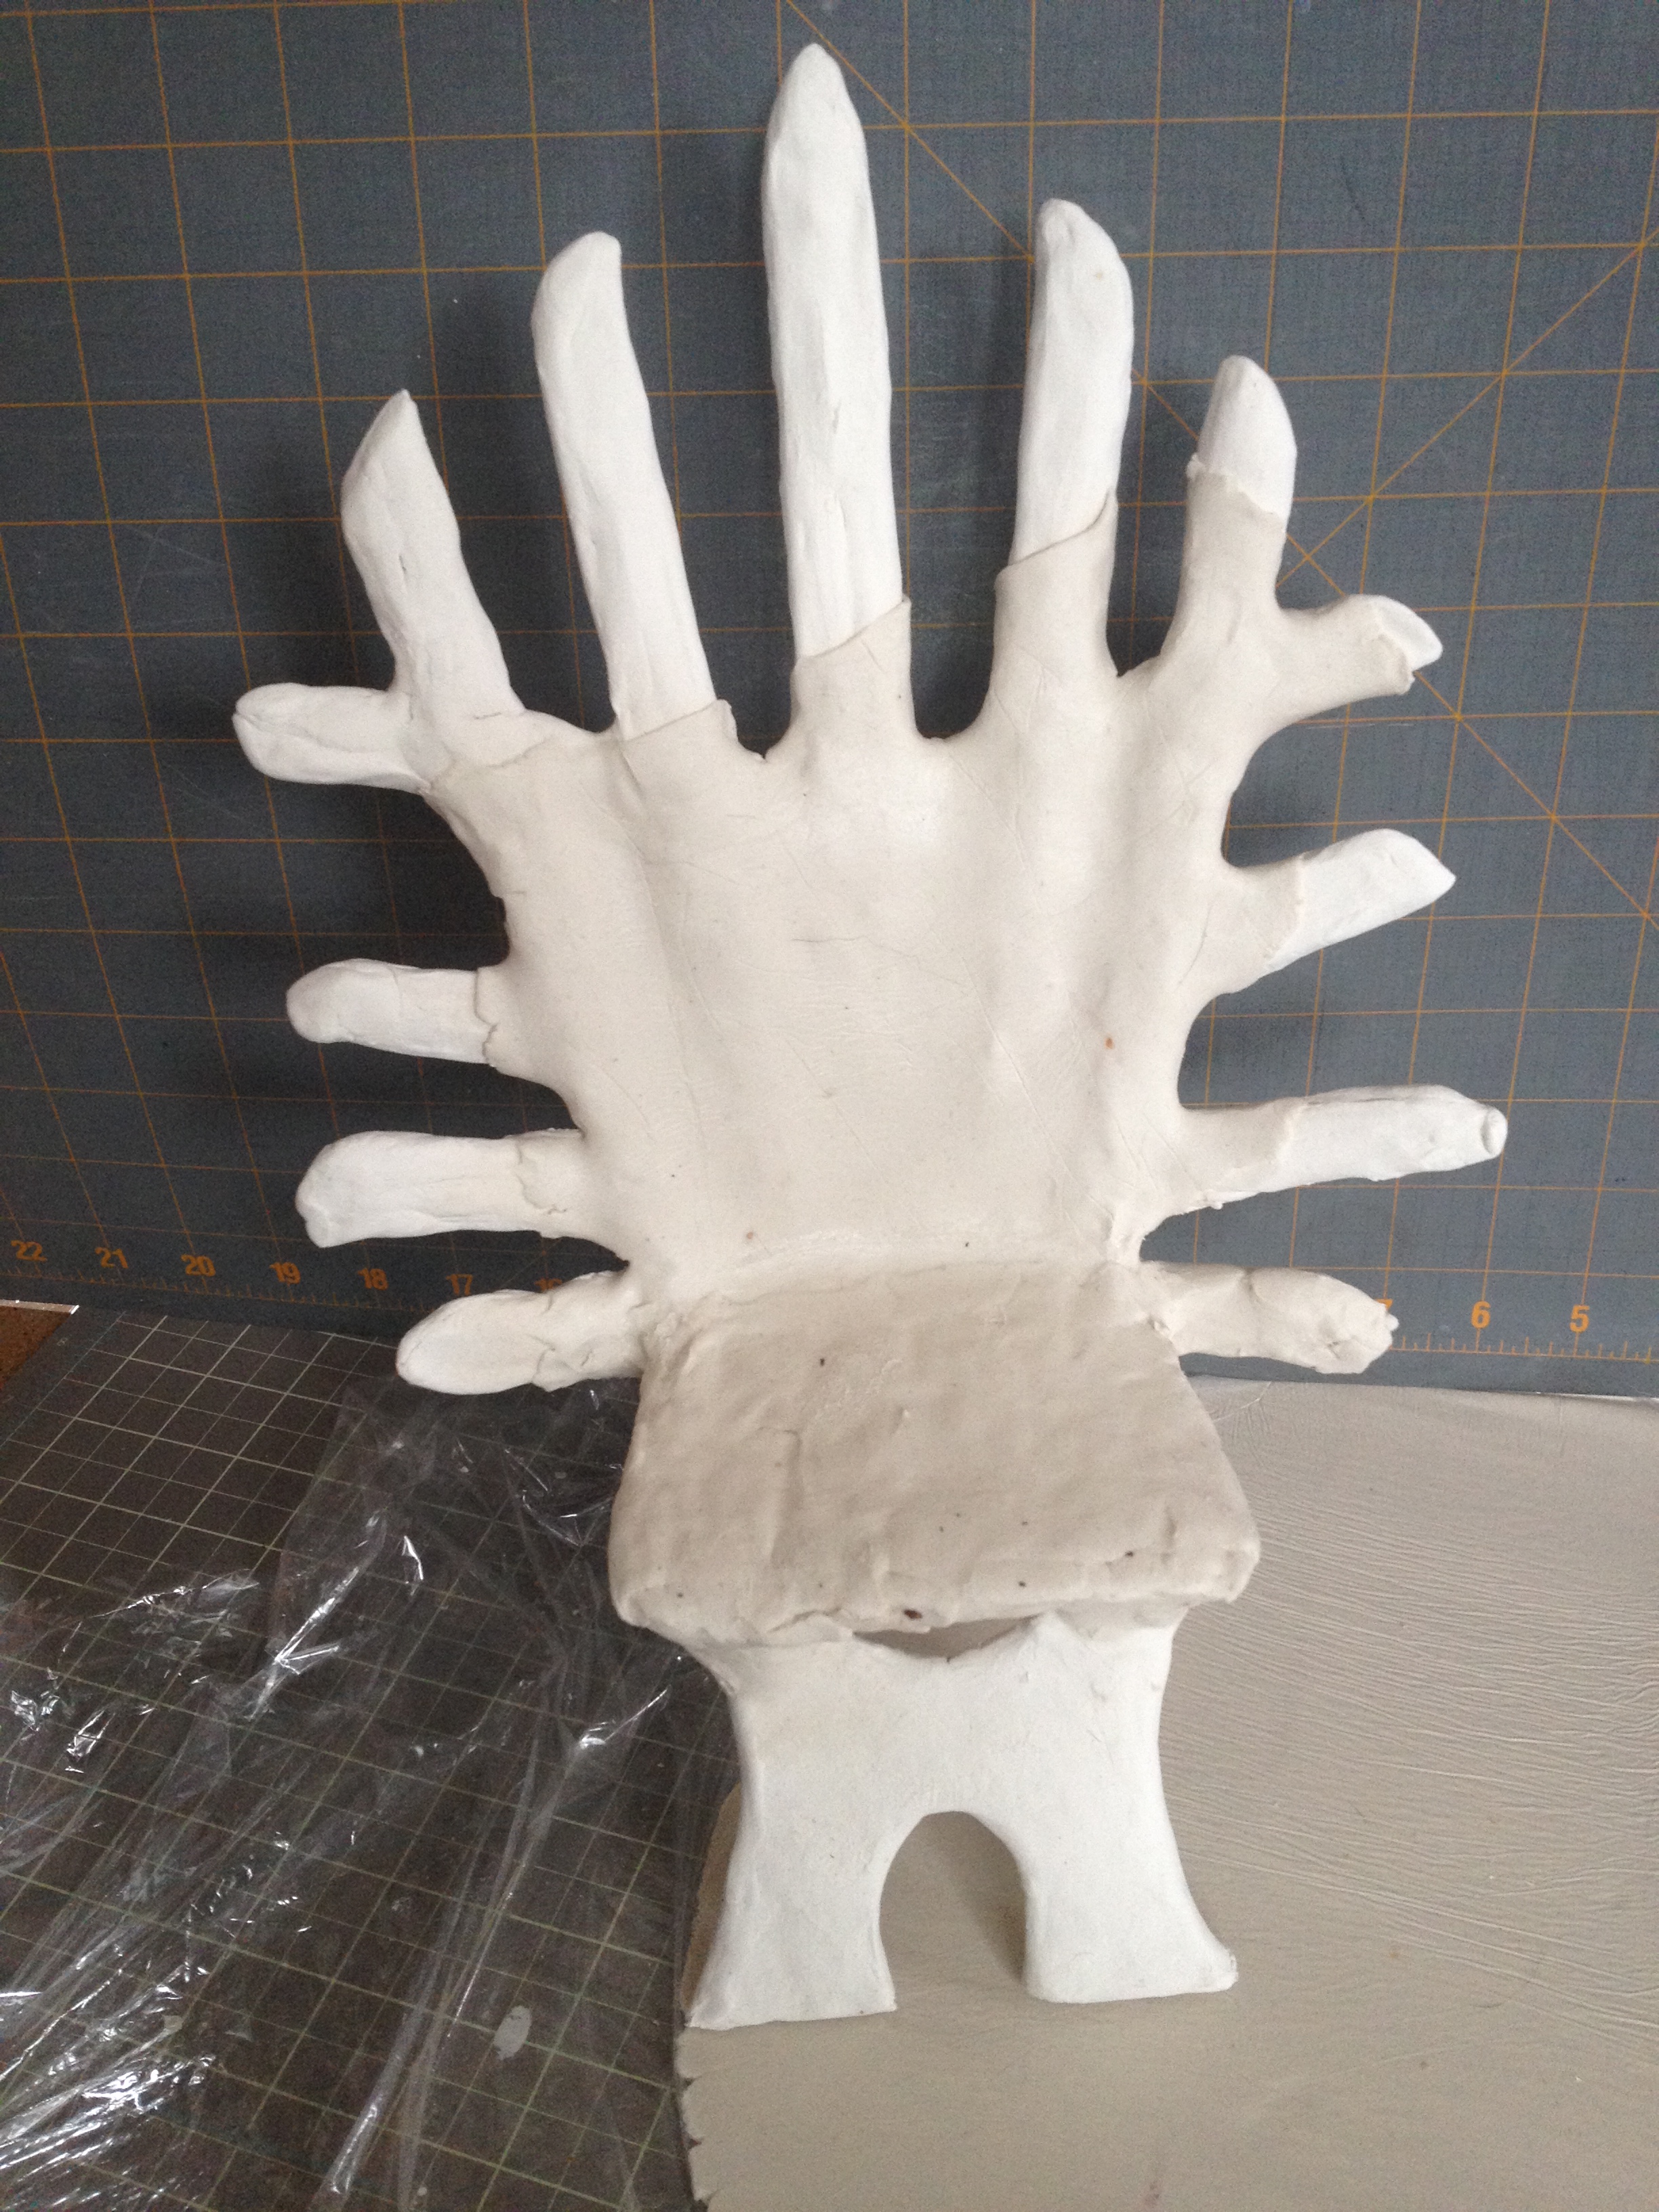
Gloriann Irizarry has created this amazing paper clay fairy throne with vines and roses

Once the first layer is all dry and the chair is much lighter you will know it will feel a little more stronger and sturdier than when it was wet. Still handle the piece with caution since the clay sheet was only 1/4 thick and we are going to add another 1/4  wet sheet over it. This will get the first layer a little soft. Work the second coat all over the first layer from head to feet once more.
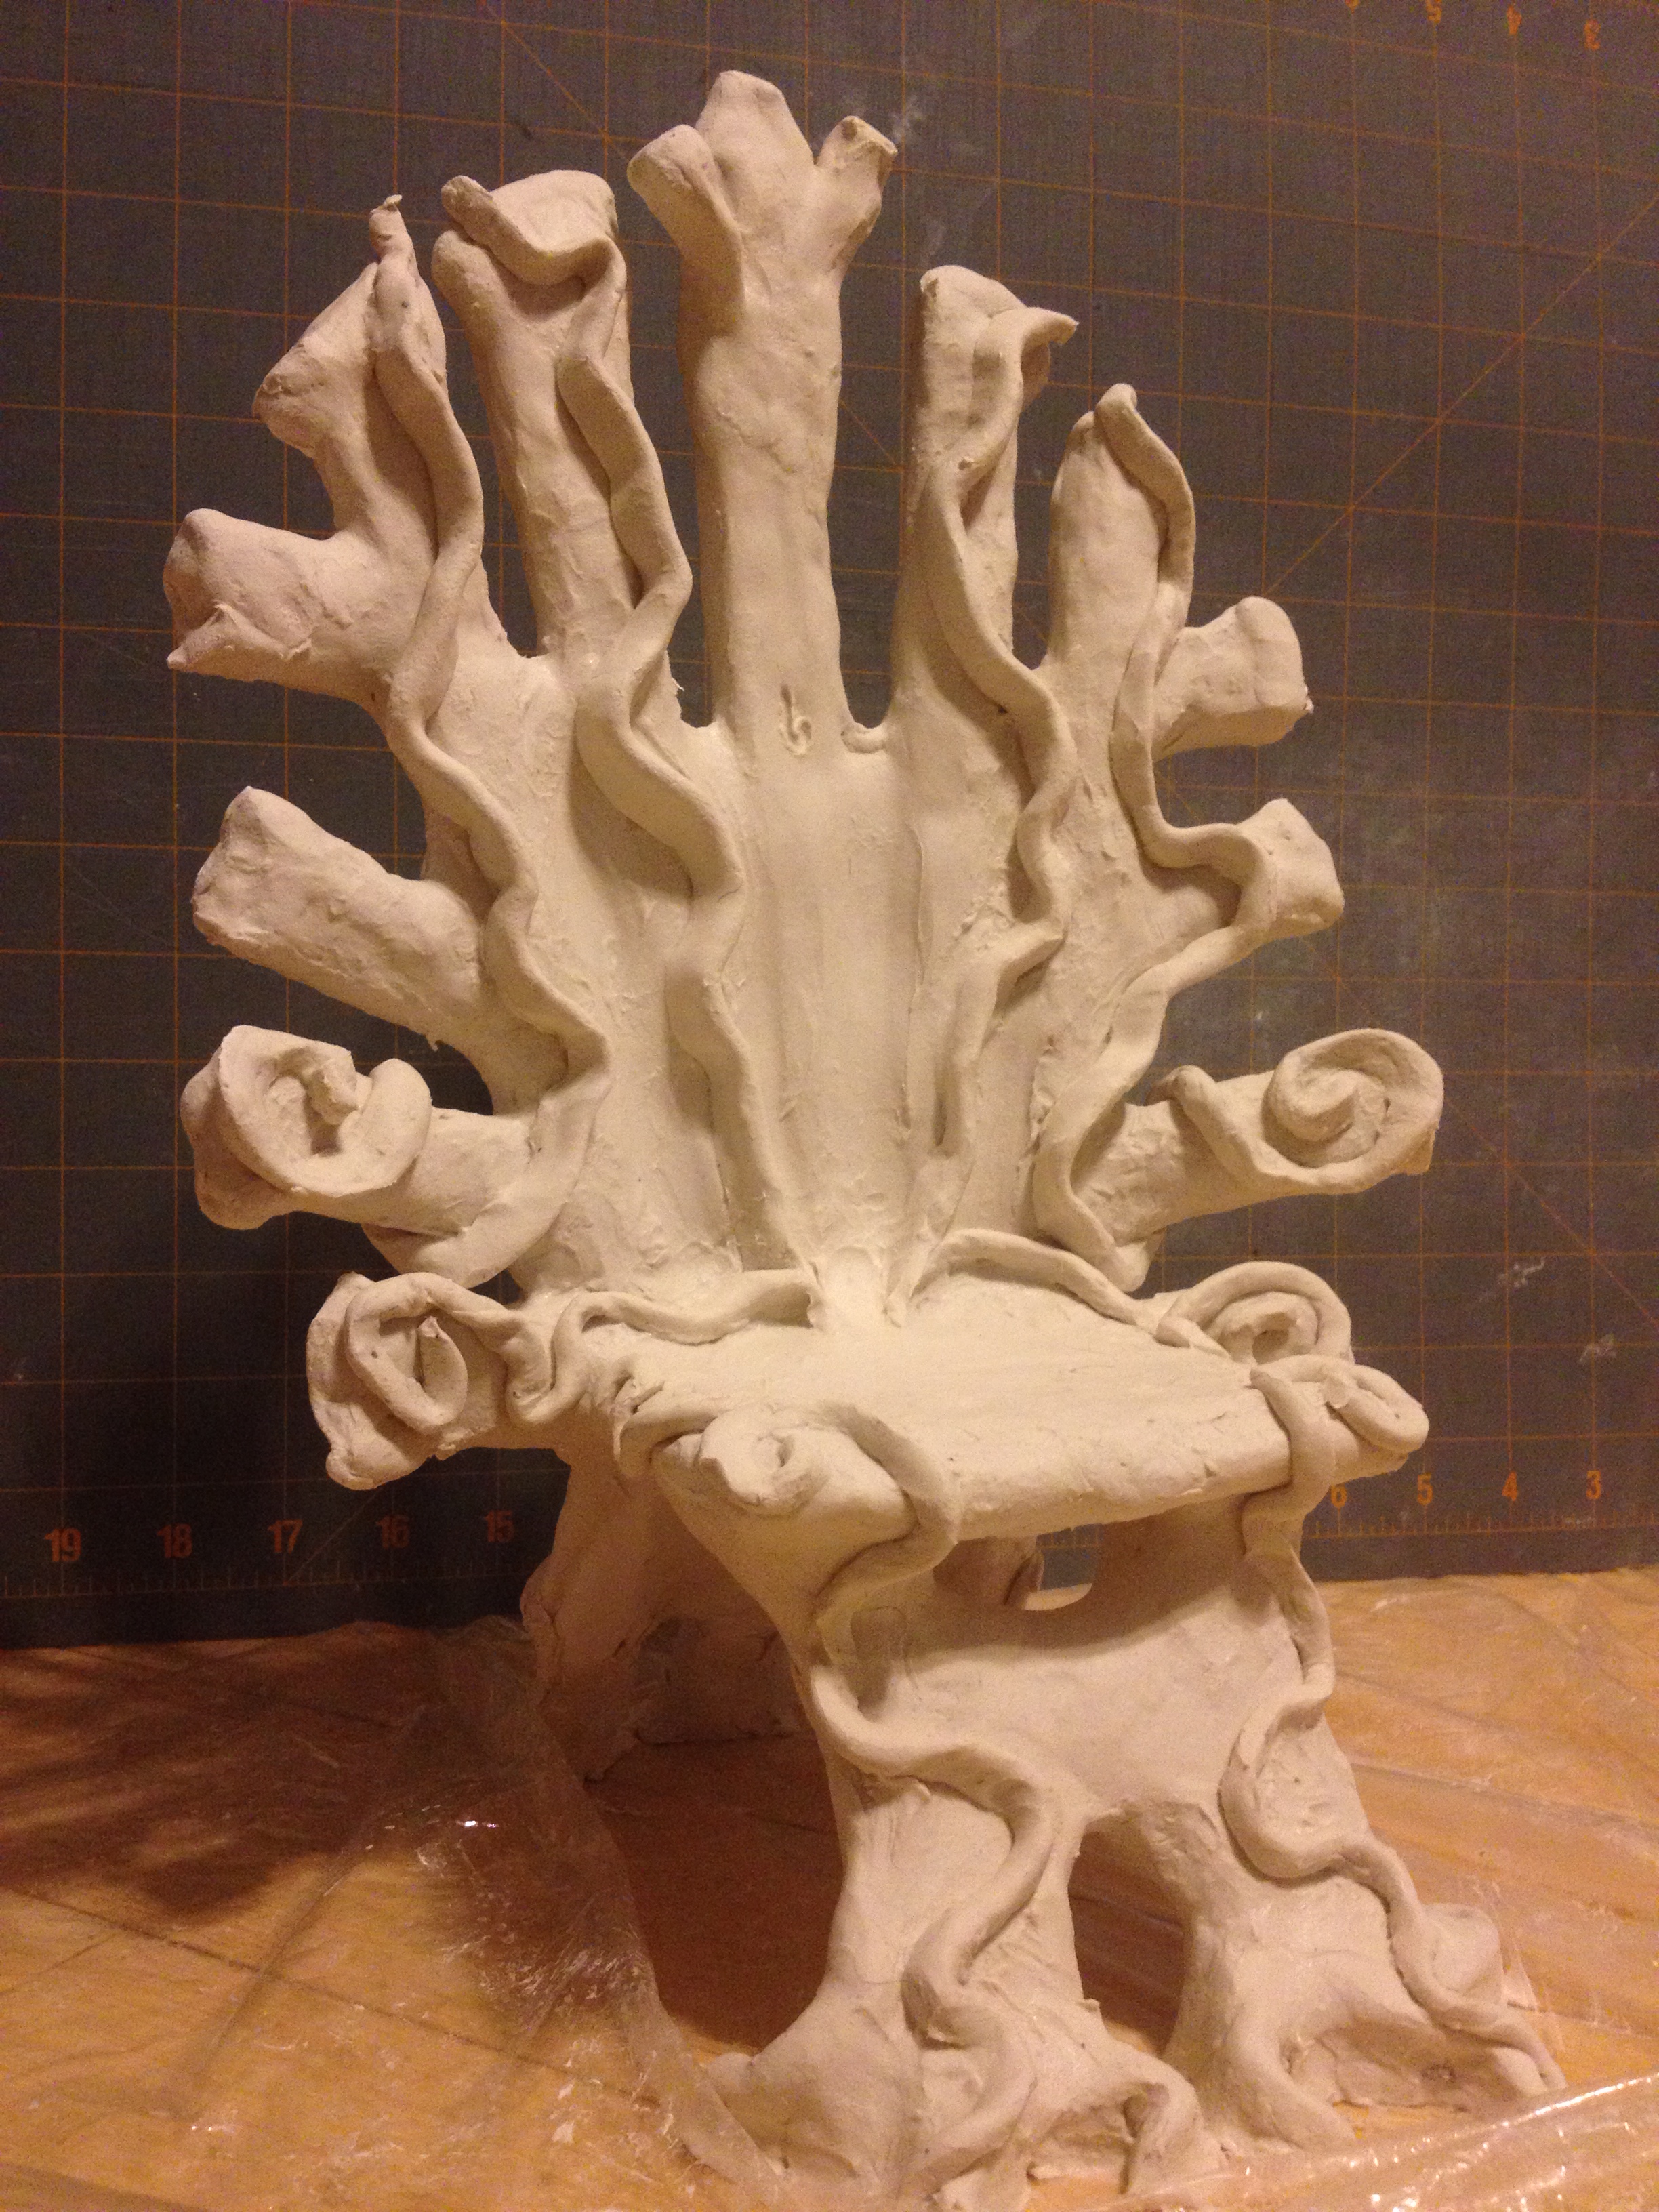
Gloriann Irizarry has created this amazing paper clay fairy throne with vines and roses

Don’t let the second coat completely dry. Mist the Throne with the spray water so it is a lot easier to add the final details to the piece.

The ivy vines are fairy easy to make.  I rolled the clay to the same 1/4 thickness and cut stripes out in different lengths. You probably wonder why cut stripes but aren’t the vines round?  Well I prefer to have round for the vine look but have a a flat back to adhere them easier to the Throne and achieve the natural look without being worry of the peeling off once the clay dries.

The flat clay sheets I cut will average 3/4 inch and 1/4 thickness. Fold them in half  on the short end . From 3/4 inches x 8 inches long will end up being 3/8  x8 inches long.  Completely moist the flat portion and attach it to the Throne from the flat part. Leave the rounded curve exposed to the front view. You will end up with a very secured vine to the Creative Paperclay  to the Throne.
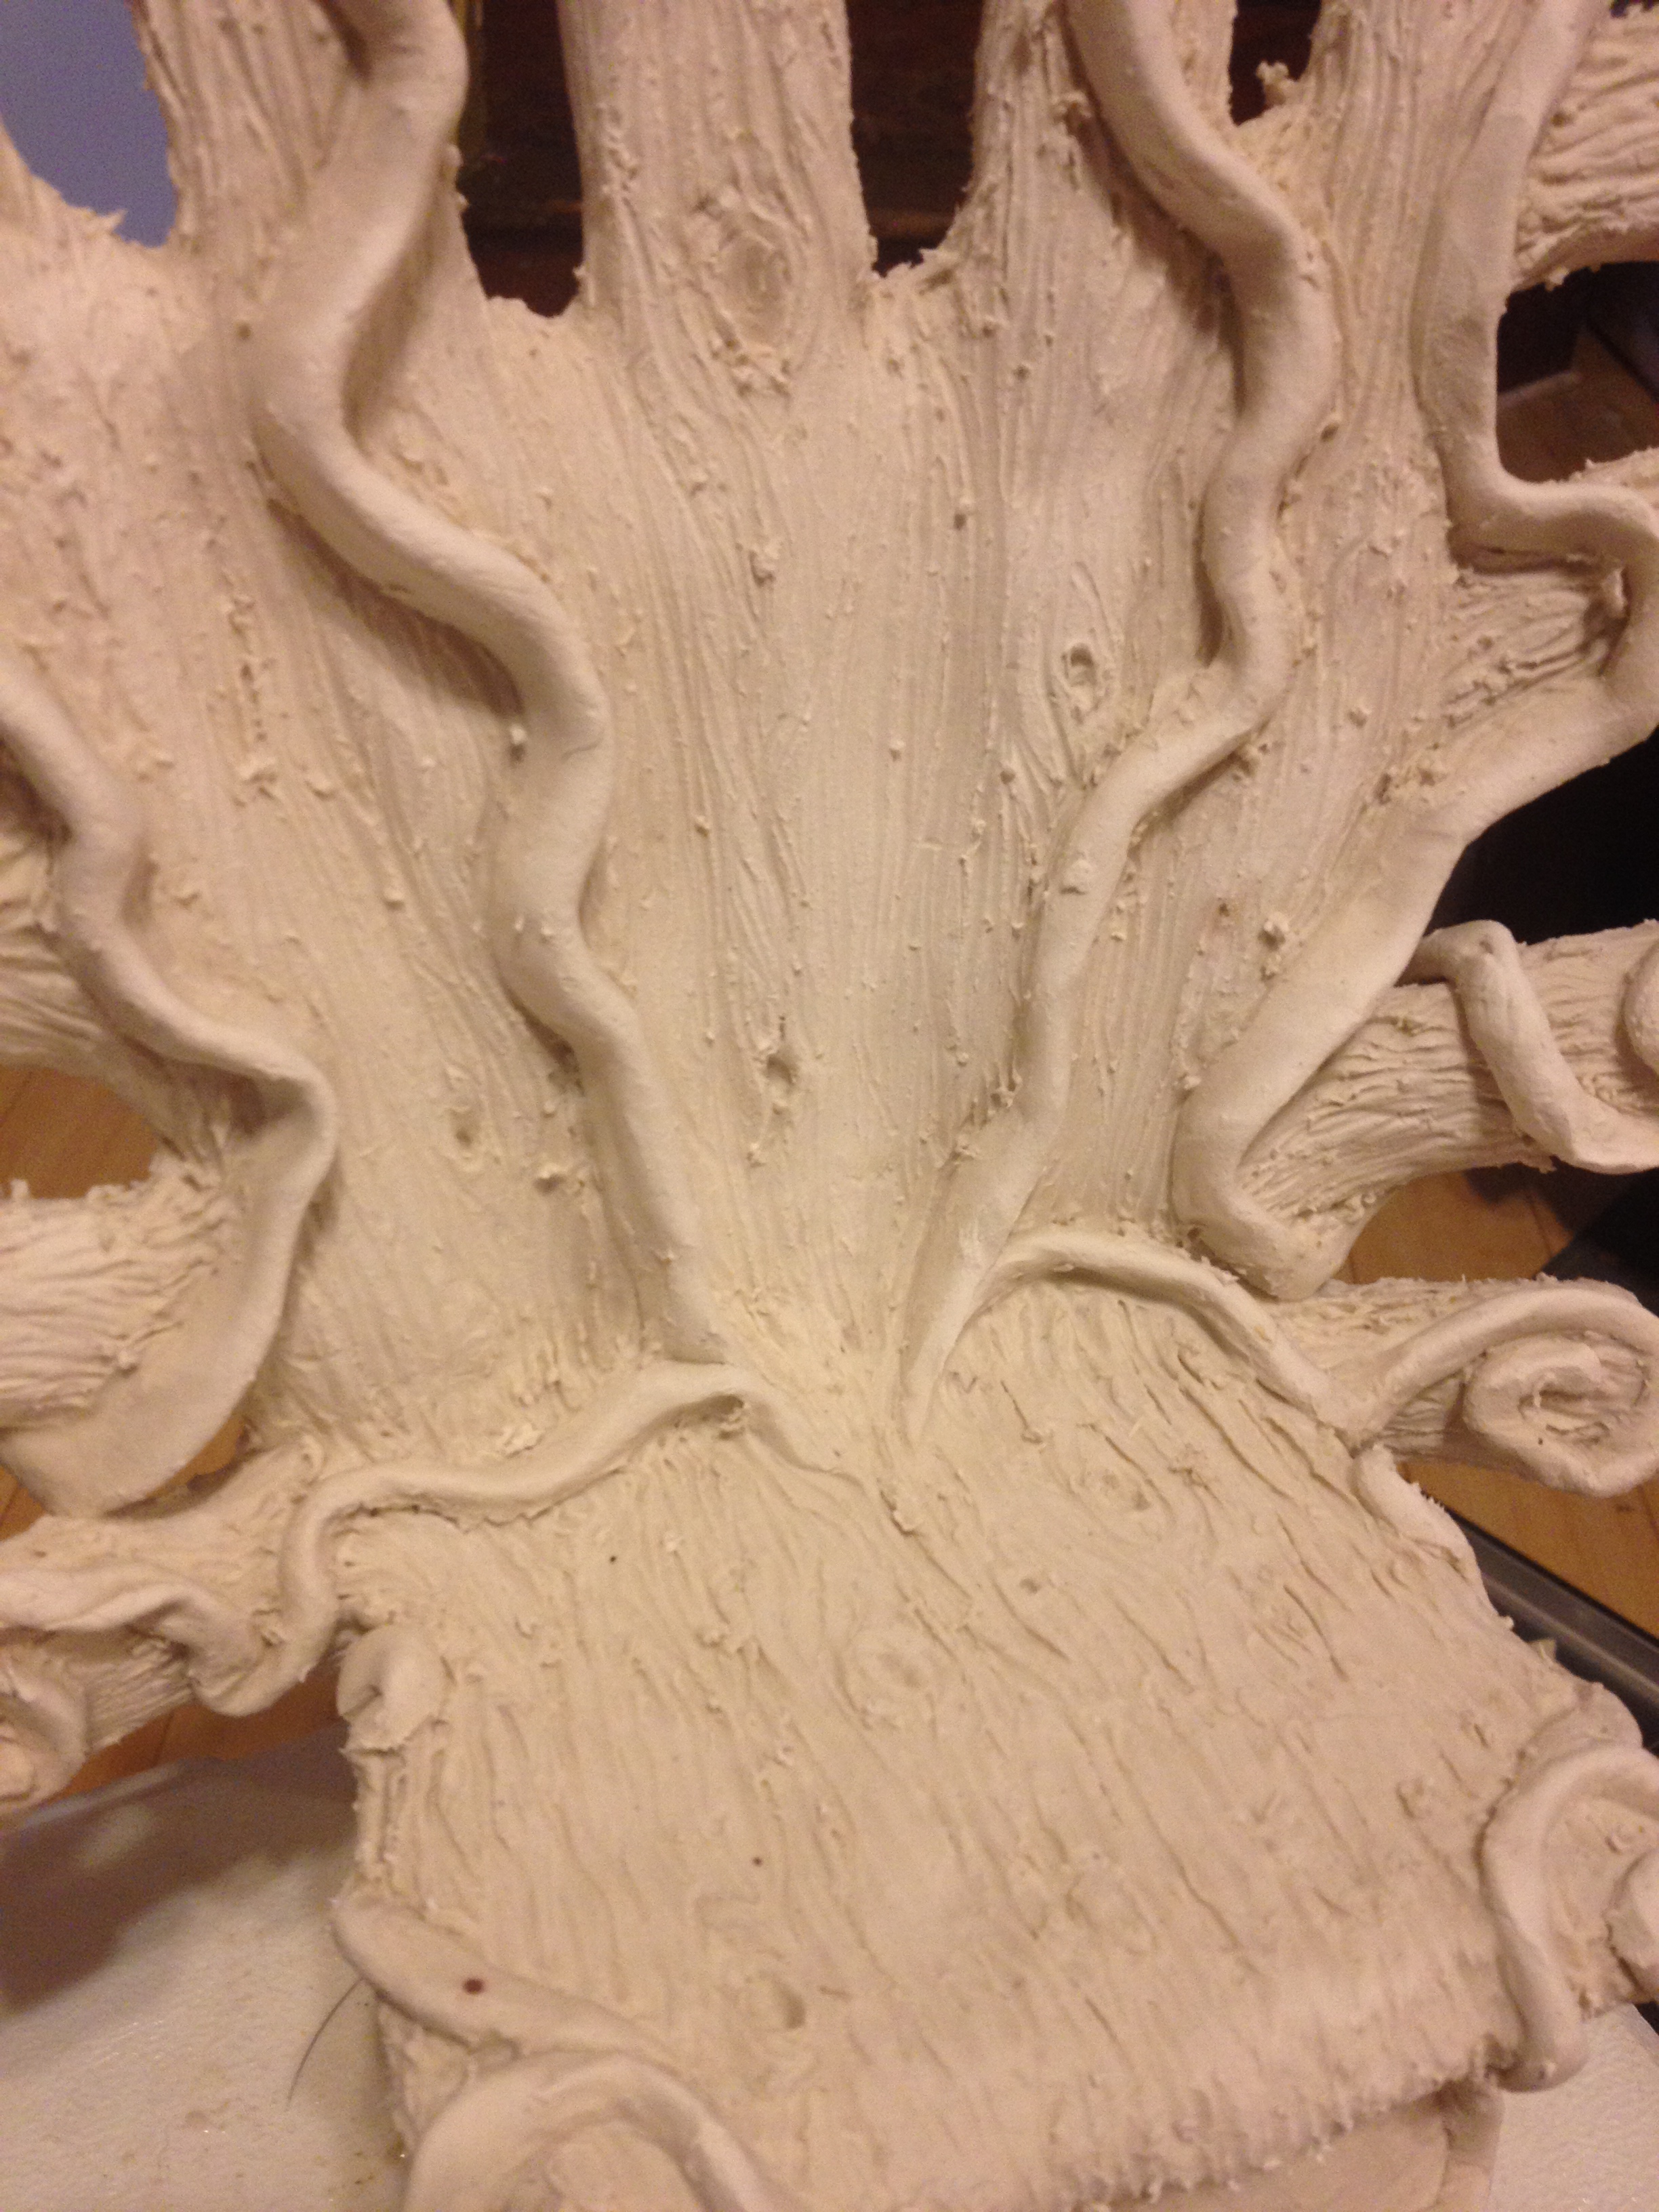
Gloriann Irizarry has created this amazing paper clay fairy throne with vines and roses

Make sure to be very gentle at this stage because the moisture from the second Clay sheet has made the piece heavier once more and very susceptible to breakage if not handled carefully.

Not to worry and make sure you don’t have to touch it too much, place the Throne in a cheap one dollar oven tray. That way you can rotate it without leaving finger marks or breaking a leg off and since the tray is only a dollar you can dispose of it or save it for your next project.

Remember to keep the entire Throne wet by mist the water all over it. This way you can add the wood details one the whole vines are attached. Use your favorite tool to complete this wood detail by carving the grain. I prefer the round embossing tool. Why? Simply they come in different sizes and I can alternate them so it look natural and not plain. Carve little by little with the tool and clean it every so often with a paper towel to be able to get clean groves and the grain pattern to look more natural. You can use a visual reference to get the grain to flow beautifully. This will be noticeable at the last paint coat.
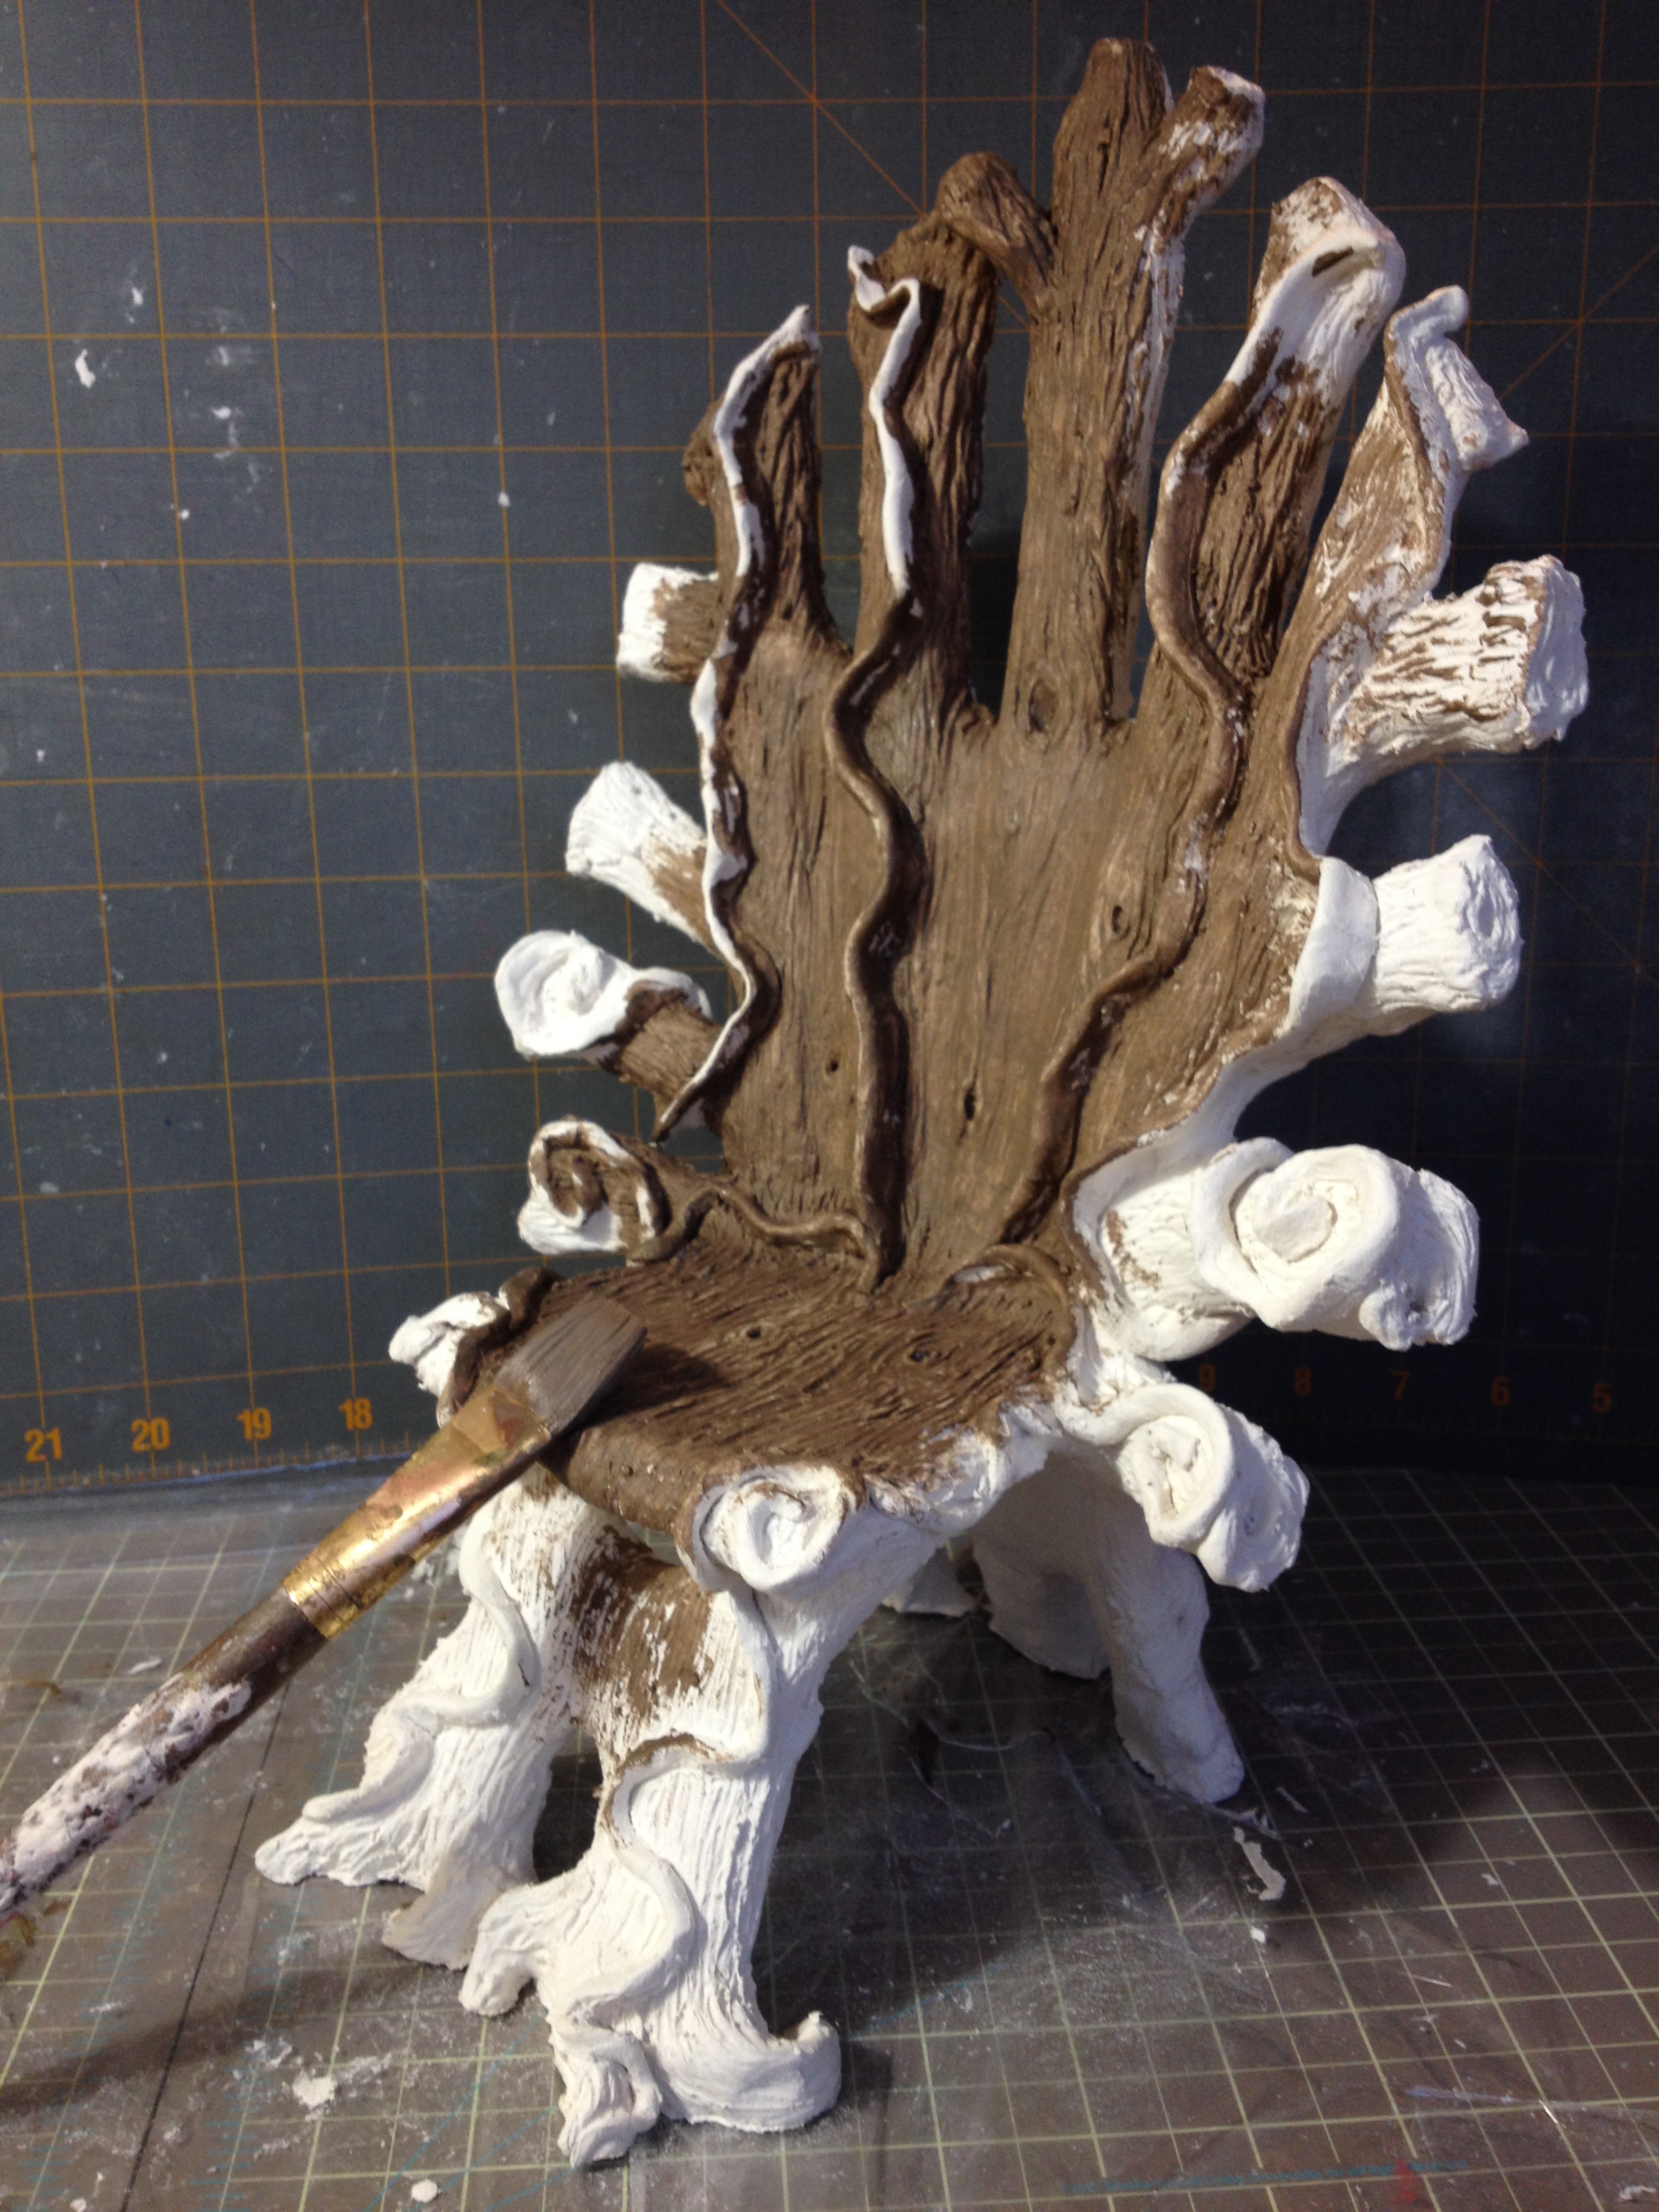
Gloriann Irizarry has created this amazing paper clay fairy throne with vines and roses

I start the first coat with the dark brown acrylic paint. Cover the entire piece vines and all. This will be the base color anyway and the details will be added in the later coats.
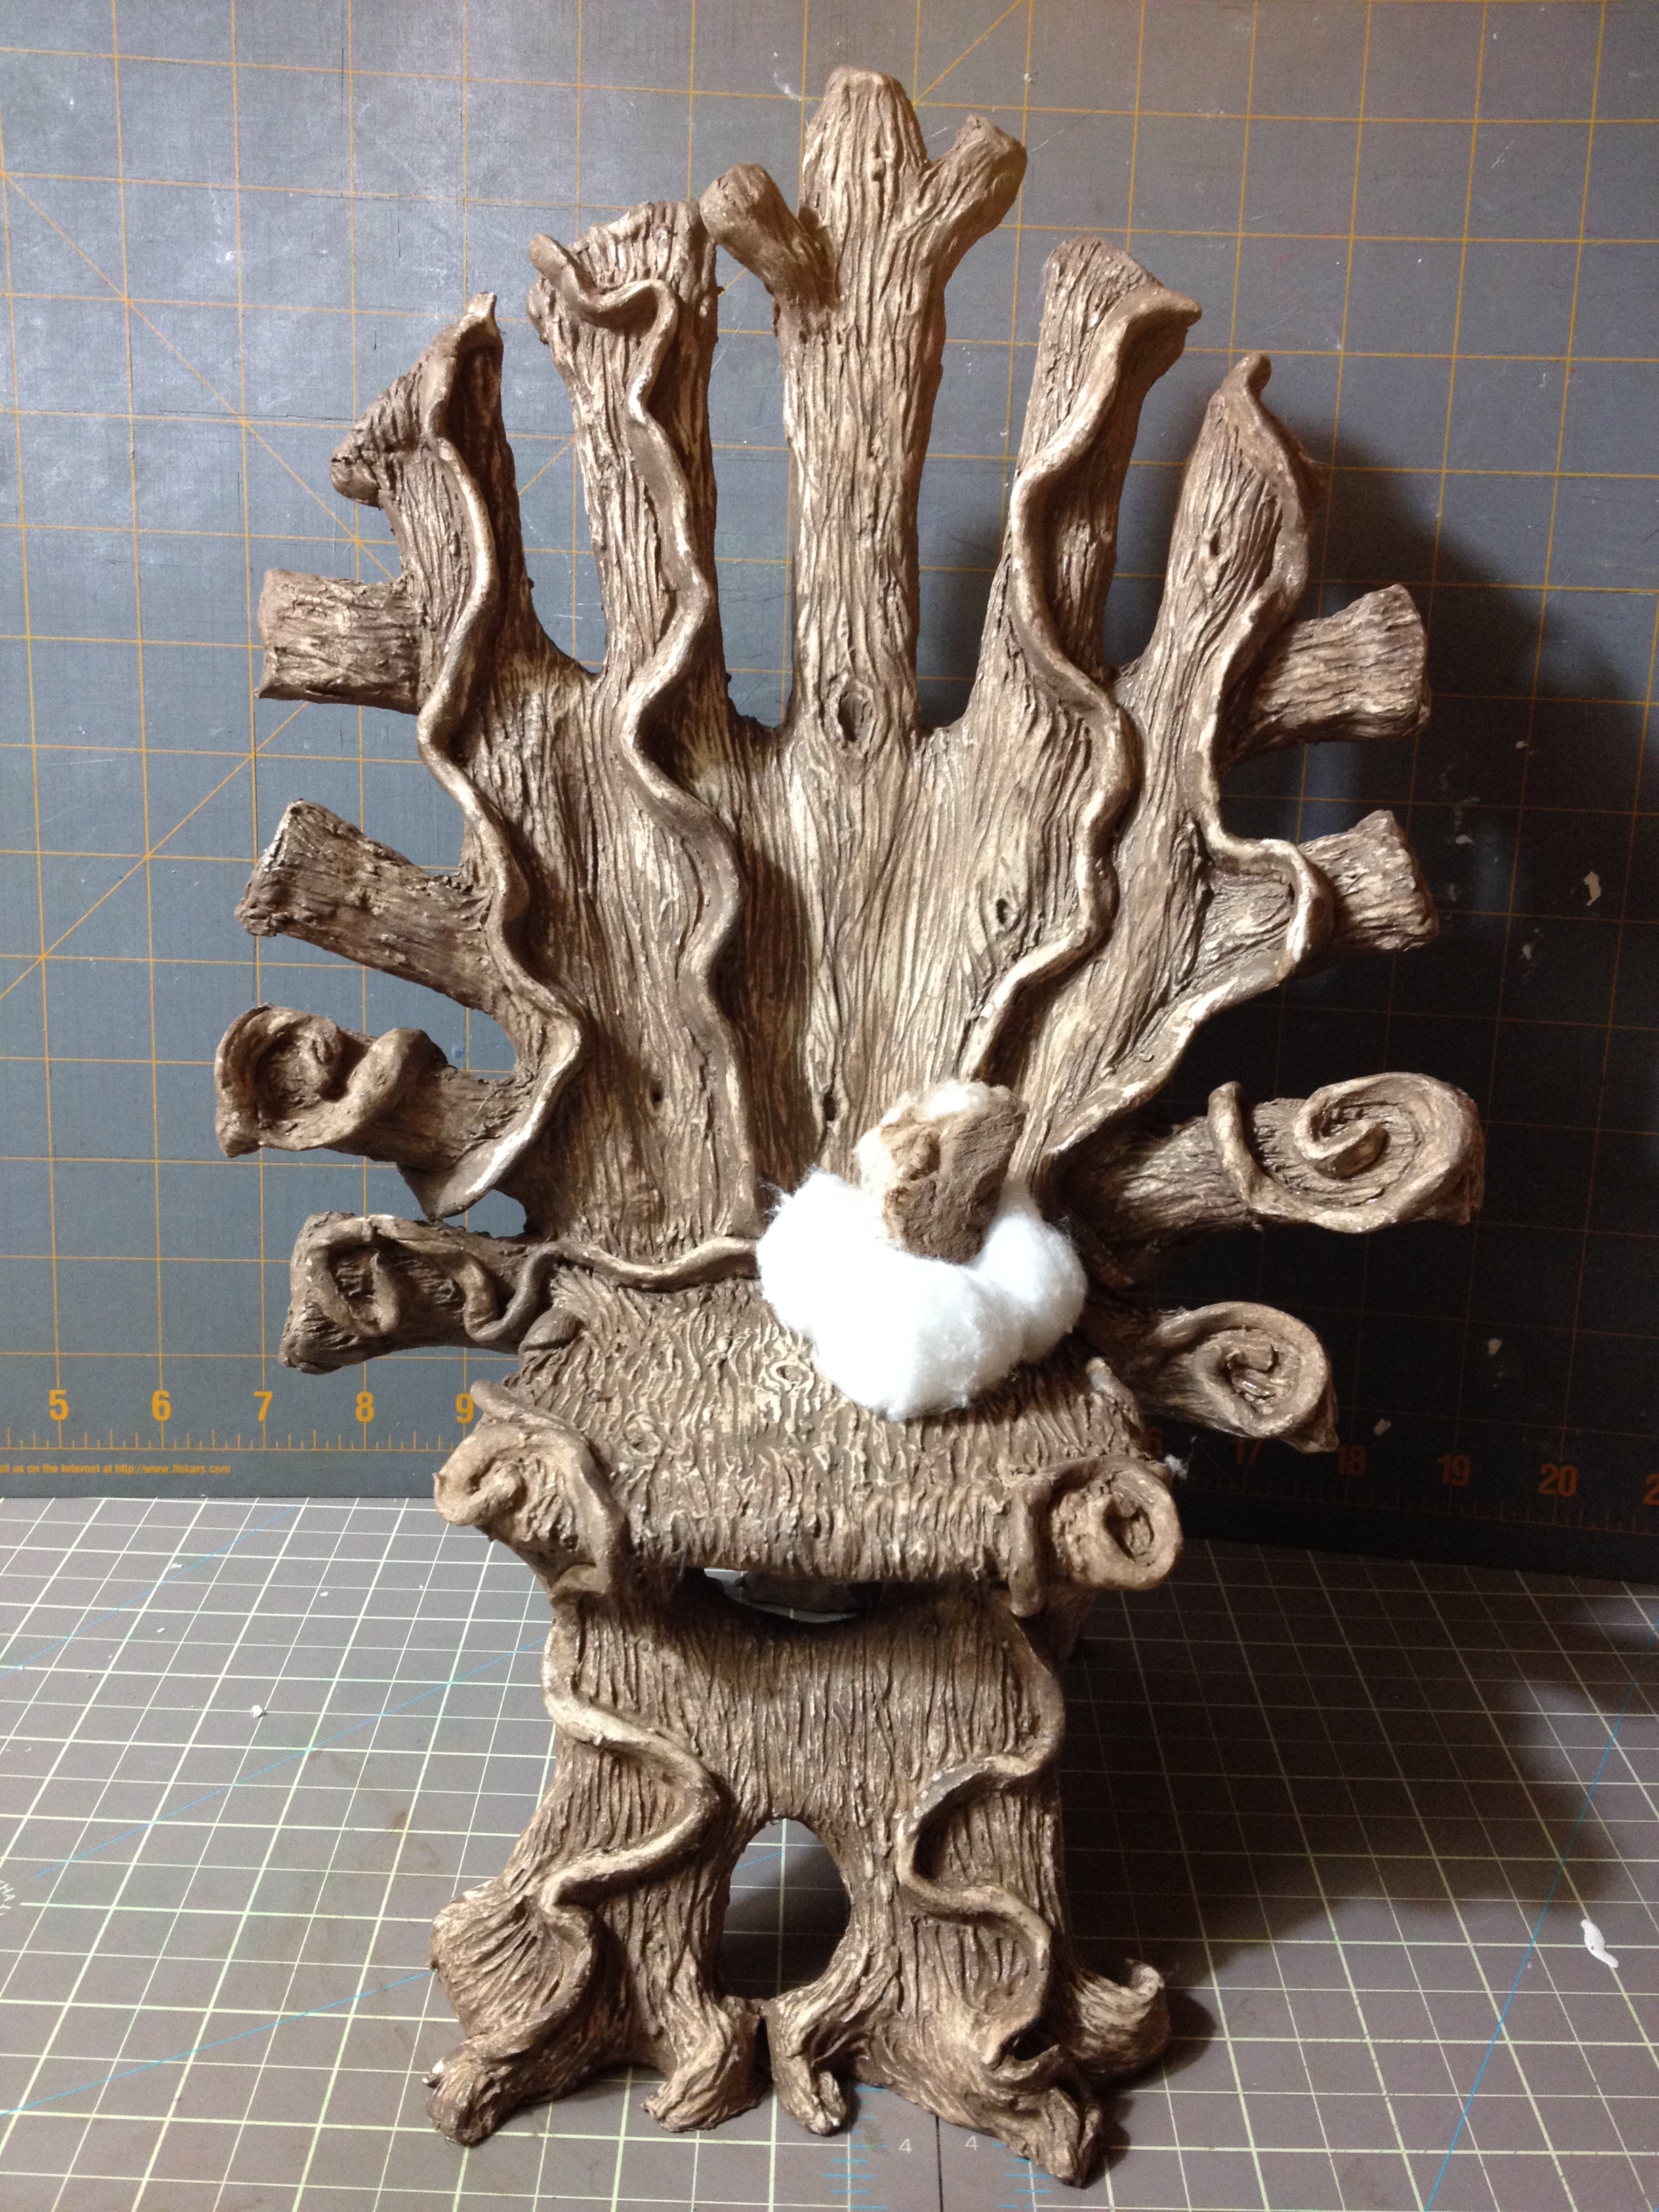
Gloriann Irizarry has created this amazing paper clay fairy throne with vines and roses

I used wet cotton balls to clean off some of the base coat. Doing this will reveal the wood grain detail and made the wood look age and natural. You will repeat this process of wetting the cotton ball and clean the Throne until you feel you had achieved the right aged look. Once the cotton ball is too saturated in paint use a new wet cotton ball.
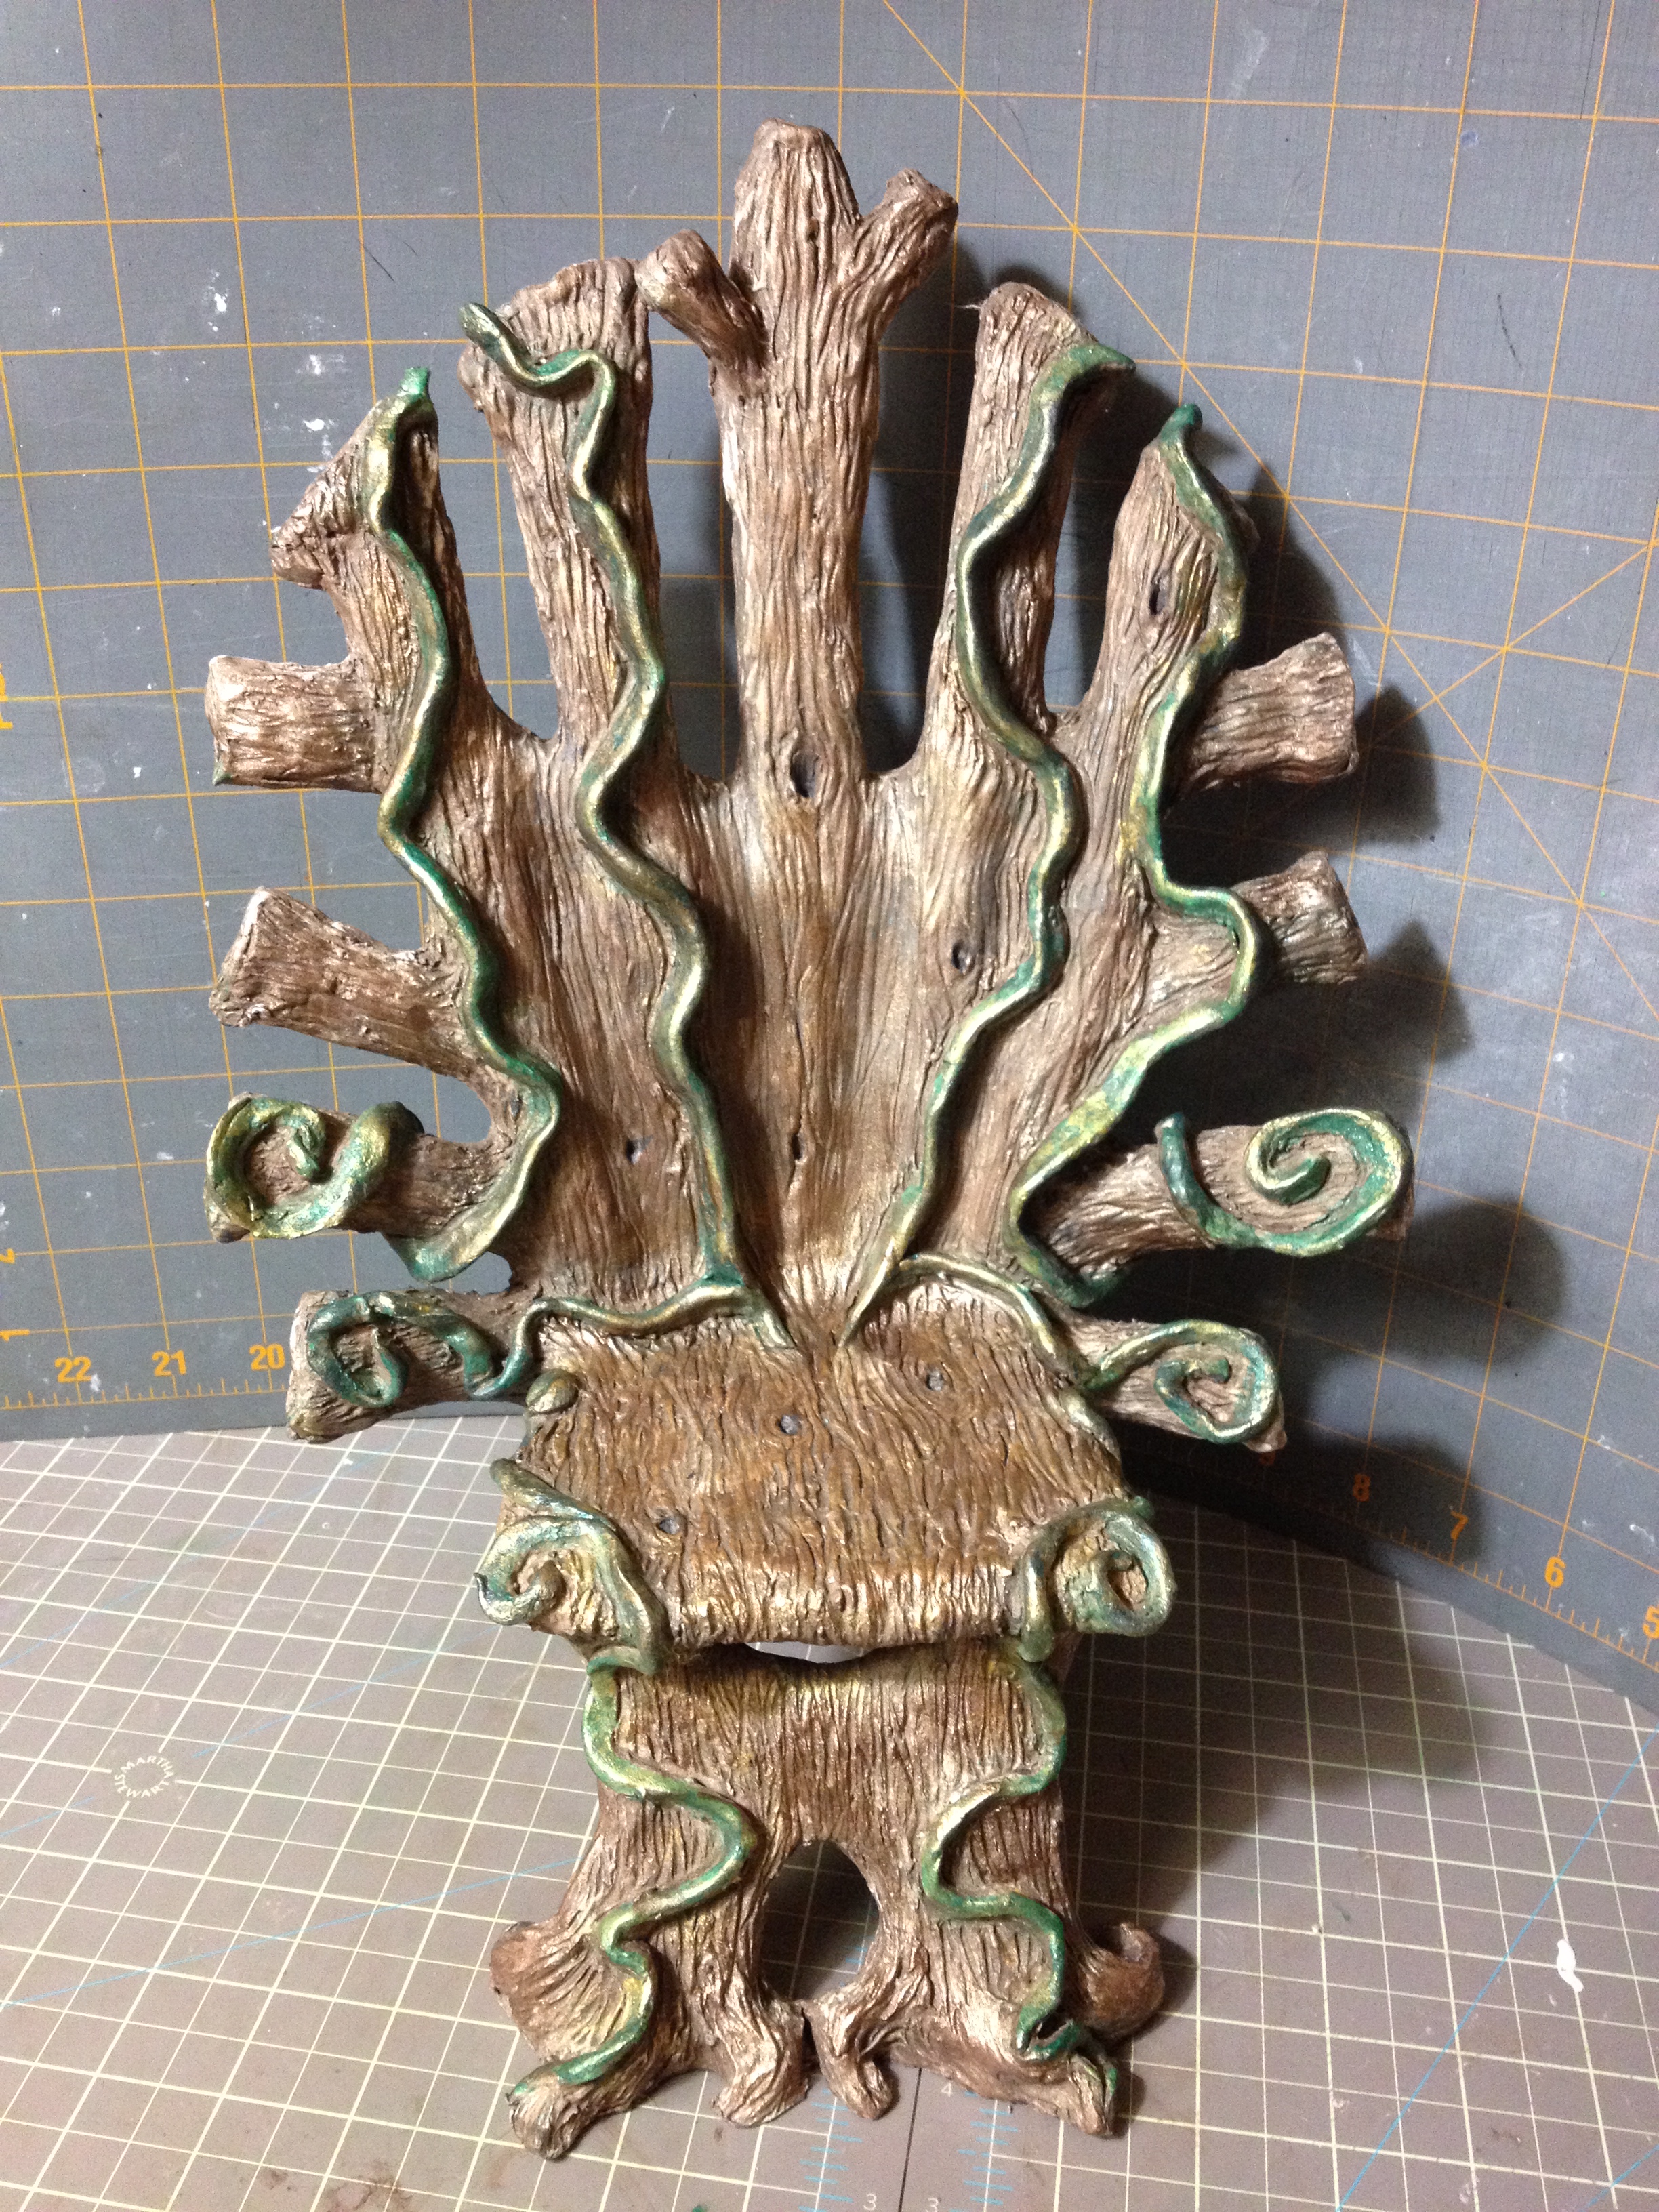
Gloriann Irizarry has created this amazing paper clay fairy throne with vines and roses

For the vines I use a water down Pearl Hunter Green color. Do not over saturate the paint  brush. You don’t want the vines to look like an old cartoon. To make these look aged moist the brush and dab any excess paint and little by little stroke the vines until you like how they look.
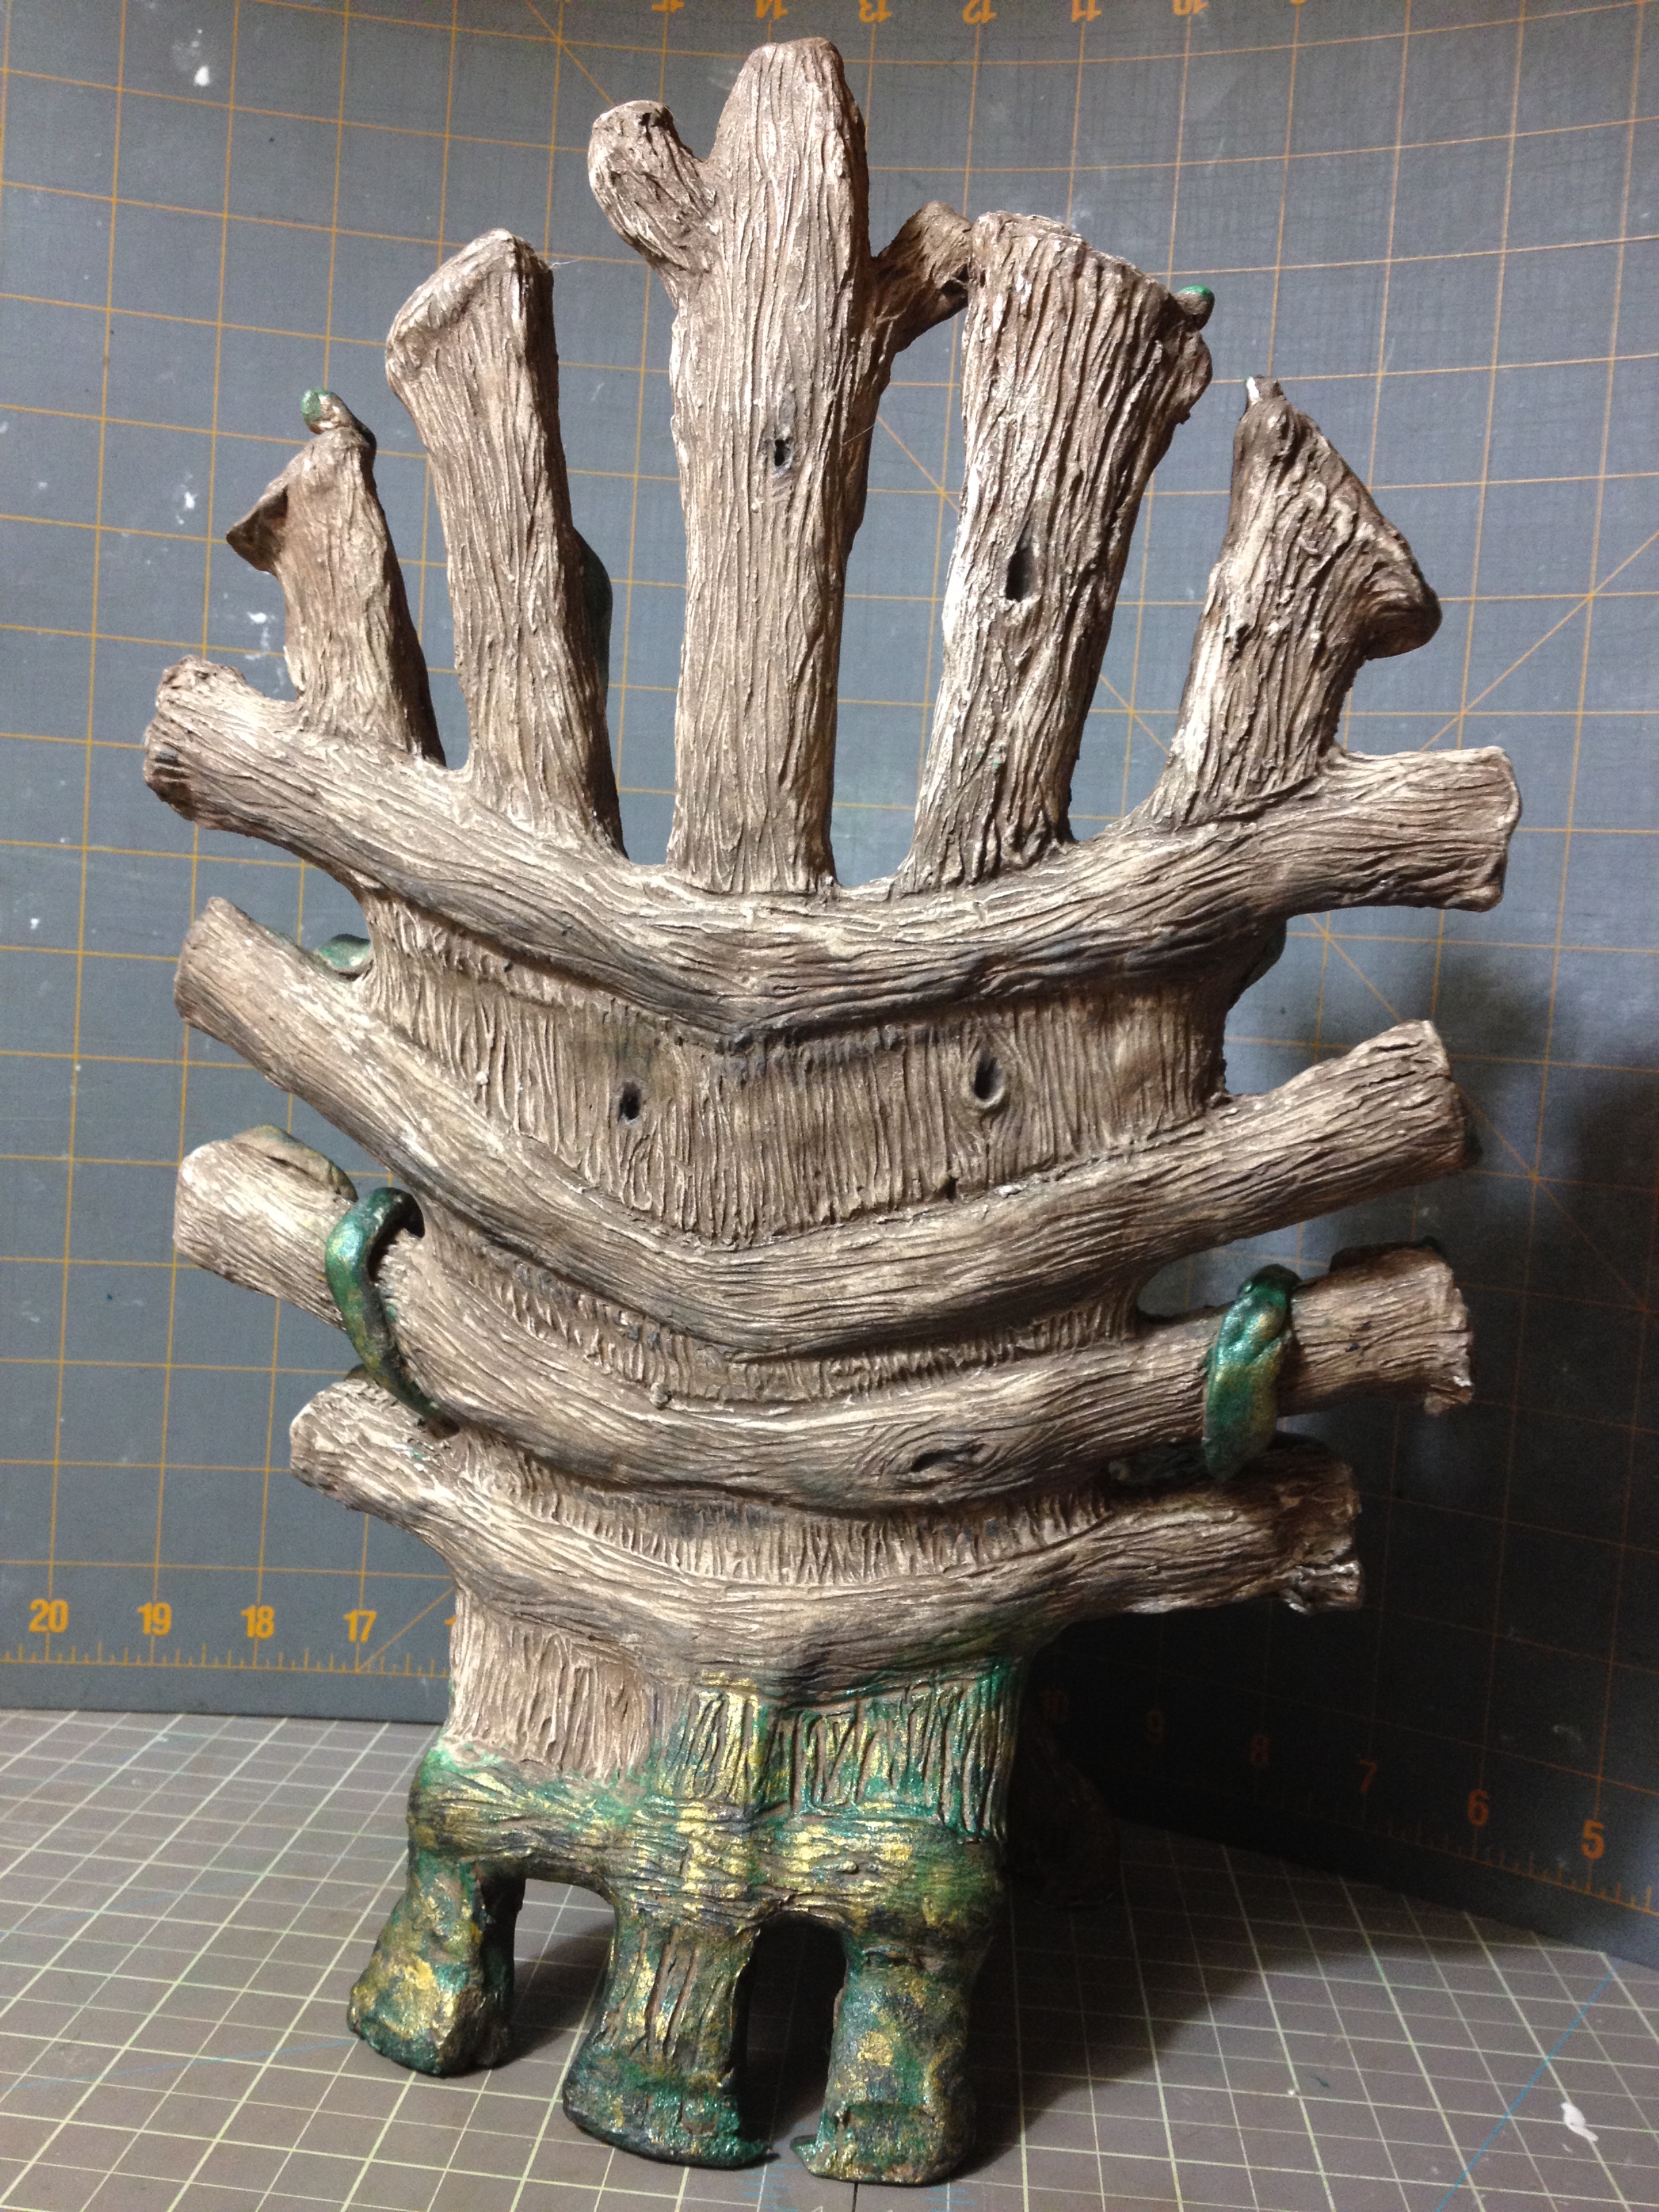
Gloriann Irizarry has created this amazing paper clay fairy throne with vines and roses

Do the same on the base. You can use the paint brush or a wet cotton ball over one coat of green,  one  coat of brown and one coat of black acrylic paint dabbed one over another this will create the effect of a moss aged look.
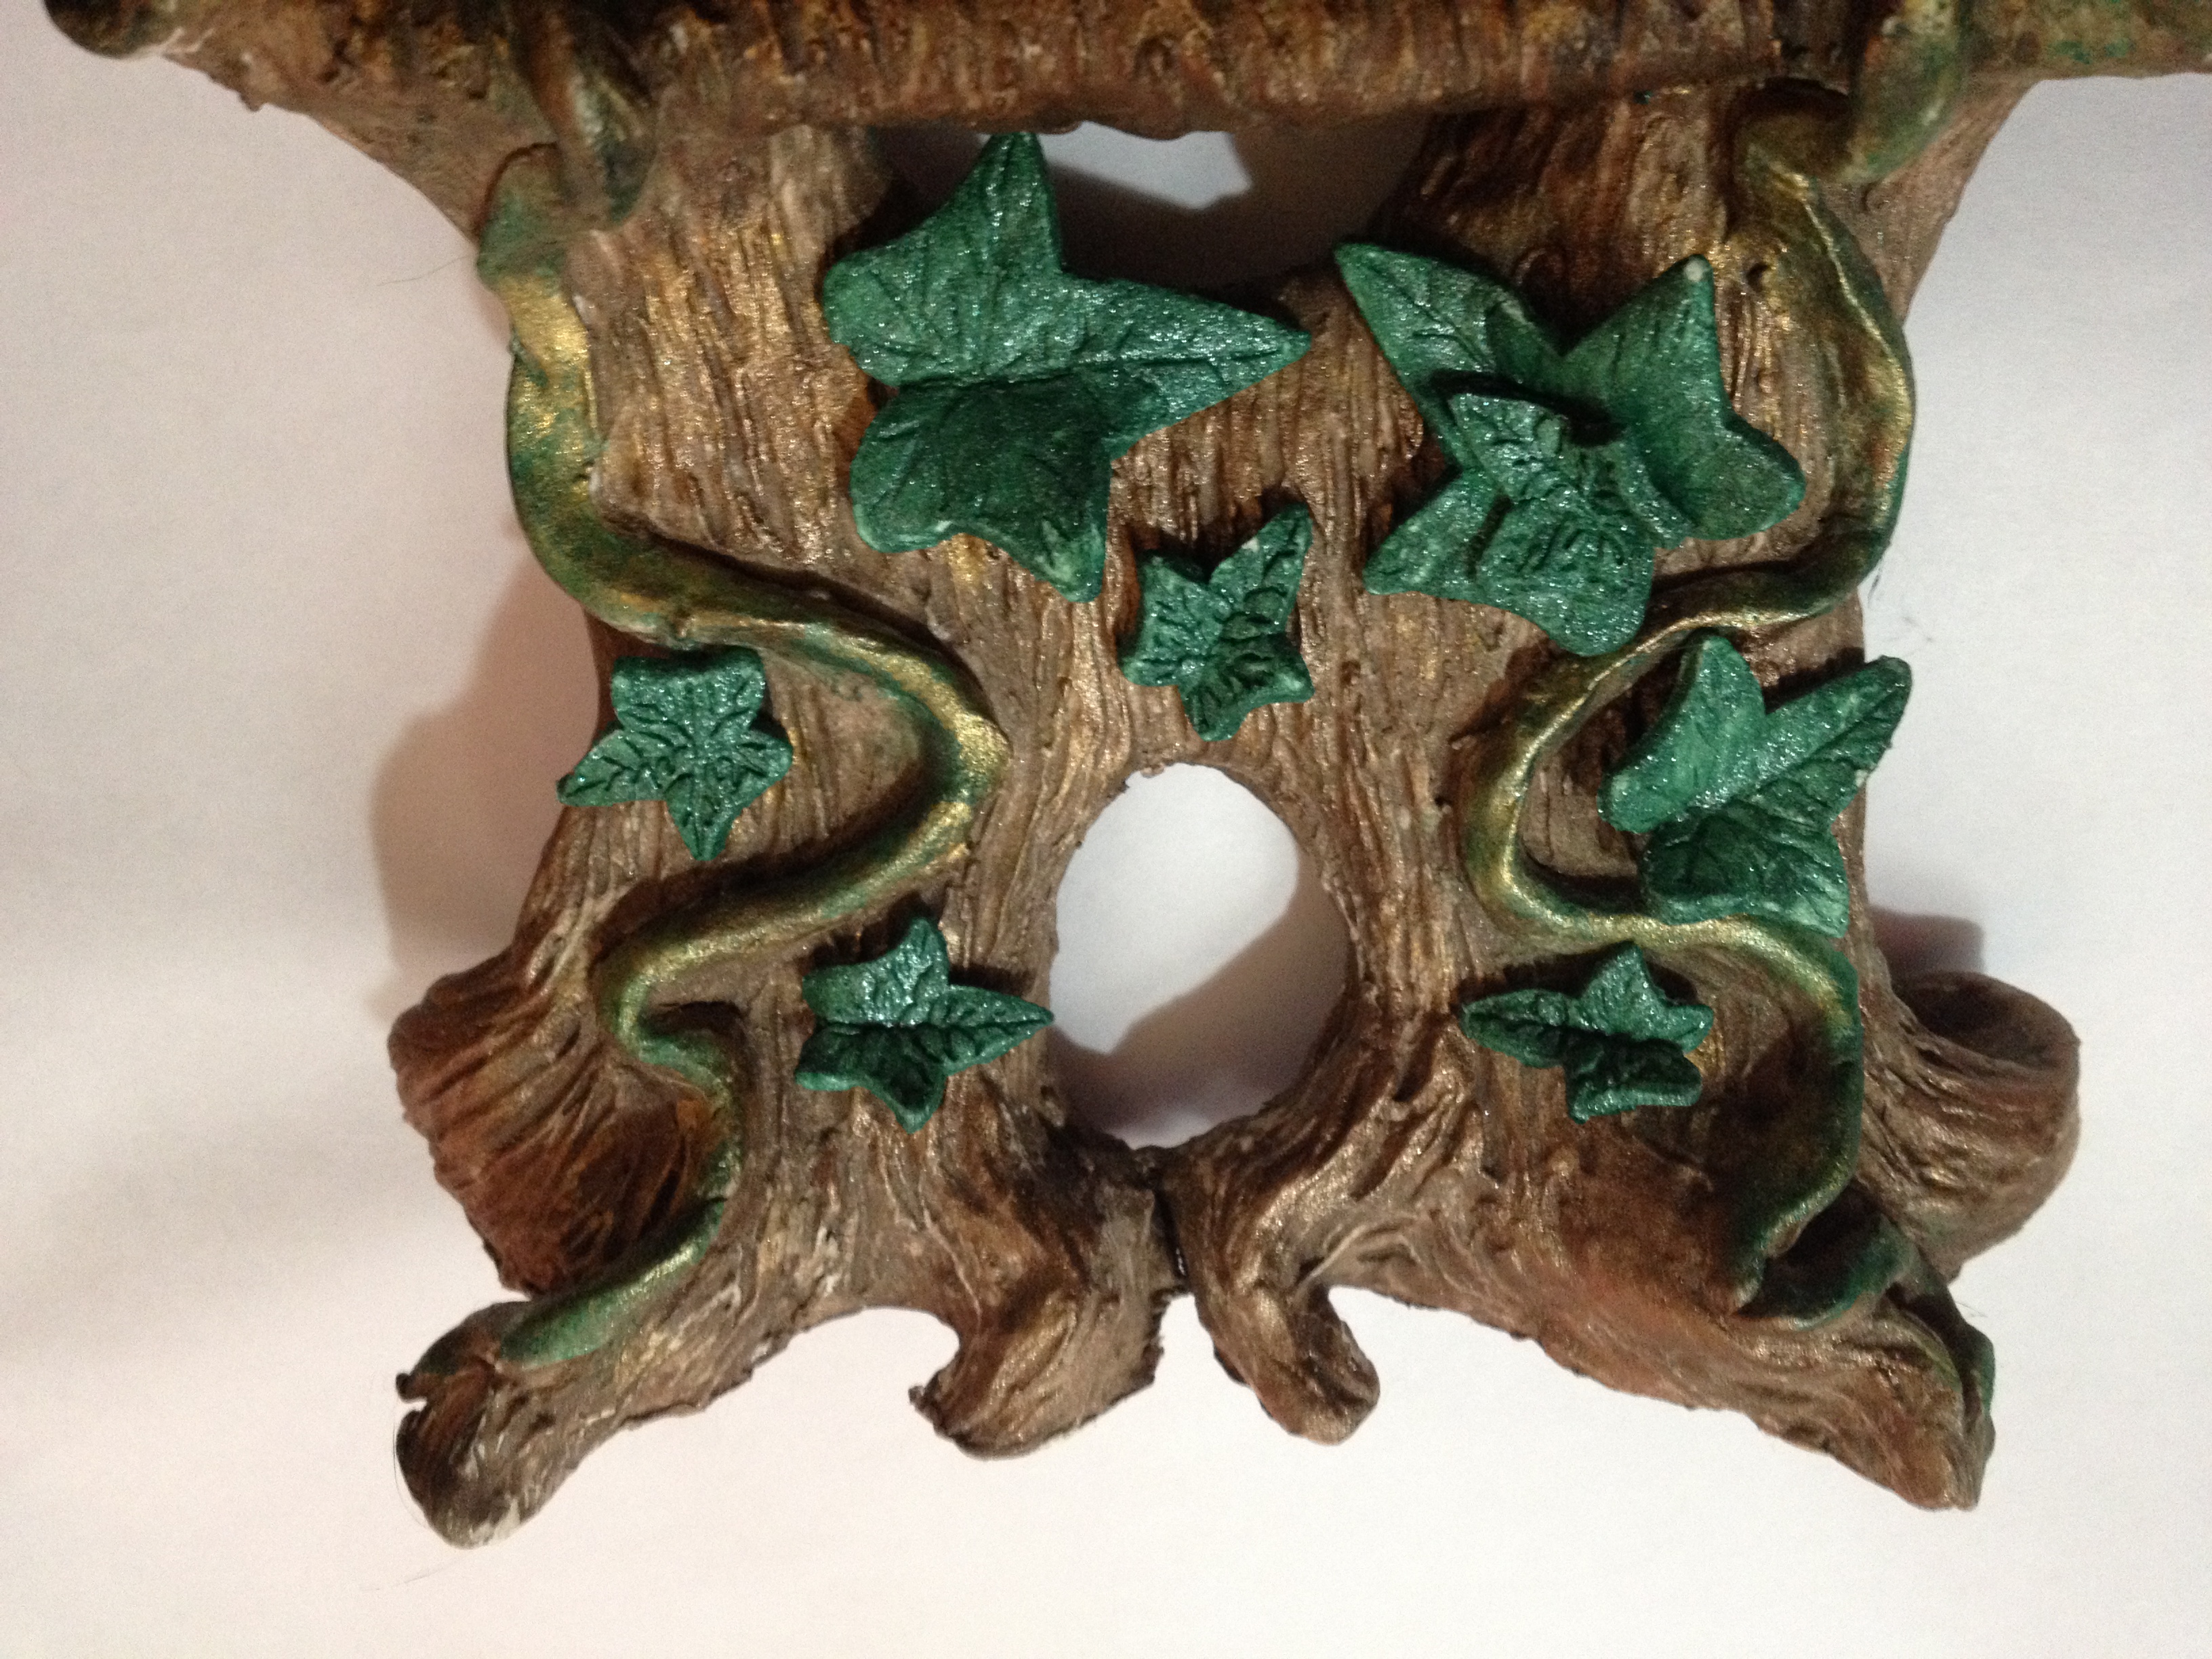
Gloriann Irizarry has created this amazing paper clay fairy throne with vines and roses

I like to place the vine leaf on top freely before I decided where I will be placing the final glue. But before I do that placement I will show you how I painted them the fast Glori’s way.

It might look overwhelming to think “OMG I have to paint over 100 individually pieces one by one?”

Well My answer is: Nope, Their is ALWAYS a better and easier way.

I really don’t have the luxury of time. Having a full time Office  job, also being a mom and wife  it makes my crafting time very limited. I had put that conflict to work for me. Yes, It has me always developing new time saving techniques all the time.
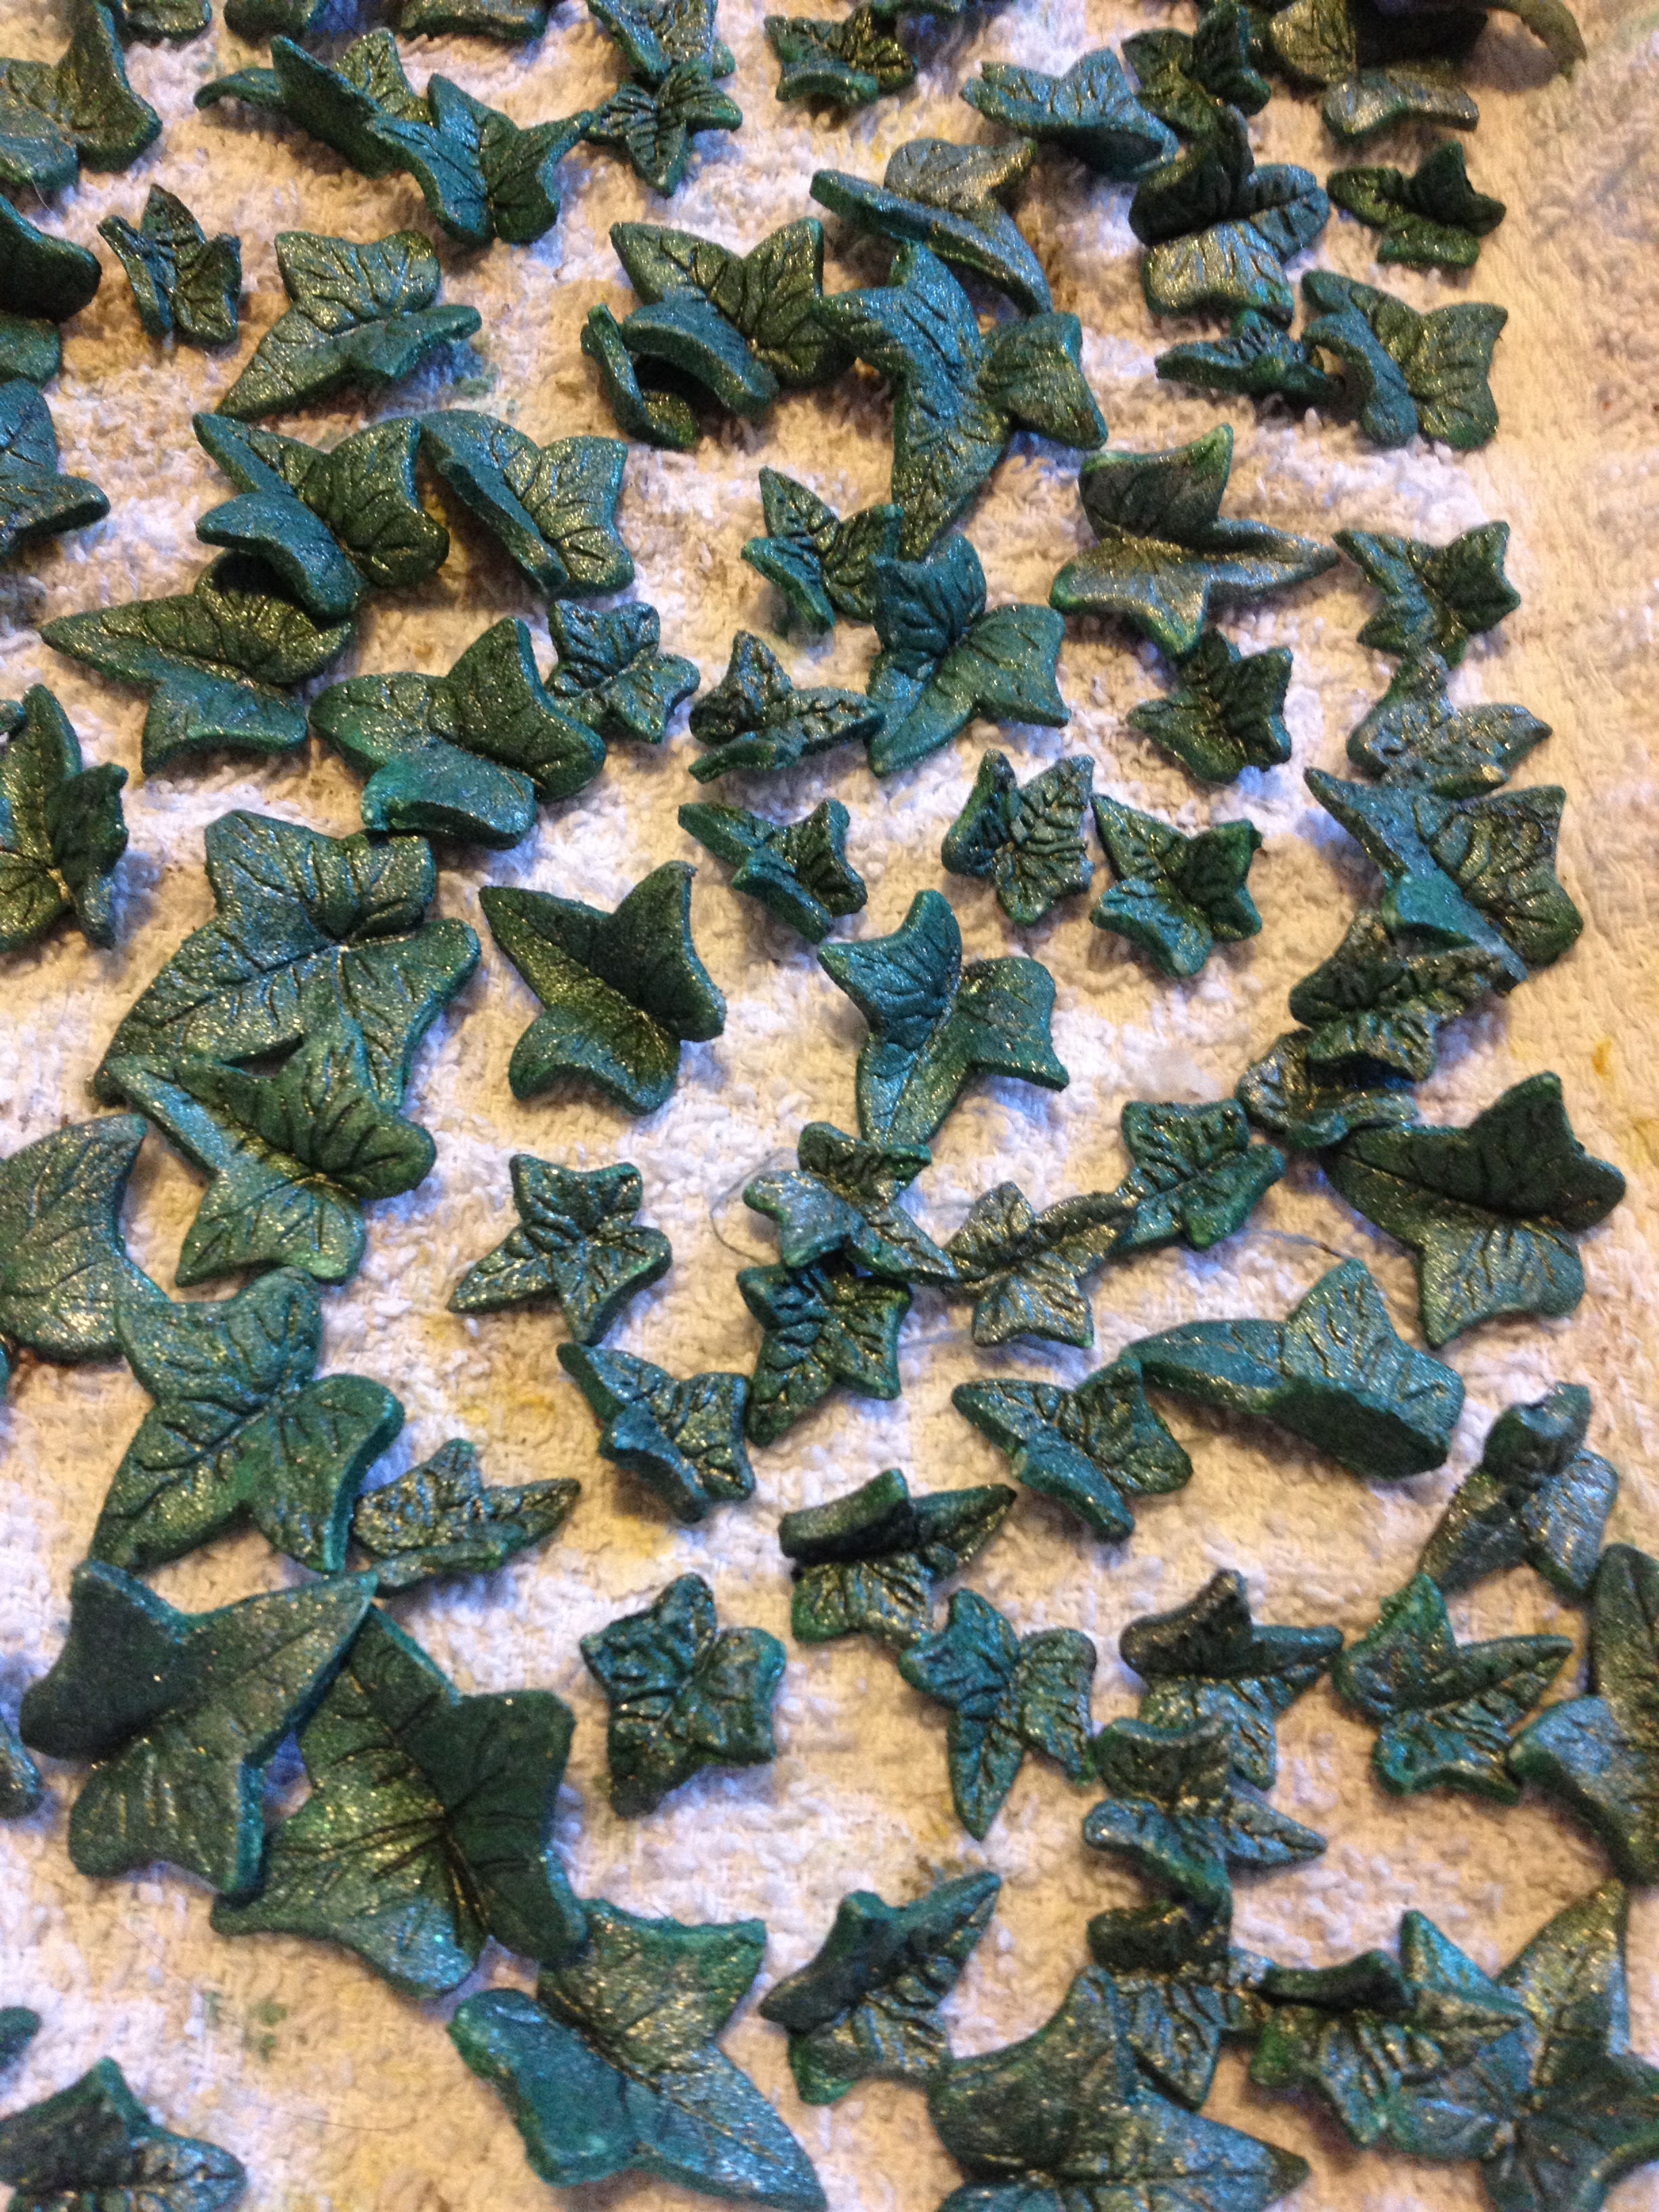
Gloriann Irizarry has created this amazing paper clay fairy throne with vines and roses

I cut or punch out all my Creative Paperclay  Ivy leaves out of 1/4 thickness clay sheet. Let them fully dry to a light crispy feel. This is essential to the next step.

In a ziplock bag add the leaf-colored acrylic paint. Completely mix the paint with some water and create a very thin wash. You will end up with a light watery inky green color. Now the fun begins. Fill the Ziplock bag with all those tiny leaves.

Make sure you do this in a very short time. Remember they are made out of a thin sheet of paper clay and they will get soft once more if they are exposed to the water for a long time.

Carefully mix the leaves with the watery inky green paint, rotating the bag and lightly shaking them all over. Look at the bag to make sure the water had mix in with all the pieces.

When all of the leaves are painted, use scissors made a small cut on the corner of the bag to drain all the excess paint off.

Carefully remove the leaves and place them over to dry over a baking sheet. Let them to dry over night.
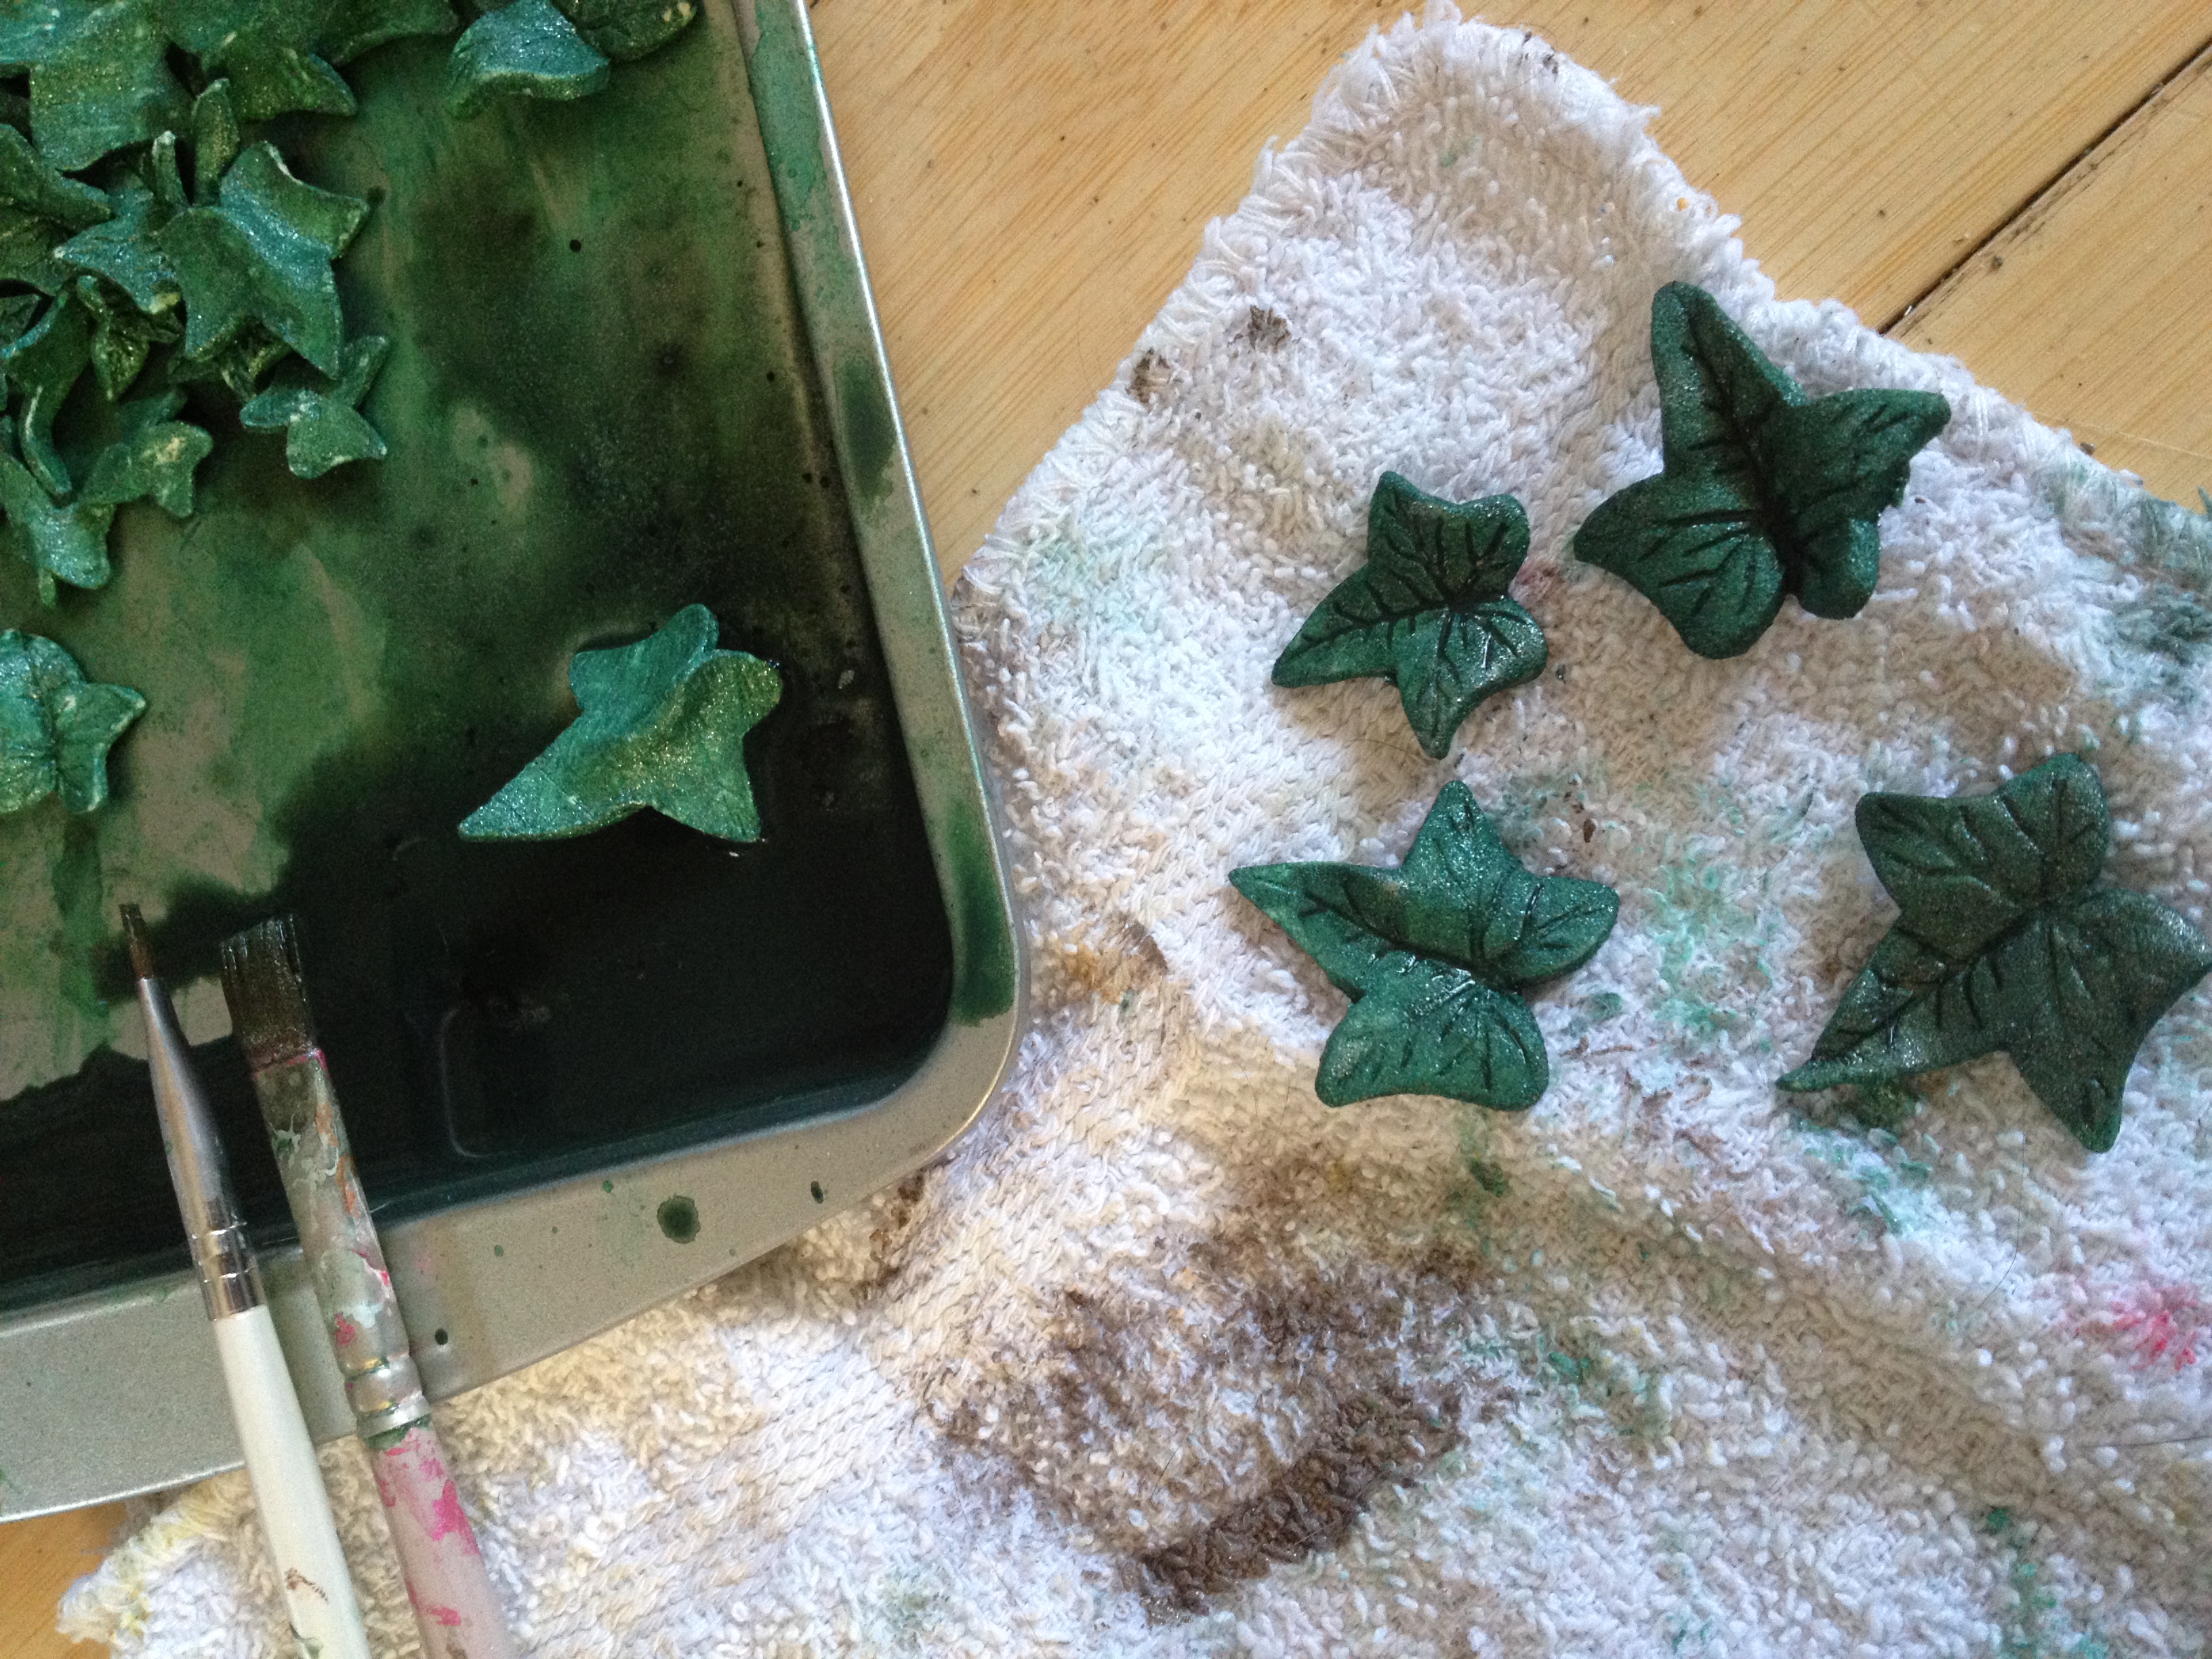
Gloriann Irizarry has created this amazing paper clay fairy throne with vines and roses

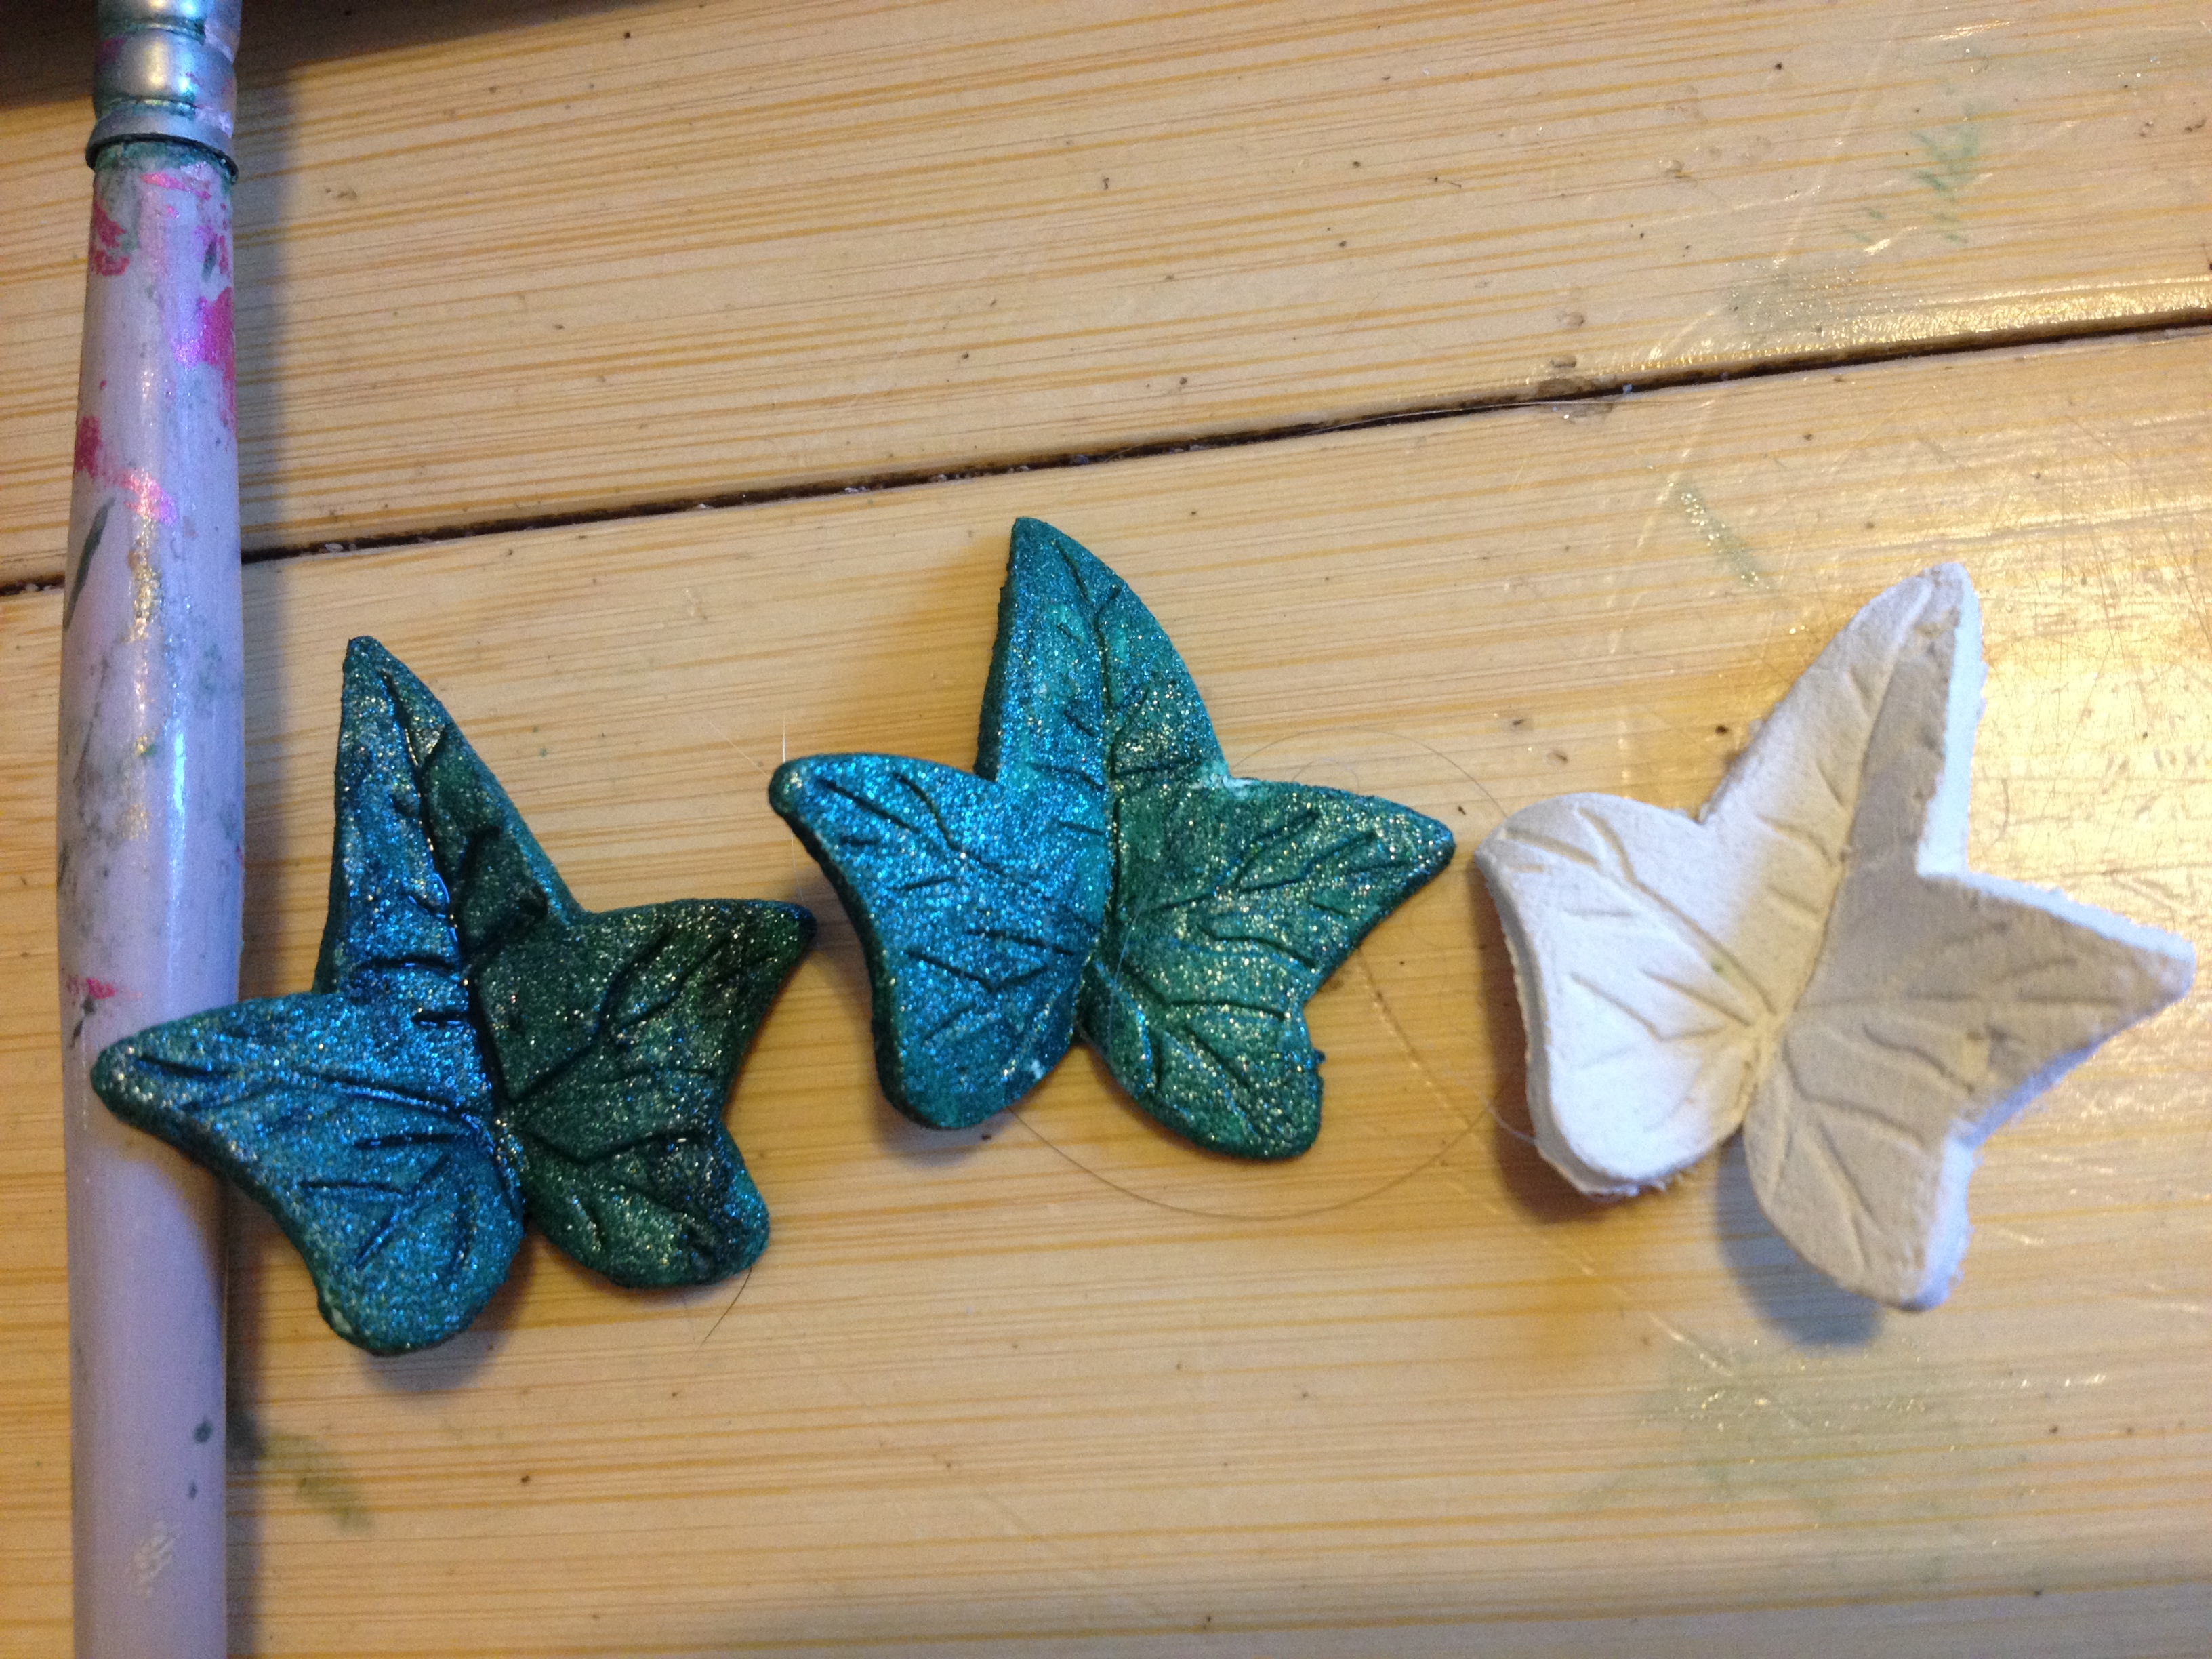
For the second coat I wanted the veins of the leaves to really pop. So you can repeat the Zip lock bag trick but this time with a darker but watery tone . Now once removed from the bag, place them facing up over a washcloth. This will ensure the watery black-green will pool over the veins and once dry you will notice the veins.
Gloriann Irizarry has created this amazing paper clay fairy throne with vines and roses

In this photo you can see to the left is the final leaf, the middle leaf is the with the first green coat only and the right is the naked Creative paperclay cut.
Gloriann Irizarry has created this amazing paper clay fairy throne with vines and roses

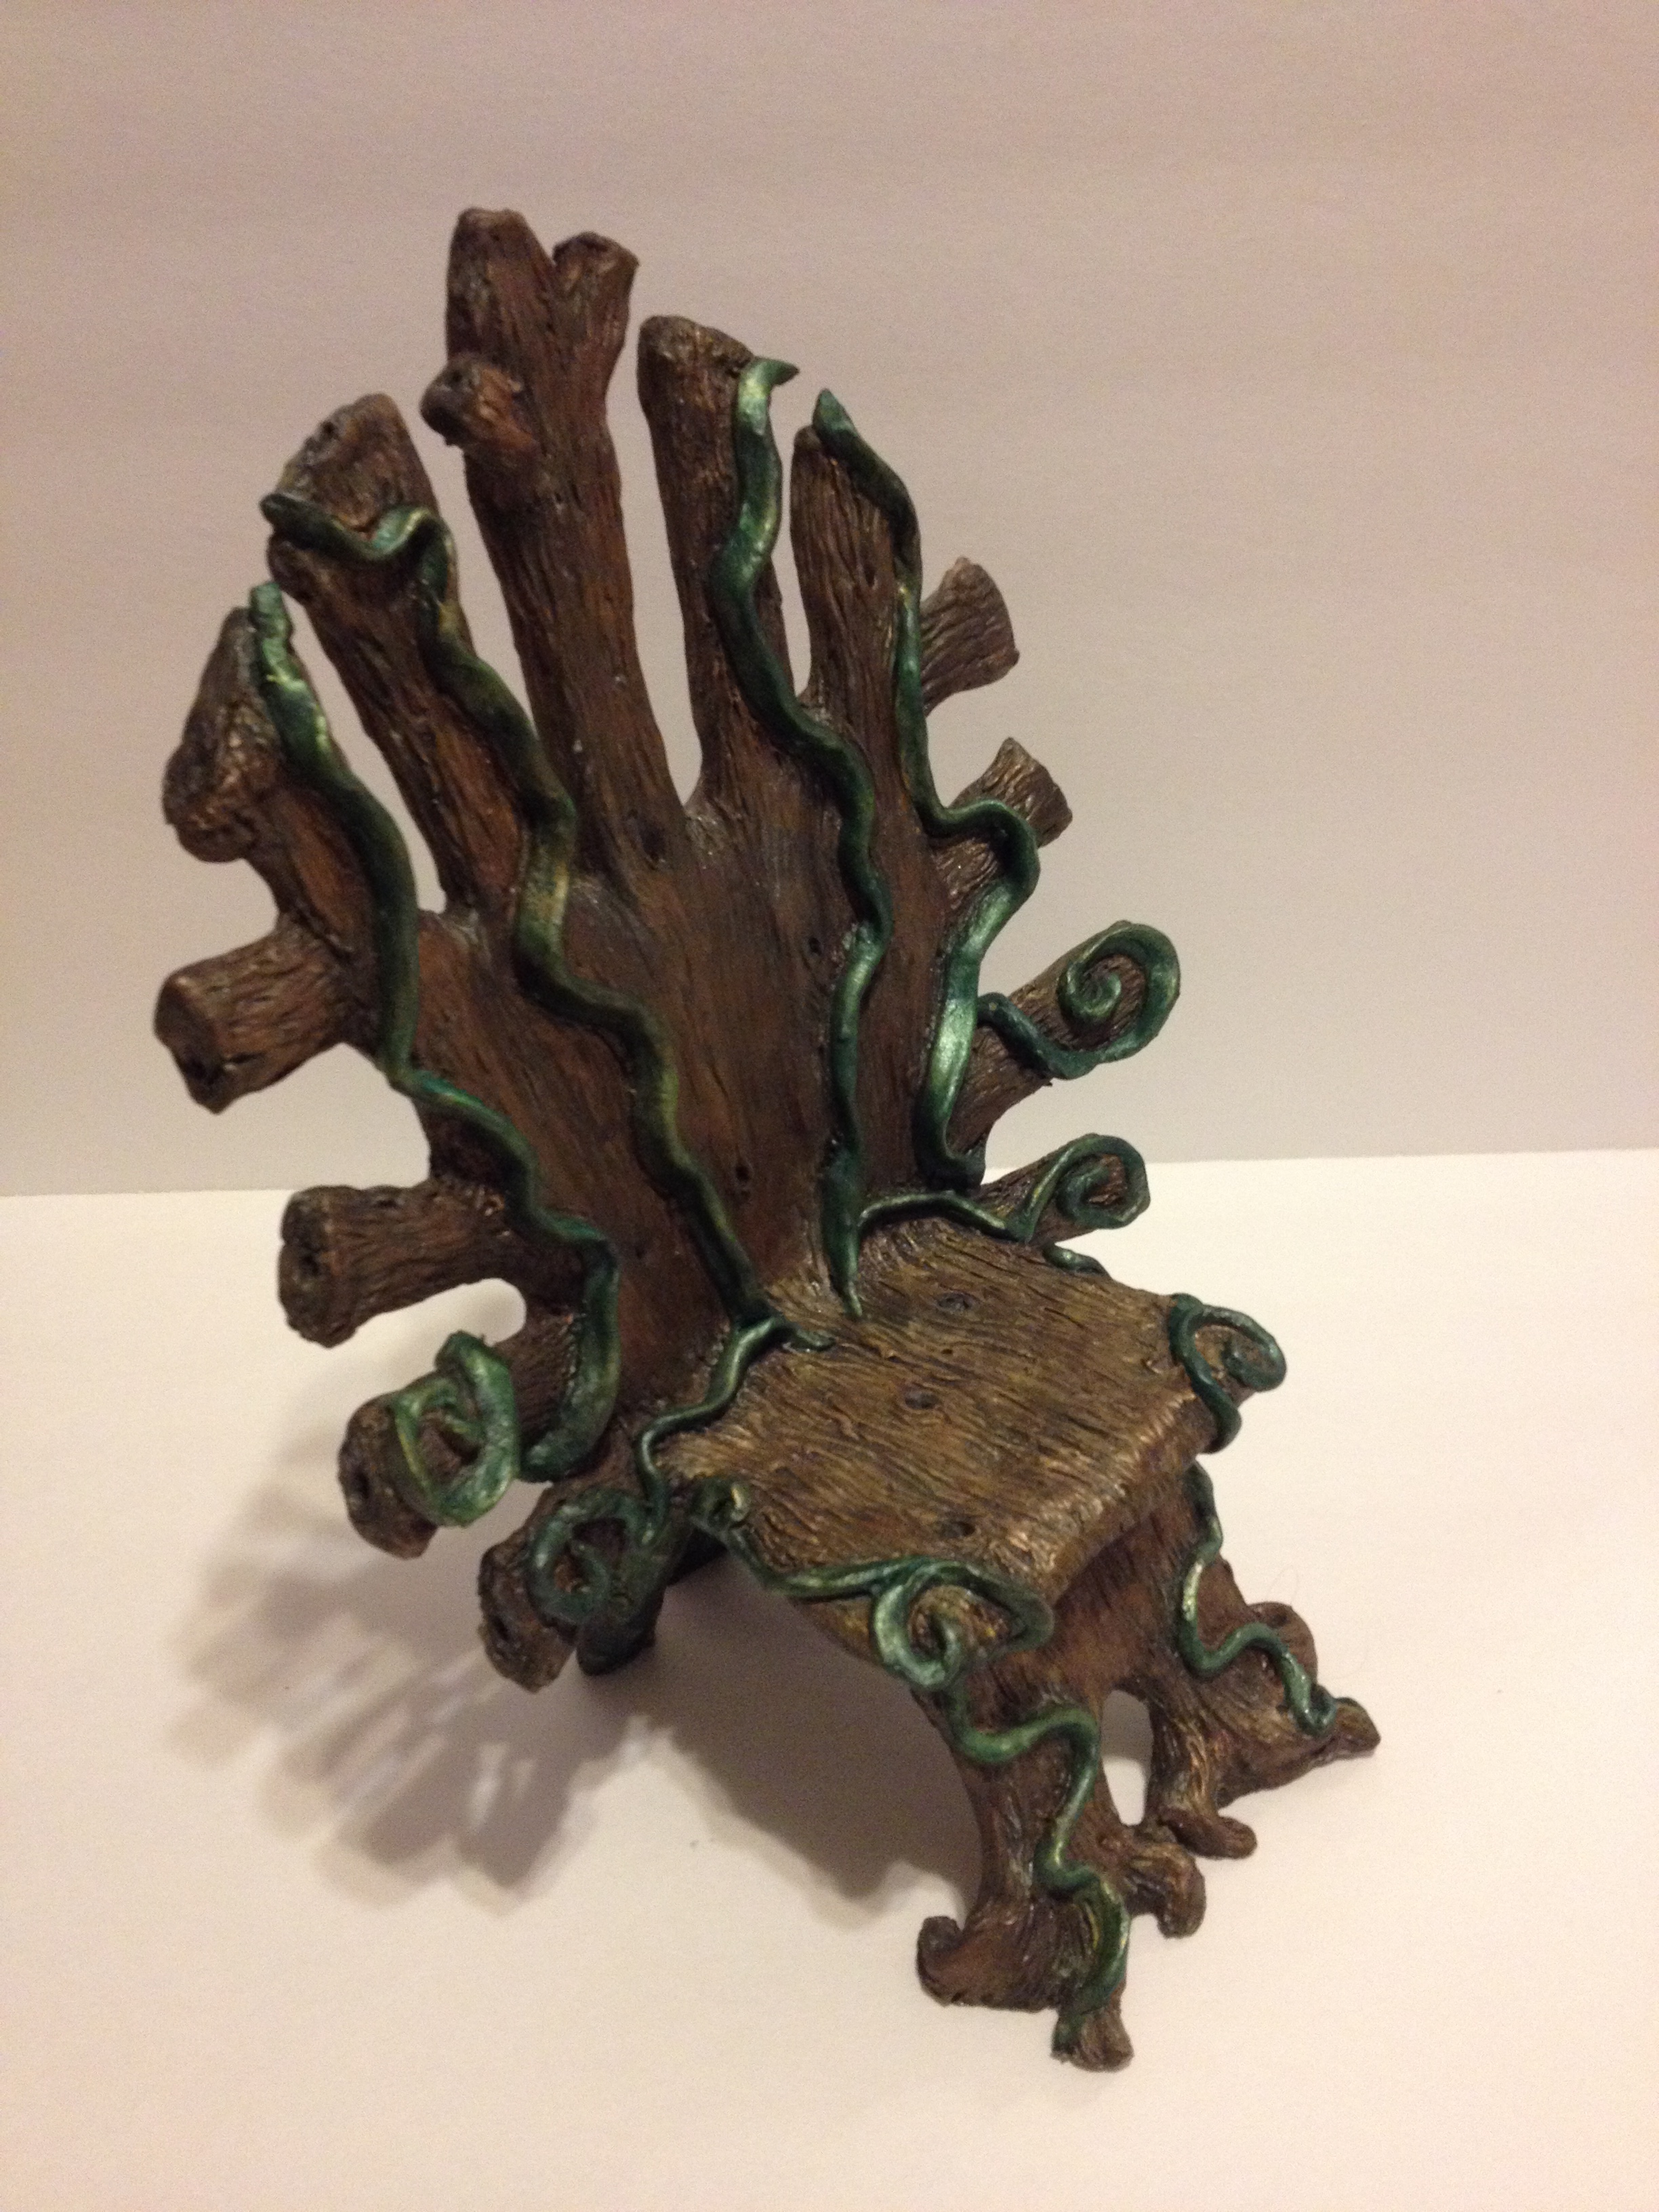
Before placing the leaves onto the throne I added one more layer of a very, very watered down black paint all over to make the wood grain look even more natural . I like how the black pool inside the grove and when it dry gives the effect of an aged magic forest tree trunk.
Gloriann Irizarry has created this amazing paper clay fairy throne with vines and roses

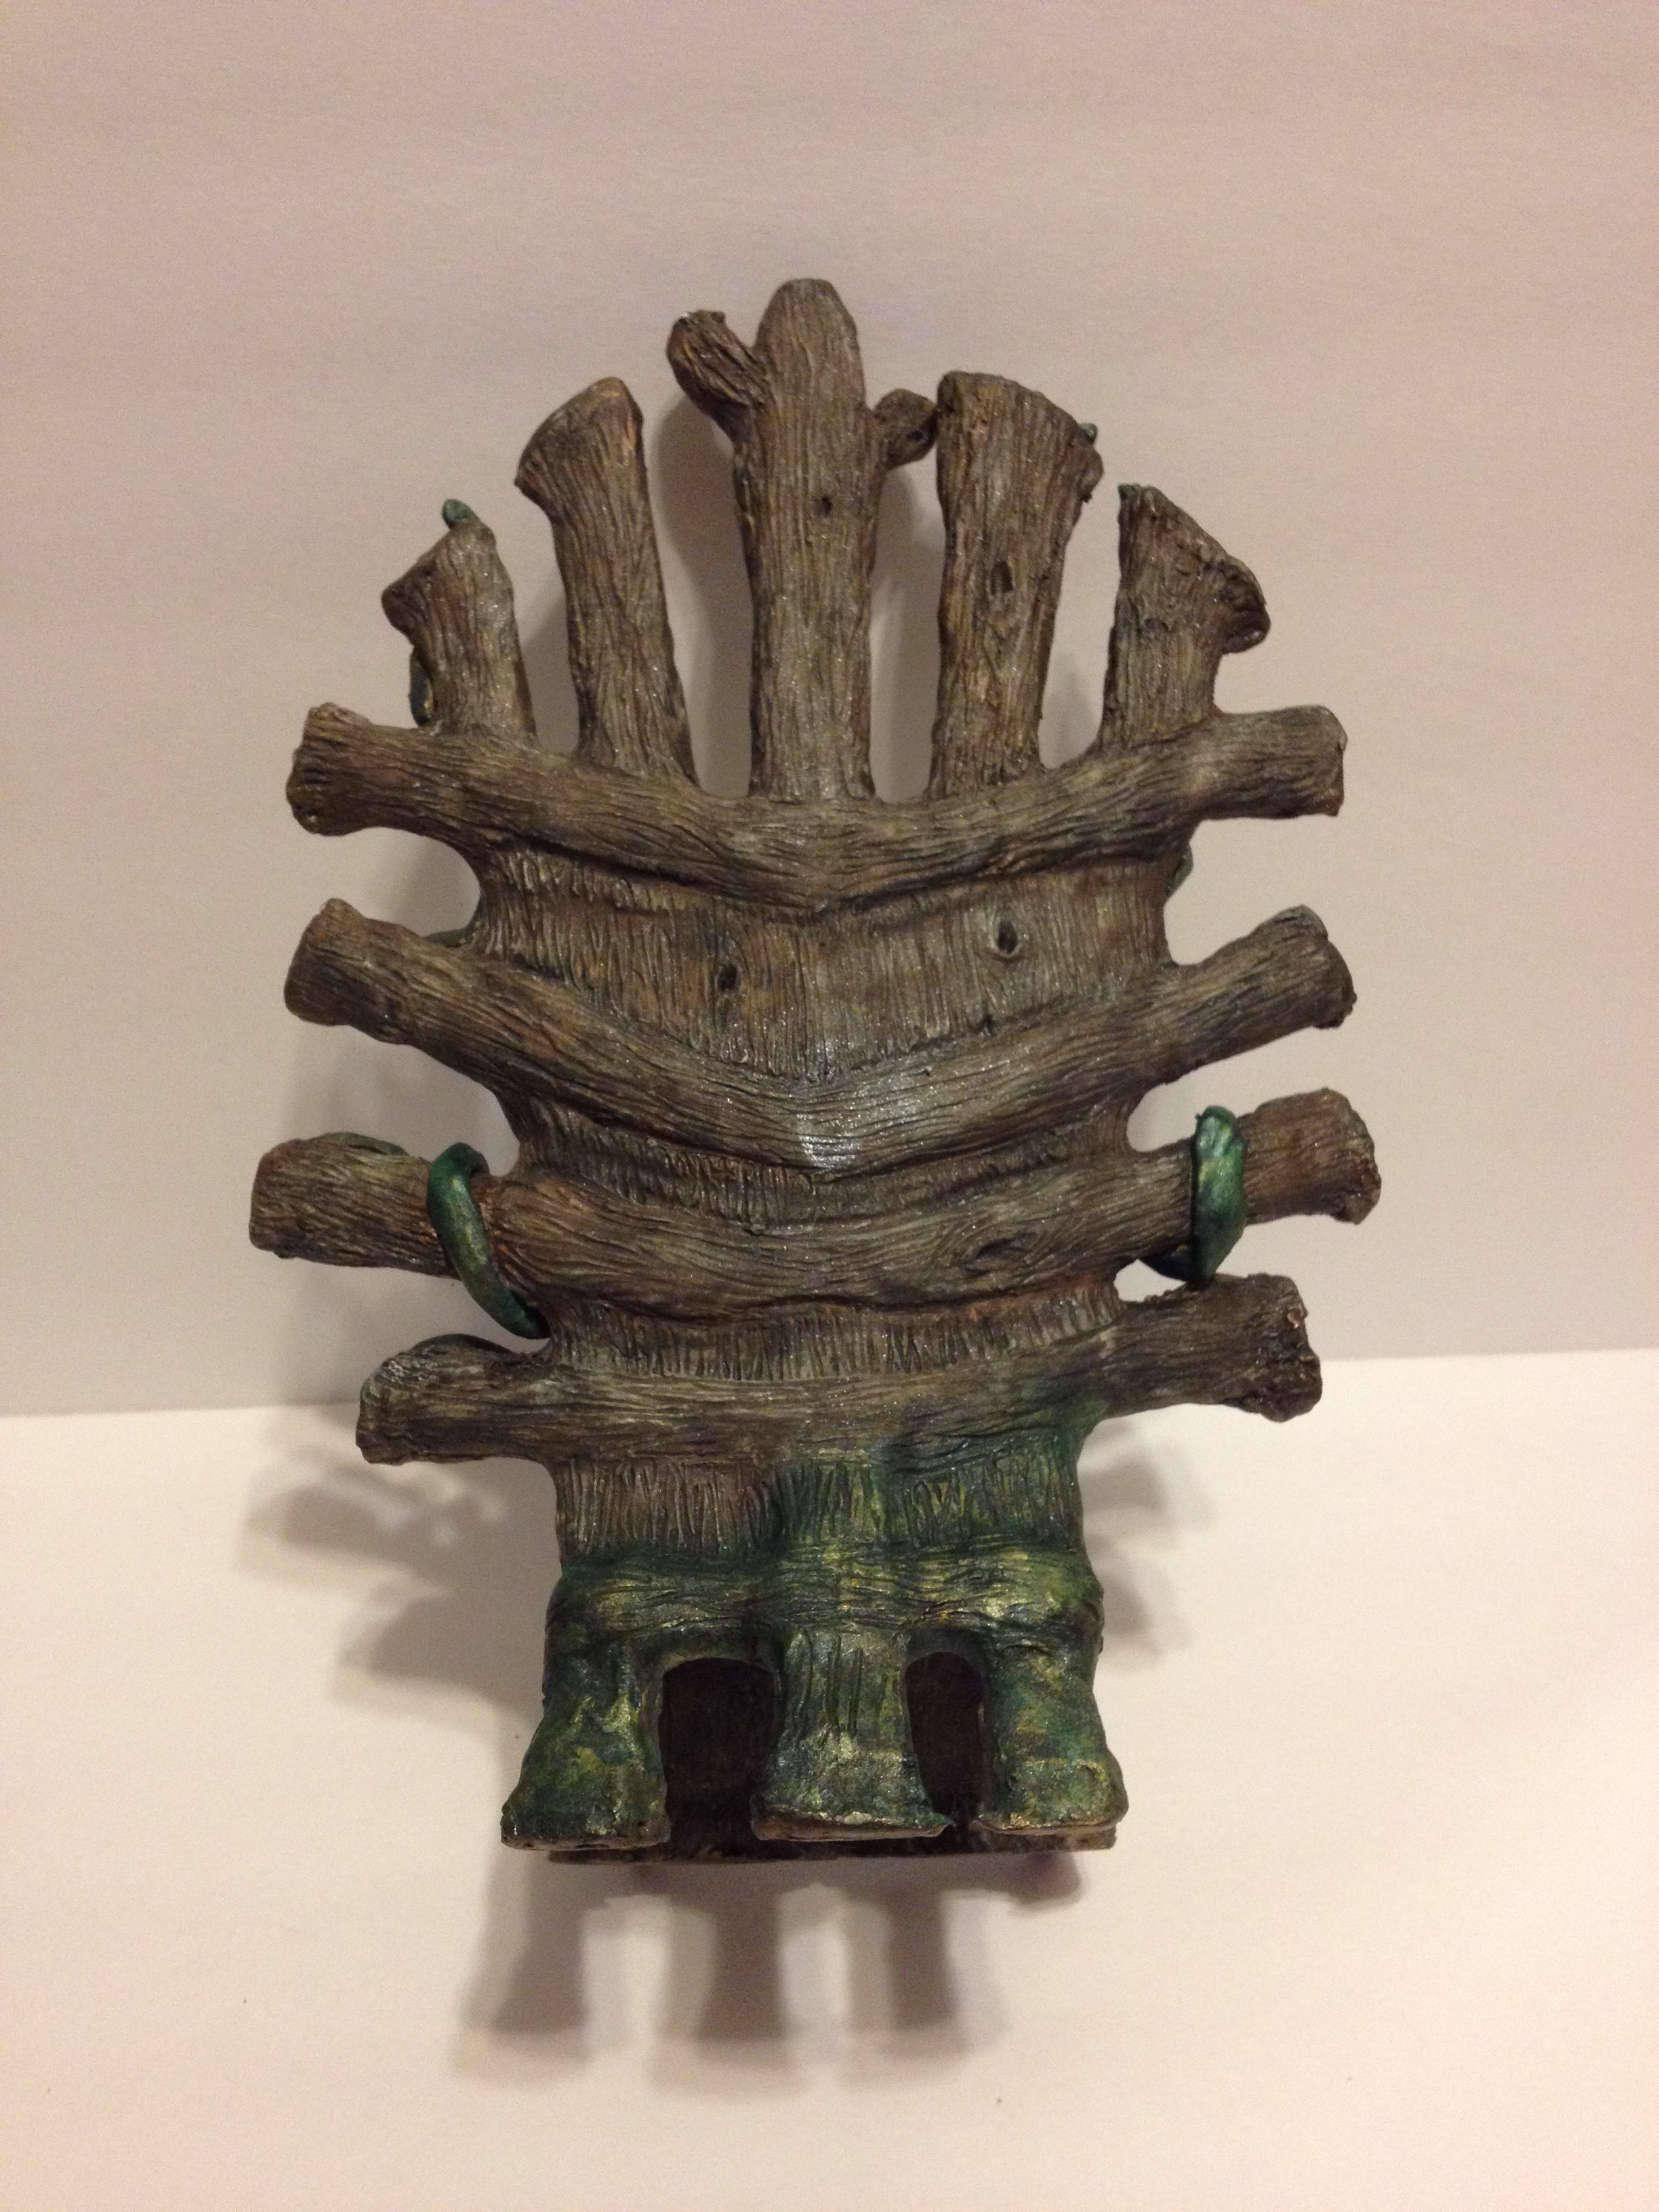
I apply the watered down black paint the back  too.

I will now decided where I want the leaves to go. Glue every single one carefully.

Once the hot glue is strong you can seal your piece with your favorite clear sealer and wait to dry.

Wait for the sealer to be fully dried and add the Mulberry paper roses to the Elf Fairy Throne.

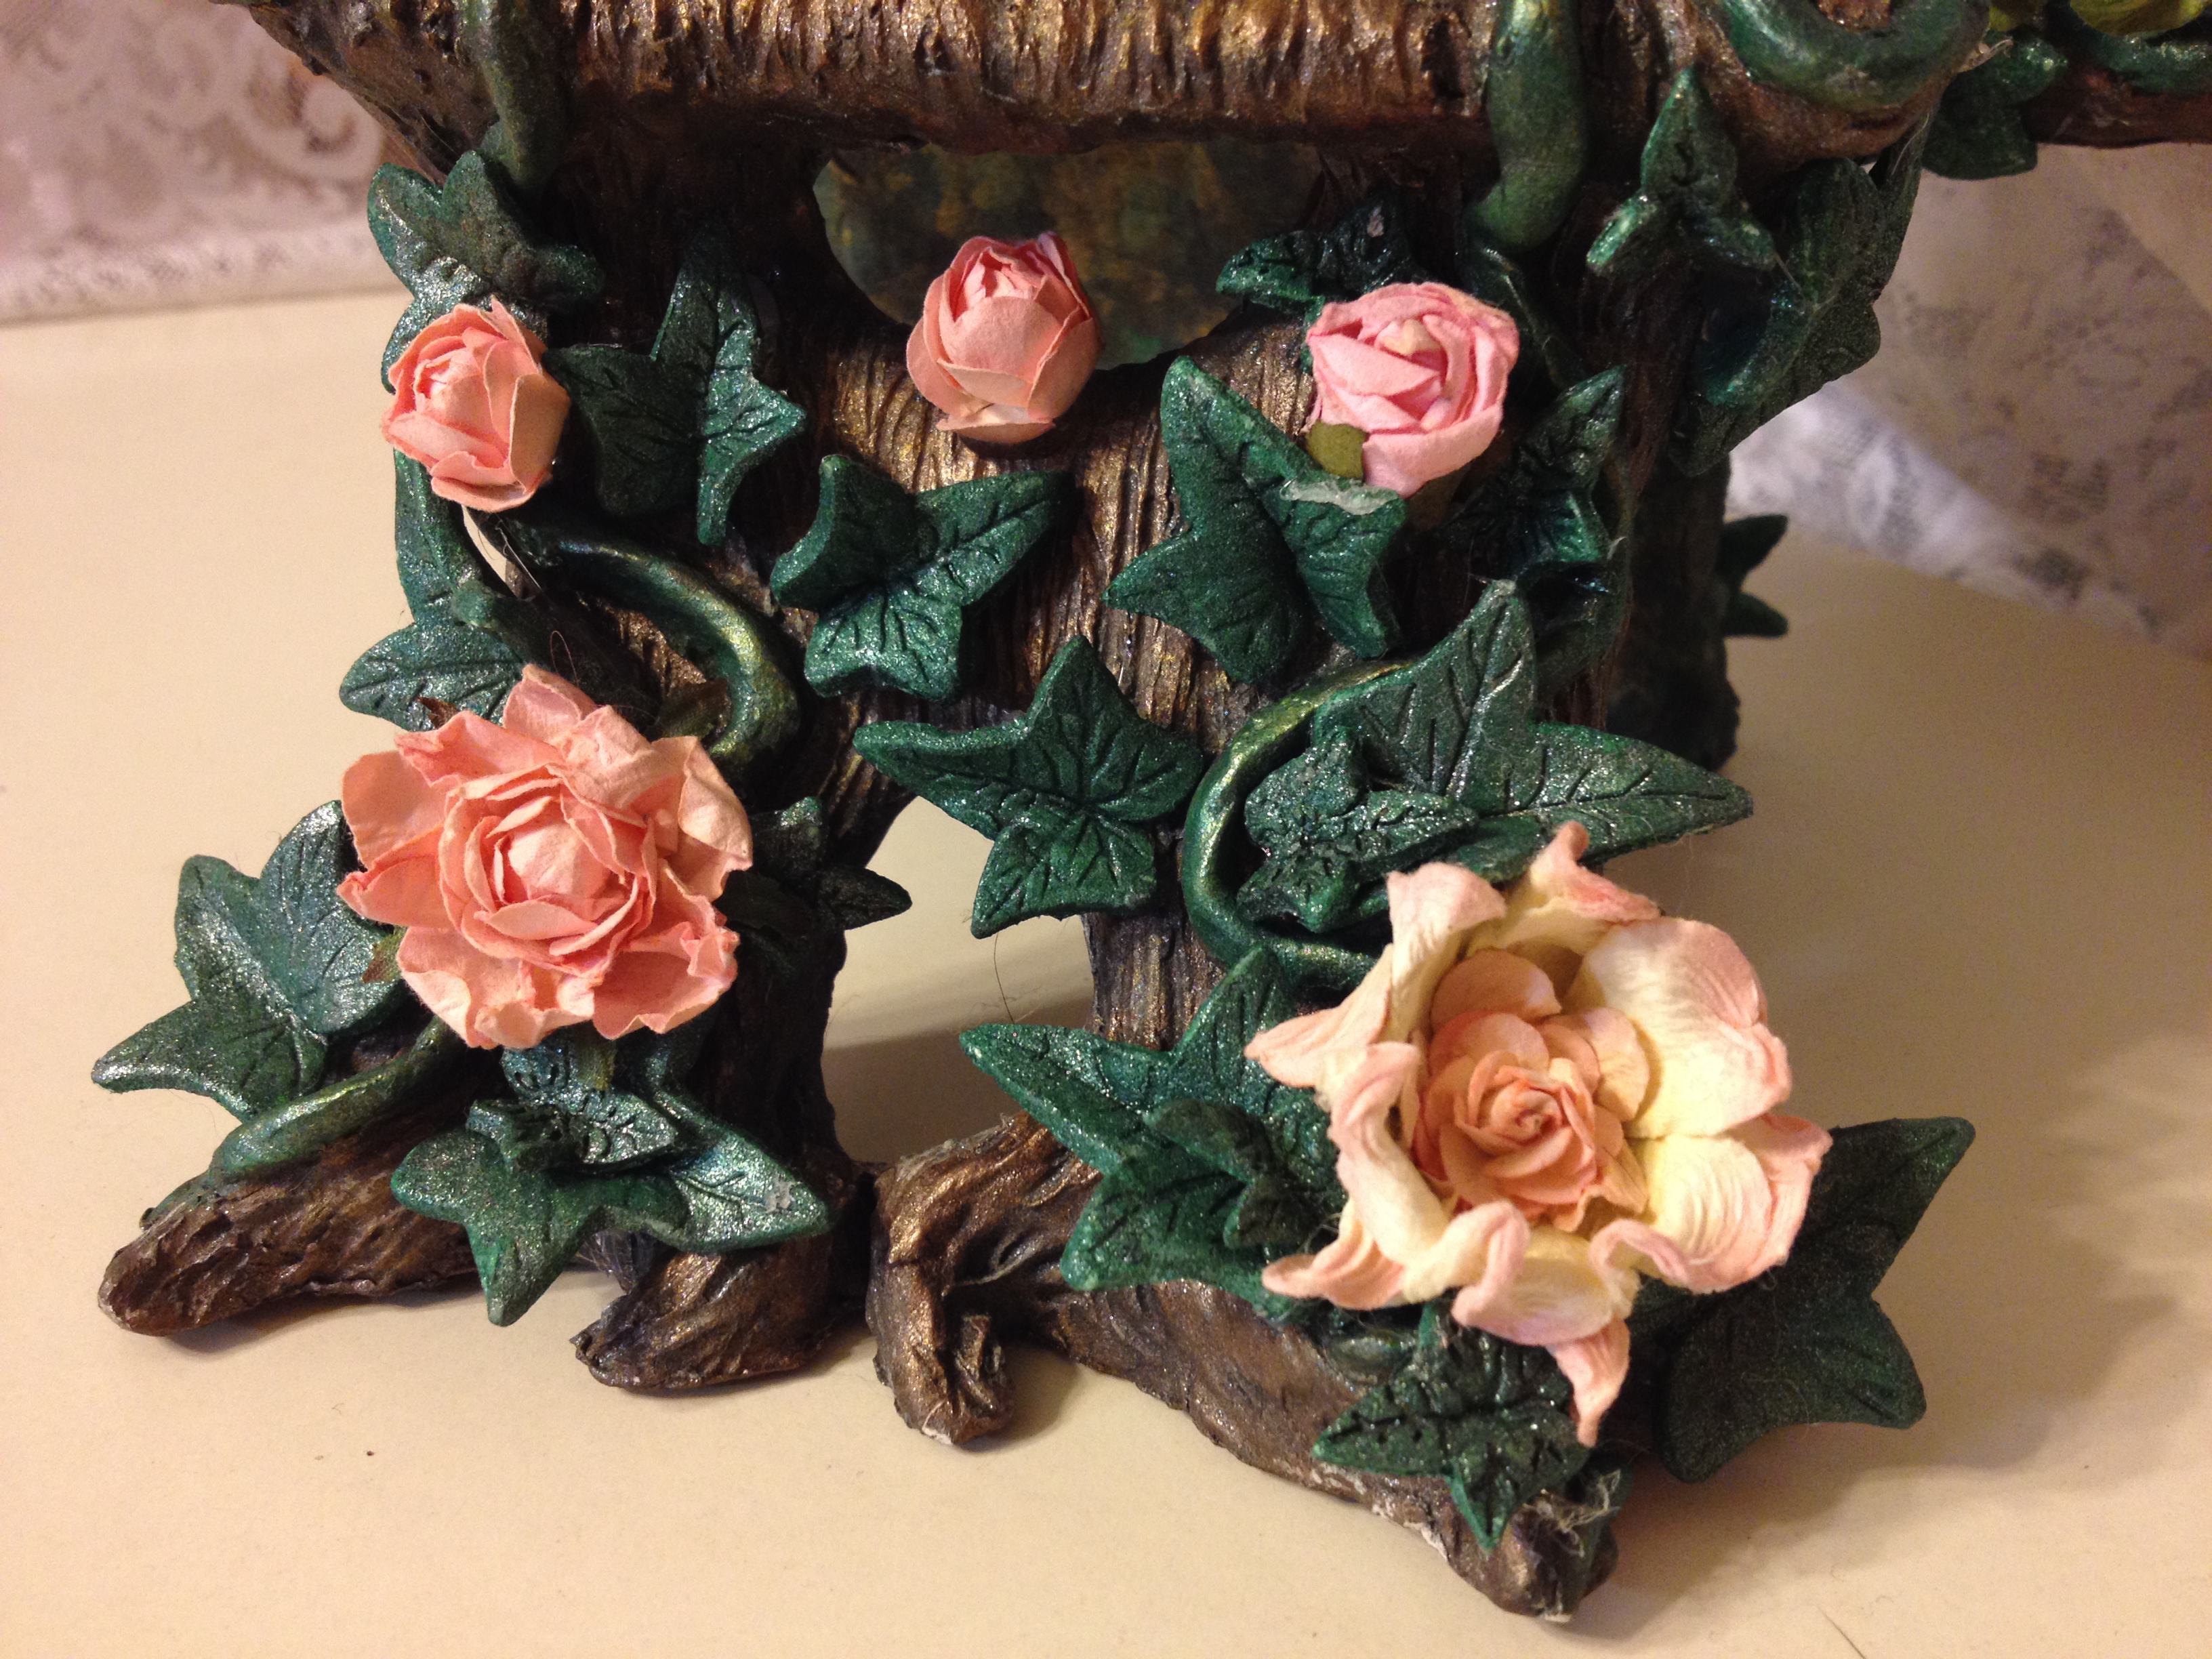
I purchase 4 different blooming stages of the flowers, so the piece will have a real mystical and magical feel.

I started to glue the rose buds to the top and in the mid section, then I glue the second open rose bud. Lower little by little to the fully open roses. I added the old roses one to the top of the Throne,  2 on each hand reach and one to the button right of the Throne leg.

One the back only one right on the center to make the rose pop.
Gloriann Irizarry has created this amazing paper clay fairy throne with vines and roses

Gloriann Irizarry has created this amazing paper clay fairy throne with vines and roses

Gloriann Irizarry has created this amazing paper clay fairy throne with vines and roses

Gloriann Irizarry has created this amazing paper clay fairy throne with vines and roses

Gloriann Irizarry has created this amazing paper clay fairy throne with vines and roses

~*~*~*~*~*~*~*~*~*~*~*~*~*~*~*~*~*~*~*~*~*~*~*~*~

My name is Gloriann Irizarry. I was born and raised in the beautiful Caribbean island of Puerto Rico. Ever since I can recall, I always had my hands on crayons, scissors and paper. My parents knew from the start how much I love to create!

As a mother of three young wonderful daughters, I find myself working, caring for my family, and taxiing kids from here to there for various sporting events.  I have to say I’m never bored!  I enjoy every little moment I spend with my girls, but will always continue to work time to create art into my daily schedule as that means doing what I love the most. My girls are learning the joys of creating also!

I love to sculpt and will never stop creating. I was born this way and for that I thank GOD every day. Art has been a great way to be creative and to express myself.  I like to keep my hands busy creating – whether it is unique jewelry, art dolls, oak sculpture figures, fairy wings for all your project needs, or even wigs and clothing for your sculptures.  I love all the variety in art! Why? because ART is so rewarding. Seeing your creation take form is an awesome feeling.

You can see more of my work on my website – ByGlori

~*~*~*~*~*~*~*~*~*~*~*~*~*~*~*~*~*~*~*~*~*~*~*~*~

.

.
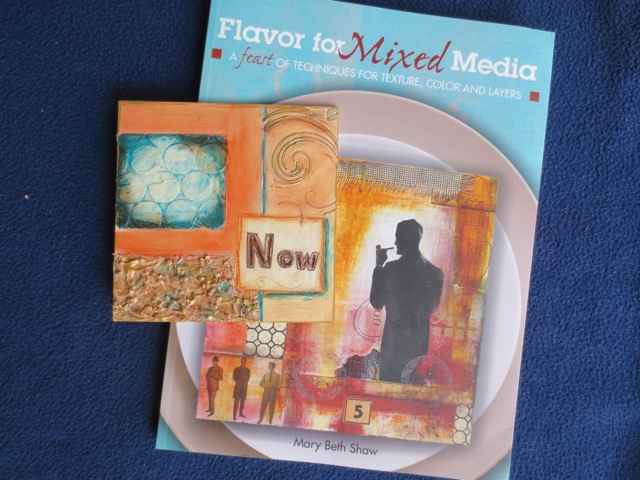
“Flavor for Mixed Media” by Mary Beth Shaw

~ * ~ 

This article was written by Michelle G. Brown

Mary Beth Shaw has put together “Flavor for Mixed Media – a feast of techniques for texture, colour and layers” with the mixed media artist who loves to get stuck in and set her hands dirty in mind. Published by North Light Books in 2011, Mary Beth brings her talents and those of 15 of her artist friends together for this feast of mixed media projects.

Mary Beth Shaw Stencil Girl

The key theme of Mary Beth’s book is to combine the skill and flavours of cooking with those of art, highlighting that “Art and food: Two of life’s most sensory pleasures and certainly two of my favourite things”. As I am NOT a particularly skilful cook, I did find the two themes clashed a little awkwardly at first but as I continued to feast on the wonderful colors and layers in Mary Beth’s projects I began to understand how the two themes could be used side by side.

The chapters run us through Preparation and making sure our artistic “pantry” is properly stocked. Then we run through Color, Texture, Layers, Flavors and Combinations. Each chapter includes three guest artists and three projects, so not only do we hear form 15 very different mixed media artists, we also have 15 projects to sink our teeth into. Mary Beth also offers alternatives to consider when one of the key “ingredients” is missing. Many of the guest artists also provide real recipes which adds a real element of tying the cookbook and art book together.

Flavor for Mixed Media Mary Beth Shaw North Light Books

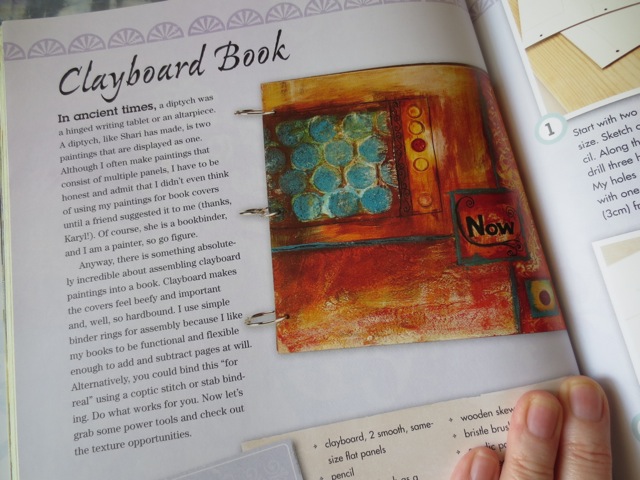
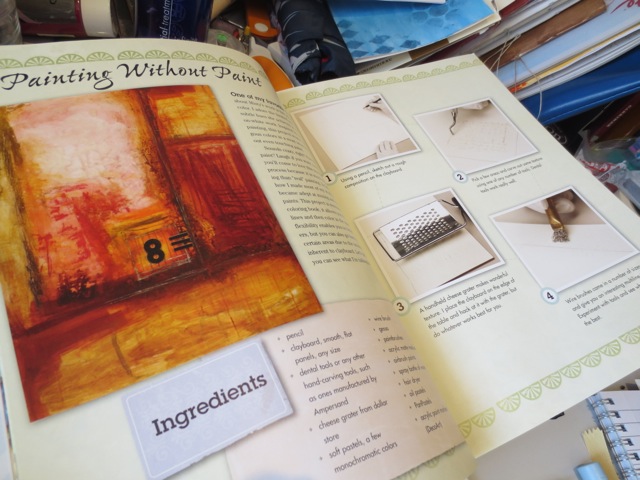
My attention was captivated by two projects; the “Painting without Paint” piece (p.16) and the “Clayboard book” (p.38). I loved the colors used and the texture and depth of layers in the final pieces. As I had actually bought some clayboard on a recent trip to the US, I was eager for a project that guided me through how to get the best out of the product and not just use it as another variation of canvas.

Flavor for Mixed Media Mary Beth Shaw North Light Books

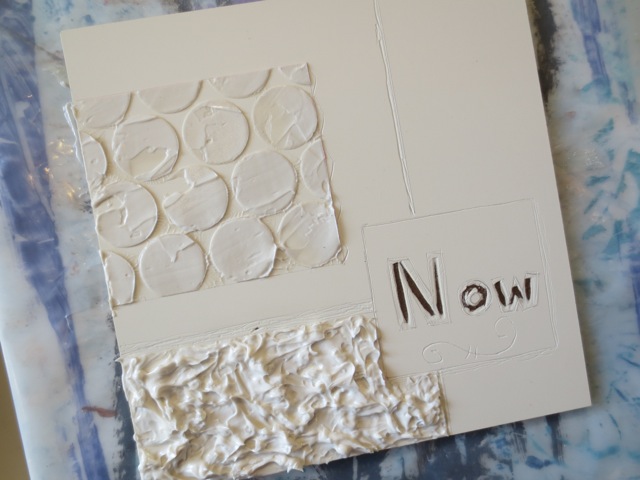
Claybord(™) is made by Ampersand and has a wood backing with a “Ultra-smooth clay surface” across the top. Mary Beth had us start by sketching out a rough layout and then scratching into the clay surface to add the first layer of texture. Mary Beth put her Dremel to good use here; I used an awl and stamp carving tools (probably not the proper way to use them!) to make my marks. Then I used Impasto medium with sequence scrap to add the circles. I used post-it notes to mask the areas around where I wanted the texture added. Mary Beth used Glass Bead Gel to add more texture – I added some seed beads into the Impasto medium – not quite the same effect but in the spirit of “making do” I ploughed on! I left the piece to sit over night so the Impasto medium could dry completely.

Flavor for Mixed Media Mary Beth Shaw North Light Books

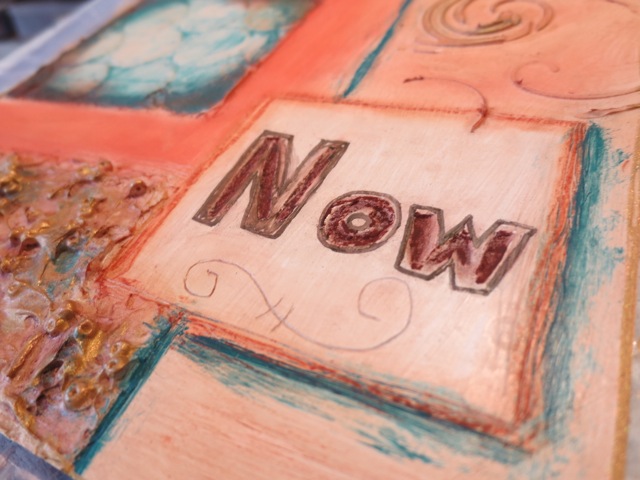
Next I combined the “Painting without Paints” technique with the Clayboard project colours by using artist pastels and chalks. I really had no idea how these soft mediums would go onto the clapboard but I was very brave and kept going! It was BLISS! The chalks went on SO smoothly and they were easy to blend and add depth and shading. It was easy to remove some of the colour as well. Some of the lines weren’t as fine as I would have liked as the pastels were thick, but I liked the end result. I used the Golden paint teal to add the color that goes so well with the earthy browns.

Flavor for Mixed Media Mary Beth Shaw North Light Books

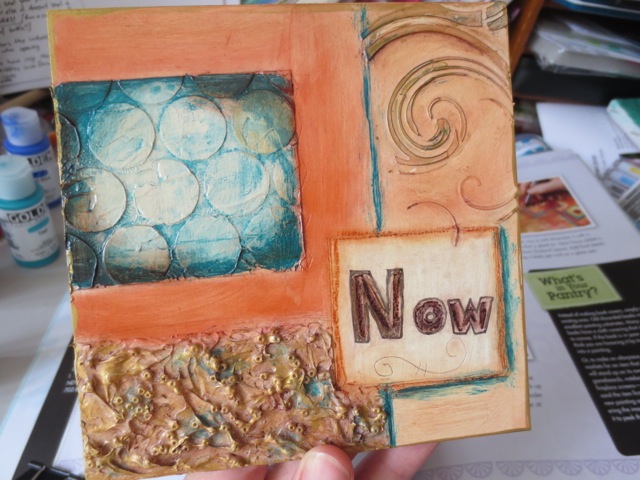
I highlighted the “Now” letters with a brown marker and added highlights with gold acrylic paint on a dry brush. Once the paint was dry I coated the whole piece with spray glass varnish. When this was dry the pastels and chalk were sealed and now won’t rub off.

Flavor for Mixed Media Mary Beth Shaw North Light Books

I was very pleased with the results.

Overall Verdict

Overall such a fun book, especially for those ready to advance your mixed media skills or those fearless artists who are quite willing to jump straight into the deep end of the mixed media techniques pool. The combination of 15 artists and 15 projects certainly provides a wide range of different styles.

~*~*~*~*~*~*~*~*~*~*~*~*~*~*~*~*~*~*~*~*~*~*~*~*~

Michelle G. Brown is passionate about mixed media art and enjoys sharing her knowledge and techniques with you to allow you to express your own creativity. Michelle understands that many of us have an inner need to create. By learning a few basic techniques the amazing world of mixed media art is accessible to everyone!

Michelle lives with her husband and two boys in Melbourne, Australia.

~*~*~*~*~*~*~*~*~*~*~*~*~*~*~*~*~*~*~*~*~*~*~*~*~


~*~*~*~*~*~*~*~*~*~*~*~*~*~*~*~*~*~*~*~*~*~*~*~*~

Disclosure: This book was bought with our own money.  All opinions are that of the MixedMediaArt team. Some links on this page may be affiliate links and any purchases help to support the ongoing work by MixedMediaArt.
.

.

Creating Landscapes with Alcohol Inks

~ * ~

This article was written by Melanie Statnick

Supply List:

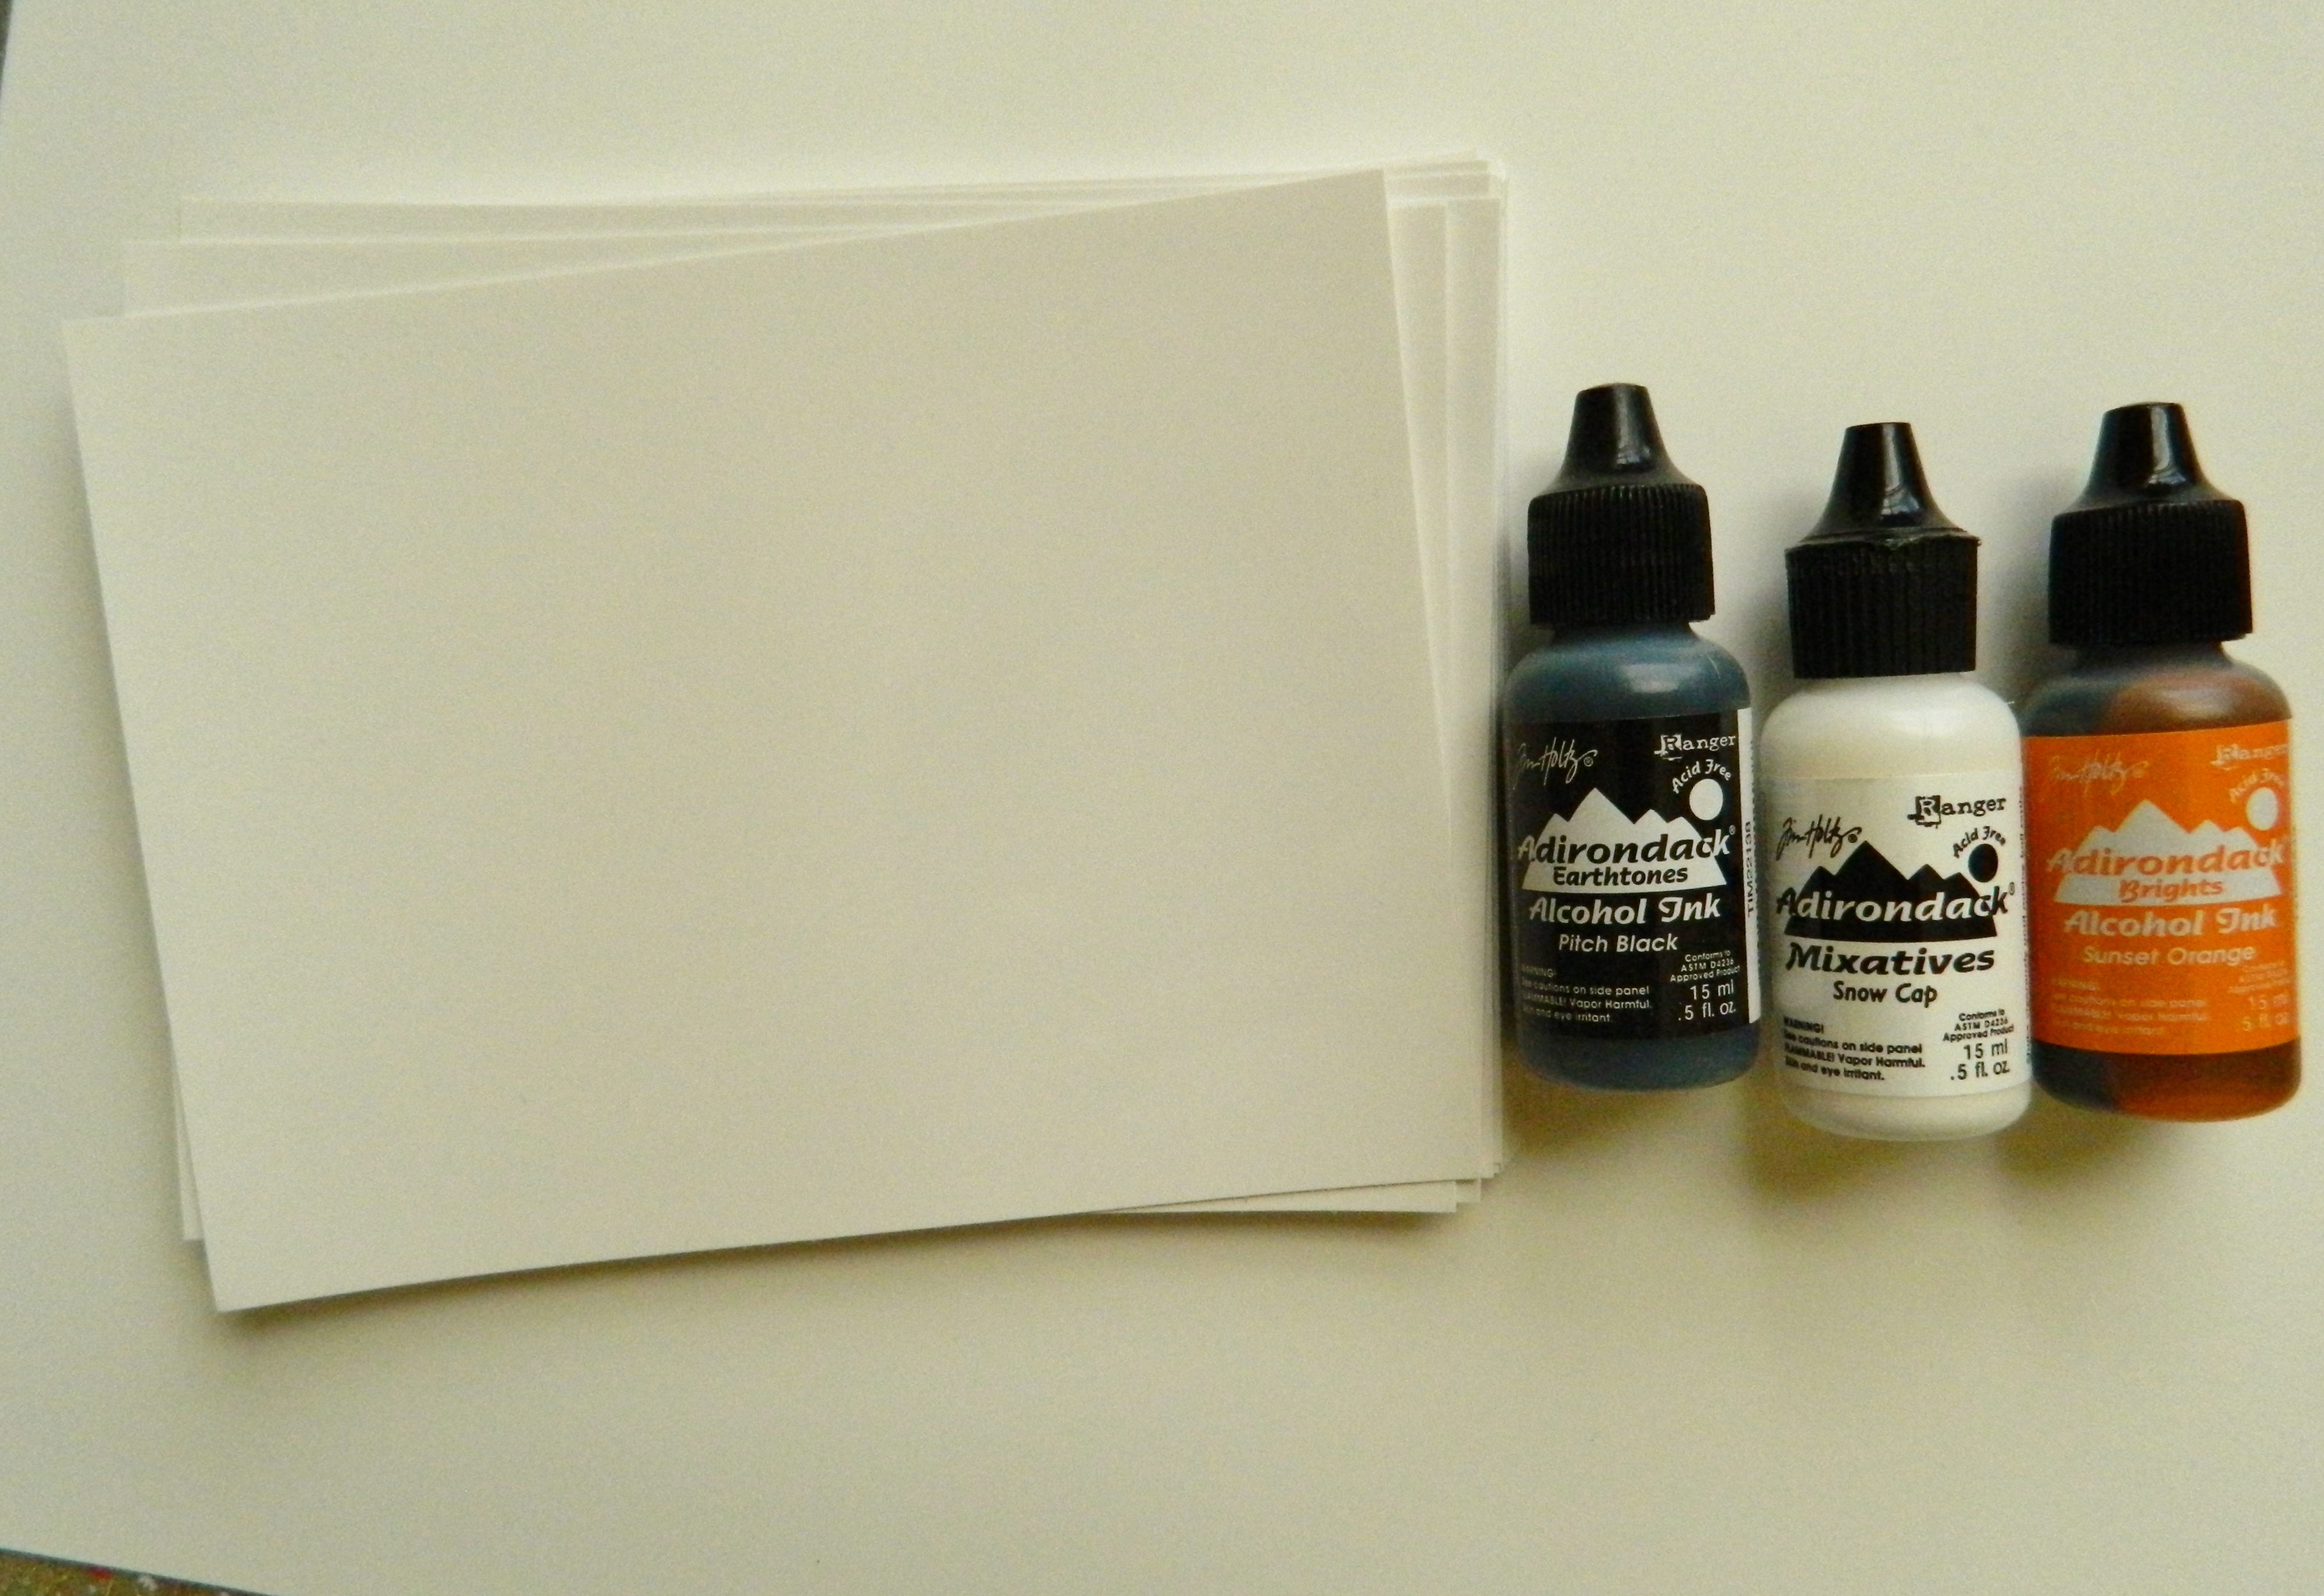
Ranger Alcohol Inks in a variety of colors

Alcohol Blending Solution

Alcohol ink cardstock and/or Yupo paper pad

Waterproof ink pad

Stamps of choice

Old toothbrush

Gloves

Paper towel

Small glass bowl

Instructions:

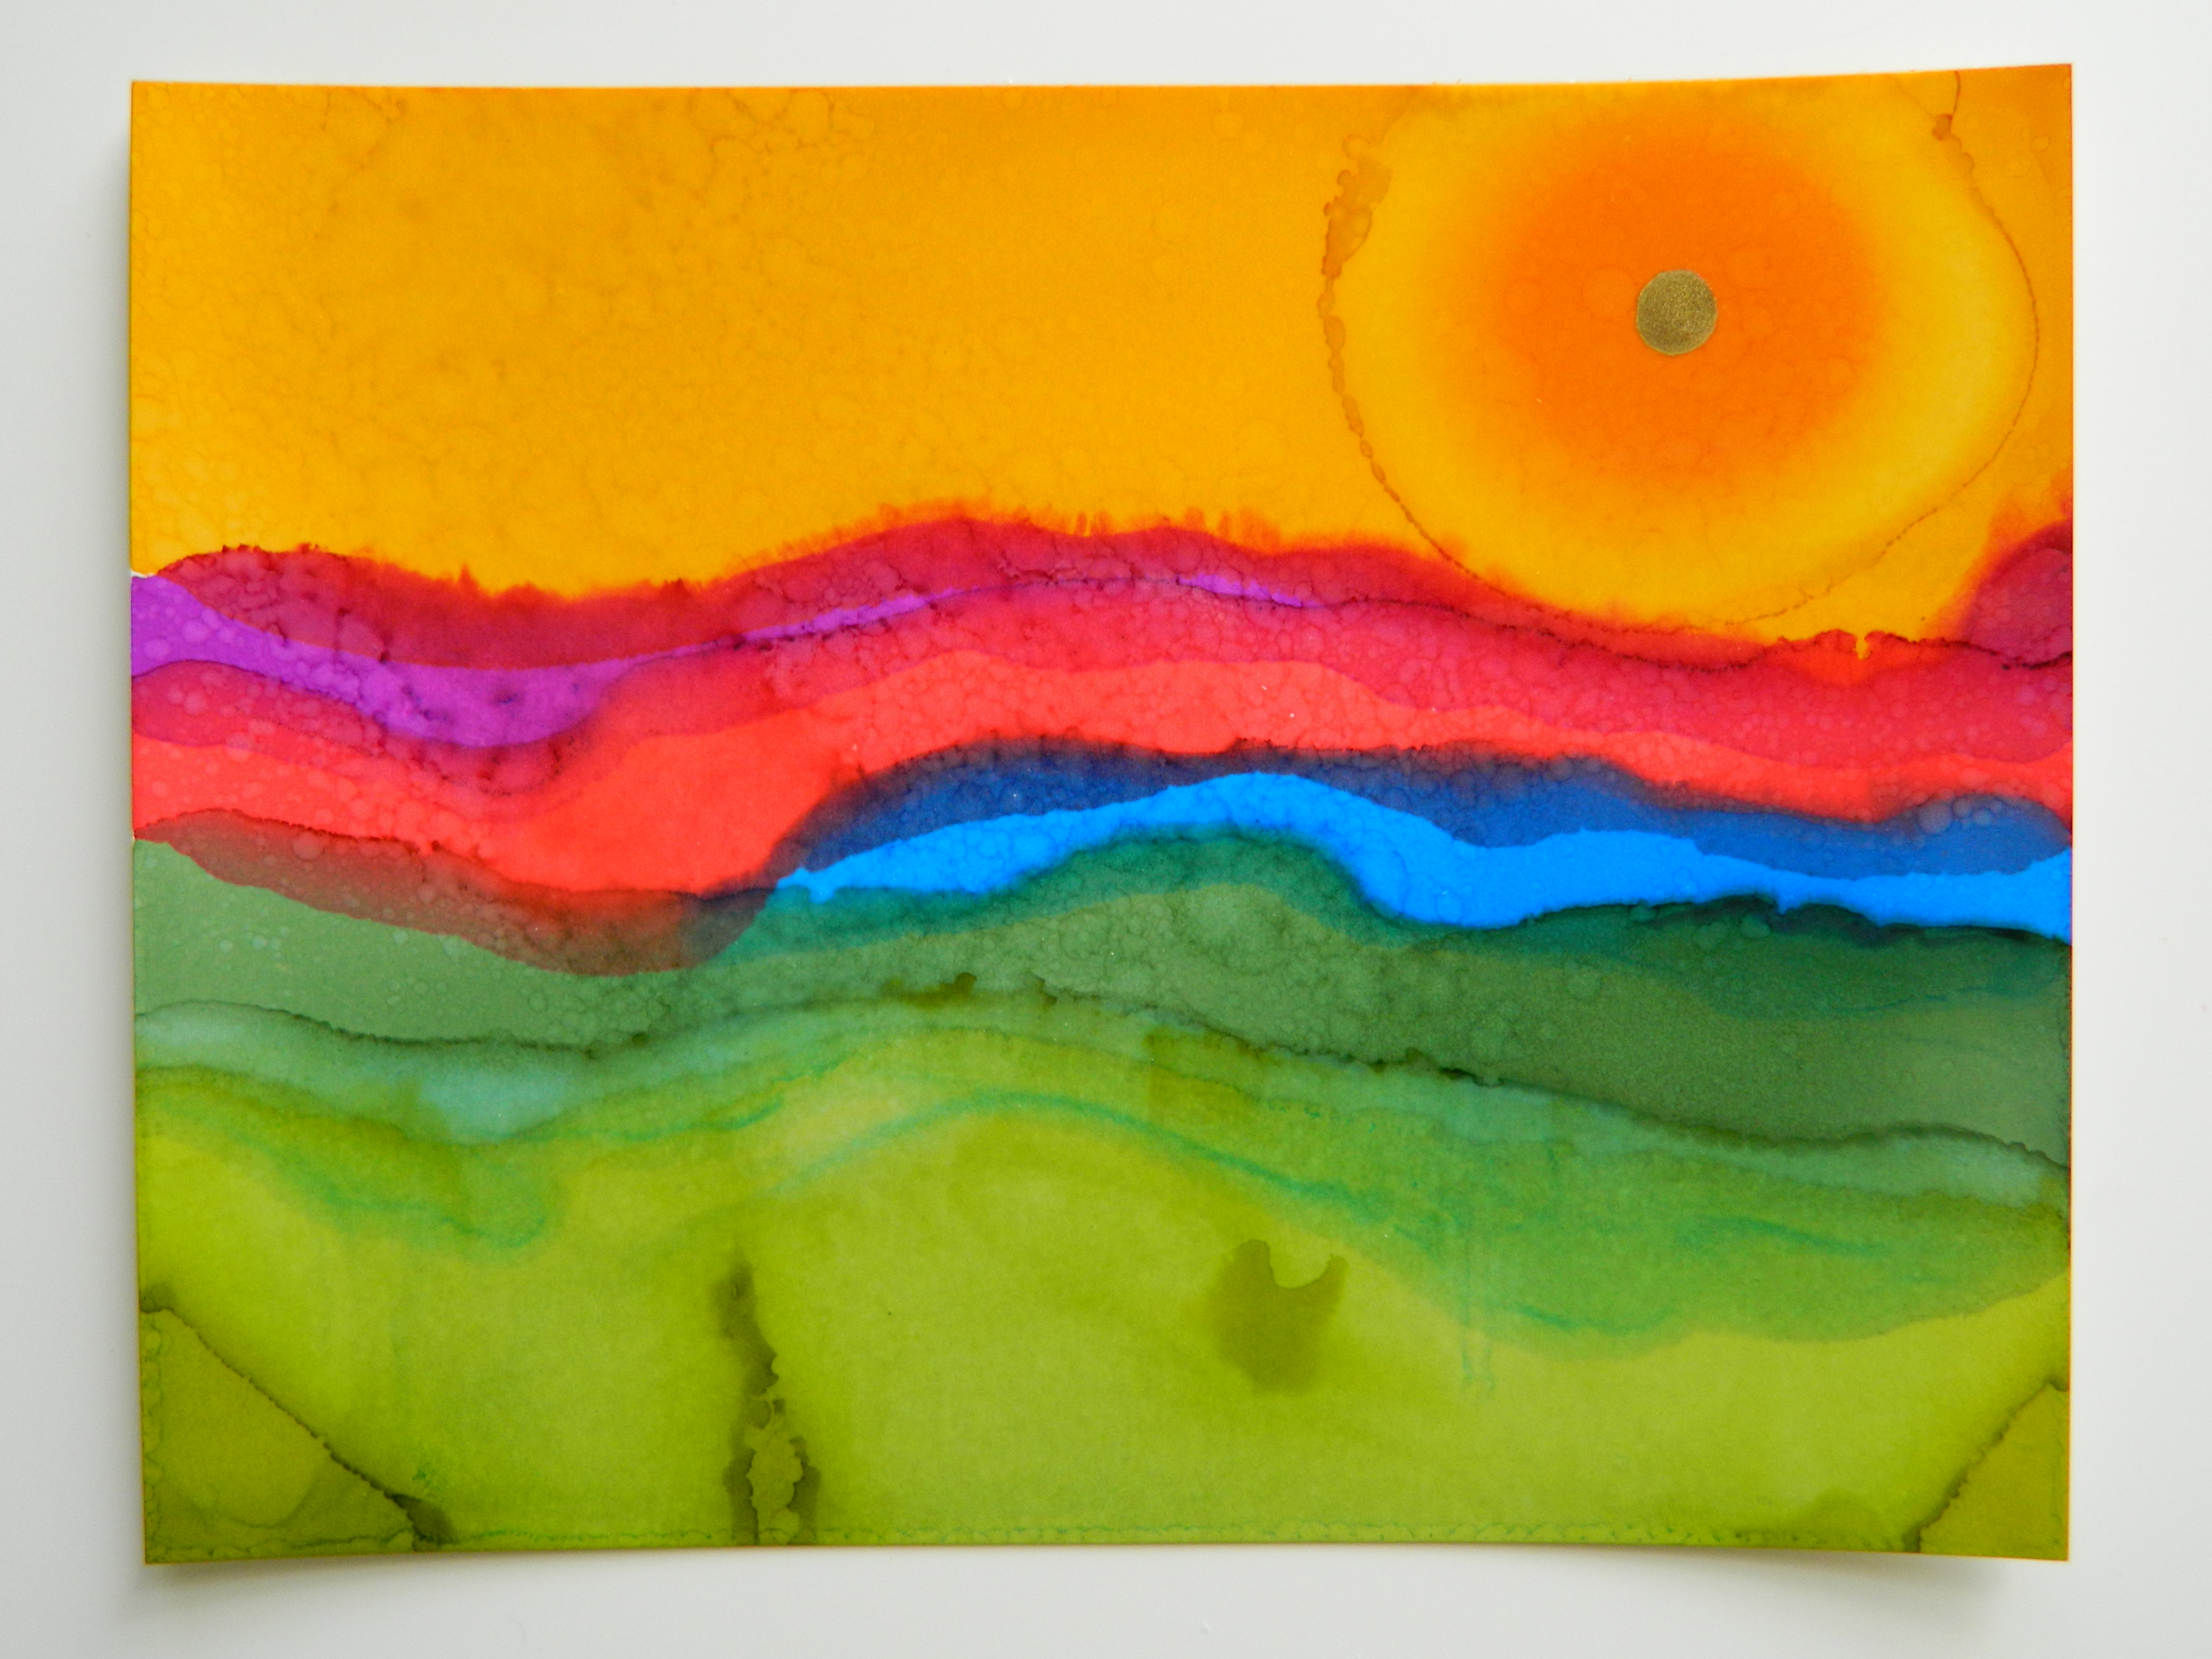
I have had the Ranger Alcohol inks on hand since they were first introduced. Since then I have seen many different brands and ink tools to use with them. I wanted to take advantage of what I already had invested in and find something new and fun to do.  Mixed media backgrounds can be made many different ways. I have always admired the work of acrylic landscapes. I’m not as tight in my painting and the Alcohol inks allow for some experimental fun. Let me guide you through a quick and addictive background technique with Alcohol inks by Ranger.

Creative lovely backgrounds on Yupo with inks

Creative lovely backgrounds on Yupo with inks

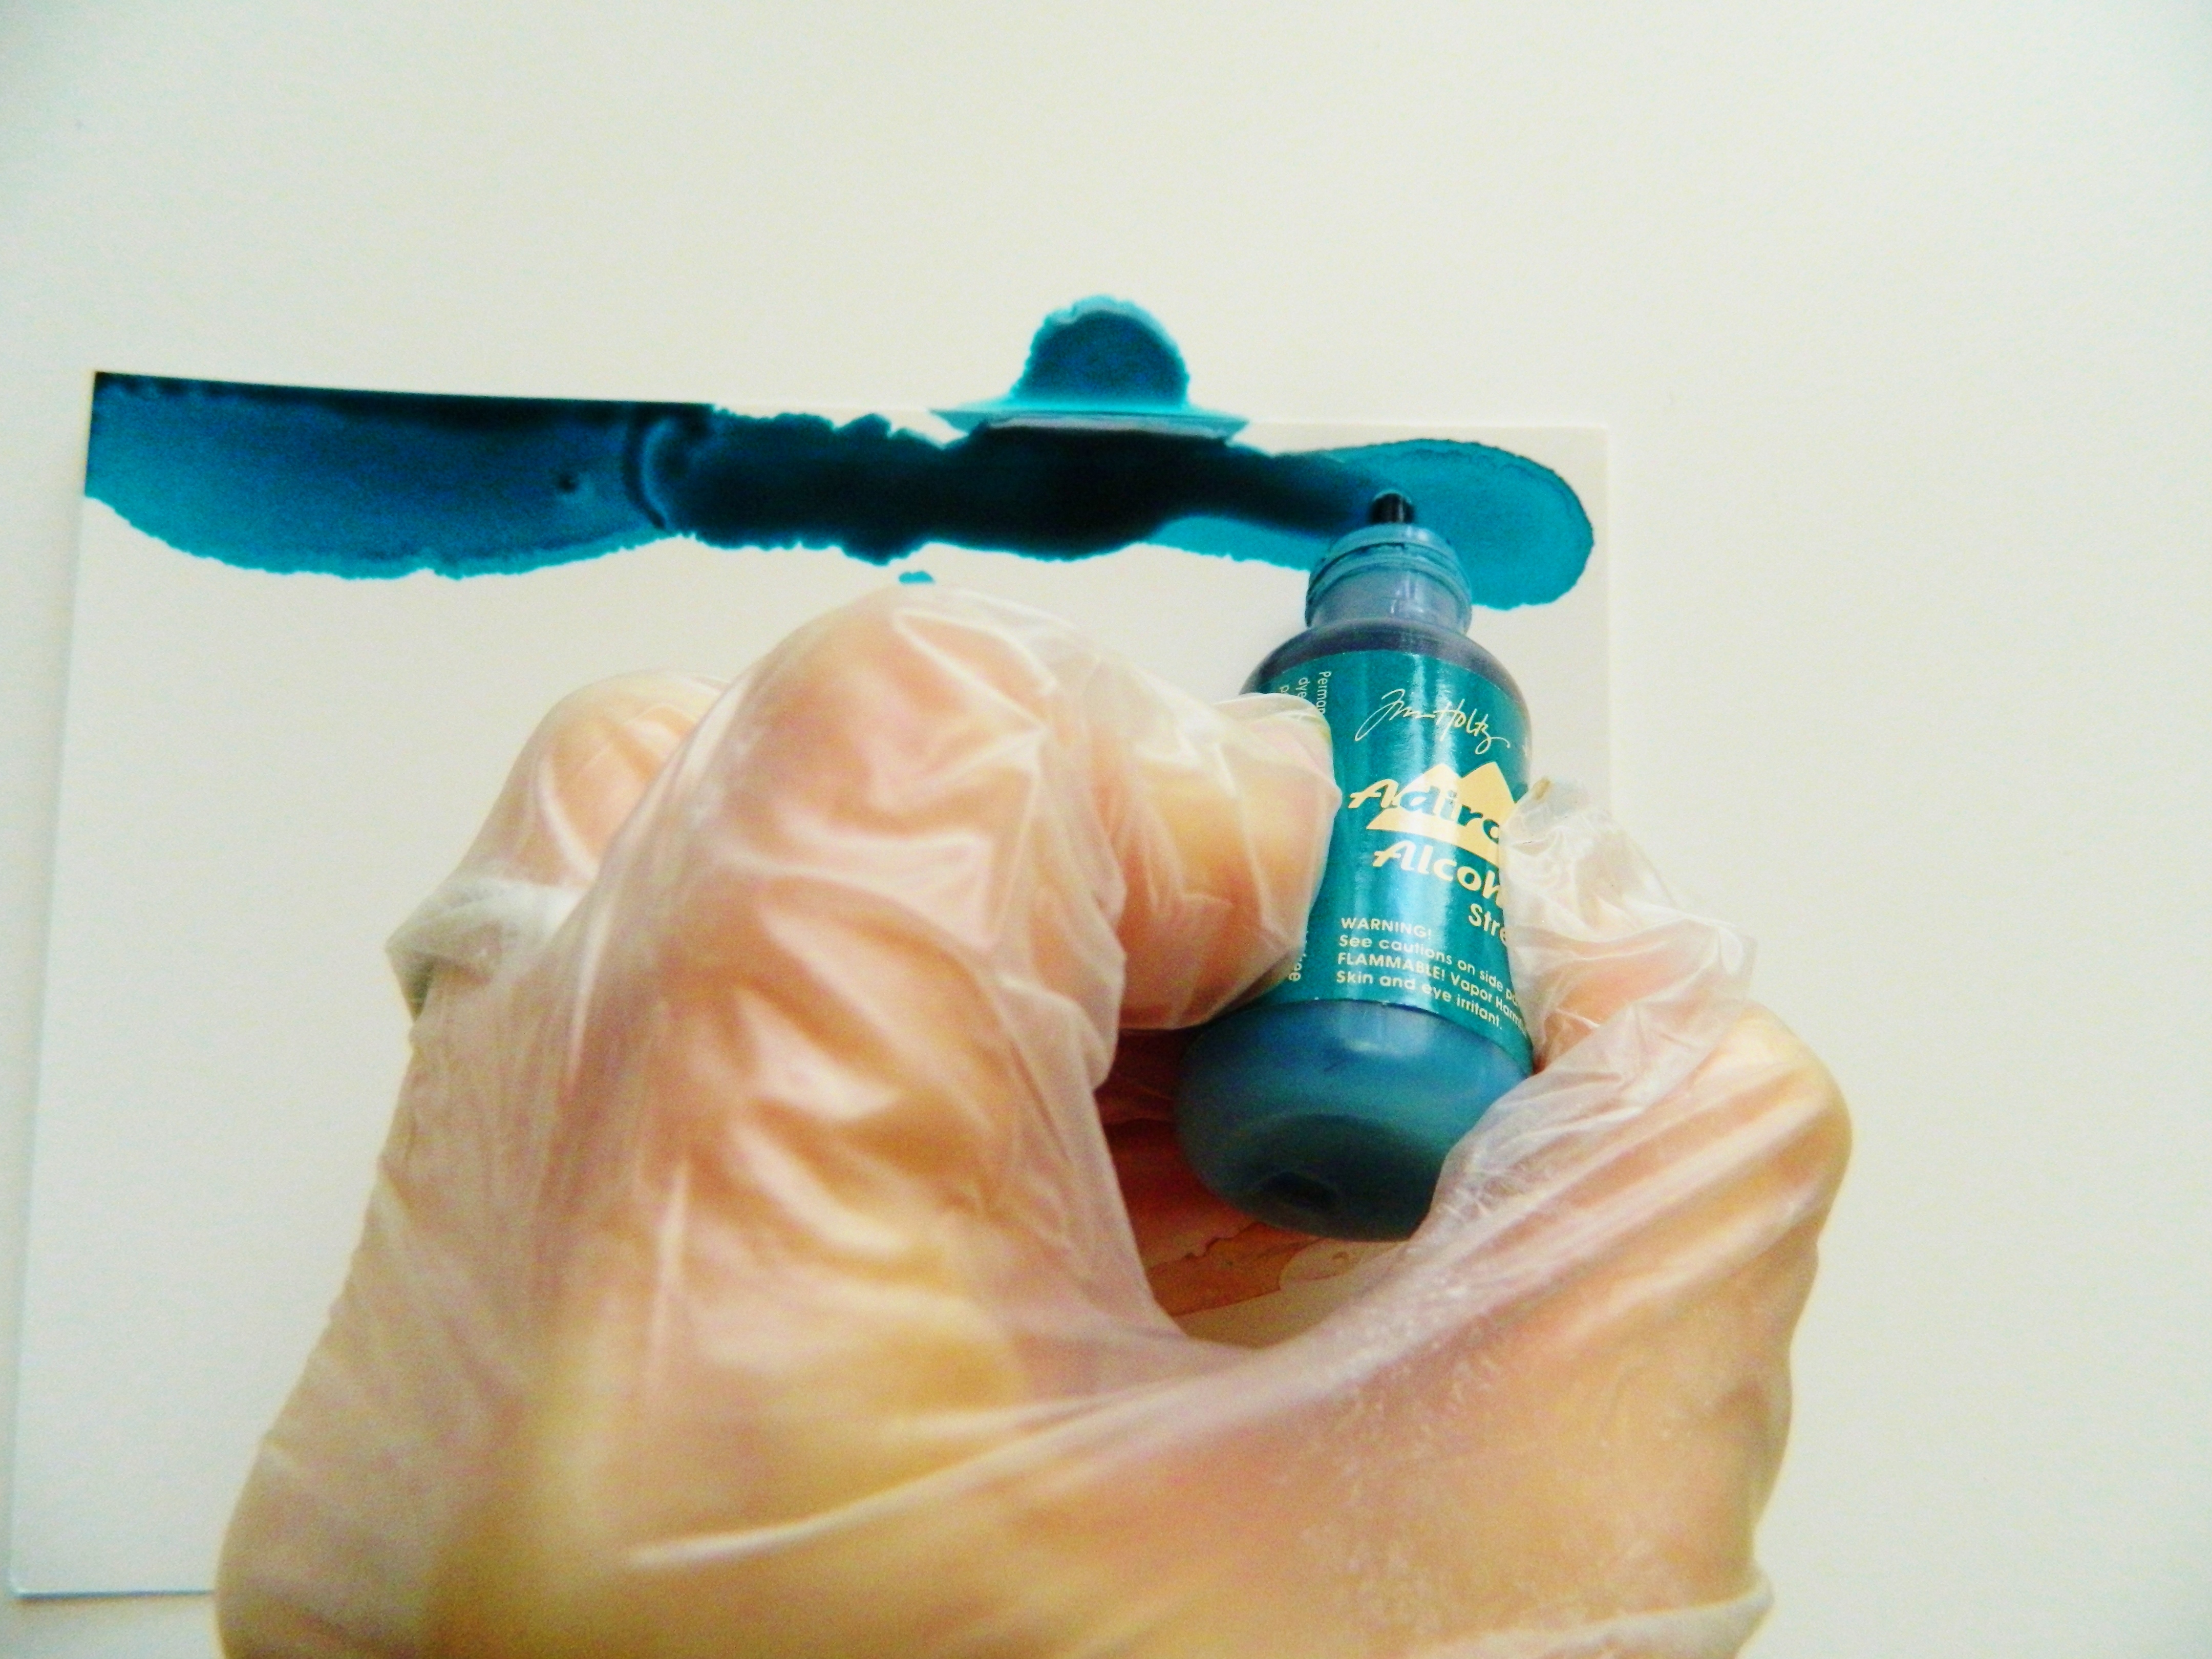
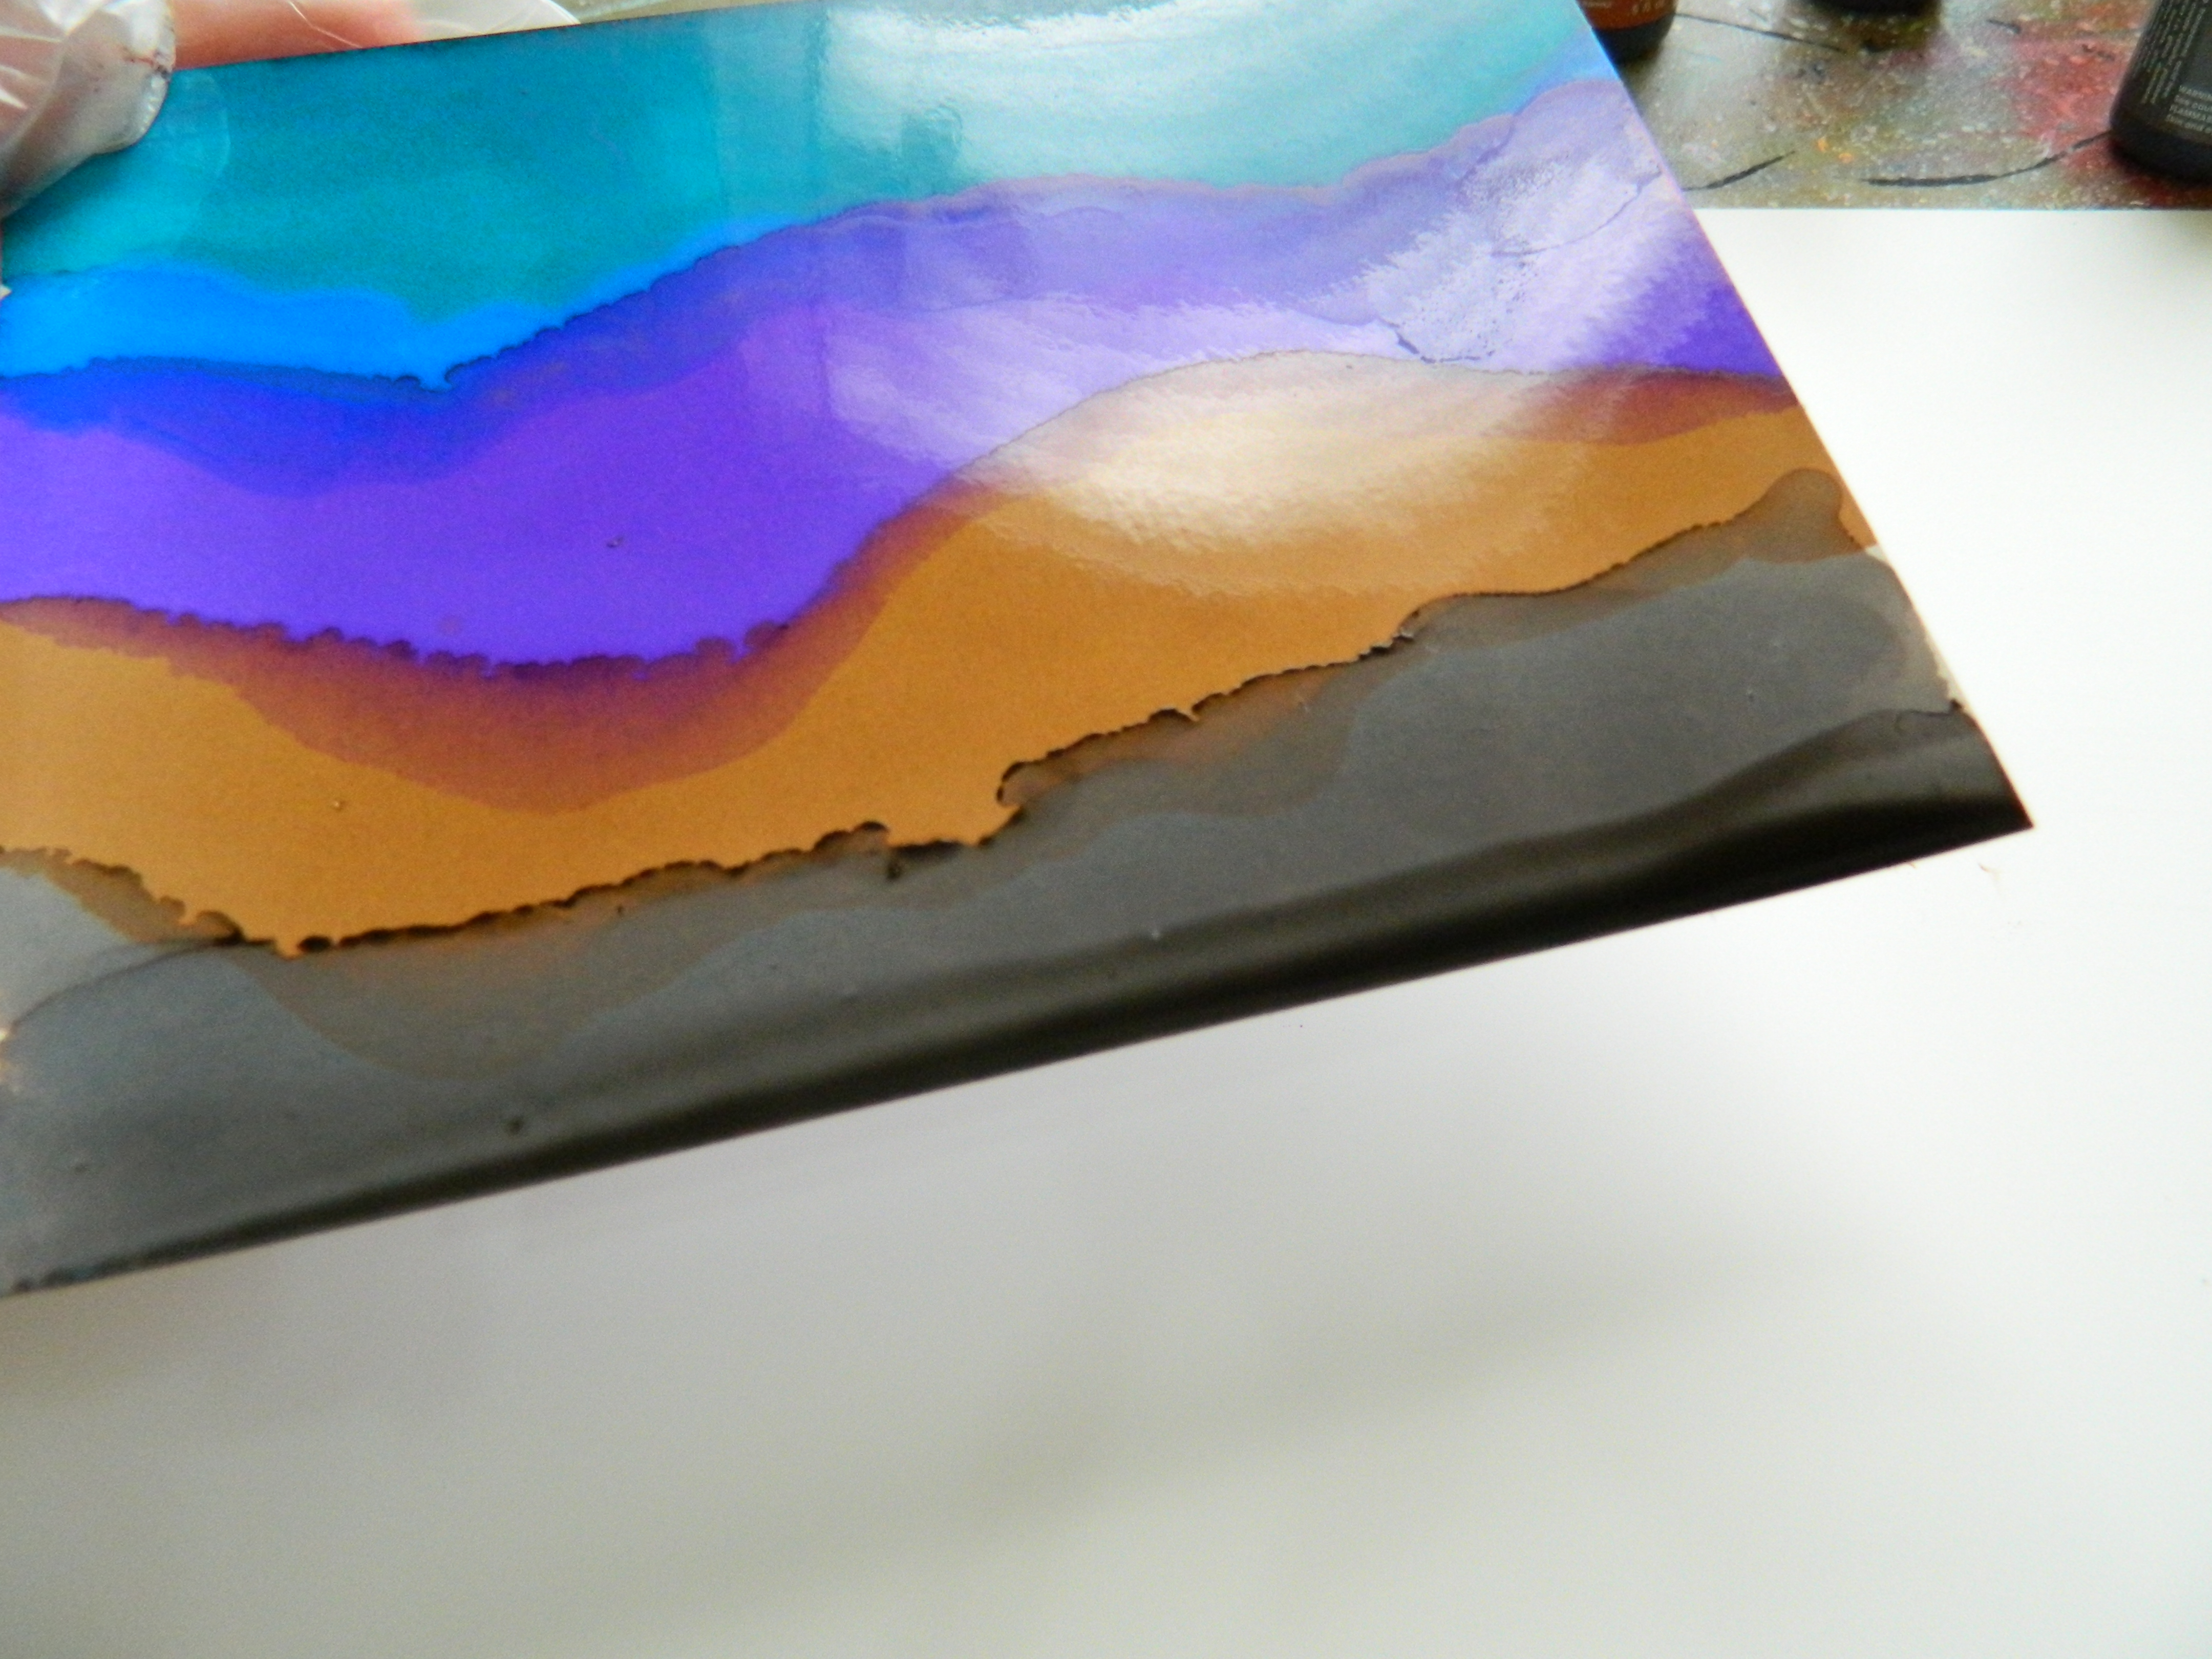
I started with picking a large verity of the ranger ink line. Wearing gloves I picked a sky blue ink color and began by spreading the ink from side to side. I moved the card stock/or Yupo paper from side to side allowing the ink to move back and forth across the paper.  The ink will dry fast. I also found that on Yupo paper the ink can become tacky in heavier applied areas.

Creative lovely backgrounds on Yupo with inks

Creative lovely backgrounds on Yupo with inks

Creative lovely backgrounds on Yupo with inks

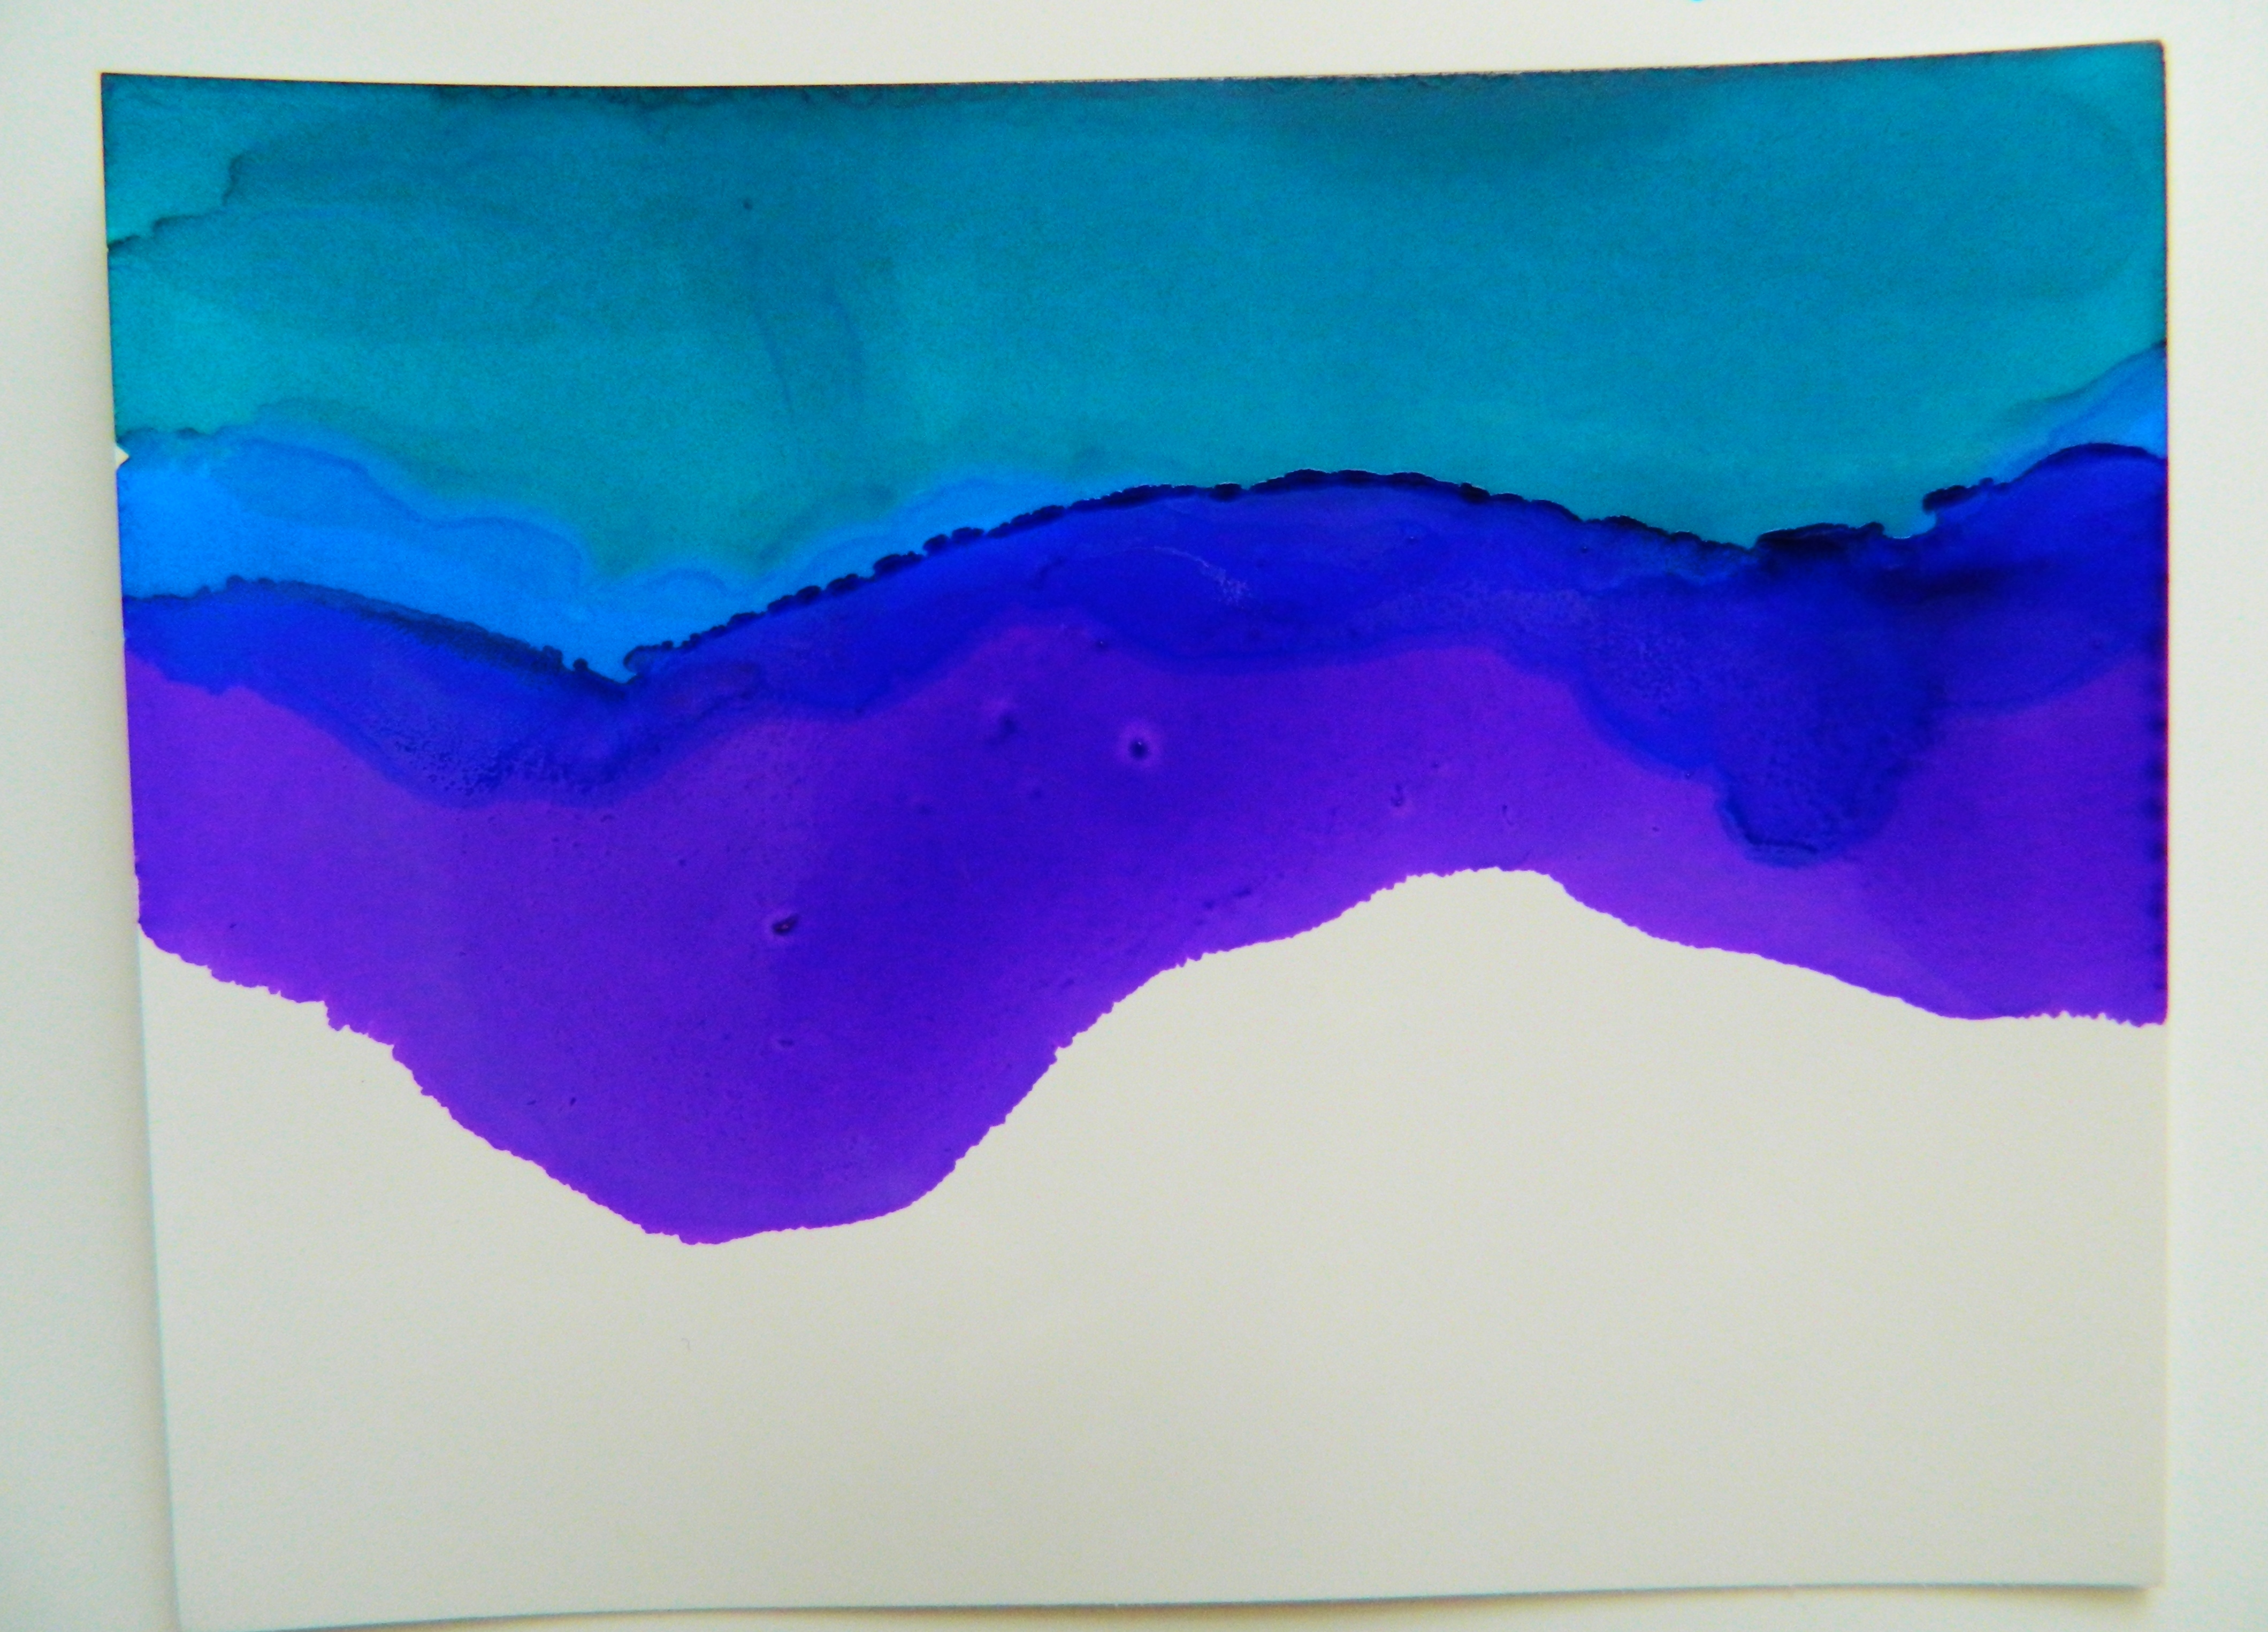
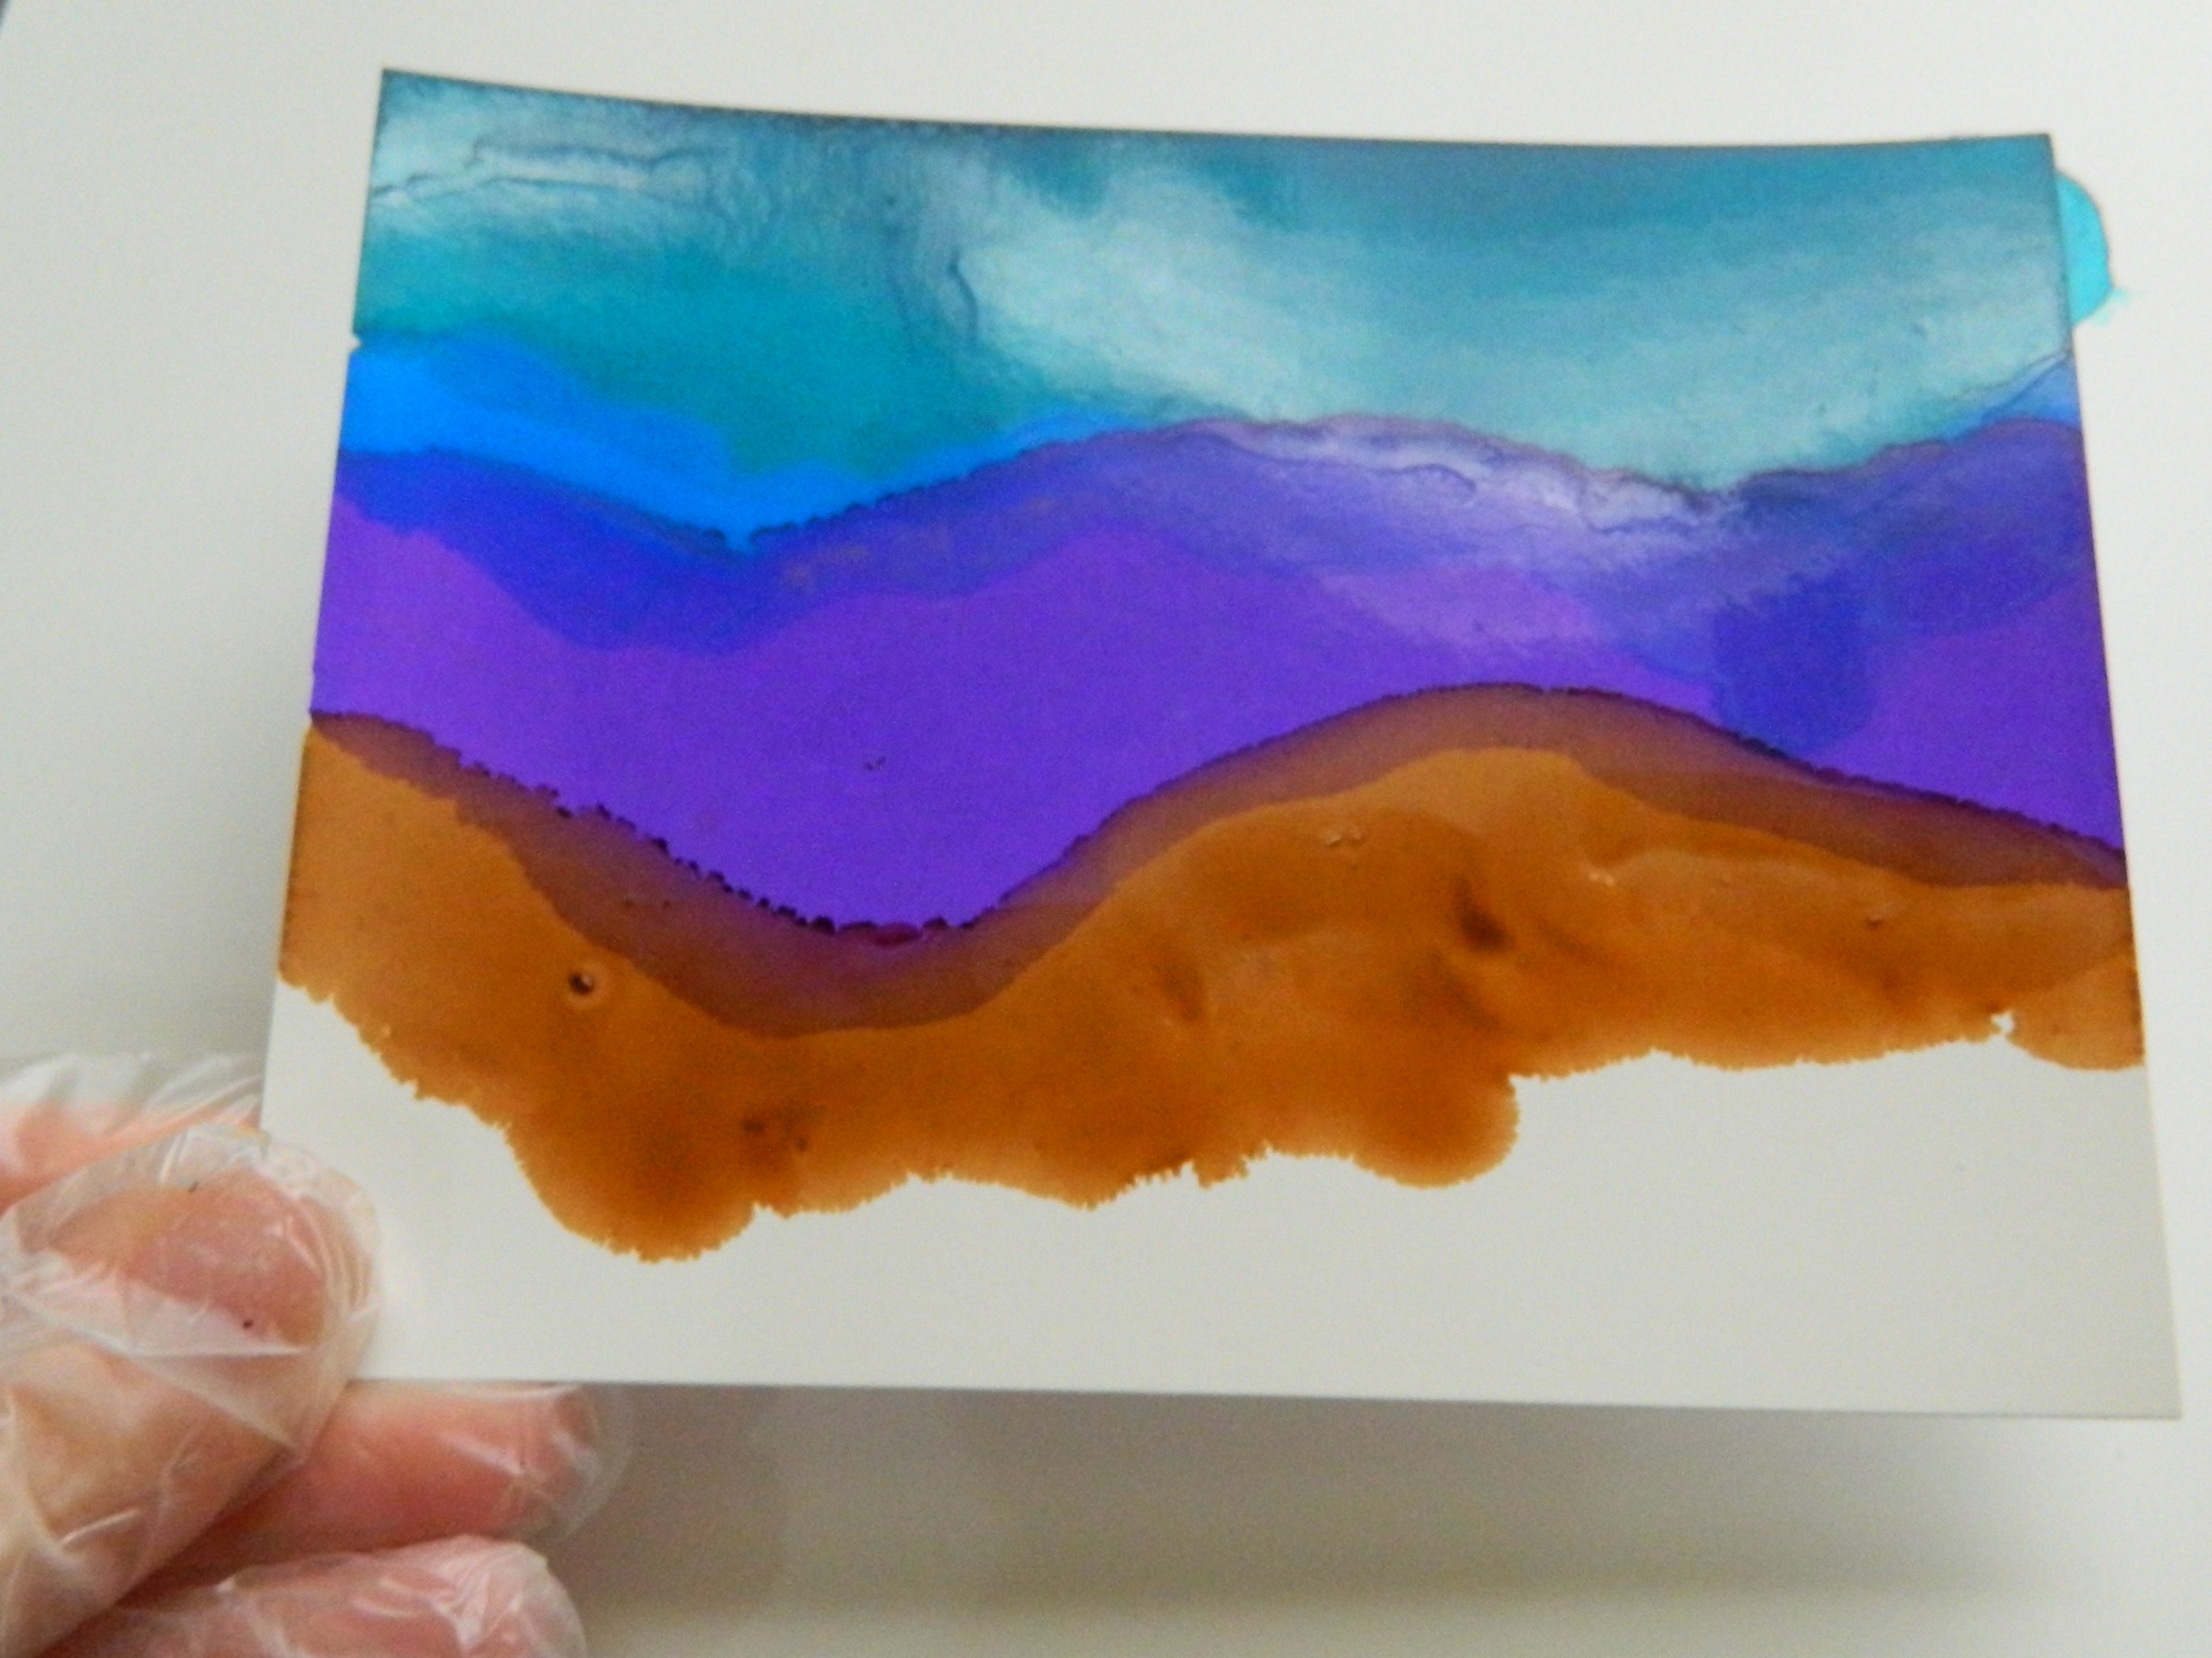
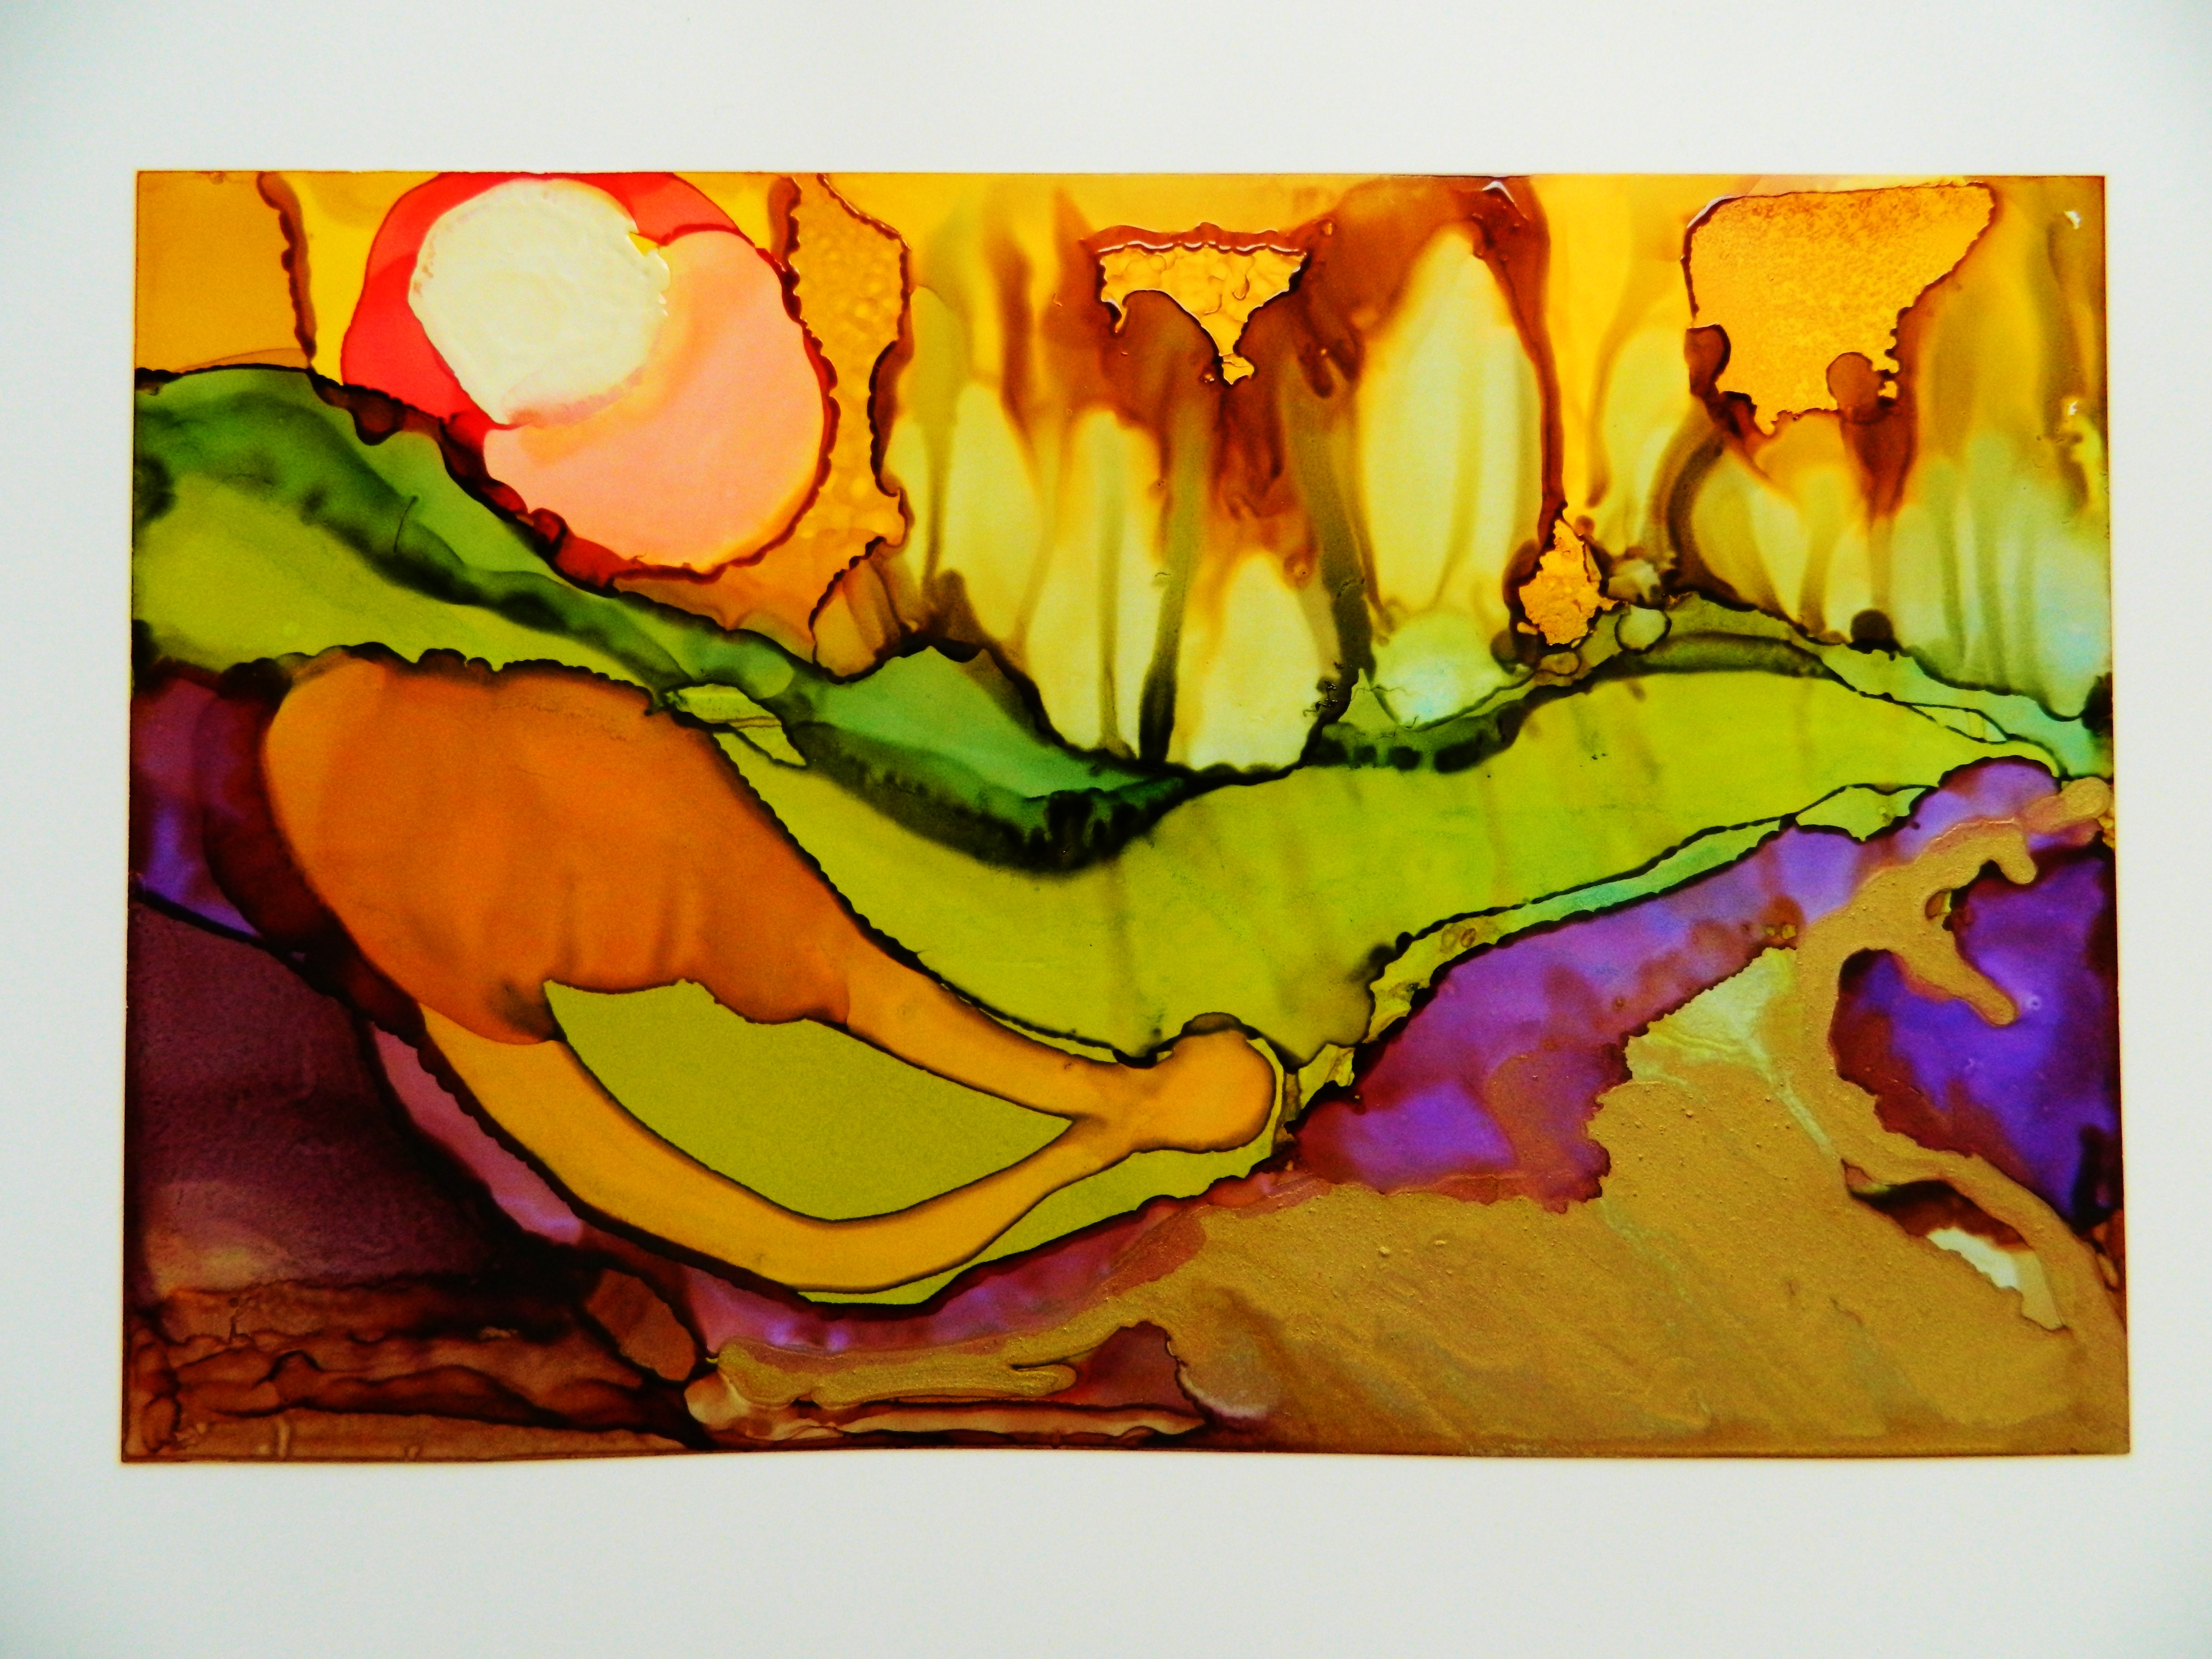
The next step is creating layered inks to achieve the look of a landscape. These can be in traditional colors or you can get creative and make something more abstract. Because the ink will dry fairly quick tilting the paper slightly forward or toward you will depend on where the ink will run. Apply the next color directly under the first. If the color runs, dip a corner of the paper onto some paper towel.

Creative lovely backgrounds on Yupo with inks

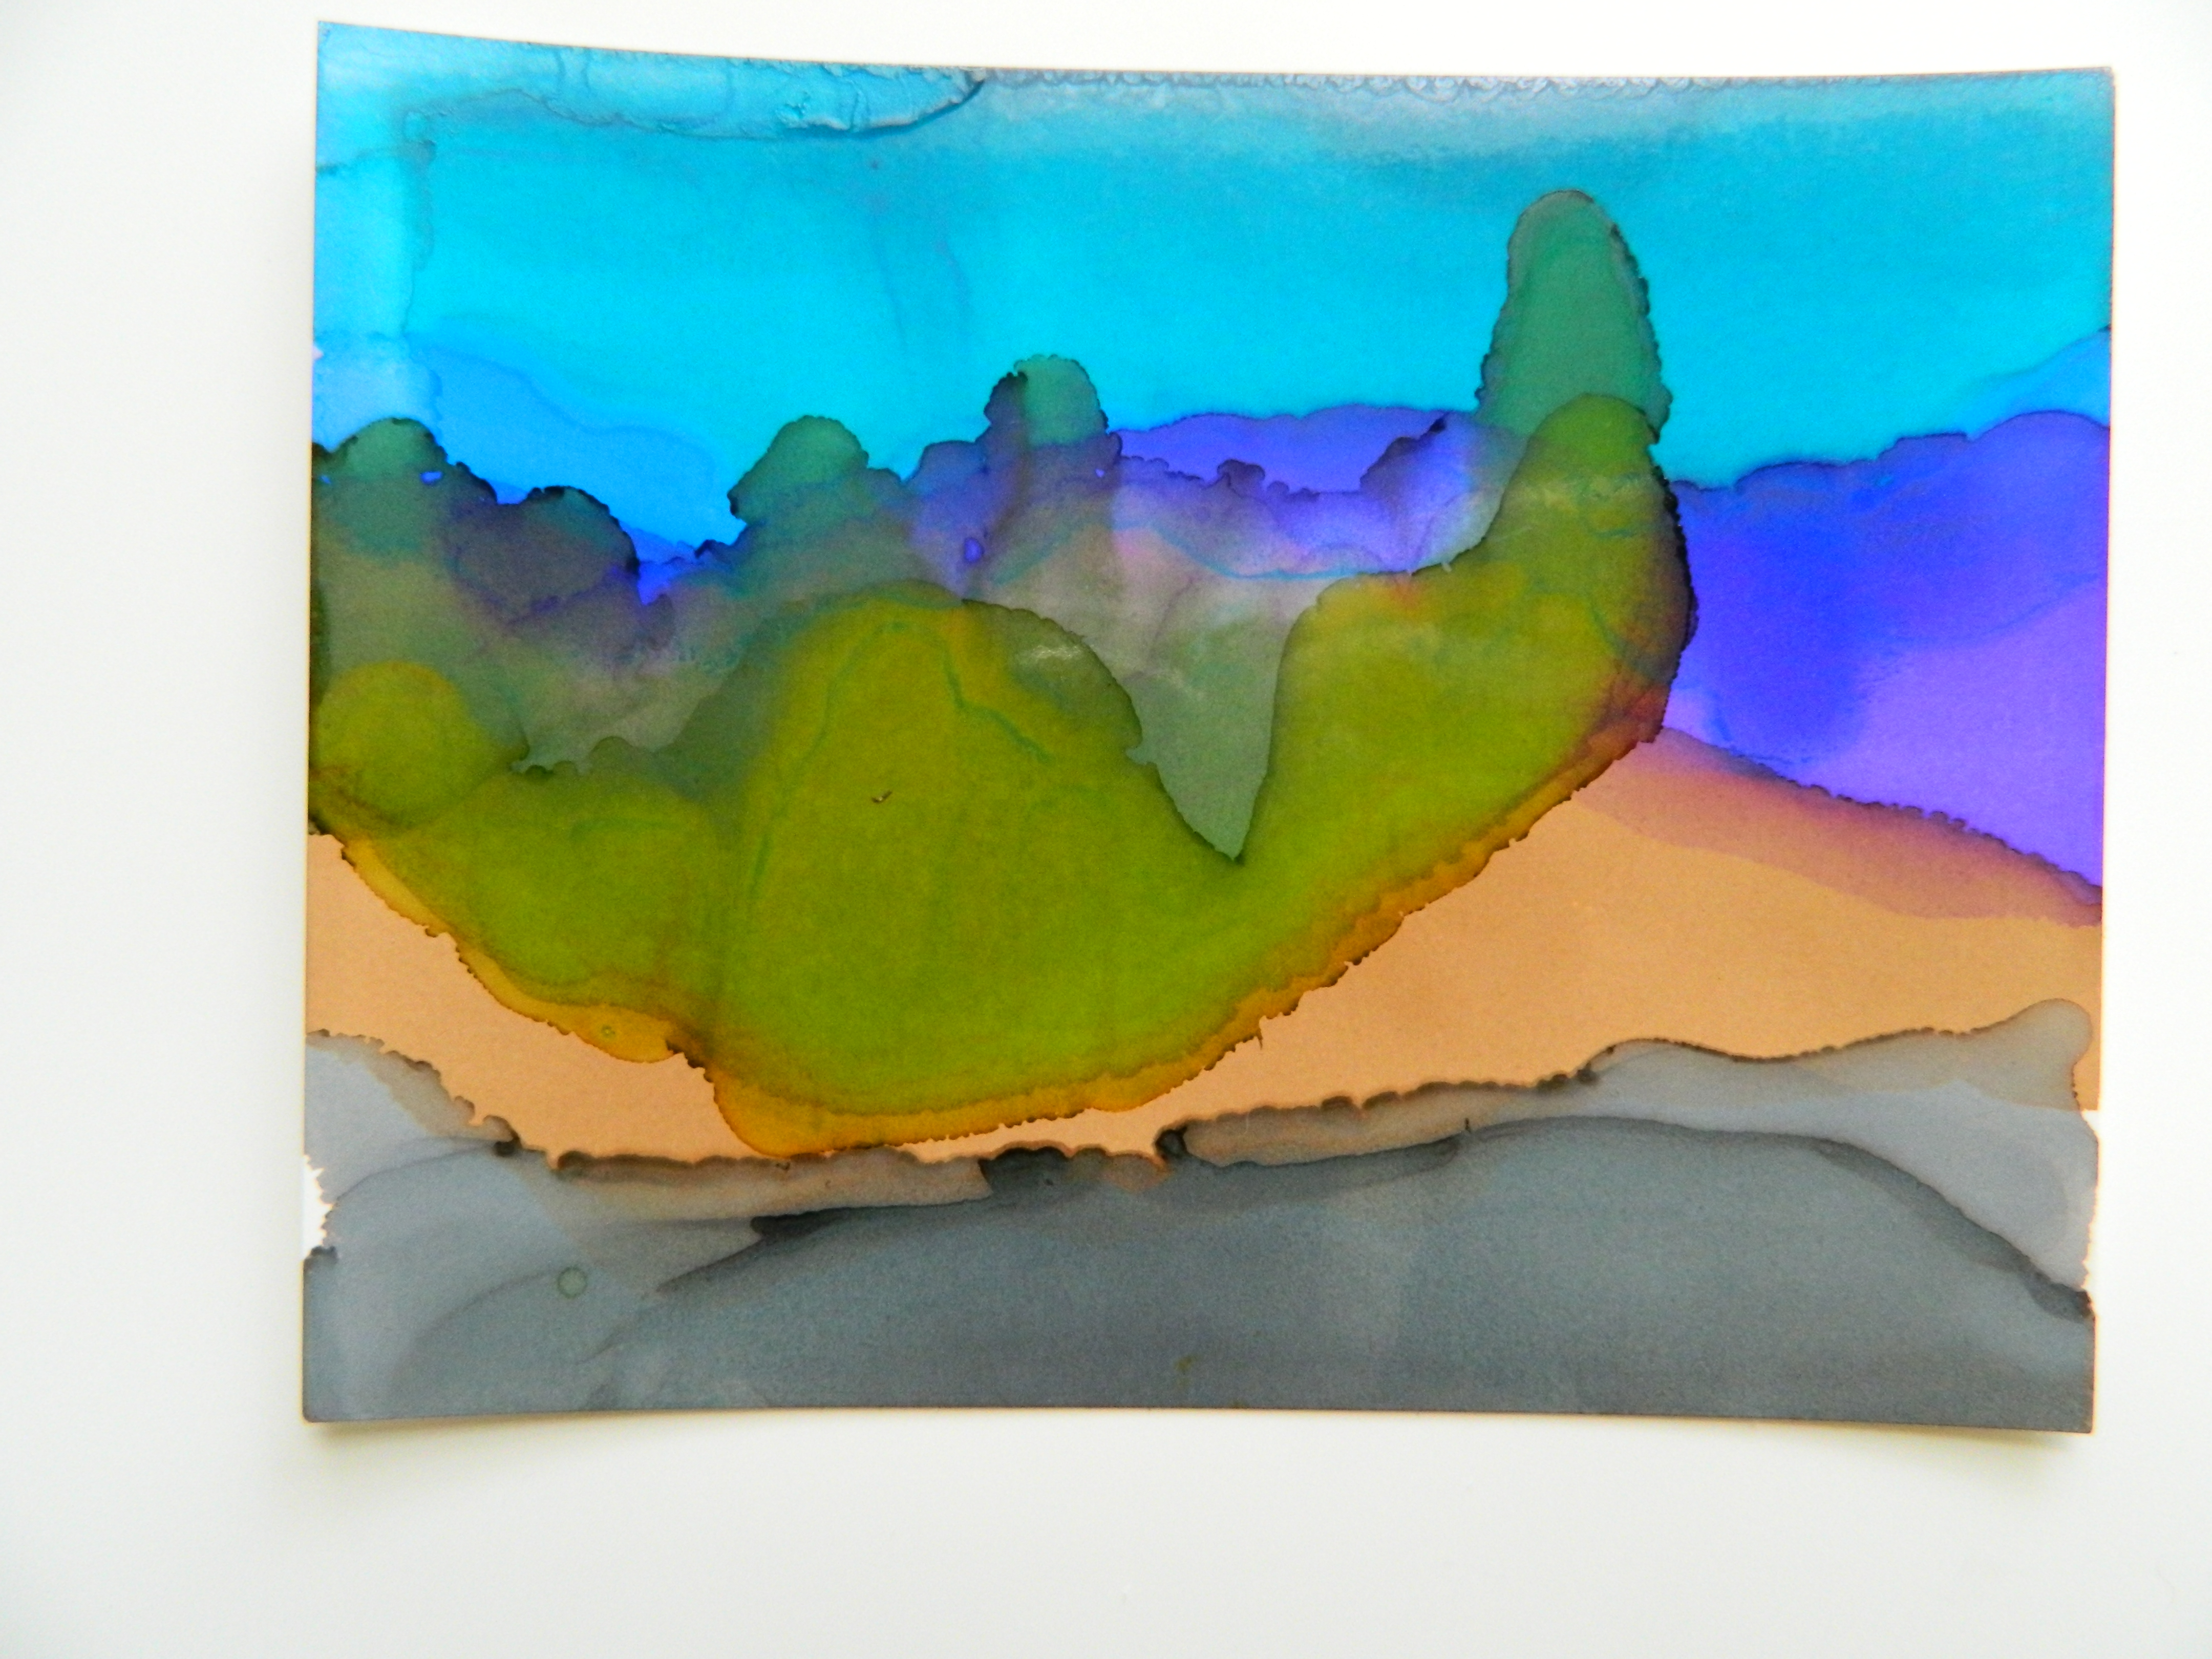
In this photo you’ll notice that I have gone into the background with a green and by tilting the card away from me and adding a few drops of ink, I then added the Alcohol blending solution to the dots of ink. This allows the ink to disperse and run down the card. This is how I made some abstract trees.

Creative lovely backgrounds on Yupo with inks

Creative lovely backgrounds on Yupo with inks

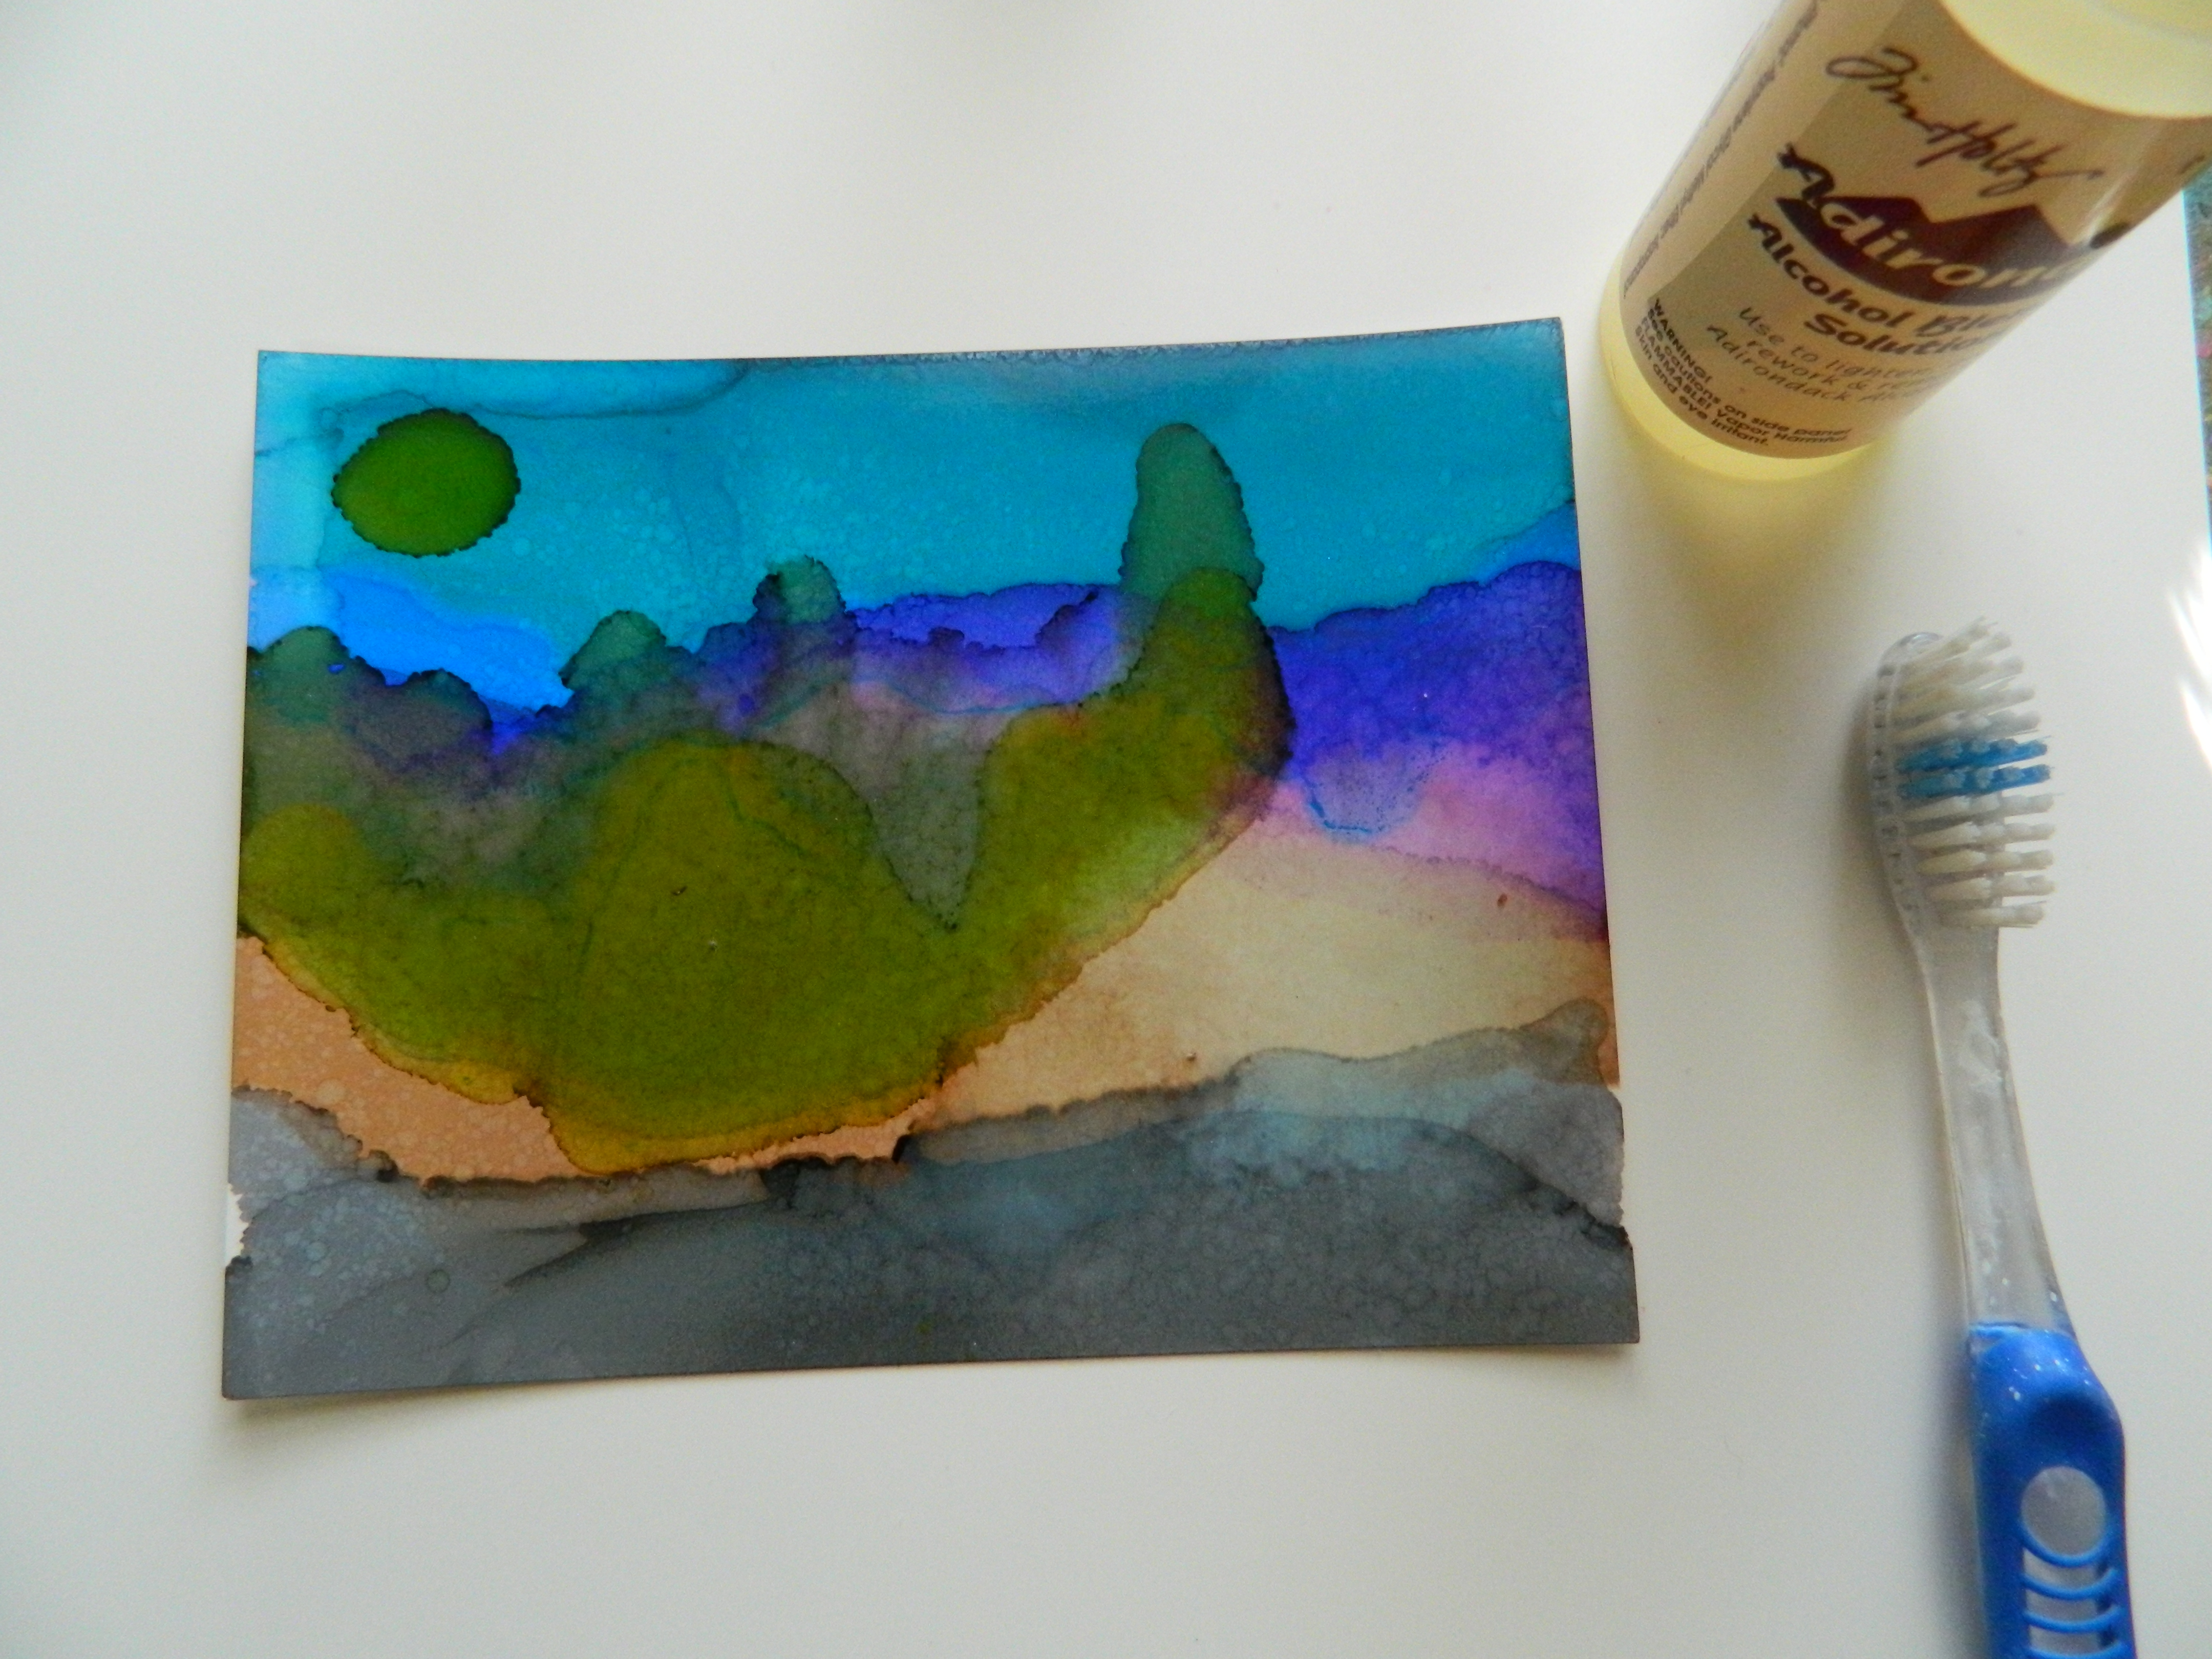
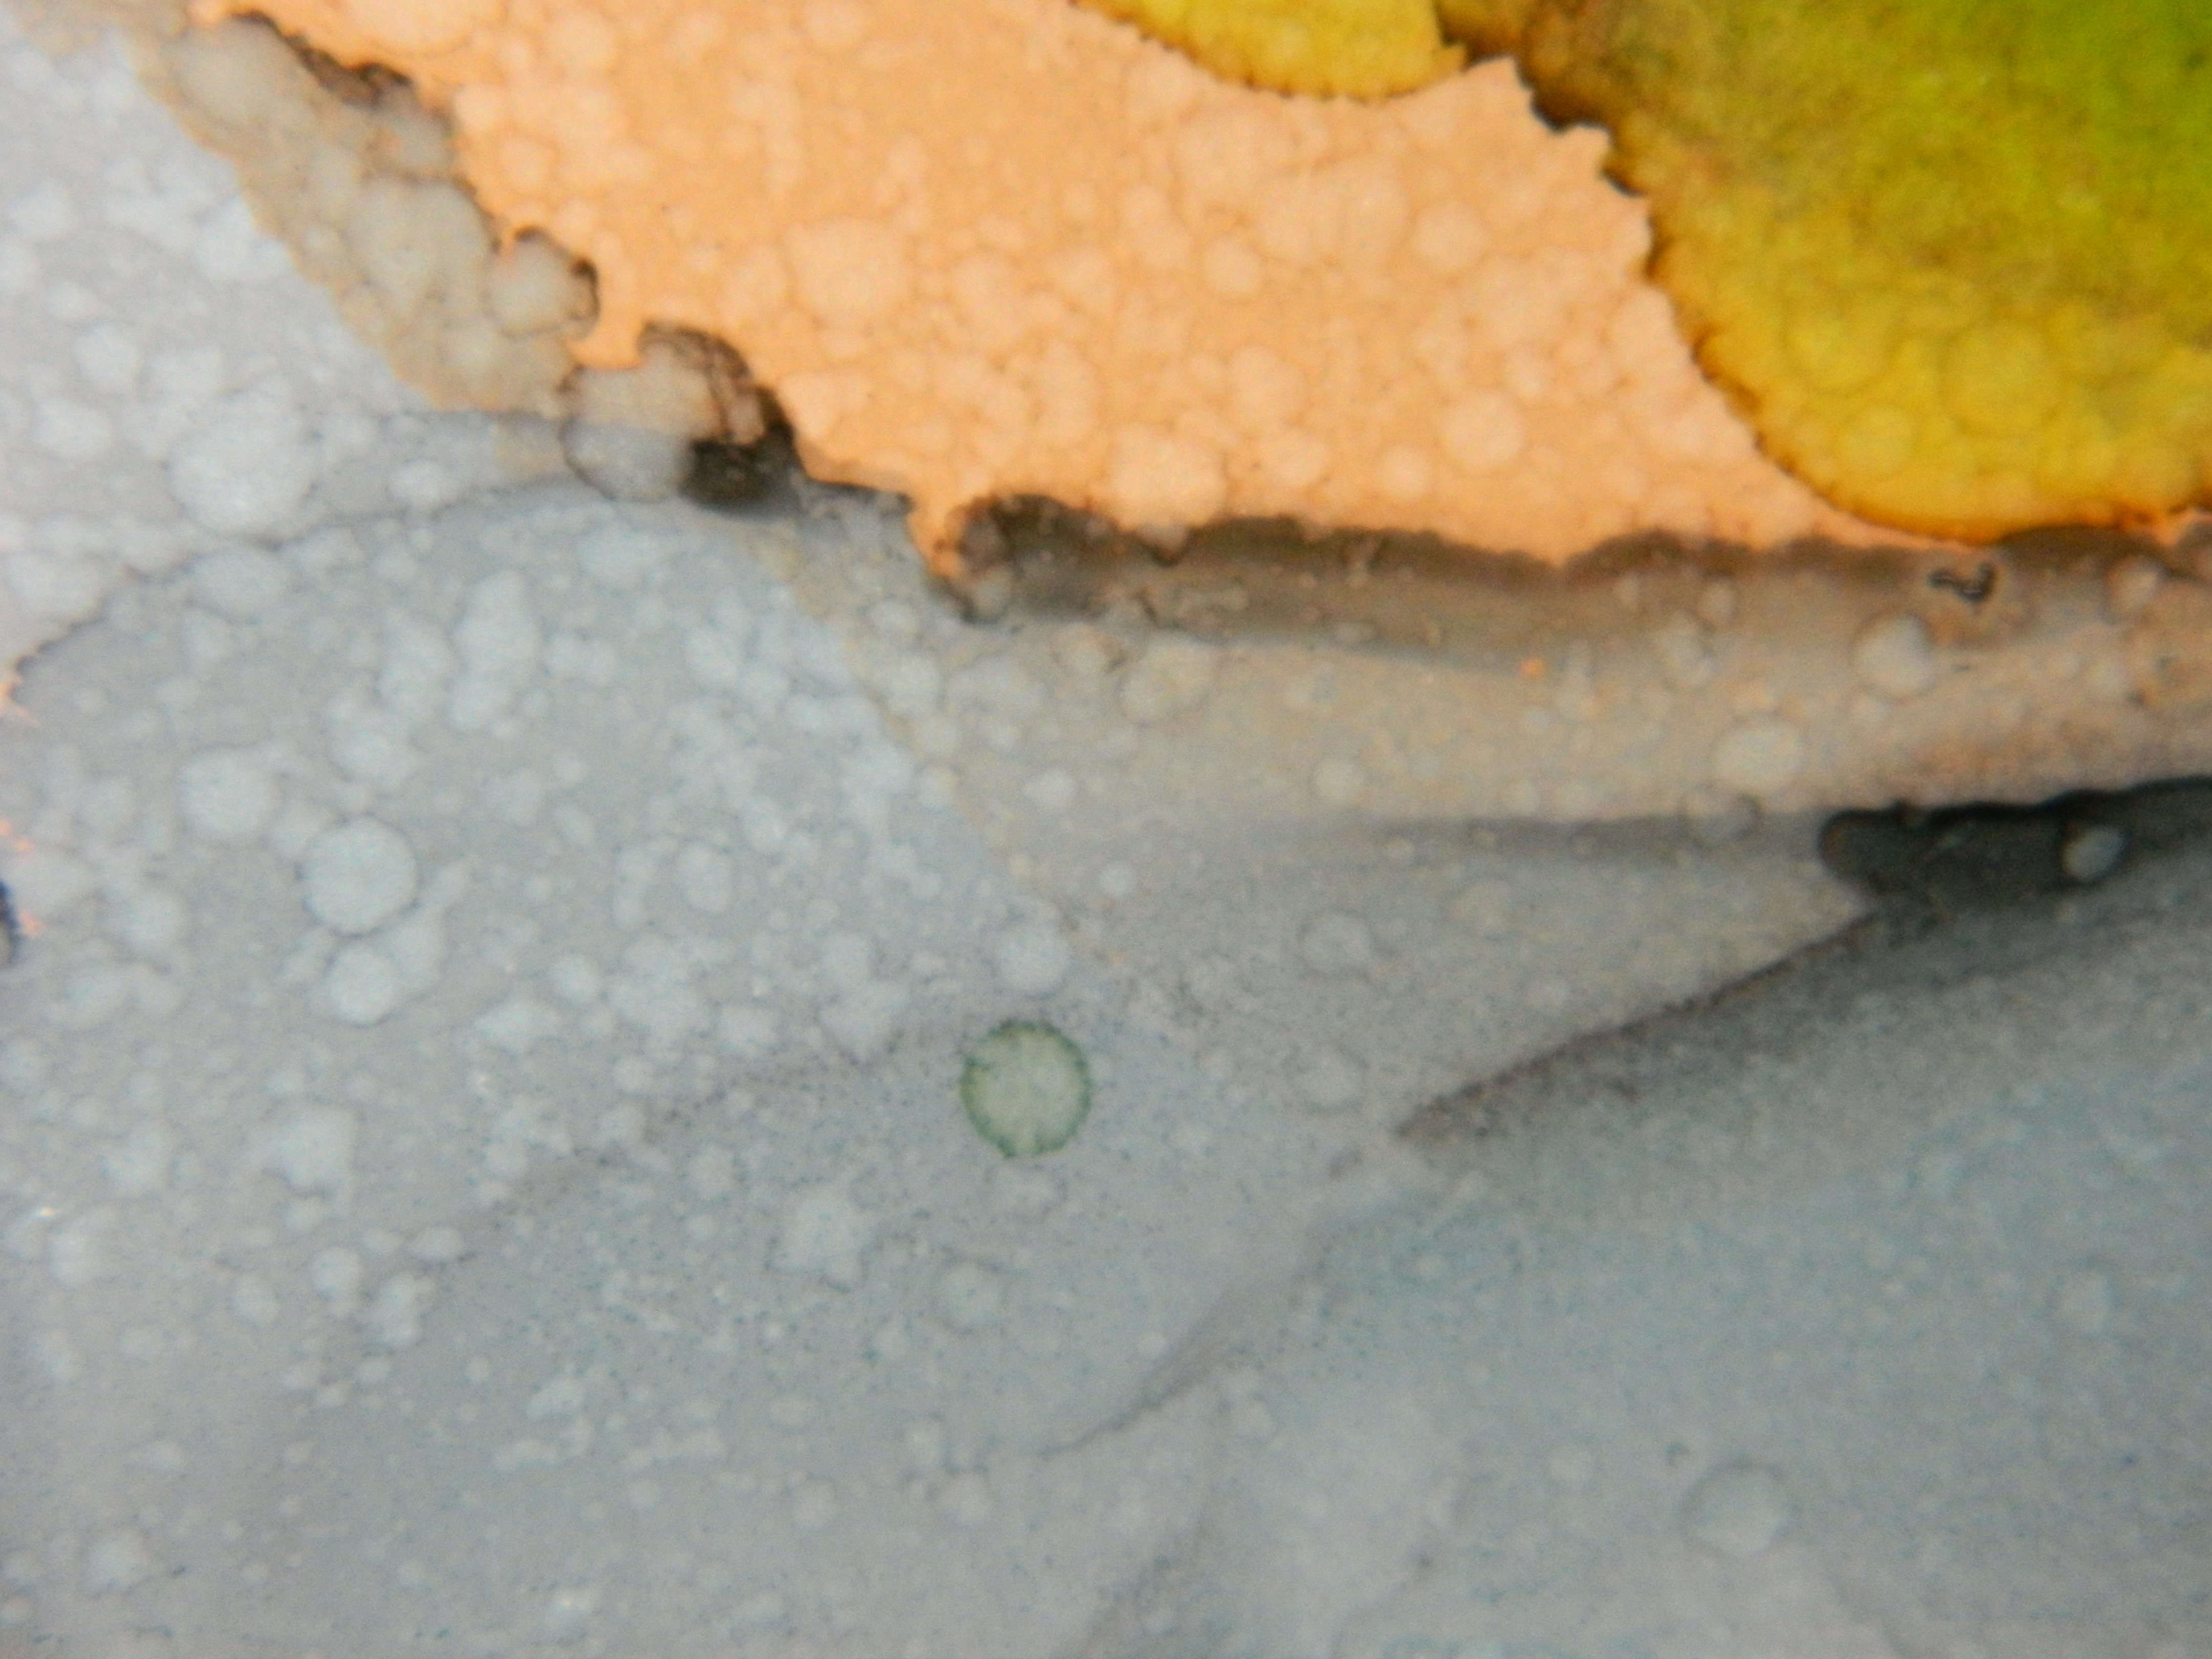
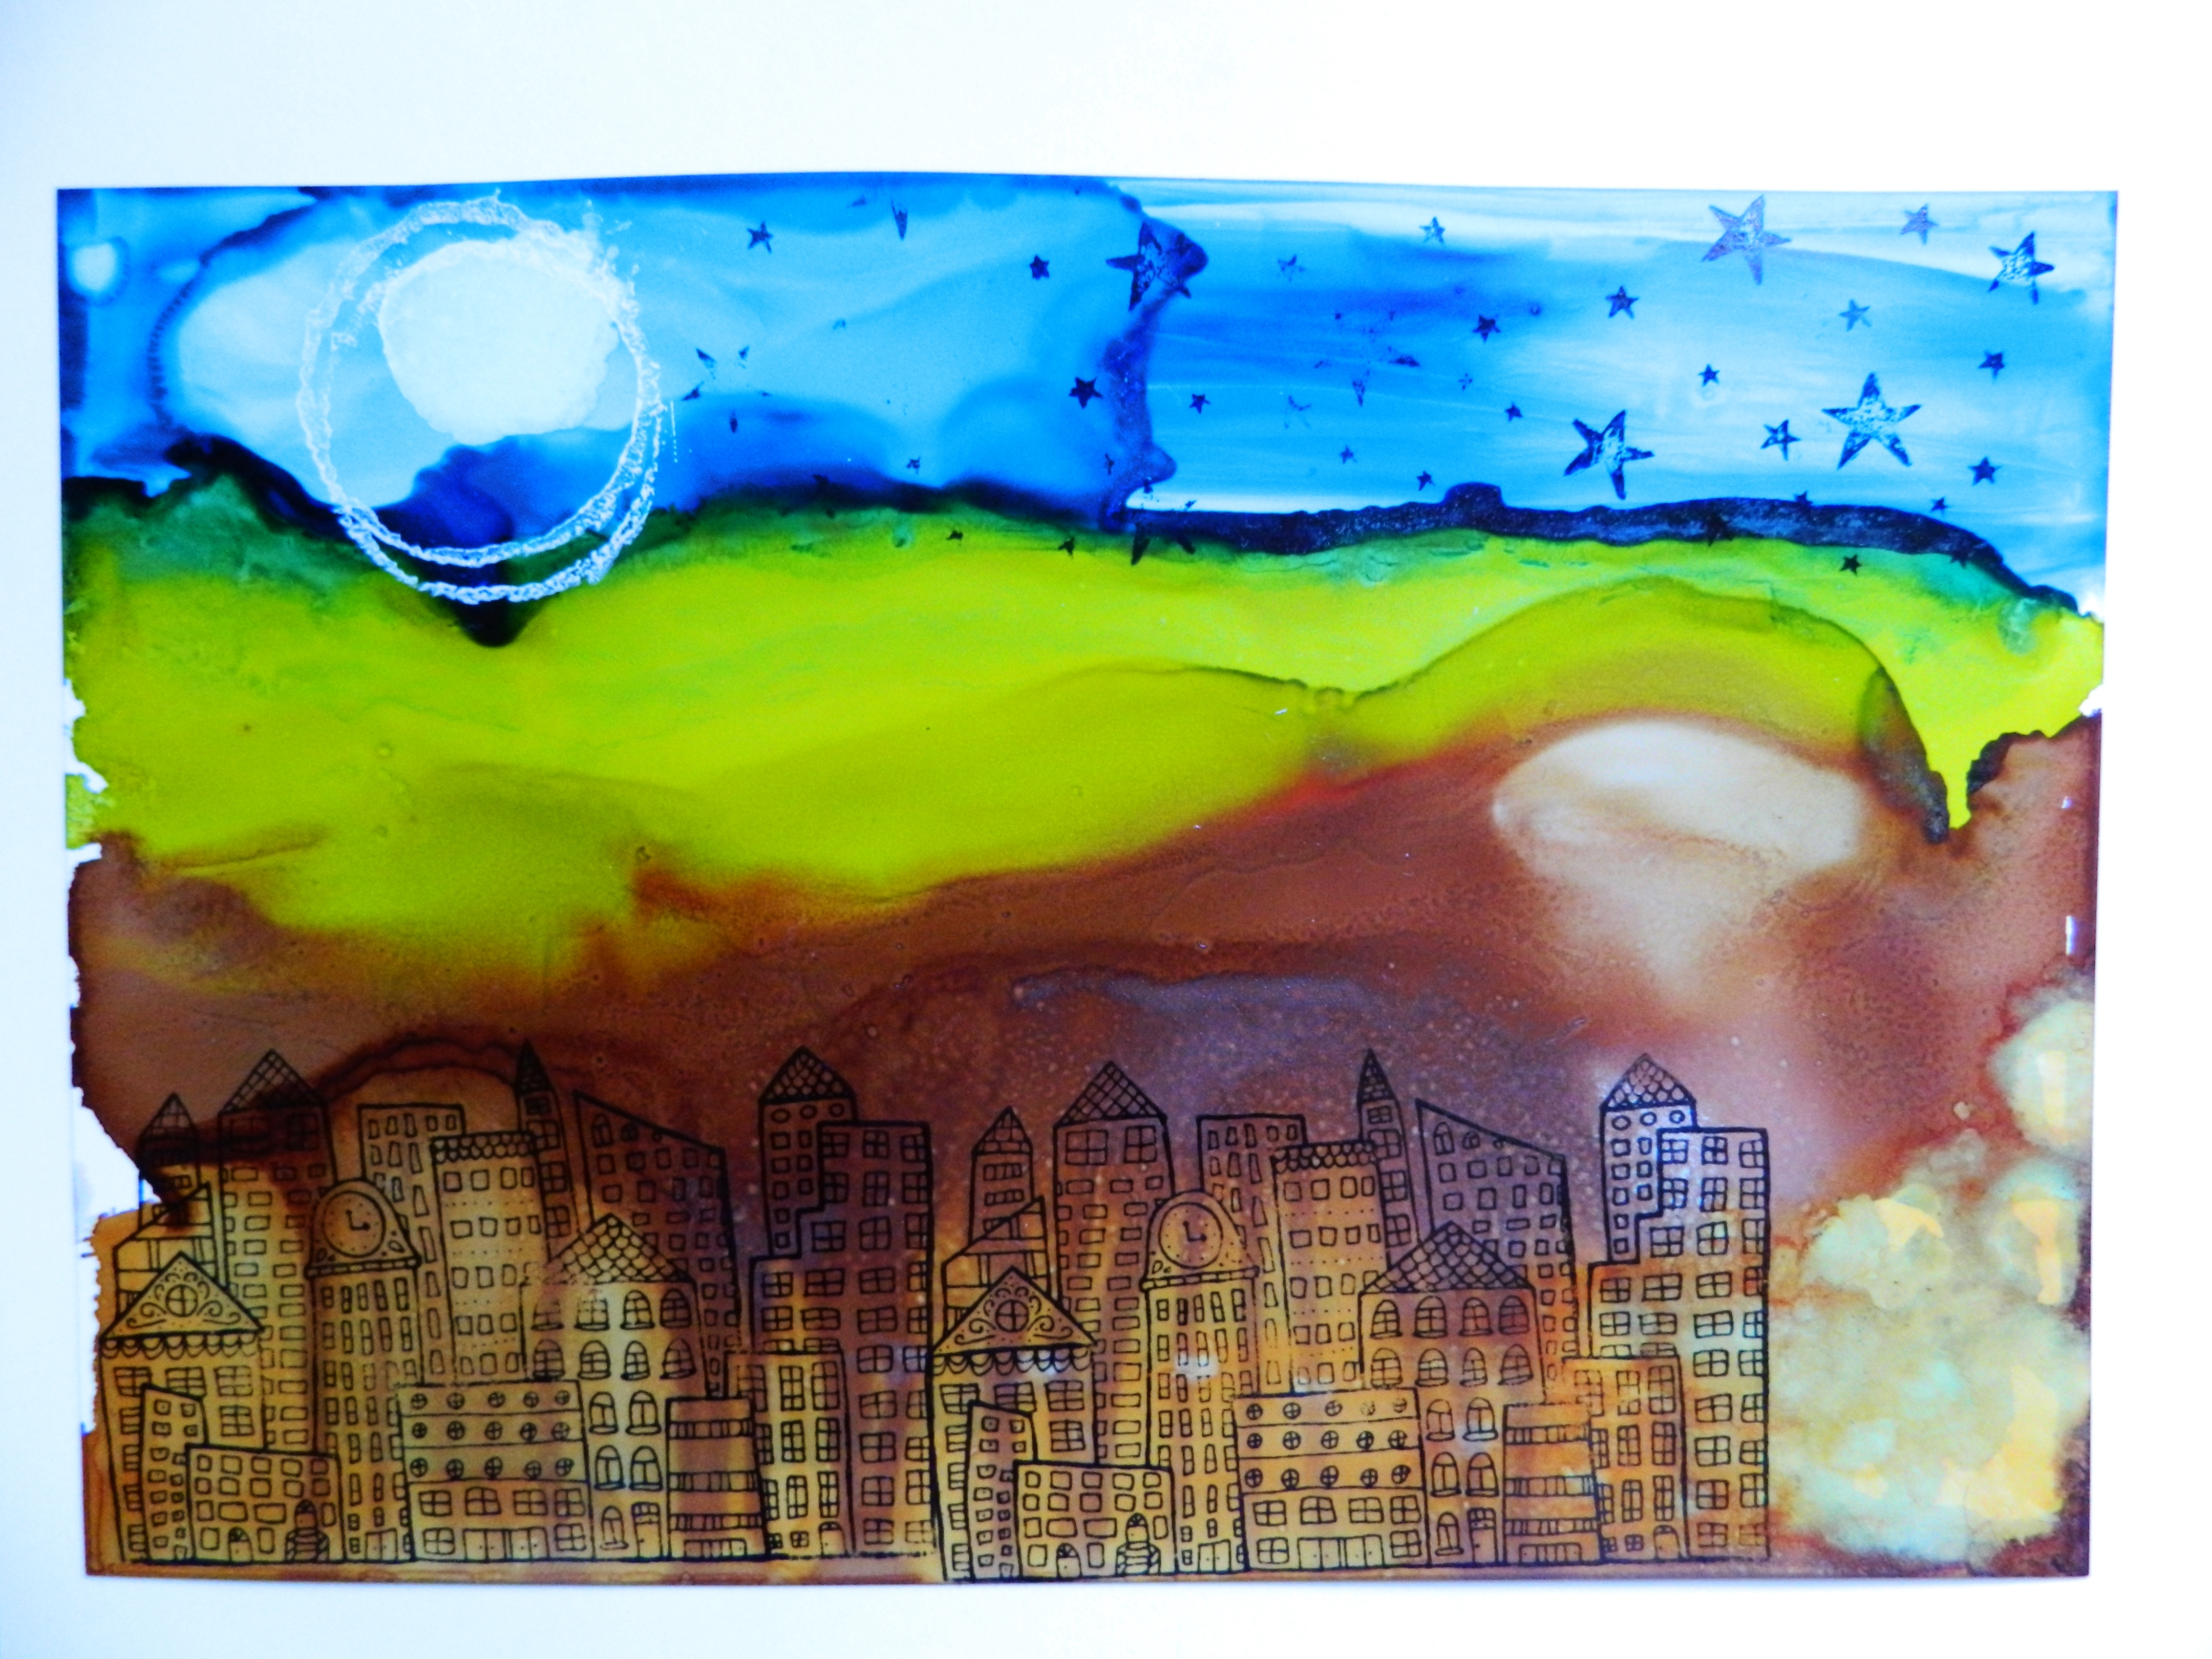
Adding splatters of paint to a painting can make for some interesting texture. Pour some Alcohol blending solution into a small glass dish and dip your toothbrush in. Holding the brush 2 inches away from your card surface run your finger and/or thumb along the bristles away from you to allow for the alcohol to spray the card surface.  This gives you the same look as adding salt to watercolor paint.

Originals and Stamping

You can add more drops to make shapes and you can also go back into a spot on your paper and add more ink to make areas darker.  I found using water proof ink pads and some of my favorite stamps I can add more to my background. Have fun and explore.

Creative lovely backgrounds on Yupo with inks

Creative lovely backgrounds on Yupo with inks

Creative lovely backgrounds on Yupo with inks

~*~*~*~*~*~*~*~*~*~*~*~*~*~*~*~*~*~*~*~*~*~*~*~*~

Melanie Statnick is a Canadian Mixed Media & Collage Artist out of North Carolina. Melanie creates art daily from her private studio. Her style is fun, whimsy and positive. She is also an Art Instructor at local venues and in community colleges to all ages. Her artwork can be found in art galleries and shops extensively in NC with international private collections.

You can see more of Melanie’s work at Mixed Media Art or via website – www.melaniestatnickart.com

~*~*~*~*~*~*~*~*~*~*~*~*~*~*~*~*~*~*~*~*~*~*~*~*~

.

.
Is Mixed Media Crafts or Fine Art?

This article has been written by Vicki Ross

Which came first, the chicken or the egg?

The sky is the limit for scrapbooking and journaling. I’ve often said that if not for the scrapbooking industry, fine artists would be lacking some of the tools we have today. Manufacturers created design labs to meet the demand for more papers, embellishments, texturing tools, paints, stamps, inks, books, etc. These supplies gradually made their way from the internet to craft and hobby shops…in small enough amounts to not put a strain on anyone’s budget.

Where investing in fine art supplies can easily amount to hundreds of dollars, a small beginning of scrapbooking supplies can be much less. Of course, you can become obsessive/compulsive in collecting either one! For example, fine artists pastels—the kind Degas used—can run $15-18 each…and a color selection of 750+. Major investment. Sure, there are all kinds of variations, from student grade and mid-range artists grade, all prices, all qualities. This is an extreme example, just to make the point.

Whatever kind of creative outlet you choose today…if you trace their lineage back through history you’ll find it!

  • Markers with permanent ink—compare to ancient Sumi painting
  • GelliPlate—monoprinting without the press. Edgar Degas famously used monoprints as the base for his pastels
  • Collage—this term was coined by both Georges Braque and Pablo Picasso in the beginning of the 20th century. Just think what they might have accomplished with all the supplies currently available in today’s marketplace.
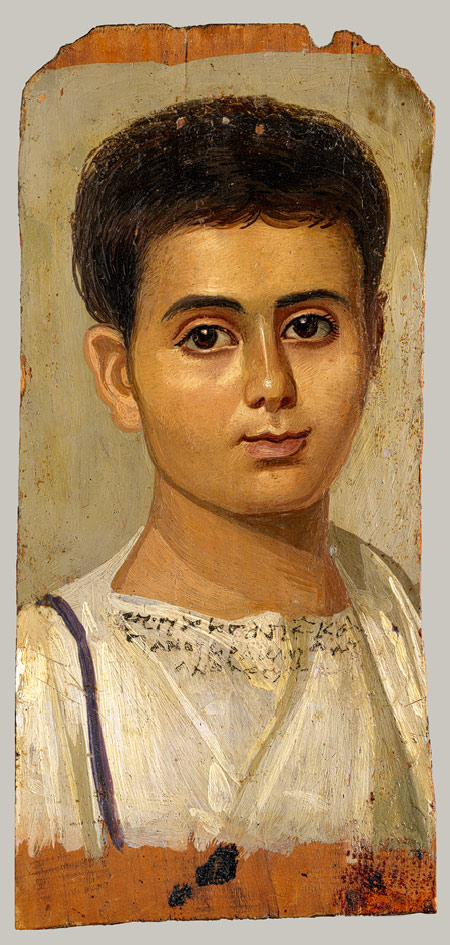
  • Encaustic—one of the newest darlings on the art scene, can be used with embellishments, collage, fiber, papers, and textured or glossy surfaces. Companies have developed single color bars and pans for ease of use. New? Nope…some of the earliest Greek art was encaustic and survives today. Now, we don’t have to work days to prepare our wax and colors! Have you noticed wax products in the Ranger line?

2nd century EgyptianEncaustic on wood

Portrait of a Boy, Roman period, 2nd centuryEgyptian,Encaustic on wood, Metropolitan Museum of Art

  • Acrylic Paint—developed in the 1930’s, and refined continuously, it is readily available in many qualities and for many uses beyond fine art and crafts.
  • Acrylic Mediums—Degas invented his own recipe for a fixative on pastels. It is today being marketed under the name SpectraFix and is a casein (milk) based formula.

Pastel on paper

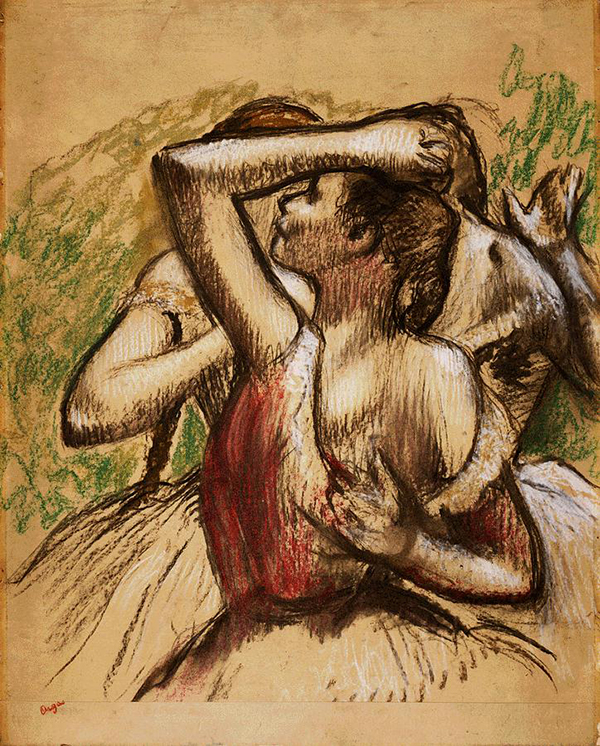
Three Ballet Dancers, One with Dark Crimson Waist” 
Degas1899; Pastel on paper, Barnes Foundation

  • Oil—used to require careful mixing by chemists, and prepared by apprentices in the studios. Each day the paint had to be prepared and used the same day. Early tubes involved syringes and pig bladders, then it became feasible to paint out of doors in oil.
  • Tools—while it is nice (good organization required) to have bright, shiny tools of any mark-making kind, be creative! You can make embossed patterns with mixtures of cornstarch and ModPodge—Pattern Rollers with Toot-di-doos (toilet paper rolls) and acrylic mediums—sticks from the yard—sand from the beach—old paintings recycled for collage pieces—makeup brushes and sponges for blending—textured paper towel for subtle repeat pattern. Anything that will make a mark can be used!
  • Zentangles—check out M.C. Escher’s work. I tried the tangles recently because all the marketing made the technique appealing.

Think outside the box! Be proud if you are a ‘crafter’…we all are! Fine Artists, thank crafters, after all, their demand helped create and bring back old techniques. No matter how intricate or simple your work, show pride in it. Research it online and you will more than likely find an old master who made his primitive tools and materials to create whatever he could dream!

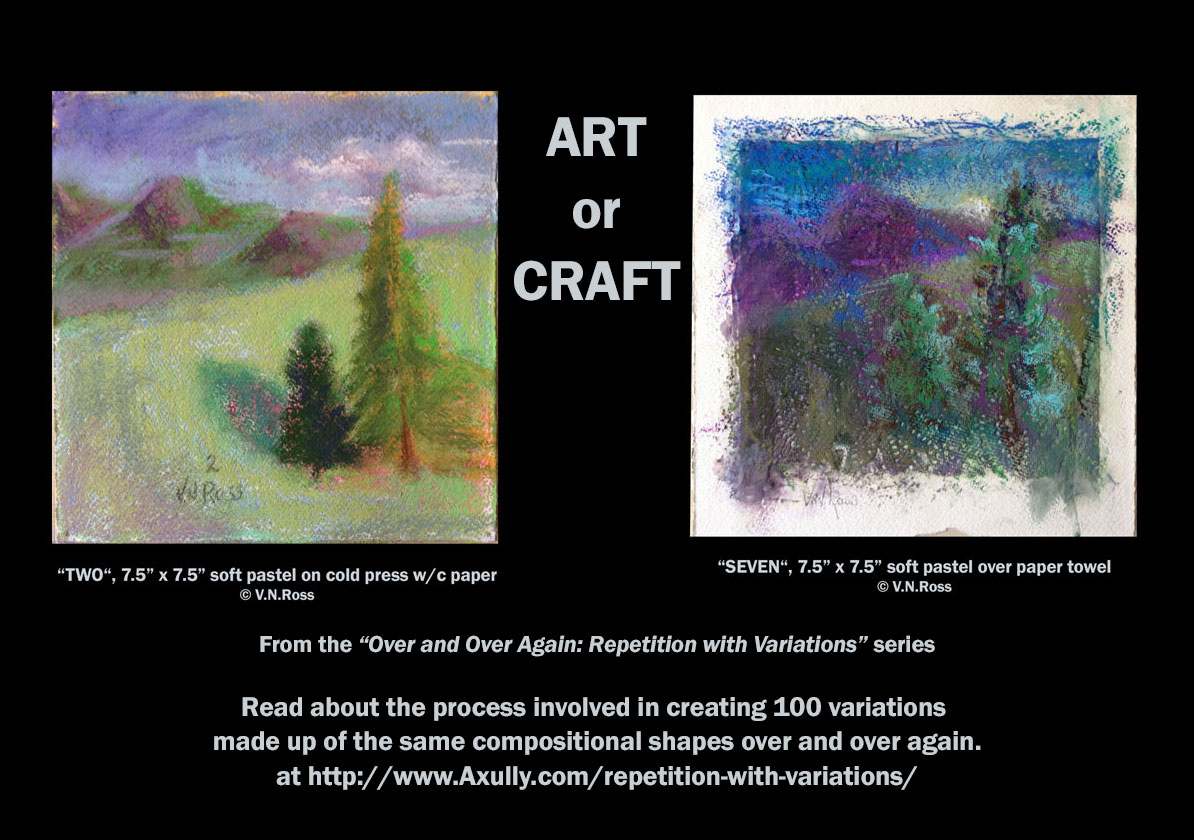
Exploration by Vicki Ross

Author bio:

Vicki Ross is focused on sharing her journey to art and how life events can shape us through creativity. www.Axully.com Vicki has always been involved deeply in the creative arts, from professional soft crafts publications (knitting/crochet/needlework) to French Hand-sewing, stenciling to macramé, oil painting to encaustics. Whatever your leaning, she believes in the healing power of creating.

You can see more of Vicki’s work at VickiRossArt or via blog posts at Axully – Solid. Useful. Beautiful

.

.