Michelle G Brown | Mixed Media Art

Vintage Vacations Altered Book Layout

~ * ~

This article is written by Michelle Brown
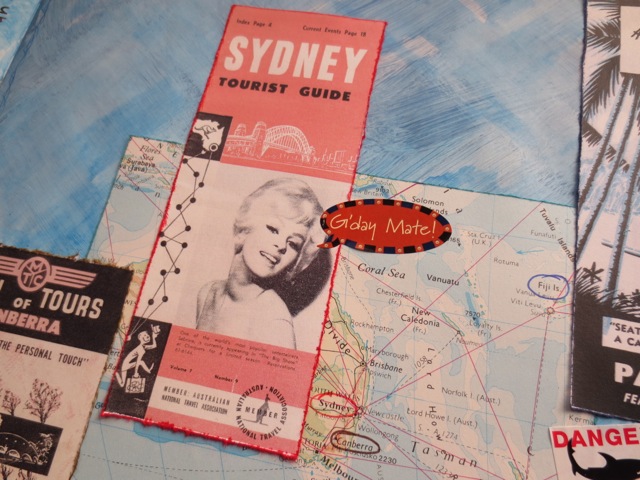
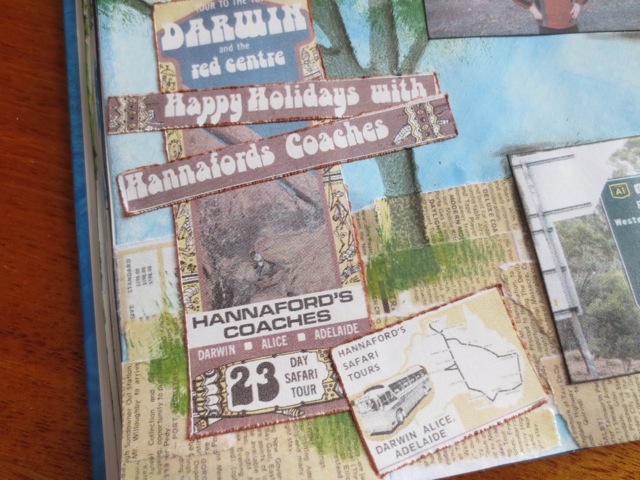
This month’s mixed media art ephemera sheet is all about Vintage Vacations – I just LOVE these cute vacation brochures that were part of my Great Aunt’s H-U-G-E collection of paper ephemera that I inherited. How cool is that font?!? You can get your own copy of this ephemera sheet here ~ Mixed Media Art Ephemera Sheet – Vintage Vacations. We had lots of fun putting this sheet together for you

To ignite your creative spark, I have created this combined altered book layout.
mixed media art ephemera images

For the first page I decided to highlight a road trip my family took a few years ago – we travelled from Victoria and across to southern South Australia for 4 weeks and over 5,700 km. We only got as far as the outskirts of the Australian Outback but it gave me a glimpse of that part of Australia.

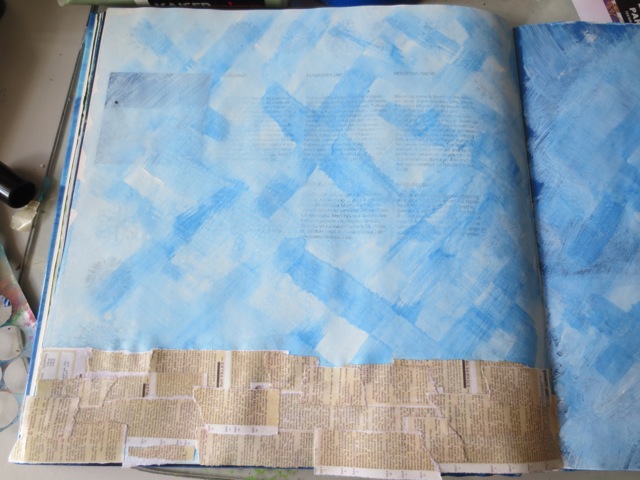
This altered book layout already had a layer of gesso and blue wash – prefect for the endless skies we saw on our vacation. First I printed out the ephemera sheet and tore out the brown brochure; just the shade of the endless dried grassy plains. This was glued in with Paper Mod Podge – Matte.
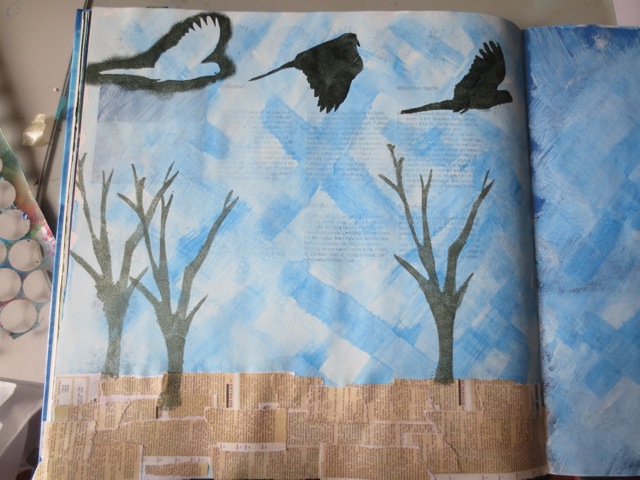
Then I stencilled in some birds (Black Crested Cockatoos) and gumtree trunks with greys.
[You can make your own Gum Tree Trunk stencil using the photos from the Mixed Media Art Technique Sheet]
Then I added some leaves in two shades of green (forgot to take photo of that step!). After printing out a selection of photos (there  were quite a few photos after 4 weeks of vacation!), I edged them in StazOn Stone Gray ink and arranged them onto the layout with double sided tape. The photos were edged with charcoal pencil.
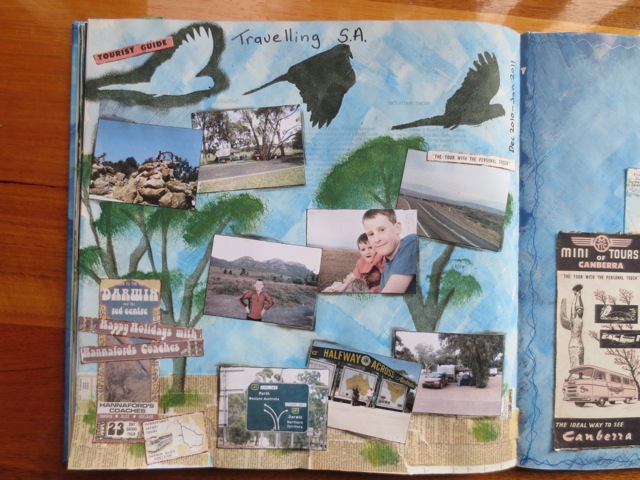
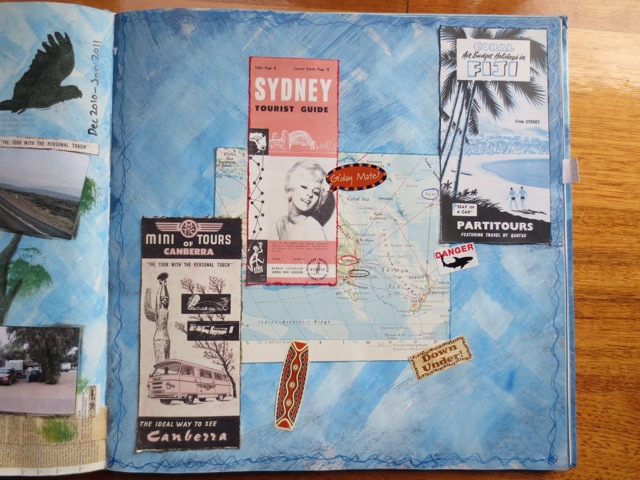
The second page was thrown together along with a page from an old atlas and a few Aussie stickers – this page isn’t finished yet as I want to add a photo of my Great Uncle, who was a Coach Driver with Hannaford’s Coaches. I’m sure many of these brochures came through him to my Aunt. I love the romantic images these brochures bring to my mind, back in the day when travel around our vast continent by coach and ship.
Happy creating!

~*~*~*~*~*~*~*~*~*~*~*~*~*~*~*~*~*~*~*~*~*~*~*~*~

Michelle G. Brown is passionate about mixed media art and enjoys sharing her knowledge and techniques with you to allow you to express your own creativity. Michelle understands that many of us have an inner need to create. By learning a few basic techniques the amazing world of mixed media art is accessible to everyone!

Michelle lives with her husband and two boys in Melbourne, Australia.

~*~*~*~*~*~*~*~*~*~*~*~*~*~*~*~*~*~*~*~*~*~*~*~*~


Encaustic and Glass Mixed Media Mobile

~ * ~

This article is written by Anjuli Johnson

Every once in a while, I slip away from my usual style of work and am inspired to create something drastically different from anything I’ve ever done before.  Whenever this happens, it’s always very exciting and terrifying at the same time.  I think one reason I tend to stay within my practiced range of techniques is that I know what I’m doing- doing something different means a necessary amount of experimentation and trial and error, which may work, or it may not.  Terrifying though it may be, it’s so important to experiment with new techniques, because obviously that is how we learn and develop our artistic talents, especially if you are self taught.

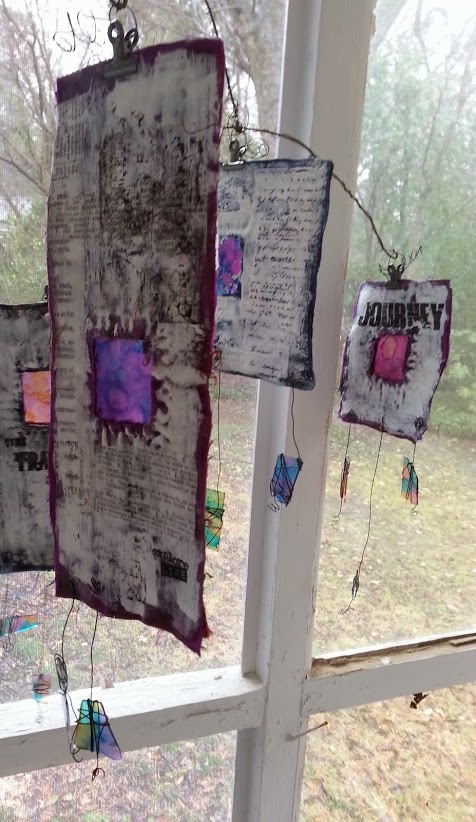
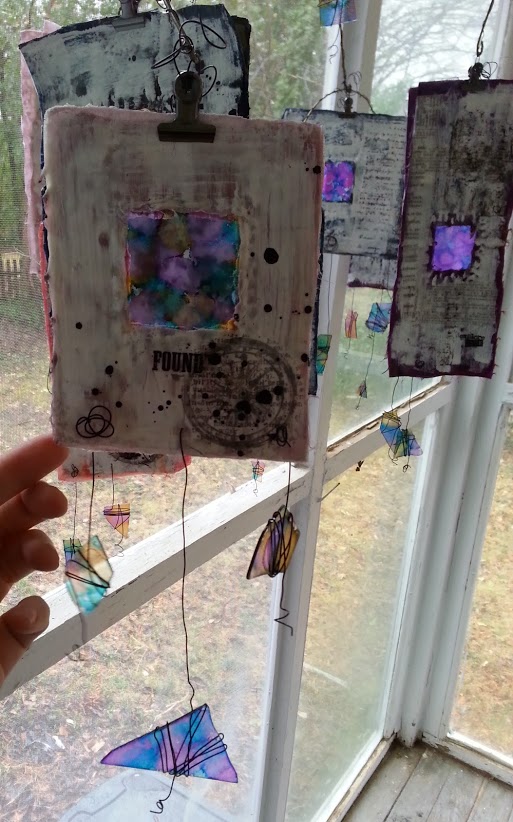
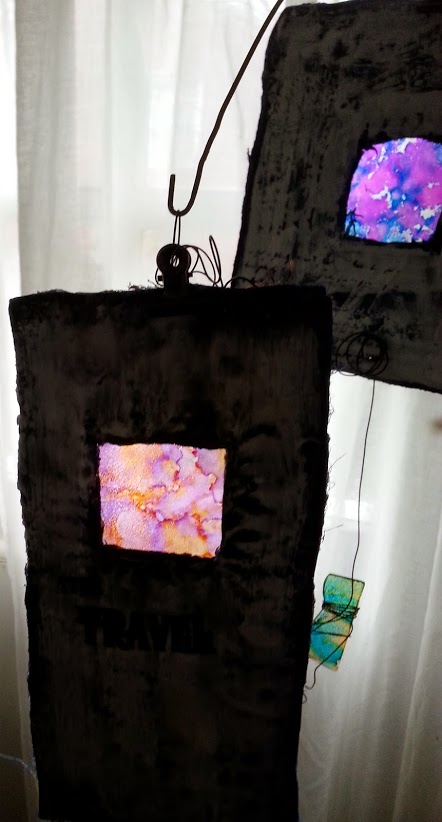
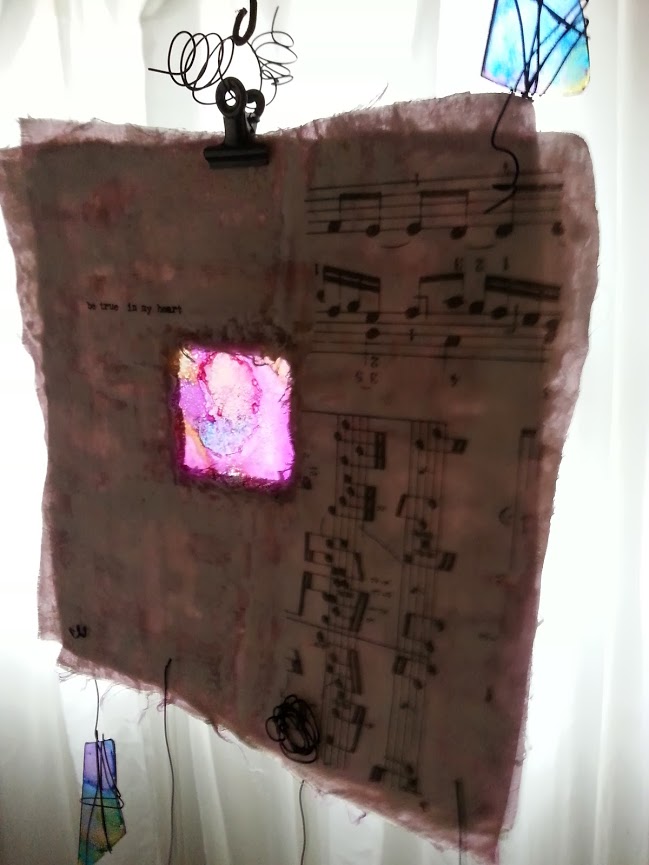
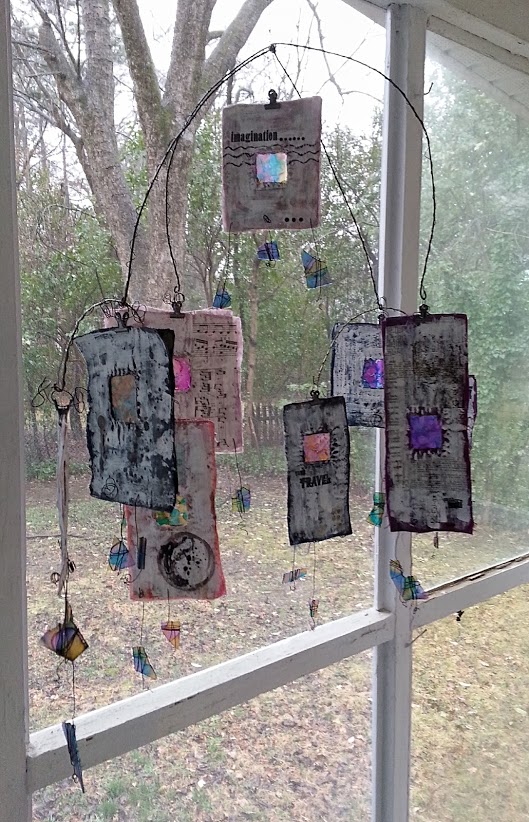
I have worked with encaustics before, but never on fabric, so I knew bringing my mobile idea to fruition was going to be tricky.  I used brocade as my base, not only for its beautiful colors and designs, but because I could leave the edges frayed or burn them smooth.  You can see I chose frayed for some, and smooth, burned edges for others.

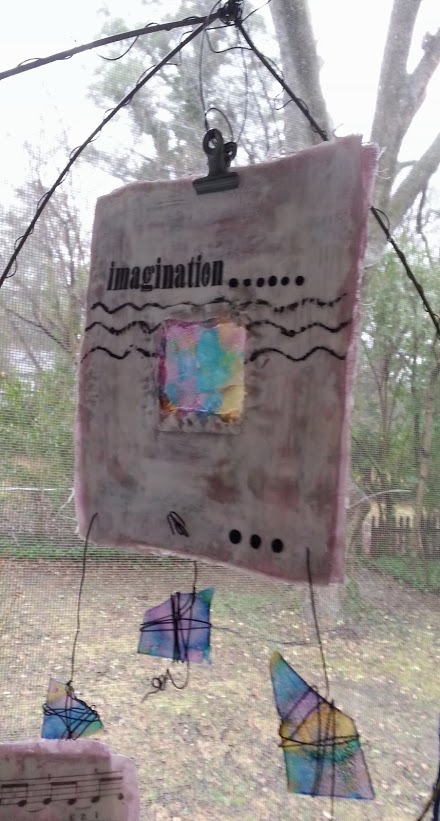
I cut 2*2 inch squares of glass for inside my encaustic pieces and random broken pieces to hang from them.  Alcohol ink is what I used to give them a stained glass effect.  You need to use Krylon acrylic coating as a sealant so the ink doesn’t smear.  I used the cut glass squares as a template to stitch squares into my layers of fabric.  I cut out the squares of fabric, leaving an edge that the glass would sit inside once I finished working with the wax.

There are some things to be aware of if you’re going to attempt a similar project- first, the surface you are working on.  Make sure that it’s clean.  My art table is covered with paint drips and old glue, so I improvised another surface to work on.  The other thing is that for my squares of stitched fabric, I wasn’t painting on just one side as I would do when painting on wood.  Both sides of my pieces would be seen in this mobile format, so I knew I would be painting with wax on both sides.  If you’re not careful, working on one side can cause the wax on the opposite side to stick to the surface of your table and peel away.  I found it easier and less messy to work until I was nearly finished adding all my wax and embellishments on one side, and then begin work on the other side.  You need a heating tool to heat the wax between layers so they fuse together- when I finished working on one side fusing the wax, I would lay it on the other side to begin painting, and hold it loosely in my hand to fuse it rather than lay it on the table to fuse it.  This keeps the wax on the fabric rather than peeling away and sticking to the table.  Be careful using your heat gun while you do this- you don’t want to burn yourself.  But I was able to do this quite easily and it worked much better.  Of course, encaustic is a very forgiving medium.  If something goes wrong, don’t fret.  There are always ways to fix mistakes or mess ups, so it’s really the perfect medium for experimentation.

I used around 6-7 layers of wax on each side, and it’s with the last couple that I added most of my embellishments.  (You can use as many as you would like, as long as you fuse between each layer.)  I used stamped and drawn images on rice paper, Tim Holtz patterned tissue paper, rub-ons, metal objects like keys and gears, and india ink stamped and drawn right onto the surface.  You’ll need to add a layer

of wax over any paper or metal embellishments you add, but if you are stamping or drawing with india ink, you can let it dry on the top layer without needing to add any more.

There are countless encaustic techniques you can use on a project like this.  One of my favorite resources is a book called “The Encaustic Studio” by Daniella Woolf. Of course, there are seemingly endless resources on pinterest and youtube, as well.  Check them out, but as I said before, don’t be afraid to experiment and try new things.  They may work, they may not, but I have found that any art experiments you try are well worth the risk!

My biggest risk was building my own mobile frame- fun, but tough.  I’m definitely going to need to practice my mobile-making skills.  The best part was adding the       wire around the glass and the frame- the swirls of dark metal give the whole piece a rather whimsical quality.

So, that’s my venture into the unknown!  I made mistakes, fixed them, had to scrap a few of my original ideas when they didn’t work, but I’m pretty happy with how everything turned out.  Not only that, but I feel like I have a little more courage stored up for the next random idea that pops into my head.  What new things are you going to try this week?


Each of us must face our fears and try new things if we’re going to continue to grow as artists.

~*~*~*~*~*~*~*~*~*~*~*~*~*~*~*~*~*~*~*~*~*~*~*~*~
Author bio:  Anjuli Johnson  is a Mixed Media Artist from Raleigh, NC.  She began her art career as a scrapbooker, and it’s been an evolutionary process every since.  She loves all things mixed media- paper, glue, paint, canvas, pens, wire, gears… the list goes on and on.  She is constantly trying to push through her fears to discover and develop her talents, meet new people, and learn from those around her.  Check out Anjuli’s Facebook page to learn more about her.

~*~*~*~*~*~*~*~*~*~*~*~*~*~*~*~*~*~*~*~*~*~*~*~*~
.

.

Cheeky Photo Frames

~ * ~

This article was written by Cecilia Sanchez

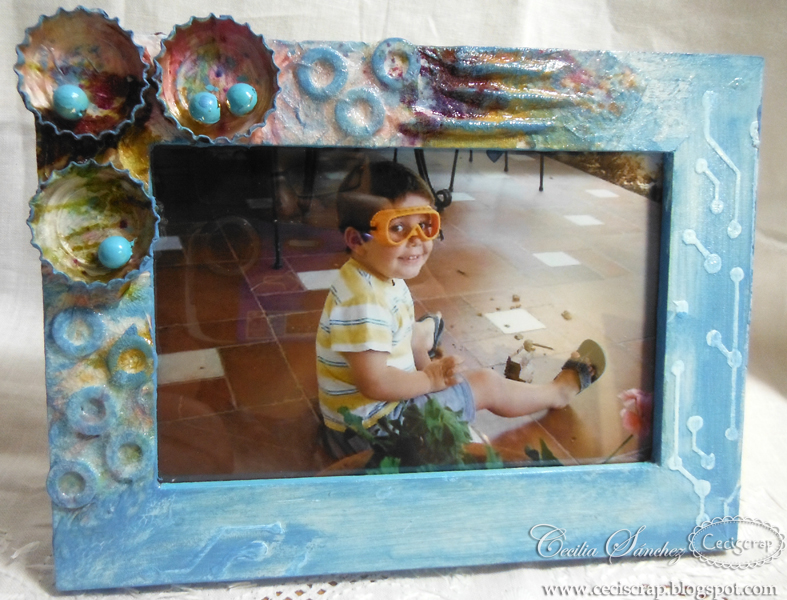
I have made a friendly and funny photo frame, thinking of putting pictures of my naughty children.  It’s pretty simple. They like to play with bottle caps, and so I wanted to include them in the frame.

Make your own photo frames

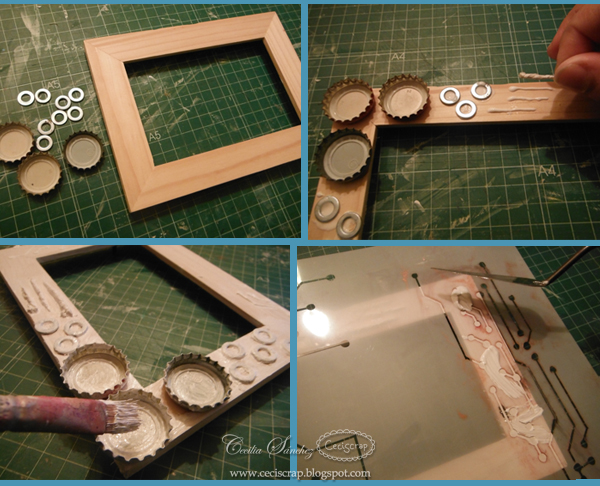
List of materials:

A wooden frame 
Bottle caps 
marbles 
metal washers 
glue 
stencil (Stencil girl products)
gesso 
acrylic paint 
paper towels 
mod podge 
crakle paint 
Zig Painty FX

First, glue the metal elements or whatever we want. 
Then, cover with a coat of gesso.

I used a stencil of electronic circuits with gesso to give more texture.

Mixed media photo frames

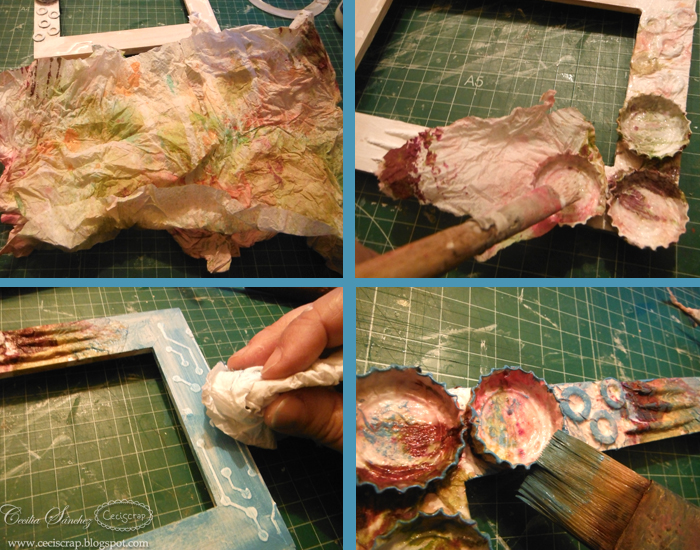
I like to use the paper towels used, and stained with paint.

I have fixed with Mod Podge.

A layer of acrylic paint.

I remove some paint with a baby wipe.

Mixed media photo frames

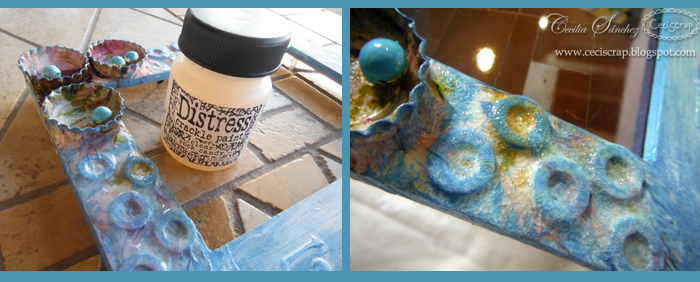
Finally, a layer of Distress Crackle paint, gives an interesting effect.

Mixed media photo frames

~*~*~*~*~*~*~*~*~*~*~*~*~*~*~*~*~*~*~*~*~*~*~*~*~
My name is Cecilia Sanchez (CeciScrap) and I live in Málaga, Spain. I am married and we have three gorgeous sons. They inspire me every day with their crazy ideas.

Since my childhood I liked the photography, drawing, collage and make photo albums with cuts and travel souvenirs. I also love crafts in general. In 2006, a few months after birth my twins, I discovered scrapbooking, digital first and then the traditional. I love to do 30X30 pages, cards and mini albums, and for a while now I am fascinated with the Art Journal and Mixed Media, and I do not imagine scrapbooking without getting my hands dirty.
I am inspired by everyday things, feelings … The art journal is a real diary for me, because sometimes I need to express feelings with colors and shapes.

I love learning and discovering new techniques and materials.
I am part of the European design team of KURETAKE, and I am also designer for a monthly blog challenge Sweet Card Club. I contribute with some blogs and digital magazines and organized Scrapbooking workshops in Malaga.

You can see more of me at:

http://ceciscrap.blogspot.com.es/

http://www.facebook.com/ceciscrap

~*~*~*~*~*~*~*~*~*~*~*~*~*~*~*~*~*~*~*~*~*~*~*~*~
.

.

The Multitasking Mixed Media Artist

~ * ~

This article was written by Ann Strecko Koeman

As a multi tasking mixed media artist I find the need to use multiple sources to market my work and to earn an income. I make different kinds of crafts and art which I try to sell through word of mouth, my ETSY store, and in my booth at a local flea market. I also teach various art making techniques in a local scrapbook store. Now when I teach I have another customer base to which I can advertise about my wares in my stores. When I am in my booth I advertise that I teach as well. In addition to the paid work I write, run a blog, and do Design work for other blogs. All of these are more ways to market myself.

Flea markets and teaching add elements to this multitasking mixed  media artist

Operating a small business such as my craft booth at a local indoor flea market is different from my other selling experiences and I am learning about the pros and cons as I go. I am going to focus on the positives right now which are many. The market is another place for me to advertise what I am capable of making. There I can bring my new ideas the good ones and the not so good. I can learn what people like and don’t. I do get more of a learning experience than I make money most of the time, but that is valuable too. The other things I do is sell supplies that I have either grown tired of or have too many of. Now this also allows me to buy more supplies at wholesale prices which in turn makes me save some money on my own art making. My booth also allows me to make new contacts and gather some interesting material for writing a book one day! The other benefit of operating with in a flea market is that I can shop for some great stuff myself, and usually at a very good price. The other vendors know about me and sometimes bring me used or new supplies they come across in their own treasure hunting. I also get customers who ask if I will do custom work, repairs, or teach . These are all great opportunities and definitely keep things interesting.

Flea markets and teaching add elements to this multitasking mixed  media artist

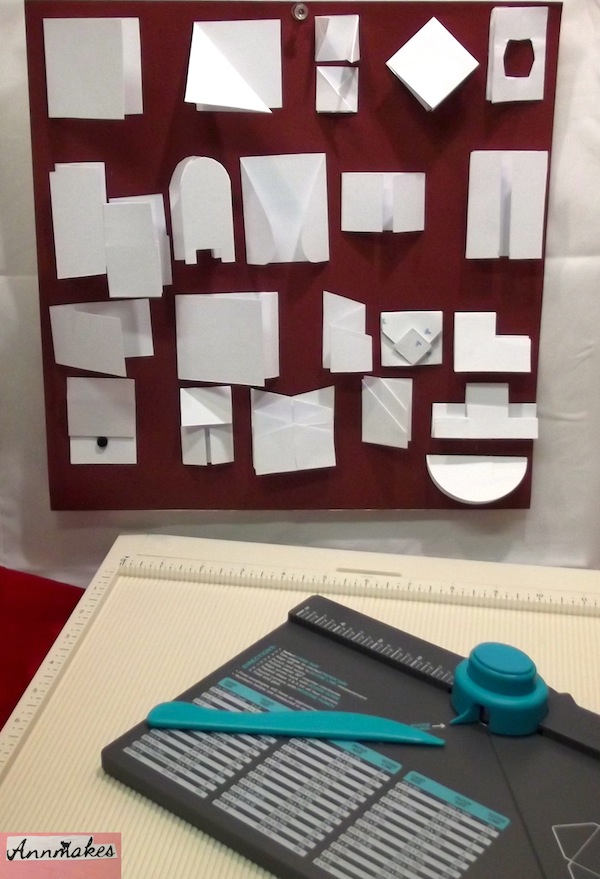
Teaching is another opportunity that I overlooked for too long. Now I have learned about the opportunity for more exposure and also gained new knowledge. Besides earning an income from teaching and advertising my work, being part of a store’s creative team has given me access to new materials and a very much appreciated discount whenever I teach. Through this experience I meet new people which leads to other possibilities for teaching and selling.

Flea markets and teaching add elements to this multitasking mixed  media artist

In addition to the paid work I gain a lot of exposure from participating in social media. I run my own blog ~ Ann Makes, I write and design for other blogs as well as Mixed Media Art. Sometimes this enables me to not only gain valuable experience and make new contacts but free products and discounts to use for more art making.

~*~*~*~*~*~*~*~*~*~*~*~*~*~*~*~*~*~*~*~*~*~*~*~*~
Ann Strecko Koeman is a Mixed Media Artist living and working near Ottawa, Ontario Canada. She is a wife and the mother of two teenage boys. She loves to work with lots of medias from paints to fabrics, papers to metals, used to new, and everything else! Her blog is Annmakes and can be seen at
http://annmakes.blogspot.com
.

.