Michelle G Brown | Mixed Media Art

Urban Flair: How to Create Your Own Handmade Graffiti Sketchbook

~ * ~

This article was written by Martice Smith II
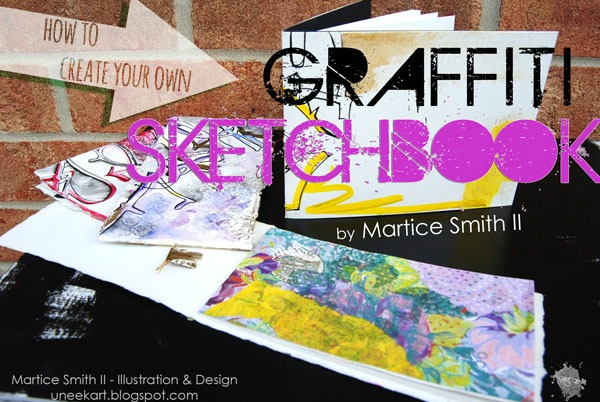
Martice Smith II shares her process of how she creates her popular handmade, graffiti sketchbooks

Attention art journalers and doodlers! Do you want a dynamic, eye-catching book cover? If so, learn how to add some ‘urban flair’ to your sketchbook covers. Try your hand at creating a popular graffiti-infused sketchbook, inspired by mixed media artist Martice Smith II.

Learn how to incorporate your hand-lettering as a graffiti style that’s sure to impress. This tutorial is inexpensive and at the end, you will have created your very own, handmade graffiti sketchbook, in as little as 30 minutes. This creative project will urge you to have the courage to experiment with graffiti-styled lettering, inspired by your own personality.

As the great Dr. Maya Angelou states, ‘We come from the Creator with creativity’.

We all have that innate desire to be heard and seen. Here’s your chance! Be bold- make your mark and let YOUR light shine!

~ * ~

Gather Supplies & Tools

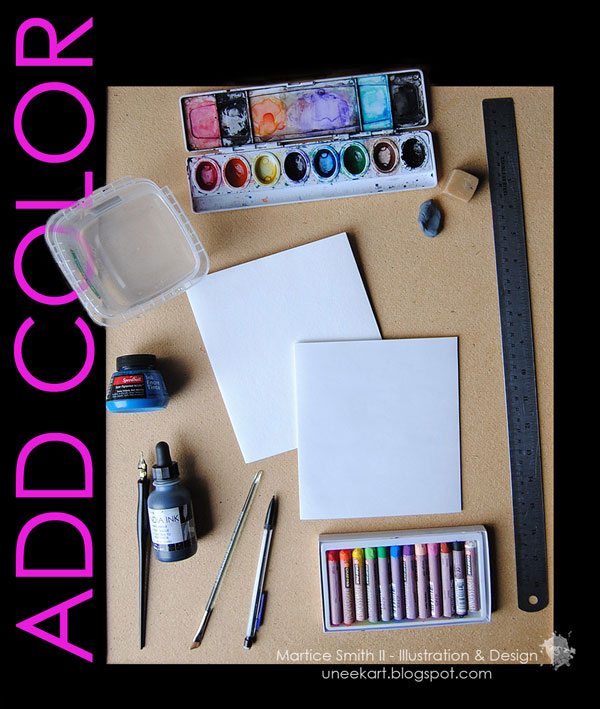
Since this project is inexpensive, you probably already have these supplies and tools on hand. If not, substitute by using what you have!
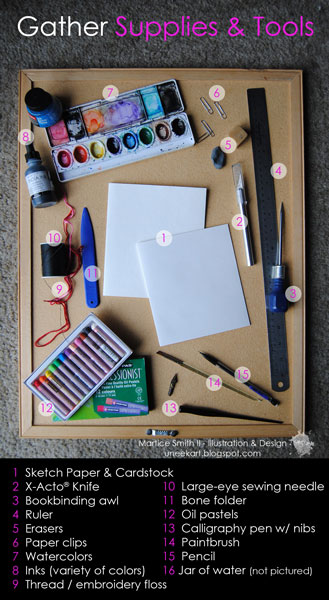
Gather supplies and tools to create your own graffiti sketchbook

Instructions

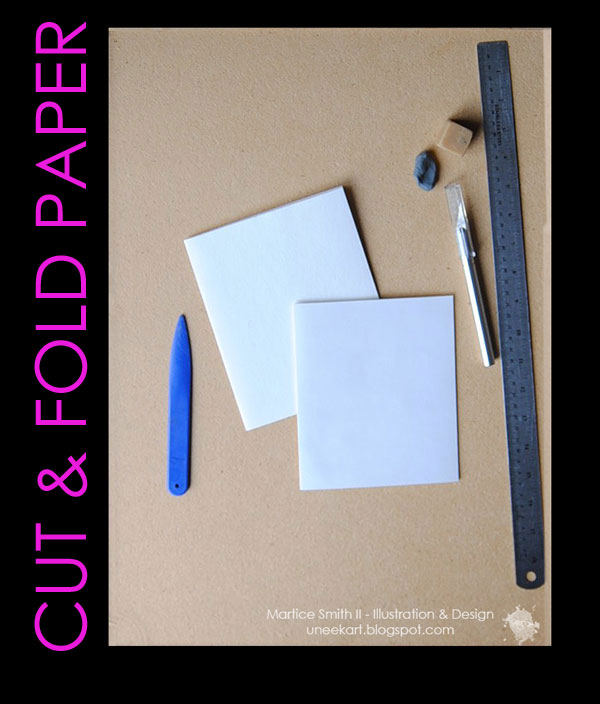
Cut and Fold Paper

Cut and fold paper for the sketchbook

The construction is very basic: heavy cardstock folded in half (for the cover) with 10-12 pages of lightweight drawing paper for the inside, bound with a simple Pamphlet stitch. Here’s what you’ll need:

1 sheet of card stock or heavy duty paper (My favorite is Rives BFK)

10-12 sheets of drawing paper (slightly smaller than the cover dimensions; these will be the inside pages) 

Instructions to Cut and Fold Paper

Start out by measuring and cutting your paper. (Should be double the size you want for the finished sketchbook.)

Using a bone folder, fold the cardstock cover and all 10-12 sheets of drawing paper, individually. Match up the corners and fold the paper to make a good crease.

Nest all 10-12 sheets, spine (the fold) on spine on spine inside of the cover. This creates one signature. (There should be equal amounts of cardstock showing at the top, bottom and right of the signature.)

FYI: Folding a sheet in half yields a “folio”. A “signature” is a compilation of two or more loose folios. In this technique, the cover and signature are sewn at once.

Use an eraser to clean any smudges or pencil lines.

Designing the Cover
Add your design to the cardstock paper

Think about the elements of art and principles of design before designing your graffiti-styled cover.

Line is the most basic element of art and one of my favorite elements to use when building a composition.

Bold and thick; squiggly and thin; lines that taper at the ends; any combination of above. When grouped together, lines can convey texture, rhythm, and density. My signature style is characterized by the use of vibrant colors and loose, energetic marks- accompanied by phrases and or quotes. How wild can you get?!

My writing is not always legible. Sometimes, I want the viewer to know exactly what I’m writing and other times, I keep it more personal by using it as a design element. Be willing to practice free-style lettering until it feels like second nature to you.

Tip: If you’d don’t have a calligraphy pen, try a marker with a chisel-tip. Do not to use your finer tip pens because you don’t want to risk ruining them when drawing over paint, oil pastel and modeling paste.
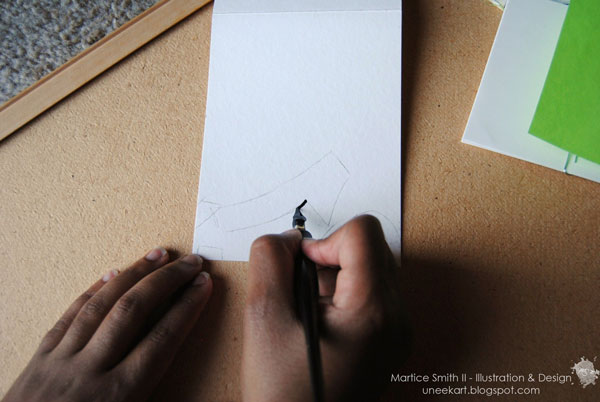
Designing the cover of the sketchbook, using a calligraphy pen and ink

You can draw a sketch of your composition, very lightly, or you can free-hand the lettering. For this tutorial, I’m doing both!

Draw and write intuitively- don’t hold back! If you start mixing uppercase with lowercase letters, that’s perfectly fine! This is your invitation to show off your unique personality. Go ahead, add your charm to the surface!
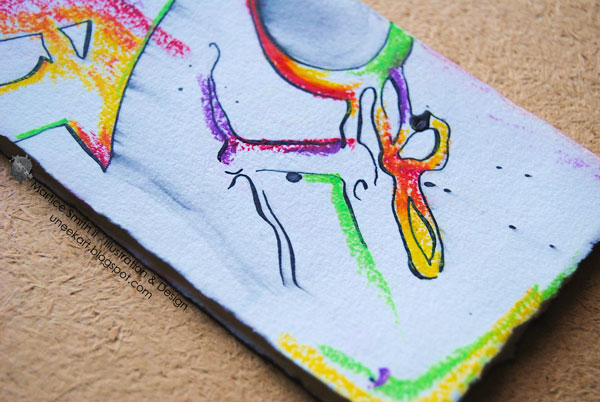
Cover of the sketchbook, featuring oil pastels, calligraphy pen and ink

Rhythm– just like music, art can also have rhythm. It can be seen as repeating shapes or colors. Showing a variety of lines, moving in different directions, helps lead the viewer’s eye around the composition. Add oversized letters diagonally across the paper and try overlapping to give a sense of depth.

Sewing the Graffiti Sketchbook
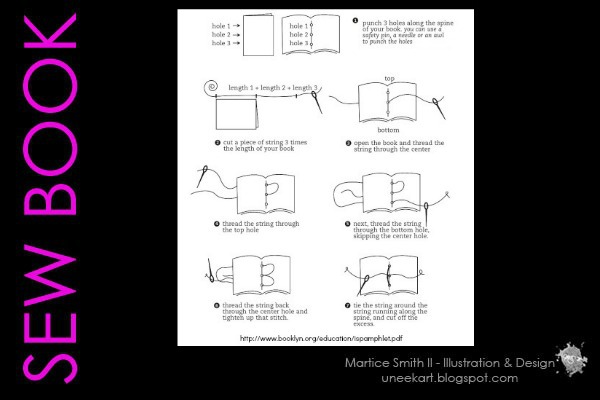
3-hole Pamphlet Stitch technique

This diagram shows you how to bind your book using a simple Pamphlet Stitch.
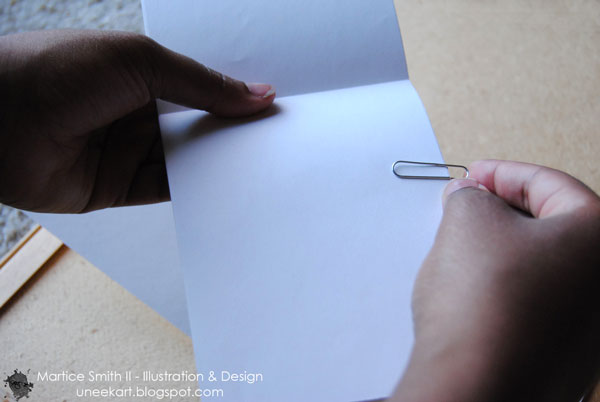
Keep drawing papers in place with paper clips

Grab a couple of paper clips. Neatly stack the signature, spine to spine, inside the cardstock cover. Secure them in place.
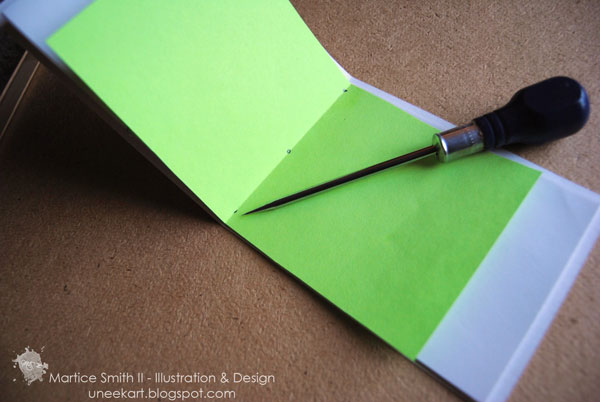
Mark holes and pierce them, using an awl

Using a ruler and a pencil, measure and mark the center of the spine.

Mark two more places: measure 1/4 inch from the top and mark. Next, measure 1/4 inch from the bottom and mark.

Using the awl, slowly and carefully, pierce thru each mark. (You should be piercing through the drawing sheets AND the cover.)

Having trouble? See diagram, here. Also, refer to this diagram for binding your book using a simple 3-hole Pamphlet Stitch.
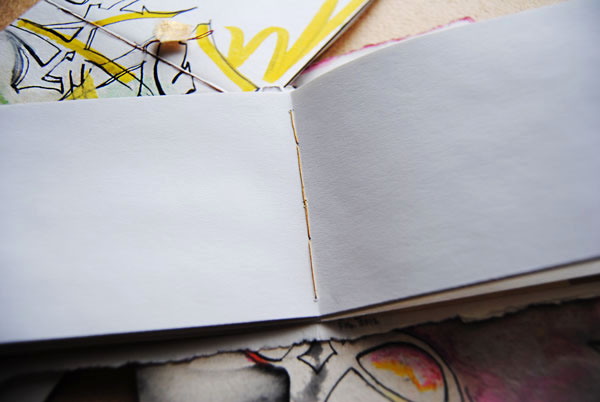
Opened view of sketchbook, showing thread

Your sewing should look straight and taut. Check the center of your sketchbook.

Varnish Cover
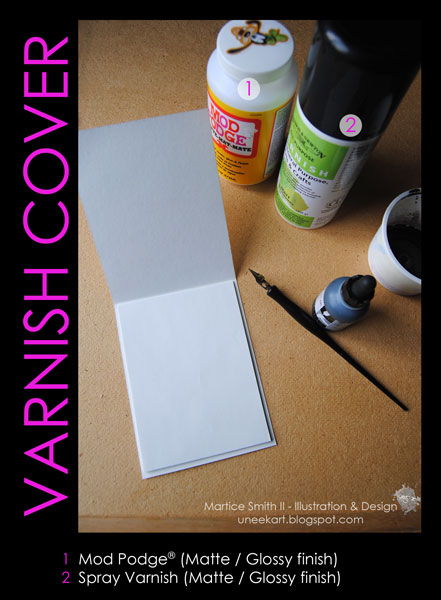
 Varnish cover of graffiti sketchbook

For the final stage, we need to protect the cover of our handmade graffiti sketchbook. I like using spray varnish for the first two coats. Note: dirt from fingertips, dust and wear and tear will create a unique worn-in appearance. If you want to prevent this from happening, apply 2-3 even coats of Mod Podge (after spraying varnish). Important: every coat of varnish needs to completely dry before applying another coat. Usually takes 5 minutes to dry.
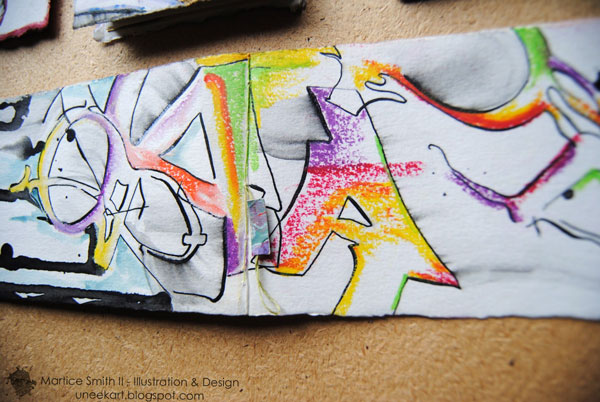
Varnish cover of graffiti sketchbook

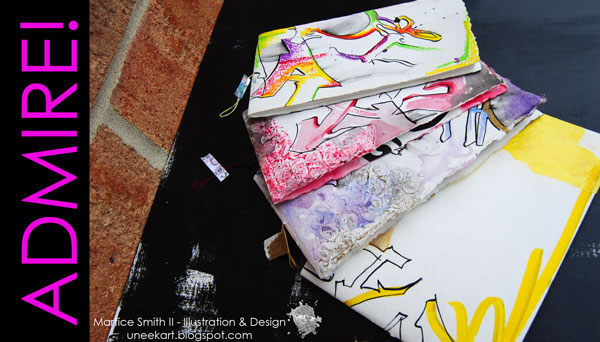
Admire!

 Admire your creation and share

Finally, your new handmade, graffiti sketchbook is complete!

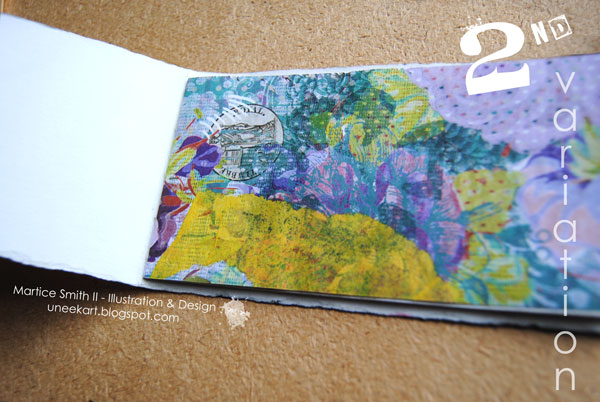
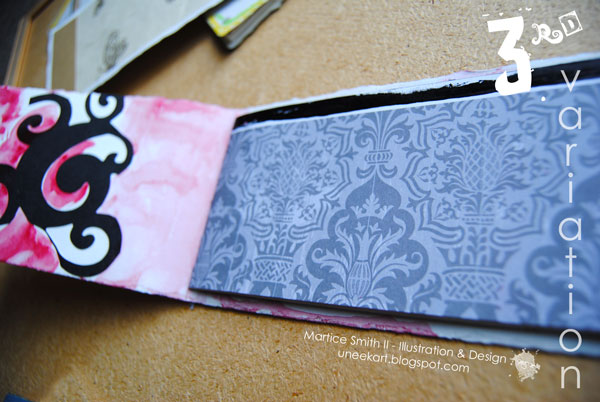
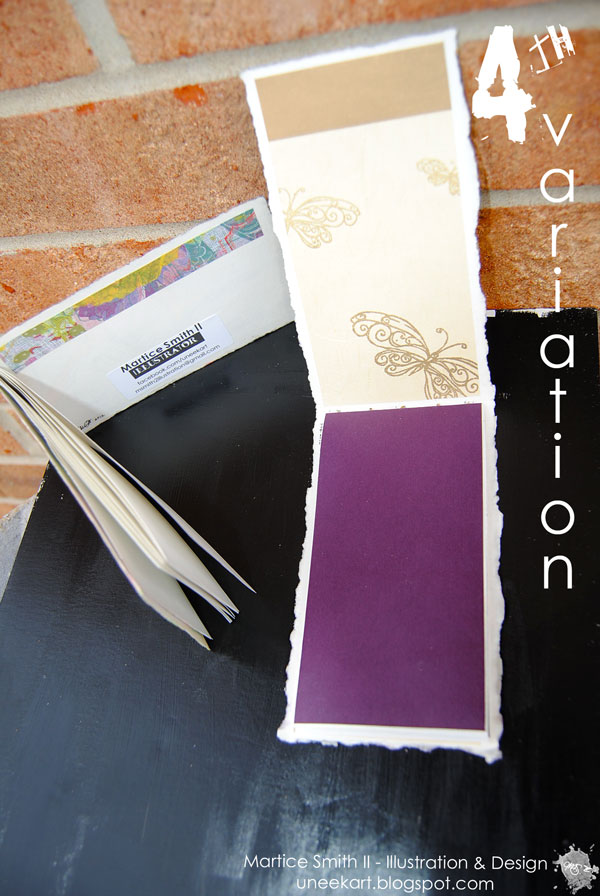
Add more “urban flair” with these four variations

Design your cover with patterns, textures, overlapping shapes and complementary colors that help bring the design together in a cohesive way. Add words, phrases, quotes or expressive writing in various areas. Try metallic paints and modeling paste, like I did here. Use up your scraps of cardstock and paper ephemera by gluing them to the inside of the sketchbook 

Take a look at these four variations, from my collection:
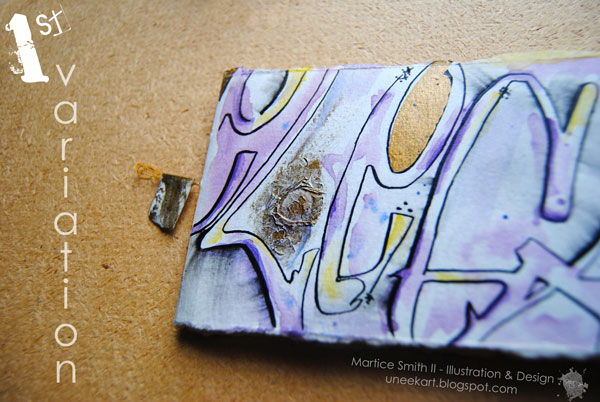
Add texture and some metallic paint and modeling paste!

 ~*~

 Use up your scraps of cardstock and paper ephemera by gluing them to the inside of the sketchbook

  ~*~

Use up your scraps of cardstock and paper ephemera by gluing them to the inside of the sketchbook.

~*~

For a more natural, unrefined look, create a deckled edge

Make more of these sketchbooks, just to practice different styles. Take the leap- experiment with creating graffiti-styled lettering. Your new sketchbook can be your safe and comfortable place to play, invent, explore, and make mistakes.

When you fill your journal and flip through the pages, you’ll begin to have a deeper connection with your own handwriting, as it has morphed into something spectacular!

With some practice and patience, your own handwriting is easily transformed into creative, graffiti-infused creations, full of your own personality. Who wouldn’t love to see more of YOU?!

I hope you have fun with this tutorial. Be bold and let your personality shine!

~*~*~*~*~*~*~*~*~*~*~*~*~*~*~*~*~*~*~*~*~*~*~*~*~
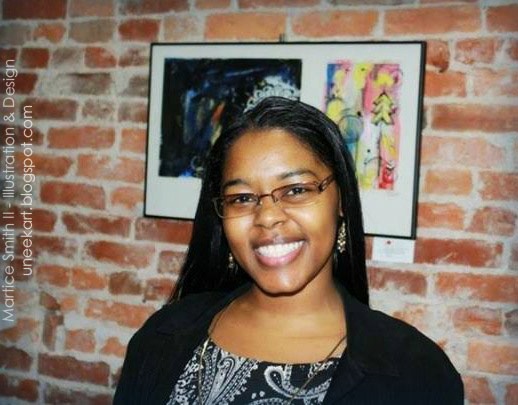
Martice Smith II

Martice Smith II is creative director of Martice Smith II – Illustration & Design Studio, based in Kansas City, Missouri and owner of Uneek Art Boutique. She established herself as a freelance Illustrator and graphic designer after receiving her Bachelors of Arts Degree.

Her stunning illustrations reveals her love for fashion, typography and wildlife- using a combination of analog and digital techniques. Martice also contributes as an article writer for the Creating Mixed Media Art website.

You can see more of her work via her Facebook page or her blog.  She invites you to join her monthly newsletter, Uneek Art Letter, for art biz tips, advice and free digital goodies!

~*~*~*~*~*~*~*~*~*~*~*~*~*~*~*~*~*~*~*~*~*~*~*~*~
Transparent Stamped Collage Layer Technique

~ * ~

This article was written by Elaine Brady Smith

I love adding collage to my mixed media art whether it’s in journals or on a piece that will hang on the wall. The collage papers that I make often spark ideas and I’m excited to mix and match to see how I can combine the layers. I am always prepared to get working when I have papers ready and on hand, so one of the things I do on a regular basis is to have paper making days when all I do for the day is make a whole lot of papers! Then on art making days, that big ole pile of collage paper just beckons to me to dive in and create something awesome!

One of my favorite go-to methods is adding transparent collage layers to my work. This adds depth and history which creates a more interesting piece of art. I can go crazy layering patterns, colors, and designs that all allow what is underneath to show through. This is added as a second stage, so after I’ve collaged or painted a start, I am ready to add the first transparent layer. There are many ways to add transparent layers to your work. The one I will talk about today is stamped layers on tissue paper that will be made transparent. When the process is complete, only the printed areas remain visible. It’s a lot of fun, so let’s get started!

Layering patterns and designs with transparent stamped collage layers.

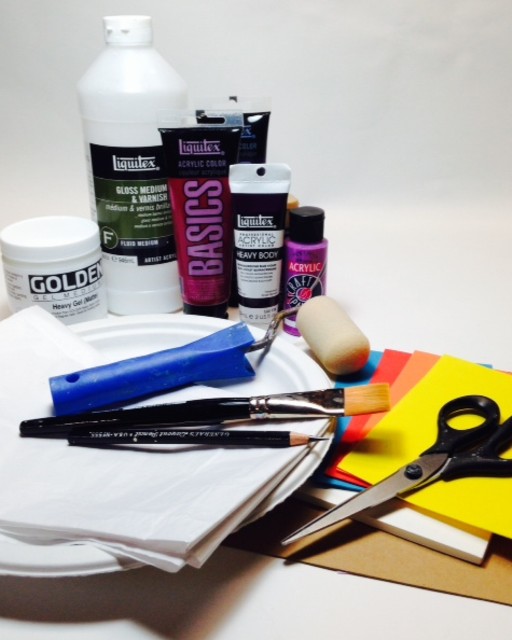
Here is the supply list for this project:

Cardboard, Mat board, or Foam Core Board

Fun Foam

Pencil or Fine Point Marker

Scissors or XActo Knife

Gel Medium

White Tissue Paper

Sponge Roller

Large Paper Plate

Acrylic Paint (can be cheap 2oz bottles or tube paint)

Wax Paper

Large White Trash Bag (not the flex bags, they have pattern on them)

Masking Tape

1” Flat Paint Brush

Plastic or Paper Cup

Liquetex Gloss Medium & Varnish

Layering patterns and designs with transparent stamped collage layers.

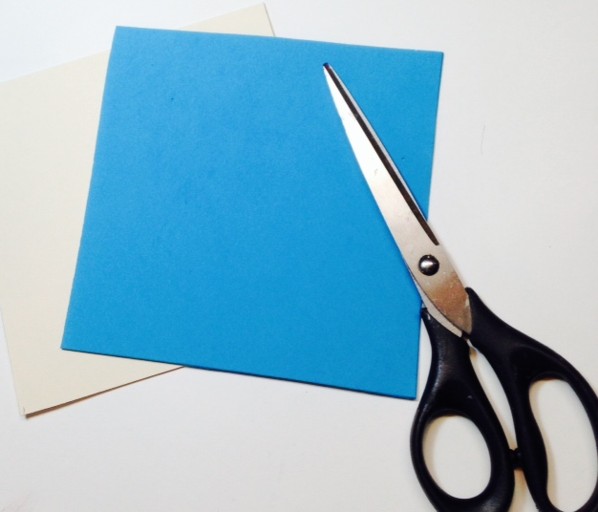
Cut both the board and the fun foam to the same size. I have cut mine to 5” square.

Layering patterns and designs with transparent stamped collage layers.

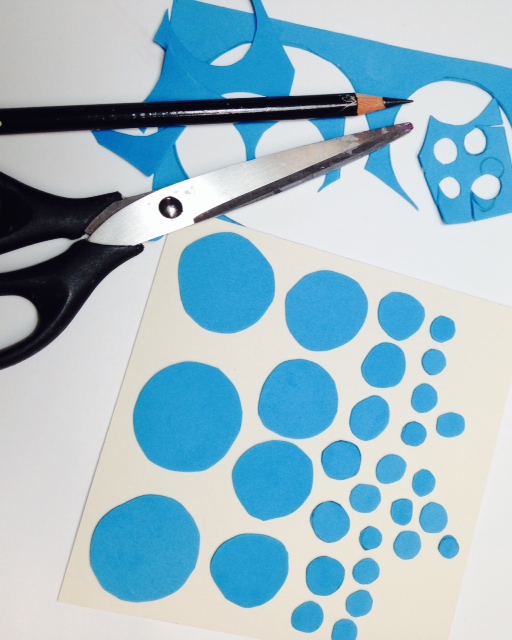
Draw your design on the fun foam with pencil or marker and cut out the pieces with scissors (or you can cut them out with an XActo knife).

Layering patterns and designs with transparent stamped collage layers.

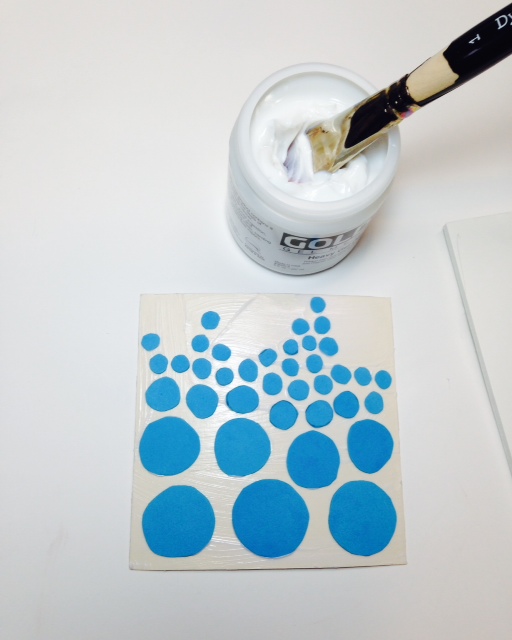
Glue the pieces to the board by brushing a layer of gel medium over the board surface with a paint brush, and then place the pieces where you want them. Press the pieces down and make sure each piece is secured with gel medium. Wipe excess gel medium and allow the stamp to dry.

Layering patterns and designs with transparent stamped collage layers.

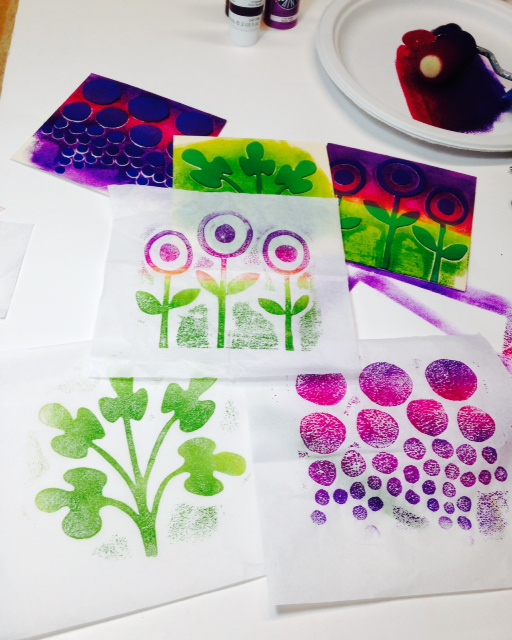
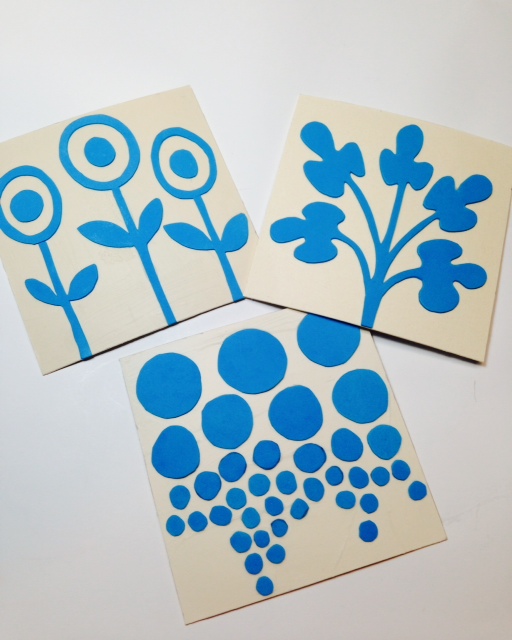
I have made 3 different stamps that I plan to print and then use in a collage.

Layering patterns and designs with transparent stamped collage layers.

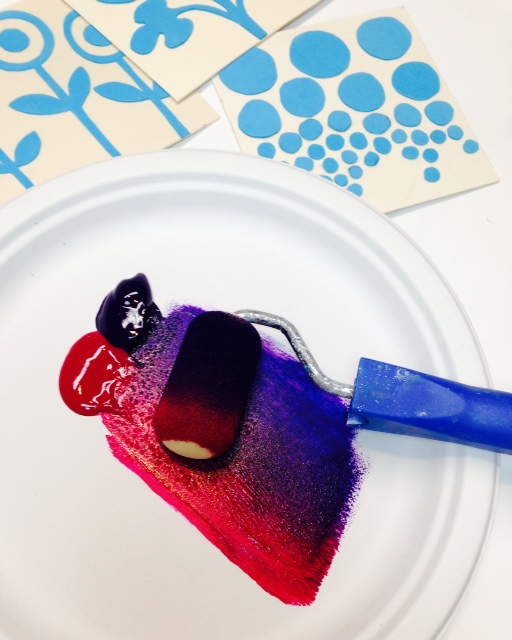
Place 1 or 2 colors of acrylic paint on one side of a paper plate and if you are using multiple colors, place them side by side on the plate. Tip the sponge roller into your paint and begin rolling out from the paint piles until the sponge roller is filled evenly with paint. This takes a good amount of paint. If you are using 2 colors, roll in a slightly left and right motion to mix the colors in the middle of the roller21.

Layering patterns and designs with transparent stamped collage layers.

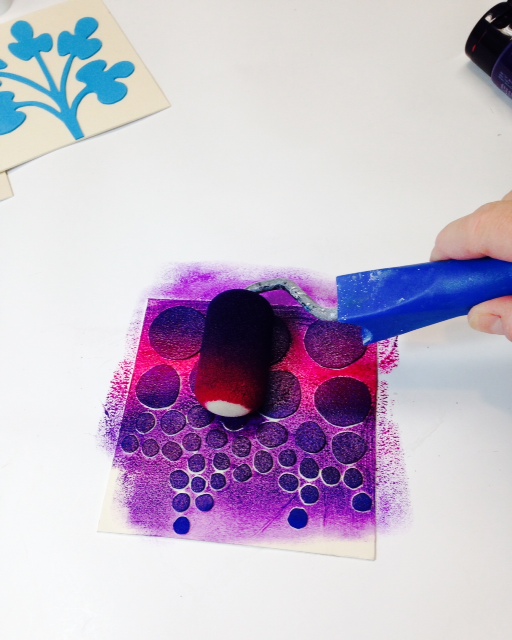
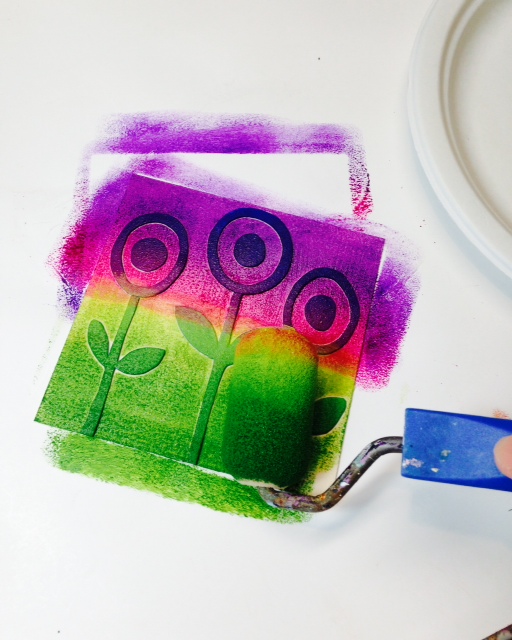
Place your stamp foam side up and roll the paint filled roller over it until it looks like the stamp is covered sufficiently with paint.

Layering patterns and designs with transparent stamped collage layers.

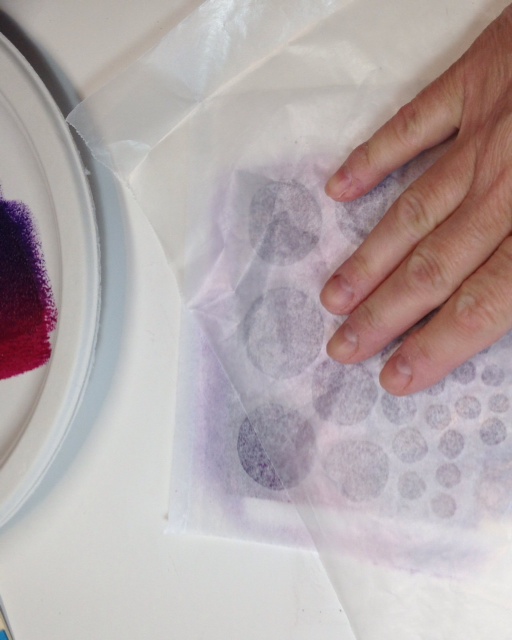
With the stamp facing up, place a piece of white tissue paper over the stamp. Place a piece of wax paper on top of the tissue paper and smooth out with your fingers making sure the tissue has made good contact with the stamp.

Layering patterns and designs with transparent stamped collage layers.

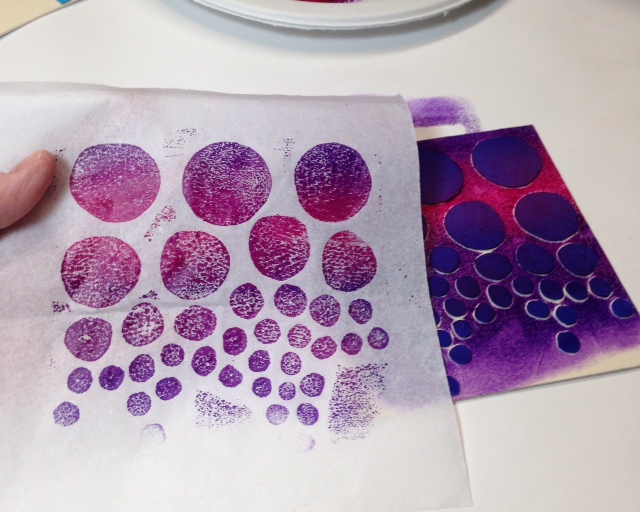
Remove the wax paper and gently pull the tissue off the stamp to reveal your image. You can repeat this process to produce a “ghost” image with another piece of tissue paper, or spritz the stamp with water from a spray bottle to revive the remaining paint. Each print will turn out slightly different as you print.

Layering patterns and designs with transparent stamped collage layers.

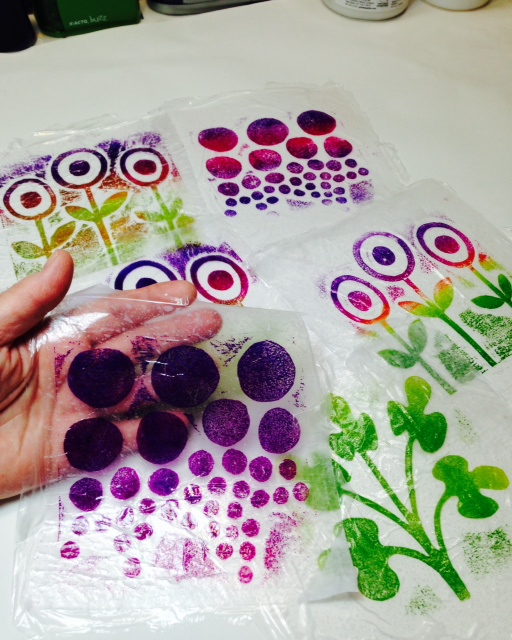
You can experiment and play with the paint colors. Here I have rolled two shades of purple on the top of the stamp with a sponge roller and with another sponge roller, added two shades of green to the bottom of the stamp.

Layering patterns and designs with transparent stamped collage layers.

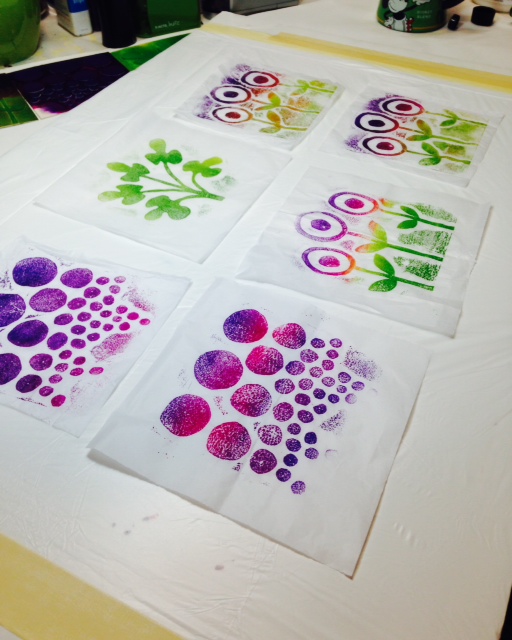
I’ve have made a variety of prints from the 3 stamps I made, so that I have multiple choices when I am ready to collage.

Layering patterns and designs with transparent stamped collage layers.

After your prints are dry, lay them on a white trash bag that has been taped flat to a hard surface such as a table top or board.

Layering patterns and designs with transparent stamped collage layers.

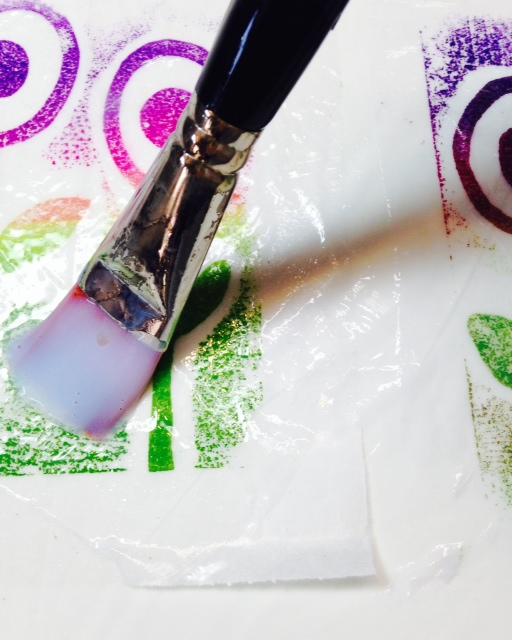
Put a small amount of Liquetex Gloss Medium and Varnish in a plastic or paper cup. With a paint brush begin to generously paint the entire surface of the printed tissue paper with the medium. You can leave a tiny corner of the tissue paper unpainted to use as a lifting point. Allow this to dry overnight.

Layering patterns and designs with transparent stamped collage layers.

When the medium is dry, carefully lift the printed tissue from the plastic bag. It will be completely transparent, except for the parts that have been printed with the paint.

Layering patterns and designs with transparent stamped collage layers.

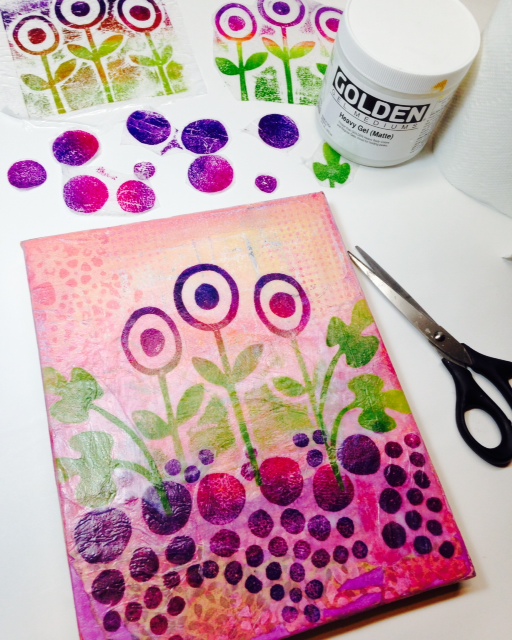
You can now add the transparent collage pieces to your art. My piece was done on an 8” x 10” stretched canvas. I started with paint, collage layers and a bit of stenciling and when the initial layers were dry; I cut and glued my transparent prints down with gel medium. You can add many of these transparent prints with different patterns to your piece to get a unique effect. Try combining different patterns or the same pattern in a variety of positions or colors.

Layering patterns and designs with transparent stamped collage layers. Make your own stamped layers! Learn how to create your own original transparent collage papers! This is an inexpensive technique using Fun Foam and acrylic paint to print on tissue paper that will then be made transparent. Your prints can be layered in your mixed media art producing depth and interest in your art.

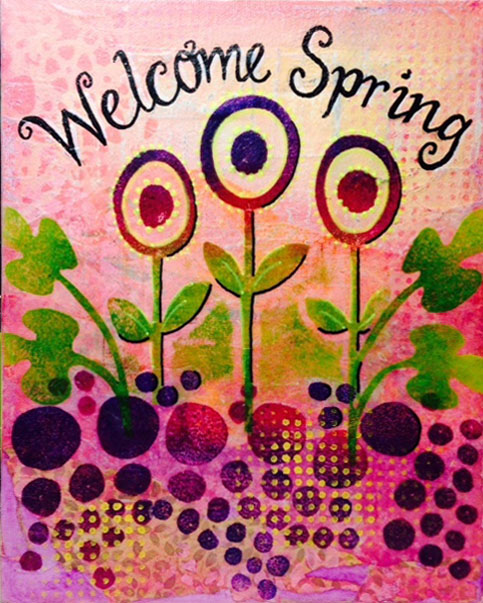
Here is my completed collage that I finished with Sharpie paint pens and some additional stencil layers.

I hope you have fun playing with this technique!!!

~*~*~*~*~*~*~*~*~*~*~*~*~*~*~*~*~*~*~*~*~*~*~*~*~
Author bio:

Elaine Brady Smith loves creating acrylic mixed media and encaustic collages. Key ingredients in her work are vintage papers and her own collage papers made with repetitive marks, simplistic shapes and transparent layers.  She also enjoys other art mediums such as art journaling, oil painting and colored pencil drawing in addition to writing, teaching and spending time with her family. Find more on her website: elainebradysmith.com and on Facebook: Elaine Brady Smith Art

~*~*~*~*~*~*~*~*~*~*~*~*~*~*~*~*~*~*~*~*~*~*~*~*~
.

.

Mixed Media Artist – Marjolaine Walker

~ * ~

This week, mixed media artist Marjolaine Walker shares her story with us – take it away Marjolaine…

~ * ~

Hi, my name is Marjolaine Walker. I’m a mixed media artist from Ottawa Canada. I’ve been working in the creative industry for eleven years now but didn’t discover my true passion until three or four years ago. I’m the owner of Twelve Stones Scrapbooking (and Art Studio) which is a travelling store. I also teach out of my studio.  For a long time I desired to be a teacher and designer but never thought I was good enough so I hid myself behind the retail front where I figured I belonged. I never told anyone about my dream because it felt too out of reach. Two things happened a few years ago to get me to where I am today. The first was taking a mixed media class taught by Donna Downey. It was there that I fell in love with mixed media and I became free to be creative after Donna told me to stop thinking so much. I have a habit of over analyzing every little thing when I am creating so this was a huge eye opener for me! From there I taught a class only as a favour for a friend and discovered that not only did I enjoy teaching but people actually wanted to take classes from me. It took another two years for me to call myself an artist.

Marjolaine Walker

As a stay at home mother of four children I find it difficult to make time for art but I make it a priority because it’s important to me. During this season of life I don’t get to be artsy as much as I would like but these years with my children will be over before I know it so for now they come first.

I get my inspiration from my faith in God. Most of  my pieces have part of my heart on them. There’s often a much deeper meaning to my art than what is known or seen. It’s always my hope that my art encourages and inspires others. It warms my heart when my art deeply moves people and touches them in an amazing way.

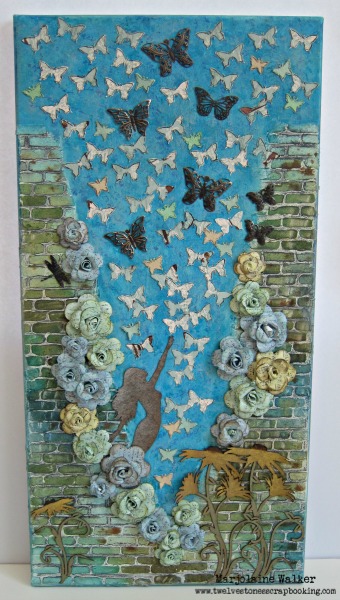
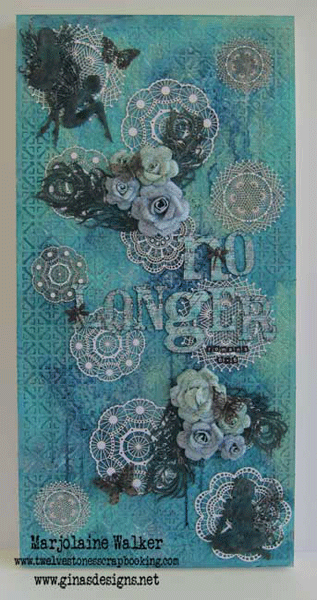
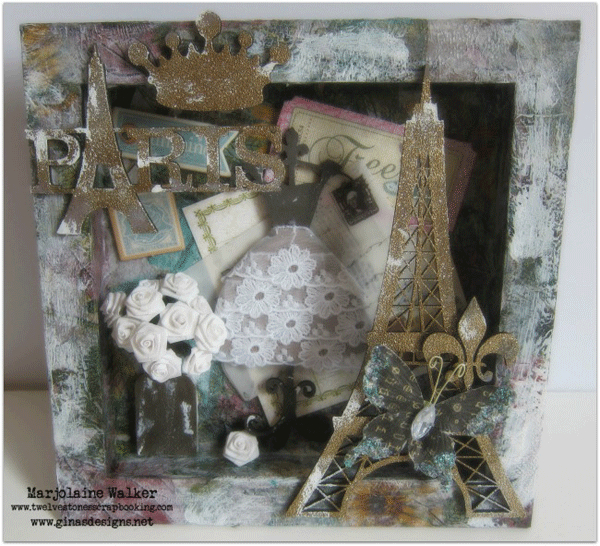
Marjolaine created mixed media art using found objects and things in her studio

I love to use all kinds of products and found objects on my projects.  My goal is to use up everything in my studio in a fun and creative way. I have accumulated so many treasures through the years and I don’t want them to go to waste. If you look closely you will often find costume jewelry as part of my art.

If I could change anything about myself as an artist, I would make myself more organized and tidy. My studio is almost always a disaster and it sometimes stifles my creativity. I waste precious time looking for things that are piled up on my five work tables. On the other hand, I prefer being creative over cleaning!

Marjolaine Walker is a mixed media artist from Ottawa Canada, using found objects and things in her studio to create these fun pieces

I love to travel and it is my dream to some day teach all over the world  but for now, I stay a little closer to home. My art friends are a diverse group from around the globe and I cherish my time with them twice a year. It’s an awesome community to be part of. As a designer member of the Craft and Hobby Association I am part of a special family who encourages me every step of the way. As a teacher and artist, my top priority is to help others to believe that they are good enough and creative enough to make their artistic dreams a reality.

My art can be seen on my blog: www.twelvestonesscrapbooking.blogspot.ca

Marjolaine created mixed media art using found objects and things in her studio
.

.

A Healing Art

~ * ~

Article written by Melanie Statnick

Five years ago I was faced with a difficult life altering situation. My world was about to be spin 360. There was heart ache and silent suffering.  First time mom being faced with having to venture on her own. It took a lot of will and strength to rise from the situation and keep going. I thought about the woman before me. My past of strong women in my family who immigrated to Canada from countries of war. They came on boats with what they could carry, which was very little.

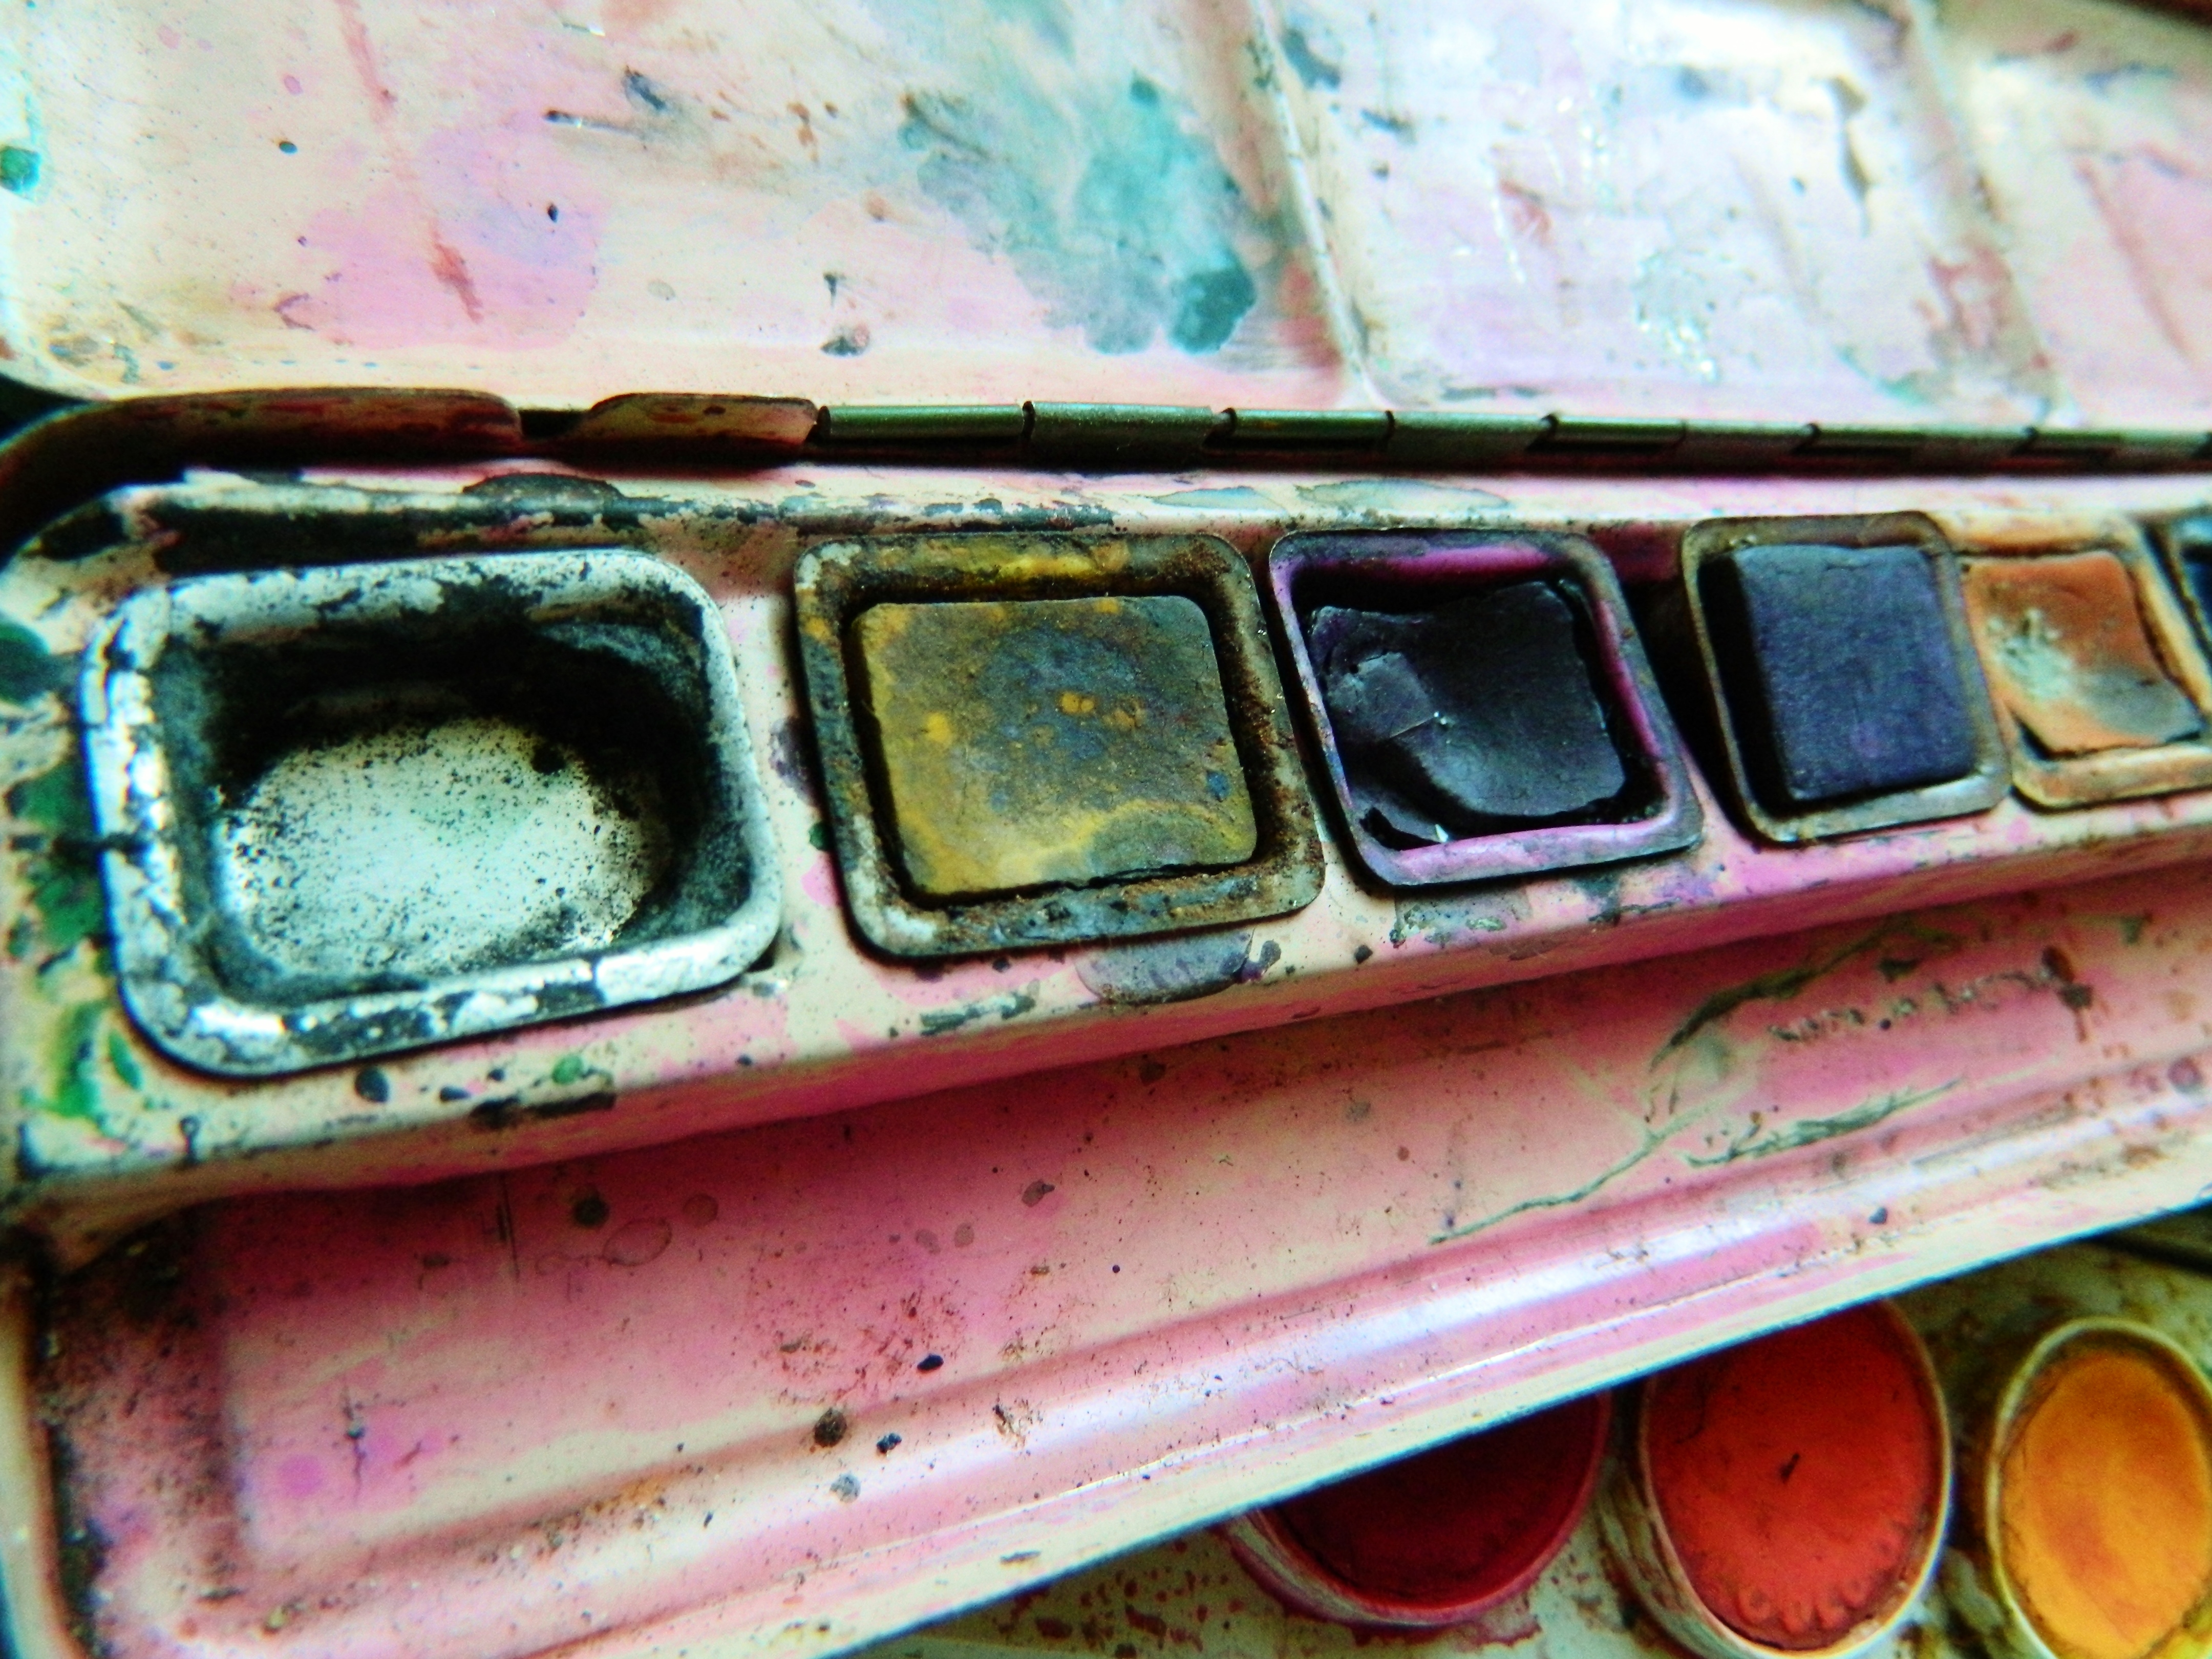
I treasure the photos, stories and memories of my paternal grandmother. She in many ways has become my heroine. One item I had rediscovered as I was packing to move out of my home was my grandmother’s watercolor tins and brushes. I had also found a sketch book with a very tiny piece of charcoal.  The tins where rusted, the watercolor cubes were coming loose from each section. Her brushes had frayed and the painted handles began to chip. In my dramatic depression I related to the tins and brushes. The hard watercolors that had been mudded from use and mixing. Like the brushes I too felt frayed, chipped and used.

Use your art to reconnect with your past and find your hidden strengths

Use your art to reconnect with your past and find your hidden strengths

That afternoon I sat in the silent emptiness of my home, poured a small bowl of water and began to paint with her watercolors. I felt connected to family, to the memories of my childhood with her, playing cards, making pasta from a hand cranked pasta machine, picking grapes from her vines in the garden and staring at these exact paint supplies on her kitchen table wondering what she was painting in her pages. Every night after work I painted and drew and replaced the brushes and watercolors here and there when I could afford it. With every stroke of the brush I was healing, I was letting go. When I saw how the beautiful colors bled into each other there was more healing.

I started as a self-taught artist and I still use art as therapy. Organizations have been studying and using art to heal. Studies show how it works for PTSD, Physical and mental illness, rehabilitation, also with children and adults in domestic abuse. It can also be used for fostering self-awareness, and personal growth. To experience healing from art you do not have to be “going through” something. We all experience stress and tension on a daily basis and art is a healthy alternative to self-expression and a release of repression.

Use your art to reconnect with your past and find your hidden strengths

It’s a journey and there are tools, teachers and students at our access. Writing in journals, keeping an art journal, free style painting on canvas or paper, and even experimenting with a new medium can help you relax and focus. I no longer use my grandmother’s tins and brushes. I keep them on a shelf as a reminder of how far I have reached, how strong I’ve become. I quote “I stood yesterday, I can stand today.”  -Dorothy Dix either you’re in a challenging situation in your life, or not; Art is there, it’s there for you to use, use it well and use it often.

~*~*~*~*~*~*~*~*~*~*~*~*~*~*~*~*~*~*~*~*~*~*~*~*~
Melanie Statnick is a Canadian Mixed Media & Collage artist out of North Carolina. Melanie creates art daily from her private studio. Her style is eclectic and often whimsy. She is also an Art Instructor at local venues and in the community colleges to all ages. Her artwork can be found in galleries and shops extensively throughout North Carolina.

~*~*~*~*~*~*~*~*~*~*~*~*~*~*~*~*~*~*~*~*~*~*~*~*~
.

.