Michelle G Brown | Mixed Media Art

Art Journal Page Inspired by Nature

~ * ~

This article is written by Cecilia Sanchez

I like to look for inspiration in the shapes, colors and textures of nature. Seeking inspiration I found a tree that had many things to tell me.
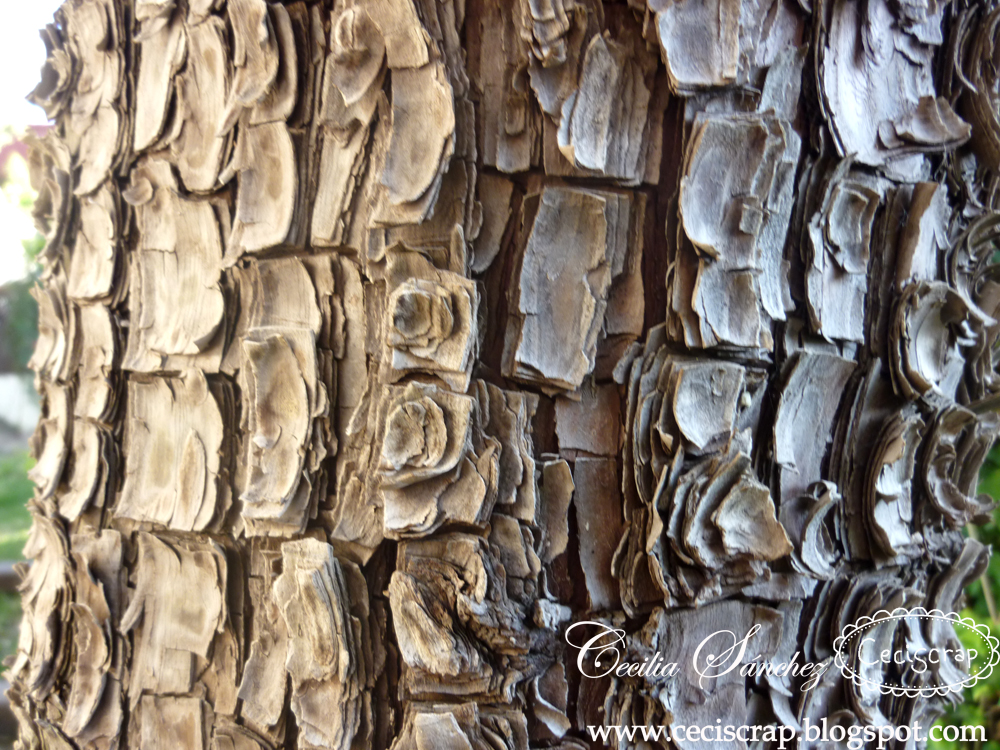
Art journal project

I started trying to reproduce the shapes, layers, shadows, but not knowing how it would end.
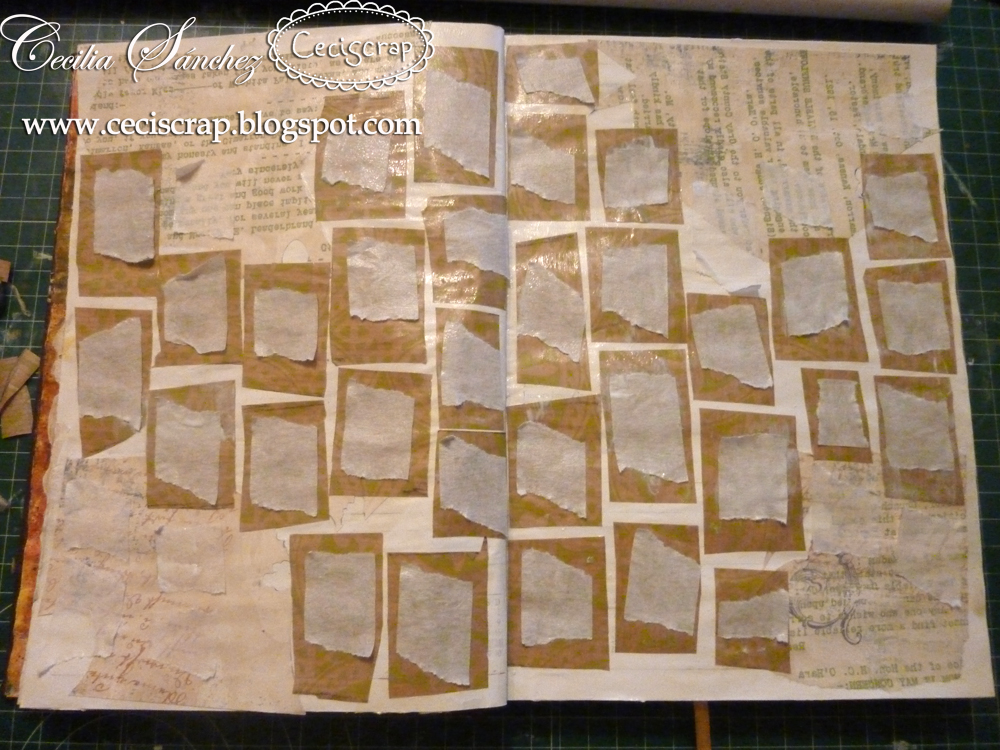
Art journal project

Gradually, the creative process leads you to the final draft.
Sometimes you see the end result from the beginning, but sometimes you need to wait several days and re-cover it with new layers.
This is the best of “Mixed media”: Anything goes!
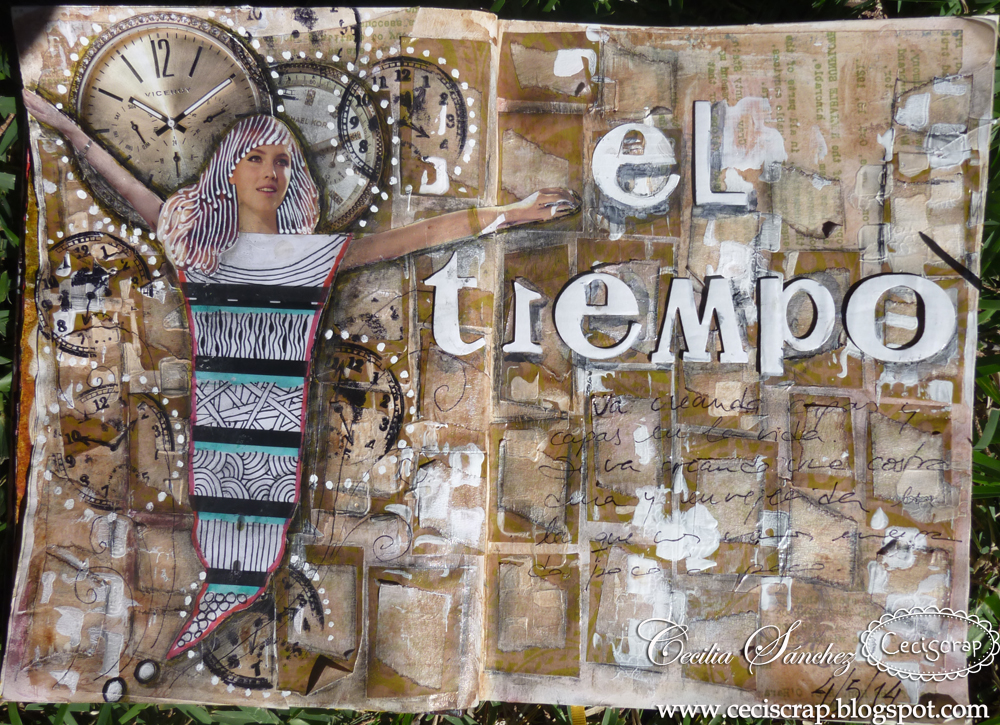
Art journal project

Here is a video with the whole process.

~*~*~*~*~*~*~*~*~*~*~*~*~*~*~*~*~*~*~*~*~*~*~*~*~

My name is Cecilia Sanchez (CeciScrap) and I live in Málaga, Spain.

I am married and we have three gorgeous sons. They inspire me every day with their crazy ideas.

Since my childhood I liked the photography, drawing, collage and make photo albums with cuts and travel souvenirs. I also love crafts in general. In 2006, a few months after birth my twins, I discovered scrapbooking, digital first and then the traditional. I love to do 30X30 pages, cards and mini albums, and for a while now I am fascinated with the Art Journal and Mixed Media, and I do not imagine scrapbooking without getting my hands dirty.
I am inspired by everyday things, feelings … The art journal is a real diary for me, because sometimes I need to express feelings with colors and shapes.

I love learning and discovering new techniques and materials.
I am part of the European design team of KURETAKE, and I am also designer for a monthly blog challenge Sweet Card Club. I contribute with some blogs and digital magazines and organized Scrapbooking workshops in Malaga.

You can see more of me at:

ceciscrap.blogspot.com

www.facebook.com/ceciscrap

~*~*~*~*~*~*~*~*~*~*~*~*~*~*~*~*~*~*~*~*~*~*~*~*~

.

.
An Upcycled Cigar Box

~ * ~

This article is written by Kathi Rerek

My father used to smoke cigars that were packaged in wooden cigar boxes. He reused those boxes to store various items like nails, screws, keys, and batteries. When he passed away, I claimed many of those boxes.

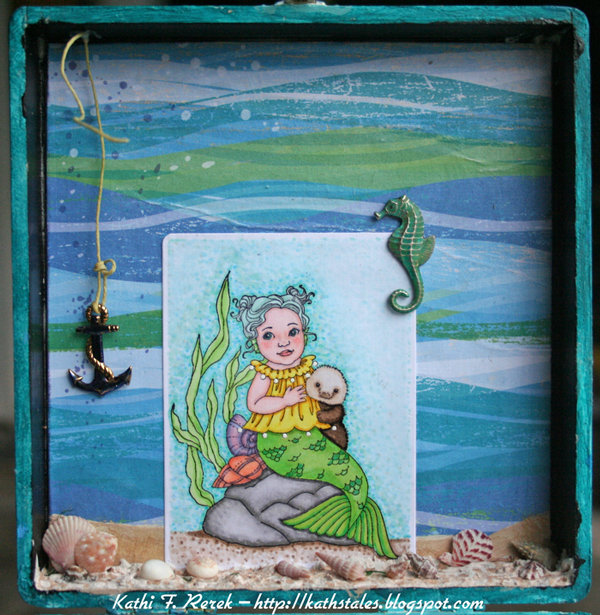
My Upcycled cigar box will feature colored stamped images, a painted surface, and seashells from my collection.

The first step is to smooth the wooden surface with sandpaper so that there are no splinters or jagged bits. When done, the exterior was coated with a layer of gesso to seal the wood and provide some tooth for the acrylic paint. The gesso was left to dry overnight.

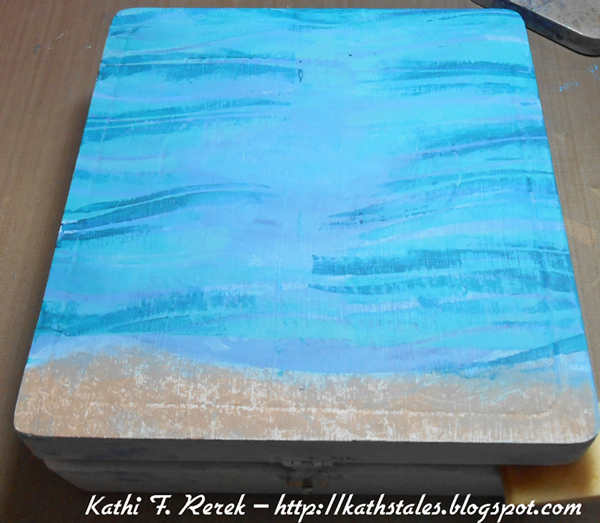
The surface of the box was painted with Mermaid, Bora Bora, Sky, and Beach Hut Fresco Finish acrylic paints by Paper Artsy as well as Salty Ocean and Chipped Sapphire Distress paints by Ranger Industries. The paint was applied top and sides of the box and blended using Cut n’ Dry Foam and heat set between layers.

Inky Pool and South Pacific Fresco Finish acrylic paints were sponged over the Waves stencil by Memory Box

A paintbrush was used to apply Nougat and Irish Cream Fresco Finish to the bottom of the top of the box.

Recycling mixed media project with cigar box

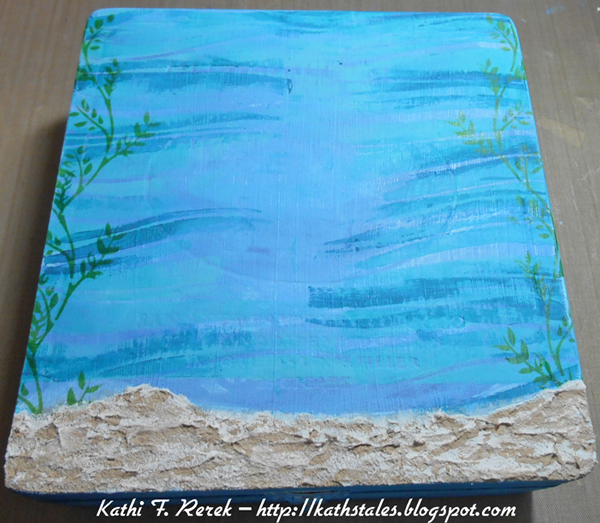
Leaf Green Archival ink by Ranger and Forest Green StazOn ink were sponged over a Club Scrap vine stencil to both sides of the top of the box.

Bone Stone Effects paint by Art Anthology was thickly applied over this using a palette knife, left to dry, then the same colors of  Fresco Finish paints were used to add definition to the “sand”.

Recycling mixed media project with cigar box

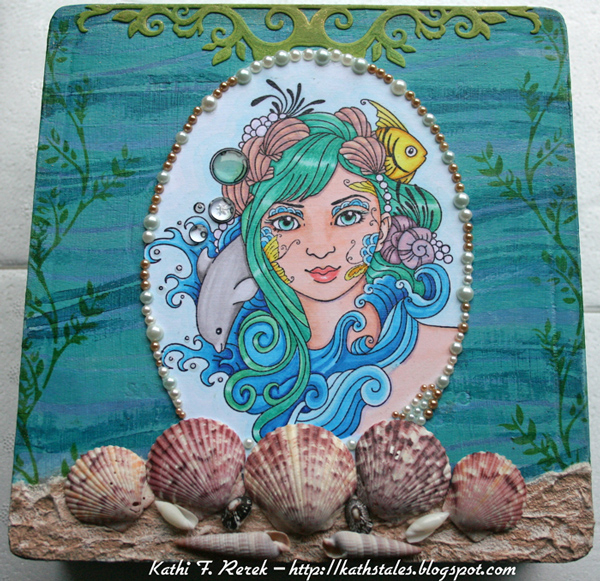
A Flourish Trim Spellbinders die was used to die-cut white cardstock, which was then sponged with Leaf Green Archival ink by Ranger and Forest Green StazOn ink. Gel medium was used to adhere it to the top of the box.

Water from The Elements collection by Susana Loves Stamps was stamped with Tuxedo Black Memento ink onto white cardstock and colored with Copic markers. The image panel was cut into an oval and adhered to the box with gel medium.

Gel medium was sponged over the die-cut, image panel, and the top of the box, excluding the “sand area”.

Shells from my collection were adhered to the sand area of the box using Best Glue Ever by ScrapPerfect.

Pearls were adhered around the oval to finish the top of the box.

Recycling mixed media project with cigar box

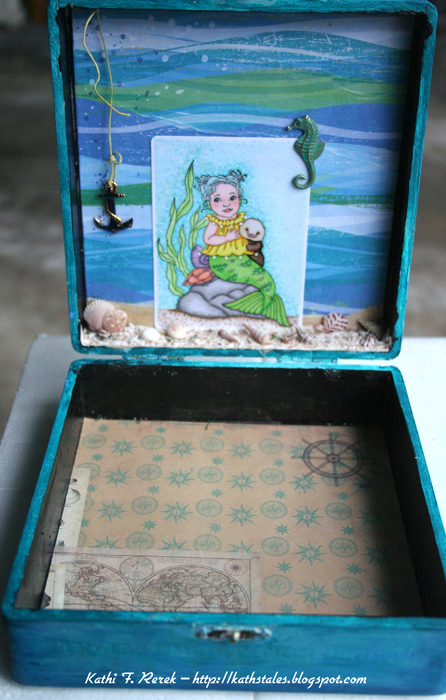
The inside of the box was painted with black acrylic paint and the rims were painted with Beach Hut Fresco Finish acrylic paint.

Water Babies, a stamp by Susana Loves Stamps, was stamped with Tuxedo Black Memento ink onto white cardstock and colored with Copic markers. White Gelly Roll Glaze pen was used to highlight the pearls on the mermaid’s outfit. The stamped image was die-cut using a Die-Namics die.

Patterned paper from my stash was cut to fit the interior of the box. The stamped panel was held along the bottom and a continuation line was marked on the patterned paper. Nougat and Irish Cream Fresco Finish acrylic paint was painted along the bottom of the patterned paper. The stamped panel was adhered to the patterned paper, which was in turn adhered to the inside top cover of the box using gel medium.

Bone Stone Effects paint by Art Anthology was thickly applied to the bottom of the inside of the box using a palette knife, left to dry, then Nougat and Irish Cream Fresco Finish paints were used to add definition to the “sand”. More shells from my collection were glued to the “sand”.

A sea horse metal charm was painted with Verdigris, Jade, Moss Patina by Ranger and Nougat Fresco Finish acrylic paint, and then sanded when dry. It still was missing something, so it was smooshed into a Champagne Dazzle VersaMark pad and heat embossed with clear embossing powder. The seahorse was adhered on the right side of the stamped image panel.

A brass anchor charm was colored with blue Sharpie marker and suspended from the top with some waxed floss.

Recycling mixed media project with cigar box

Patterned paper from the Maritime 6×6 pad by 7 Gypsies was adhered to the inside base of the box.

Recycling mixed media project with cigar box

~*~*~*~*~*~*~*~*~*~*~*~*~*~*~*~*~*~*~*~*~*~*~*~*~

Kathi F. Rerek is a mixed media artist who lives in New Jersey with her husband, daughter, and two cats. She’s been crafting for almost fourteen years and has been lucky to have served on several design teams.

Her blog, Kat’s Tales of Stamping and Scrapping can be found at kathstales.blogspot.com

Water and Water Babies are stamps by Susana Loves Stamps. They can be found at susanascustomartandcarddesign.com

~*~*~*~*~*~*~*~*~*~*~*~*~*~*~*~*~*~*~*~*~*~*~*~*~

.

.
Intricate Paper Stencils, Part 1

~ * ~

This article was written by Martice Smith II

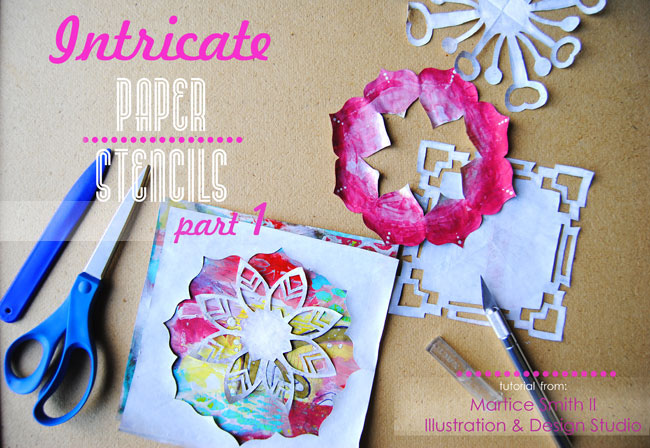
Martice Smith II shares a tutorial on how to make intricate, paper stencils using phone book paper

I love creating my own backgrounds for my illustrations and art journal pages. But sometimes, when I’m learning a new technique, I can go through a stack of papers and I don’t want to necessarily throw them away and then, I’m left searching for more paper to use up. So, the next best thing is to re-purpose them by creating something entirely different!

For this tutorial, I will show you how to use pages from a phone book to create these intricate, paper stencils.You can even use up all of those ‘unsuccessful’ gelli prints and breath new life into them with this easy tutorial.

Let’s get started!

Gather Supplies & Tools

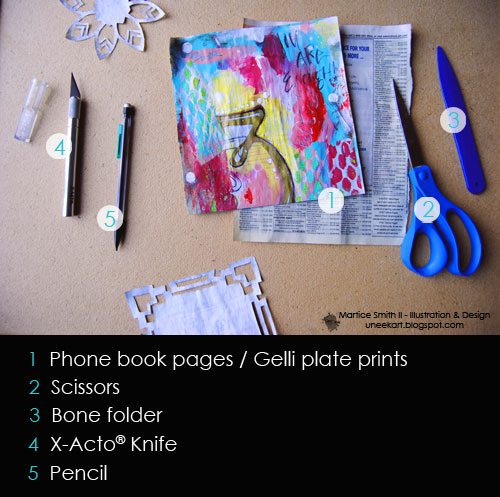
Gather supplies and tools

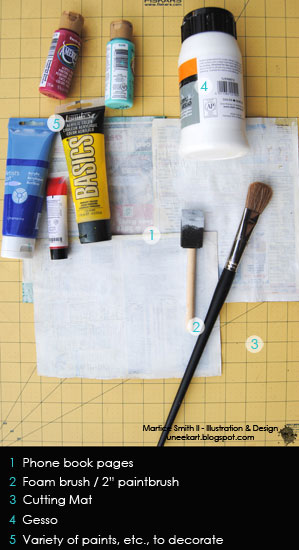
Old Phone book (pages will be torn out)

You can, certainly, use any kind of decorative paper you like for this tutorial. I’m just using up what I already have around the house and adding my own flair to it! Using something old to create something new…

Glue & Gesso

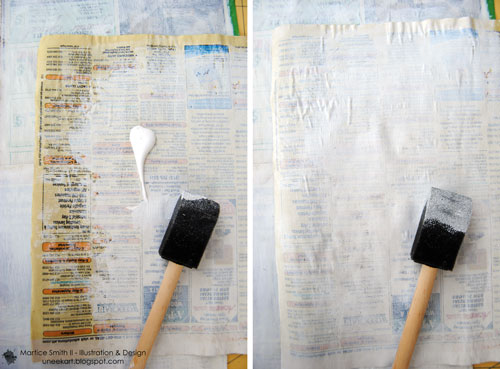
Apply gesso to phone book paper

Supply needed: Glue (not pictured)

I felt that one page of phone book paper was too thin, so I glued two pages together for a little more stability and strength. (The final stencil will still appear delicate.)

Next, use a foam brush or a 2 inch brush to apply 2 light coats of gesso to one side of the phone book paper.

Tip: I like to use a foam brush because it applies an even coverage. I like how the words and numbers peek through the gesso. This will give more depth to the final stencil.

Paint & Decorate

Add color and decorate the phone book paper. Gelli plate prints can also be used!

**If you’re working on pre-designed paper, you can skip this step and proceed to the next step, ‘Create the stencil’.

Make sure you grab the supplies listed in the photo.

Now let’s paint our gessoed phone book pages with acrylics, watercolors, oil pastels- whatever we want! Keep in mind, though: the more layers of paint added, the heavier/sturdier the final stencil will become.

Create the stencil

It really doesn’t matter if your paper is right (paint) side up or wrong side up. Personally, I like to fold the paper with the ‘wrong side’ facing up, simply, because I can easily see the lines I’ll need to draw.

Fold. 

For this particular design, I will need to start with a square sheet of paper.

Since phone book pages measure 7 inches (18 cm) wide by, approximately, 9 inches (22.5 cm) in height, I’ll have to trim the excess.

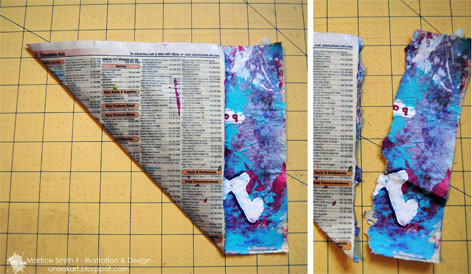
Take one corner and bring it up, diagonally. Line up the top edges.

Folding paper to make a square

Be sure to crease all folds with a bone folder.

Phone book pages are rectangular so I’ll need to trim off the excess paper, after I make my fold.

Note: There will be a leftover strip that measures, approximately, 2 inches (5 cm) wide by 7 inches (18 cm) in height.

Cut or tear off the strip on the side.

Set this strip to the side, for now. (Later, you can make mini-stencils from this same strip.)

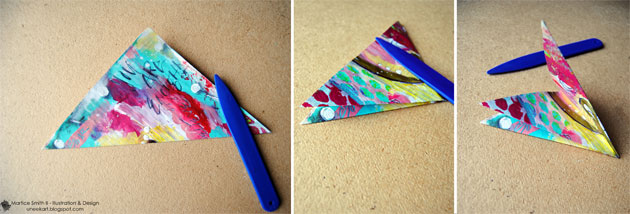
Fold paper

Now your page should look like a triangle.

Fold this triangle in half, twice, in the same direction. Remember to crease every fold with the bone folder.

Now, we’re ready to add our design!

Mark. 

Let’s first visualize what kind of shapes and lines we want our finished stencil to have. There’s no need to measure anything- just go with the flow and enjoy the unique and organic line quality coming from your hands!

Draw a design onto the triangle.

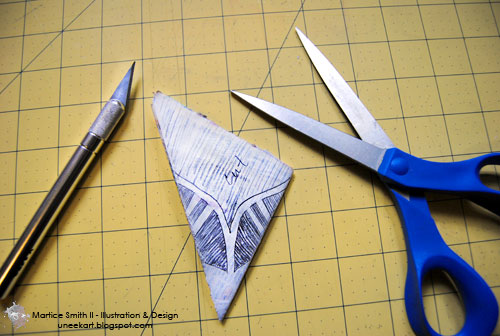
Place the fold on your right hand side. Draw your design onto the paper triangle.

To avoid cutting the wrong lines, shade in the areas that need to be cut away.

Cut out your lines. 

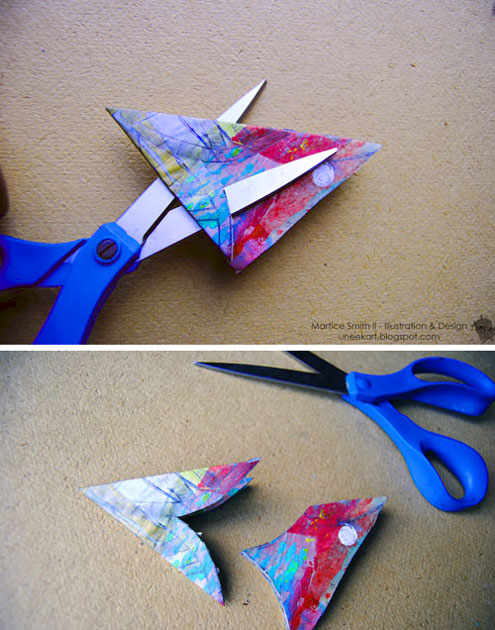
Look for the largest area that needs to be cut away. This particular design calls for me to use scissors, first.

Use scissors to cut out the largest area(s).

Next, determine if you need to continue using scissors to finish cutting out the design. A sharp X-Acto® knife would be a better choice for those narrow, hard to reach areas.

Next, determine if you'll need to use scissors or an X-Acto® knife to cut out the remaining areas.

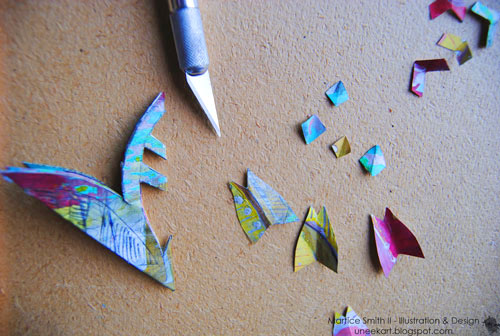
Use an X-Acto® knife for narrow, smaller, and hard to reach areas in your design.

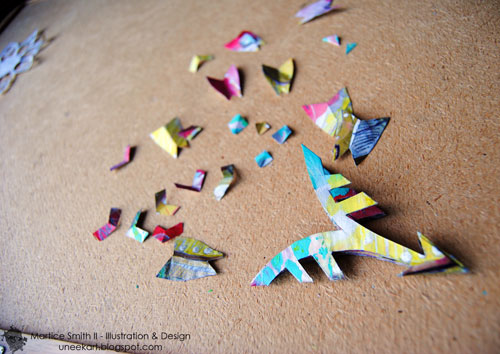
Tip: When you cut out the smaller areas, DO NOT throw them away! If you’re like me, you love to keep small bits of paper because, who knows? You might want to add them to your next collage! These small pieces can add some much needed color or texture to that ‘unsuccessful’ gelli print you have laying around.

You’ll thank me later for this tip 😉

Look at those beautiful bits of paper! DO NOT throw them away…

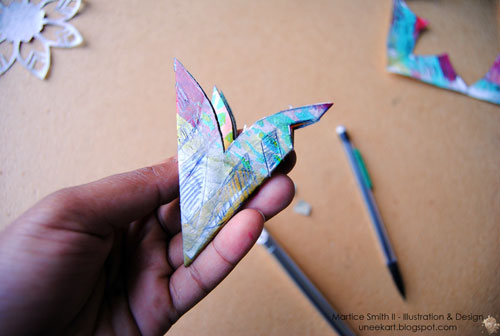
This is what the stencil looks like after cutting away a few areas. Don’t worry, we’re not done yet! Small things pack a big punch…you’ll see.

Open

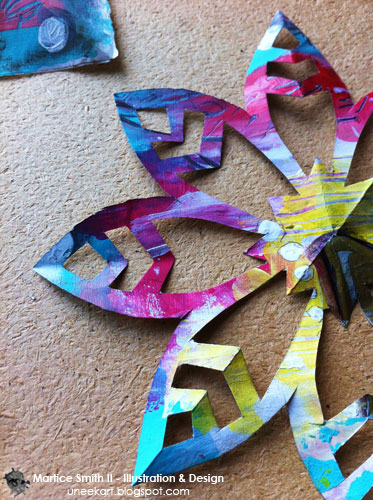
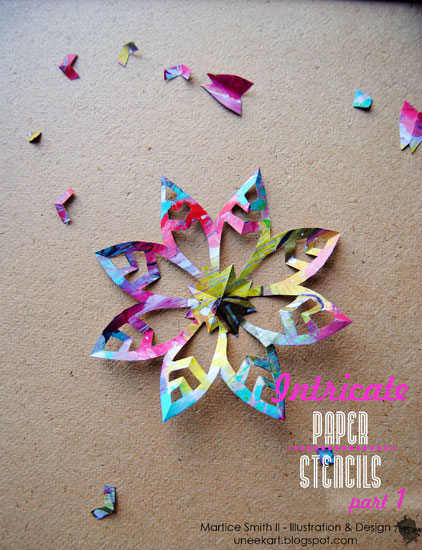
Once you’ve cut out your design, slowly and gently open your intricate paper stencil. Whoa! Isn’t it beautiful?!

: Very slowly and gently, open up your paper stencil.

You can add finishing touches with distress inks, more paint to accent certain areas, embellish with textured stamps or add some glitter, bling bling!

An example of an intricate paper stencil, made from phone book paper.

Did you enjoy this tutorial? If yes, don’t miss Part 2! Look for Intricate Paper Stencils, Part 2: Gift Wrap! I will show you how easy it is to make your own gift wrap using your beautiful, phone book paper stencils.

Until then, have fun and keep creating!

~*~*~*~*~*~*~*~*~*~*~*~*~*~*~*~*~*~*~*~*~*~*~*~*~

Author bio:

Mixed-media illustrator and designer Martice Smith II

Martice Smith II is creative director of Martice Smith II – Illustration & Design Studio, based in Kansas City, Missouri and owner of Uneek Art Boutique. She established herself as a freelance Illustrator and graphic designer after receiving her Bachelor of Arts Degree.

Martice also contributes as an article writer for the Creating Mixed Media Art website.

You can see more of her work via her Facebook page or her blog. She invites you to join her monthly newsletter, Uneek Art Letter,  for art biz tips, advice and free digital goodies!

~*~*~*~*~*~*~*~*~*~*~*~*~*~*~*~*~*~*~*~*~*~*~*~*~

.

.
5 Easy Ways to Make Your Own Tape

~ * ~

This article is written by Sandra Parés

I love mixed media because it allows me to create my own decorations and customize to my personal style. Today we will see how we can make our own washi tape in an easy and simple way to incorporate it into our scrapbooking or mixed media projects.

The supplies I will use are the following: masking tape or repositionable and transparent tape (with transparent tape, at the end our tape will have more transparency), some Silks Acrylic Glaze , some permanent markers like Promarker, acrylic paint, heat gun, templates, some stamps, black permanent ink like Stazon, paper figures punched and 1 piece of baking paper.

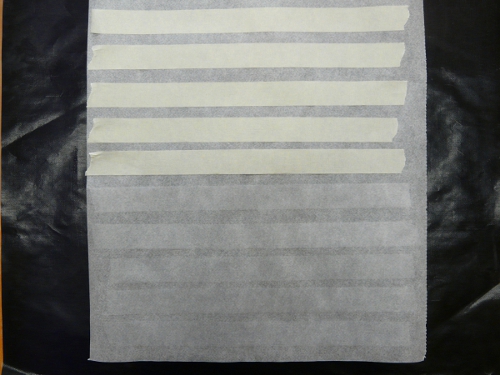
Before we start, we have to prepare our tape. We cut a piece of baking paper and paste it a few strips of masking tape or repositionable tape. You will see that the tape isn’t paste good on the baking paper. The advantage is that we can work well with paints and, in addition, the tape retains good its adherence so then we can stick it right in our projects.

Put strips of tape on the baking paper

1st way

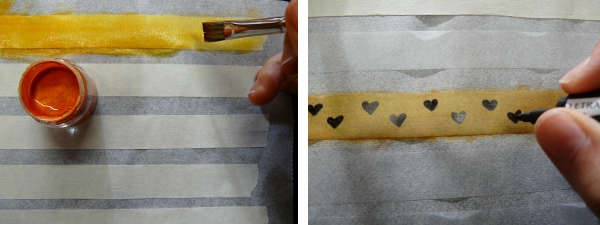
We choose a color of Silks Acrylic Glaze and with a brush we paint the whole tape to give it a basic background color. Silks Acrylic Glaze gives us a good transparency and they add a nice shiny appearance to the tape. When the paint has dried (Silks dry very fast) with a permanent marker we draw a continuous pattern in our tape. And our first whasi tape is ready!

Painting with Silks Acrylic Glaze and draw with Promarker

2nd way

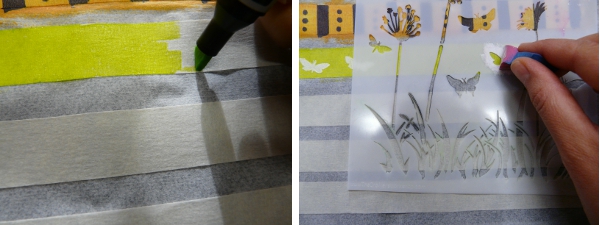
We choose a Promarker color to paint the background of the tape. The Promarker pen also paints with transparency so it is ideal for quick backgrounds in our handmade whasi tapes. When we have our background ready, we choose a template and we can stencil a pattern with acrylic paint throughout the tape. When it dries, we already have another type of whasi tape.

Painting with Promarker and stenciling onto stencil with acrylic paint

3rd way

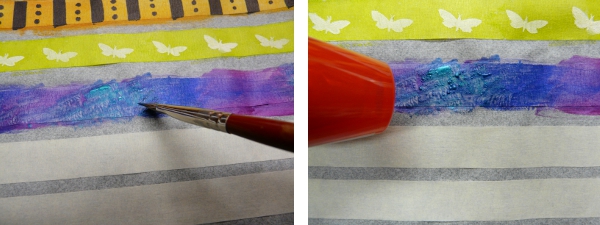
For me one of the easiest and funniest! This time we will use different Silks Acrylic Glaze to paint the background. We have to paint with a large quantity of paint in the tape, and we can mix the colors. It is important that we create paint lumps, I mean, we need areas where we have an accumulation of paint. Before the paint dries, we use the heat gun over the paint, we put the hot air very near the paint lumps. Then you will see that paint makes bubbles and when it dries (and it dries quickly) it has a very original texture.

Painting with Silks Acrylic Glaze and warming lumps of paint with heat gun.

4th way

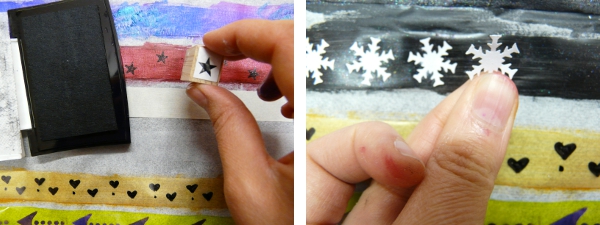
In this case we also do a background with paint or permanent marker. After it dries, we stamp a stamp with a permanent ink making again a pattern throughout the tape.

5th way

And in the last easy way to make a whasi tape, again we do a background with paint or permanent marker. And in this case we paste small paper figures (mine are made with die cutting shapes) in our tape with matte gel medium.

Painting with Silks Acrylic Glaze, stamping and pasting a paper figure.

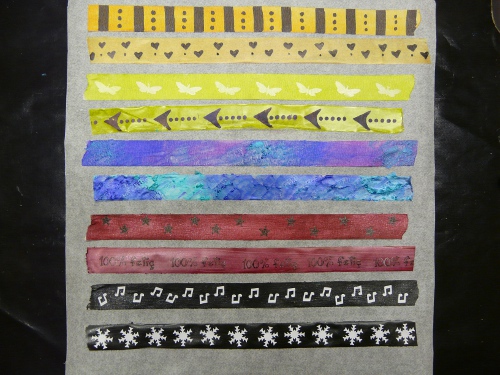
And here you can see the final result:

Paper tape decorated with mixed media

~*~*~*~*~*~*~*~*~*~*~*~*~*~*~*~*~*~*~*~*~*~*~*~*~

Author bio: Sandra Parés loves working with mixed media! The colors and textures leave her amazed and she enjoys creating and getting their hands dirty with paint and gesso! On her site My mixed media you can find a mixed media online store, mixed media workshops in Spanish, tutorials, ideas and mixed media techniques.

~*~*~*~*~*~*~*~*~*~*~*~*~*~*~*~*~*~*~*~*~*~*~*~*~

.

.