Michelle G Brown | Mixed Media Art

Organizing Our Mixed Media Collections

~ * ~

This article is written by  Ann Strecko Koeman

In a previous article I contributed to turning some of you into enablers of the collecting (NOT hoarding) kind (see “Are we Collectors or Hoarders?”).  Today I am presenting to you some of the ways I choose to organize my massive collections of art supplies and materials.  May this be of help to you and may the force be with you as you partake in some spring cleaning in your own studios.

One of the many items I collect are ribbons and trims.  I include cords and other long fibres in this category.  I find new ribbons, trims, yarns, cords, and threads in a variety of places such as Dollar type, department, grocery, hardware, fabric, craft and other stores.  I tend to buy all things on sale or in clearance bins.  I also visit and purchase from thrift stores, flea markets, garage sales and  ebay.  Finally there is all the free stuff I find through friends and family, Free Cycle, and any thing that enters my home and can be recycled such as string, shipping bands, rubber elastics around the vegetables, and old clothing unfit for donating but fine for recycling.
organizing studio supplies

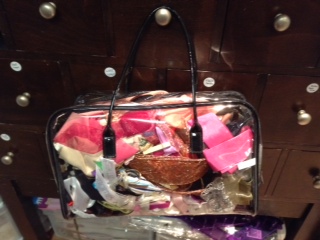
Now putting away the new items is fairly simple, as I just store them with other like minded items in my studio in designated  and labelled drawers, shelves and bins.   When it comes to the items I get second hand, these I deal with slightly differently.  First, if the new/old item is unused I just store it with other like minded materials.  However if the items are used or come in tangled messes of pieces then I need to tackle and conquer.  Usually I just dump these treasures into a big see thru purse that I found at my local thrift store.  The bag hangs from one of the drawers in my studio until I am in need of just a small bit of something for my project.  Once in a while I dare to plunge into the treasure bag and do some organizing by retrieving the longer pieces, wrapping them around some cardboard and storing them in a designated bin.
organizing studio supplies

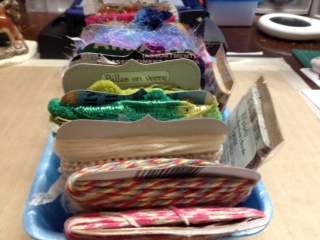
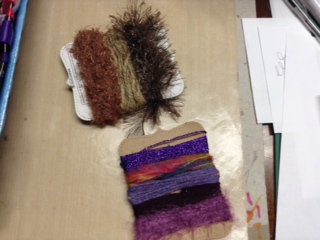
As I have a larger then necessary collection of fibres I find that keeping just a sample (of 3 metres) or so wrapped around a piece of recycled and die cut cardboard easier to store in my crafting area, while the bulk of my yarns, and such are stored in a storage closet.  I made some cards with the help of some cardboard taken from the recycling bin that I die cut into large labels.  I cut pieces of each yarn I own and wrapped them around the card.  I also took the time to colour coordinate my wrapped cards to make it visually appealing.  I find that by having a bin with most of my trims in sight makes it more likely that I will use them, as I tend to forget what type of goodies I have.  This system also makes my ribbons, trims, etc a lot more portable to classes and events.
organizing studio supplies

~*~*~*~*~*~*~*~*~*~*~*~*~*~*~*~*~*~*~*~*~*~*~*~*~

Ann is a Mixed Media Artist working in the capital of Canada.  She is surrounded by wild life inside her home (she has teenagers) and outside her country home.  All this nature is inspiring in her art work.  More of her work can be viewed on her blog Annmakes at annmakes.blogspot.com

~*~*~*~*~*~*~*~*~*~*~*~*~*~*~*~*~*~*~*~*~*~*~*~*~

.

.
Dr. Ph Martin’s Bombay India Inks

~ * ~

This article is written by Anjuli Johnson

Being an art supply junkie is something I think all of us reading this can relate to.  The act of creation can be fairly difficult without anything to create with.  We can’t make something from nothing.  So the quest to find different and creative ways or organizing different materials into art is a constant, never ending adventure, and if you’re anything like me, becoming proficient in using a few materials over and over again isn’t satisfying enough- new materials need to be found and experimented with until we become proficient in using them, and we continue to find new things to work with.

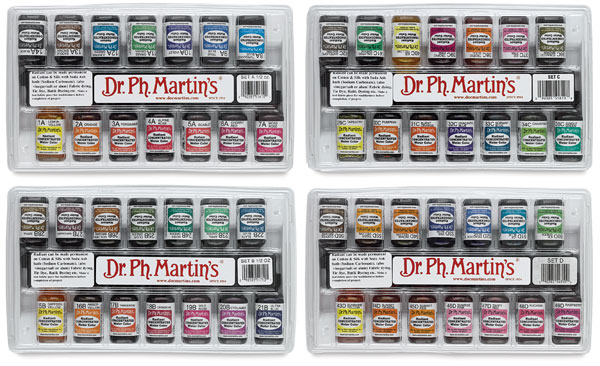
This past week my new material was Dr. PH Martin’s Bombay India ink set.

Sets of India Ink

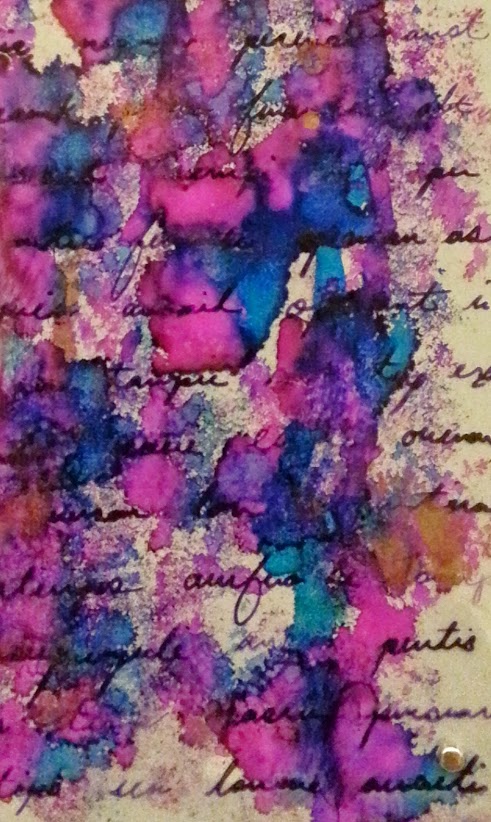
I used to think that India ink was only available in one color- black.  Nope, these different sets of inks come with as many as 12 colors, all vibrant and versatile.  I decided to try a few different techniques to see just how versatile they are.  Here are a few of the ones I tried.

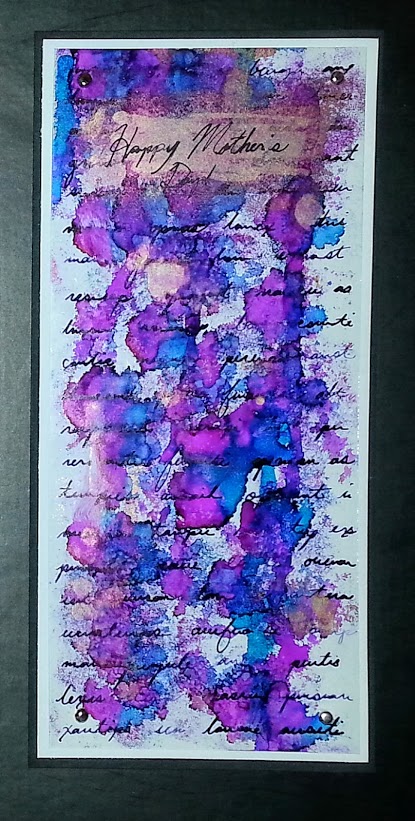
India and Alcohol ink on clear acetate

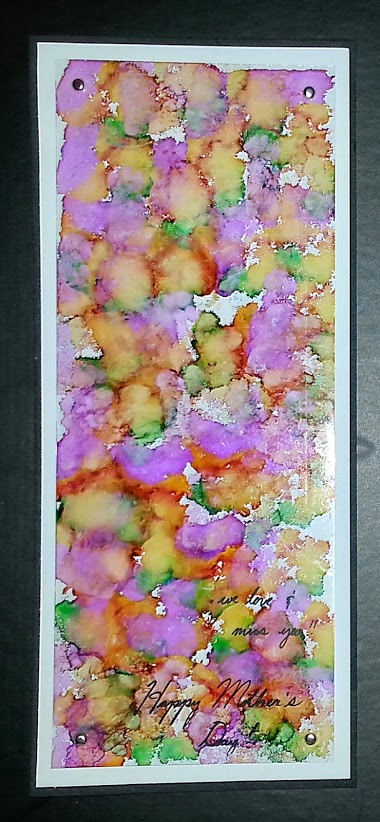
Card

India Ink and Alcohol ink on clear acetate

I made these cards for Mother’s Day.  Black and white cardstock with clear acetate attached to top with brads.  I colored the acetate using alcohol inks and india ink.  I tried it two different ways- india ink first, followed by alcohol ink, and vice versa.  It worked both ways.  Even thick drips of alcohol ink had no effect on the india ink once it was dry.  As long as I didn’t rub it really hard, the ink stayed fast.  I’m going to be using this technique a lot. 

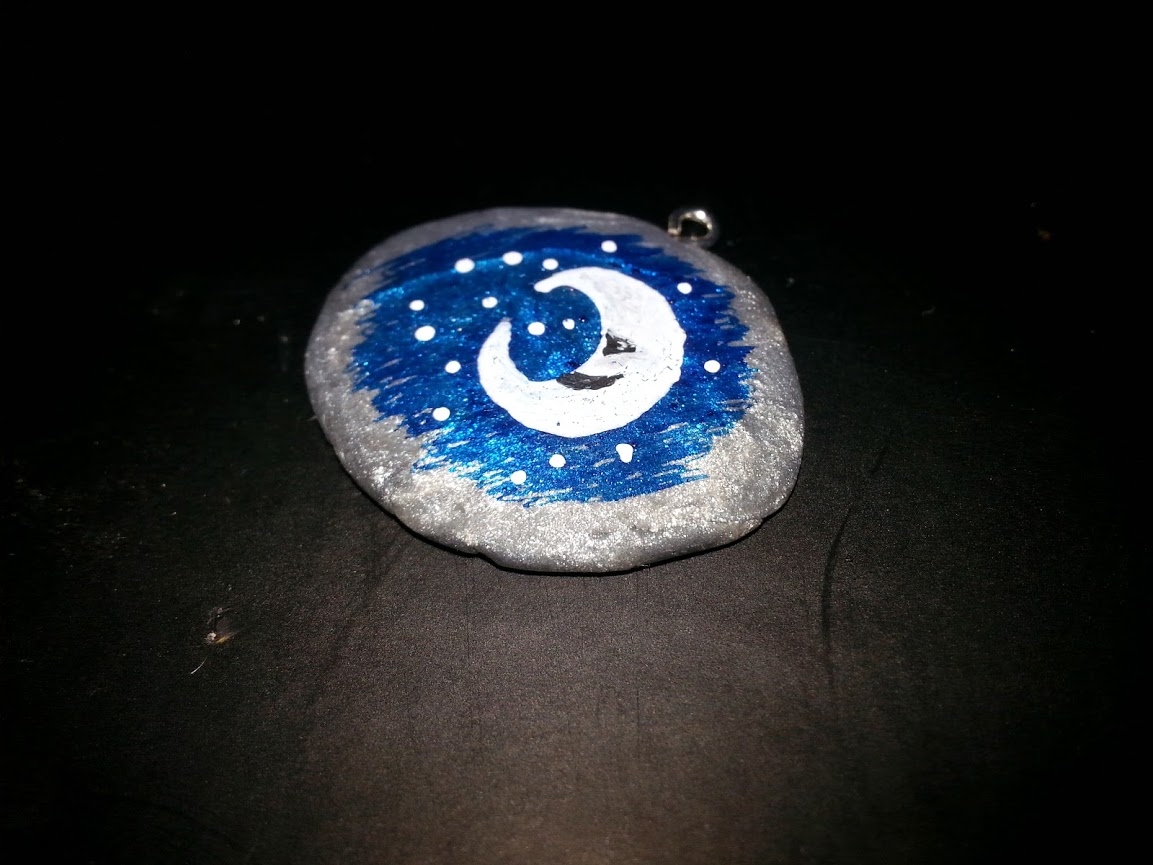
Clay pendant

This is a really simple polymer clay pendant I made.  I baked the clay before I painted it, but once the ink dries, it’s permanent.  Anyone who makes polymer clay jewelry, charms, or even art journals- this adds another dimension to the possibilities open to you.

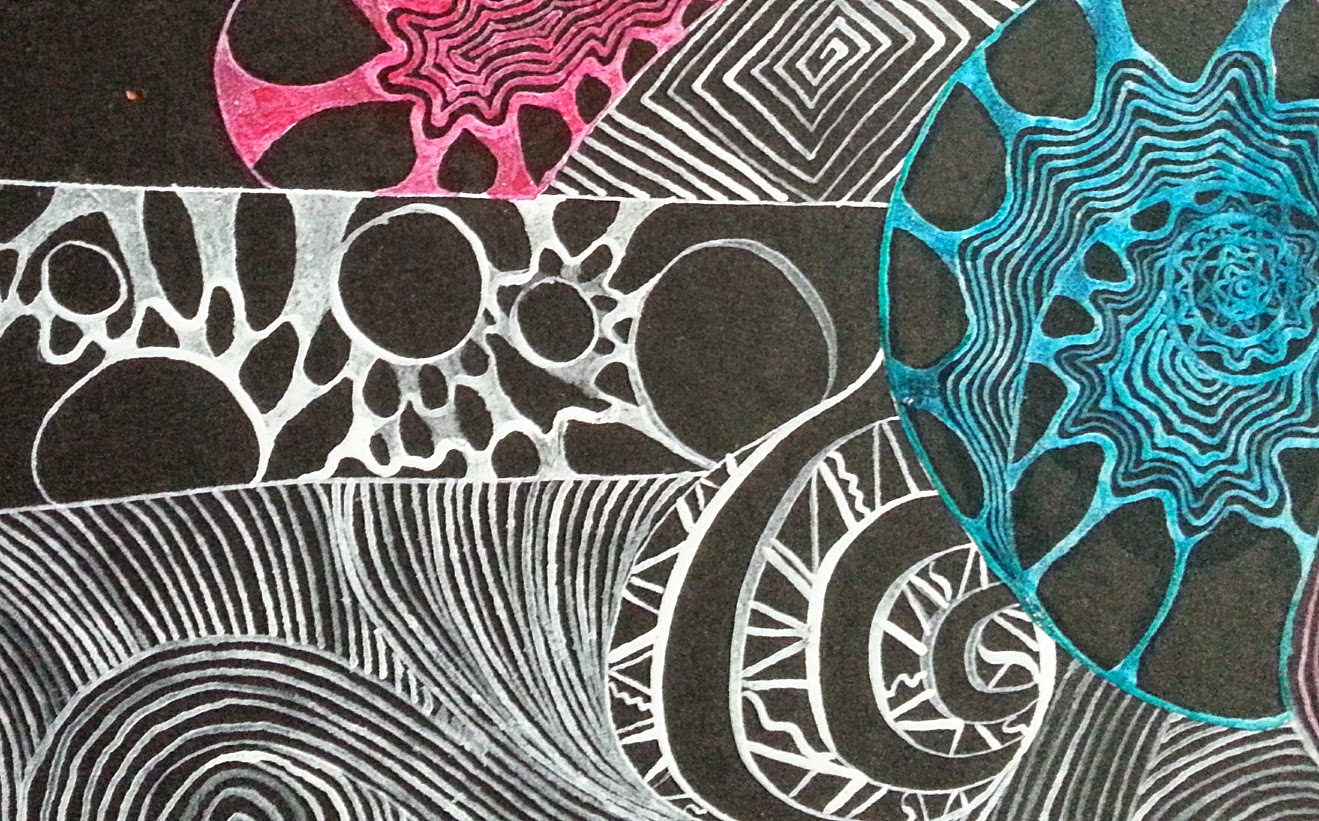
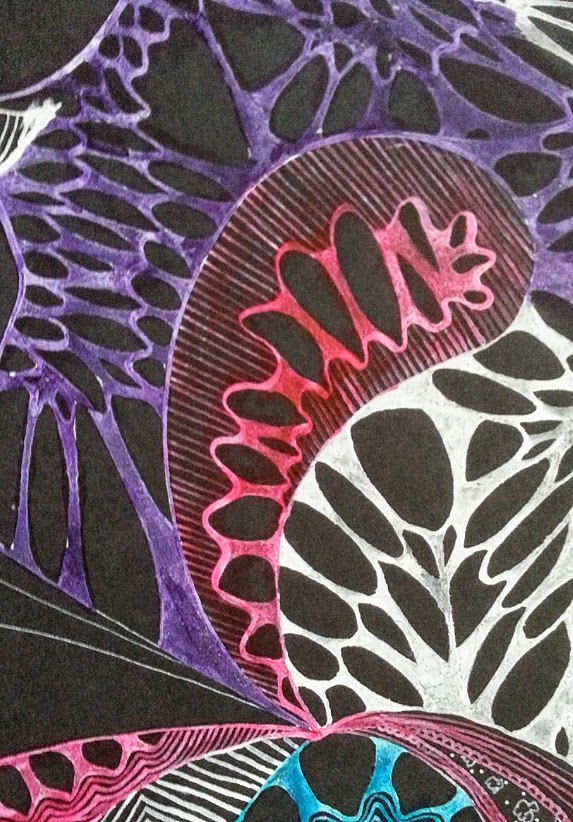
Sketch with white and colored inks on black paper

Sketch with white and colored inks on black paper

These are from a sketch I made in my black journal.  I was curious to see how these inks worked on black paper.  Though the colored inks soaked in and didn’t show that well, the white is amazing on the black.  You can even dilute it a little bit.  These inks are pretty intense, and adding a little water can make them last longer and go further without taking much away from their brilliancy.  Once I was finished with the white, I used some of the other colors on top so they would stand out.  A little more work, but it’s a way to be able to have all the colors stand out against a black background.  So fun!

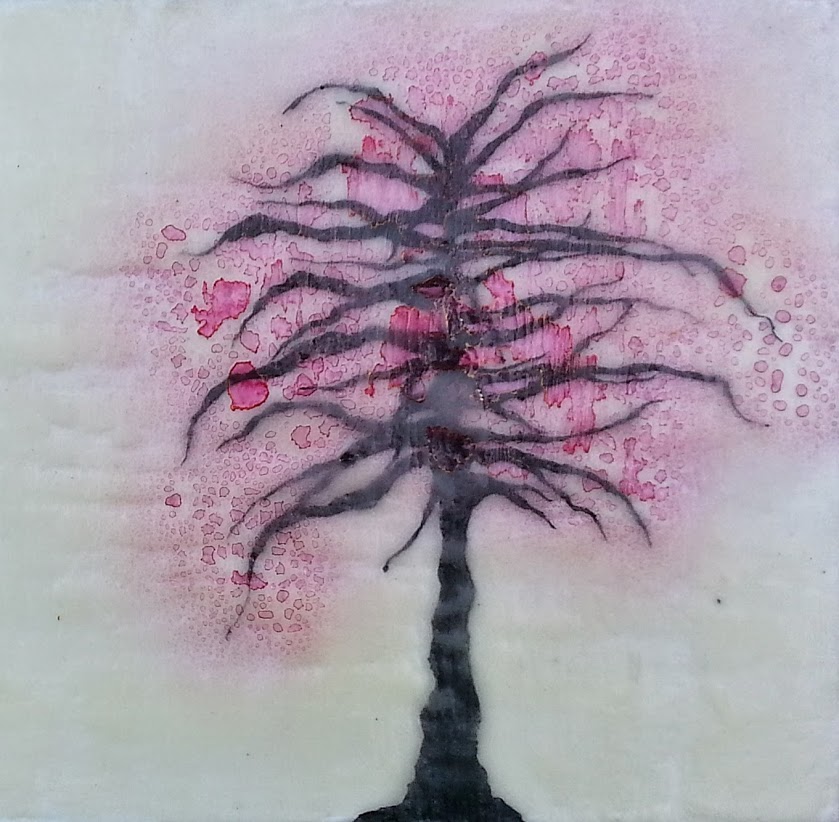
Tree drawn directly onto encaustic wax

This is an example of a sketch directly onto encaustic wax.  You can sketch onto tissue or rice paper and add it on top of the wax, but I didn’t want to see the edges of the paper.  I used my calligraphy tips to sketch and color in the tree, then I added a couple layers of wax before I spritzed some diluted red ink onto the branches, as a way to add leaves without drawing them individually.  Once again, when the ink dries, it becomes permanent and you can leave it as a top layer, or use more wax layers on top.

So, these are some of the things I’ve tried this week with my new india inks.  I’ve found a few tutorials in addition to these techniques that sound amazingly fun. Here’s a quick list with links so you can try them yourself-

Gouache painting with India Ink- www.craftsy.com

Masking fluid resist- www.alenahennessy.com

Shellac sprayed with India Ink- www.littleblackjournal.com

India Ink with bleach- arteascuola-miriampaternoster.blogspot.ca

Watercolor and India ink- www.youtube.com

So, now you have another supply set to add to your growing list of must-try art supplies.  Go have some fun!

~*~*~*~*~*~*~*~*~*~*~*~*~*~*~*~*~*~*~*~*~*~*~*~*~

Anjuli Johnson is a Mixed Media Artist from Raleigh, NC.  She began her art career as a scrapbooker, and it’s been an evolutionary process ever since.  She loves all things mixed media- paper, paint, pens, wire, gears, clay… the list goes on and on.  She is constantly trying to push through her fears to discover and develop her talents, meet new people, and learn from those around her.  To see more of Anjuli’s art and techniques, check out her website at www.thefarpavilion.com, her blog at www.thefarpavilion.blogspot.com, and like her Facebook page TheFarPavilion

~*~*~*~*~*~*~*~*~*~*~*~*~*~*~*~*~*~*~*~*~*~*~*~*~

.

.
Inspiration Word Blocks

This article is written by Melanie Statnick

My mother is a Tole Painter of over 20 years. I watched her carve out time for her art from work and motherhood. Each night she would spend long hours painting on wood, tin and more. Painting folk art on everything she could alter. She sold her art at bazaars and gave them as gifts to friends and family. She was an inspiration to me growing up. My Father who worked with wood by trade would make what she couldn’t find or needed more. The art and carpenter gene was pasted down to me. I adore working with word and altering objects.

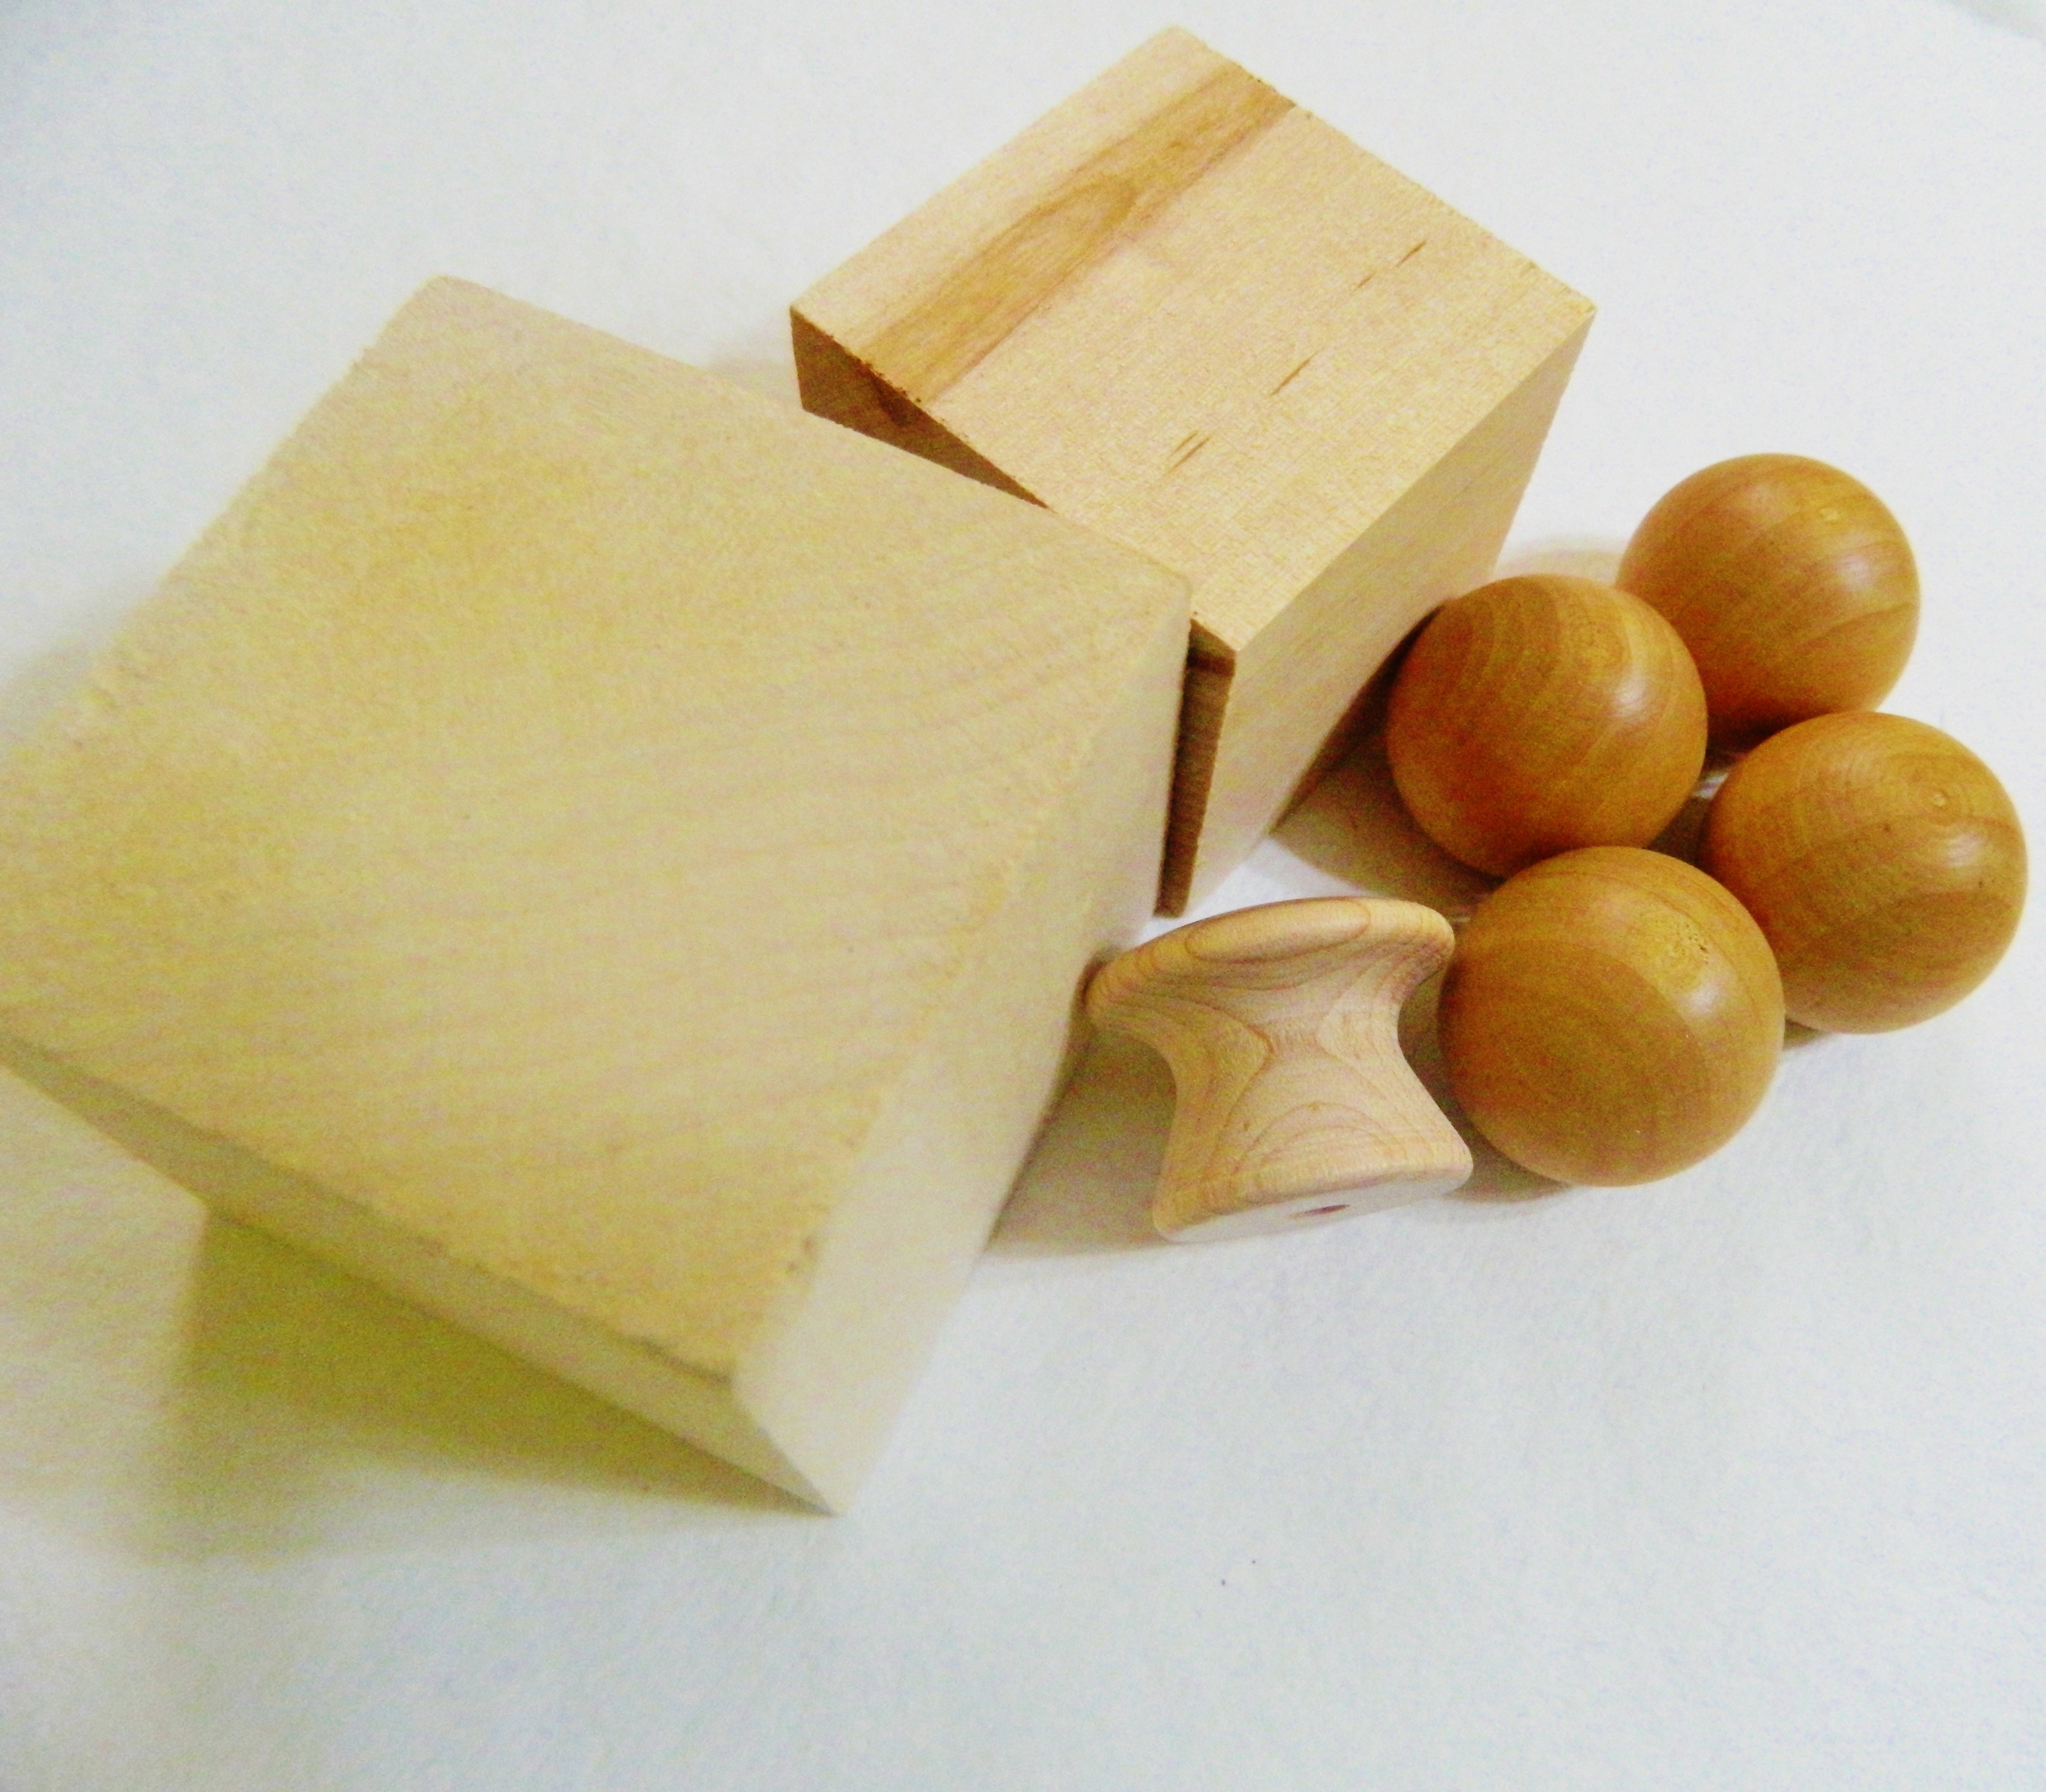
Woodblock, knobs, and balls

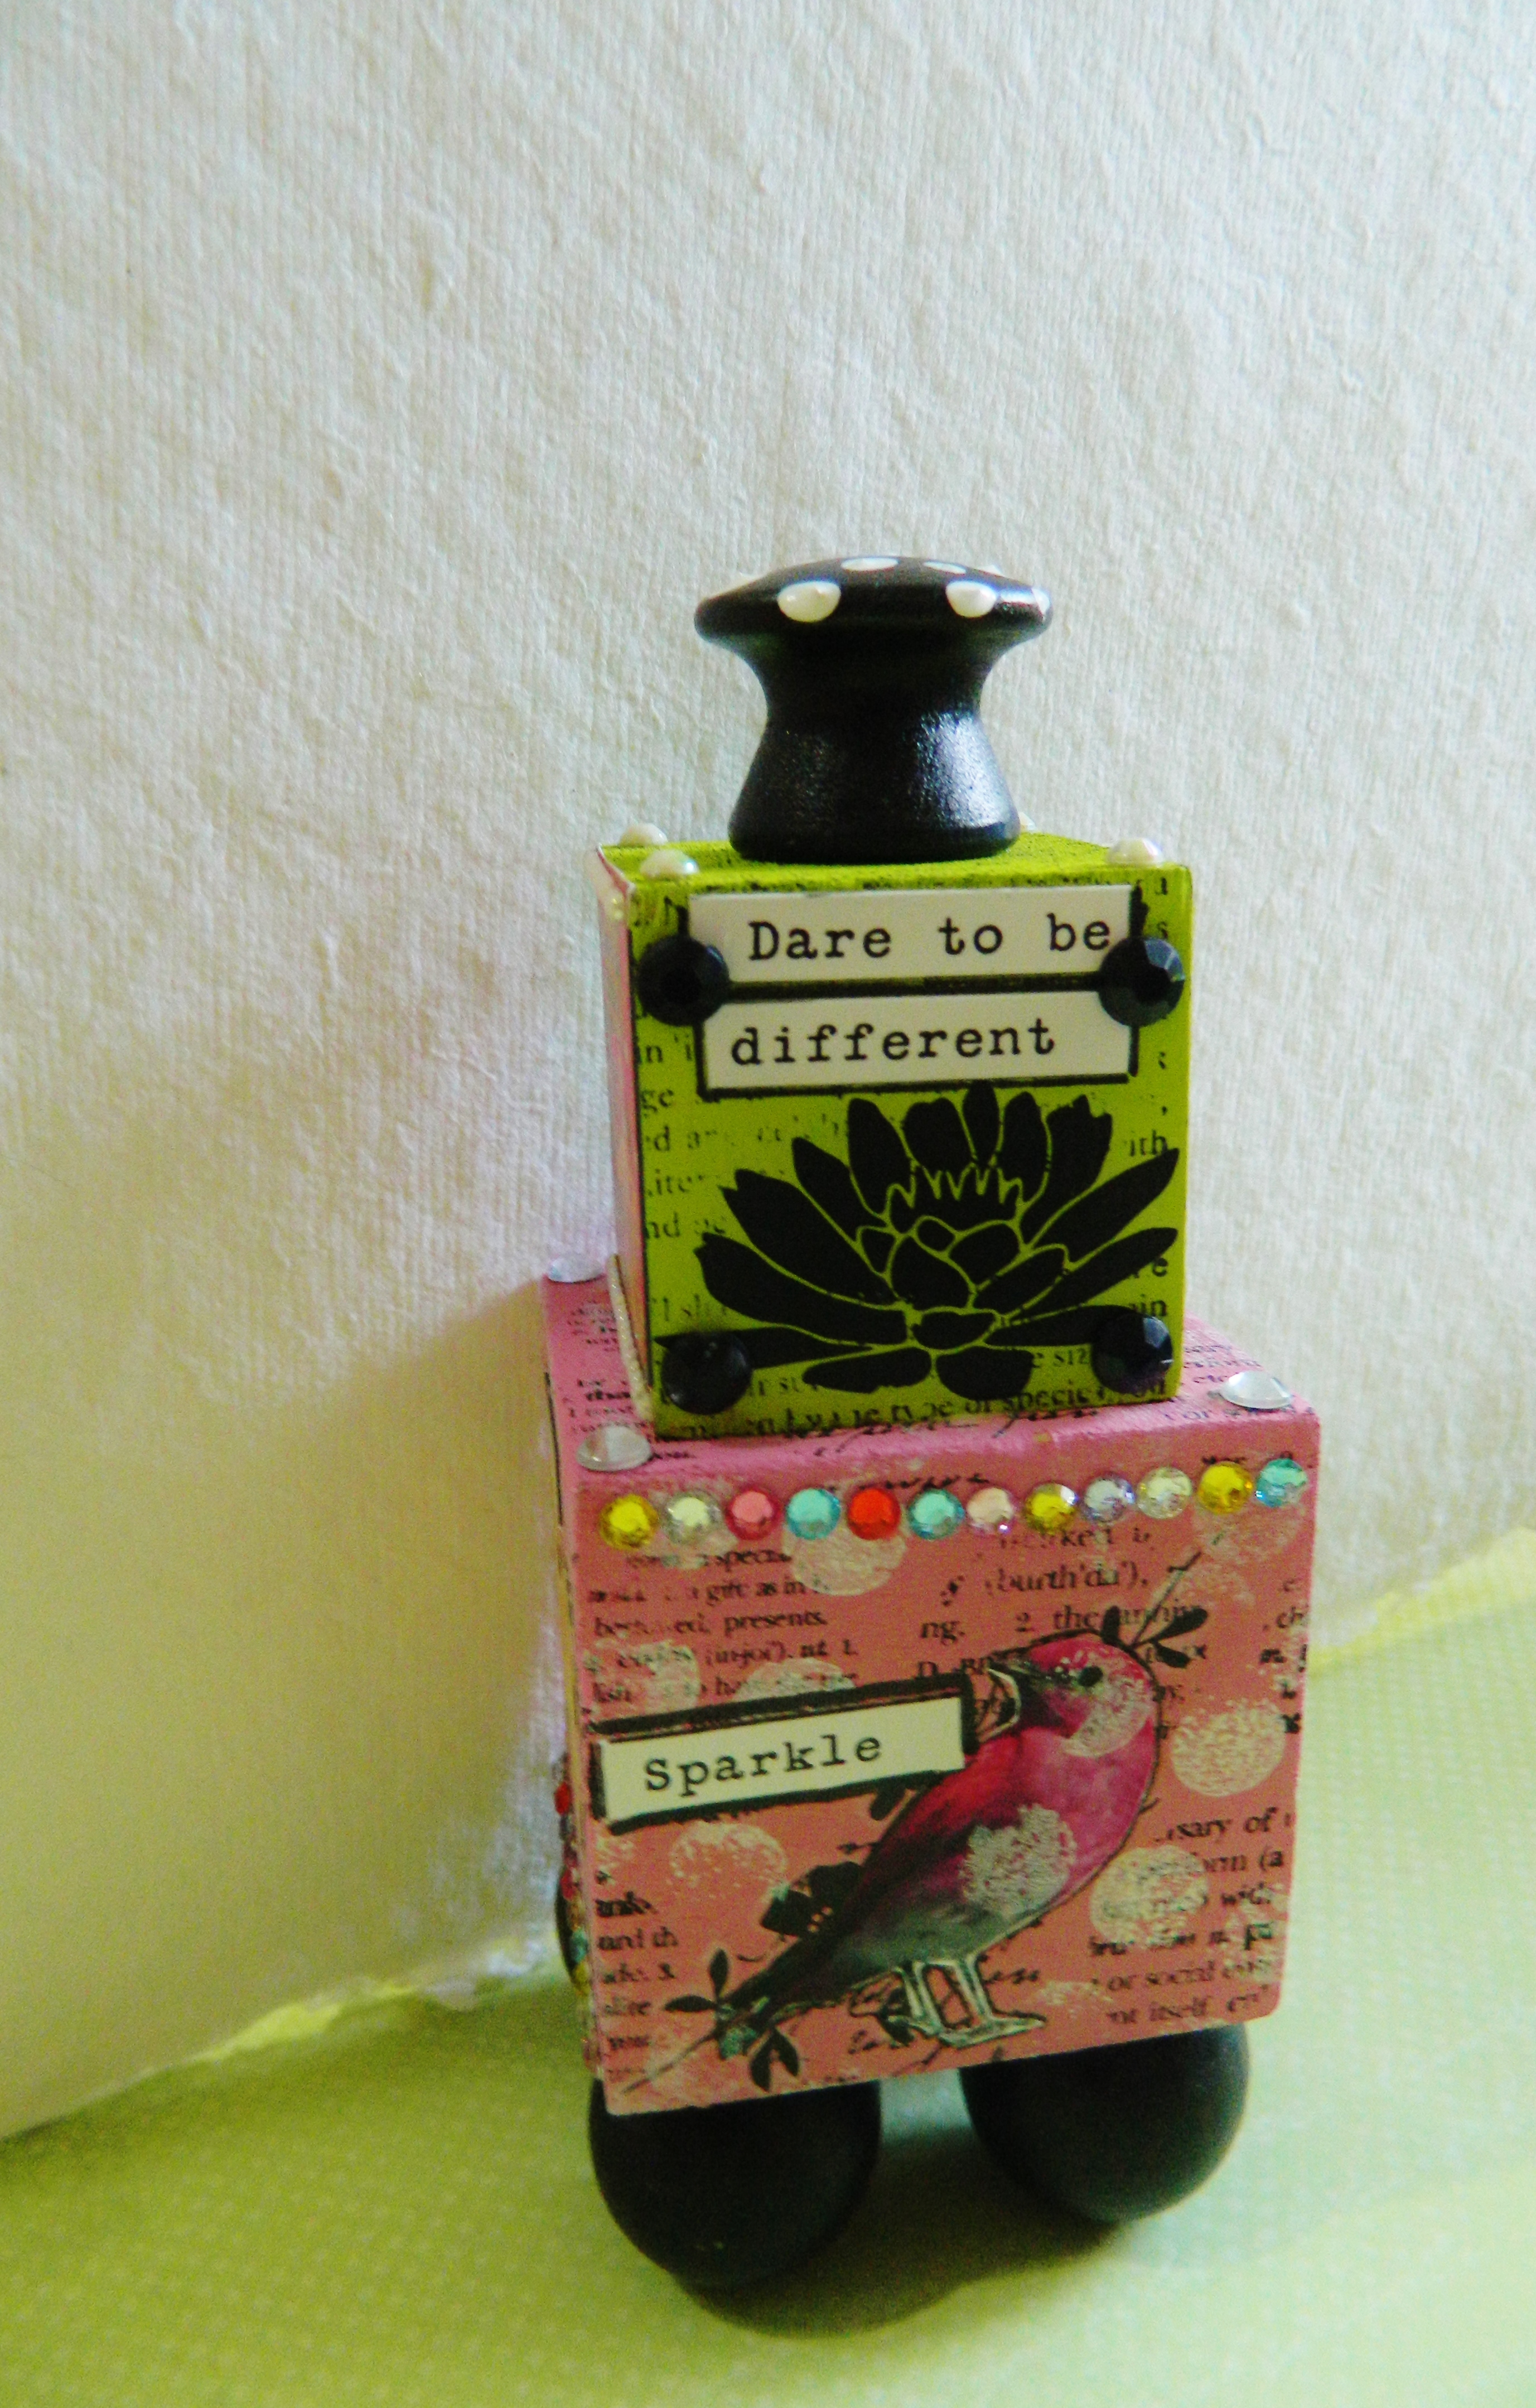
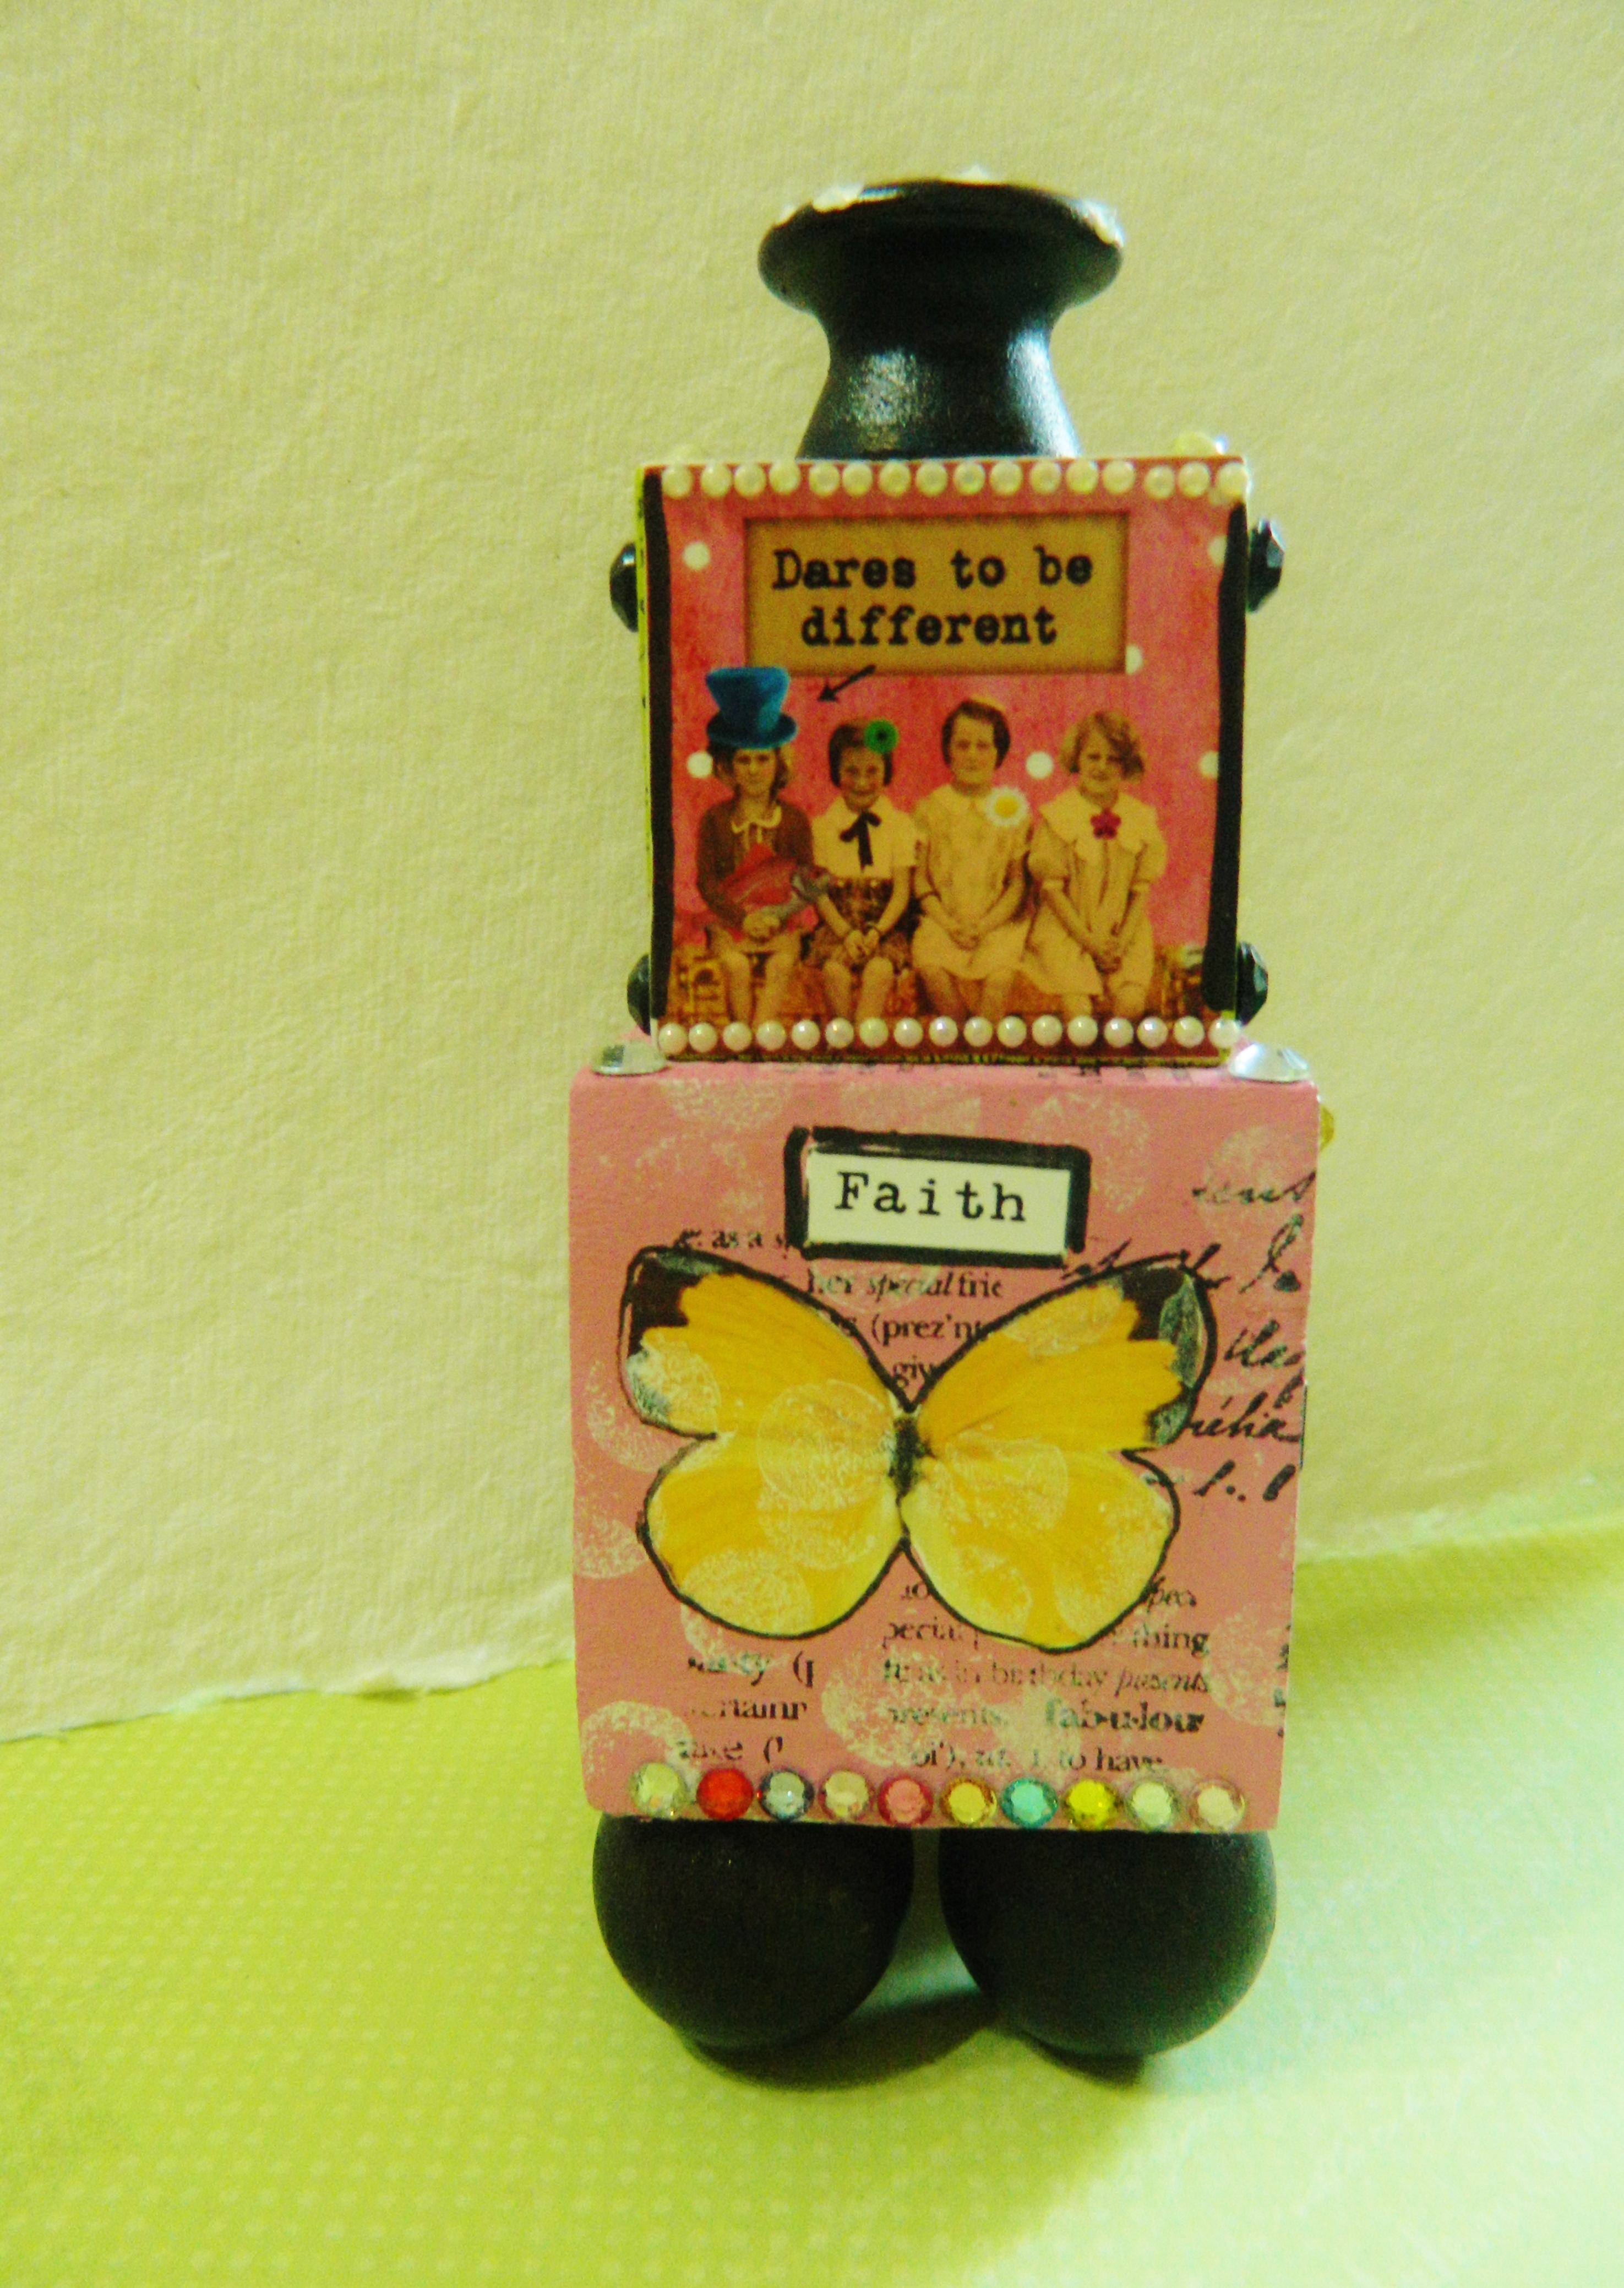
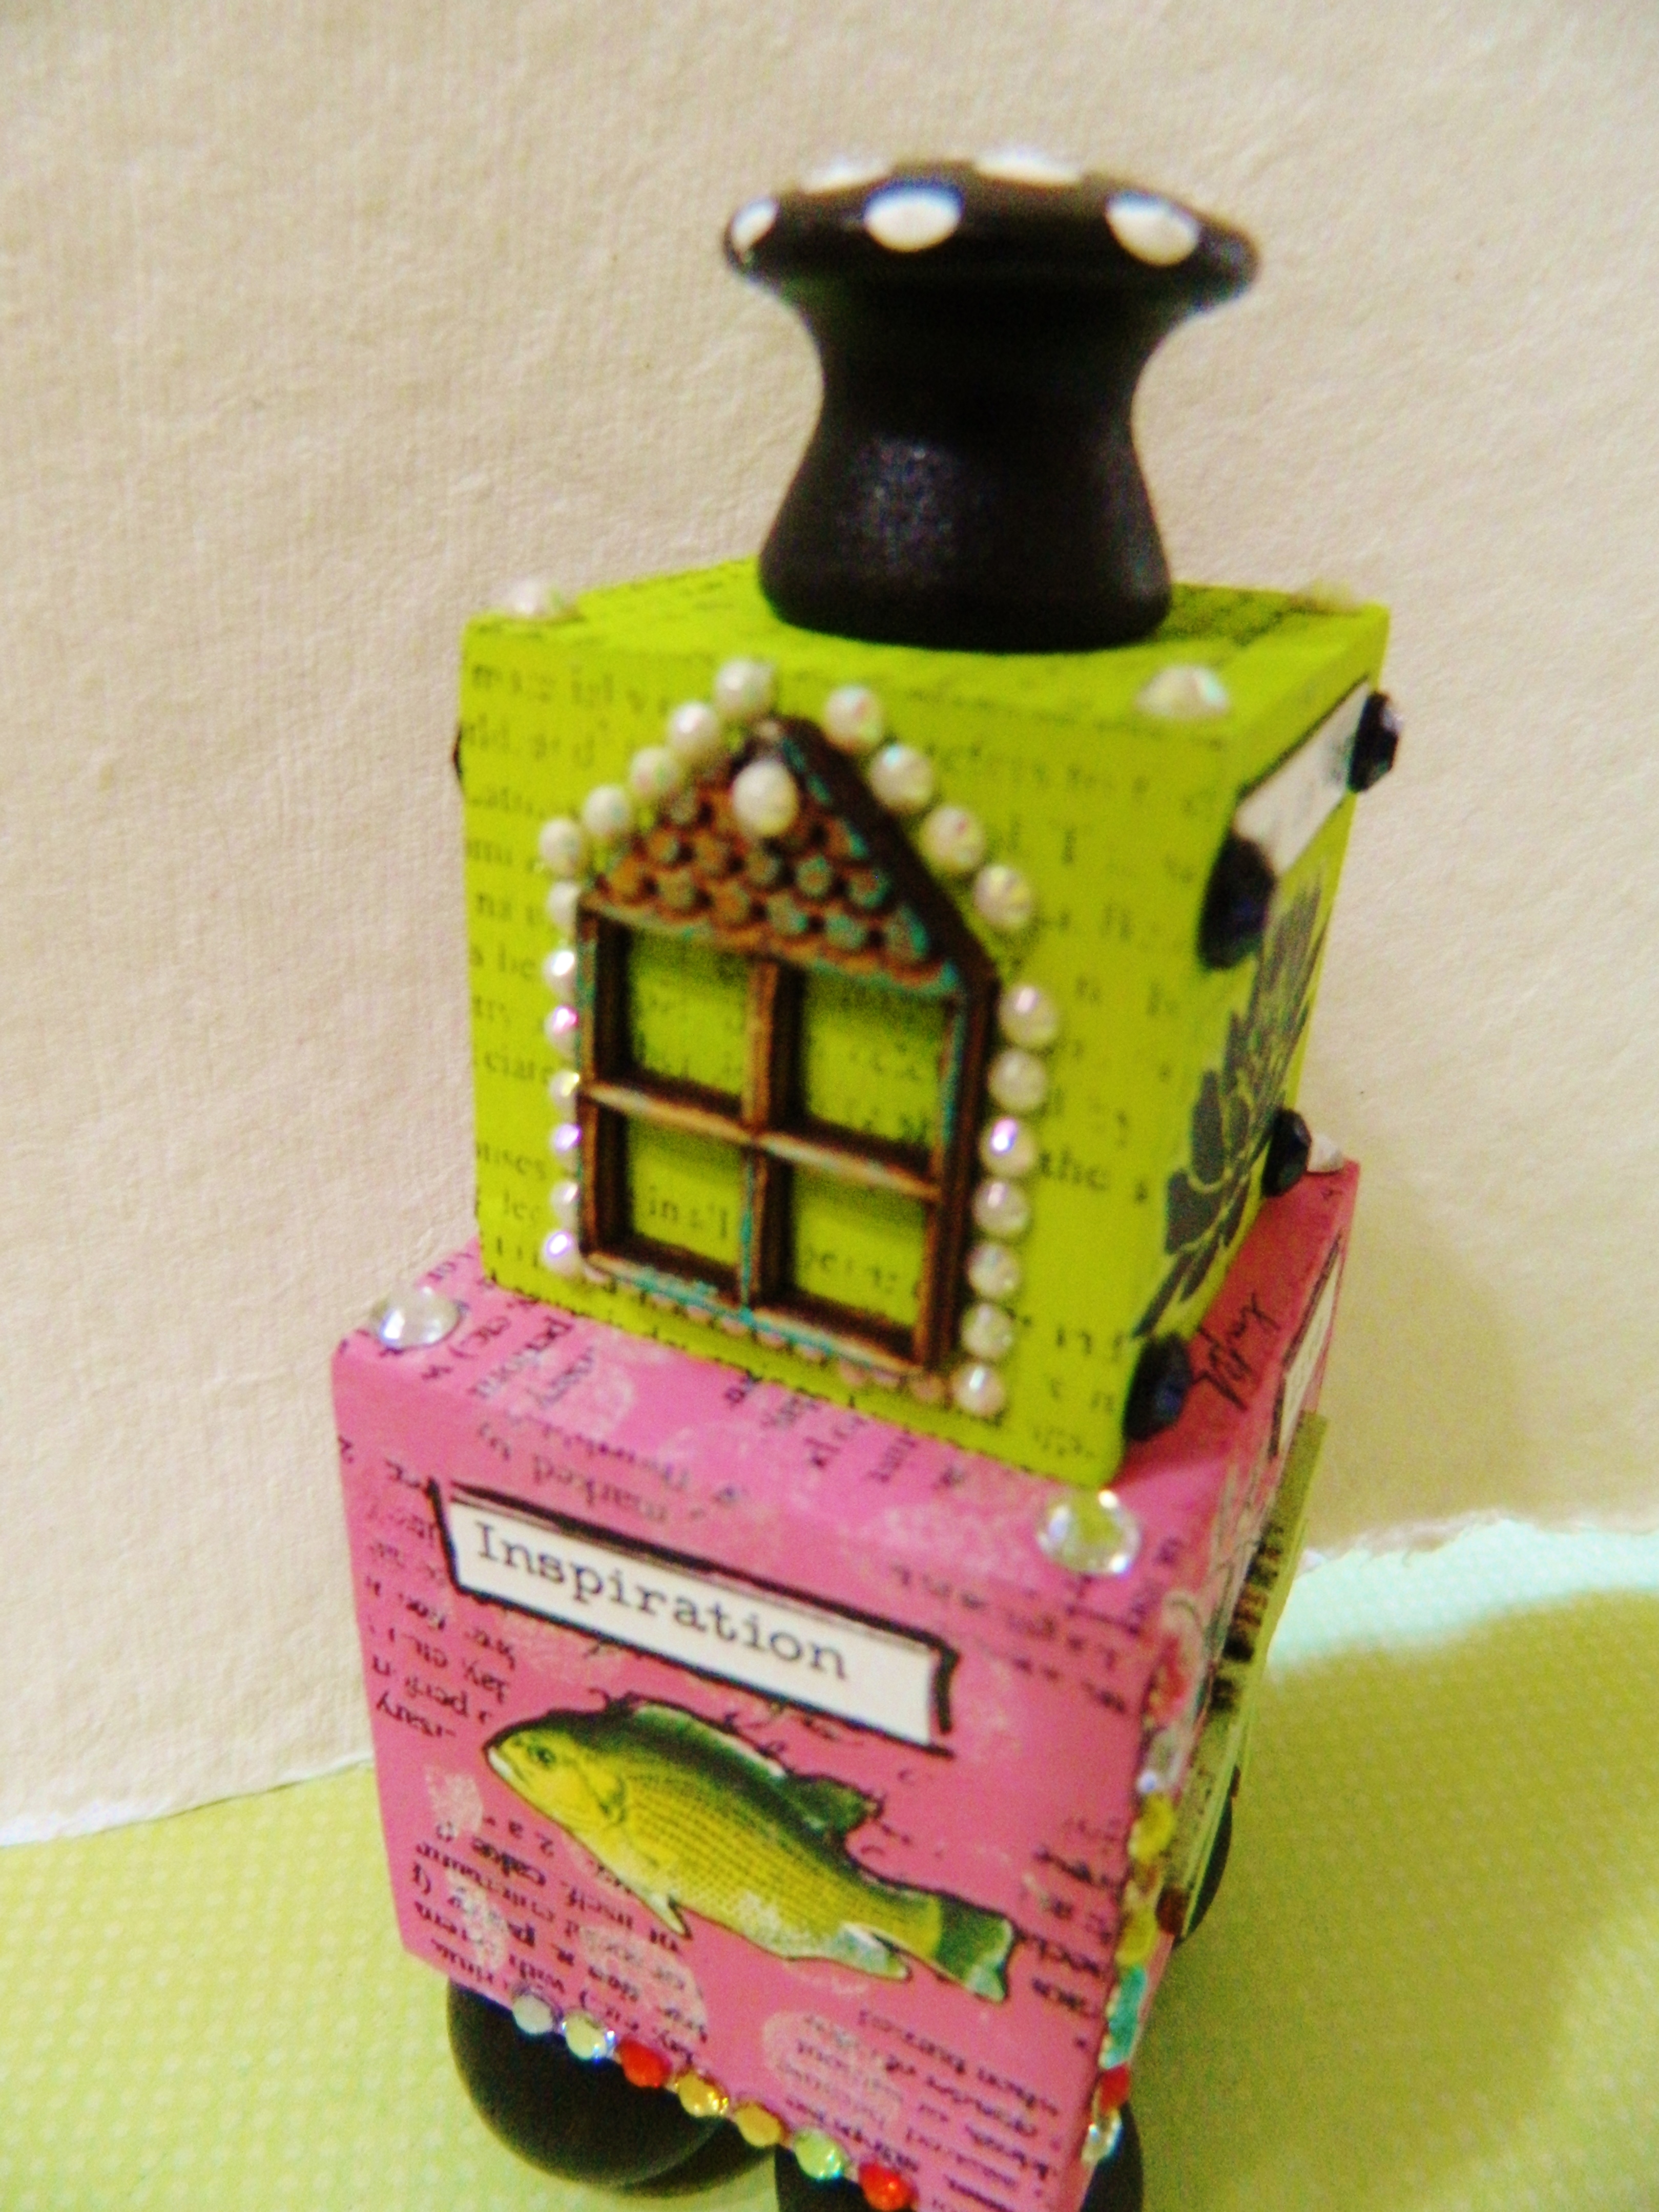
I have drawers full of wood blocks, knobs, balls, and cut images. I wanted to share with you what I created. These word blocks are inspiration for art friends, family or gifts.

Materials Needed:

1 Large wood block

1 Small wood block

1 door knob

4 wood balls with flat edge

Acrylic paint

Collage images/words

Wood glue

Gel Medium

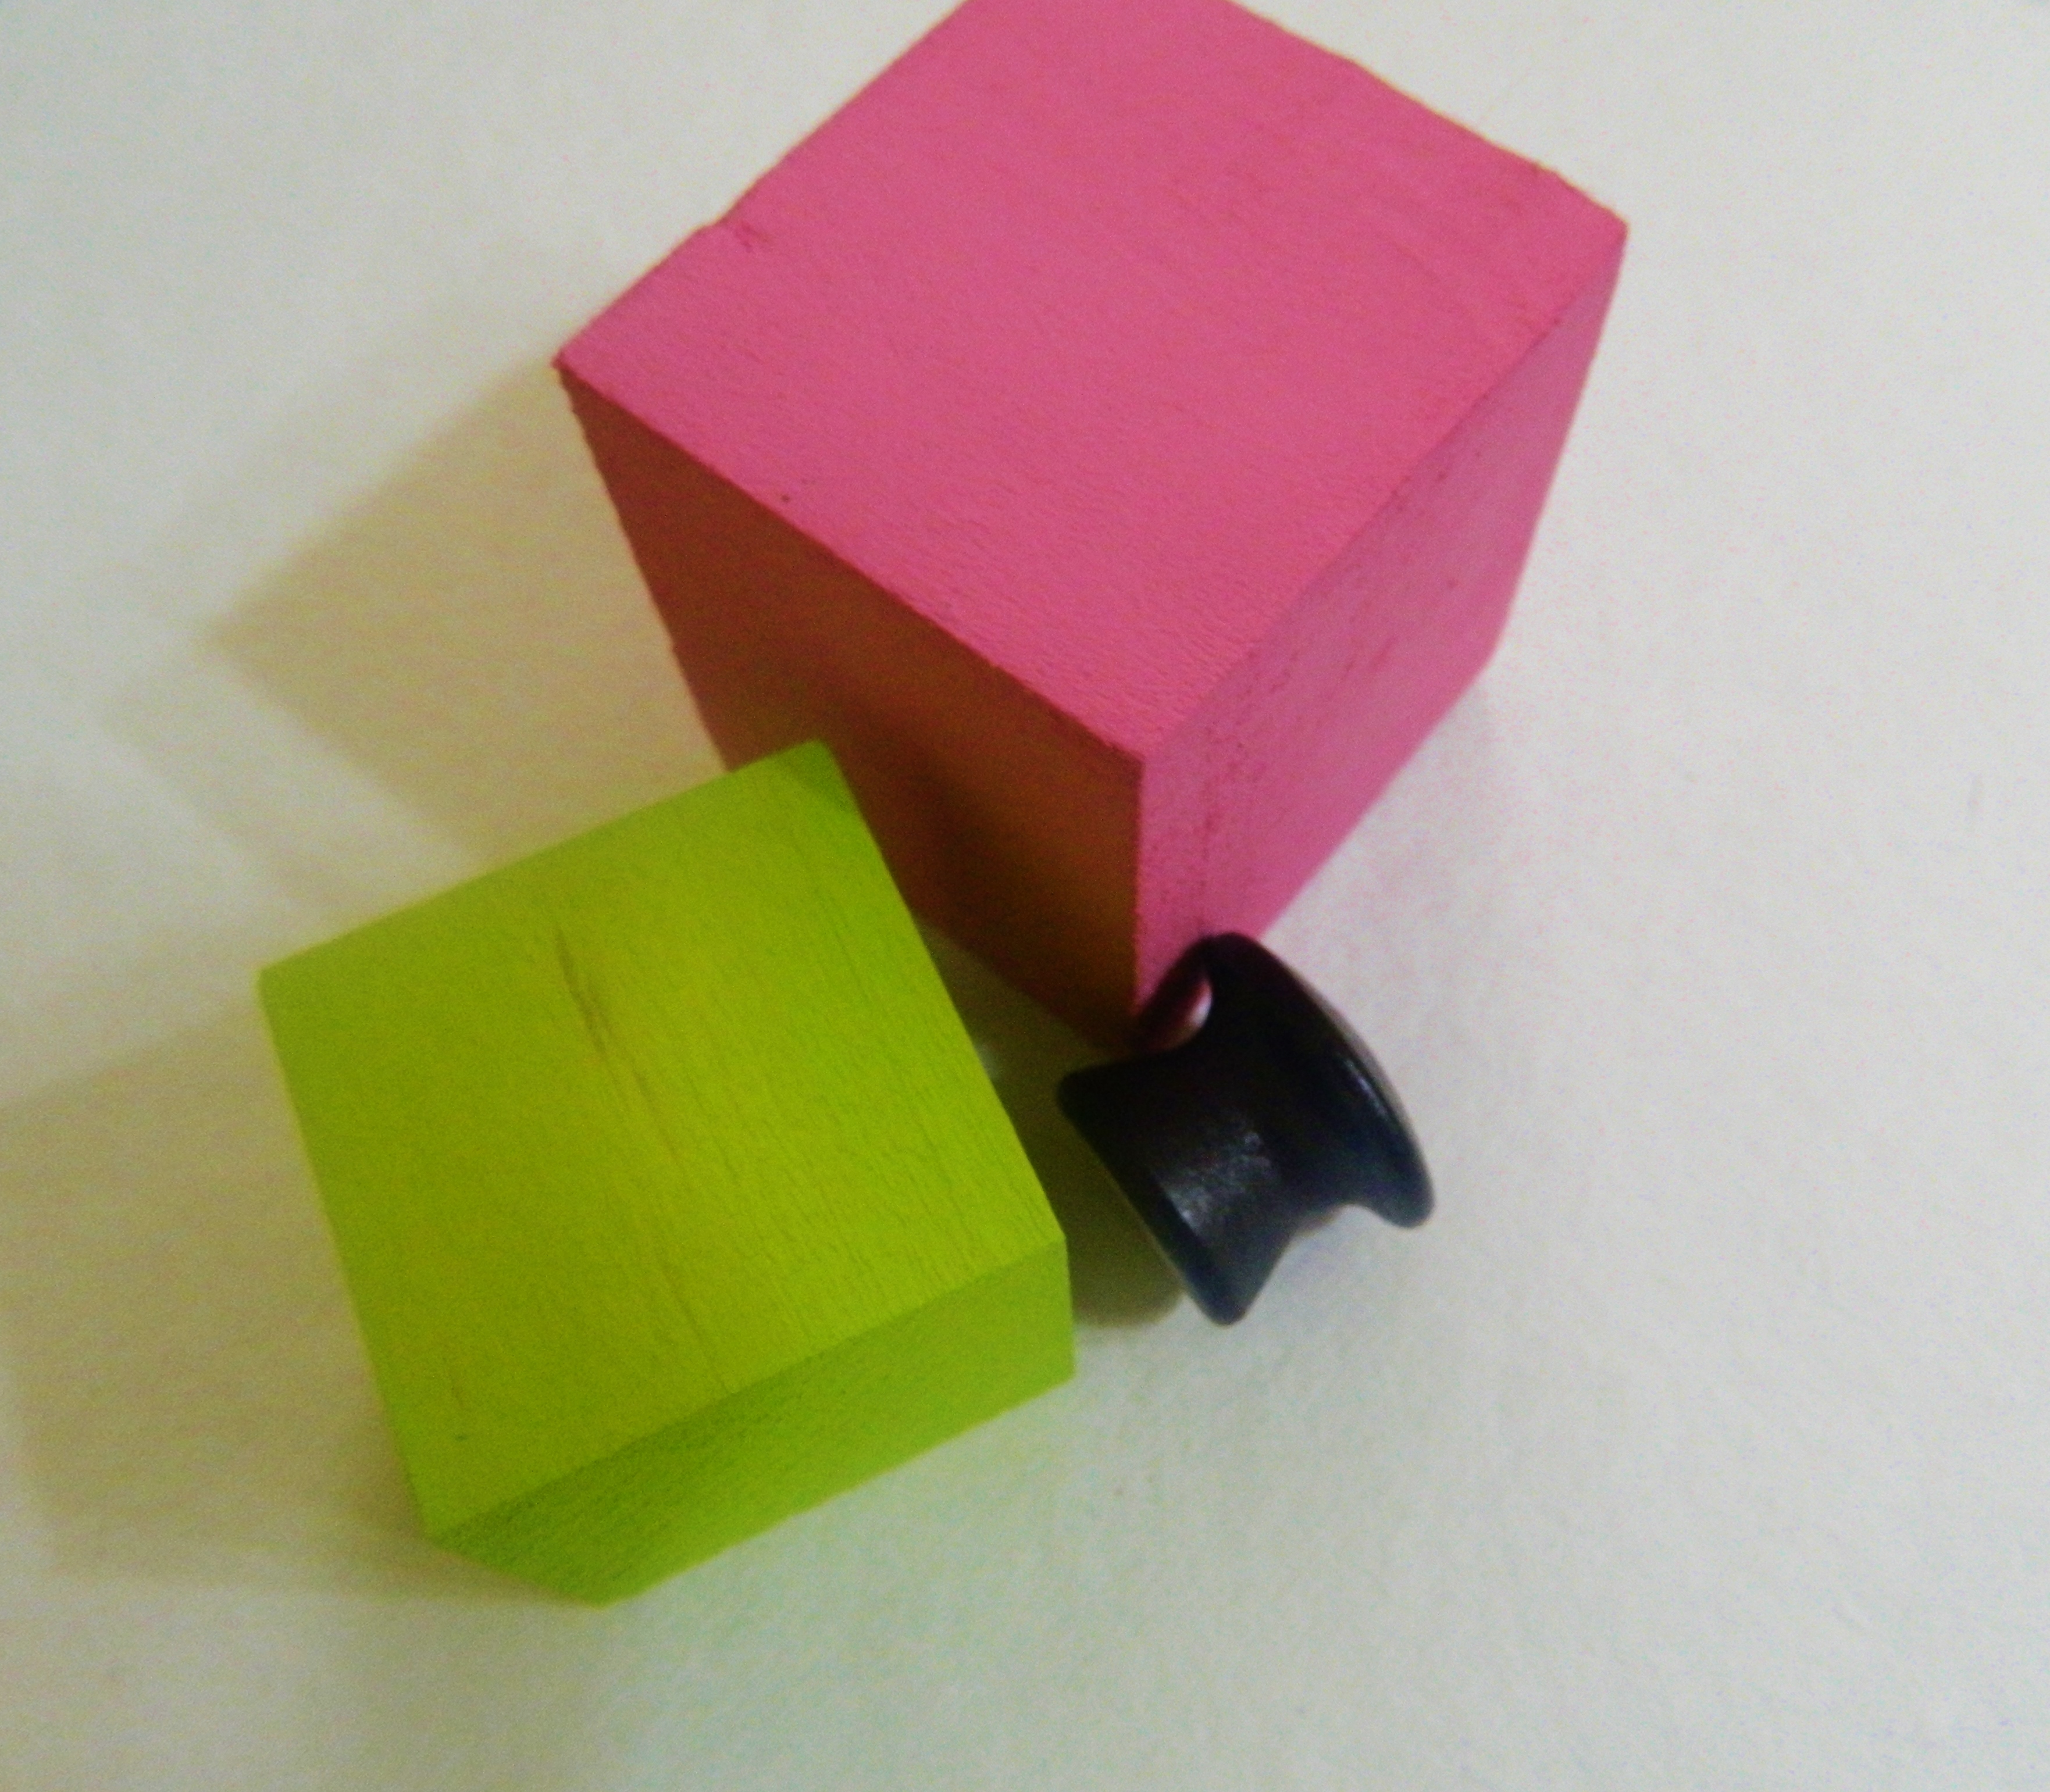
Start by painting all four sides of wood blocks, knob and wood balls for the bottom. Have some creative ideas in mind before you start gluing your images down. You can be as simple or elaborate as you’d like. Make sure you have some word rub’ ons or stickers you’d like to use.

Stamp, stencil or glue paper to four sides of your square blocks.

Wood blocks, knob and wood balls with different paints

Once you have all your sides painted the way you like you can begin to glue your collage images down to the sides for your blocks. Leave two sides open for a top and bottom with both blocks. Once satisfied with your design use the wood glue to glue your smaller block onto your large one.

You will also need to glue your door knob on top of the smaller block. On your large block follow the same direction leaving a top and bottom open for the small block and “feet” that are the wood balls. Glue your small block on to the large block and glue your wood balls to the bottom of the large block. Glue your knob on last. Leave plenty of drying time.

Blocks with collage images

 Blocks with collage images

Blocks with collage images

Embellish your word blocks with your intuition. Use the words you’ve chosen as inspiration to help you complete your blocks. I used gem stones, stamps, and outlined my images. So many possibilities for these. Use different shapes for the knobs and feet. Get creative and have fun!

~*~*~*~*~*~*~*~*~*~*~*~*~*~*~*~*~*~*~*~*~*~*~*~*~

Author bio:

Melanie Statnick is a Canadian Mixed Media & Collage Artist out of North Carolina. Melanie creates art daily from her private studio. You can see her artworks at her website www.melaniestatnickart.com. Her style is fun, whimsy and eclectic. Melanie is also an Art Instructor for local venues and community colleges for students of all ages.

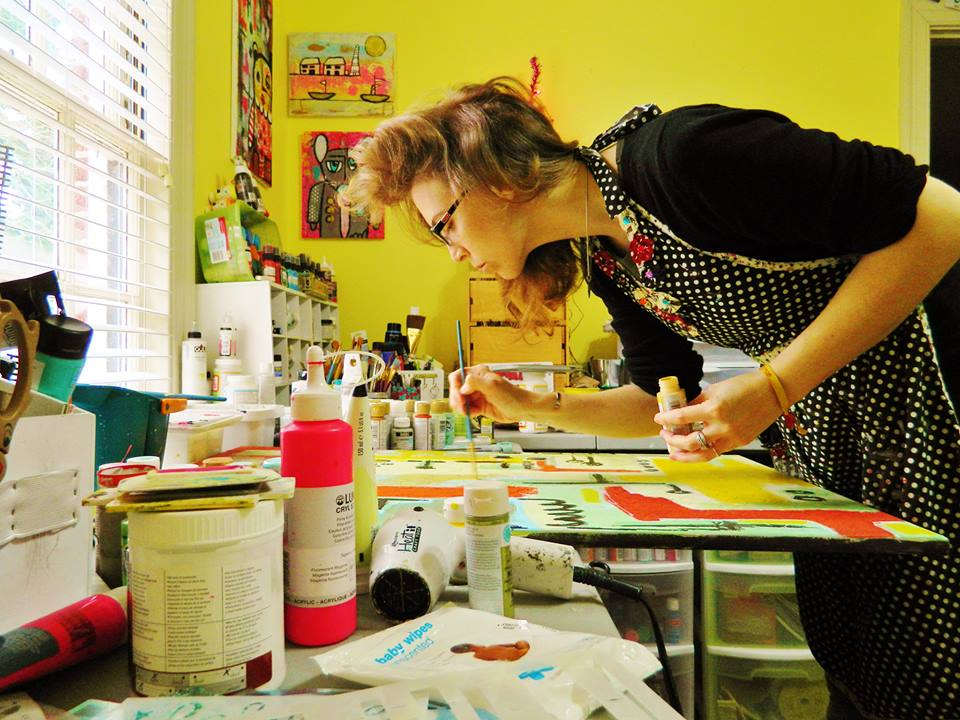
Melanie Statnick in action
.

.

Usable Art: Mixed Media Papier Mâché Containers

~ * ~

This article is written by Katja Blum

Papier mâché (French for “chewed paper) is a sculptural technique that most people know from elementary school, Mardi Gras floats and big rocks falling on Captain Kirk. But did you know that papier mâché was used for making coffins in Ancient Egypt, for armor, medieval church and castle interiors, boats and even aircraft fuel tanks during World War II?

Paper – as pulp, meaning shredded, soaked paper bits, or strips – combined with various bonding agents like paste, glue, oil or lacquer can be used to build amazingly sturdy, even waterproof, structures and made to resemble pretty much any other material. Many artists today use fine paper clay for dolls or other kinds of sculptures, but I would like to invite you to channel to inner third-grader and glue paper strips to a balloon. It’s fun, satisfying, not to mention a great way to recycle – and you can make objects that are not just interesting substrates for a wide range of mixed media techniques, but also perfectly usable containers to bring more of your art into your everyday life.

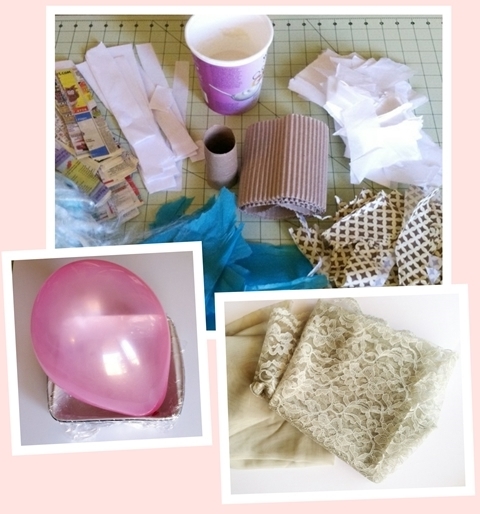
Materials for making papier mâché containers

I’m willing to bet that you have everything you need to make a papier mâché bowl in your house right now.

You need:

  • Air-filled balloon and/or a household container lined with plastic wrap
  • •Paper, torn into strips and pieces – tissue paper, newsprint, junk mail, gift wrap, scrap paper, cardboard (for making bases, handles etc.). If it’s paper, you can use it.
  • •Fiber, fabric, threads and other light, “glueable” things
  • •Flour or wallpaper paste
  • •Masking tape for adhering bases, handles etc.

I use a very simple flour paste recipe:

Whisk one part flour into one part water, until the liquid is smooth and of a consistency somewhere between heavy cream and Sauce Hollandaise. Add a squeeze of white glue for extra strength, if you like.

When working mainly with tissue paper, make the paste a little runnier, because applying heavy paste tends to rip thin paper.

Balloon bowl

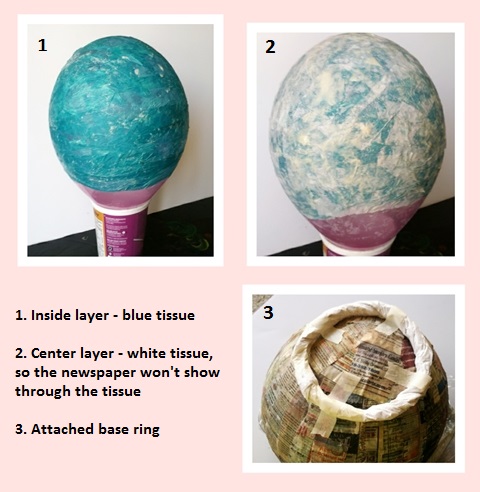
Steps for making a bowl on an inflated balloon

Take a piece of paper, apply the paste with your fingertips and smooth the wet strip onto the balloon. When working on top of a form, you are creating the layer that will show on the inside of your bowl first. If you want to use decorative paper for the inside layer, remember to paste it on with the “good” side down.

Build up layers of paper strips and pieces. You don’t have to let one layer dry before putting on the next. When working with paper strips, try to cross-hatch the layers – one layer of vertical strips, one of horizontal strips. If you get bubbles and creases, wait a few moments for the paste to soak through the paper and smooth them down with your fingers or with the back of a spoon. (Pro tip: Don’t use a pointy bone folder on a balloon project. Bad things can happen.)

When you have almost reached the desired thickness, think about the base for your balloon bowl. You can get as creative as you like, but one easy method is a base ring. Twist a long piece of paper (a newspaper page works well) into a tight paper rope, form a ring and tape the ends together with masking tape. Position the ring on the balloon bowl – doesn’t have to be in the center, my bowl is supposed to stand a little tilted. Cover the ring while building your next couple of layers.

You can also use this technique to make handles and rims. A rim around your bowl is very useful if you don’t want the bowl to be thick – for instance if you want to decorate it with stitching and need to get a needle through the paper layers later. A rim will give the bowl a lot of stability without adding thickness.

Once your balloon bowl pleases you, let it dry thoroughly. If you dry your papier mâché objects outside, try to avoid direct sunlight, especially for thinner items. Drying too quickly in intense heat can warp the object. Same goes for oven drying.

Container bowl

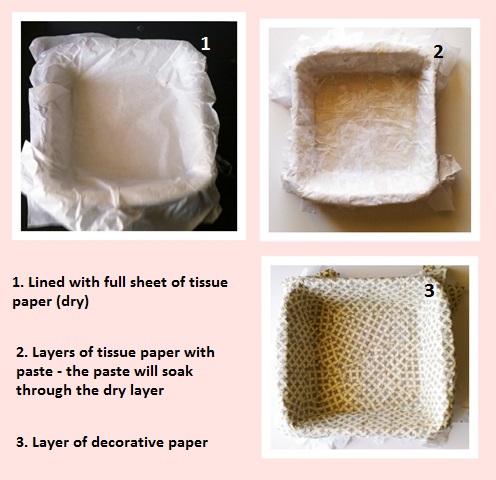
Steps for making a papier mâché bowl inside a household container

If you want to create a papier mâché container shaped like one you already own, cover the inside of that container with plastic wrap and use it as a form. Make sure that the form’s opening is not narrower than the rest of it; otherwise you’ll have a hard time extracting the paper object. It’s safer to work on the inside of containers you don’t want to cover permanently with papier mâché (which, by the way, is a great way to turn plastic bottles into pretty vases). The paper tends to shrink while drying, and you don’t want to have to tear off your art object to get your casserole dish back.

Remember that you are working the outside first this time. Again, layer decorative papers into the bowl “good” side down.

Proceed as described for the balloon bowl. In my example, I’ve lined the bowl with a full sheet of tissue paper without paste. It gives the outside of the bowl an interesting texture and makes a sturdy start for a bowl with thin walls. Press in the next, wet layer – the paste will soak through and hold the tissue in place.

When working in a bowl, you won’t need a base to make your object stand, but you can certainly add one later, as well as handles etc. Let the papers hang over the edge of your form for now. You can always make a neat edge later after drying. Or not.

I used pieces of polyester lace for this project. Fabric, yarn and fiber can be used just like paper here – just paste them on.

Finishing

Once the objects are dried all the way through, lift your papier mâché bowl out of the form and pop the balloon. Cut the containers into any shape that pleases you.

If you didn’t build a layer of decorative paper, acrylic gesso gives you an even, neutral surface to work with. I like my objects to look like papier mâché, so I tend to leave them pretty rough and torn-looking, but the hardened papier mâché (with or without gesso) can be sanded smooth, if you prefer a sleeker look.

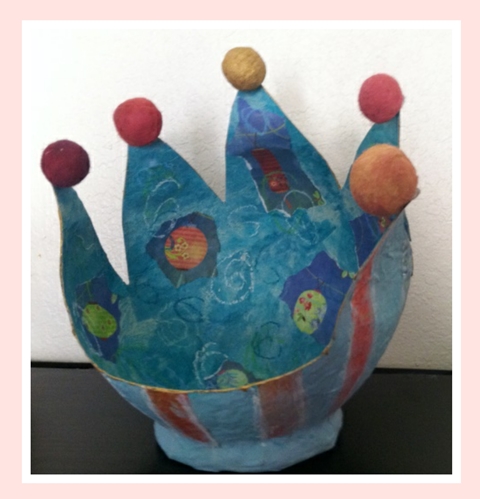
Decorated balloon bowl

Decorated bowl made in a form

Decorate the papier mâché bowls. You can always add more paper or cardboard elements. Painting, stamping and stenciling all work well on these objects. Thinner containers can be stitched or beaded. Painted felt balls find a use here. Spray varnish is a good protective finish.

Enjoy your useable papier mâché art and experiment with the infinite possibilities of this ancient technique.

~*~*~*~*~*~*~*~*~*~*~*~*~*~*~*~*~*~*~*~*~*~*~*~*~

Katja Blum is a writer and translator from Tulsa, OK. As an artist, she started with yarn, fabric and papier mâché (rarely together), branching out into collage and other paper arts about ten years ago. Her latest obsession is making soft stuffies and art dolls – to the delight of her toddler. She also likes to find creative solutions for ugly or broken things around the house – to the delight of her husband.

You can see more of her work with fiber, paper and words at www.thewaywardsheep.com

~*~*~*~*~*~*~*~*~*~*~*~*~*~*~*~*~*~*~*~*~*~*~*~*~

.

.