Michelle G Brown | Mixed Media Art

Calligraphy for Mixed Media Artists

~ * ~

This article was written by Katja Blum

One common description of the art of calligraphy is “the art of giving a pleasing, harmonious form to the written word”. This rather terse definition includes masterpieces of calligraphy from the Book of Kells to the scribes of ancient Persia to William Morris and contemporary art.

Many works of mixed media art include text – individual words or text blocks – as a focal point and added layer of texture, color and meaning. One would think that calligraphy and mixed media should be a natural combination. However, as a big admirer of the work of calligraphy artists, I often find myself developing a special form of writer’s block – calligrapher’s block, if you will.

The surface of a piece of mixed media art is often textured and varied, with layers of different materials that make it hard to control the nib or brush, the classic calligraphy tools. And forget aids such as ruled lines and light boxes. So there is just freehand writing. What if I mess it up? My solution for this (as for many other mixed media issues) is to move towards serendipity and relaxed design. I embrace my handwriting, although I can tell you that it has suffered as much as the penmanship of any computer user – and I play with tools. Take a good look at your art tools, kitchen utensils or other implements, dip them in ink or diluted acrylic paint and start writing.
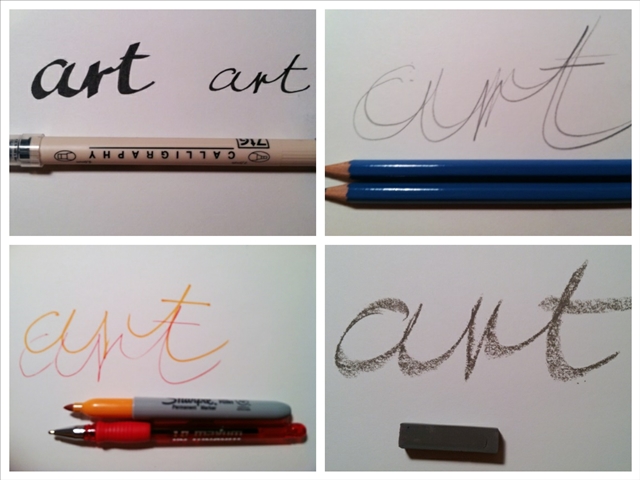
Samples done with classic writing tools

First, let’s look at “simple” writing tools. A calligraphy pen with a broad and fine tip is a good choice for a block of text, perhaps on a journal page. Holding two pencils or colored pens together creates an interesting effect. Try writing with five or six colored pens held together. The result is a fascinating blur. Pastels and crayons look substantial, but still relaxed – lovely in white on a dark background.
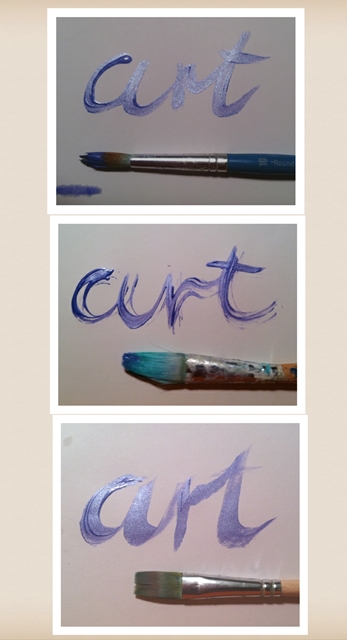
Samples done with different brushes

Play with brushes. The top and bottom ones are classic shapes for Asian and Western calligraphy. The middle brush is one I used to apply PVA glue once and forgot to wash. It is one of my favorites for applying color effects and for writing.
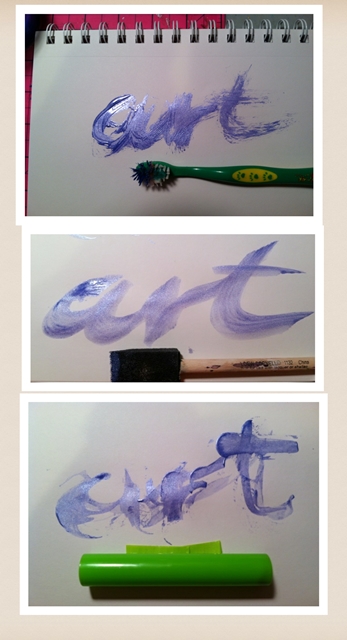
Samples done with uncommon writing tools

For the third round of writing experiments, I used some unusual writing tool. At the top I wrote with a children’s toothbrush and found I like the feathered effect. This could be very interesting on heavily textured backgrounds with very diluted acrylic paint. The center word was written with a sponge brush. The broad strokes can accommodate all kinds of color effects and decorations. My favorite is the bottom picture. Here, the tool is a hollow polymer clay roller. I love the completely random, unrepeatable strokes. Working with unusual tools is the calligraphy version of a monoprint – you can’t plan every move and you’ll never do two the same.

Choose your tool, take a deep breath and just start writing on your artwork. Lay the foundation with your favorite writing implement – mine turned out to be the roller – and then add color, highlights, texture – or take your inspiration from ancient palimpsest manuscripts and layer more writing on top.
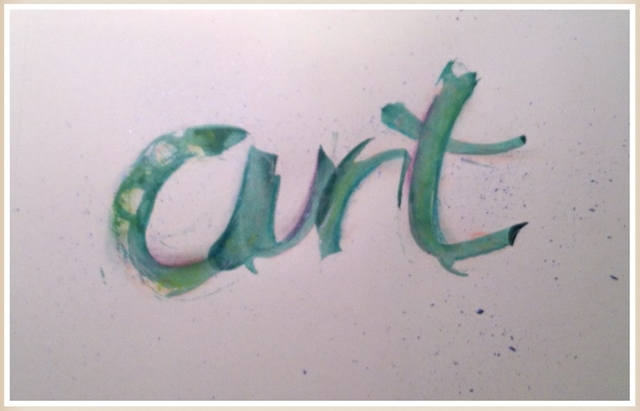
“Art” written with a polymer clay roller

~*~*~*~*~*~*~*~*~*~*~*~*~*~*~*~*~*~*~*~*~*~*~*~*~

Katja Blum is a writer and translator from Tulsa, OK. As an artist, she started with yarn, fabric and papier mache (rarely together), branching out into collage and other paper arts about ten years ago. Her latest obsession is making soft stuffies and art dolls – to the delight of her toddler. She also likes to find creative solutions for ugly or broken things around the house – to the delight of her husband.

You can see more of her work with fiber, paper and words at thewaywardsheep.com

~*~*~*~*~*~*~*~*~*~*~*~*~*~*~*~*~*~*~*~*~*~*~*~*~

.

.
Encaustic Basics Part II: Preparing Substrates, Fusing, Adding Color

This article is written by Elaine Brady Smith

Welcome back to the Encaustic Basics Series!!! This is Part II, on how to make it easy and economical to get started with encaustic painting. If you missed Part I, click here. In this article we will talk about how to prepare your substrates, fusing, and adding color to your work. So let’s get started!

Preparing Substrates

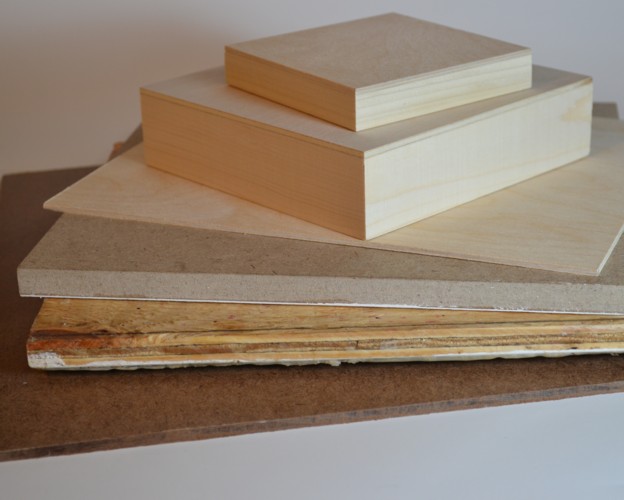
Encaustic wax will adhere to a variety of surfaces. It is important that the surface is absorbent and porous or it will eventually crack and flake off. So glass, plastic, smooth metals, and any surfaces painted with acrylic paint are not suitable for encaustic. I will be using ¼” birch plywood for the demo pieces in this article that I purchased from Dick Blick.

Encaustic Basics-Part II-How to do encaustic painting. Learn how to prepare your substrates, learn how to fuse, and how to add color to your encaustic paintings.

If you are doing 2 dimensional works, some good choices for substrates are: Birch Plywood, Regular Plywood, Unfinished Pine, Un-tempered Masonite, MDF, and Cradled Panels. When choosing your substrate, make sure that it has not been previously treated with any oils or chemicals. Once you decide what type of work you want to do, spend some time researching what substrate will best suit your needs.

Encaustic Basics-Part II-How to do encaustic painting. Learn how to prepare your substrates, learn how to fuse, and how to add color to your encaustic paintings.

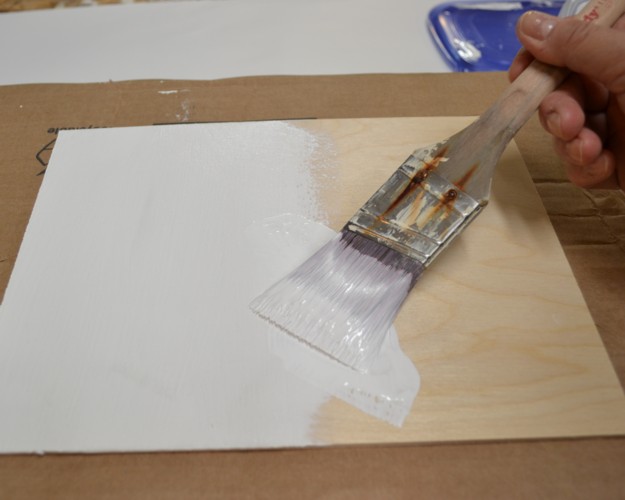
To prepare your substrate, encaustic medium or plain beeswax can be applied directly to most unfinished wood. If you are doing a painting, preparing the surface with a ground of encaustic gesso will enhance and give brighter color results. R & F Encaustic Gesso is my go-to product for surface preparation for an encaustic painting. It is easy to apply and gives me a solid white background. It is important to know that regular gesso made for acrylic and oil painting does not work with encaustic painting. Encaustic gesso has a “higher proportion of solid to binder, making it highly absorbentR&F Paints.

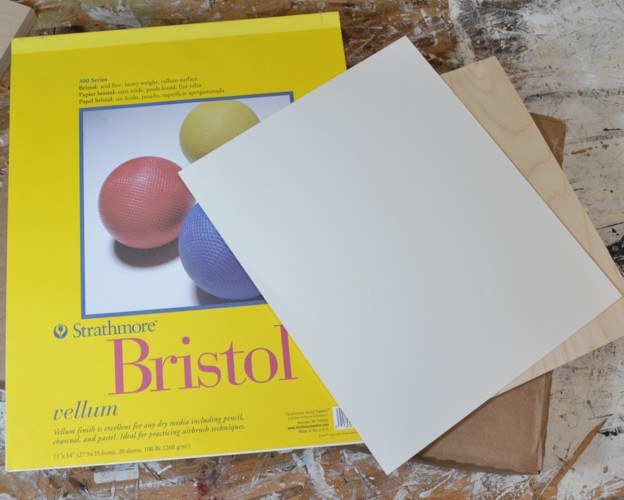
If I plan to do a collage piece that will eventually be covered with paper, I don’t bother with the gesso, I just work on the raw wood. Also, as an alternative to encaustic gesso, you can glue any type of absorbent paper to your surface to serve as a ground. Bristol paper is a good choice for a white, smooth, consistent surface.

Encaustic Basics-Part II-How to do encaustic painting. Learn how to prepare your substrates, learn how to fuse, and how to add color to your encaustic paintings.

Steps for gluing paper to your board:

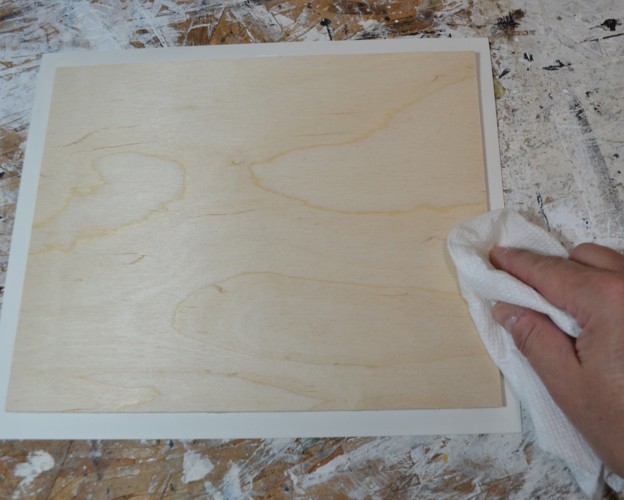
  1. Lightly sand your board and wipe away any dust particles.
  2. Cut your paper slightly larger than the size of the board.

Encaustic Basics-Part II-How to do encaustic painting. Learn how to prepare your substrates, learn how to fuse, and how to add color to your encaustic paintings.

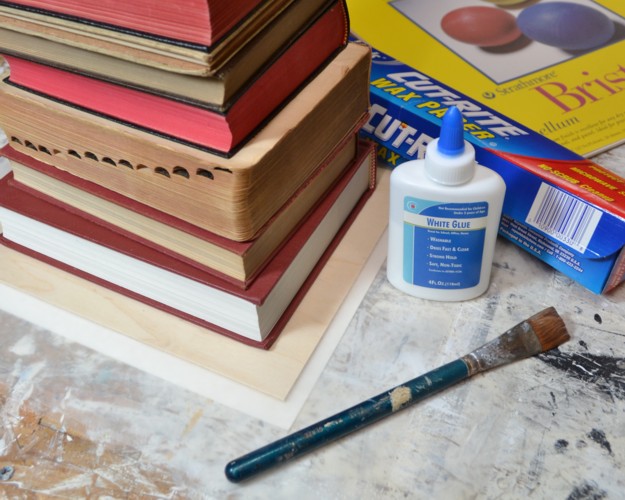
  1. Brush an even layer of glue on to the board and on to the back side of the paper.
  2. Lay the glue side of the paper onto the board and brayer down to make even contact, smoothing out any air pockets.
  3. Place the board upside down on a sheet of wax paper and wipe away excess glue with a damp paper towel.

Encaustic Basics-Part II-How to do encaustic painting. Learn how to prepare your substrates, learn how to fuse, and how to add color to your encaustic paintings.

Encaustic Basics-Part II-How to do encaustic painting. Learn how to prepare your substrates, learn how to fuse, and how to add color to your encaustic paintings.

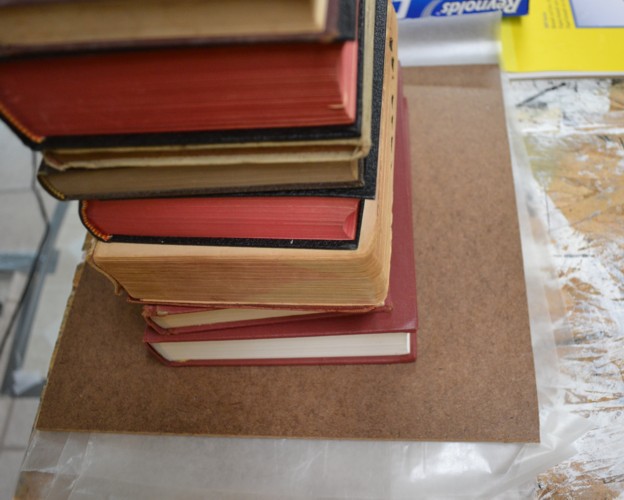
  1. Weight the board with a heavy object. I have inserted a thin piece of Masonite board (shown in photo above) between my boards and the books…my heavy object, to evenly distribute the weight.
  2. Allow to dry overnight.
  3. Trim excess paper from the edges with an x-Acto knife or single edged razor blade.
  4. Sand the sides of the board to remove dried glue.

In the photos above I have used 100lb Bristol Vellum Paper and white glue. You can also use gel medium or PVA as your glue, just make sure that your paper is evenly covered with glue and that none gets on the surface of your paper.

Encaustic Basics-Part II-How to do encaustic painting. Learn how to prepare your substrates, learn how to fuse, and how to add color to your encaustic paintings.

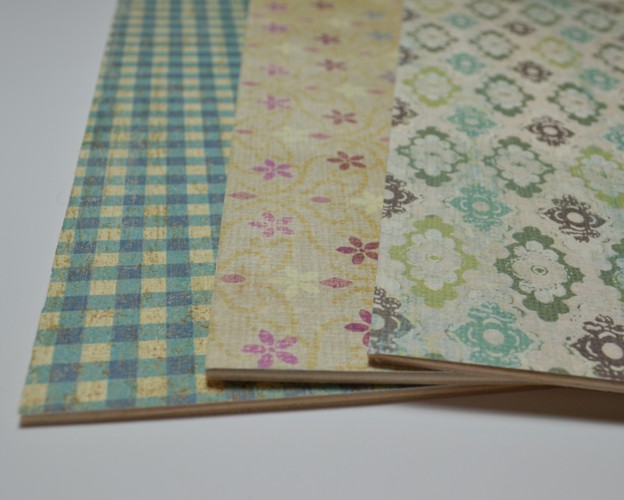
If you’d like a patterned background, you can glue collage paper directly to your board. This is a good way to add heavier papers that might be difficult to attach with wax. Shown above are boards that I have prepared with heavy weight scrapbooking paper. This is also an excellent way to incorporate drawings or artwork as background to your piece. Just make sure they have not been painted with any acrylic paint.

Note that the paper will absorb whatever glue you use, so be mindful that glue might seep through your paper if it is too thin or between cracks of adjoining pieces. If it is a lighter weight paper, don’t bother with glue; just attach it to the board with wax.

Another note about using paper with encaustic is that the wax will make many papers transparent or darker, so it is best to test before you start! We’ll talk more about adding collage paper to encaustic work next month in Part III of this series.

Fearless Fusing!!!

You should begin your painting with a primer layer of wax on your substrate regardless of what type of ground you chose. The layers of wax cool very quickly as you add them and will remain individual layers, one on top of the previous one until you fuse them together. It is necessary to fuse each and every layer to make it one with the previous layer. This may seem tedious at first, but after a while, you will begin to enjoy the Zen-like practice of fusing.

Encaustic Basics-Part II-How to do encaustic painting. Learn how to prepare your substrates, learn how to fuse, and how to add color to your encaustic paintings.

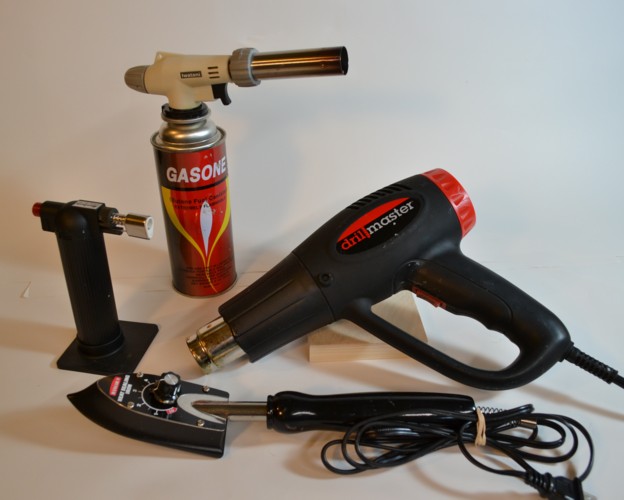
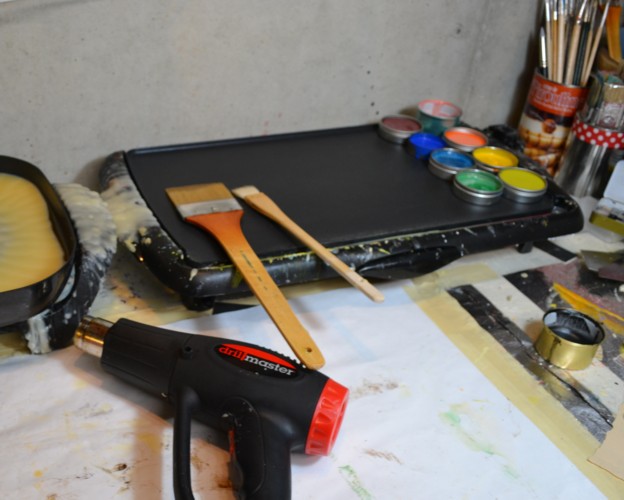
Fusing is the process of adding a heat source to the surface so the wax melts enough to bond with the layer beneath. It is possible to fuse very large areas with a heat gun or acetylene torch, and it is possible to fuse very small areas with a small butane torch or mini quilt iron. As you practice with different heat sources, you will begin to know which heat source you prefer and which to use for various techniques. In the photo above, I am showing the heat sources I use most often. I generally prefer a heat gun because of the amount of collage paper I use in my work. I don’t want any of it to catch on fire!

Encaustic Basics-Part II-How to do encaustic painting. Learn how to prepare your substrates, learn how to fuse, and how to add color to your encaustic paintings.

Steps for adding primer layers and fusing with a heat gun:

  1. Melt encaustic medium or plain beeswax directly on your heated palette or in a clean tin can.
  2. With a natural bristle brush, dip into the medium and paint an even layer onto your board. This should also be done on top of a collage paper ground. 2-3 layers are sufficient as primer for a painting. You will get the feel for how many layers are needed, depending on what techniques you plan to use next.
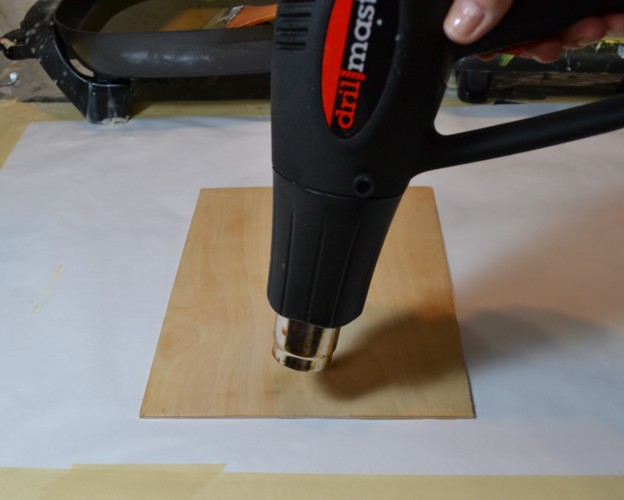
  3. Point the heat gun 4-6 inches away and perpendicular to the surface (depending on the air flow of your heat gun). Move it slowly across the surface until you see a slight shine on the wax. When you see the shine, move the gun nozzle on to the next area.
  4. Be careful not to heat too long in one spot, as this will cause the wax to spread and create bare spots on your surface. I recommend using your heat gun on the lowest setting until you get used to the process.
  5. When the shine disappears and the wax is dull again, your piece is cool enough to brush on another layer of wax and fuse again.
  6. Fusing takes practice, so don’t become discouraged if your first attempt isn’t perfect. And don’t be afraid to try all the types of heat sources, so you know what you will like! I know many artists who love the big acetylene torch!

Encaustic Basics-Part II-How to do encaustic painting. Learn how to prepare your substrates, learn how to fuse, and how to add color to your encaustic paintings.

And Finally – Adding Color!!!

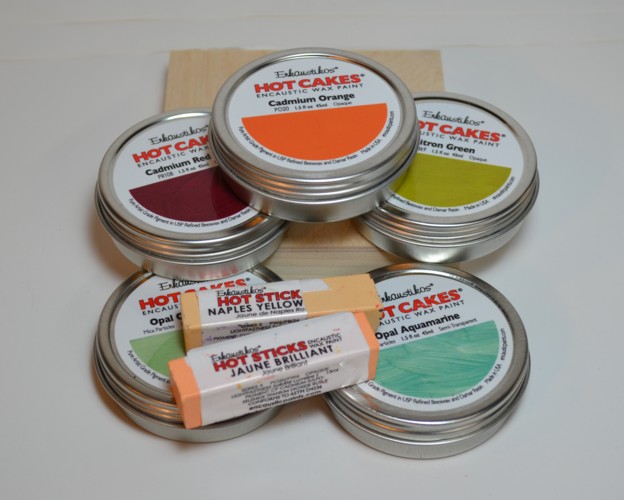
Adding color to your work is the beginning of the real fun! In addition to adding color with collage papers, encaustic paints are available in readymade cakes. I recommend Enkaustikos brand pigment cakes, as they are affordable, good quality encaustic paints with a large variety of colors.

Encaustic Basics-Part II-How to do encaustic painting. Learn how to prepare your substrates, learn how to fuse, and how to add color to your encaustic paintings.

You can heat the pigment cakes in a tin on your palette, or if you only need a small amount of paint or want to mix colors together, melt the paint right on the palette. The pigment colors can also be thinned with encaustic medium to make glazes.

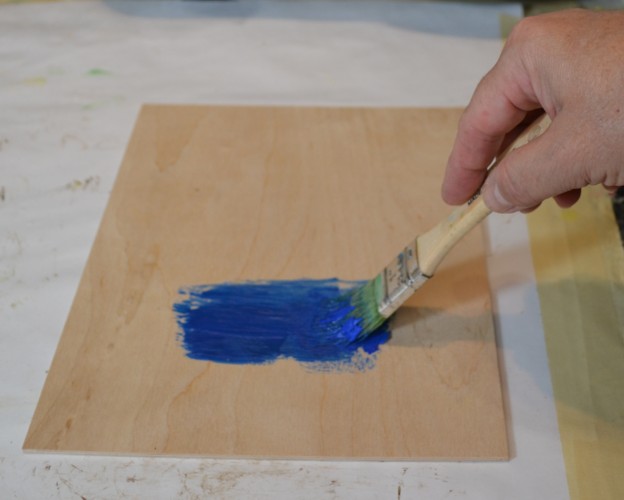
Use a natural bristle brush to apply the color to your piece. Once you use a brush for a particular color, it is best to dedicate the brush to that color, as it is difficult to completely clean wax from brushes.

Encaustic Basics-Part II-How to do encaustic painting. Learn how to prepare your substrates, learn how to fuse, and how to add color to your encaustic paintings.

Encaustic Basics Part II: Preparing Substrates, Fusing, Adding Color

Encaustic Basics-Part II-How to do encaustic painting. Learn how to prepare your substrates, learn how to fuse, and how to add color to your encaustic paintings.

Steps for adding encaustic paint to your work:

  1. Brush on the melted encaustic paint with a flat natural bristle brush.
  2. Fuse the paint to the surface.
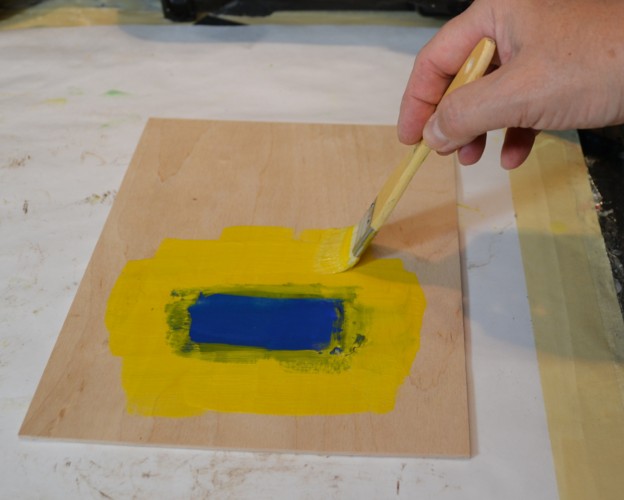
  3. Add more of the same color or add another color to the surface.
  4. Fuse this layer to the previous layer.

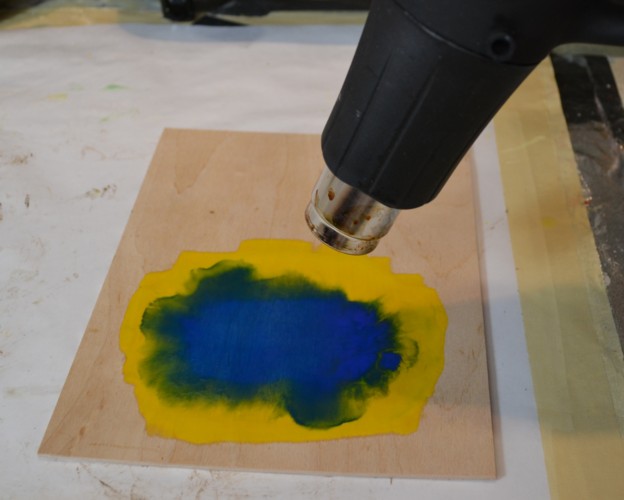
You will notice as you fuse multiple colors, you will be able to use the heat gun to move the wax around to blend them and create new colors. This is the fun and unpredictable nature of encaustic painting.

Here are the three boards I started earlier with scrapbooking paper. They may or may not be finished. I never really know until I look at them for a while! I’ve added more collage paper, encaustic paint, and an incised line technique. Let me know what you think.

Encaustic Basics-Part II-How to do encaustic painting. Learn how to prepare your substrates, learn how to fuse, and how to add color to your encaustic paintings.

Encaustic Basics-Part II-How to do encaustic painting. Learn how to prepare your substrates, learn how to fuse, and how to add color to your encaustic paintings.

Encaustic Basics-Part II-How to do encaustic painting. Learn how to prepare your substrates, learn how to fuse, and how to add color to your encaustic paintings.

So I have given you a lot of information, but these instructions are by no means the whole ball of wax (no pun intended!). There are many more techniques to discuss, but you can see that getting started is very simple. It is not beyond your reach to learn encaustic painting. I will keep sharing information here and on my blog www.elainebradysmith.com about encaustic painting and some of my other favorite mixed media techniques. Next month in Part III of the Encaustic Basics series, we will discuss adding collage and embedding objects to your work. So until then, go play and have fun with encaustic painting!!!

~*~*~*~*~*~*~*~*~*~*~*~*~*~*~*~*~*~*~*~*~*~*~*~*~

Elaine Brady Smith loves creating encaustic and mixed media art. Key ingredients in her work are vintage papers and hand printed collage papers made with repetitive marks, simplistic shapes, and transparent layers. She also enjoys other art mediums, such as art journaling, oil painting, and colored pencil drawing. Among her other interests are writing, teaching and spending time with her family. Find more on her website: elainebradysmith.com and on Facebook: Elaine Brady Smith Art

~*~*~*~*~*~*~*~*~*~*~*~*~*~*~*~*~*~*~*~*~*~*~*~*~

.

.
Painted Paper Collage

~ * ~

This article is written by Debbie Davis

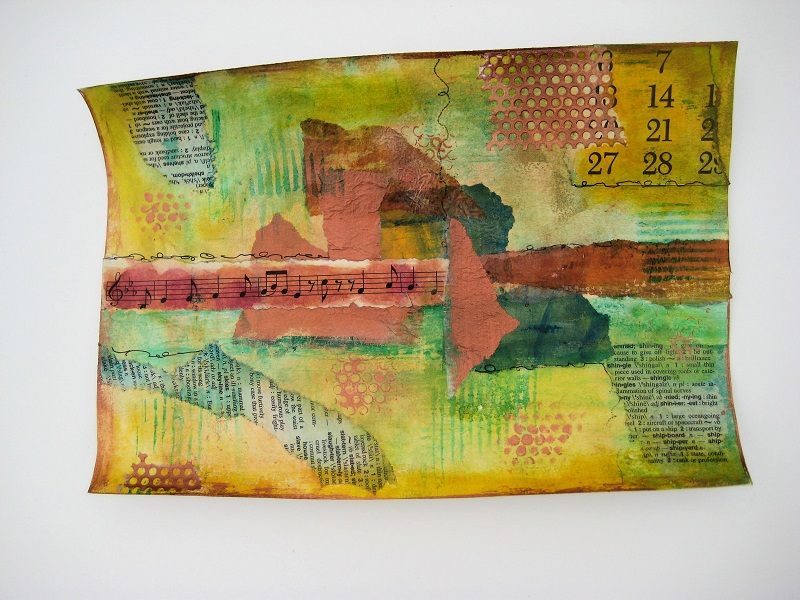
One of my favorite things to do is paint and collage onto mixed media paper.  When using paper, I let go of any apprehensions about messing up a nice canvas or other expensive substrate.  This allows me to work freely and just have fun.  Once a paper collage painting is complete, depending on the size of the paper,  it can be cut to make smaller pieces of art or you can use the entire piece.

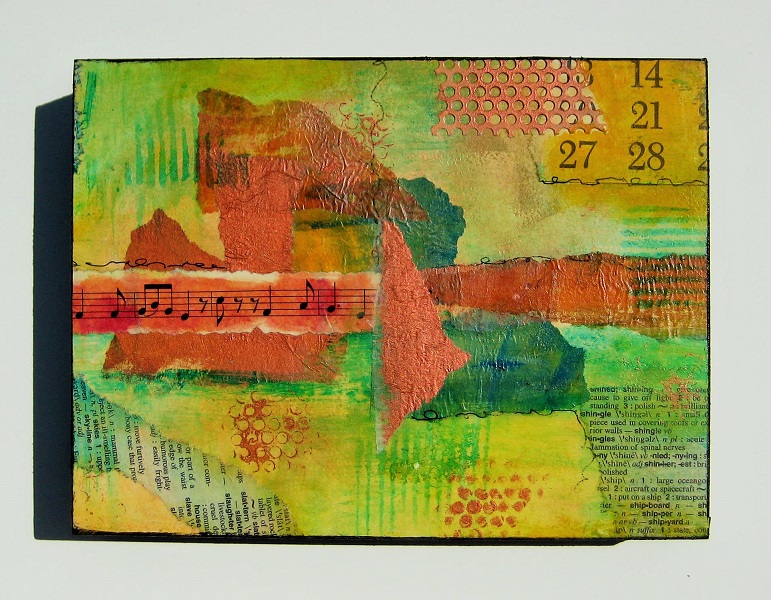
mixed media collage on canvas

I usually start by collaging various papers onto the mixed media paper.

For the collage painting above, I used pieces from a vintage ephemera music book, dictionary and calendar page.  I also added some deli paper that I had painted and crumpled to give it some texture along with some painted drywall tape.  Once the papers were collaged on the mixed media paper, I added some paint and did a bit of stamping with a piece of cardboard that I had brushed some paint onto and pressed onto the paper.  I also used a piece of the drywall tape as a stencil and pounced some paint through it.  Line work was added using a Pitt artist pen.

mixed media collage on canvas

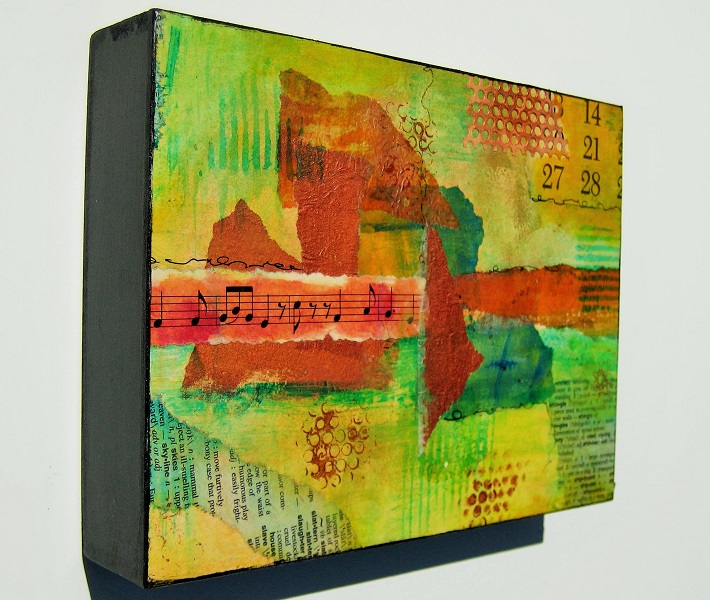
I sometimes mount the paintings onto wood panels that I purchase from my favorite art supply store.  Another option is to buy clearance craft art from your local hobby/home decor store, that is done on wood pieces or panels to repurpose and use as your substrate.  I am always on the lookout and buy a lot of my substrates at 80% off.  I recently paid $2.00 for some panel boxes that had words printed on them.  They were just the size I needed for a few of my paper collage paintings.

mixed media collage on canvas

Cut your paper close to the size of the substrate.  Extra paper can be trimmed off after the glue dries.  To adhere your art onto the substrate, use PVA glue by adding it to the center of the substrate and brushing it out towards the edges.  You need to make sure and cover the entire top of the panel with the glue.  You don’t want the glue to be too thin that the paper won’t stick in some areas. You also don’t want to put so much down that it is oozing out the sides once you get the paper down.

Next lay your art onto the panel smoothing out any air bubbles.  I like to cover it with wax paper and roll out the bubbles and smooth down the paper using a brayer.  Next, leaving the wax paper on the painting,  put some heavy books on top and leave to dry overnight.  Once dry, paint the sides of the substrate and finish it off with a spray sealer or varnish.

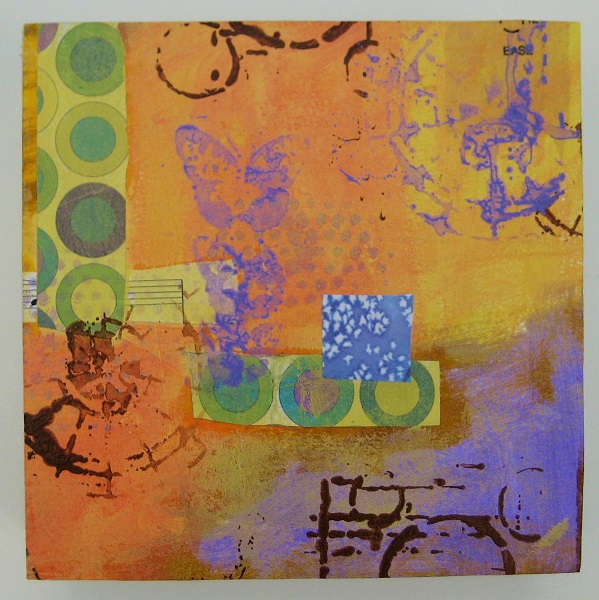
Here is another painting I completed recently and mounted on to a wood panel.  I used some scrapbook paper on this one along with stencils.

mixed media collage on canvas

~*~*~*~*~*~*~*~*~*~*~*~*~*~*~*~*~*~*~*~*~*~*~*~*~

My name is Debbie and I live in Morton, Illinois, USA. I’m happily married and have a wonderful family that includes a daughter, son, son-in-law and 3 of the sweetest grandchildren ever!

What I love most about mixed media art is that you don’t have to be an expert at anything to create beautiful art. It is a great way to recycle found objects. Art is such a wonderful stress reliever. I just wish I had more time to play!

I have a blog called In Art Therapy where I share my art along with techniques I have learned.  I hope you will come visit me there.  I also have an Etsy shop called Artful Explorations where I place some of the art I have created for sale.

~*~*~*~*~*~*~*~*~*~*~*~*~*~*~*~*~*~*~*~*~*~*~*~*~

Creating Mixed Media Hair Tutorial

~ * ~

This article is written by Kate Palmer

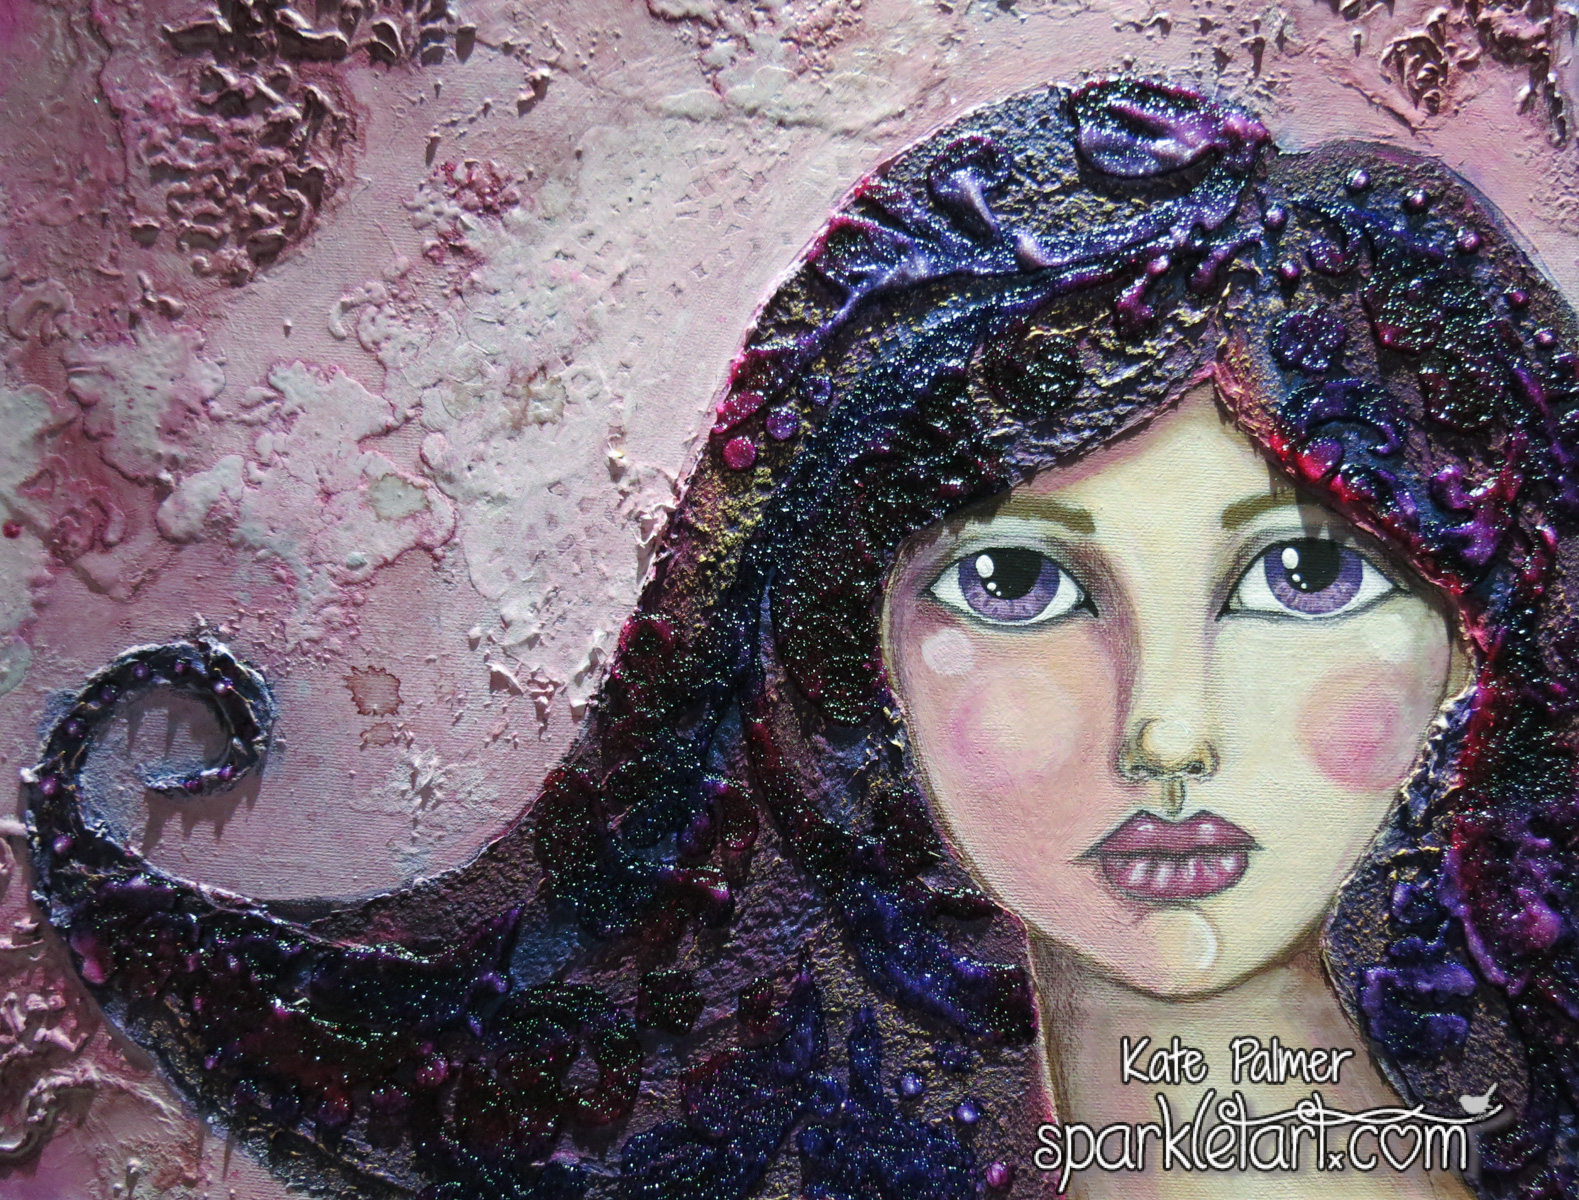
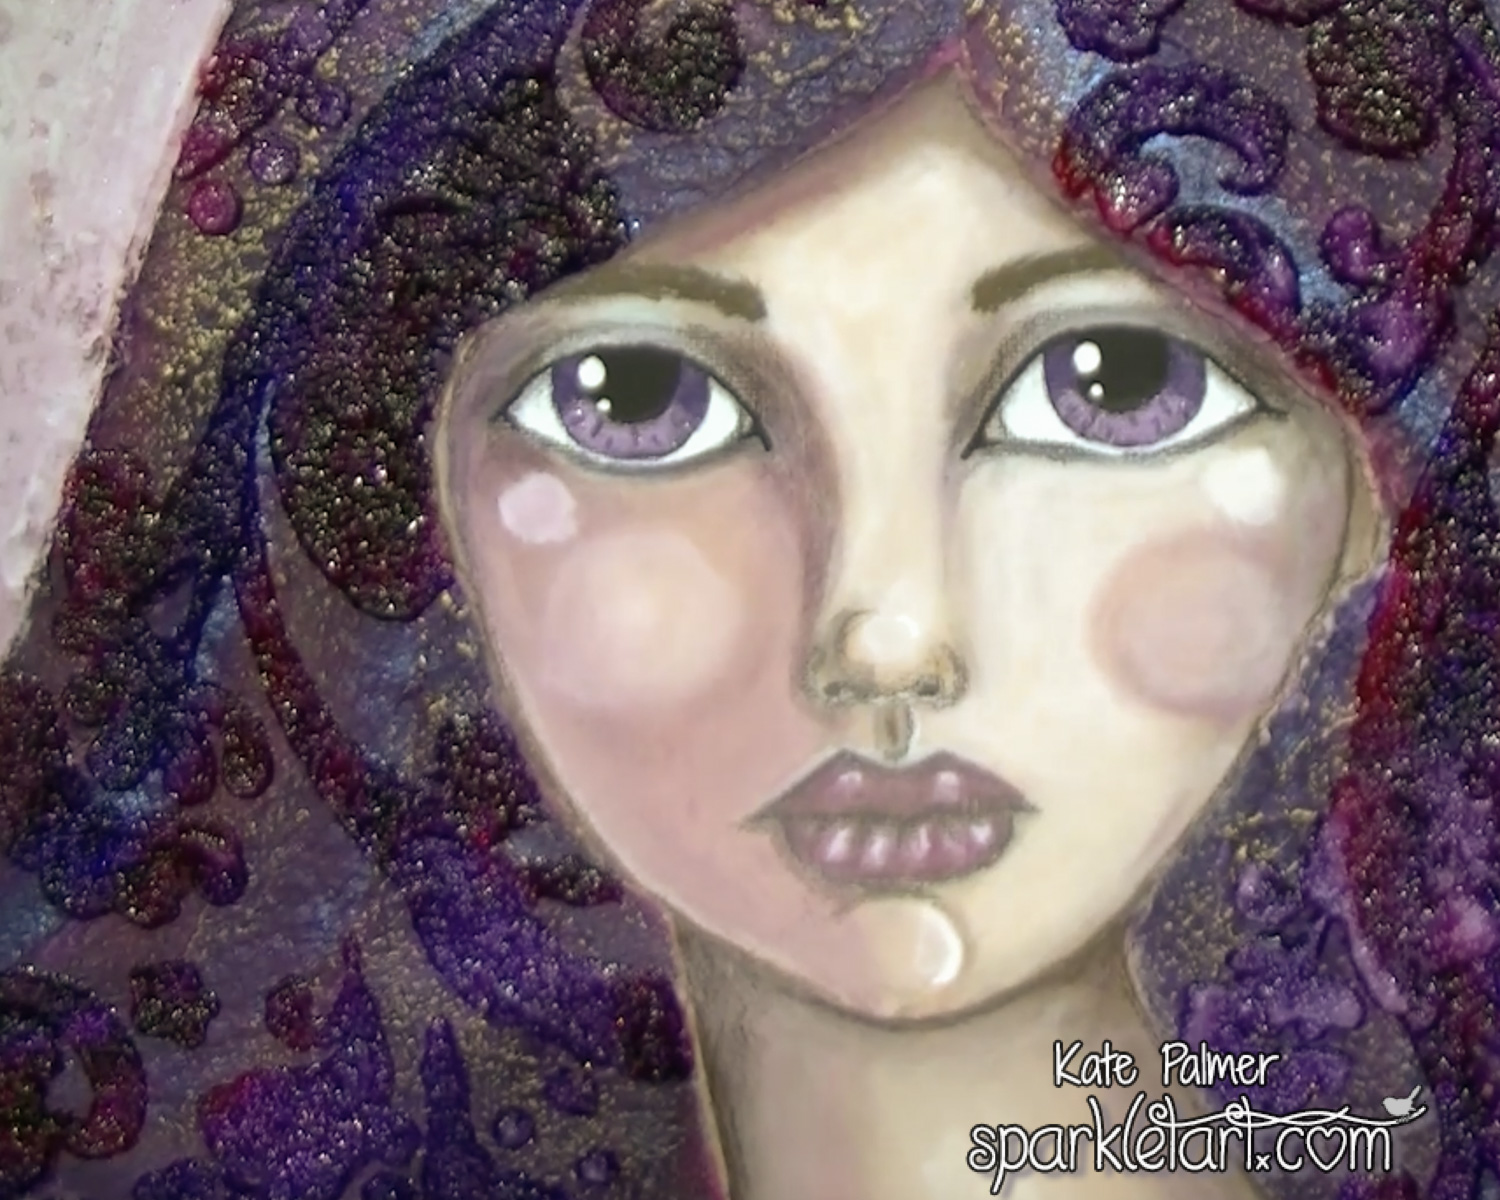
Today I’m going to show you how to create interesting Mixed Media hair with depth and texture.  You can use this technique on canvas or paper and it results in a project that you want to reach out and touch – to run your fingers over the pattern and surface (well I do any how!)

Mixed Media Hair

What I used:

  • Lindy’s Stamp Gang Products:
  • Magicals mixed with Gesso for pastel background – Cheshire Cat Cherry and Tea Pot Purple
  • Magicals mixed with Gel Medium for hair base – Cheshire Cat Cherry and Tea Pot Purple
  • Magicals mixed with water as ink – Cheshire Cat Cherry, Tweedle Dee Denim and Tea Pot Purple
  • Starburst sprayed over background for subtle shimmer – Cheshire Cat Cherry and Down the Rabbit Hole
  • Magicals mixed with acrylic paint for face – Cheshire Cat Cherry and Tea Pot Purple

Other Products:

  • Martha Stewart Gesso – white
  • Golden Mediums – Glass Bead Gel and Fiber Paste
  • Stencil Magic Stencil – Floral Accent
  • White pre-gessoed canvas

To Create the Mixed Media Hair:
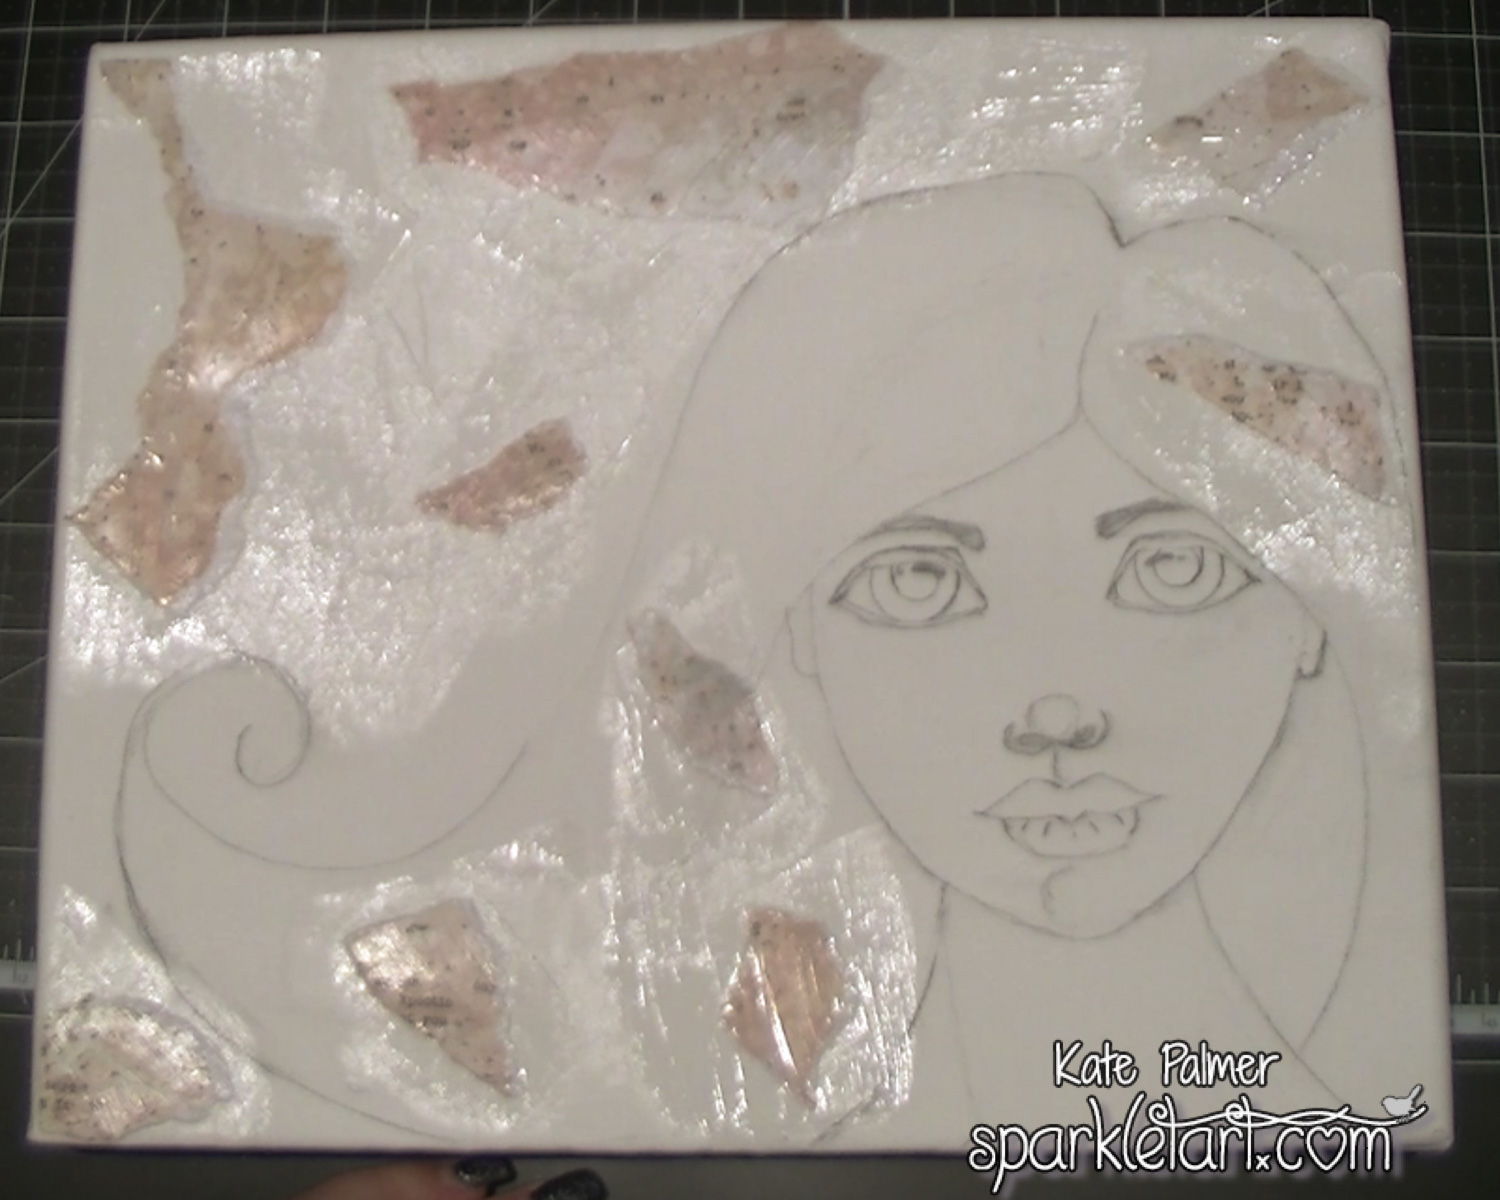
Sketch image onto your canvas
Mixed Media Hair

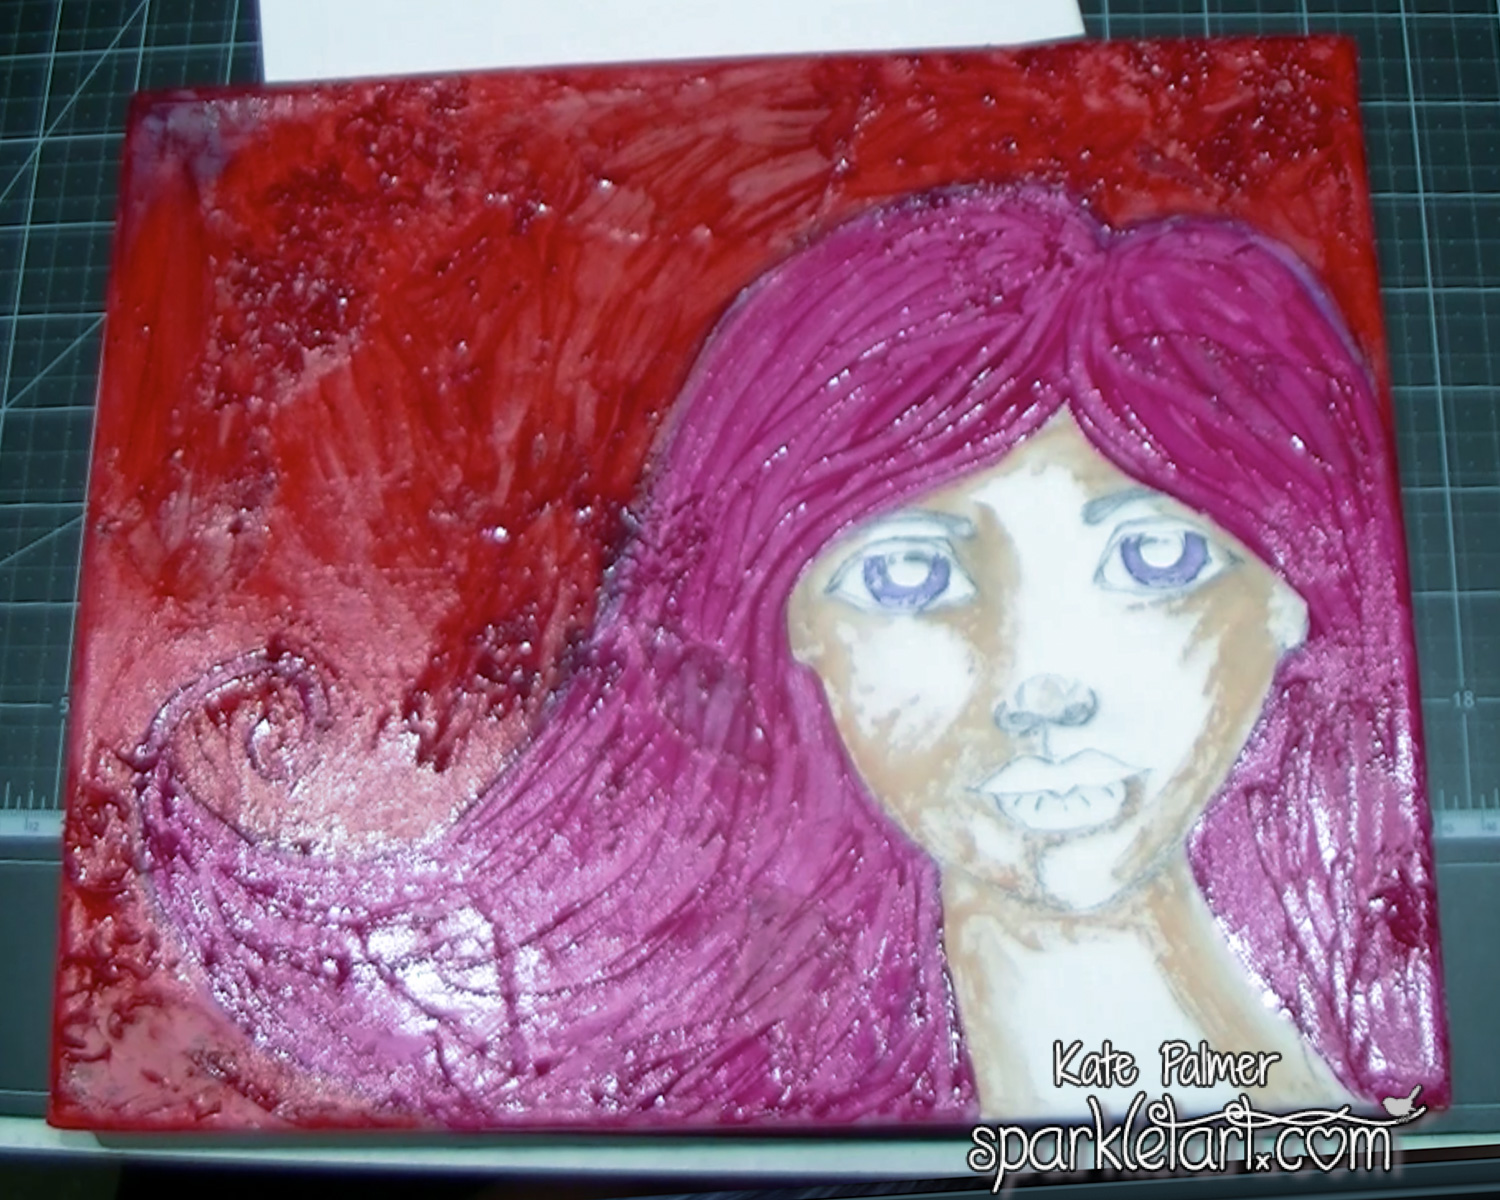
Colour the hair using Magicals (Cheshire Cat Cherry and Tweedle Dee Denim) mixed with Gel Medium to create a base layer.

Mixed Media Hair

I applied the cherry all over the hair and then added the denim to darken.

Mixed Media Hair

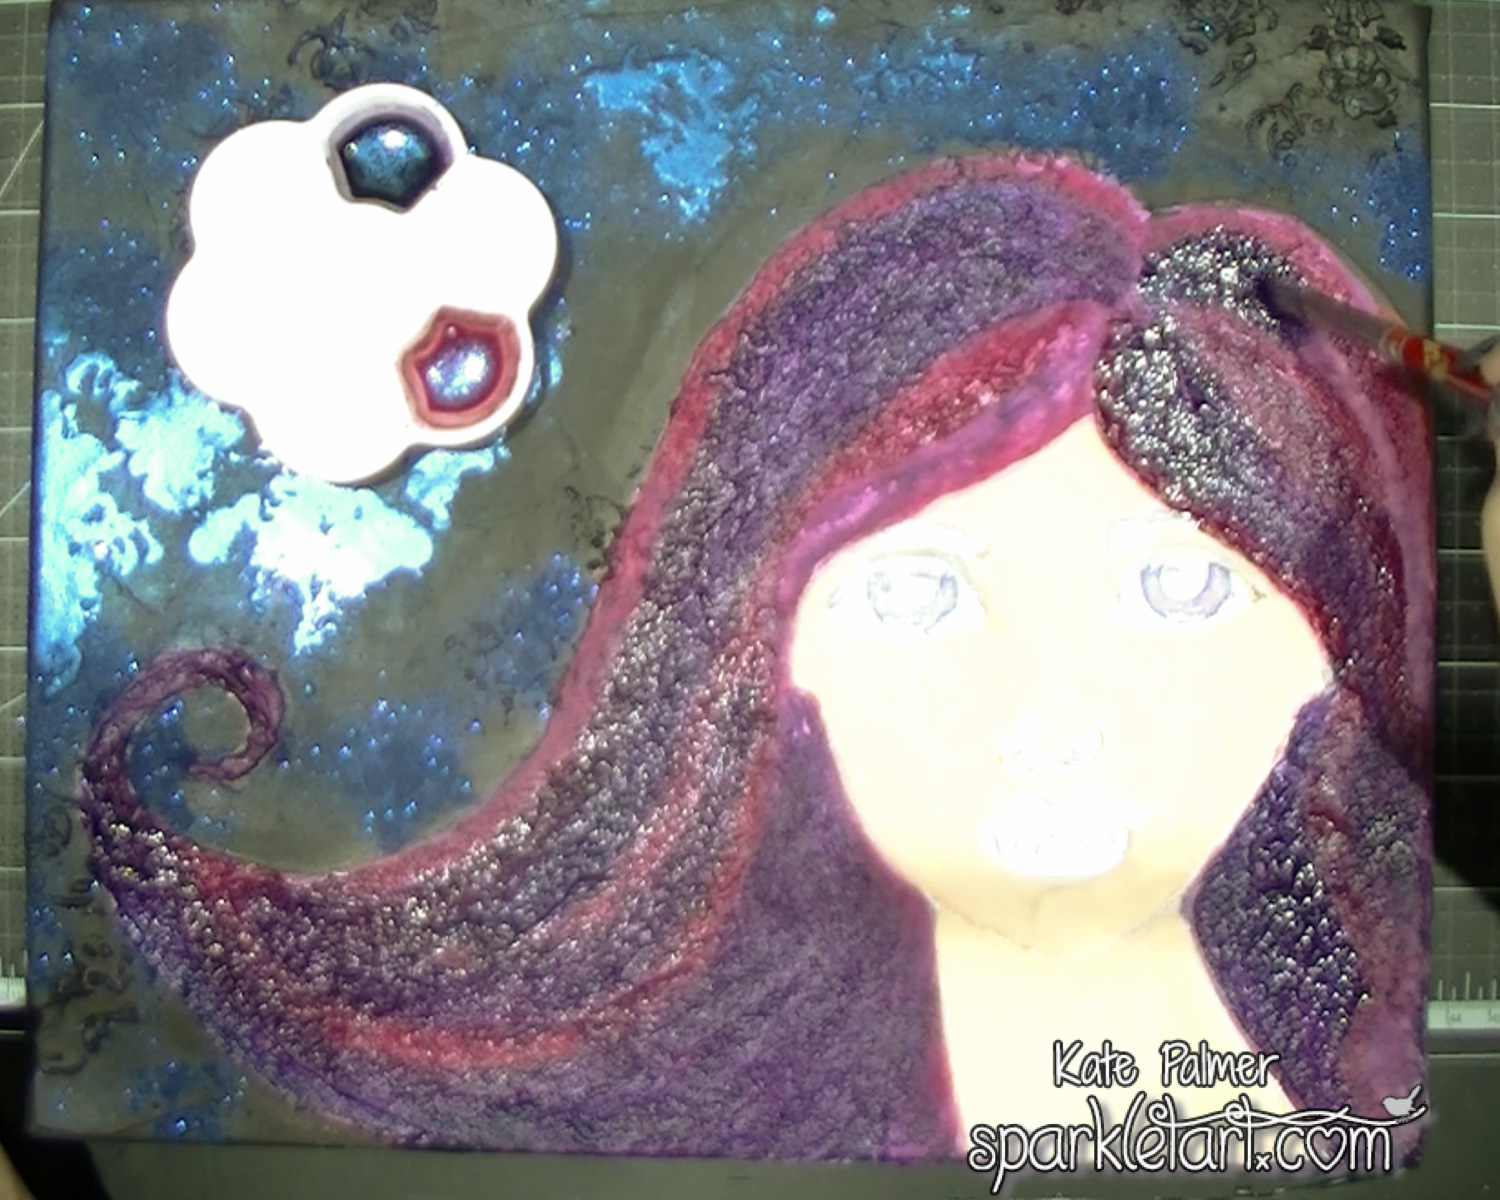
Once the base layer is dry, cover hair with texture paste, making sure to create loads of peaks and valleys as these will catch the colour and shimmer of subsequent layers.

Mixed Media Hair

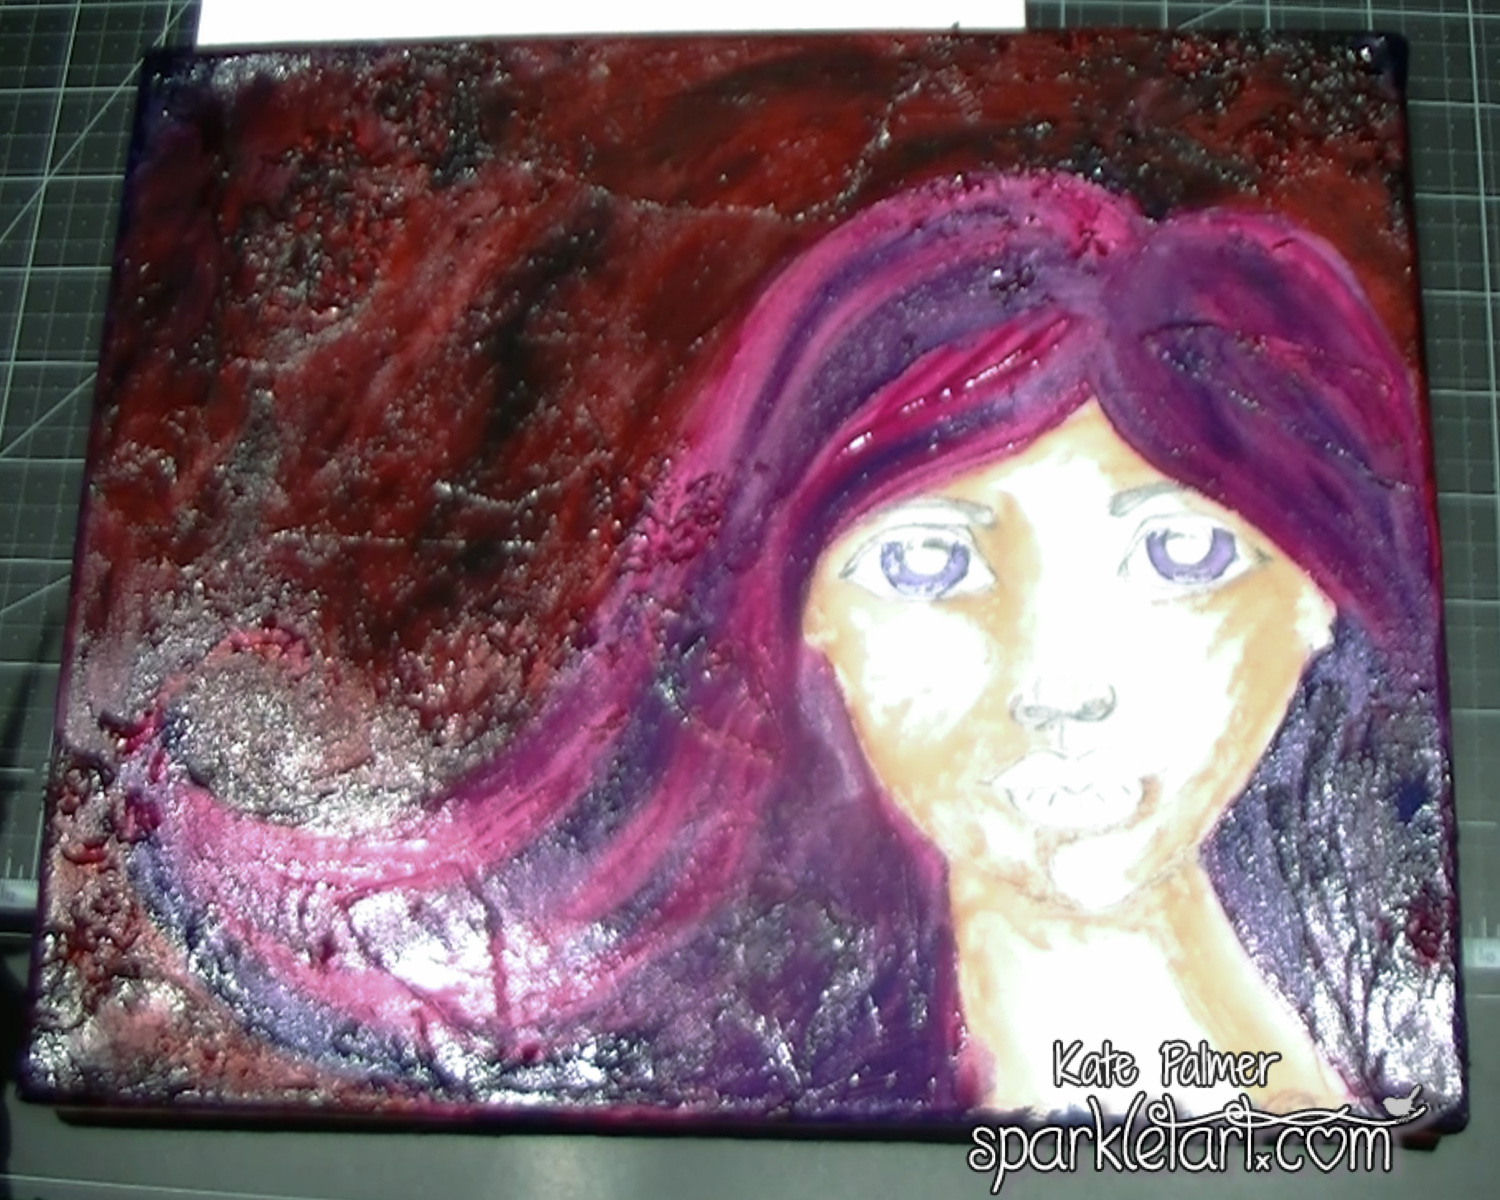
Once the texture paste is dry, mix Magicals (Cheshire Cat Cherry and Tea Pot Purple) with water to create a sparkly ink and apply over the hair, make sure to be heavy handed and allow the mica to settle into the valleys in the texture paste and allow to dry thoroughly.

Mixed Media Hair

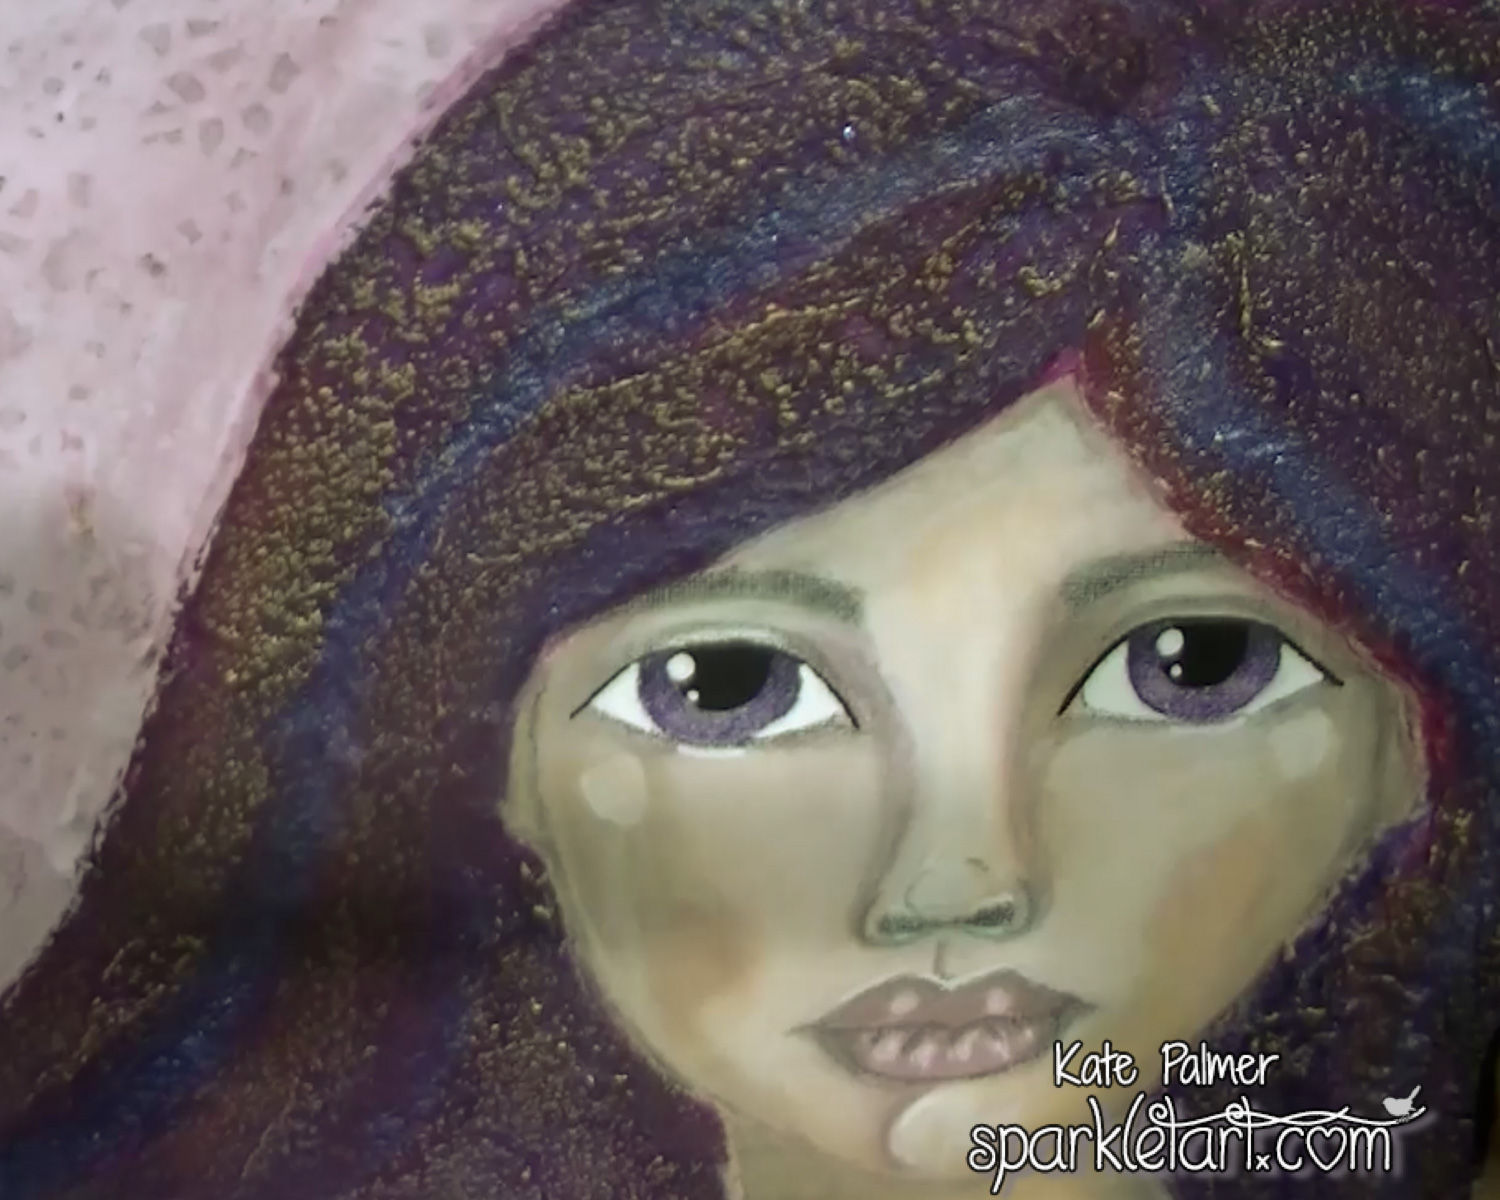
Using your finger apply a light layer of Inka Gold to the high points created by the texture paste, this picks up the texture and breaks up the colours underneath a little.

Mixed Media Hair

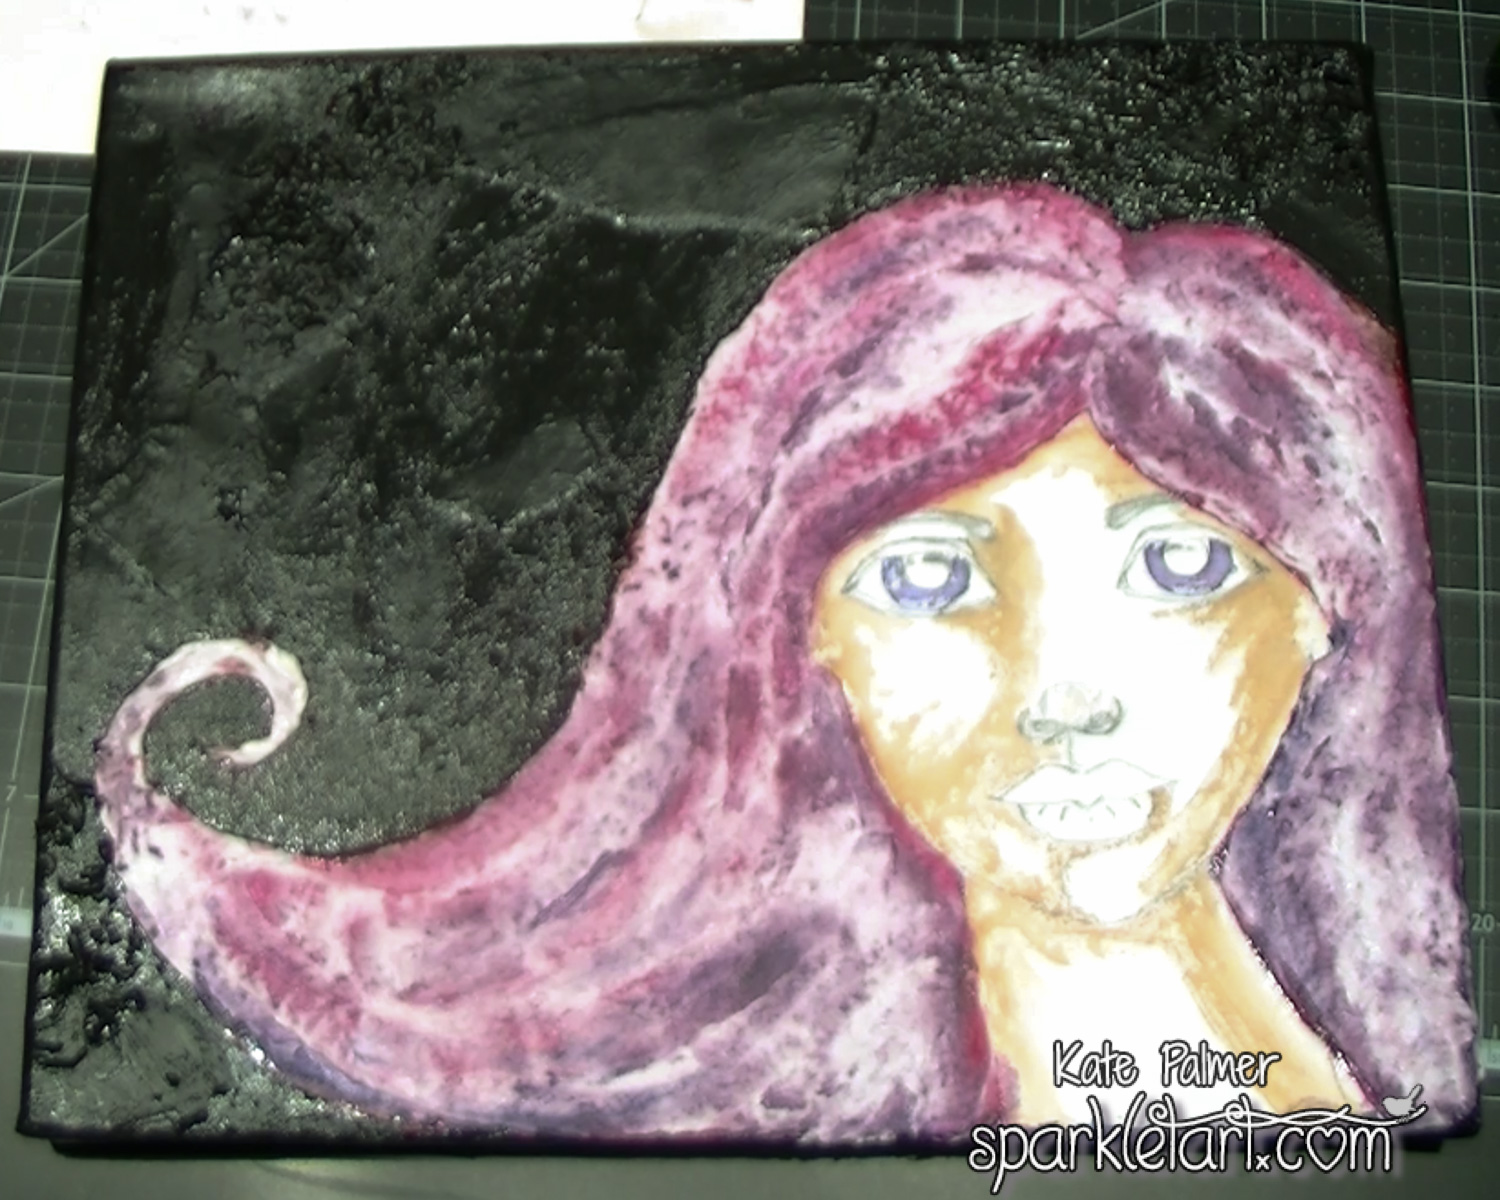
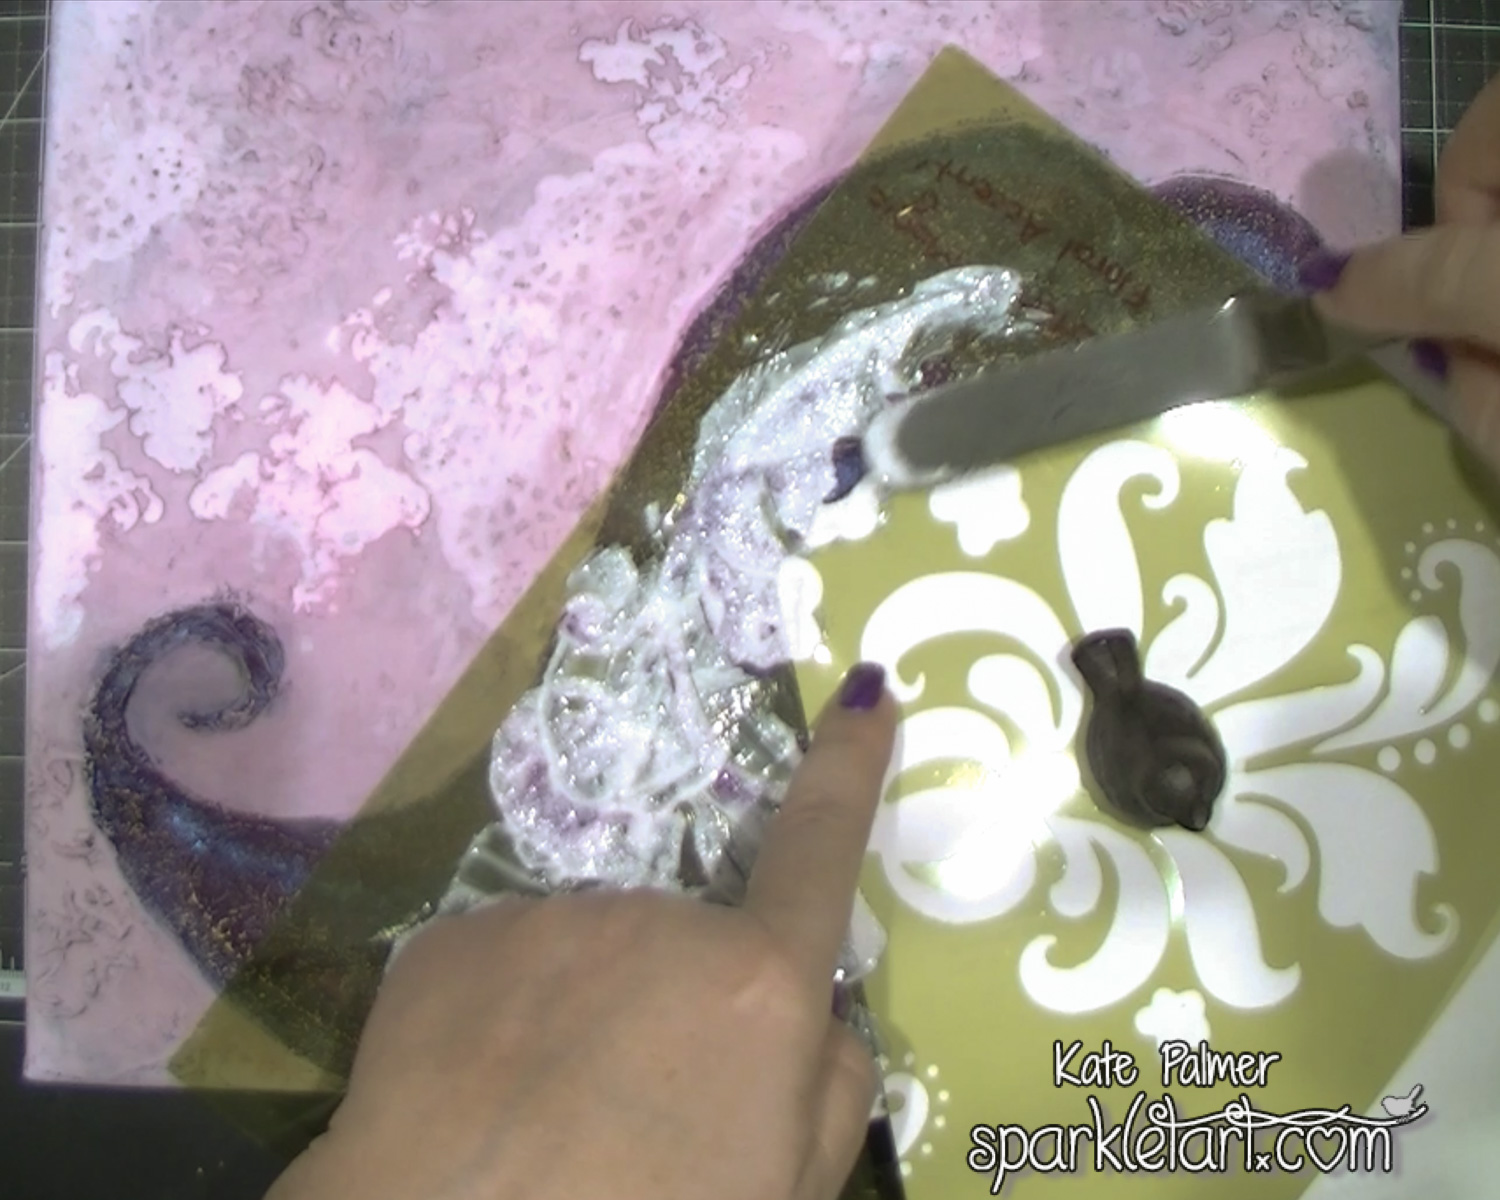
For the final step, you will need some Glass Bead Gel and a bold stencil.  Protect the face and apply the bead gel through the stencil onto the hair.

Mixed Media Hair

You will need to allow each section of bead gel to dry before applying the next.

Mixed Media Hair

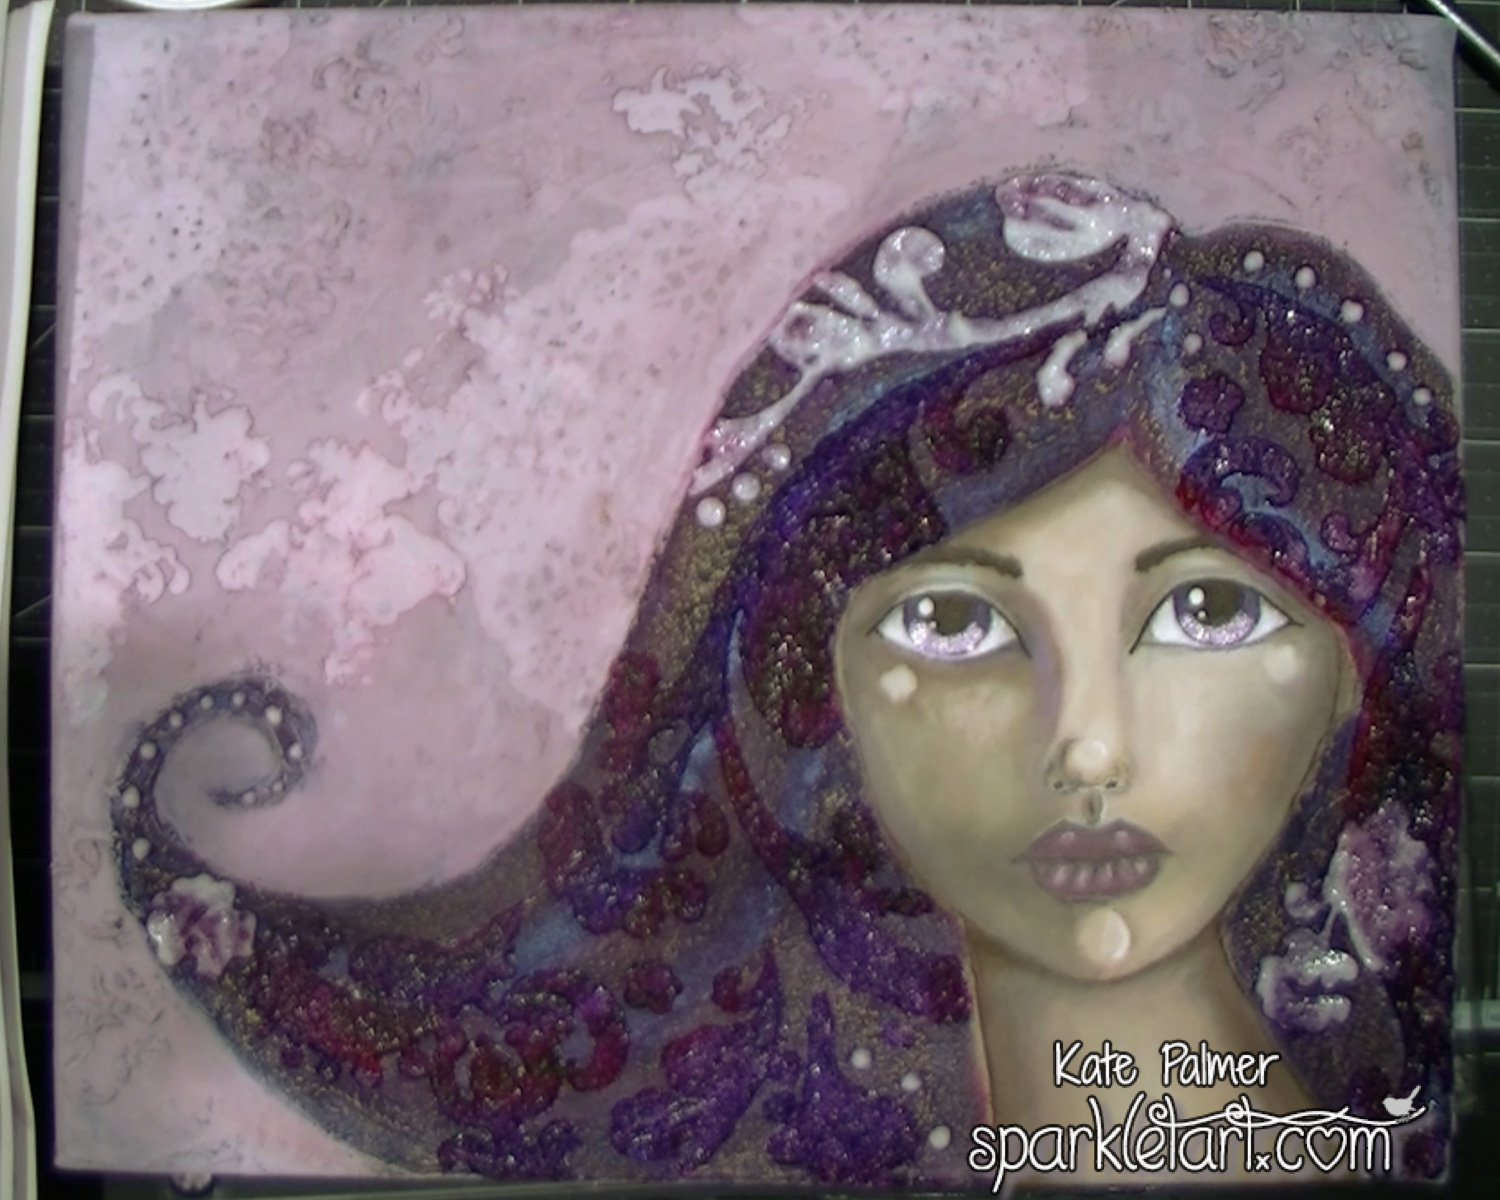
Once dry, the bead gel takes on a wonderful glossy appearance and the clear beads pick up the colours from underneath and enhance the sparkle.

Mixed Media Hair

I really adore how this turned out, the hair in real life is truly a show stopper!
Kate

~*~*~*~*~*~*~*~*~*~*~*~*~*~*~*~*~*~*~*~*~*~*~*~*~

Kate Palmer though perhaps better known as Sparkle Tart loved playing with mixed media and techniques.  Most of her work incorporates sparkly media of some sort, which is used on journal pages, canvases, scrapbooks or hand made cards.

You can see more of Kate’s work at Sparkle Tart or via Facebook – Keep It Simply Sparkly

~*~*~*~*~*~*~*~*~*~*~*~*~*~*~*~*~*~*~*~*~*~*~*~*~

.

.