Michelle G Brown | Mixed Media Art

Mixed Media Drink Tags

~ * ~

This article is written by Tamara Dinius
Fun altered art project

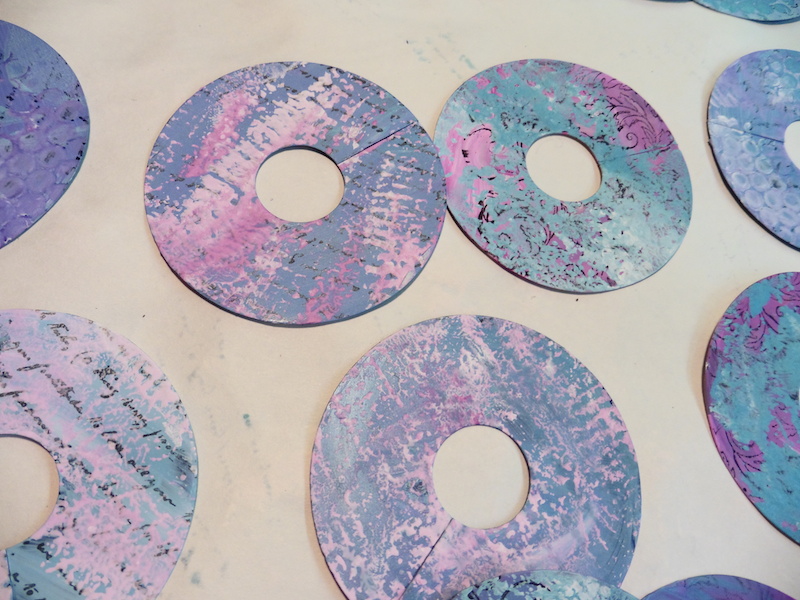
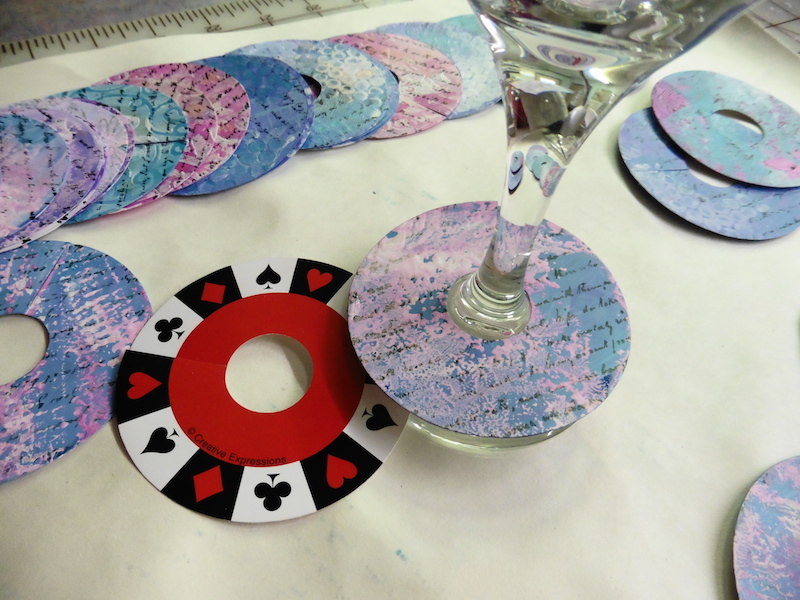
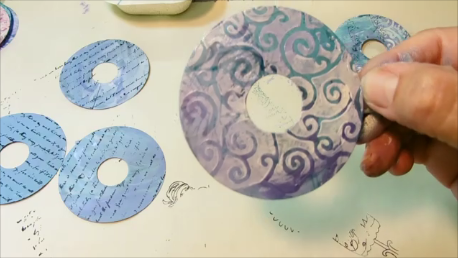
This video will demonstrate mixed media techniques using bargain bin finds. The techniques shown can be used on multiple  substrates to create unique gifts for any occasion.

 
All you need is a cheap substrate, add some paints, stamping and stencilling to decorate your altered art. Here I’ve used Drink Tags from a local craft warehouse
Fun altered art project

~*~*~*~*~*~*~*~*~*~*~*~*~*~*~*~*~*~*~*~*~*~*~*~*~

Tamara Dinius lives in the Pacific Northwest with her husband and chocolate lab. She has two grown daughters who make her life meaningful. They support her, ground her, embrace her, and are amazing people in their own right.

Her love for mixed media has taken over most aspects of her creative journey. She believes mixed media allows for a broad range of styles and anyone can find success in this form of artistic expression.

You can find more of Tamara’s work, and on her website countrycraftersusa.comEtsyshop,  or via her Facebook

Fun altered art project

~*~*~*~*~*~*~*~*~*~*~*~*~*~*~*~*~*~*~*~*~*~*~*~*~

.

.
Taking Your Art Journaling Out of a Book with Altered Art

~ * ~

This article is written by Keri Sallee

Art journaling…many of you have heard of it and probably have tons of pins on Pinterest of artist that inspire you and quotes that have you moved. There pages and pages of art, but…what if we chose to take our art journals out of their books and instead made 3-D embodiments of our feelings and thoughts?

For the second year, I was asked to help at a mentor/mentee retreat for an organization called Saving Grace. It is an amazing organization that offers transitional housing and education to girls age 18-23 who have aged out of the foster care system, are homeless or have a home living situation that is dangerous. This year, their retreat theme is “Fight Like a Girl” and I was given a plain paper mache dress form to come up with a project example  for the girls to spend time expressing themselves creatively.

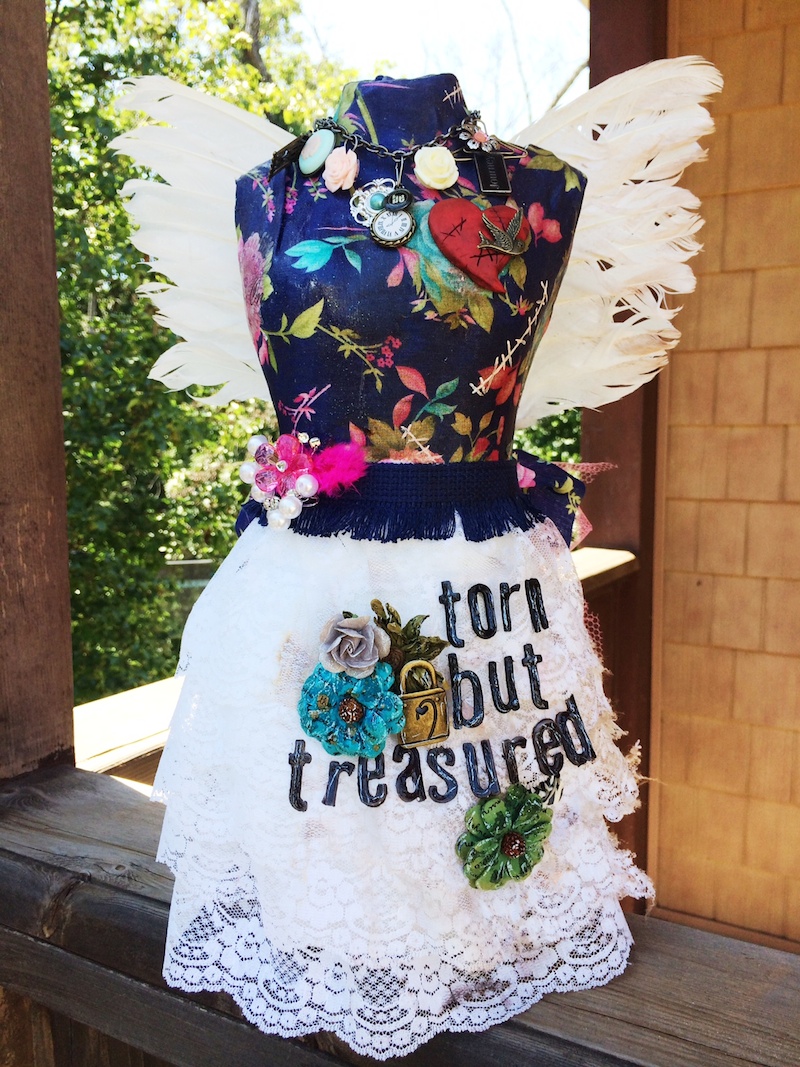
Torn but Treasured Dress Form

I wanted my piece to tell a story…to tell a story that we all struggle with…the desire to be normal and perfect despite our baggage, our history and our scars. The sides  of the dress tell that story:  one is sparkly, pristine and dazzling white, while the other is dingy, tattered and torn. Both sides of the same person.

I originally planned on making this super girly, really pretty piece, but the more I thought about the theme “Fight Like a Girl”, I thought “If I was fighting for my life, would my dress be perfect and immaculate or would it be messed up and stained and torn?” And then I thought a step farther…thought of it through the lenses of my past and thought “Would someone still love me if I showed up in a torn dress?” And the answer is…YES…even though I am torn, I am still treasured.

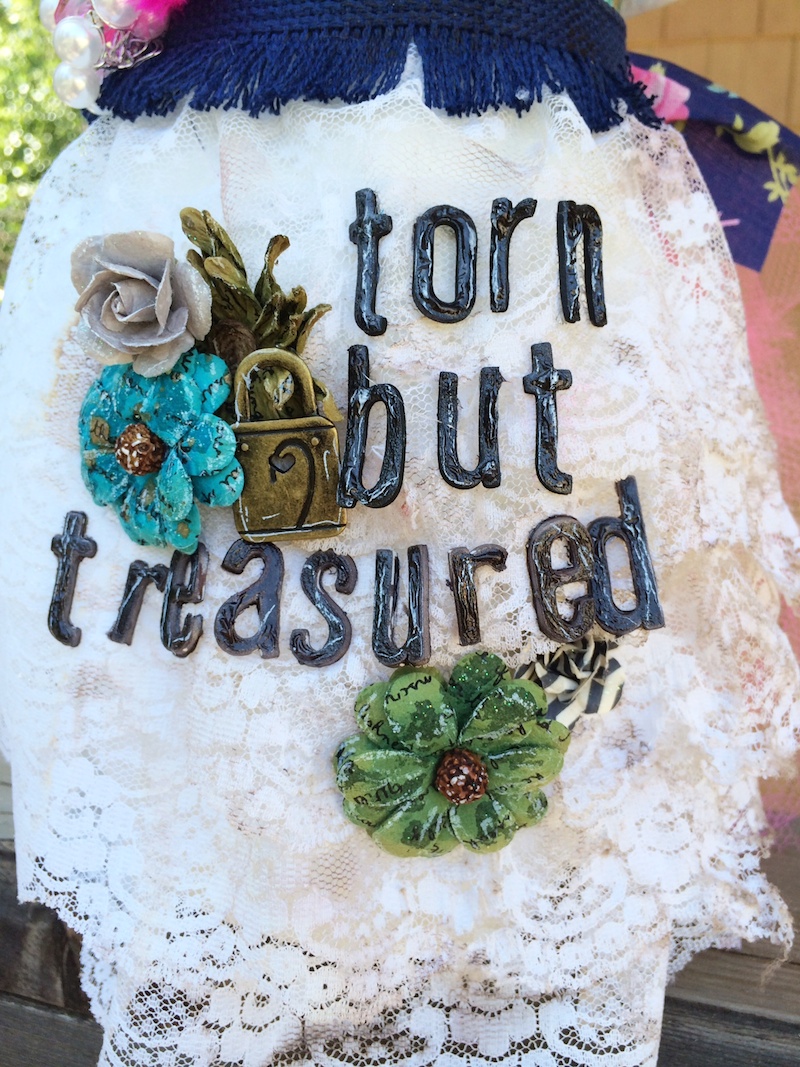
“Torn but Treasured”

I wanted to be very deliberate in my choices of embellishments and everything has some kind of meaning.  Like in the above title I added the lock because if you treasure something, you protect it.

The “perfect” side of life

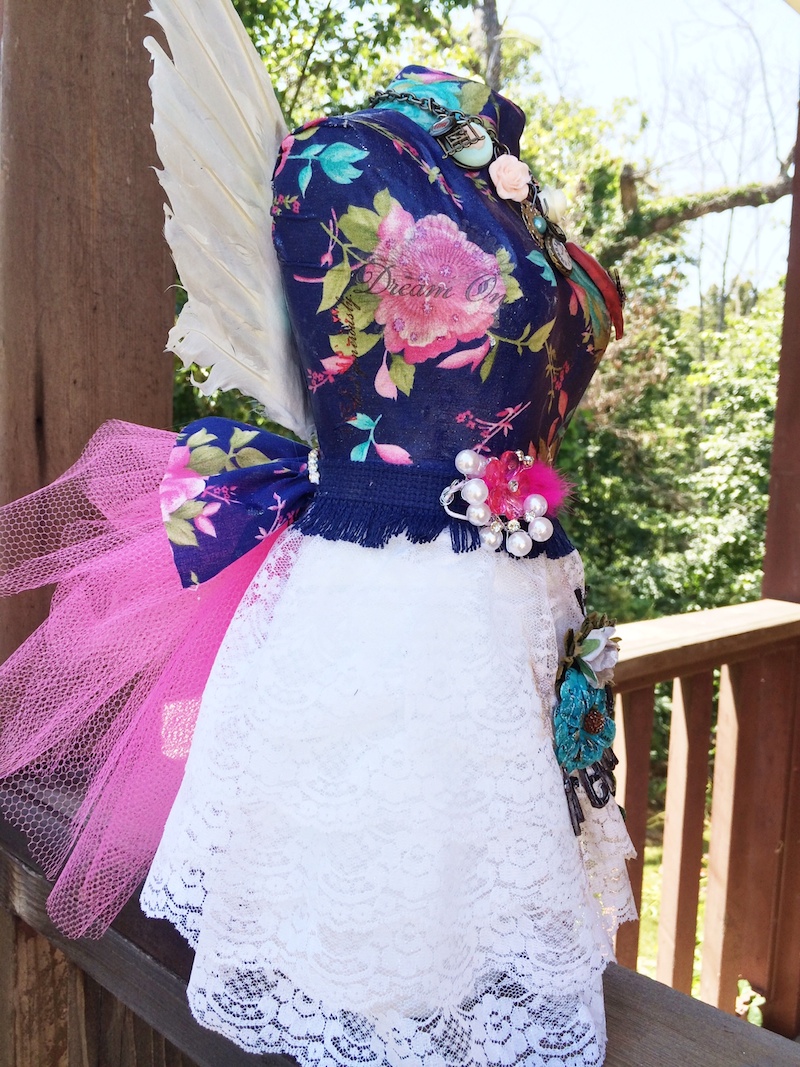
This side view shows the “perfect” shiny side that we try to portray, but if you look closely, you can see works like “love” and “Dream on” across the side because even in our striving to be “perfect” and “normal” we all still have dreams that we dare to dream, even if it’s only in our own heads.

The pink bustle in the back shows that, as women, we can be bigger than life, while still being women.

The wings show the desire that everyone has to excel at something.

Tattered Heart

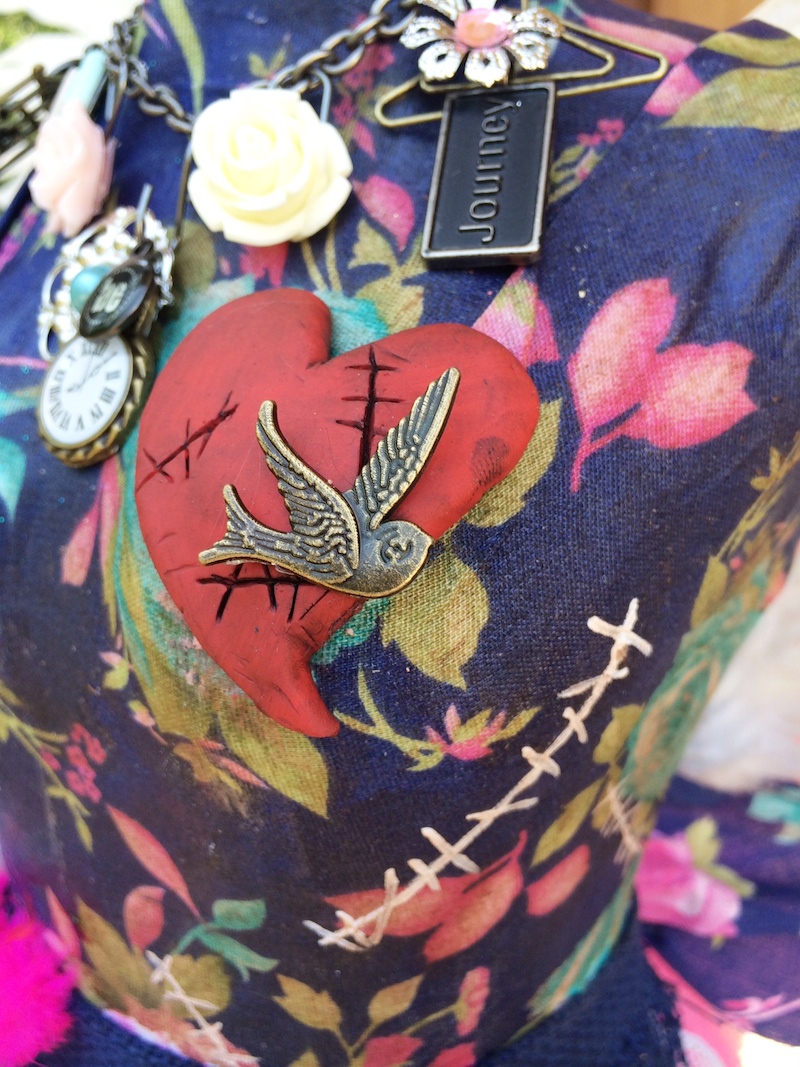
The heart was formed with red Sculpey clay. Before I bake it, etched “stitches” into it. I baked it over a small ball of wax paper to keep the shape curved. Once it was baked and cooled, I applied a layer of black acrylic paint and wiped off the excess. In some ways, we all have scars on our hearts, but  through the love of family and friends we can be stitched back together and be free just like that little bird.

Symbolic Charm necklace

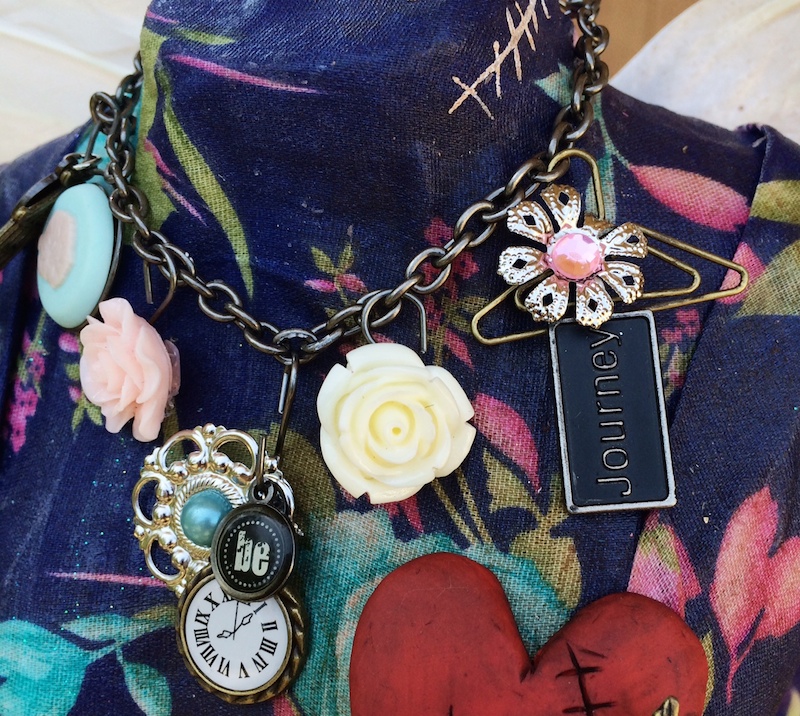
The necklace is very heavy in symbolism: the bird cage (need for freedom), the clock (everything happens in time), the word “be” (BE who you are!), roses (there are seasons for everything), and the word “journey” (we are ALL on a journey.)

You can also see the white “stitches” on one side of the dress form. I made them white for 2 reasons: (1) it would show up better and (2) because so many times we feel like our scars are bright white and everyone can see them, when in actuality, most of us keep them hidden pretty well.

So what do you think? How about we take our thoughts, dreams and desires out of our books and put them on display for all to see and to remember that art can be both beautiful and healing.

For more information on Saving Grace, check them out at www.savinggracenwa.org

Have a Blessed Day.

Keri Sallee

~*~*~*~*~*~*~*~*~*~*~*~*~*~*~*~*~*~*~*~*~*~*~*~*~

Keri Sallee is a lover of all things creative and believes that everyone has the ability to be creative in some manner. She currently designs for Graphic 45, Marion Smith Designs and The Crafter’s Workshop, as well as occasionally appearing on the blog for The Canvas Corp family of products. She loves to challenge herself and others to think outside of the box. You can find her at her blog, on Facebook and her favorite photo hangout, Instagram

~*~*~*~*~*~*~*~*~*~*~*~*~*~*~*~*~*~*~*~*~*~*~*~*~

.

.
Courageous Corrugated Cardboard

~*~

This article was written by Kim Kelley

Are you one of those types of people who save everything, just in case you may be able to use it one day? I know I am. Of course half the time I put it away somewhere and forget where I put it! For whatever reason, I have gotten into the habit of saving boxes. I will use them for the standard stuff of course; shipping, and storing stuff, but I also will cut them up and use them to pop up parts of a project or to back a page I create.

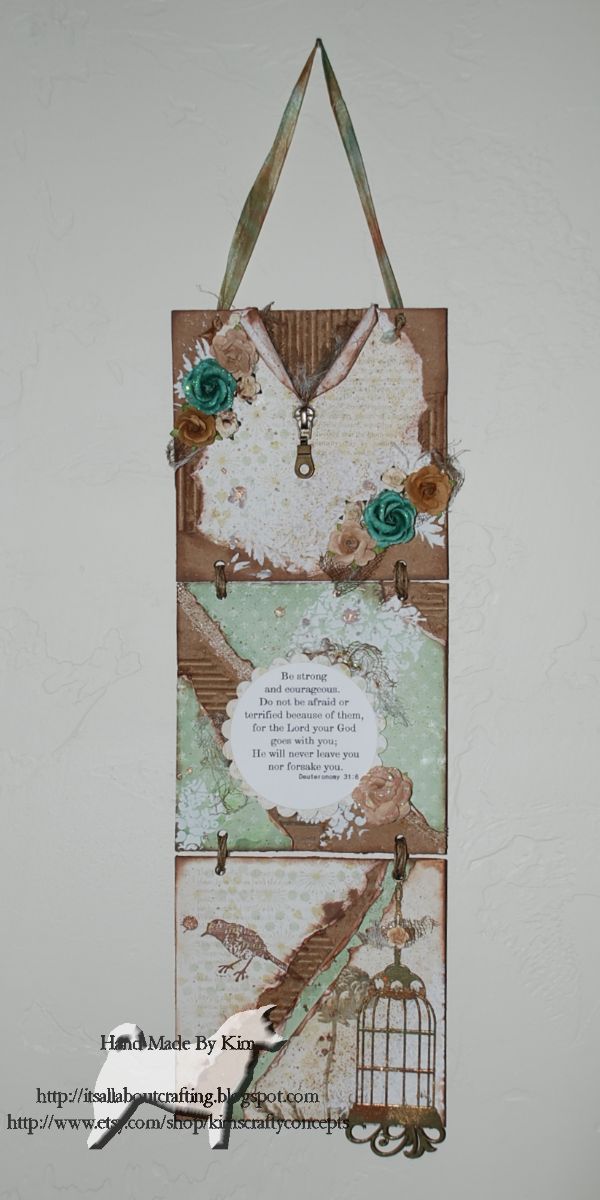
Using recycled cardboard, Kim Kelley make this handmade gift wall hanging

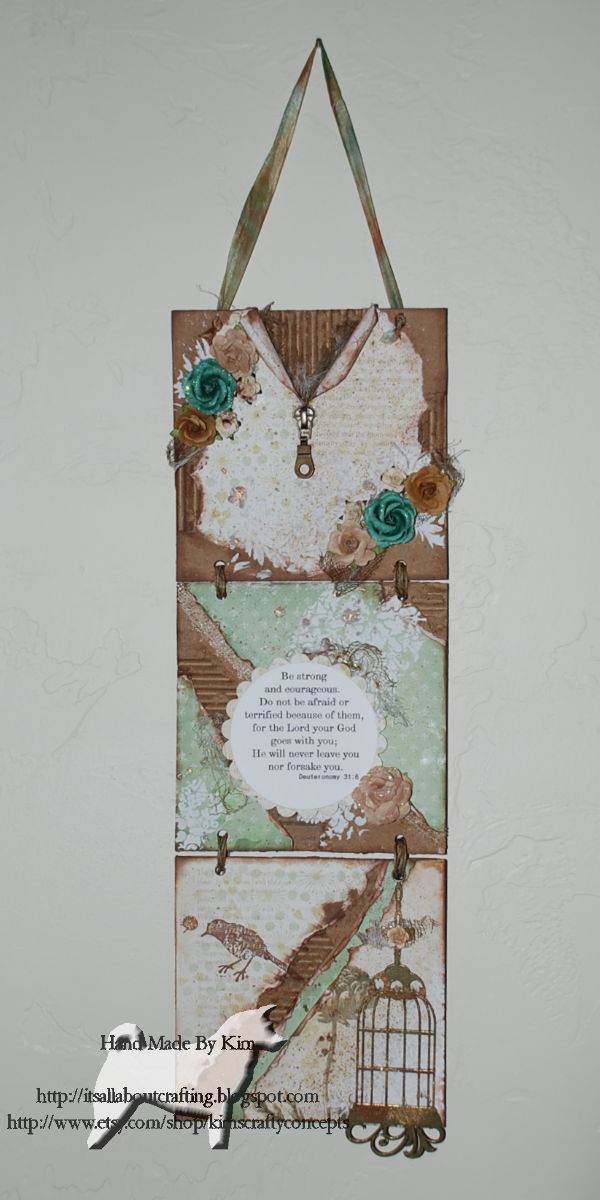
Today I am going to show you a wall hanging I made using some of that recycled cardboard. I got the idea for this project from Gabrielle Pollacco and a picture she posted on Pinterest.

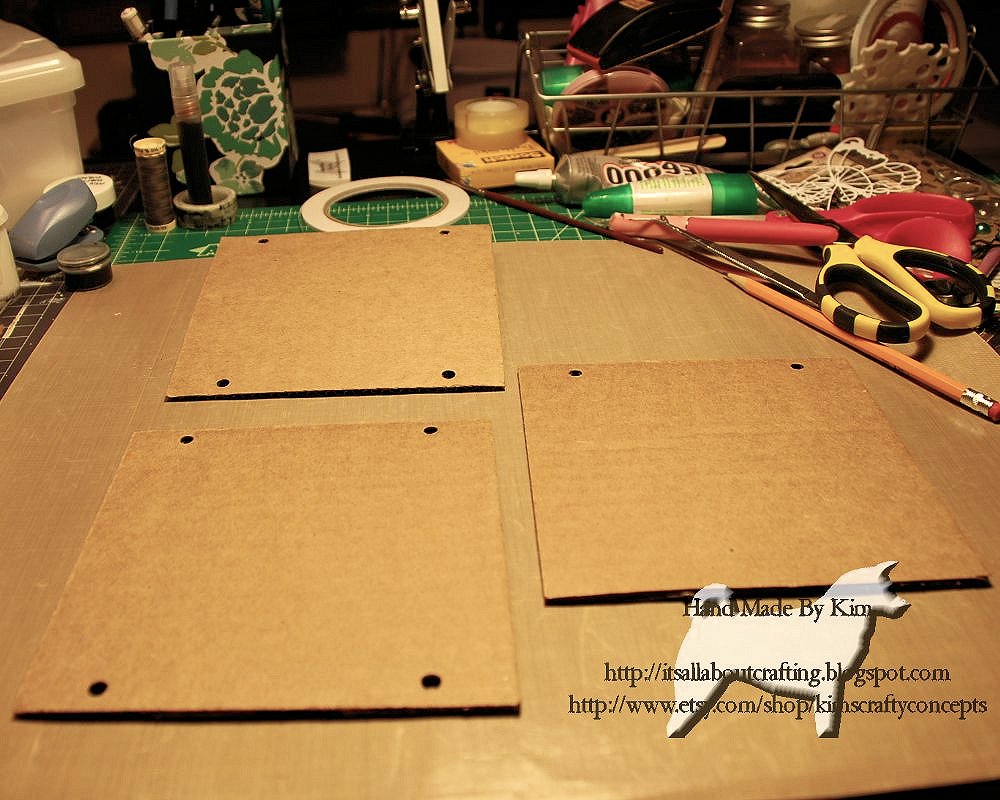
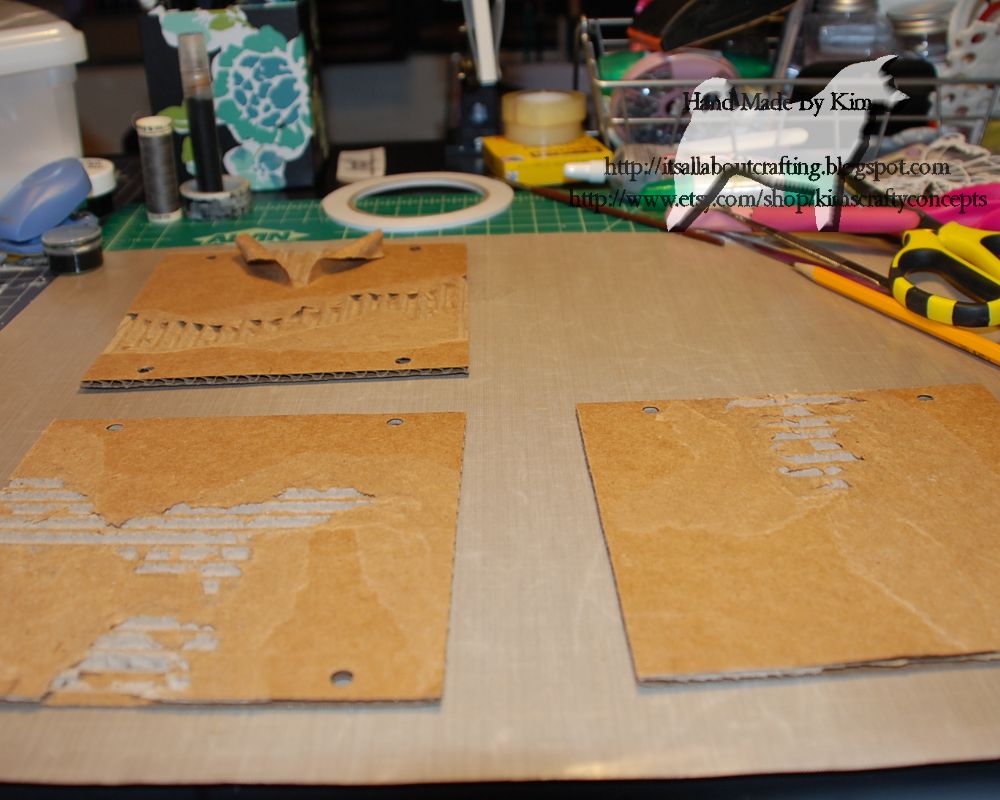
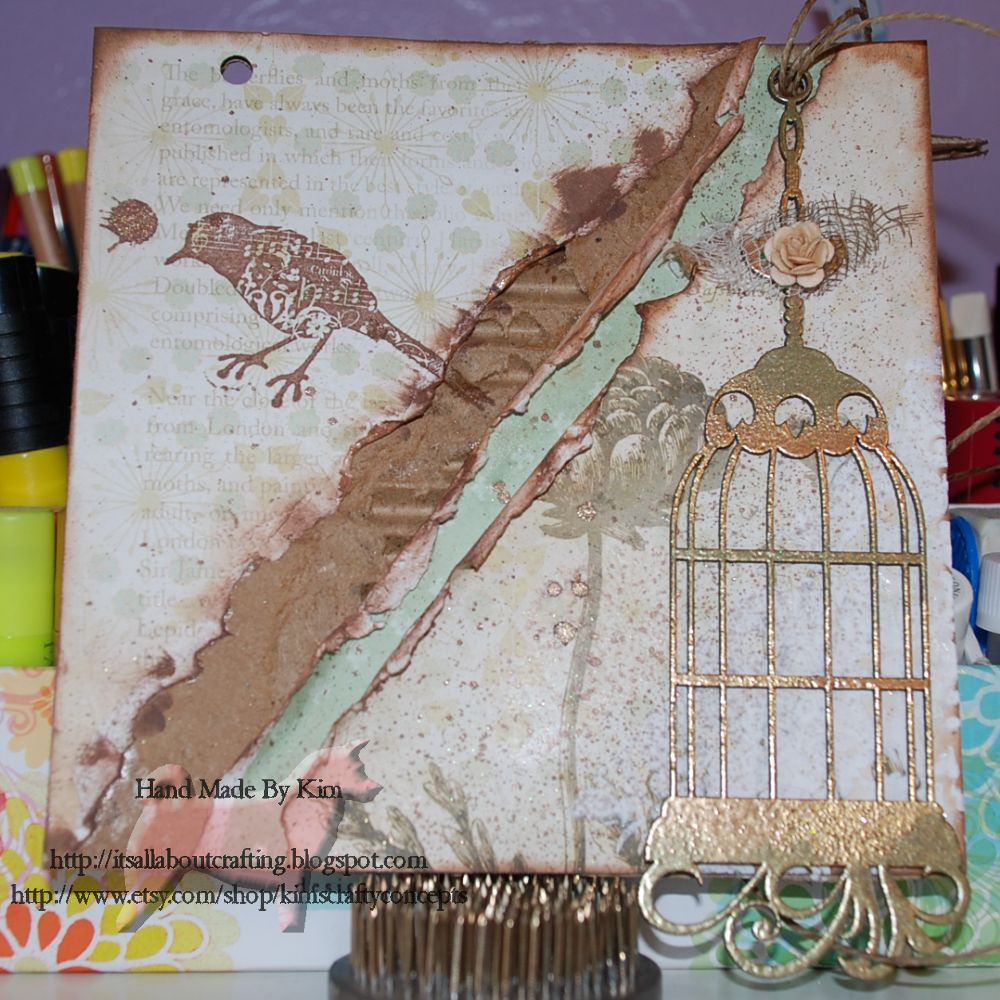
For this project I cut flaps from a box into 3 6” x 6” squares, added holes to attach them together and in several places peeled some of the paper back to show the corrugated insides.

Using recycled cardboard, Kim Kelley has created this cute mixed media wall hangingCorrugated Cardboard

Using recycled cardboard, Kim Kelley has created this cute mixed media wall hangingCorrugated Cardboard Peeled

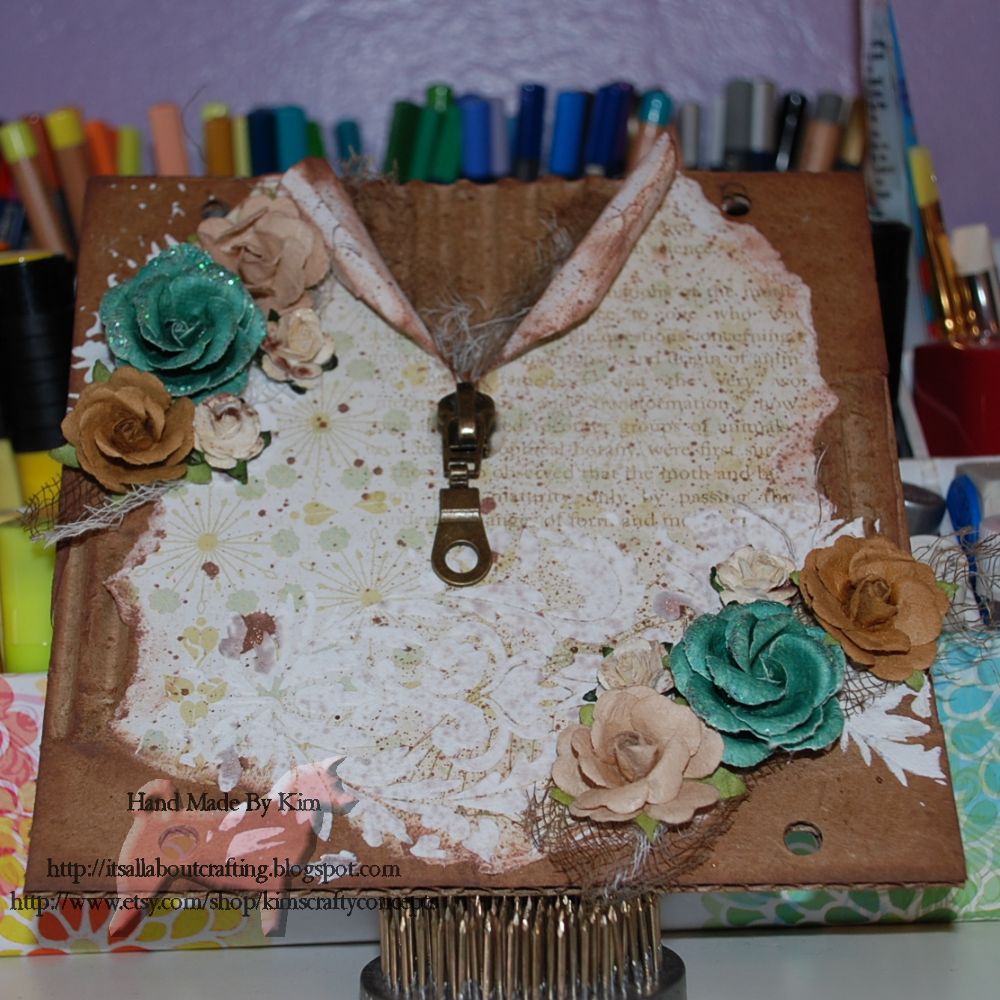
Wanting a soft color palette I went with light greens and browns, going off the color of the cardboard. Honestly I did not have a specific layout in mind, just knew colors and embellishments I wanted added. I used some brown ink on the edges and some gesso with a damask stencil here and there to get some texture. Used brown twine to attach them all together and here is what I came up with.

First Panel

Using recycled cardboard, Kim Kelley has created this cute mixed media wall hanging

Second Panel

Using recycled cardboard, Kim Kelley has created this cute mixed media wall hanging

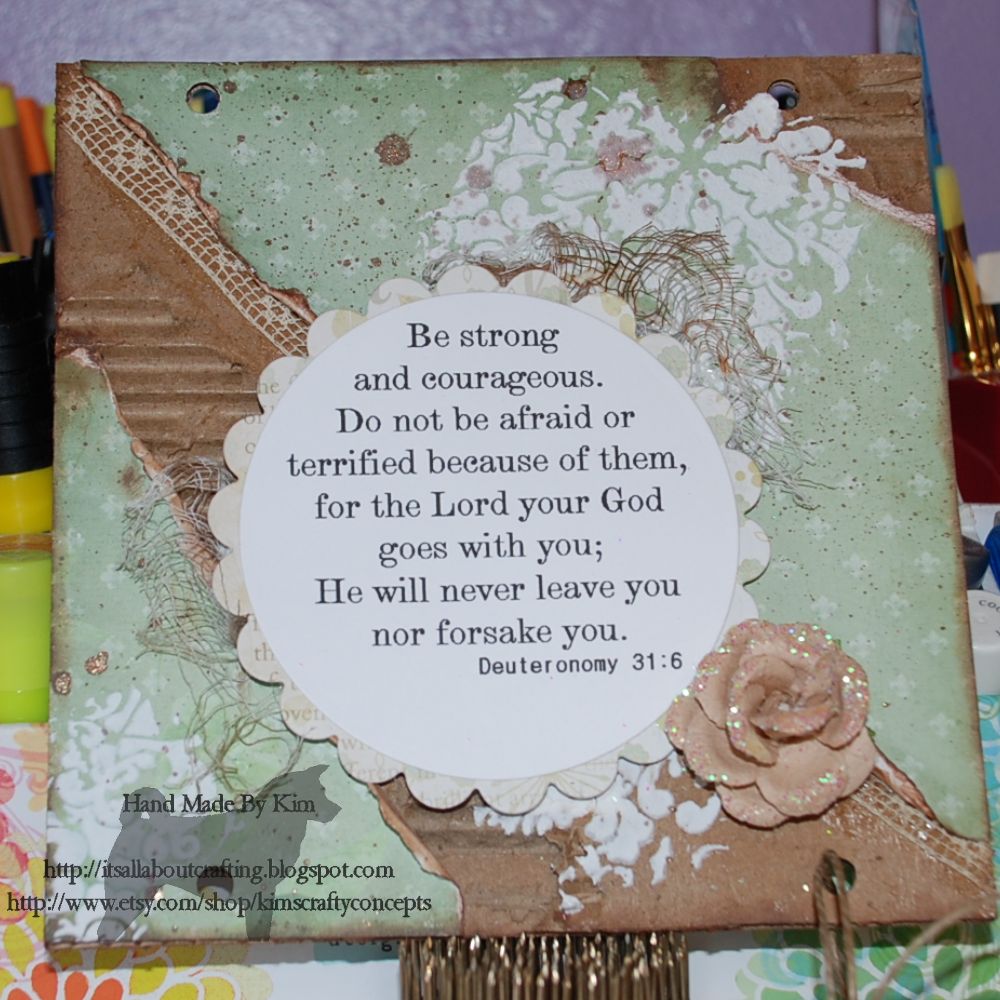
Third Panel

Using recycled cardboard, Kim Kelley has created this cute mixed media wall hanging

All Together

Using recycled cardboard, Kim Kelley has created this cute mixed media wall hanging

The birdcage is from Dusty Attic, the flowers are from Prima,  and the papers are from DCWV. I chose one of my favorite scriptures for the center panel…Deuteronomy 31:6…”Be strong and courageous. Do not be afraid or terrified because of them, for the Lord your God goes with you; he will never leave you nor forsake you.”

Life is short, do something creative everyday!

~*~*~*~*~*~*~*~*~*~*~*~*~*~*~*~*~*~*~*~*~*~*~*~*~

Kim Kelley is borderline obsessive about her crafting and her art. She loves mixed media art because you are free to go beyond your comfort zone, using your imagination and exploring an anything goes mind set. Kim loves to learn and explore new techniques and hopes that any art she creates leads someone to find their inner creative artist!

Sites: itsallaboutcrafting.blogspot.com and www.facebook.com/kimscraftyconcepts

~*~*~*~*~*~*~*~*~*~*~*~*~*~*~*~*~*~*~*~*~*~*~*~*~

.

.
Art Journaling with Imagine Craft Irresistible Sprays & Stazon inkpads

~ * ~

This article was written by Melanie Statnick

Art Journaling with Imagine Craft product Irresistible Sprays & Stazon inkpads

Art Journaling with Imagine Craft product Irresistible Sprays & Stazon inkpads

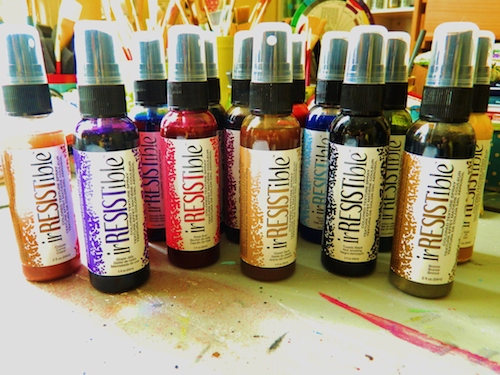
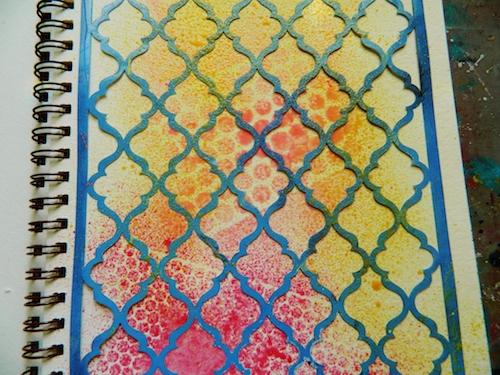
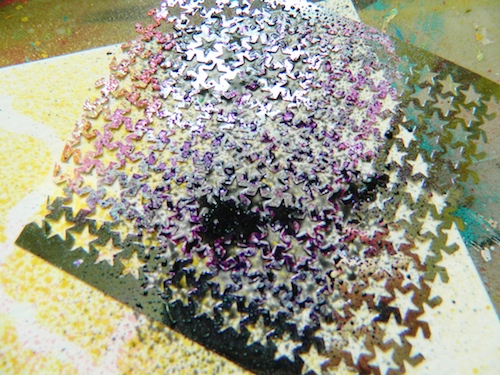
I had a chance to play with Imagine Crafts product line of irRESISTible colored texture spray.  I have to say I’m loving all the juicy bright colors I have in my collection. These are some new colors and today I used a few that blended well together in a palette. Rose bud, Angel pink and Gold. With the metallic sprays you need to shake well before spraying.

Art Journaling with Imagine Craft product Irresistible Sprays & Stazon inkpads

Art Journaling with Imagine Craft product Irresistible Sprays & Stazon inkpads

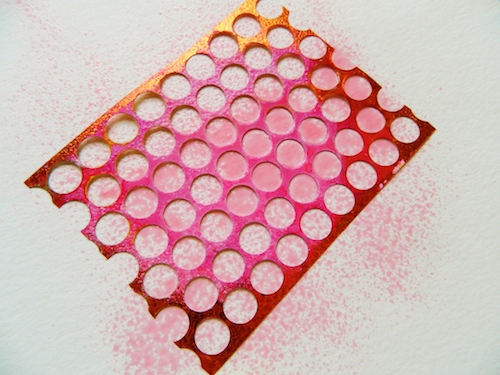
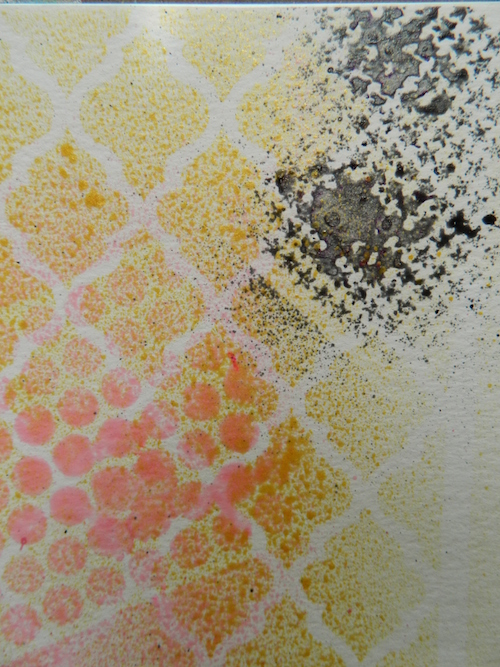
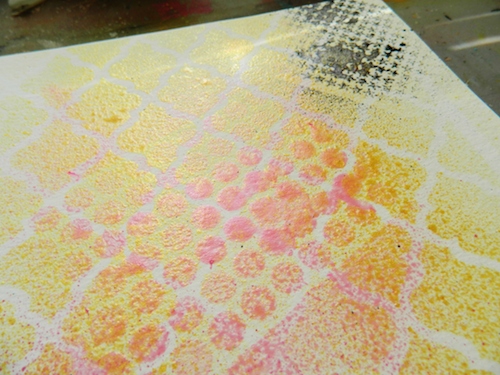
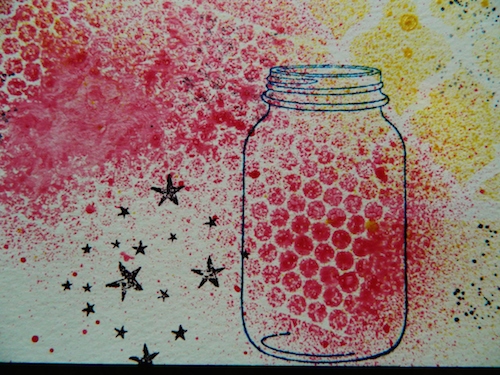
Lay the stencil down on your journal surface and spray approx.12 inch away from the paper. To get a speckled look hold spray father and to achieve and more saturated heavy texture spray closer. Because this is acrylic it dries fairly quickly and I recommend washing off your stencil after spraying.

Art Journaling with Imagine Craft product Irresistible Sprays & Stazon inkpads

Art Journaling with Imagine Craft product Irresistible Sprays & Stazon inkpads

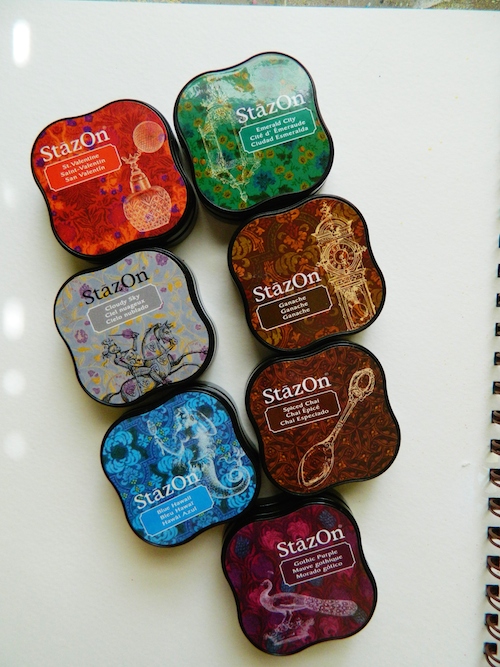
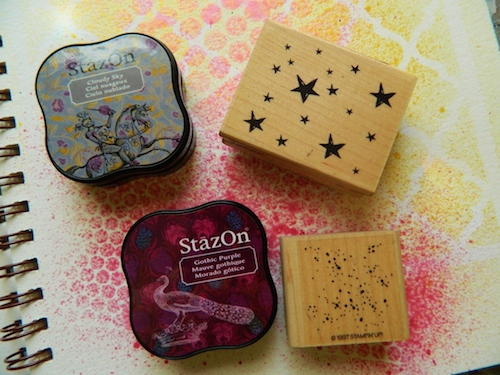
I must admit I was getting excited over the result in the sprays blending so well. I found that none of the spray ran onto another color. I did not dry in between coats. The colors remained bright, juicy and added fantastic texture coverage. I wanted to add some stamps to my page using Stazon. Stazon is not my go-to ink pad. I have found that the ink makes my stamps sticky and has a light odor to it.  However they are solvent ink and come in some yummy new colors. Here I used Gothic Purple, Cloudy Sky and Blue Hawaii. Aside from the brilliant colors the pads seem to come very wet which is a benefit. This allowed for maximum ink coverage. I also like the design of each case. The images give them just a little something to catch your eye. They are also stackable for those of you who like to keep order in the craft room.

Art Journaling with Imagine Craft product Irresistible Sprays & Stazon inkpads

Art Journaling with Imagine Craft product Irresistible Sprays & Stazon inkpads

Art Journaling with Imagine Craft product Irresistible Sprays & Stazon inkpads

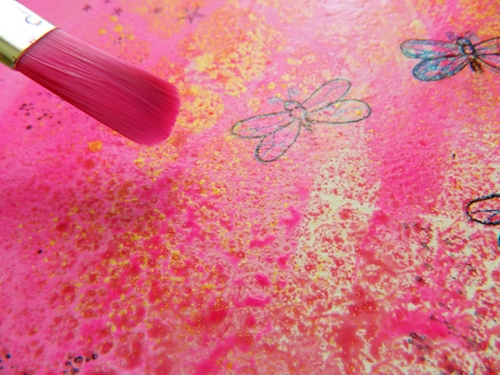
After adding the irresistible texture spray and my stazon inked stamps I wanted to see how the sprays provided a resist.  I added my watercolor to the page and while it was still wet I gently rub off some excess color. The result was beautiful.  I encourage you to try irresistible texture spray in your project for yourself and play with this delightful product.

Art Journaling with Imagine Craft product Irresistible Sprays & Stazon inkpads

Art Journaling with Imagine Craft product Irresistible Sprays & Stazon inkpads

Art Journaling with Imagine Craft product Irresistible Sprays & Stazon inkpads

~*~*~*~*~*~*~*~*~*~*~*~*~*~*~*~*~*~*~*~*~*~*~*~*~

Author bio:
Melanie Statnick is a published artist/writer out of North Carolina. Melanie creates art daily from her private studio. Her style is happy and whimsy. Statnick’s artwork can be found in art galleries and shops extensively in NC with international private collections. Learn more about Melanie view her website at: www.melaniestatnickart.com

~*~*~*~*~*~*~*~*~*~*~*~*~*~*~*~*~*~*~*~*~*~*~*~*~

.