Michelle G Brown | Mixed Media Art

Mixed Media Canvas with DecoArt Media Line

~ * ~

This article is written by Kathi F. Rerek

As part of the DecoArt Blogger team, I was delighted when I recently received a package containing products from DecoArts’ new Media range, which includes new Fluid Acrylic paints (including Interference and Metallic colors), crackle products, Texture products, Antiquing Creams, Misters, and Varnishes.
DecoArt products and The Crafters Workshop stencils

I decided to try them out on a flat canvas, which I knew would hold up to most anything. I started out by applying White Gesso to smooth out a bit of the canvas texture as well as cover up a rejected project. DecoArts’ White Gesso  is thicker than most others I’ve used and covered up the previous project very well.

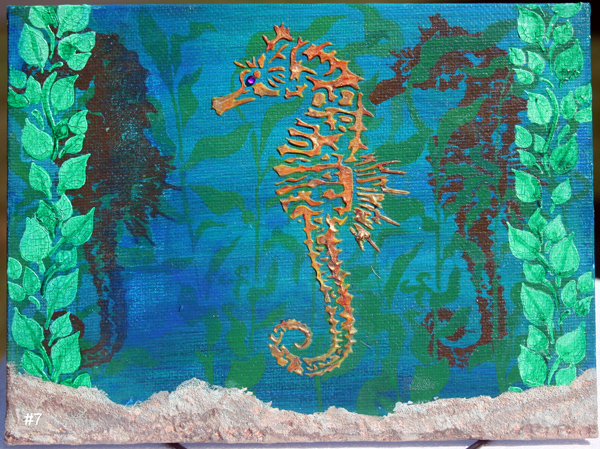
The next step was to  mix Primary Cyan, Titanium White, and Paynes Grey Media Fluid Acrylics (MFA) on a palette and sponge them onto the canvas. Pthalo Green-Blue MFA were sponged horizontally over the blue to add additional color. This layer was knocked back with a baby wipe.
DecoArt product review

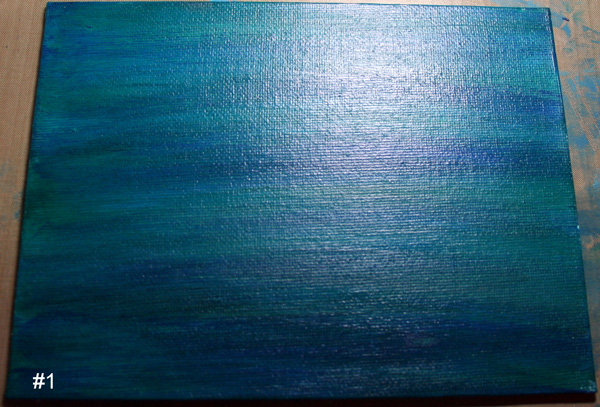
Primary Cyan and Primary Yellow were blended then applied over the Kelp Forest stencil by The Crafter’s Workshop.

Burnt Umber MFA, Primary Yellow MFA, and Diarylide Yellow MFA were combined on a palette, then sponged over the Sea Horse from the Sea Creatures stencil by the Crafters Workshop onto each side of the canvas.
DecoArt product review

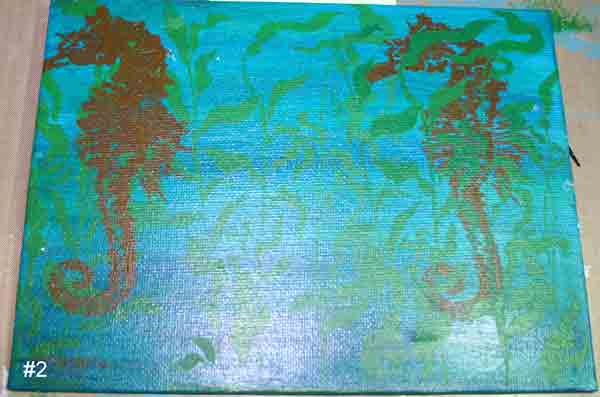
White Modeling Paste is supposed to be tintable using Media Fluid Acrylics, so I decided to give that a go. I scooped out a palette-knife bladeful of the paste and blended a few drops of Primary Yellow MFA into it. This was applied over the Seahorse from the Sea Creatures stencil.
DecoArt product review

It was time to try out DecoArts’ new White Crackle Paint, which like the Modeling Paste, is supposed to be tintable. Using a palette knife, I scooped out some White Crackle Paint onto a palette and mixed in a few drops of Pthalo Green-Yellow MFA and Primary Yellow MFA. The mixture was sponged over a Leaf Flourish stencil by Dylusions/Ranger onto the right side of the canvas. The stencil was cleaned and when I came back, I was thrilled to discover that the leaves had already crackled! The same mixture was sponged over the stencil onto the left side of the canvas. Sadly, it seeped under the stencil, so I had to wipe it off, which left some spotty patches on the canvas. I went ahead and reapplied the Crackle Paint mixture through the stencil with better results.

DecoArt product review

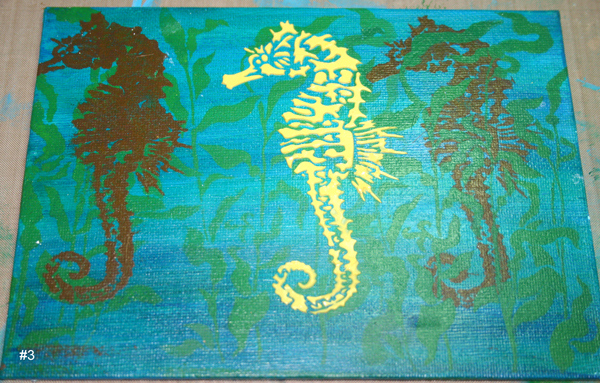
By this time, the center Modeling Paste on the Sea Horse had dried sufficiently for me to add additional colors to it. First Quinacridone Gold MFA was painted and allowed to dry. Interference Gold MFA was then painted over the previous layers.
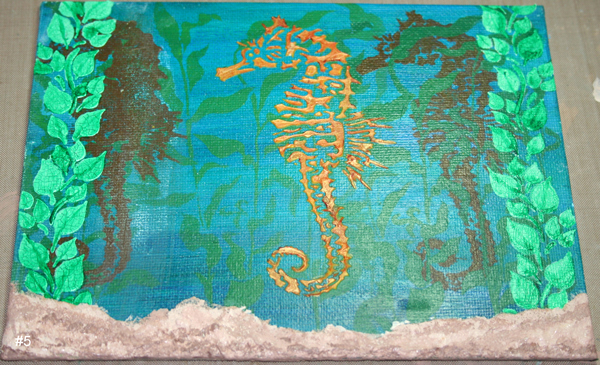
DecoArt product review

Like the other DecoArt Media Texture products, Textured Sand Paste is supposed to be tintable. It is a greyish color when in the jar and I wanted the sea floor to be a different color, so I scooped some of the paste onto a palette and added Burnt Ochre MFA and Transparent Yellow Oxide MFA to it, then used a palette knife to apply it to the base of the canvas.

While this was drying, I went back and touched up the leaves since I wasn’t pleased with the color I had mixed. Pthalo Green-Yellow MFA and Interference Green MFA were combined and spritzed with water to thin it to a wash-like consistency. This was brushed over the leaves on both sides of the canvas. I was delighted to note that the crackle texture remained even when painted over with a wash of paint.

The painted Textured Sand Paste was mostly dry, but I wasn’t thrilled with the color, so I mixed Transparent Yellow Oxide MFA, Burnt Sienna MFA, Titanium White MFA, and Burnt Umber MFA and lightly brushed the paint over the sand. Much better!
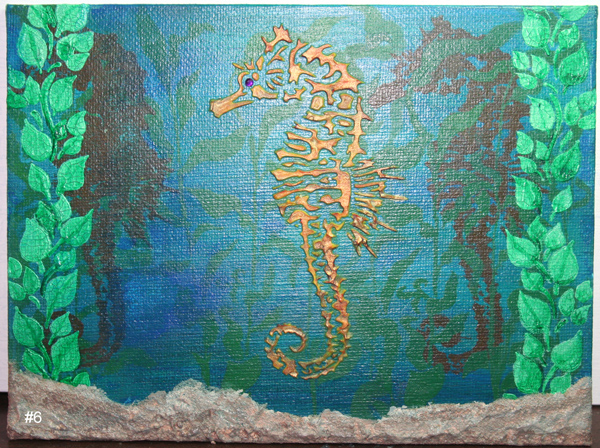
DecoArt product review

The last step was to combine Cobalt Turquoise MFA and Cobalt Blue MFA with some water to create a wash, which was brushed over the entire canvas. A purple jewel added to the seahorse’s eye finished the canvas.

DecoArt products and The Crafters Workshop stencils

Whereas I’m not totally happy with my canvas, I am very pleased with the performance of the products from DecoArt’s Media line and can’t wait to explore them further.

Reference Websites:

DecoArt

The Crafters Workshop

Susana’s Custom Art and Card Design — SCACD carries most of the products mentioned in this article. Additionally, she carries rubber stamps that coordinate with several of the latest stencils from The Crafters Workshop.

~*~*~*~*~*~*~*~*~*~*~*~*~*~*~*~*~*~*~*~*~*~*~*~*~

Kathi F. Rerek is a mixed media artist who lives in New Jersey with her husband, daughter, and two cats. She’s been crafting for almost fourteen years and has been lucky to have served on several design teams.

Her blog, Kat’s Tales of Stamping and Scrapping can be found at kathstales.blogspot.com

~*~*~*~*~*~*~*~*~*~*~*~*~*~*~*~*~*~*~*~*~*~*~*~*~

Disclosure: These products have been provided by DecoArts for the purpose of review. All opinions are that of the MixedMediaArt team.
.

.
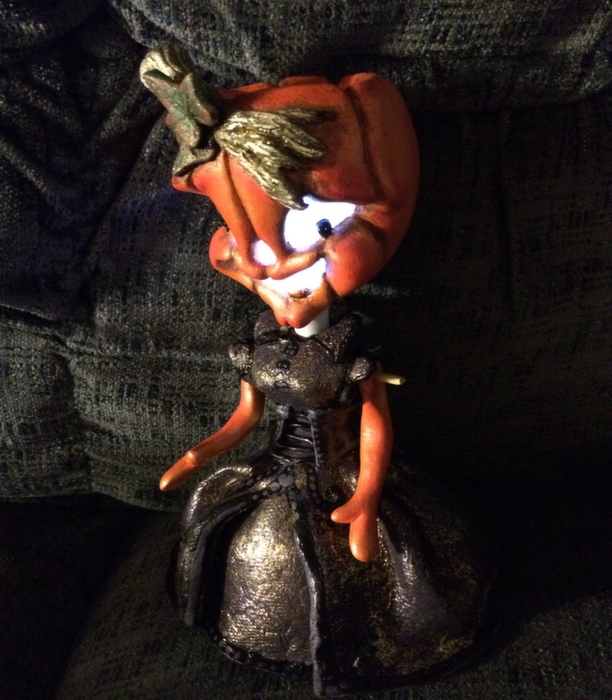
Mixed Media Jack-o-Lanterns with Creative Paperclay

~ * ~

This article is written by Gloriann Irizarry

Welcome back and hola to all my wonderful followers, collectors and friends.  It’s Gloriann Irizarry here to show you how easy it is to use household items like LED lamps to light has an armatures to light up your paper sculpt projects.

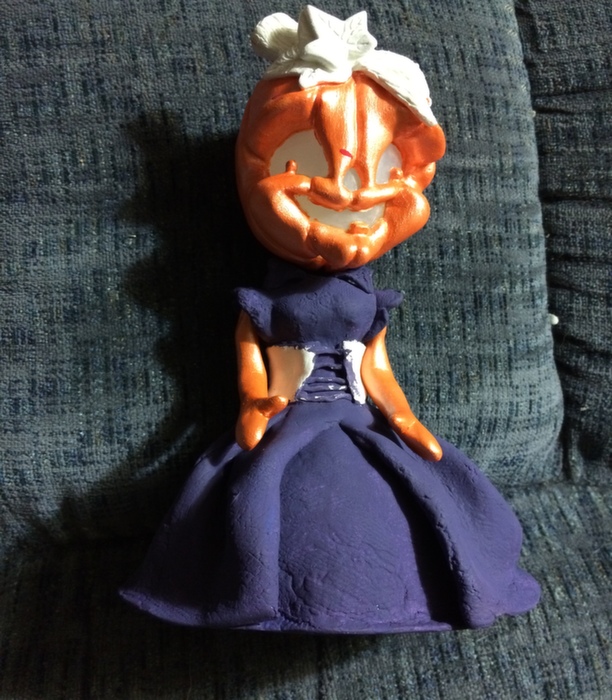
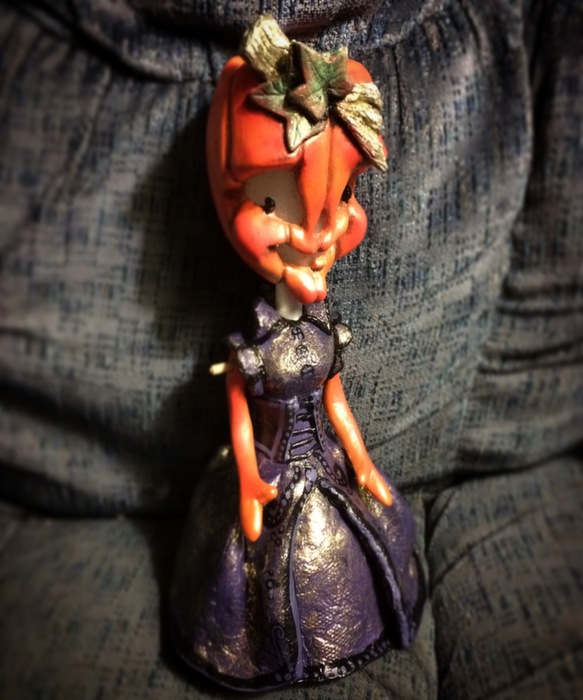
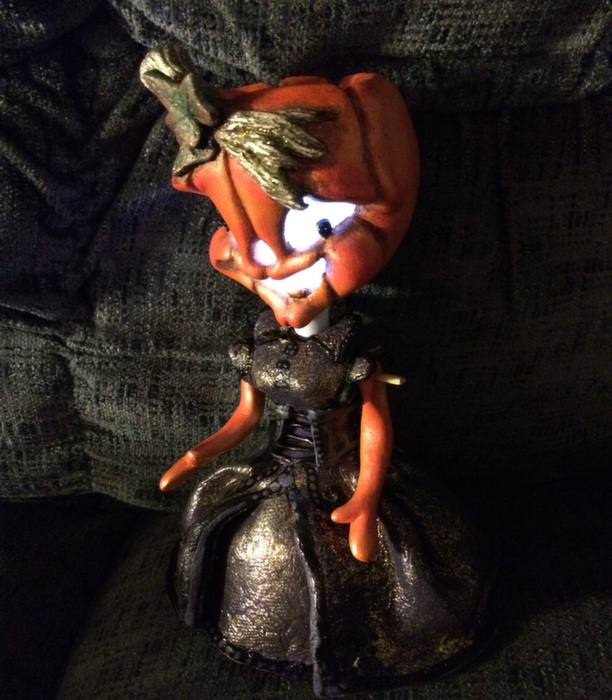
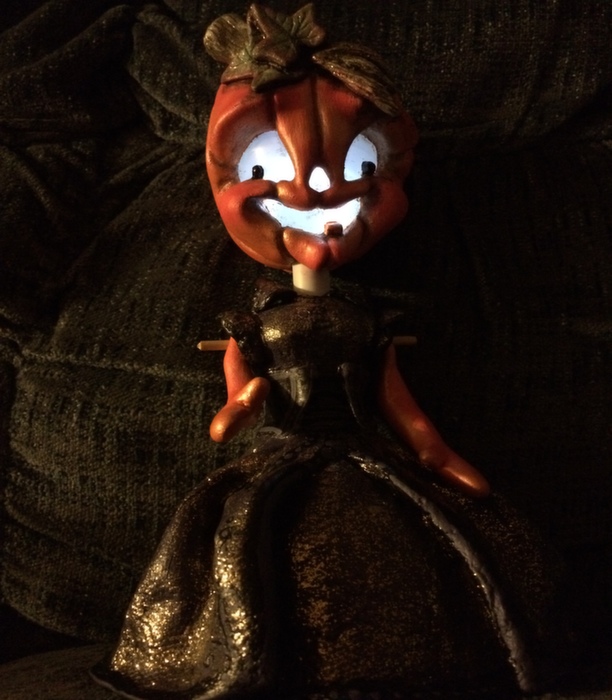
mixed media jackie o lantern handmade halloween decorations

I have to say this is a great way to enhance any project and to give is a little bit of pizzaz to any sculpture. I do have to thank one of my wonderful friend and amazing Folk Art artist Mr Patrick Gill. He create the most amazing art challenges and welcomes us artist to create pieces. His group Every Witch Way Lane is full or great artist whiling to lend a hand and guide you through the sculpting process. His group can be also found under #EWWL. His guidance was my inspiration for this piece Jack O Lantern or in my case a Jackie O Lantern .

Now let me show you how I sculpted this piece and what I choose to be the lighting source will make you look at house hold items differently from now on.

handmade jack-o-lantern halloween decorations

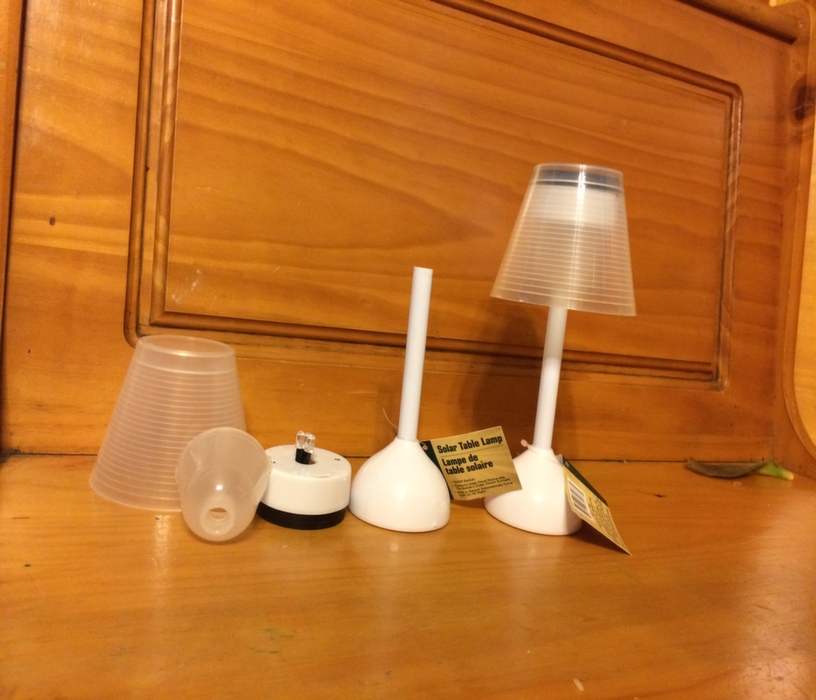
Now let hunt down some LED battery operated lamps. I like to start any search at my Dollar Tree Store and could not believe it I could not believe what a find. I found these great solar LED desk lamps and I couldn’t resist them. I have to say this one was a big successful hunt.

Let purchase a few for this and future projects

handmade jack-o-lantern halloween decorations

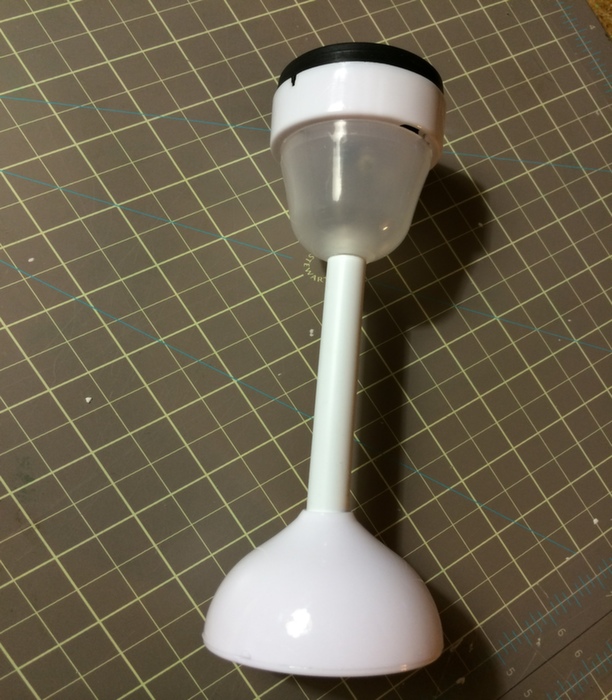
I start by taking the LED lamp apart. I will not be using the top lamp shade only the lamp, post and the base. So I discarded those out.

handmade jack-o-lantern halloween decorations

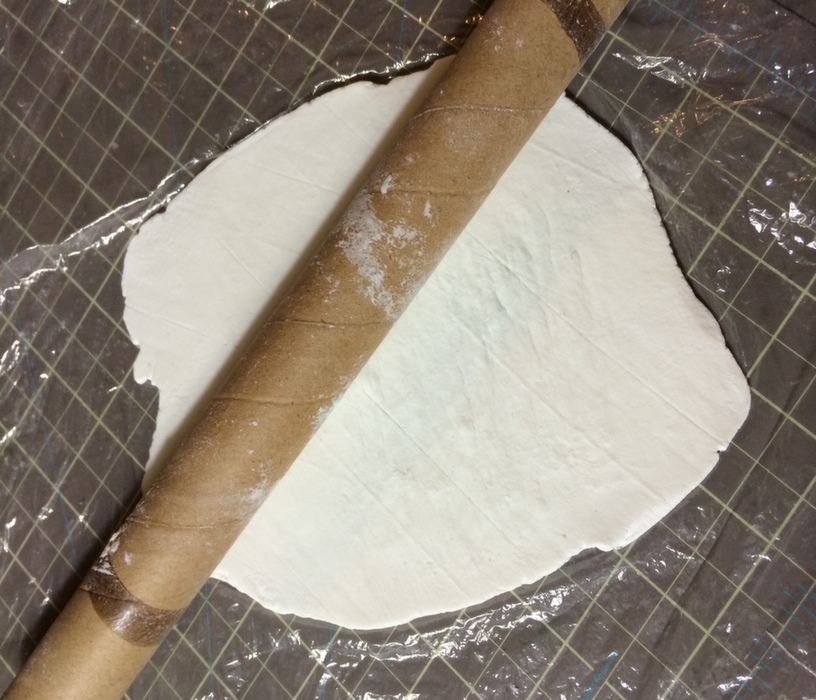
I grab a pack of Creative Paperclay and roll the clay  into a ¼ thick sheet. I recycled a old thick wrapping paper roll and used it to roll the clay sheet.

handmade jack-o-lantern halloween decorations

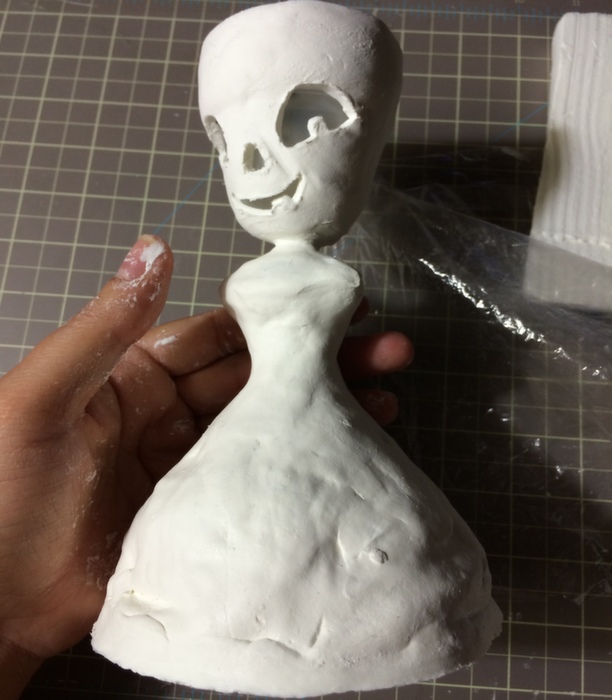
I decided to create a folk art Jack O Lantern. Use the clay sheet and cover the top of the lamp

creative_paperclay_ewwl_jackie_o_lantern_mix_media_article_5

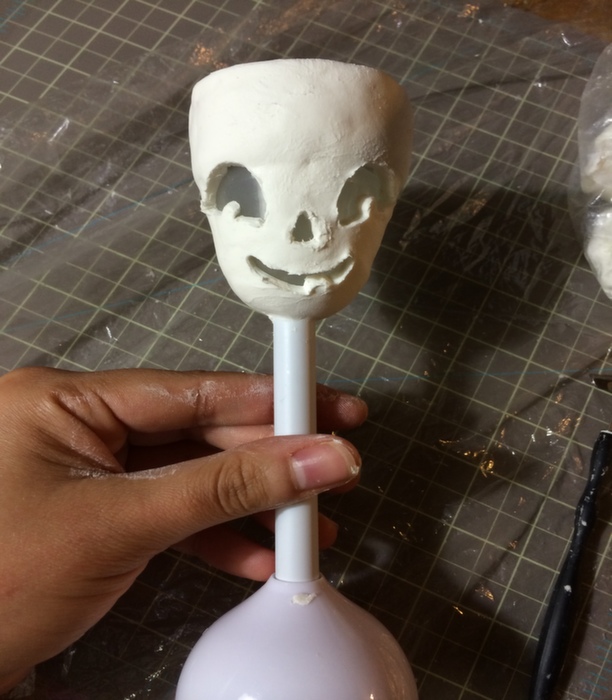
Pinch the clay all around the top of the lamp make sure you cut any excess out and smooth all the edges with water to make it easy to work with.

creative_paperclay_ewwl_jackie_o_lantern_mix_media_article_6

For the facial expression I wanted her to bring a smile to you.

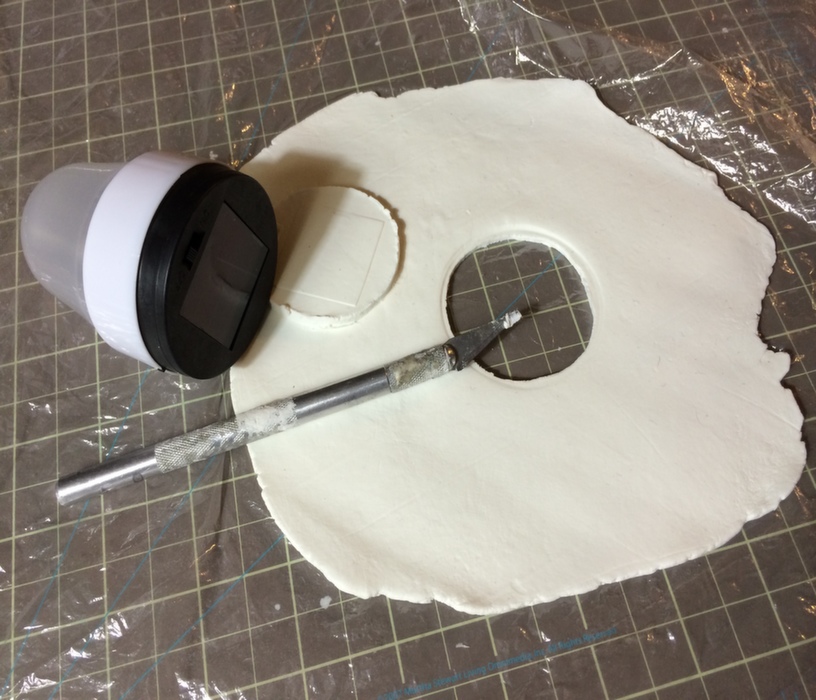
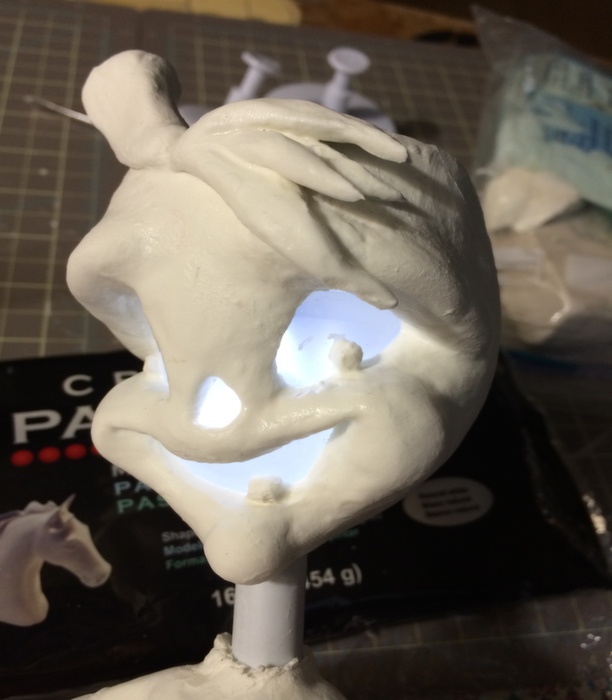
To give your sculpt the smile you’re looking for grab a sewing needle and free hand cut the eyes, nose and mouth off. Remove any excess paperclay.

creative_paperclay_ewwl_jackie_o_lantern_mix_media_article_7

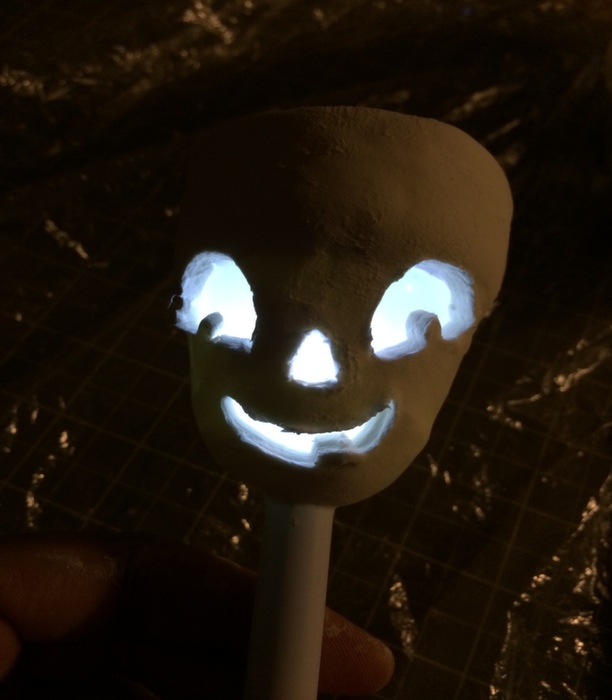
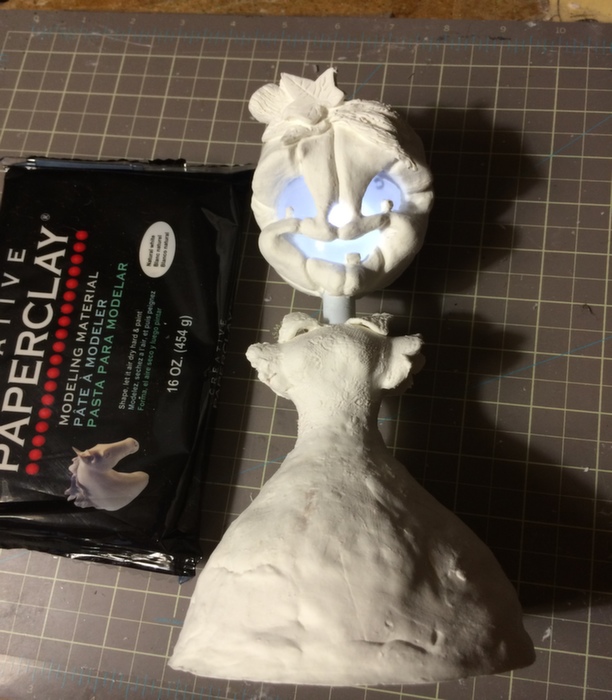
Make sure the head smile is what you’re looking for test it by turning the lights on.

I did turn mine by covering the solar panel. It looks good!

creative_paperclay_ewwl_jackie_o_lantern_mix_media_article_8

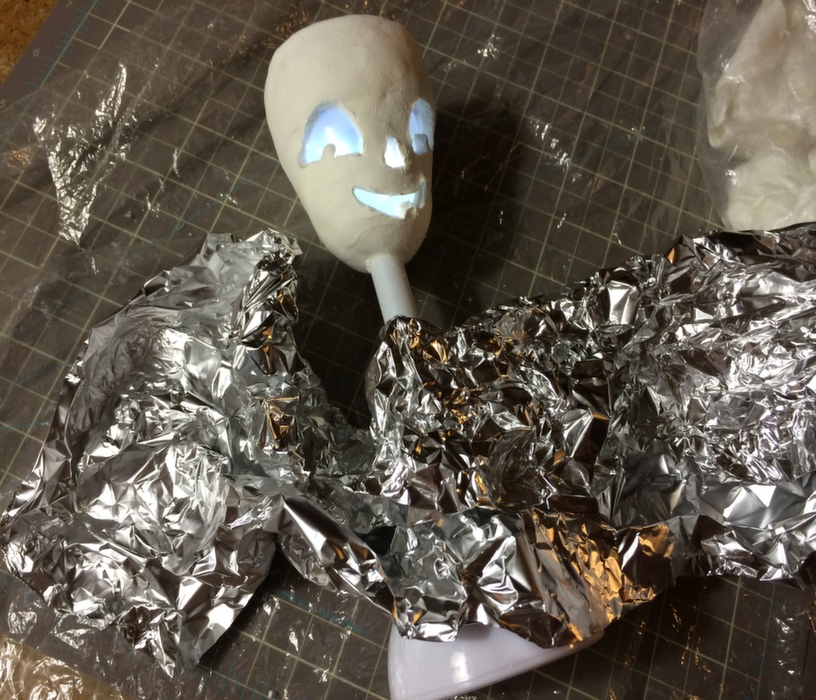
While the head dries you can start working on the dress.

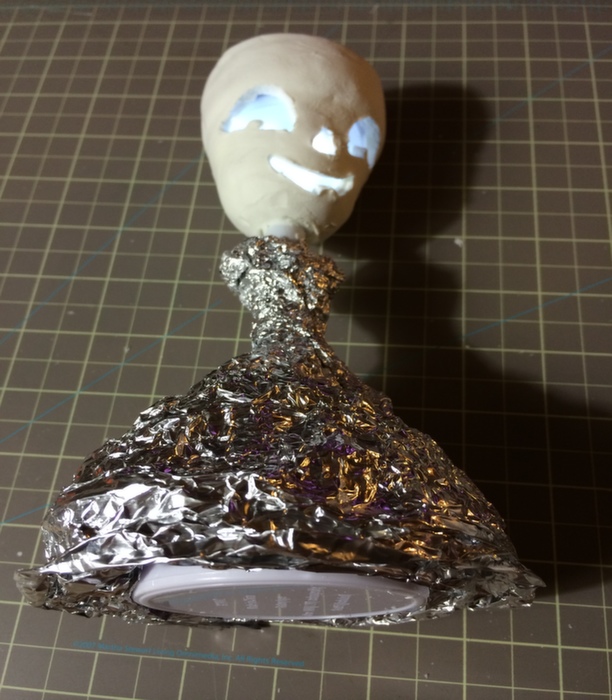
I grab the aluminum foil and sculpt a dress form.

creative_paperclay_ewwl_jackie_o_lantern_mix_media_article_9

Use has much foil you want to create the desire shape you are looking for. Press, twist and turn until you are completely satisfy with the form.

creative_paperclay_ewwl_jackie_o_lantern_mix_media_article_10

After your satisfy with the aluminum foil form cover completely with a rolled ¼ thick Creative Paperclay sheet and let it dry completely to create the base for your Jackie O Lantern

creative_paperclay_ewwl_jackie_o_lantern_mix_media_article_11

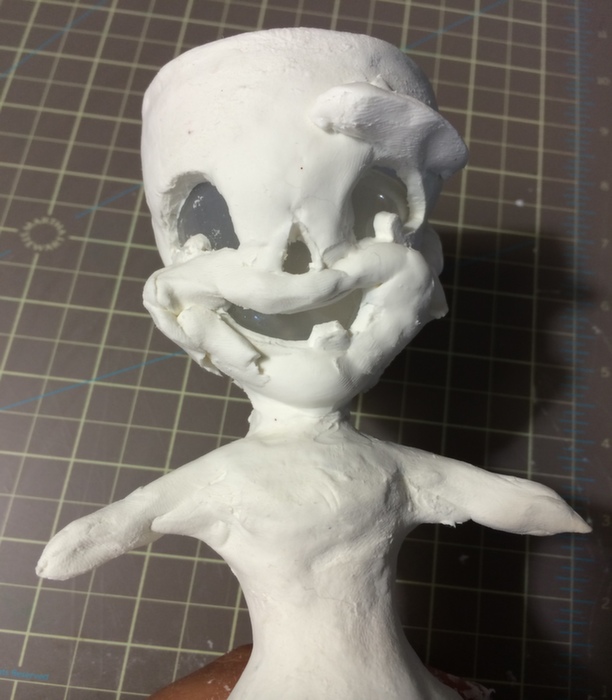
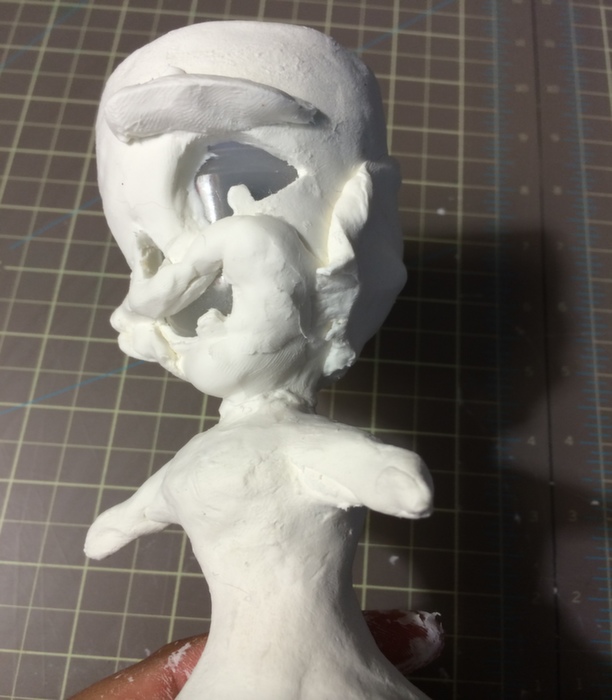
While we wait for the dress core to dry I work sculpting the face. I add a little more clay on the eyebrows, cheeks and jaw. Moist your tools or fingers and smooth the clay by moving in place little by little. Add a little more or take some out depending on your taste.

creative_paperclay_ewwl_jackie_o_lantern_mix_media_article_12

I like to add clay little by little and let the sculpt speak to you. For the most part it will tell you when to stop adding or removing Creative Paperclay.

creative_paperclay_ewwl_jackie_o_lantern_mix_media_article_13

I added a more clay and move it in shape to create the desire smile. You can make if chunky or thinner is all up to you. Just make sure to smooth all the clay edges with the water bottle or with the soft wet brush blender.

creative_paperclay_ewwl_jackie_o_lantern_mix_media_article_14

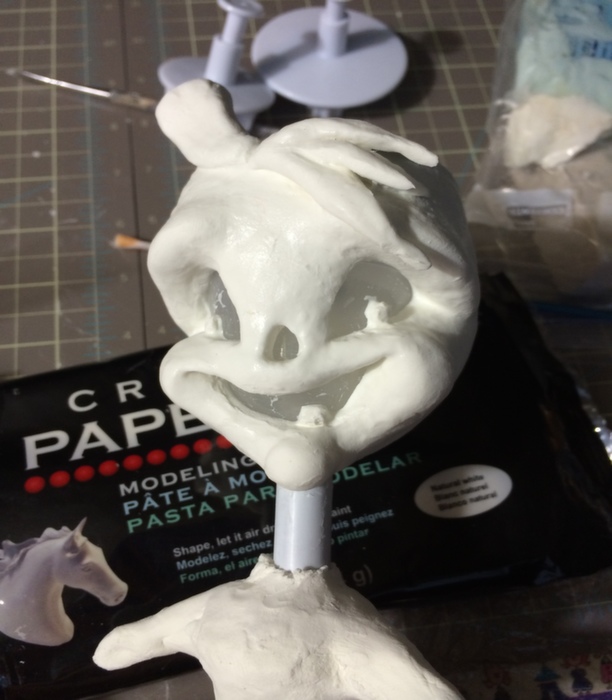
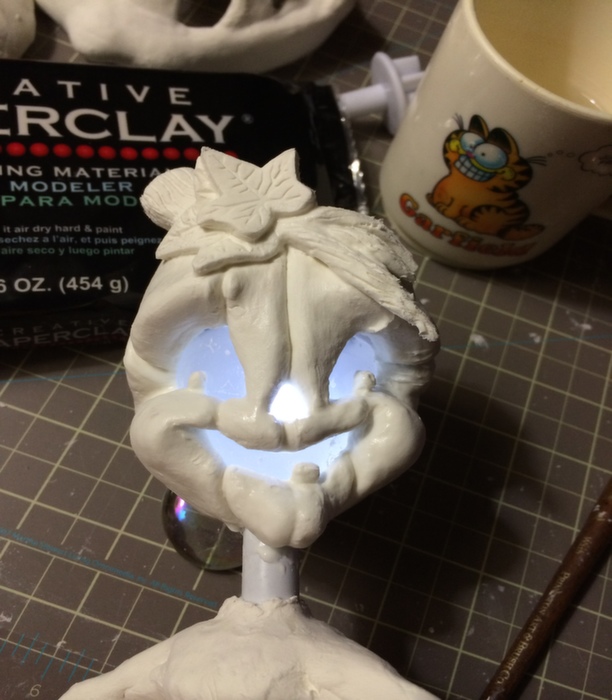
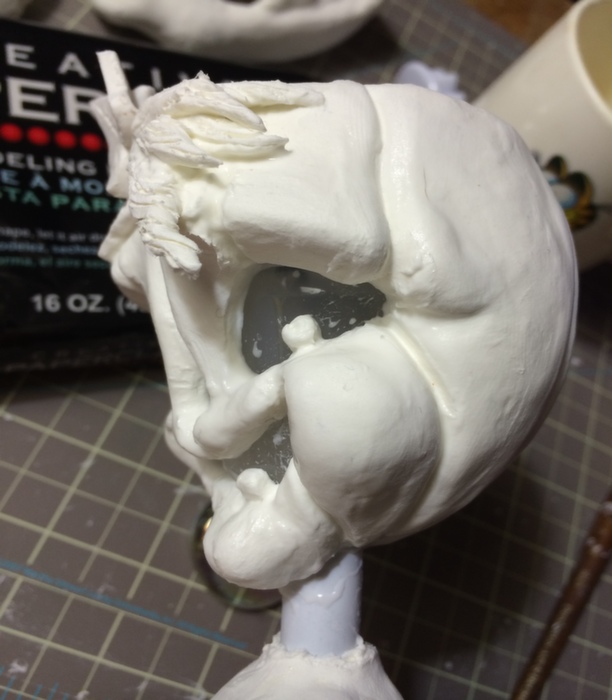
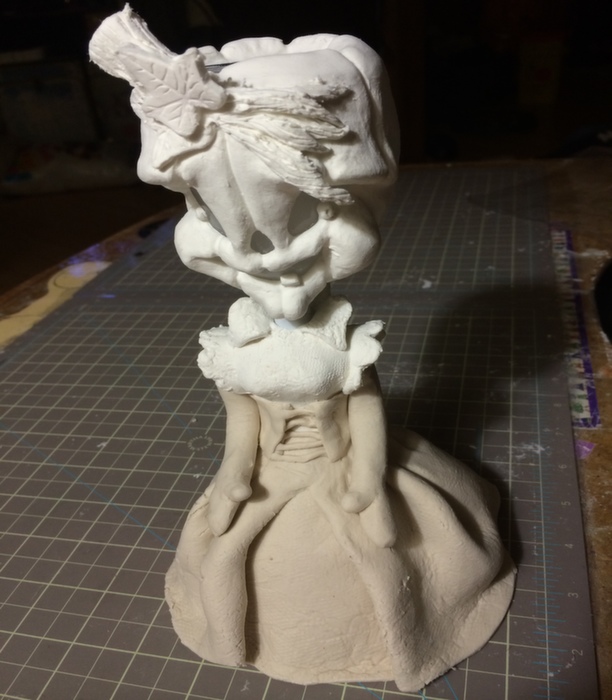
The key to add more character to any piece is the on the details. So focus on these to give your sculpt your signature style. For this piece I wanted to give her a female look by adding some hair bands and little stomp hat.

creative_paperclay_ewwl_jackie_o_lantern_mix_media_article_15

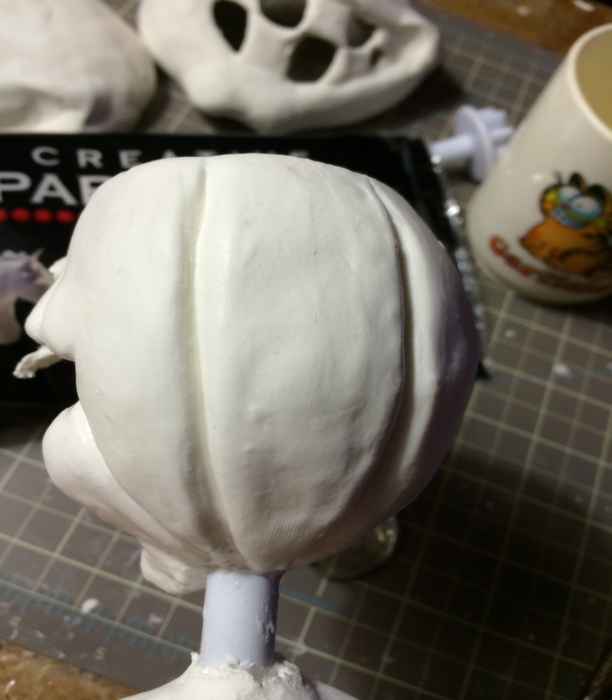
I’m not quite done yet my friends. I wanted my pumpkin head to look natural and spooky at the same time, so I created the pumpkin vertical seems and I also added some more detailed to the head. Like a couple leaves to decorate the pretty root hair bands.

creative_paperclay_ewwl_jackie_o_lantern_mix_media_article_16

Add a couple wrinkles here and there. This will give your folk art paperclay sculpt the spookiest and unique character ever

creative_paperclay_ewwl_jackie_o_lantern_mix_media_article_17

I also smooth the edges all around the head to make sure is all round a plump. This will give Jackie O Lantern the pumpkin look you are looking for.

creative_paperclay_ewwl_jackie_o_lantern_mix_media_article_18a

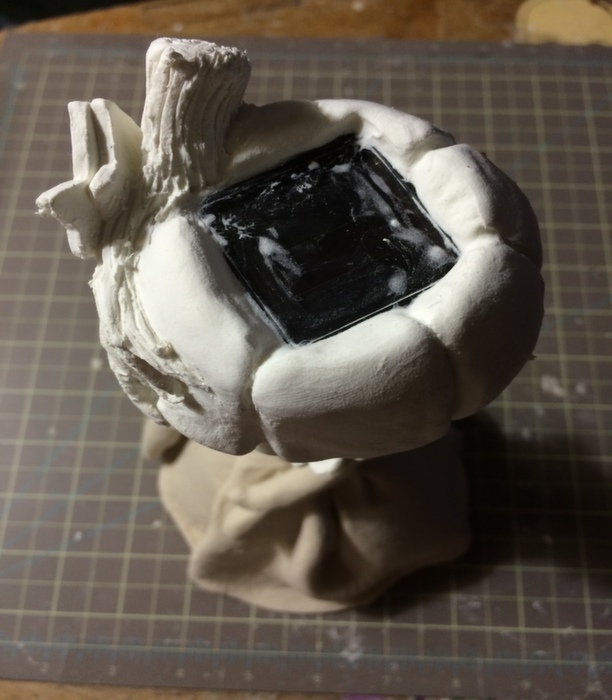
Make sure your leaving the solar panel cell free from shadows and excess clay.

You have to remember this solar panel is the one will recharge your batteries to illuminate the Jackie O Lantern face.

creative_paperclay_ewwl_jackie_o_lantern_mix_media_article_18

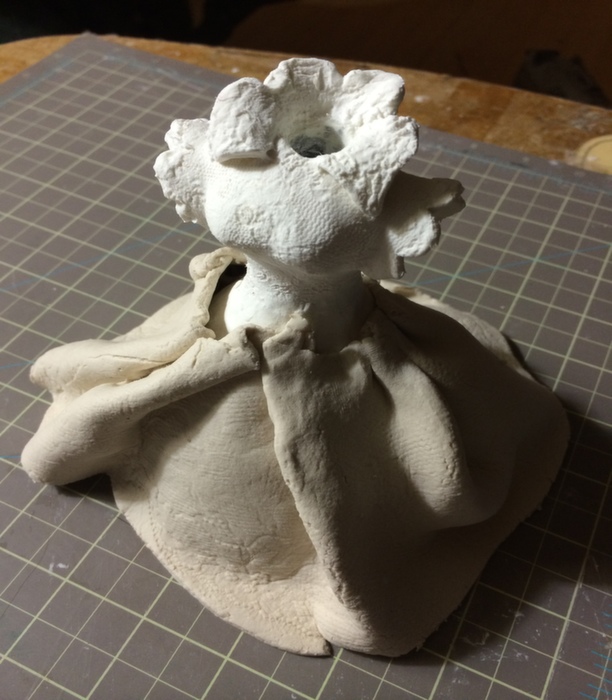
I waited for the dress form to be completely dry to start giving the dress the neck and sleeves.

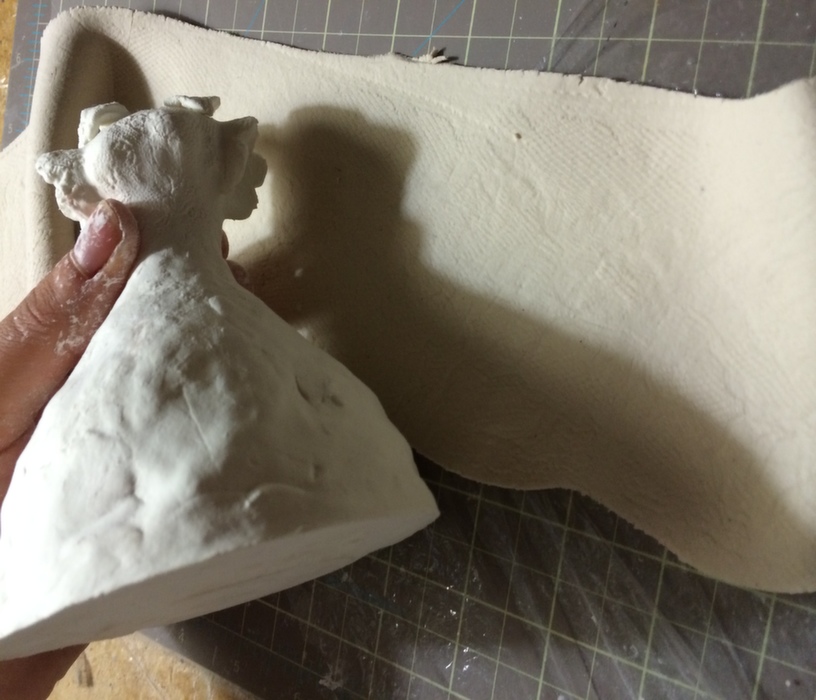
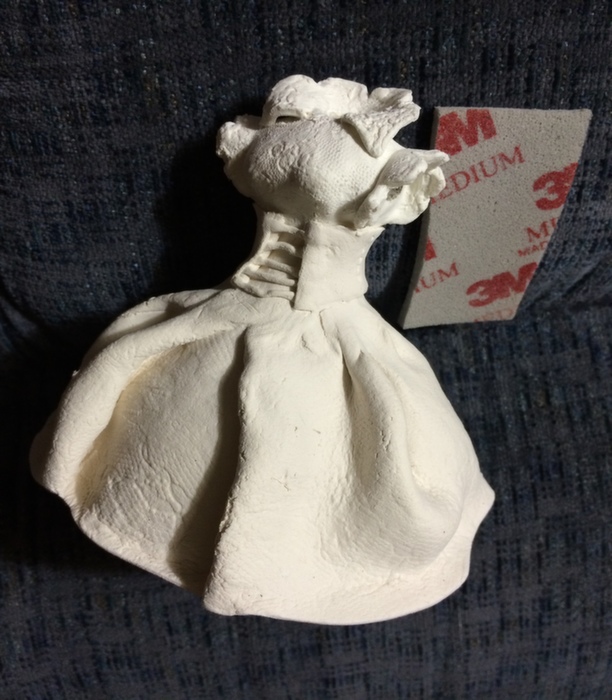
Add a little more clay to create the top. I added texture to the dress by pressing the lace fabric to the ¼ thickness sheet. This will give a nice fabric finish to the dress.

creative_paperclay_ewwl_jackie_o_lantern_mix_media_article_19

Do the same for the skirt. Roll a long enough piece of paperclay to cover the entire skirt.

creative_paperclay_ewwl_jackie_o_lantern_mix_media_article_20

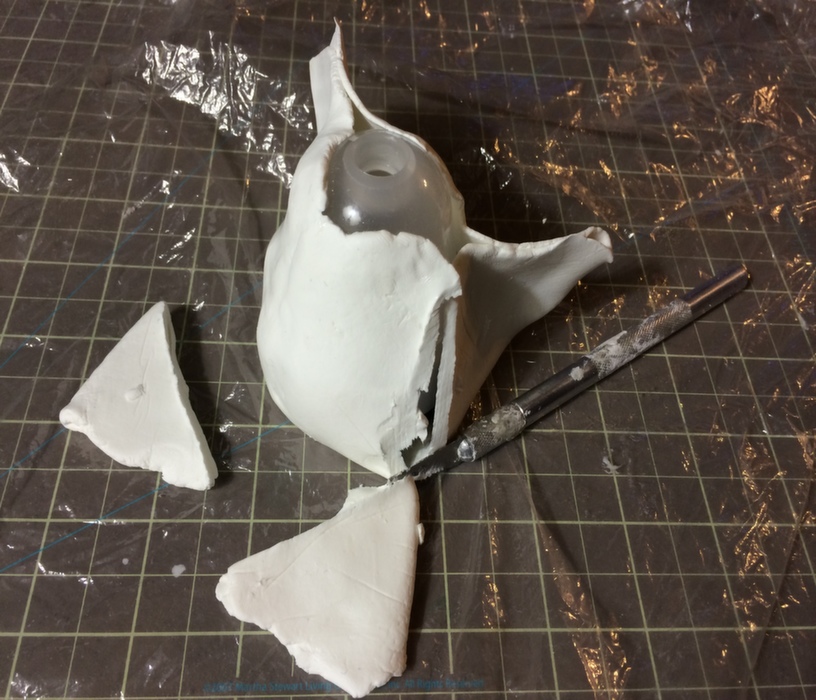
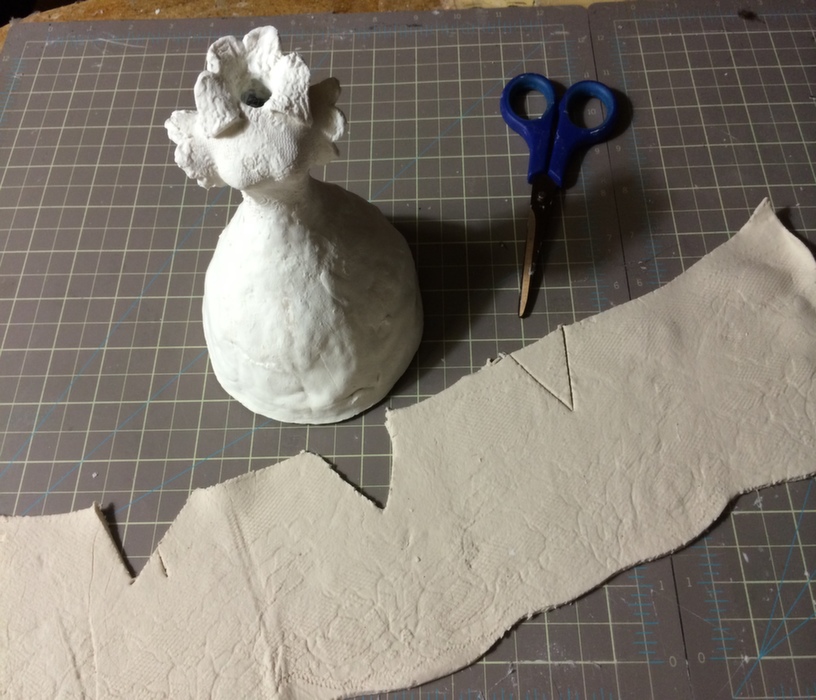
Now to make sure the skirt flow naturally I cut start by cutting some triangles off from the top portion of the skirt to remove the excess material off.

creative_paperclay_ewwl_jackie_o_lantern_mix_media_article_22

Applied the skirt to the sculpt and adjust the sheet to flow naturally and press the dress edges smooth to the waist. Don’t worry much about the look once the skirt is dry and set you will cover the waist with a thin sheet in shape of a corset.

creative_paperclay_ewwl_jackie_o_lantern_mix_media_article_23

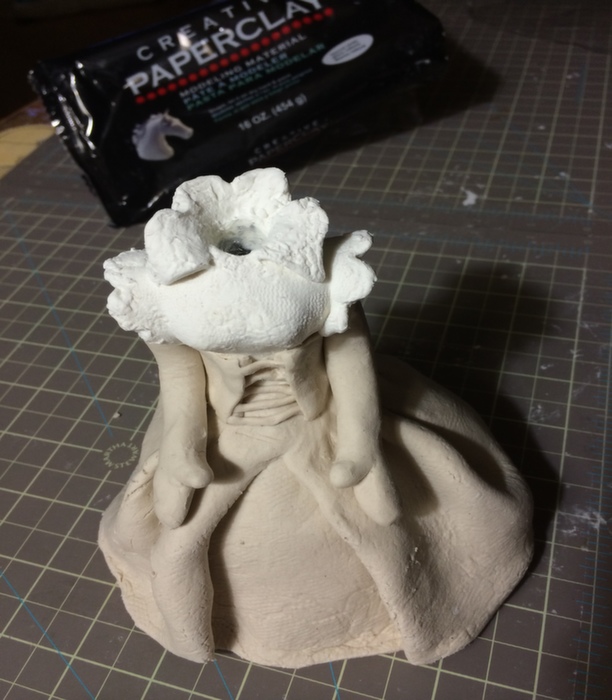
Here you can see the final simple corset piece I made to cover the imperfections of the skirt.

creative_paperclay_ewwl_jackie_o_lantern_mix_media_article_24

Don’t forget to give her a set of arms

creative_paperclay_ewwl_jackie_o_lantern_mix_media_article_27

creative_paperclay_ewwl_jackie_o_lantern_mix_media_article_28

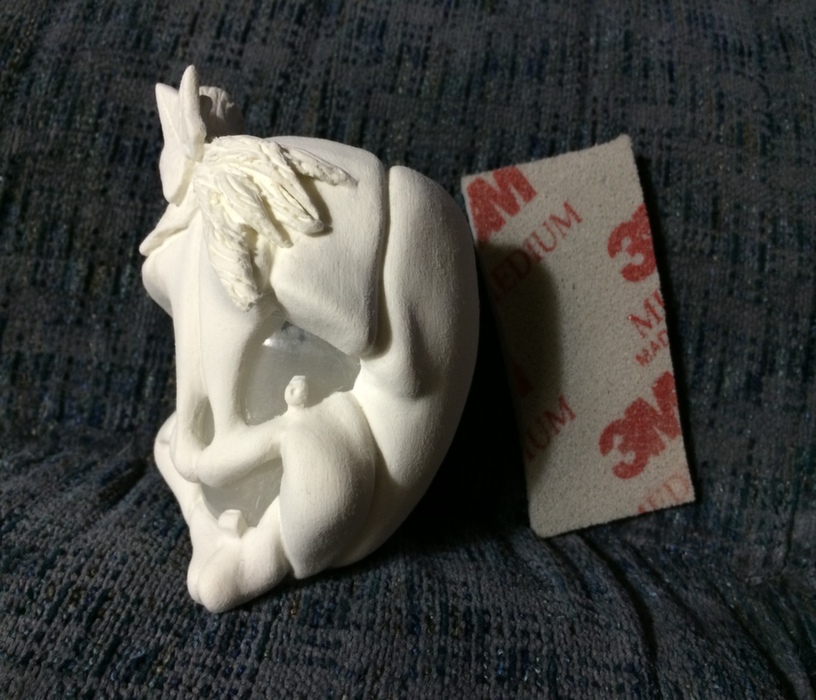
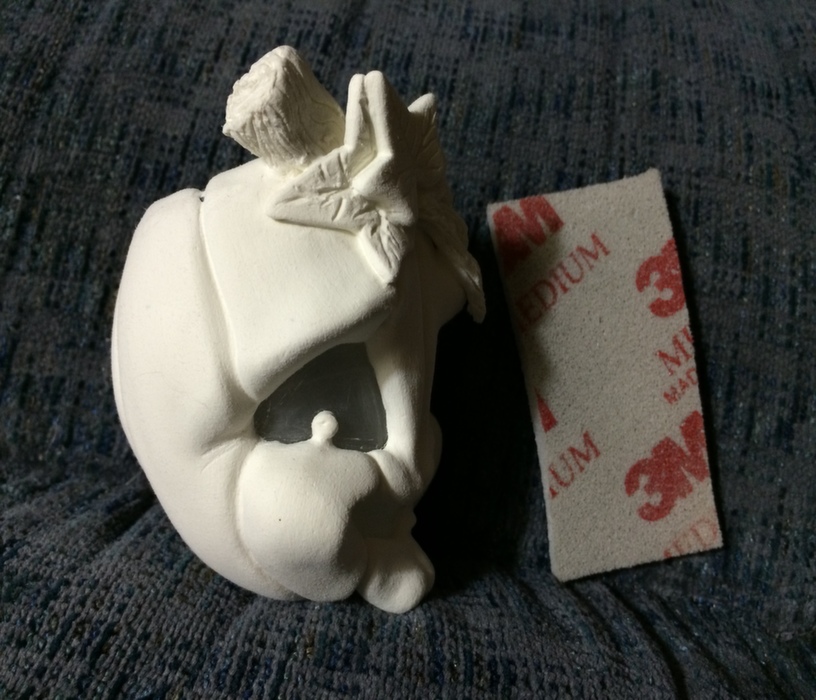
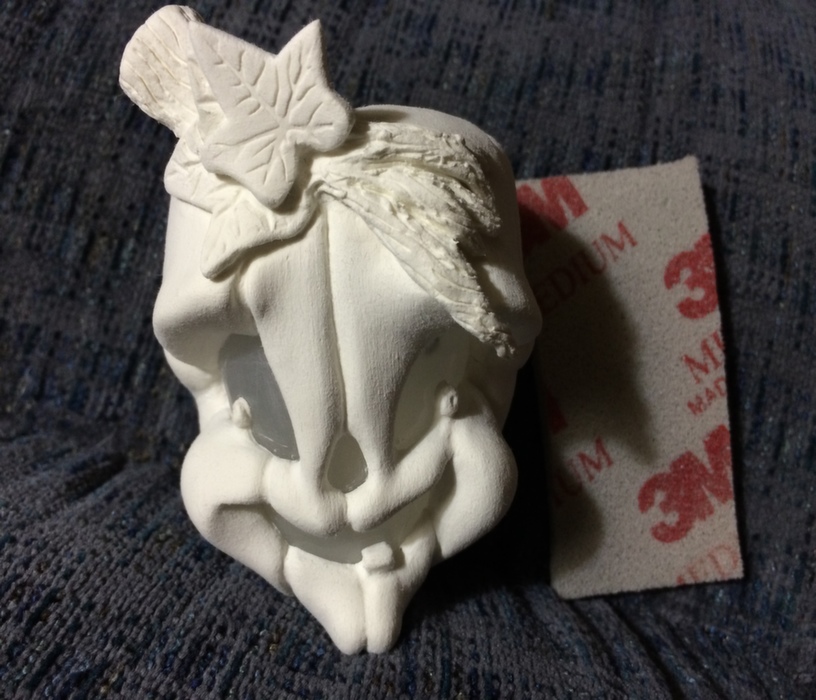
I like to sand the piece in stages with 3M sponge sanders.

I start the shaping with the medium size grit

creative_paperclay_ewwl_jackie_o_lantern_mix_media_article_26

When sanding the pumpkin head sand it vertically so the lines can look naturally once the piece is painted. I like the stress effect this type of sanding gives to the final sculpt.

creative_paperclay_ewwl_jackie_o_lantern_mix_media_article_29

Lightly sand the any imperfection or clay excess of the dress and even out the stand.

creative_paperclay_ewwl_jackie_o_lantern_mix_media_article_30

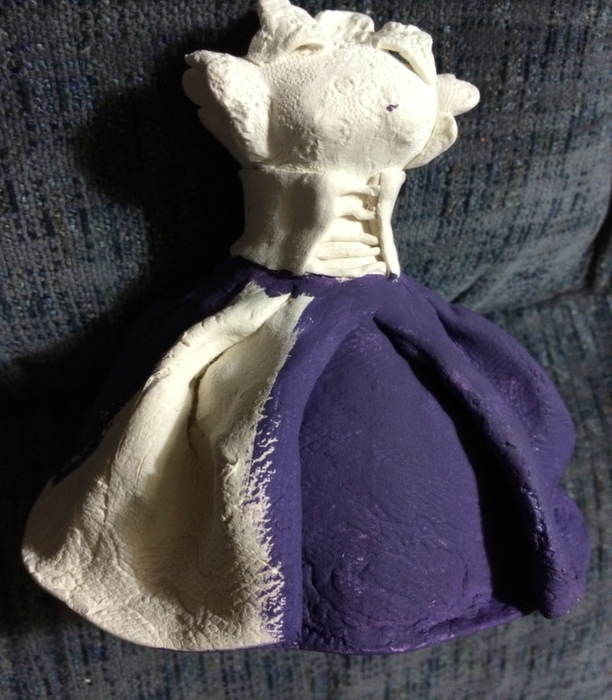
I mix myself some red and blue to create my very own shade of purple and apply 2 coats of acrylic paint to the entire dress.

creative_paperclay_ewwl_jackie_o_lantern_mix_media_article_31

I wanted to give a nice sheen to the pumpkin head so I used the Martha Stewart pearls orange. I painted the stumps pearl green and accented with a brown dry brush.

creative_paperclay_ewwl_jackie_o_lantern_mix_media_article_33

Add more sheen to the dress with Martha Stewart gold glitter.

I glued a stick to the shoulders of the doll to hold the arms in place .

creative_paperclay_ewwl_jackie_o_lantern_mix_media_article_35

I also use the black acrylic paint to give her some accents here and there.

Use some pink acrylics to blushed the cheeks with the dry brush technique.

Let the paint dry overnight so you can seal your sculpt with a nice spray sealer and the piece is ready to be display once it is all dry.

Now it is time for you to display your new Jackie O Lantern.

Well I hope you enjoy this article and if you have any questions or concern please feel free to send me an email at gloriann@byglori.com

Feel free to like or comment on this article below.

Have a bless day and like always have fun crafting.

Sincerely Gloriann Irizarry

creative_paperclay_ewwl_jackie_o_lantern_mix_media_article_36

~*~*~*~*~*~*~*~*~*~*~*~*~*~*~*~*~*~*~*~*~*~*~*~*~

My name is Gloriann Irizarry. I was born and raised in the beautiful Caribbean island of Puerto Rico. Ever since I can recall, I always had my hands on crayons, scissors and paper. My parents knew from the start how much I love to create!

As a mother of three young wonderful daughters, I find myself working, caring for my family, and taxiing kids from here to there for various sporting events.  I have to say I’m never bored!  I enjoy every little moment I spend with my girls, but will always continue to work time to create art into my daily schedule as that means doing what I love the most. My girls are learning the joys of creating also!

I love to sculpt and will never stop creating. I was born this way and for that I thank GOD every day. Art has been a great way to be creative and to express myself.  I like to keep my hands busy creating – whether it is unique jewelry, art dolls, oak sculpture figures, fairy wings for all your project needs, or even wigs and clothing for your sculptures.  I love all the variety in art! Why? because ART is so rewarding. Seeing your creation take form is an awesome feeling.

You can see more of my work on my website – ByGlori

~*~*~*~*~*~*~*~*~*~*~*~*~*~*~*~*~*~*~*~*~*~*~*~*~

.

.

Playing with the Irresistible Pico Embellisher

~ * ~

This article was written by Melanie Statnick

using Pico embellisher in mixed media art and on cards

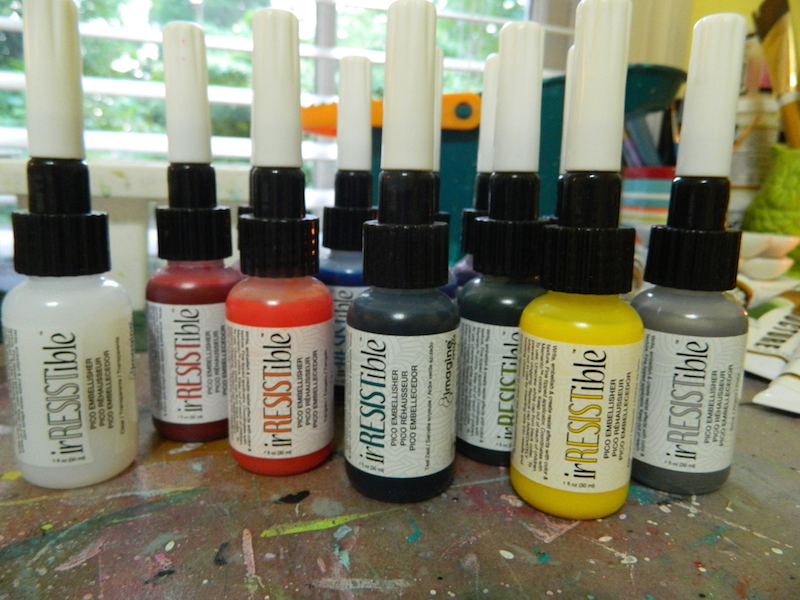
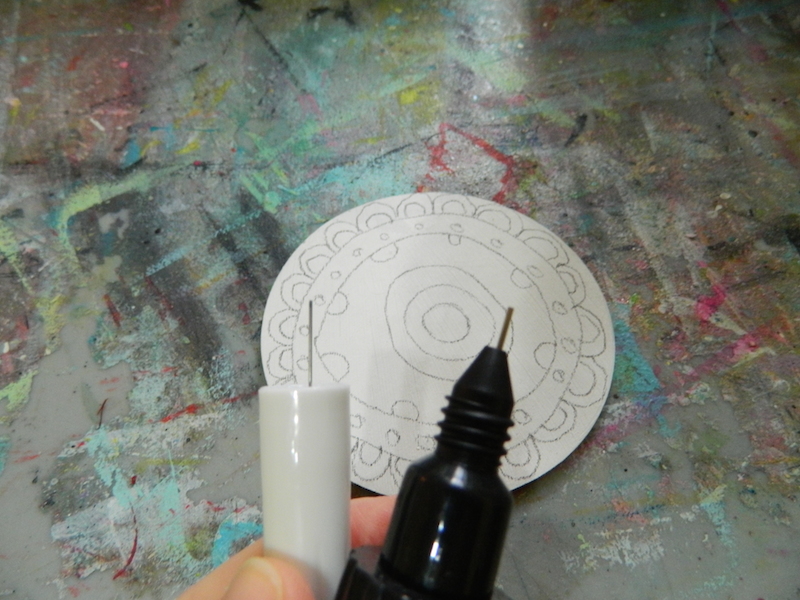
I really enjoy working with a new product. When I saw the Imagine Craft irresistible Pico embellisher I wasn’t sure what to expect with its precise tip applicator and the needle that inserts into it. It was foreign and I wanted to try it.

using Pico embellisher in mixed media art and on cards

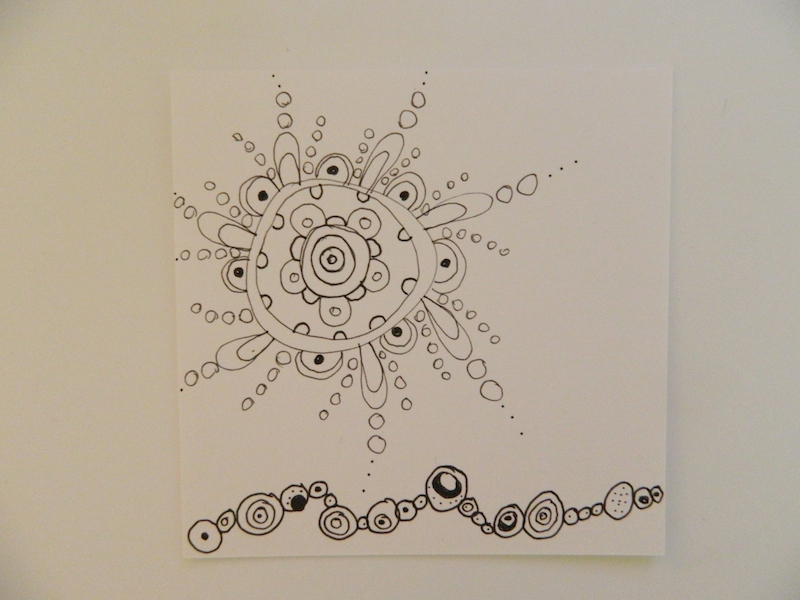
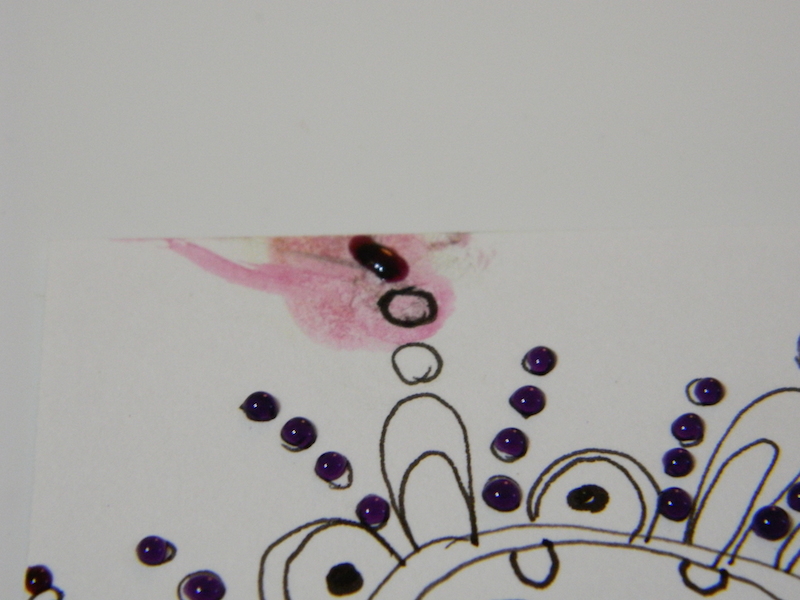
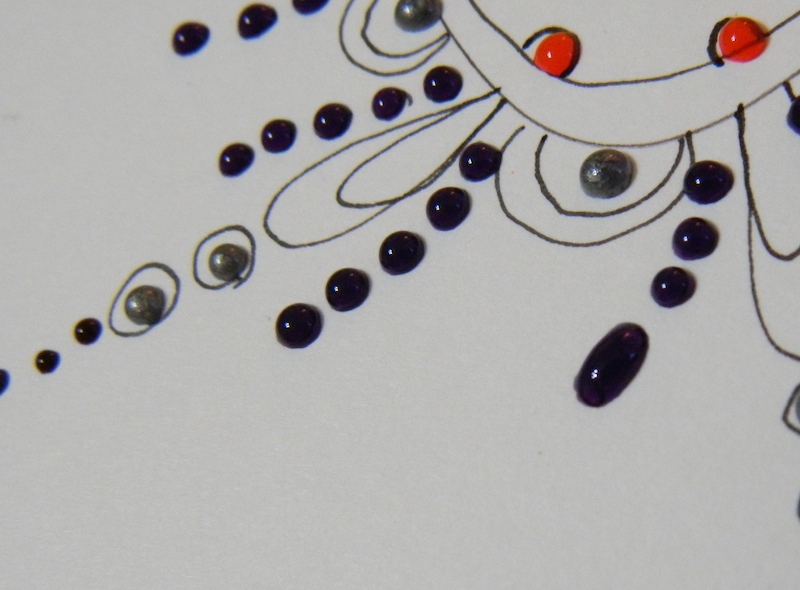
As a visual artist I could see numerous ways to add this texture into art pieces. I love to add details into my art and the Pico embellisher tip is perfect for this. On a piece of Bristol paper I drew up a doodle and gave it a go.

using Pico embellisher in mixed media art and on cards

using Pico embellisher in mixed media art and on cards

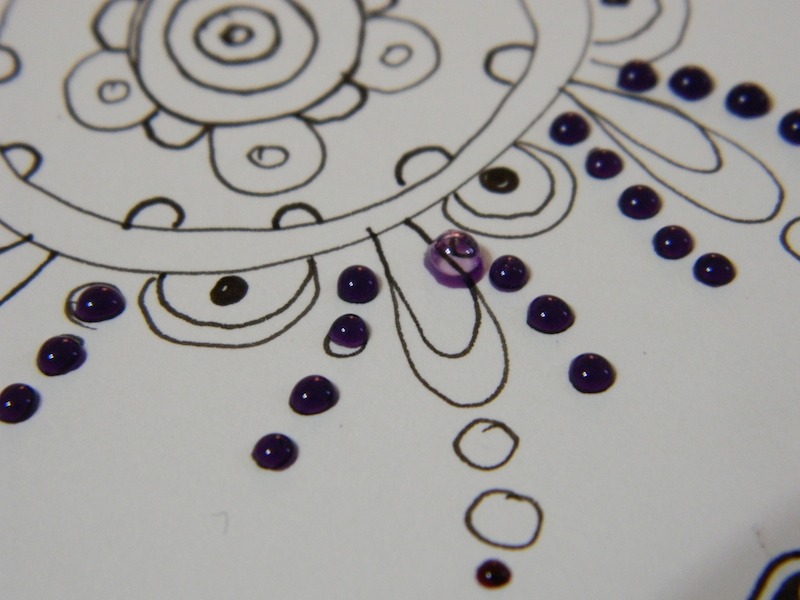
There is allowance for control with the tip the embellisher has, making lines and dots thick or thin depending on the pressure of how you squeeze. I did notice that the embellisher will suck some air creating bubbles on the next release.

using Pico embellisher in mixed media art and on cards

using Pico embellisher in mixed media art and on cards

I dabbed the bubble with a napkin and it broke leaving a ring. Another time I wiped it away and it left a mess. Please take care cleaning up any bubbles that may happen. This could have been something that happens with a first time user. I also wanted to try the embellisher freehand. I think it gives the drawing a needle point look.

using Pico embellisher in mixed media art and on cards

using Pico embellisher in mixed media art and on cards

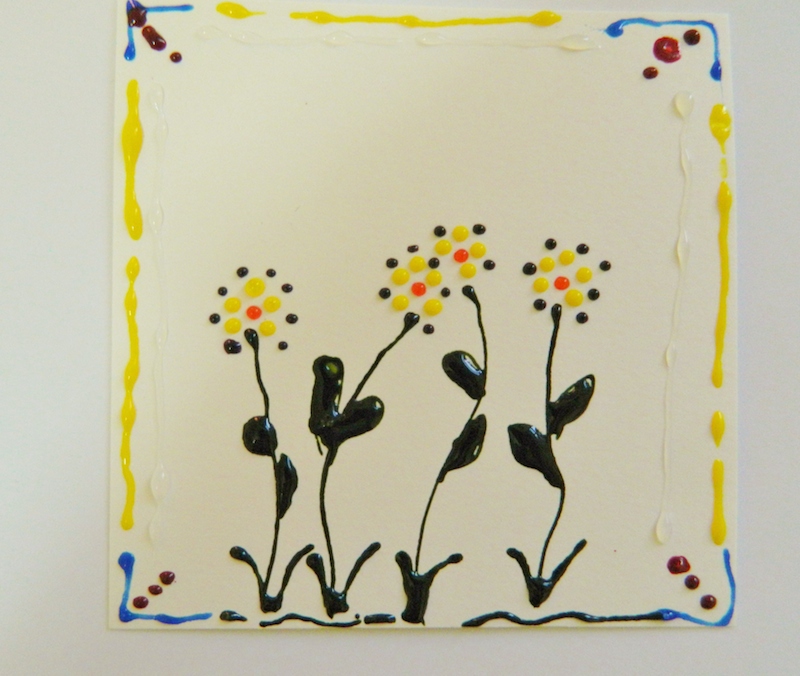
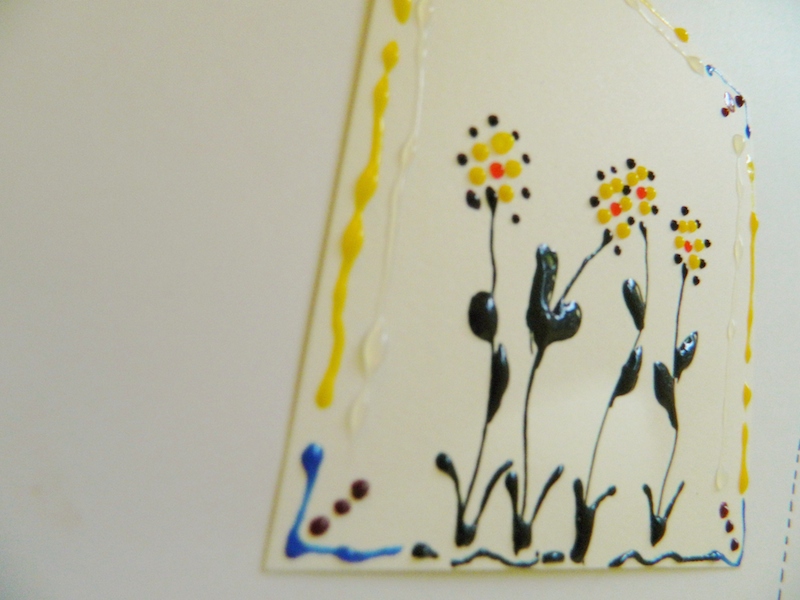
Overall I think the irresistible Pico embellisher by imagine craft is an excellent tool for texture and more. With the verity of colors who know what your imagination will create.

~*~*~*~*~*~*~*~*~*~*~*~*~*~*~*~*~*~*~*~*~*~*~*~*~

Author bio: Melanie Statnick is a published artist/writer out of North Carolina. Melanie creates art daily from her private studio. Her style is happy and whimsy. Statnick’s artwork can be found in art galleries and shops extensively in NC with international private collections. Learn more about Melanie view her website at: www.melaniestatnickart.com

~*~*~*~*~*~*~*~*~*~*~*~*~*~*~*~*~*~*~*~*~*~*~*~*~

Disclosure: These products have been provided by Imagine Crafts  for the purpose of review. All opinions are that of the MixedMediaArt team.
.

.
Mixed Media Magnet

~ * ~

This article is written by Sandra Parés

Today I am going to show you how to make a decorative fridge magnet with mixed media. If you have spent these holidays at home or if you have come back from your trip and you haven’t remembered to bring gifts … you can make these fridge magnets to give away to your family or friends!

The supplies I am going to use are the following:

  • A square piece of wood 6x6cm (you can also use hard cardboard).
  • Gesso
  • Modeling paste
  • An old credit card
  • 1 stencil to make abstract backgrounds
  • 1 stencil with a sharp image to fit inside the square 6x6cm
  • Acrylic paints in various colors (I am going to use Silks Acrylic Glaze because they will give amazing brightness)
  • 1 brush
  • 1 sponge
  • 1 piece of adhesive magnetic tape

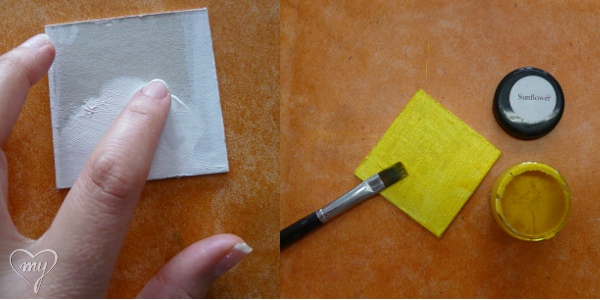
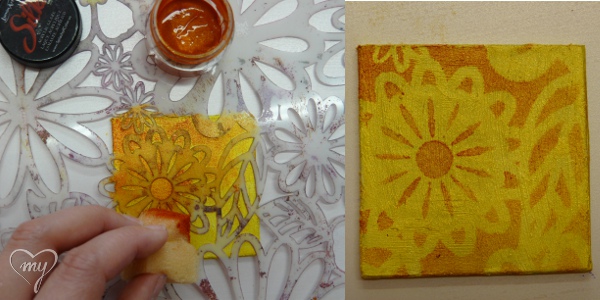
First of all we will put gesso on wood and we will let it dry completely. With this first step we will have the support ready for painting. Then we choose a light colour of our acrylic paints and we will paint the surface with it.

Putting gesso and painting the first coat of acrylic paint.

When the layer is dry, we will take a stencil that allows us to add texture over the background and with a sponge we will stencil the template using a contrasting color to the background layer.

Stenciling the background with a acrylic paint

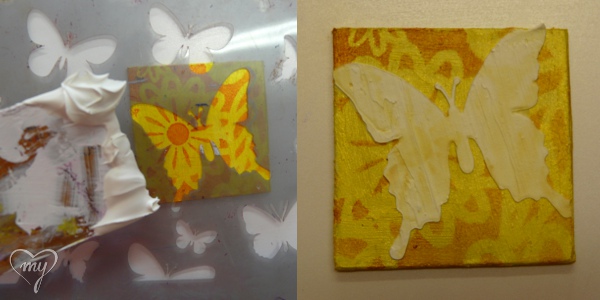
Once dried we will take another template, this time we will choose a stencil with a sharp image. And with the credit card we will catch some modeling paste and we will fill the gap with the paste. With this step we will have a embossed figure. We will let it dry a few hours until the paste is completely harden.

Filling the stencil with modeling paste

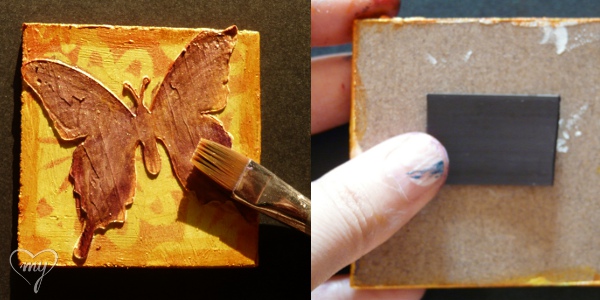
When the paste is dry we can paint the figure with acrylic paints. Also we can paint around the edge to give sense of well finished. Finally when all the work is dry we have to put a piece of adhesive magnetic tape to get the magnet.

Painting the magnet and putting the adhesive magnetic tape

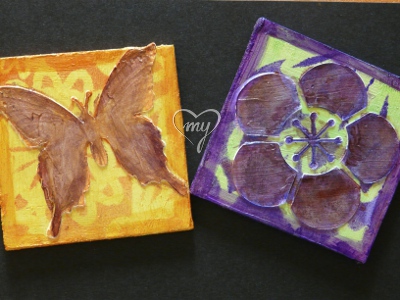
And with this easy way we can make these beautiful fridge magnets:

Handmade mixed media magnets

~*~*~*~*~*~*~*~*~*~*~*~*~*~*~*~*~*~*~*~*~*~*~*~*~

Sandra Parés loves working with mixed media! The colors and textures leave her amazed and she enjoys creating and getting their hands dirty with paint and gesso! On her site My mixed media you can find a mixed media online store, art and craft products, mixed media workshops in Spanish, tutorials, ideas and mixed media techniques.

~*~*~*~*~*~*~*~*~*~*~*~*~*~*~*~*~*~*~*~*~*~*~*~*~

.
.