Michelle G Brown | Mixed Media Art

Catch up with MMA in 2023

Hello magnificent creative ones! We hope you have had a BRILLIANT, restful and creative Holiday and are ready to get back into crafting again!

The Mixed Media Art team are planning another HUGE year of craft shows, classes and new stock!

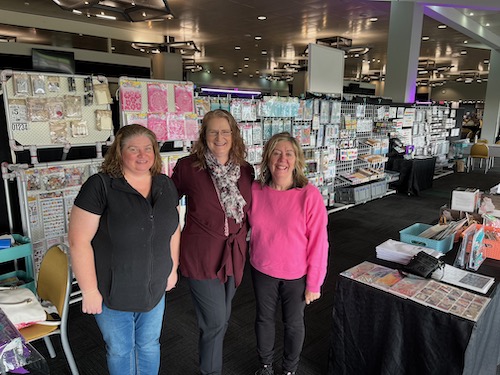
From Picture to Page Papercraft shows

We will be attending ALL of the From Picture to Page shows, where we offer a *free* Make and Take plus run demonstrations across the weekends.

  • Northern Show – 25 & 26 February 2023
  • Makers, Arts & Crafts @ Train & Hobby show – 11, 12 & 13 March 2023
  • Bendigo Show – 18 & 19 March 2023
  • Pakenham Show – 20 & 21 May 2023
  • Western Show – 22 & 23 July 2023
  • Sandown Show – 13, 14 & 15 October 2023
  • Peninsula Show – To be confirmed

Melbourne Paperific Expo

We will be back at Paperific ~ Friday 25, Saturday 26 & Sunday 27 August, at the Flemington Racecourse, Melbourne.

Click here for details

Mixed Media Art Studio

The Mixed Media Art studio and store will continue through 2023.

Our SHOP is open on Mondays, Thursdays and Fridays, 10am to 4pm ~ Find us in Mount Waverley, Melbourne Australia

CLASSES are being developed, along with chatting with some amazing guest artists, and details will be out soon!

Keep an eye on our Classes & Events page

Art journaling inspired by Marlene

Michelle joined the From Picture to Page Spring into Sandown online show line up with this fun and quick art journaling layout, as she shares her 5 step art journaling process with the new Art by Marlene paints, stencils, stamps, die cuts, collage papers and more!

Materials List

Vicky P inspired ATC at Paperific

The Mixed Media Art team are excited to be heading back to Melbourne Paperific Expo – 26, 27 & 28 August 2022 at Flemington Racecourse, Victoria Australia for three days of papercrafting delight!

Come along and create this layered ATC featuring our new range Create Happiness by Vicky Papaioannou and Stamperia in our *free* Make and Take class.

Just because an ATC (Artist Trading Card) is small (2.5″ x 3.5″) doesn’t mean it can’t have loads of mixed media dimension. You will learn several mixed media techniques, using stamps, stencils, inks, volume paste, glue, die cuts and more to create this gorgeously laid ATC.

Sign up for the free* ATC make & take at the Mixed Media Artist stand at Paperific expo. Sessions every half an hour across the weekend!

  • Note: Entry fee into the Melbourne Paperific Expo is required

Materials List:

Create a mini book from A4 gel print

Creating your own mini book is so much fun and easy for any age to master! Let’s turn these colourful A4 gel prints into a mini book, ready to decorate with your favourite mixed media techniques.

What you need to create a mini book:

Materials:
• A4 Gel Print
• spare gel prints
• gel print circles
• ephemera
• Art by Marlene Die Cut image

Tools:
• Scissors
• Circle Punches
• Glue Stick
• Washi tape
• Dina Wakley Scribble Sticks
• paint brushes
• mini ink pads
• ink blenders and handles
• stencils

Step-by-step instructions to create a mini book

Take 1 piece of A4 gel print.

Fold in half; use finger nail to crease fold

Open paper

Turn over and fold the opposite way, along the same fold. Crease well with fingernail.

Fold in half, long ways; use finger nail to crease fold

Open paper

Turn over and fold the opposite way, along the same fold. Crease well with fingernail.

Open paper; it should look like this

Fold one of the short ends into middle; Crease well with finger nail

Turn around and fold other end

Open folds

Turn over and fold the opposite way, along both folds. Crease well with fingernail.

Fold in half, along short side

Use scissors to cut one segment, along the folded edge.

Pinch middle section and fold out bottom flaps

Pull middle section forward and backward

Fold Flat

Juggle to get mini book to fold flat and close.

Finished mini book.

Now you are ready to decorate your mini book


Decorating your mini book

All of your mixed media and papercraft techniques can come into play to decorate your mini book!

Mini book cover ideas

Here we have added washi tape to create a horizon, about a third of the way up. Then we have added an image, stamped a sentiment and finished off the cover with doodles and markings using a black Fudeball pen to finish off our mini book covers.


Decorating the inside of our mini book

The two ideas we used here to decorate our mini book included using a circle punch to create a window, then adding an image of interest behind it. We also created a mini picket by sealing the base of the opening with washi tape and using a smaller circle punch to create a finger pull at the top.

We hope you have enjoyed making your mini book from A4 gel printed paper!

Please SHARE your creation in our Facebook Group / Mixed Media Studios Australia

Or on Instagram with the hashtag #MMAStudio

Happy creating,
Michelle