Michelle G Brown | Mixed Media Art

Love Bookmarks for Valentine’s Day

This article is written by Cecilia Sanchez Peralta

How many things can be used to make a bookmark?
While I’m working on something with mixed media techniques, I am not aware of all the material I use.

I use a little of everything on the fly.
When I finished these bookmarks, I’ve put together all the material.

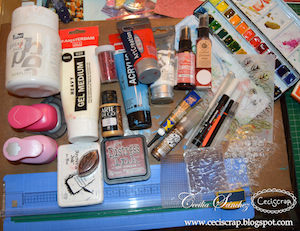
Here is all together:
Love Bookmarks

Supplies:

Gesso,  gel medium, acrylic painting, watercolors, markers, inks, acrylic stamps, glimmer mist, embossing paint, markers, glitter, pastel, stencil, cardboard, brushes, cutters, etc ..

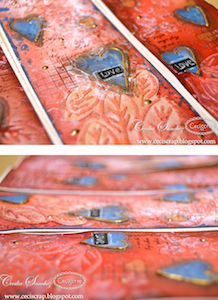
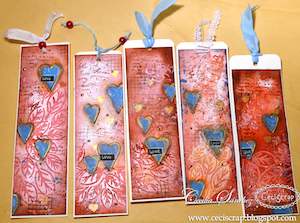
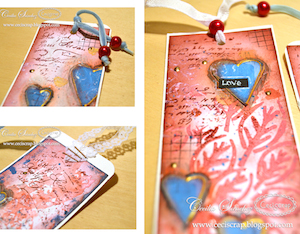
And here are my bookmarks for Valentine’s Day. Full of love.
Love Bookmarks

Love Bookmarks

Love Bookmarks

~*~*~*~*~*~*~*~*~*~*~*~*~*~*~*~*~*~*~*~*~*~*~*~*

My name is Cecilia Sanchez (CeciScrap) and I live in Málaga, Spain.

I am married and we have three gorgeous sons. They inspire me every day with their crazy ideas.

Since my childhood I liked the photography, drawing, collage and make photo albums with cuts and travel souvenirs. I also love crafts in general. In 2006, a few months after birth my twins, I discovered scrapbooking, digital first and then the traditional. I love to do 30X30 pages, cards and mini albums, and for a while now I am fascinated with the Art Journal and Mixed Media, and I do not imagine scrapbooking without getting my hands dirty.
I am inspired by everyday things, feelings … The art journal is a real diary for me, because sometimes I need to express feelings with colors and shapes.

I love learning and discovering new techniques and materials.
I am part of the European design team of KURETAKE, and I am also designer for a monthly blog challenge Sweet Card Club. I contribute with some blogs and digital magazines and organized Scrapbooking workshops in Malaga.

You can see more of me at:

ceciscrap.blogspot.com.es

facebook.com/ceciscrap

~*~*~*~*~*~*~*~*~*~*~*~*~*~*~*~*~*~*~*~*~*~*~*~*

.

.
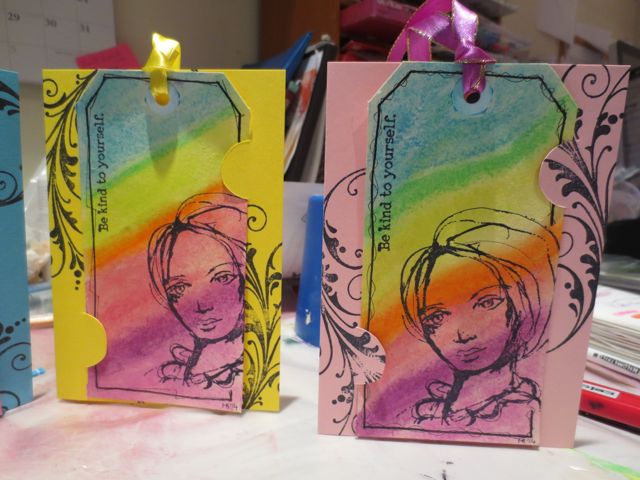
Turning Mixed Media Tags into Greeting Cards

~ * ~

This article is written by Michelle G. Brown

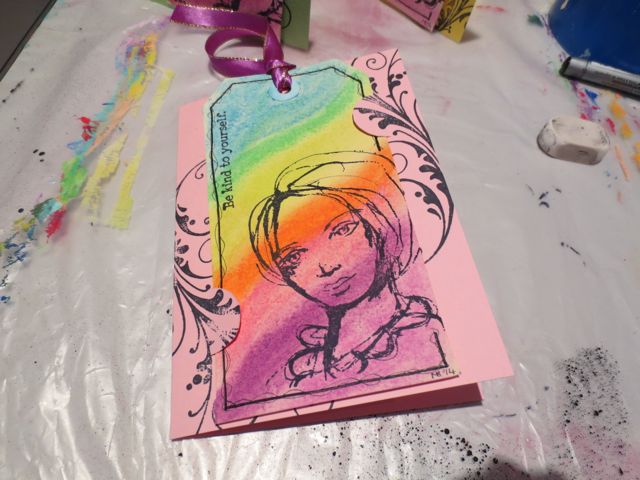
I love making handmade greeting cards from my family and friends – but I always worry that the hard work that has gone into making them won’t be appreciated and they will be discarded along with the store bought cards. I wanted to make a greeting card that would keep on giving, well after the birthday or event has passed – that’s when I decided to make a tag bookmark and integrate that into a card; that ticks both boxes – a handmade greeting card AND a gift

Greeting Cards from shipping tags

Materials:

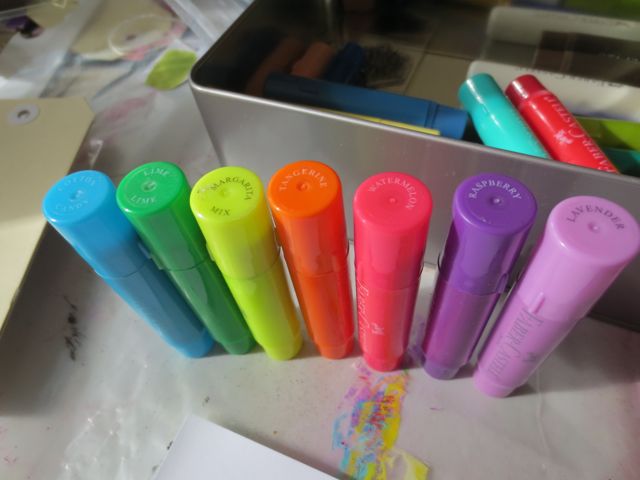
Faber-Castell Gelatos

Manilla shipping tags (here we used Size 7)

Rubber stamps (for the tags we used Ranger Ink Dina Wakely Media – Face in the Crowd MDR41313)

Black ink

Black markers and pens

Cardstock in colours to match the gelatos

Craft knife and cutting mat

Ribbon in colours to match

Making your Greeting Card Tags:

1. Gather materials and decide on colors. Here I was making Mothers’ Day cards, so I was after bright colours (and I just LOVE rainbow colours!)

handmade Greeting Cards from manilla shipping tags

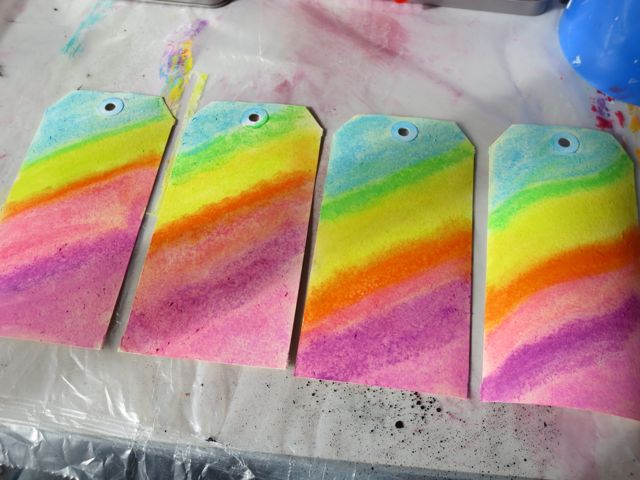
2. Create a colourful background with the Gelatos on the tags, activating them with a little water

handmade Greeting Cards from manilla shipping tags

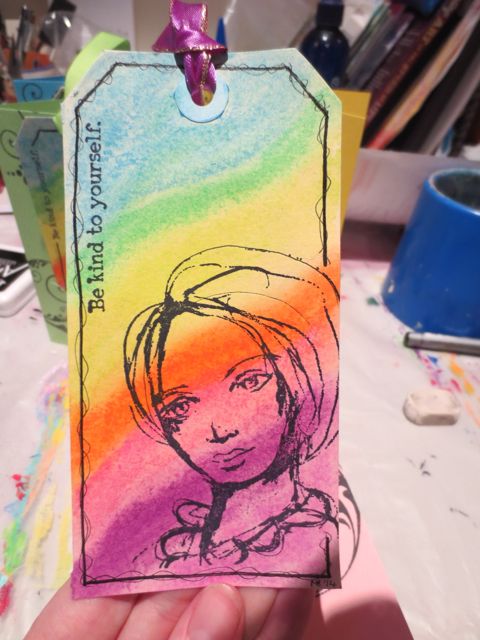
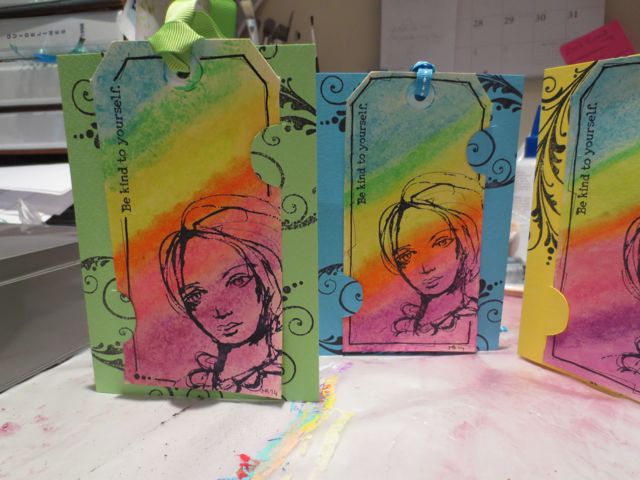
3. Add a stamped face and quote from the Dina Wakley set to your tag. Add a border with black marker. Add ribbon.

handmade Greeting Cards from manilla shipping tags

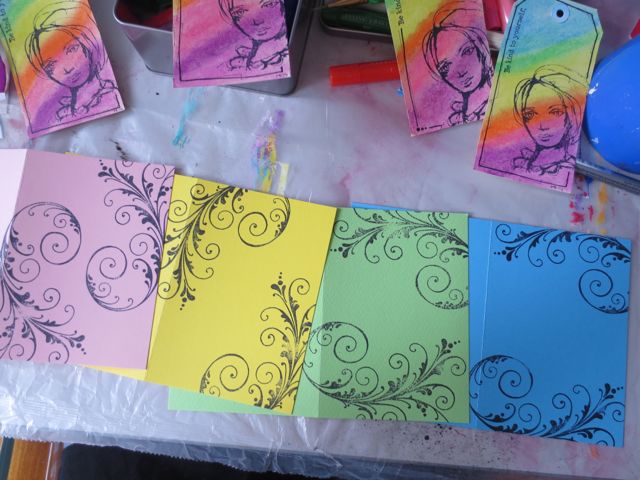
4. Add some stamped swirls to the card. Put the images around the edges as the tag will cover most of the card front.

handmade Greeting Cards from manilla shipping tags

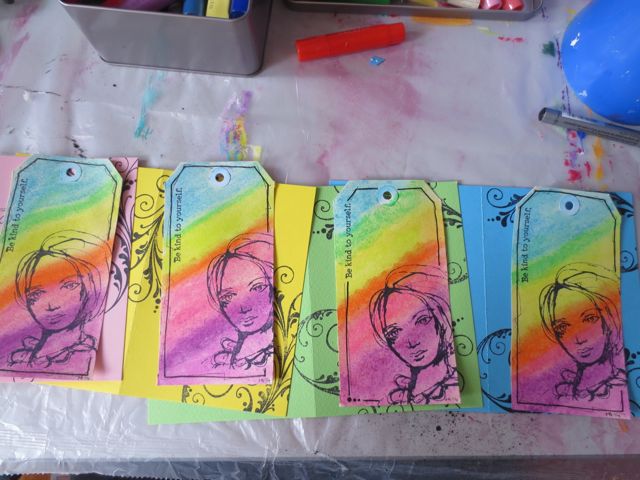
5. Match the tags to the background card stock

handmade Greeting Cards from manilla shipping tags

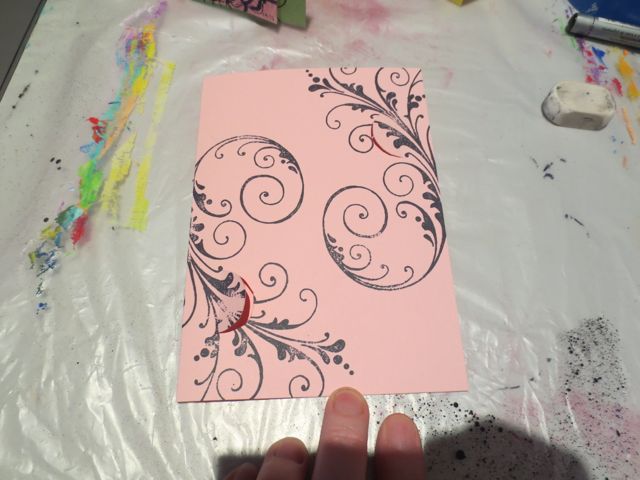
6. Now we need to create a way to attach the tag to the card. I didn’t want to glue it permanently, so I cut slots into the card.

handmade Greeting Cards from manilla shipping tags

I put the tag onto the card and used a pencil to mark the top right side and the bottom left side of the tag, so I would know how wide the tag is. Then a drew half circles and cut them using the craft knife and cutting mat. Then I tested the tag and found the slits needed to extend past the edge of the tag. Then I cut the slits a bit bigger.

7. The easier way to put he tags into the card was to “twist” it in

handmade Greeting Cards from manilla shipping tags

8. Your mixed media tag greeting card is finished! You can also write a note INSIDE the card to tell the recipient that the tag can be removed and used as a bookmark.

handmade Greeting Cards from manilla shipping tags

~*~*~*~*~*~*~*~*~*~*~*~*~*~*~*~*~*~*~*~*~*~*~*~*~

Michelle G. Brown is passionate about mixed media art and enjoys sharing her knowledge and techniques with you to allow you to express your own creativity. Michelle understands that many of us have an inner need to create. By learning a few basic techniques the amazing world of mixed media art is accessible to everyone!

Michelle lives with her husband and two boys in Melbourne, Australia. When she is not creating or on Facebook, she’s at karate training.

~*~*~*~*~*~*~*~*~*~*~*~*~*~*~*~*~*~*~*~*~*~*~*~*~

.

.

Where do Your Ideas come from?

~ * ~

This article is written by Ann Strecko Koeman

As an artist I am often asked “where do you get your ideas?”. I usually smile and politely reply “all around me”.  To the non-artist this seems like a flakey answer, or that I don’t wan’t to share some secret and mysterious portal of inspiration that only artist types have access to.  In other words I feel like Hermione in the Harry Potter series of books, who has magical powers but must live within the mogul world!  However, as lame as my answer sounds it is the truth.  Creatives get their inspiration everywhere, and anywhere.  Inspiration strikes when you are living, working, playing, and even sleeping.

where do mixed media ideas come from?

Personally I find that I get ideas all the time just by living and acting.  If I am ill or depressed and not moving I do not feel the same level of inspiration as when I am well but I still am open to any ideas.  Which is why I try to always have pen and paper near by to jot down any ideas I get.  As some of you are reading this you may be thinking “now, really, where do you get your inspiration?”.  For you, I am including a list of inspirational starting points.

From my every day life and interactions with my family.

A song playing on the radio.

Something I  overheard while eating out at the restaurant.

Seeing children playing outside.

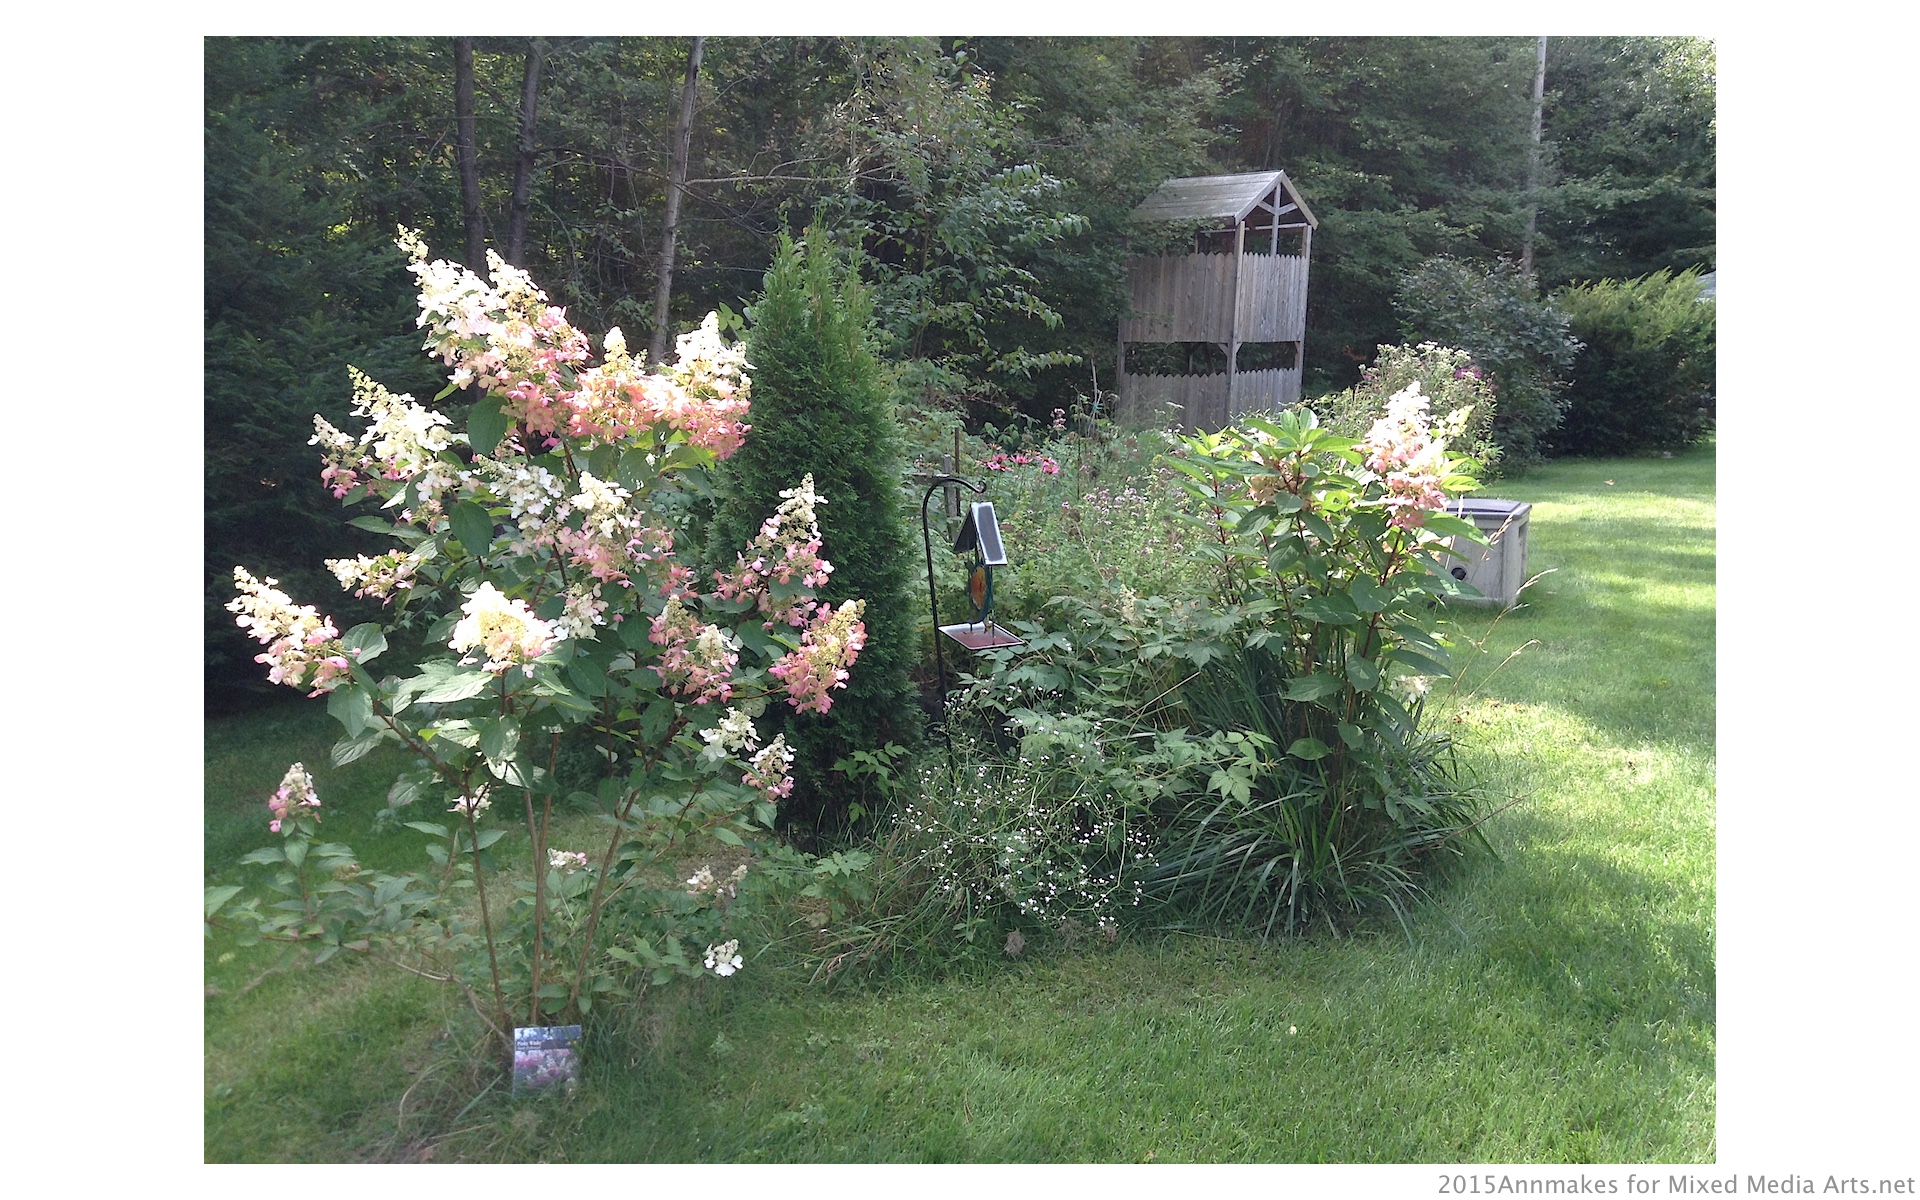
The woods behind my house.

Flipping through catalogs and magazines

where do mixed media ideas come from?

Tossing the junk mail into the recycling bin.

While watching a movie.

Surfing the internet, browsing through websites, Pinterest etc.

Looking through my vast collection of books (not just the art ones)

Cleaning around my house (ok I don’t do that very often)

Talking with other creative people.

Talking with my husband (get it, he’s not creative or so he  says).

Purging a closet.

While shopping (favourite one).

Walking around my neighbourhood.

Chatting with my neighbours.

Reading old magazines while waiting at the Doctor’s office.

Doodling while waiting at the Doctor’s office.

Checking out all the new products for pets in the shop while waiting for our cat to be seen by her Vet.

The people waiting in line at the post office.

My drive to and from home.

Packaging.

Artwork by other artists.

How- to leaflets in the department stores, and craft stores.

The hardware store.

Shovelling snow.

Waiting for my car to warm up in winter and cursing at the ice I have to chip off the windshield.

The new design on the paper coffee cup I just bought from the drive thru to warm up my frozen fingers from doing the previous.

My garden, any time of year.

The wildlife and the neighbour’s pets.

Taking a class.

Writing a blog post.

Attending a trade show.

The thrift store.

where do mixed media ideas come from?

Whatever it is that I am doing I stay open to any ideas that come my way.  There are days where I get a bunch of ideas that amount to nothing.  On the other hand sometimes a simple thought will develop itself into a larger idea and snowball into a project.  On the days that I just feel void of any creativity I just start doing anything, I doodle, splash some ink on a surface, rearrange my basket of scraps, or pull out an all in one beginner’s crafting kit just to get me going. My best days are when I am overflowing with ideas and I just scribble them all down like a mad woman into my many notebooks for fear I will forget them.  I also take photos often of anything that inspires me if I don’t have that pen and paper or can’t put into words the idea I just got.

So, I could list so many more ways to find inspiration but I think I have made my point.  Look around with an open mind and listen, there just might be the next big inspiration whispering to you.

~*~*~*~*~*~*~*~*~*~*~*~*~*~*~*~*~*~*~*~*~*~*~*~*~

Ann is the Artist and owner behind Annmakes®, a blog about Mixed Media Arts and Crafting in general.  She is based in Canada just outside the nation’s capital of Ottawa, Ontario.  As the winters are long and cold there, she is bunkered down in her studio/office with a mug of coffee in the morning and a mug of tea in the afternoon, and wishes she did not have to leave until the Spring thaw!

~*~*~*~*~*~*~*~*~*~*~*~*~*~*~*~*~*~*~*~*~*~*~*~*~

.

.

Mixed With Faith, Hope, and Love

~ * ~

This article is written by Kim Kelley

The holidays are over, the decorations are put away, time to get crafty and I don’t know about you, but it’s not a moment too soon for me.

This month I decided to make a memory tray that I purchased from Hobby Lobby. I have several and have always been a bit nervous to try one. So I chose the one in the shape of the cross, threw the nerves out the window and got to work.

Here is a list of what I used:

~ Cross Memory Tray by Paper Studio

~ White gesso by

~ Texture medium by Imagine Crafts: Original, Vintage and Shimmer

~ Spray mist by Lindy’s Ethereal Emerald and Maidenhair Fern Green

~ Miscellaneous charms, flowers and clothes pins from stash

~ Glue gun

~ Mod Podge

Most trays are basic black, but by using gesso and adding paint or texture and sprays; you can change the color real easy, all depending on what look you want to create.  Wanting a real light coating of gesso I added a bit of water, to thin it out, and brushed it on leaving areas where the black showed through.

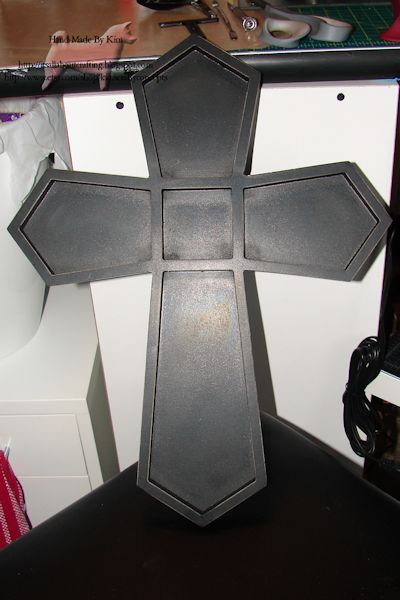
altered art memory box tray

Cross Tray

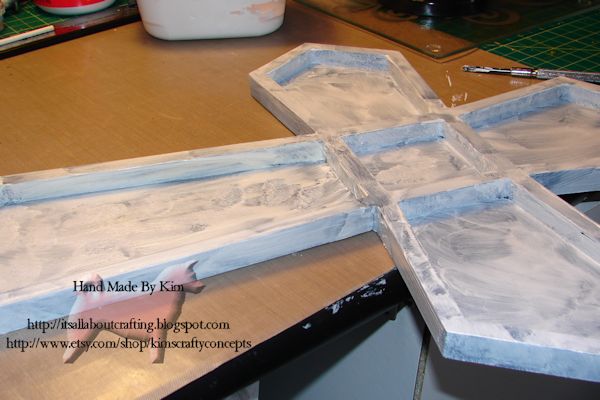
altered art memory box tray

Cross Tray with Gesso

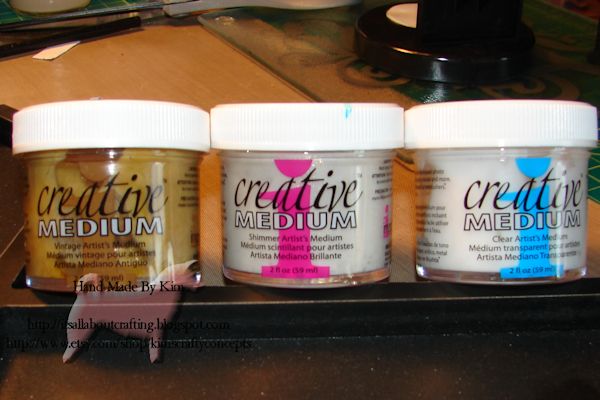
After letting it dry, with a little bit of help from my heat gun, I started to add my texture mediums. Here’s where it gets weird…I knew what I did not want it to turn out like: not clear, not one color, no flakes, grit or fibers. So I grabbed my “Creative Medium” in Vintage, Shimmer and Clear and started sponging it on, making sure to keep them somewhat separated so each shows through.

altered art memory box tray

Texture Medium

altered art memory box tray

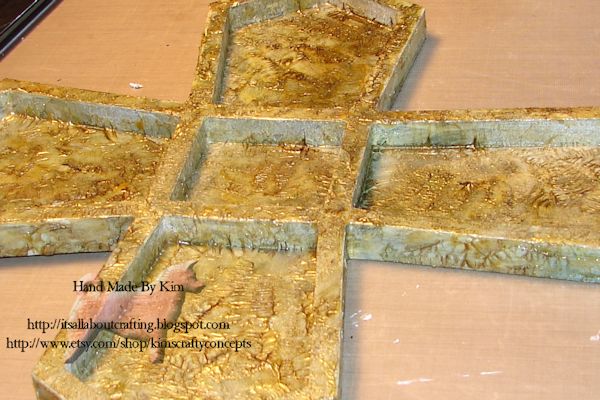
Tray with Texture Medium

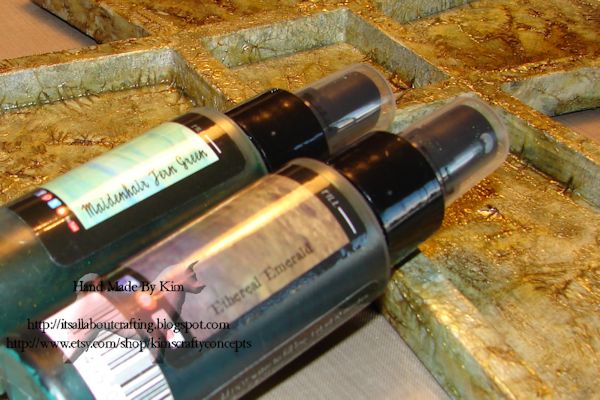
After letting the texture dry for about 2 hours I chose my sprays. This is probably one of the hardest parts of creating something, not knowing what the color will end up looking like. In my mind I had a soft patina color, but achieving that is half the battle. Looking through my spray bottles I decided to try Ethereal Emerald for the green hue and Maidenhair Fern Green to add that bit of brownish tone, hoping it will go well with the vintage color of the creative medium.  (Sorry the pictures did not turn out that great of the sprays before I added the embellishments.)

altered art memory box tray

Sprays

OK I said the hardest part of the creation process was choosing color…well I lied. The hardest part is the waiting, waiting for stuff to dry seems to take forever.  I usually end up having at least one other project going at the same time, sometimes more than one.

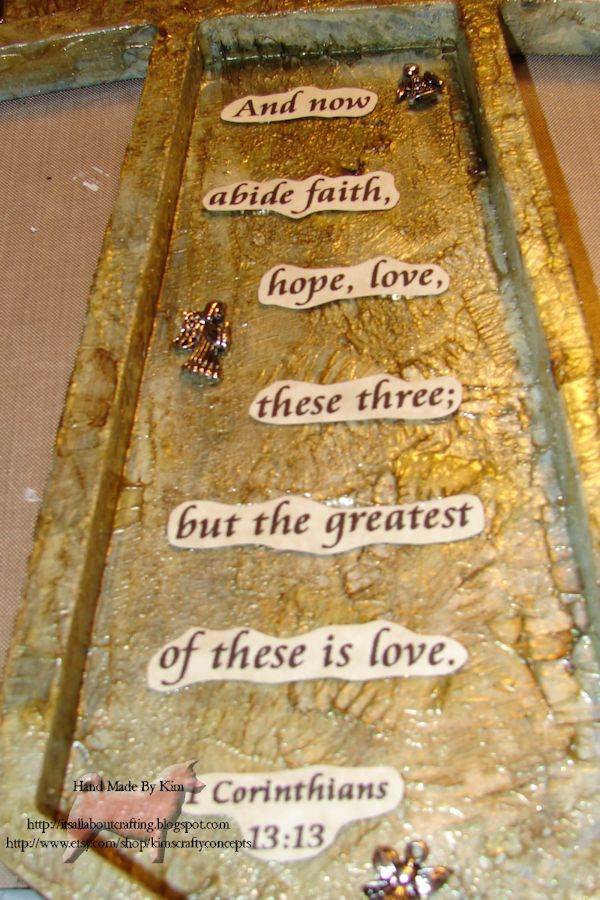
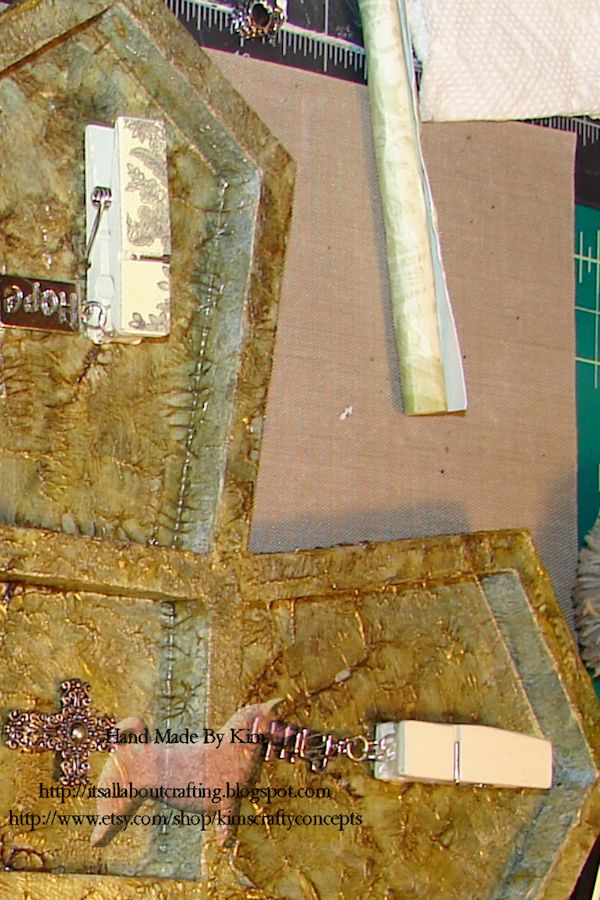
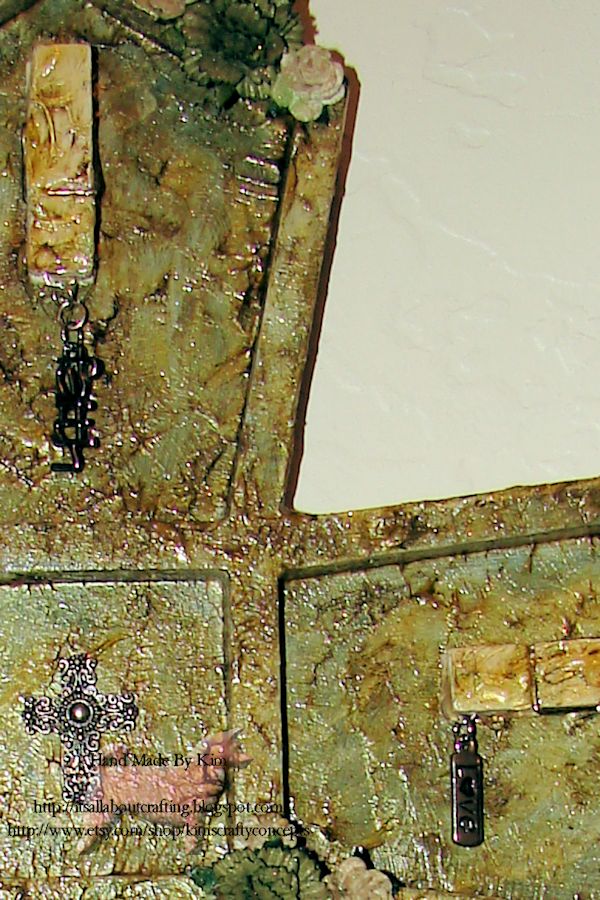
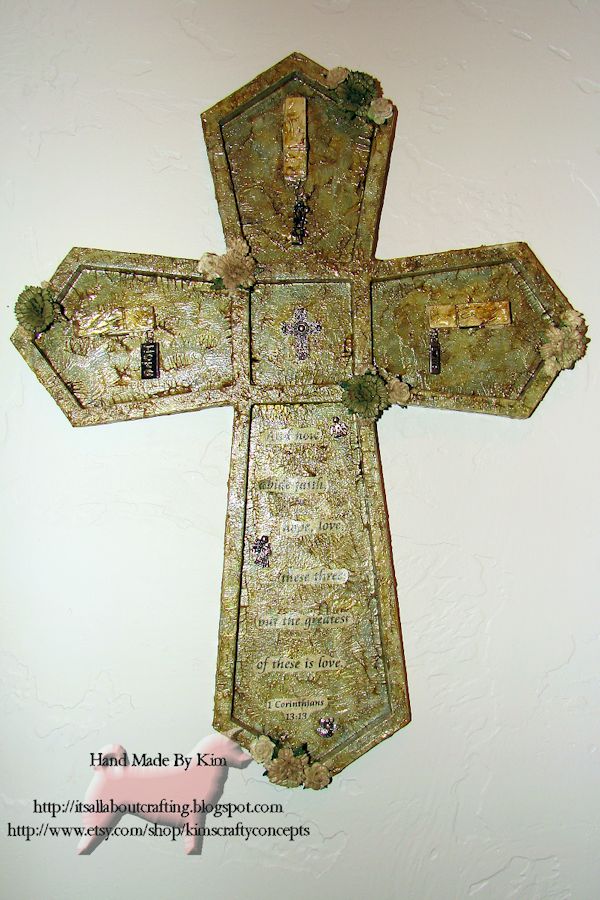
The next step was to determine what scripture I wanted…I chose to use I Corinthians13:13 “and now abide faith, hope, love these three; but the greatest of these is love”, deciding this would be a perfect choice to use some charms I had of “Faith”, “Hope” and “Love”. Wanting them to hang rather than lie flat I found some small, chunky clothes pins that would hold the charms perfectly. I did add some texture medium to the pins to make them blend in more. After adding all the embellishments I added more spray, covering the texture on the clothes pins.

altered art memory box tray

Scripture

altered art memory box tray

Clothes Pins

altered art memory box tray

Textured Clothes Pins

After texturing, gluing, and spraying I added some Mod Podge to seal it all up. I like using Mod Podge because I can go over any item with it; charms, texture, paper, whatever is on the project and it dries clear and FAST! Less waiting time for me.

Without further ado, here is the finished project:

altered art memory box tray

Finished Cross

(Again sorry for the photo, everyone I took came out with the scripture not as distinct)

Life is short, do something creative every day!

~*~*~*~*~*~*~*~*~*~*~*~*~*~*~*~*~*~*~*~*~*~*~*~*~

Kim Kelley is borderline obsessive about her crafting and her art. She loves mixed media art because you are free to go beyond your comfort zone, using your imagination and exploring an anything goes mind set. Kim loves to learn and explore new techniques and hopes that any art she creates leads someone to find their inner creative artist!

Sites: itsallaboutcrafting.blogspot.com and kimscraftyconcepts

~*~*~*~*~*~*~*~*~*~*~*~*~*~*~*~*~*~*~*~*~*~*~*~*~

.

.