Michelle G Brown | Mixed Media Art

Digital Quote Collage with Martice

~*~

This article was written by Martice Smith II

Digital Quote Collage with Martice

SUPPLY LIST: 

  • Image editing program/software (Photoshop, or a free program like Picmonkey)
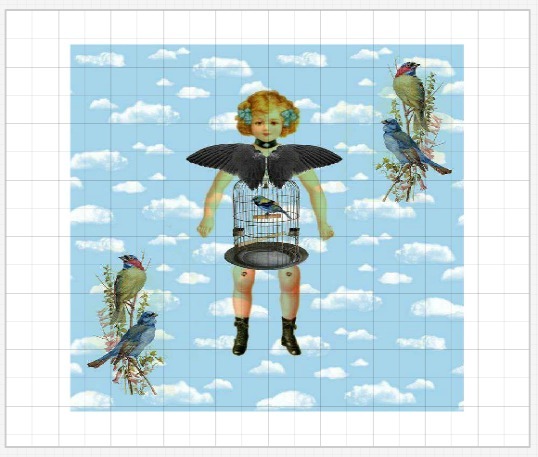
  • Monoprints / collage
  • White cardstock
  • Pigma Micron pens, black (05 and brush)
  • pencil + vinyl eraser

Creative Hand-lettering:


photo example of Martice demo of creative hand-lettering, using a pencil

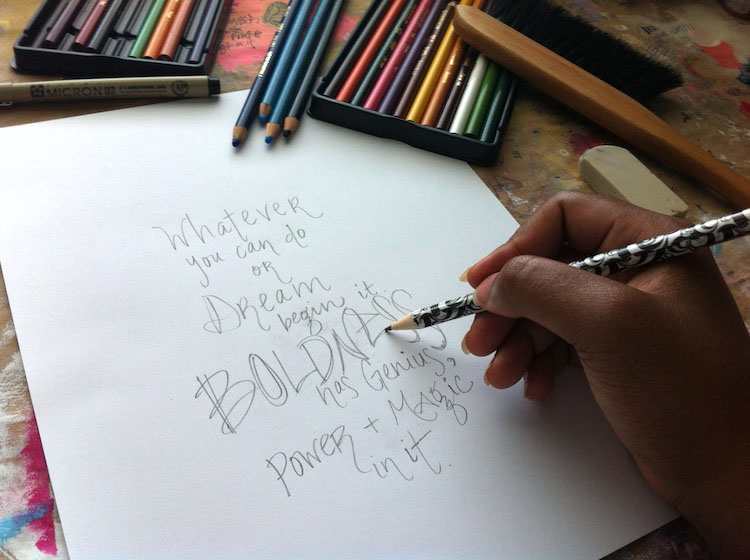
Write your favorite quote on white cardstock.

Have fun with this! Write some words bigger than others to put visual emphasis on them.

Made a mistake? No problem! I like using a vinyl eraser to remove mistakes and accidental graphite smears.

(TIP: place a sheet of paper under your palm to prevent smearing. Saves time on cleaning up your final image!) 

Creative hand-lettering, using Pigma Micron pens

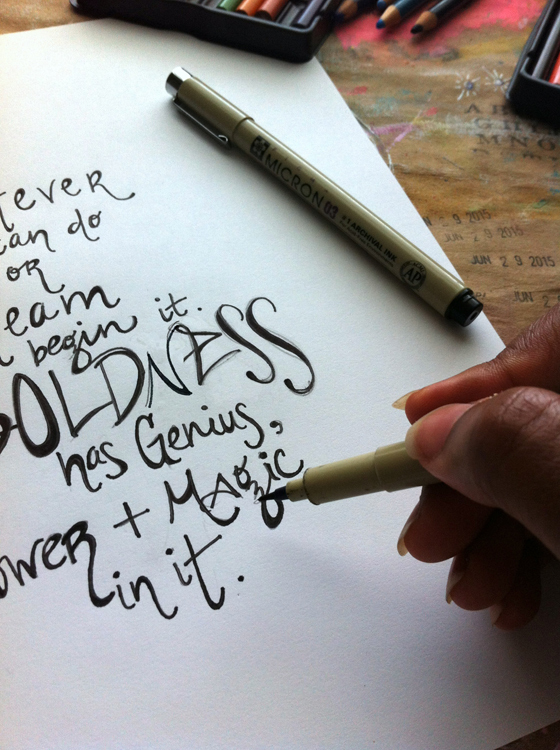
Trace over your quote with black Pigma Micron pens.

I traced the entire quote with 05 and a brush pen for a faux-calligraphy look. Add variety to the design of your letterforms. Making the downstrokes thicker will give the letters more visual weight! Finally, erase all pencil lines with a vinyl eraser. 

Now, let’s dive into the digital realm of this tutorial! 

STEP 1// Scan your monoprinted/collage background and your hand-lettered quote. These should be two separate documents.

(TIP: Adjust the settings so that your image is black and white with high contrast.)

STEP 2// Launch Photoshop. Open your monoprinted/collage background. Duplicate the background layer.

Next, create a new layer.

Using the rectangle tool, draw a rectangle large enough to fit the quote.

Fill the rectangle with a light color. (I chose yellow as my fill color.)

Lower the opacity to 48% or play around with the opacity level so that the monoprinted/collage background barely peeks through.

STEP 3// Select the brush tool then choose white for the brush color. Outline the rectangle with white dots.

Rearrange the layers: Click and drag the yellow rectangle on top of this layer of white dots. (Now the dots look as though they’re behind the yellow rectangle. Cool, huh? 😉

STEP 4// Import your hand-lettered quote into this document. 

Set the blending mode to Multiply. (Cycle through the various blending modes to see which one looks best for you.) Position the quote on top of the yellow rectangle.

(TIP: You’ll want the quote to stand out from the colored rectangle, so that the words aren’t competing against the image behind it. Black letters are best to work with.)

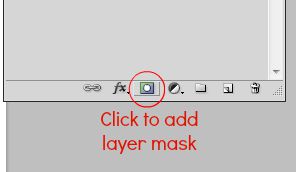
STEP 5// Add a layer mask

The purpose of a layer mask is, simply, a non-destructive way to edit an image. It gives you more control over certain parts of an image so that it only changes specific parts.

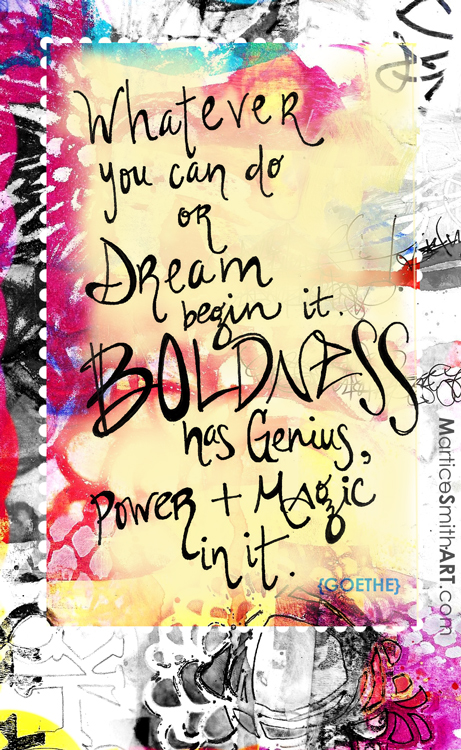
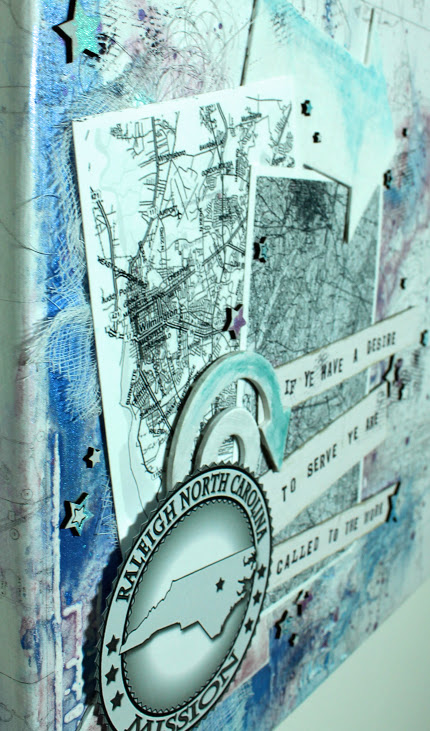
Take a look at the final image, below. Notice how you can see through certain parts of the yellow rectangle while other parts or more opaque?

Martice's completed, digital quote collage

To create a mask, just click on the layer with the yellow rectangle, then click the rectangle icon, next to the ‘create a new fill or adjustment layer’ thumbnail, at the bottom of the Layers panel  (See screenshot, below).

Screenshot of 'Add layer mask' icon, at the bottom of Layers Panel in Photoshop

STEP 6// Select the brush tool. Use black for the brush color.

With this approach, you’re removing color where you don’t want it. Or in other words, you’re erasing the yellow.

Switching the brush color to white adds the yellow back in.

(TIP: You can change the opacity, shape and size of the brush strokes by accessing the brush preset menu. Here’s how I remember which color to use: Black conceals, white reveals.)

Troubleshooting Tips: 

  • Did you remove too much color? If so, change the color of your brush to white. Paint in where you want the color to re-appear.
  • Vary the size of your brush to get as detailed as you wish.
  • If you make a mistake, simply alternate between black and white to “conceal or reveal” the color.
  • Try adjusting the Opacity of the brush to reduce the impact of the adjustment in some areas.

STEP 7// Merge layers and crop!

Merge all layers together. For this example, I gave myself one inch borders on the top, left and right sides and 2 1/2 inches on the bottom for visual weight.

STEP 8// Save and name your document

I hope this tutorial encouraged you to try your hand at digital art making! Feel free to ask questions, if you’re unsure about a specific step. I’m always happy to help 🙂

Happy creating!

~*~*~*~*~*~*~*~*~*~*~*~*~*~*~*~*~*~*~*~*~*~*~*~*~

Author bio:

Mixed-Media artist, designer, and instructor Martice Smith II

Martice Smith II is creative director of Martice Smith II – Illustration & Design Studio and online boutique owner. As a published multi-medium artist, Martice shares her passion as an educator and design team member for multiple manufacturers, where her tutorial topics range from merging traditional art with digital techniques, to fashion illustration, to creative hand-lettering and more.

Martice is committed to helping you create + live your most soulful, wildest + colorful dreams…to the maxx! Discover more tutorials on her blog and join her colorful museletter

~*~*~*~*~*~*~*~*~*~*~*~*~*~*~*~*~*~*~*~*~*~*~*~*~

.

.

“Under Glass” Mixed Media Steampunk Canvas

~ * ~

This aricle is written by Anjuli Johnson

I have become rather obsessed with cloche’s and bell jars.  I’ve started collecting them and using them to display books and things around my house.  I love the vintage, sophisticated feel they bring to any room.  Not to mention, they make me feel like part of a fairy tale (I’m thinking Disney’s Beauty and the Beast here, in case you were wondering).  So when I found that Tim Holtz had some mini bell jars in his Idea-ology collection, I couldn’t resist bringing home a package.

Under Glass- mixed media steampunk art

I grabbed a 6*6*1 ½ inch canvas, and turned it around so that I could use the center hole in the back as the display for the cloche.  I wasn’t sure exactly how this project was going to come together, so I covered everything with acrylic gesso to prepare the surface and help cover the staples and the transition from the wood to the canvas.  The rest of the process was a step by step decision of which elements to use and where.  To decorate the cloche, I knew I wanted a natural plant type of look, so I went to Michael’s to find some moss and maybe some small branches or twigs that would be made for models.  Well, I did find some moss and some small branches of grapevine- they were scattered on the ground, about to swept up and thrown away.  So I grabbed a small handful and asked if I could save them from the depths of the abyss- I didn’t even have to ask.  J  And now my mini cloche shimmers with a touch of green and a tiny swirling branch with a hint of moss hanging down.  Perfect!

I love the chipboard lamp and frame in the background that add a dollhouse type of look, especially as the background for the cloche.  Just seeing all these elements come together is giving me lots of ideas for how to use the rest of these mini cloche’s to create different types of assemblage pieces. I haven’t done much assemblage art, but I’m pretty excited to try some new techniques that could really stretch me as a mixed media artist.

Close up of mixed media steampunk art

I do plan on framing this with a floating frame to give it a more finished look.  Then it’s just a matter of deciding where to display it!

I made a video to showcase the whole process, and I’d love to hear your thoughts!  Feel free to leave comments and links to your own projects with Tim Holtz mini bell jars.

~*~*~*~*~*~*~*~*~*~*~*~*~*~*~*~*~*~*~*~*~*~*~*~*~

Anjuli Johnson is a Mixed Media Artist from Raleigh, NC.  She began her art career as a scrapbooker, and it’s been an evolutionary process every since.  She loves all things mixed media- paper, glue, paint, canvas, pens, wire, gears… the list goes on and on.  She is constantly trying to push through her fears to discover and develop her talents, meet new people, and learn from those around her. For more of her projects and techniques check out her blog at www.thefarpavilion.com.

~*~*~*~*~*~*~*~*~*~*~*~*~*~*~*~*~*~*~*~*~*~*~*~*~

.

.

Vintage Inspired Artist- Linda Hughes

~ * ~

This article is written by Linda Hughes

Hi, My name is Linda Hughes and I am a mixed media artist from Chicago, Illinois, USA. Even as a small child I have always enjoyed creating things with my hands. My mother taught me how to sew by hand and machine when I was 9 which began a life long love of sewing and creating all kinds of hand made items.

Linda Hughes, mixed media artist

I did for a time have an online store called Monkey Bizness (from 2007-2011). I started losing my eye sight a month after I turned 47, due to a rare form of fast accelerating cataracts and within just a couple short months found myself beyond legally blind. Wearing glasses was not an option so I had to close my store and stop working.  I had corrective surgery in both eyes in 2013, I am so grateful to be given a second chance at sight and back to doing what I love by creating.

Linda Hughes, mixed media artist

Now days I use my imagination and enjoy the whole process of creating what I hope others will view as memorable works of art. I have always been drawn to and adore anything vintage or Asian and incorporate that in my items I make.  I combine royalty free vintage images and graphic design to create a picture, a story if you may in the form of collage art. Then the fun continues!

Linda Hughes, mixed media artist

I take my finished graphic designs and print them either directly onto fabric or paper which is then used to create my handmade purses and/or note cards.

Linda Hughes, mixed media artist

~*~*~*~*~*~*~*~*~*~*~*~*~*~*~*~*~*~*~*~*~*~*~*~*~

Linda Hughes has created items & sold them in all kinds of mediums over the years but always get lead back to textile work. She has a background in sewing (took a year of sewing) and have done seamstress work off and on through the years and have worked at a costume shop for a time, creating costumes.

Linda Hughes, vintage inspired mixed media artist

Self taught herself graphic design when she got her sight back. Linda hopes that her story will inspire others to go for your dreams, don’t let anything stop you from what you want to do in life. We all have unique talents that we should share with the world to see!

To learn more about Linda Hughes, you can see her store here: hyenacart.com or find her on Facebook

~*~*~*~*~*~*~*~*~*~*~*~*~*~*~*~*~*~*~*~*~*~*~*~*~

Linda Hughes, mixed media artist
.

.

Adding Maps to Your Artwork

~ * ~

This article is written by  Anjuli Johnson

Mixed Media map collage with chipboard elements
I am such a map fanatic. I can’t explain why, there’s just something about them that sparks my interest. It could be any type of map, too; historical, topographical, maritime charts, star charts, it really doesn’t matter. I’m hooked. So, when I was asked recently to create a collage for a missionary who had been serving in Eastern Carolina for the past 18 months, I knew I needed some maps to showcase the cities where she had been assigned to serve. I had to find maps of three cities in order to complete the piece that was forming in my head. Luckily, finding maps to use is pretty easy.

There are multiple places you can find maps online. There are several Etsy shops that sell different sized prints of various cities in different formats and colors. This might be a good idea if you want something really big, but for the purposes of collage work, I needed something free that I could print off myself. Google searches are always a good idea, but some of the best places I have found maps, both for this project and ones I’ve done in the past, are libraries. Most local or state libraries have digital collections of maps that are provided free to the public and can be downloaded or printed. I have found so many maps of the same city from different time periods that I could stay busy looking at them for years- it’s fascinating to see so many in one place!

mixed media map collage art using maps of various cities

Since I was focusing on Eastern Carolina for this piece, the maps I used were from UNC Libraries map collection.
Love it! Once I found the maps I needed, I downloaded them and printed them on 4*6 photo paper. The background, however, I printed 18*24 on a large format printer and used it to cover the entire 12*12 canvas. I made sure to spray each one with Krylon acrylic coating to make sure the ink wouldn’t run as I worked with the paper.

So there you have it! Is anyone out there as obsessed with maps as I am? I’d love to see what projects you’re working on!

map collage using mixed media techniques to include maps of North Carolina cities

~*~*~*~*~*~*~*~*~*~*~*~*~*~*~*~*~*~*~*~*~*~*~*~*~

Anjuli Johnson is a Mixed Media Artist from Raleigh, NC.  She began her art career as a scrapbooker, and it’s been an evolutionary process ever since.  She loves all things mixed media- paper, paint, pens, wire, gears, clay… the list goes on and on.  She is constantly trying to push through her fears to discover and develop her talents, meet new people, and learn from those around her.  To see more of Anjuli’s art and techniques, check out her website at www.thefarpavilion.com  and like her Facebook page TheFarPavilion   Follow her on Instagram and Twitter as well.

~*~*~*~*~*~*~*~*~*~*~*~*~*~*~*~*~*~*~*~*~*~*~*~*~

.

.