Mixed Media Art Backgrounds

This article is written by Linda Giese

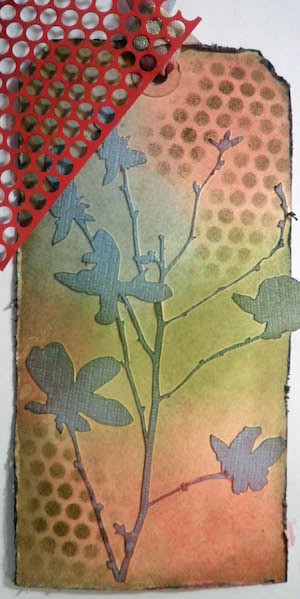
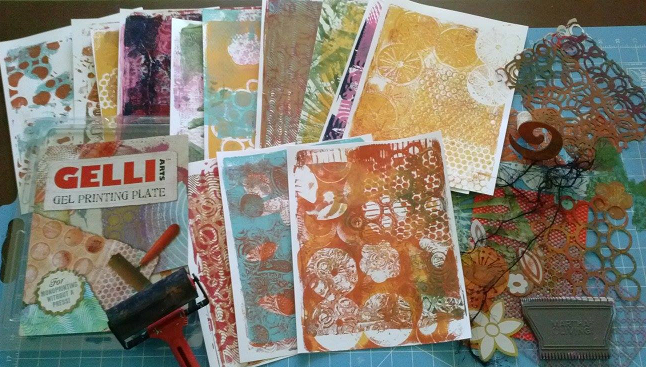
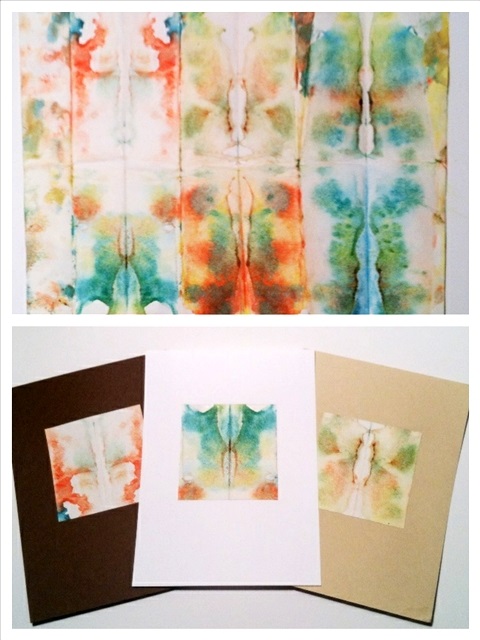
For the past year I’ve been putting papers over my plastic covered workspace. It began when I found a roll of thermofax for a dollar at a thrift store.  I put it on my workspace and soon it filled up with random stamps, paint splatters, doodles and notes.  I tore off another sheet and saved the first for collage fodder. I progressed to large sheets of newsprint that came as packing material in boxes.  A friend even gave me old architectural plans she was going to throw away.

Backgrounds

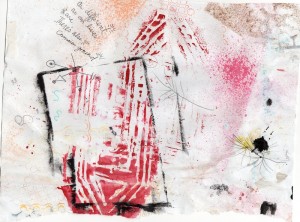
This is an easy way of making original collage papers to make your art unlike anyone else, and it won’t even take extra time!  Now I glory in messing up my surface papers with ideas and oversprays.  Since I teach at my dining room table, there are class notes and ideas for what my students want to learn next.  I test out new stamps and “stamp off” ones I’m using.  There are scribbles trying to get a pen to write or see what color it is.  Sometimes there is even a random fruit label!

Backgrounds

I’m not likely to run out of clean papers to mess up, but thought of an idea if I did.  I’d take sheets of junk mail with clean backs and tape them together.  Or as I’ve done, use sheets of scrapbook paper I don’t like that perhaps came in a stack of paper.  If you take a class, perhaps you can mess up newspapers under your work there too!  Good luck and happy splatters!

Backgrounds

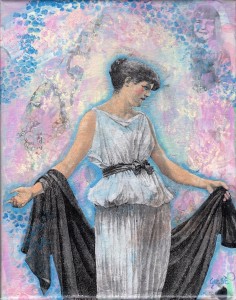
Materials I used for my canvas:
Underpainting is blended background of Americana orchid, butter and baby blue
I applied the torn collage papers with Americana DecouPage as well as the Dover clip art woman image
I used the above paints plus Americana cad red, bright yellow(to make the flesh color) and true blue for shading

Backgrounds

Backgrounds

~*~*~*~*~*~*~*~*~*~*~*~*~*~*~*~*~*~*~*~*~*~*~*~*~*~*~*~*~*~*

Linda Giese encourages comments, questions, and sharing your art journey at linda.giese@yahoo.com

She teaches classes privately and at a local scrapbook store, The Stamp Addict

~*~*~*~*~*~*~*~*~*~*~*~*~*~*~*~*~*~*~*~*~*~*~*~*~*~*~*~*~*~*

.

.

What is Viva Décor Paper-Soft-Color?

~ * ~

This article is written by Barbara Rankin

What exactly is Viva Décor Paper-Soft-Color?

How does it differ from other products you may already own?  This article is intended to demystify this product.

When you open the jar, you will see a jar that appears to be full of paint on a sponge.

Product picture with a view inside jar

Removing the top sponge reveals the paint distribution system.  You will need to replace the top sponge for use.

Product picture with top sponge removed.

The best way to apply this product is with a sponge brush. Here are two examples of sponge brushes that I think work well.  The red handled sponge applicator is by Viva Décor, and the white handled applicators are by Martha Stewart.  A nice, dense sponge works best.

Viva Décor and Martha Stewart sponge applicators

Paper-Soft-Color is perfect for making soft, gradated colored backgrounds.  They blend extremely well and are super simple to use.  If you are familiar with distress inks and how to blend them, then you will find that Paper-Soft-Color is much easier to blend, and you can obtain more even coverage in a shorter amount of time.  The colors are very soft and they are quite transparent.  There are 20 colors.

First, load the sponge brush by dipping it into the jar’s sponge.  You will use very little paint, thereby making it excellent for stenciling with very little to no bleeding.  Using different colors will give you a graduated, soft effect, to make a beautiful background.  You can even stamp with Paper-Soft by dabbing the color onto your rubber or silicone stamp for amazingly crisp results.

For my example, I first cut a silhouette flower image onto light blue adhesive-backed card stock with a cut file from my Silhouette machine.  I adhered it to a #8 manila tag and began coloring the background, beginning with the lightest colors:  Lime Green, Light Carmine Red, Moss Green, and Light Blue.   I used a heat gun to dry the tag between each color while using a separate sponge for each color.

Photo of tag with colored background

Not only can you see how well the colors blended into each other, but also how the colors on the light blue die cut changed, as well.

I love distressing the edges of most everything I make, and so I distressed the edges of the tag all around and colored with Walnut Brown Paper Soft.  The technique would be the same as when you do this with distress inks and a foam blending tool, but again, the Paper-Soft-Color process is much faster and just as effective.

Photo showing how to distress edges of tag with brown Paper Soft.

I wanted to share the stencil technique with you, also, so I used a scrap of Punchinella  to stencil the dots with the Walnut Brown Paper Soft.  I deliberately sponged some areas darker than others to show how you can blend the stenciled areas right into the background.

Adding color through a stencil.

Moss Green Paper Soft was sponged directly onto the “PEACE” wood veneer and adhered at the bottom of the tag, thereby proving it works well on wood, too.

Adding Paper Soft to wood.

Moss Green, Light Blue, and Light Carmine Red Paper Soft colors were added in sections to a piece of off-white seam binding and thread through a decorative button, then through the tag hole at the top.  Again, this product works well on fabric, too!

Adding Paper Soft to fabric

Scrap lace was added to the bottom of the tag.

One last thing I wanted to share is how to take a simple silhouette image and give it some detail.  By simply adding a large dot of the Cream Pearl Pen and pulling it out towards the end of each flower with a pin, it dries shimmery and dimensional.  You can also apply the paint through a stencil with a spatula for a dimensional look. Add glitter to the paint while still wet for added sparkle.

Viva Décor Paint Pen uses

You can further embellish the tag to your heart’s content.

~*~*~*~*~*~*~*~*~*~*~*~*~*~*~*~*~*~*~*~*~*~*~*~*~

Barbara Rankin is a mixed media artist who loves to teach.  She loves to learn new techniques and to share her knowledge with other artists.    She is a contributing artist in a book:  Make it in Minutes: Mini Albums, and has been published in several paper and online magazines.  She is currently on two design teams, Sin City Stamps and Altered Pages, and has served as a design team member for The Robin’s Nest and Creative Paperclay®, as well as guest designer for Craftwell USA and an upcoming issue of Unruly Paper Arts.

She lives in the Memphis, Tennessee, with her very supportive husband of 32 years, and her two Yorkies, Chloe and Zoe.

You can see more of Barbara’s work on her blog at Black Hole Art Studio or via Facebook – Black Hole Art Studio

~*~*~*~*~*~*~*~*~*~*~*~*~*~*~*~*~*~*~*~*~*~*~*~*~

.
Aweber code:
.

Creating Your Own One of a Kind ATC Backgrounds

~ * ~

This article is written by Shari Welch

I came up with this tutorial out of need. I needed to find a way to produce a series of artists trading cards with the same background color scheme, with each one being an original little piece of art in itself. I needed to get these out soon so I had to be creative with my time as well. GelliArts gel printing plate to the rescue!

Those of us who have used a Gelli plate will admit, it is VERY addicting. A few of the many facts I love about the gel plate is that it is reusable and cleans up easily. If you haven’t used one, the link below takes you to the Gelli Arts website. Their site will give you a better understanding of what the gel printing plate is, and what you can create using it. Besides instructions, projects, and a You tube video, you can order a plate too. www.gelliarts.com

I thought that I would print up two or three pages. But like I said, it is very addicting.

gelli plate, printed papers, and stencils

Materials I used:

  • 8×10 printing plate
  • Rubber brayer
  • White card stock 8.5×11 (cut to 8×10 after printing)
  • DecoArt acrylic paints
  • Yarn, texture tool, cut out decorative paper
  • Flower masks and stencils by Heidi Swapp
  • Stencils by Tim Holtz
  • Stencils by Prima

This template shows 8 artists trading card that can be produce out of a single gel print page if you are using the 8×10 size.

ATC template

I had a fall color theme in mind, so here are the two finished ATC background sets I choose. I still have a lot of gel prints left for yet another project. I won’t complain.

Pic of 8 ATC cards
ATC cards 2nd sheet
~*~*~*~*~*~*~*~*~*~*~*~*~*~*~*~*~*~*~*~*~*~*~*~*~

Shari Welch is a mixed media artist living in Denton Texas. She is known for using reuse and recycle materials in her artwork. She volunteers for SCRAP Denton where she is on the education committee, teaches workshops, art camps, and performs art demos. She is passionate about mixed media art and enjoys helping others discover their creativity.

Shari studied graphic design in Portland, Oregon before moving to Denton. Besides writing for mixed media art, she is currently a blogger for DecoArt, was featured in Mixed Media May, and has been in a number of art shows in her hometown of Denton including GDAC “It’s in the bag”, Thirty for thirty art show, and 3arthwurks gallery show.

You can see more of Shari’s artwork at www.facebook.com/my.altered.life
and on her blog shariwelch.blogspot.com

~*~*~*~*~*~*~*~*~*~*~*~*~*~*~*~*~*~*~*~*~*~*~*~*~

.

.

Ten-minute art idea: “Tie-dyed” paper

~ * ~

This article was written by Katja Blum

I love paper marbling. The technique fascinates me, and while it is possible to apply the color to the water or sizing in a controlled manner, the outcome can still be a happy surprise. I love surprises.

However, marbling is somewhat time- and labor-intensive. Making the size, preparing the paper and paints, creating the marbled papers, rinsing… Enjoying one of those busy lives we all lead these days, I rarely find the time. That doesn’t mean I have to do without creatively colored paper or happy surprises. If ten minutes is all you can spare for a little art fix, how about faux tie-dyeing?

“Tie-dyeing”, or rather fold-dyeing, paper is a technique that requires few materials and no preparation. You can do it at your worktable or at the kitchen sink while making tea. On hold with the utility company? No need to get frustrated. Put the phone on speaker and make art.

You need:

  • Paper

Most paper qualities will work. I often use my son’s sturdy watercolor paper or rice paper. Since rice paper is fairly thin, it’s a good idea to take several sheets at once and use the stick or folded techniques.

  • Liquid fabric or silk paints

I like Dye-Na-Flow. If you have one of those tie-dyeing kits with the prepared paints for a summer projects with the kids, see that there are leftovers, because they work really well.

  • Gloves
  • Bowl of water (or the sink)
  • • Wooden dowel and rubber bands (for the rolled technique)
  • Paper clips to hold folded papers together for drying

Materials for tie-dyeing paper

Fold the paper into various shapes. You can also crumple it up or roll it up on the dowel and fasten it with rubber bands.

Paper in different shapes: folded, rolled and crumpled.

Put on gloves, protect your work surface from paint spatters and apply random drips of fabric paint to the folded or crumpled paper and into the folds. Remember that too many colors might make mud – even though it can be very pretty mud!

You can use the paper dry or wet it before or while applying the color. Seriously, standing at the kitchen sink is a good way of doing this. When you are satisfied with the color application, secure the folded papers with paper clips and leave them to dry. Done.

Do resist the urge to unfold the papers before they are dry, because wet paper breaks more easily and there might still be wet paint in the creases that could run and cause streaks.

Once the papers are dry, unfold them carefully and enjoy the colors and patterns you have created. Some papers – the folded ones in particular – make terrific Rorschach tests. Let your imagination run wild and see what you can see. To smooth out the creases, iron the papers on a low setting or press them under a few books.

Tie-dyed papers

Tie-dyed papers

Of course you can use your tie-dyed papers as backgrounds for mixed-media pieces or as collage material – or display them as the pieces of serendipitous ten-minute art that they are.

Display your tie-dyed papers as finished art

~*~*~*~*~*~*~*~*~*~*~*~*~*~*~*~*~*~*~*~*~*~*~*~*~

Katja Blum is a writer and translator from Tulsa, OK. As an artist, she started with yarn, fabric and papier mache (rarely together), branching out into collage and other paper arts about ten years ago. Her latest obsession is making soft stuffies and art dolls – to the delight of her toddler. She also likes to find creative solutions for ugly or broken things around the house – to the delight of her husband.

You can see more of her work with fiber, paper and words at www.thewaywardsheep.com

~*~*~*~*~*~*~*~*~*~*~*~*~*~*~*~*~*~*~*~*~*~*~*~*~

.

.