~ * ~
This article is written by Michelle G. Brown
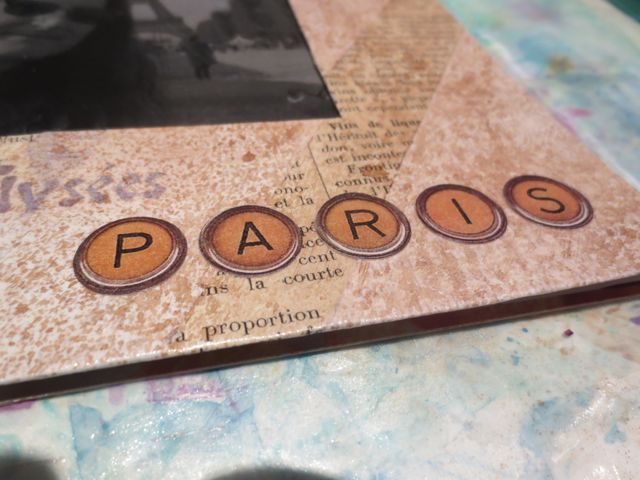
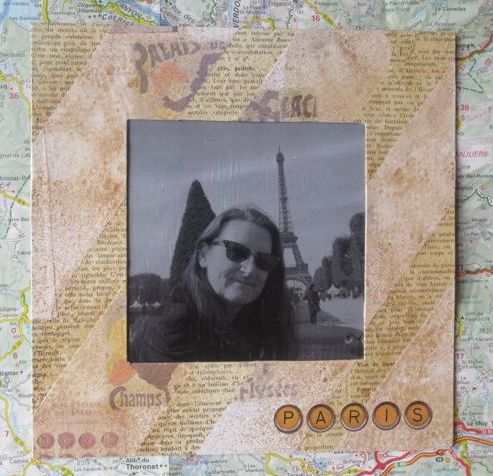
This week we are Celebrating France with our Mixed Media Art Ephemera Sheet. For my contribution, I wanted to showcase my favourite Paris photo, taken by my husband during our trip in October 2012, so I made this mixed media photo frame. It’s also my Facebook photo, so it holds a special place in my heart.
Materials & Tools
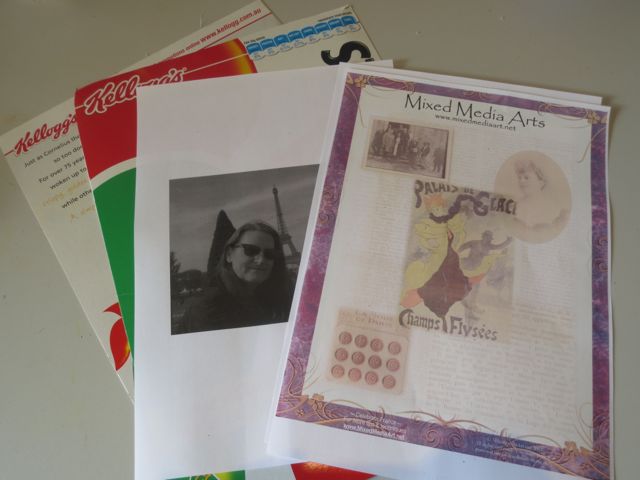
* Mixed Media Art Ephemera Sheet 22 – Celebrate France
* Printed photo
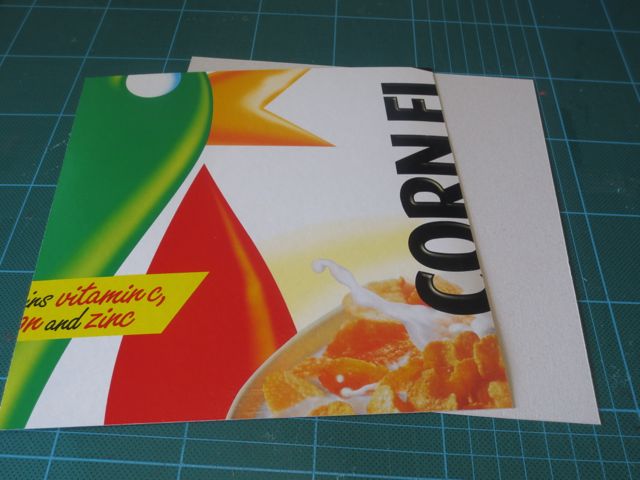
* Cereal box panels
* Mod Podge Gloss
* Walnut Ink
* Cutting mat, steel rulers and craft knife
* Brayer
* Sponge applicator
Instructions to Make a Mixed Media Photo Frame
1. Gather supplies and print out ephemera sheet and photo
2. Cut cardboard panels into two 8” x 8” panels
3. Decide on photo size and cut out middle of frame. Here I used a window of 4.5”x4.5”

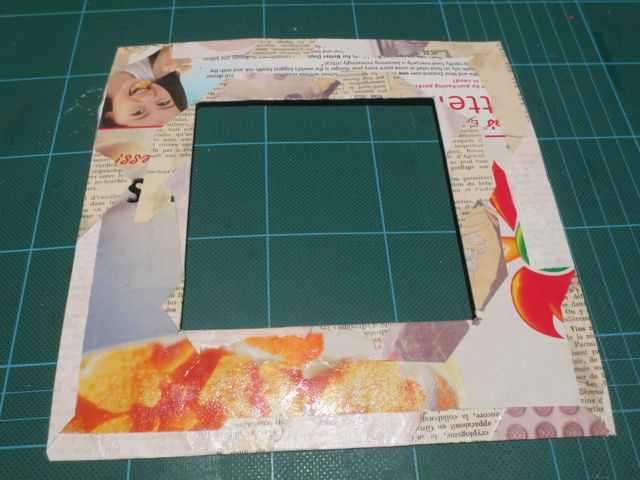
4. Tear ephemera sheets into strips. I used both the printed sheet and another piece of French text
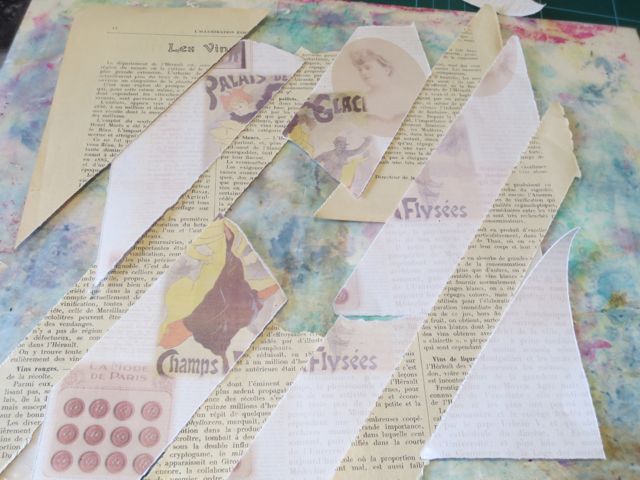
5. Using Mod Podge, adhere the strips onto the front of the frame and allow to dry.
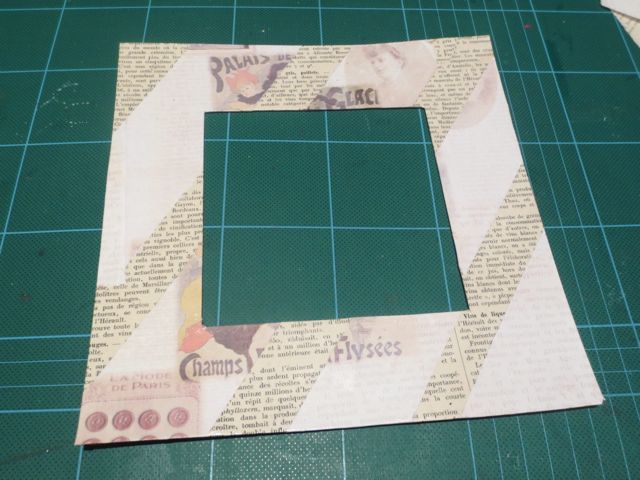
6. Then turn over and glue over the ephemera edges to make a nice finish around the edge of the photo frame.
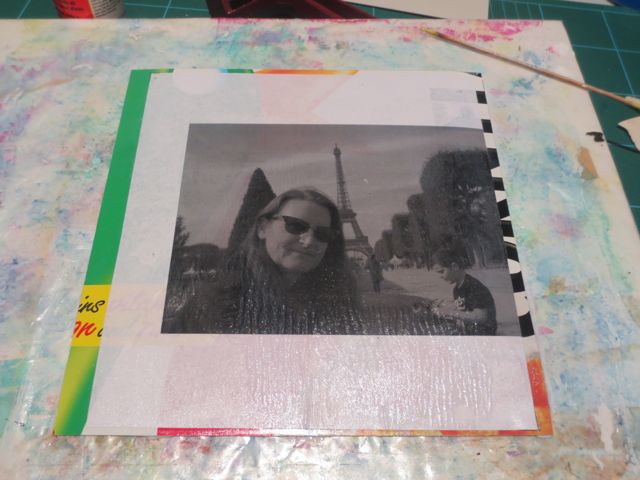
7. Add the Mod Podge to the backing piece of card and even out with the brayer. Add the photo and use the brayer to flatten out the photo. Set aside to dry.
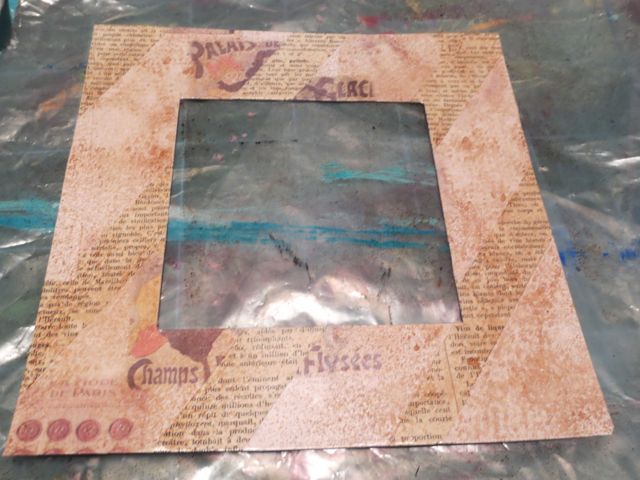
8. Add Walnut ink spray onto the ephemera sheets collage. This gives a nice antique tone and evens out the different ephemera strips
9. Glue the two layers together. I was worried about getting Mod Podge onto the photo when is spreads so I deliberately covered all of the photo and backing card with Mod Podge, then added the front frame. Weigh down and leave to dry over night.
Finish with lettering
I hope this project has inspired you to get some of your vacation pictures out of the computer and create a frame to put on display.
~*~*~*~*~*~*~*~*~*~*~*~*~*~*~*~*~*~*~*~*~*~*~*~*~
Michelle G. Brown is passionate about mixed media art and enjoys sharing her knowledge and techniques with you to allow you to express your own creativity. Michelle understands that many of us have an inner need to create. By learning a few basic techniques the amazing world of mixed media art is accessible to everyone!
Michelle lives with her husband and two boys in Melbourne, Australia.
~*~*~*~*~*~*~*~*~*~*~*~*~*~*~*~*~*~*~*~*~*~*~*~*~


Recent Comments