Intuitive Art Listening

~ * ~

This article is written by Honorata

I would like to tell you the story of the creative magic that happens to me every time I let my inner voice to talk to me through the creative process.

Honorata creates wonderful mixed media art journals

We all love to create- don’t we? But thinking a little bit more about how we create brings one simple questions- is it us, creators making what we plan in our mind or is it actually art talking to us through the process of creation? As I started my innocent journey into art I have realised that the more we trust our intuition we actually can get answers from the art making process.

Honorata creates wonderful mixed media art journals

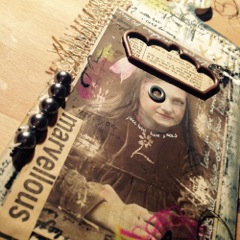
My favourite medium is a mixed media art journaling where I never really plan exactly what is going to be on that page. I have the feel, general vision and may have an urge to use certain colours but the final results is always unknown and very much unexpected. I trust the process and let it lead me. I strongly believe that art is giving us answers if we let ourselves to be guided.

Honorata creates wonderful mixed media art journals

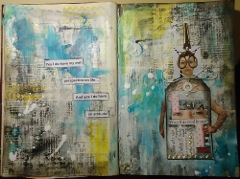
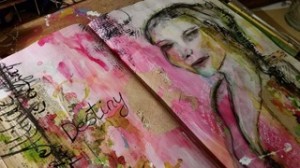
After putting the background by using variety of mediums like acrylic paints, ink sprays and watercolours I wait and by looking at the background see if there are any hints what to do next. Is there a shape formed from a random paint application, any interesting ink stains? If I feel like painting is the answer I go this route but if something is telling me the collage would be good I start flicking through the magazines. Some people would have the cut outs ready and categorised but I just simply browse my collection of old magazines and see what images are appealing to me. Next step is to alter the imagines so I would colour them, add paper hats, change the outfits, and add freckles or even moustaches! This is the stage when breaking any conventional rules is such fun….

Honorata creates wonderful mixed media art journals

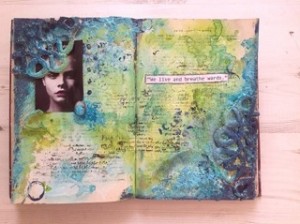
Once all images are completed and I liked the final collage I would see what meaning it has. Was there the message for me? Then something may pop in my head and a quote or sentence giving full interpretation appears. Sometimes I would browse books and magazines for some text or titles to give me a clue. This is how page “Find your soul” was created-the leftover cut out formed something like an empty person so that was a symbol of soul being lost. Another page “We live and breathe words” was simply an answer to may search for a quiet time without speech clutter.

Honorata creates wonderful mixed media art journals

This is how I developed my art journaling when started and was still too afraid to go into painting area. I would just start with random collages and enjoyed it more and more. Sometimes I would open my journal without any plan but the final creation would tell me more about myself that I could imagine. Journals would be telling me to be brave, to heal, accept and seek for my soul. Art is simply sometimes talking from our inner self…And what is your art whispering to you?

~*~*~*~*~*~*~*~*~*~*~*~*~*~*~*~*~*~*~*~*~*~*~*~*~

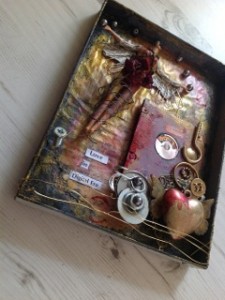
Honorata – I am a mixed media artist based in the heart of England. I love to art journal, paint mixed media and collect random objects to create quirky assemblage frames. I am the creative releaser, art listener and convention shaker strongly believing that we can connect with our true selves through the creative journey.  I am planning to run on line workshops when my mixed media art process is shining and sharing that magic. You can find me on Facebook or visit my new website artlysing.com.

~*~*~*~*~*~*~*~*~*~*~*~*~*~*~*~*~*~*~*~*~*~*~*~*~

.

.
Creating a Simple Mandala Design

~ * ~

This article is written by Shari Welch

What does a mandala look like? A simple explanation of what a mandala looks like is that it kind of looks like a detailed, abstract flower.

On a spiritual level, mandalas are useful devices for centering yourself and getting in touch with your own inner reality. When you color a mandala, you can connect with your spiritual core. Mandalas have long been a part of spiritual practice for many cultures around the world, from Celtic to Tibetan.

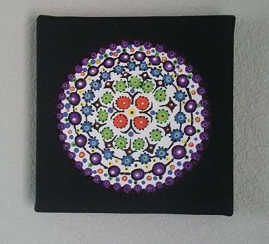
Mandalas can be very detailed works of art. Today I am going to show you a way to create a mandala that looks more difficult than it really is. We will be using lines, dots, circles, and a few diamond shapes. You can create this in an hour or less.

Finished mandala piece

Lets get started

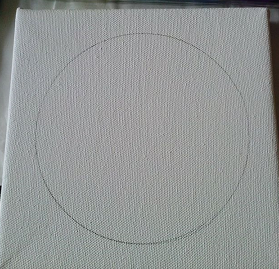
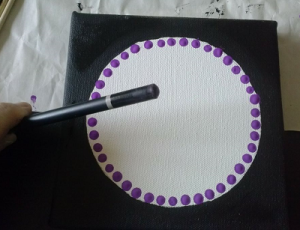
1.Start with a 4×4 canvas. I used a lid as a template to create the main circle.

canvas with plain circle

2.Paint around the outside of the circle black.To create the dots you can use the end of a paintbrush, an eraser, glass head pin, dowel, pencil lead, pencil end. You should experiment because each one will give you a different size of dot. Continue to add dots to fill your circle.

dots around inside edge

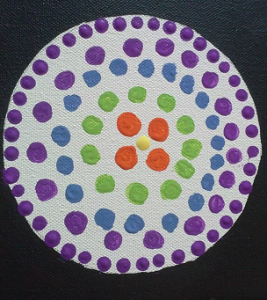
dots filling circle

3.Experiment using different shades of the same color family, complementary colors, etc. on top of the dots that are already on your canvas. You can add small dots around larger ones to define them. It’s really up to you.

dots on dots

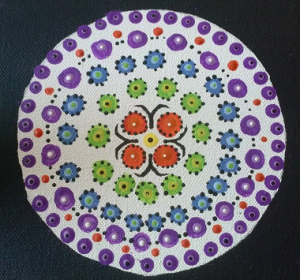
4. Experiment with dashes, diamonds, curved and straight lines until you are happy with your piece.

Finished mandala piece

~*~*~*~*~*~*~*~*~*~*~*~*~*~*~*~*~*~*~*~*~*~*~*~*~

I have been creating art for as long as I can remember. I studied graphic design in Portland,Oregon before moving to Denton, Texas and putting all my focus on mixed media art. In addition to being an article writer for mixed media art, I am on the Creative Paperclay Design team, The Robin’s Nest Design team and a blogger for DecoArt. I strongly believe in giving back. I volunteer at Scrap Denton Creative Reuse Center where I teach workshops, art camps, and perform art demos. I am very passionate about mixed media art and helping others discover their creativity.
You can follow more of my work on My Altered Life’s blog and My Altered Life on FB

~*~*~*~*~*~*~*~*~*~*~*~*~*~*~*~*~*~*~*~*~*~*~*~*~

.

.
Positive Thoughts for your Side Table

~ * ~

This article is written by Shari Welch

Everyone needs a little positive thought to start your day. I created this pretty little art block of positive thoughts to jump start my mornings. You can make this easy project in a few hours once you have all your materials on hand.

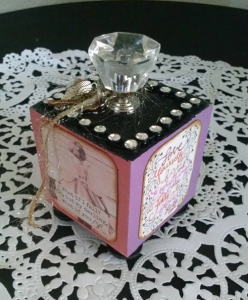
Positivity Art Block Final Product

Shari Welch creates a lovely DIY art block to keep beside her bed

Materials

  • Wooden block
  • Inspirational words
  • Drawer pull
  • Wood pieces for feet (optional)
  • Fibrous string
  • Embellishments
  • Diamond mesh ribbon
  • Americana multi-purpose® paint
  • DecoArt® glamour dust
  • Distress ink
  • Aleenes® tacky glue
  • E-6000® glue

Let’s get started!

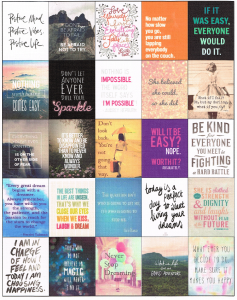
1. You will need to find images that will fit on your art block.
To save time you can use online companies that sells images you can download and use right away. If you are using images you find on the internet make sure that they are truly intended for free use and are not copyrighted.

sheet of images for the positivity block

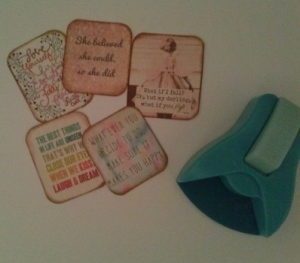
2. Cut out your images. I used a corner punch to make my edges rounded.
Define the edges with Distress ink.

Images used for the positivity block

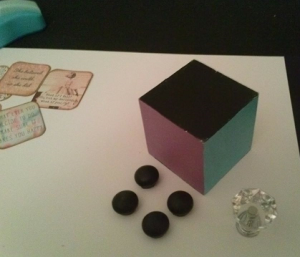
3. Paint the art block and the feet. I choose to paint each side a different color to coordinate with my images. You can use a hairdryer to speed up the dry time. Glue the feet on the block using E6000.

Materials for the project

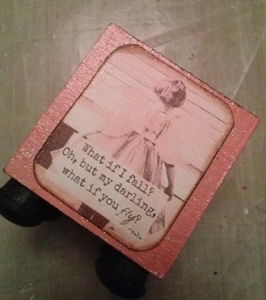
4. Glue your images on the block with tacky glue. When Dry you can accentuate around the sides using the glamour dust. I added it around the images and not on the entire image. I did paint the entire top with glamour dust because I liked the look. Feel free to use your creativity.

single image on the positivity block

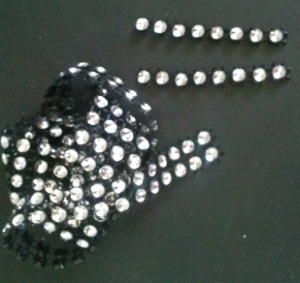
5. Cut the diamond mesh ribbon to fit the block and glue with tacky glue.

diamond mesh ribbon for embellishement

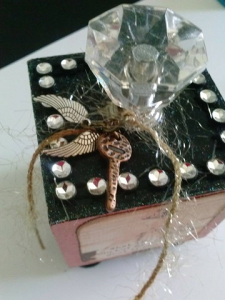
6. Tie your embellishments on the fibrous ribbon and then onto your drawer pull.

positivity box top view

~*~*~*~*~*~*~*~*~*~*~*~*~*~*~*~*~*~*~*~*~*~*~*~*~

I have been creating art for as long as I can remember. I studied graphic design in Portland,Oregon before moving to Denton, Texas and putting all my focus on mixed media art. In addition to being an article writer for mixed media art, I am on the Creative Paperclay®Design team, The Robin’s Nest ®Design team and a blogger for DecoArt®. I strongly believe in giving back. I volunteer at Scrap Denton Creative Reuse Center where I teach workshops, art camps, and perform art demos. I am very passionate about mixed media art and helping others discover their creativity.

You can follow my journey on my facebook page My Altered Life and  My Altered Life’s blog page

~*~*~*~*~*~*~*~*~*~*~*~*~*~*~*~*~*~*~*~*~*~*~*~*~

.

.
Altered Object – A Clock with a Mixed Media Facelift

~ * ~

This article is written by Katja Blum

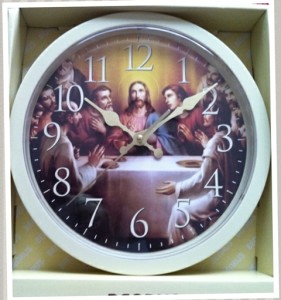
Yep. They gave us a Jesus clock. It was a joke gift for my husband’s birthday. The fact that he is Jewish seems almost insignificant in the… well… face of this clock, because even if he wasn’t… Anyway, this is it.

The Jesus clock in all its glory

I’m not a huge fan of joke gifts, because most of them are expensive landfill fodder, but after taking a deep breath or six, I was able to see past the weirdly glowing disciples and realize that this was a working clock that didn’t have to stay the way it was. My husband was generous enough to give it to me.

What to do with it though? Somehow I didn’t just want to spray paint it a pretty color, add some ephemera and call it good. I wanted it to have personal meaning, because despite the garish decoration, the original subject has rather a lot of personal meaning to many people.

Mulling it over, the clock reminded me of my favorite piece of memento mori art. It’s an easy pick, because this piece is the only one I like at all. Most art of the genre reminding us of our own mortality is way too creepy for my taste. However, my German hometown of Hamburg has a famous park cemetery, Ohlsdorf Park. One wall of its crematory is adorned with a gilded metal clock. The lettering underneath reads “Eine von diesen” – one of these. Just that.

I wanted to create a clock that would remind me to use some of the hours on it to make more time for the most important thing in my life apart from my family – writing.

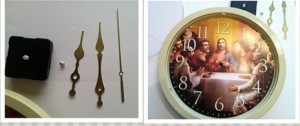
First, I took the clock apart. With most of the cheap plastic clocks, this is easy. The clear cover pops right off (if it doesn’t, you can always break it off and not use it again). Be careful when disassembling the clockwork. Again, it is not hard, but you obviously want the parts to be functional.

Taking the clock apart

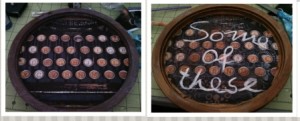
Once the clock was in pieces, I gave it a coat each of black spray paint and white gesso to lay the groundwork for a slightly distressed look. The frame was painted with a mixture of chocolate brown and copper. Then I covered the face with the image of an old typewriter, added a layer of Mod Podge and some alcohol ink. For a bit of texture, I used various stamps with white and copper ink.

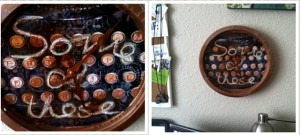
The lettering, “Some of these”, I did freehand with my favorite method – white oil pastel and alcohol ink. I added a dab of paint here and there for depth and contrast.

The new clock face

The gold metal hands were colored with copper alcohol ink and got a thin coat of spray varnish. You want to mess with the hands as little as possible to ensure that the clock will work well. They should not be weighed down with too much decoration or have sticky layers of paint.

I reassembled the clockwork and decided to leave off the cover.

Some of these are for writing

Now it is hanging right above my desk reminding me to write more, make art and be happy for “all of these”.

~*~*~*~*~*~*~*~*~*~*~*~*~*~*~*~*~*~*~*~*~*~*~*~*~

Katja Blum is a writer and translator from Tulsa, OK. As an artist, she started with yarn, fabric and papier mâché (rarely together), branching out into collage and other paper arts about ten years ago. Her latest obsession is making soft stuffies and art dolls – to the delight of her son. She also likes to find creative solutions for ugly or broken things around the house – to the delight of her husband.

You can see more of her work with fiber, paper and words at www.thewaywardsheep.com

~*~*~*~*~*~*~*~*~*~*~*~*~*~*~*~*~*~*~*~*~*~*~*~*~

.

.