Doing What you Love and Loving What you Do

~*~

This article is written by Stacy Steinborn

DO WHAT YOU LOVE, LOVE WHAT YOU DO…This quote has actually stirred controversy in the aspect of making a living and not making a living.  It is mostly interpreted in a thought of what you should do or not do to make money.   Whatever it is you do, you should love it.  The argument for some is, yeah, but you will most likely be broke. Living in Nashville Tennessee the music Capitol of the world, this city is full of thousands upon thousands of broken dreams and hungry musicians.   Now I can’t even begin to write about this argument.   I’m still figuring that one out.  However, I can look at this quote and read into it a little deeper.

Stacy Steinborn

But first, how I came to the conclusion of my interpretation.

As a creator of mixed media art, have you ever finished a piece and shown it to someone and they don’t really react like they like it. I truly feel some people just “don’t get” mixed media.  And I’ve simply come to the conclusion that, that’s okay.

This is a scenario that has happened to me on more than one occasion: At a gathering or function, a group will be talking and someone introduces you to an artist.  In the introduction they state that you do artwork as well.  Then you are questioned, what kind of art do you practice, what style of painting do you prefer? What do you use? And do you sale your art?  To answer these questions I usually say: mixed media, I guess my own style and, I have sold some pieces.  Then you are probed to show your work and you get out your phone show the other artist your pictures, and….crickets.  I find myself for a week or more after this scenario, questioning my talent, my ability, my work in general as an artist.  What an empty feeling to have when it comes to something I love so very much!

If you have ever had a doubt because of other opinions of your work, or because you are just not to the point that you are sure of yourself… I want to encourage you to think about you and your art in a new way.

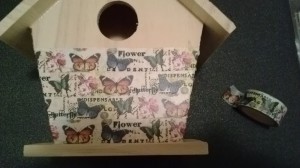
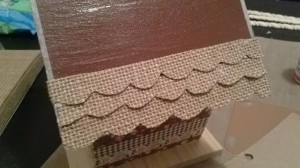
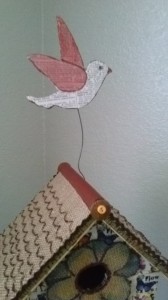
That bookmark, painting, shadow box, frame, whatever you  have put your hands to do, to make; it has never existed before, not ever.   There may have been other things created like it or similar, you may have looked at something else for inspiration but that very thing you made is the only thing with the brush stroke you made, the glitter you sprinkled, the paper you added, whatever it is you do to your piece of art, it can never be duplicated.  It can never be done the exact same way again.

You are a creator.  You created something.

cre·a·tor   (kr-tr)

n.

1. One that creates

cre·ate   (kr-t)

tr.v. cre·at·ed, cre·at·ing, cre·ates

1. To cause to exist; bring into being. See Synonyms at found1.

2. To give rise to; produce: That remark created a stir.

3. To invest with an office or title; appoint.

4. To produce through artistic or imaginative effort: create a poem; create a role.

adj. Archaic Created.

What a great definition of you!

The next time an “artist” or the “art community” tries to snub, insult you or your work because your not in the right circle or are not up to their standards please read the above definition.  You my dear are amazing because you brought something into existence with your hands and your mind and it is here now.   Take joy in your creation!

This finally brings me to the quote, DO WHAT YOU LOVE, LOVE WHAT YOU DO.  Now think about it again.

DO WHAT YOU LOVE = If you love to paint in circles, in lines, sideways, cross-ways, glue everything but the kitchen sink to your painting, cut strips of paper, add salt to your watercolor, do image transfers, paint the same subject over and over, use stamps, whatever style it is that you use, and you love it…then DO it.

DO WHAT YOU LOVE! When it comes to creating YOUR piece of art…you are the only one who can decide if you love how you do it.  If you are passionate about it you will keep on working at it until you figure out what you love if your not there yet.

Now the second part to that quote.

LOVE WHAT YOU DO = If you have finished your work.  You owe it to yourself to love it. If your not in love with it, love the fact that you did it, you learned from it, even if its what not to do next time, love it.   Don’t let someone’s interpretation of your art become your interpretation of your art.  You did it, you LOVE it! Love your style, love your mistakes(this makes you grow, I promise) love your whimsy, love your boldness, love your subtleness, love the colors you put together, love the lines, love the stamps you chose to use, love your paint covered clothes, love it…love yourself!

If you’ve been struggling with your ability or your style, if its because you are still growing or you have been snubbed or insulted.  Remember three things..

You CREATE

DO WHAT YOU LOVE

LOVE WHAT YOU DO

Stacy Steinborn

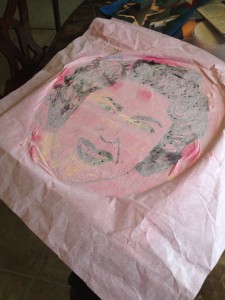
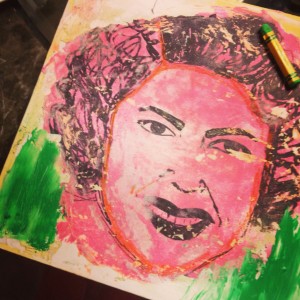
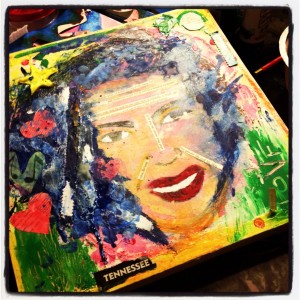
I’m closing with a painting that I created using an image transfer of a sketch I did with a sharpie on packing paper.  I used ephemera from an old love story from the thirties and the colors that make me think of the honky tonks in Nashville. I used a heavy gel medium and a stencil to make the star pop and added layers and scraped off layers until I had the texture I desired.   This lady looks as if she sang in the honky tonks of yesteryear and she was happy, because she did what she loved.

Stacy Steinborn

She has earned her laugh lines, her wrinkles from  her hurts and her worries.  She wore the stories of her life written on her face. But she smiled because she did what she loved.

Stacy Steinborn

I hope you are inspired to love what you do.

Flood your art with your inner light,

Stacy Steinborn


~*~*~*~*~*~*~*~*~*~*~*~*~*~*~*~*~*~*~*~*~*~*~*~*~

Stacy Steinborn lives in a little suburb outside of Nashville called Spring Hill TN in the USA. More of Stacy’s work can be found on her Flooded in Light blog.

~*~*~*~*~*~*~*~*~*~*~*~*~*~*~*~*~*~*~*~*~*~*~*~*~

.

.

Making Gift Card Wrappers

~ * ~

This article is written by Katja Blum 

It took me a while to like gift cards. In my family, gift cards, certificates and all kinds of “pick your own” gift promises were seen as an afterthought, proof that the giver didn’t remember until the last minute or put much thought into your gift. I don’t think that’s true. In my mind, a gift cards says “I think you deserve a treat, please pick exactly what would make you smile right now”. Whereas very sensible and frugal people might use a check or cash to do sensible and frugal things, a gift card is fun. It doesn’t look like “real” money, and it’s perfectly okay to spend it on something entirely frivolous.

Hurray for gift cards – but let’s be honest: Sometimes we do buy them at the last moment. So here are a few ideas for some mixed media flavored presentation ideas for holiday gift cards.

General tip: You shouldn’t glue, staple or otherwise directly attach a gift card to anything, because you might damage the strip on the back. Many cards come with a small envelope anyway.

If you have a day

If you still have a day, anything is possible! How about making a collage or mixed media painting and using the envelope as part of the background? Just affix it to whatever paper or canvas you are using and paint, stencil and decorate right over it. Just make sure you have the flap facing out, so the card can be inserted and removed without ripping the envelope off the painting. And don’t glue the flap shut with gel medium. Or make your own simple card pocket by gluing a piece of paper, card or fabric to the piece on three sides, leaving the top open. While painting, you can slip a piece of freezer paper into the pocket to avoid pasting it shut.

If you have a few hours

I like felt ornaments. They are easy to make – and felt can be decorated with anything. The coffee shop card I’m giving this Christmas is going in a little mug ornament, which I plan to slip on the recipient’s tree, so she can find it later.

Gift Card Wrappers

  1. Cut out the mug shape and oval “coffee”. Use the shape as a template to cut out the mug again, but without the top. This will be the pocket for the gift card. You can do this with any shape. If you want to make a snowman, for instance, just cut out the bottom snow balls. Or you could cut out your ornament and put a rectangular pocket on the back – but I like the card peeking out in the front.
  2. If your ornament is a bit on the big or your felt is on the thin side, you can make it less floppy by gluing a piece of cardstock to the base ornament.
  3. Sew the coffee to the bigger mug shape, also attaching a ribbon loop for hanging, and decorate the front pocket – beads, embroidery, paint, glitter glue … The back of the pocket won’t be visible later, so it doesn’t have to be super neat.
  4. Sew the front pocket to the mug base. If, like me, you are not very good at sewing, thin thread in a similar color and a regular sewing needle works best, as your stitches will not be very visible.
  5. Place the card in the pocket. Give away.

If you have an hour or less

The second item on my art to-do list for 2015 is “Learn origami”. I’m fascinated by the possibilities, especially in combination with fabric. If you are really pressed for time, a simple origami envelope can be folded in minutes. Almost any kind of rectangular paper works for the envelope here – and you can, of course, decorate it as much as time allows. Using a piece of fabric gives an unexpected twist – lightweight to medium fabrics work best, my favorite is quilting cotton.

The fabric needs to be stiffened to hold the creases better. You can spray it with a thin coat of varnish or laundry starch. The one thing I always have in the house is white glue, so I dunked the fabric rectangle in a solution of two parts water and one part white glue. Smooth the fabric out on a sheet of freezer paper or plastic. It will peel off when dry. The fabric is going to be stiff, but can still be decorated with needle and thread, if desired.

I used paper to demonstrate the folding steps – a rectangle of about 8″ x 11.5″ makes an envelope big enough for most cards.

Gift Card Wrappers

Folding instructions:

  1. Fold the paper in half, make a sharp crease and unfold.
  2. Fold the top right and bottom left corners down to the center crease.
  3. Fold the top left and bottom right sides inward so that they meet the vertical triangle edges.
  4. Turn the paper 90° and fold the right side down to meet the bottom edge. Tuck the edge into the flap at the bottom.
  5. Fold the left side to the top edge and tuck it into the flap as well.

Slide the gift card into the slit in the center. The envelope has two layers of folds. Slip the card into the bottom layer, because the short sides are open in the layer above.

Gift Card Wrappers

Enjoy giving a gift card to someone special this holiday season!

(Oh, and just in case this article is giving my family some festive ideas – remember the mantra, guys: books, crafts, coffee!)

~*~*~*~*~*~*~*~*~*~*~*~*~*~*~*~*~*~*~*~*~*~*~*~*~

Katja Blum is a writer and translator from Tulsa, OK. As an artist, she started with yarn, fabric and papier mache (rarely together), branching out into collage and other paper arts about ten years ago. Her latest obsession is making soft stuffies and art dolls – to the delight of her toddler. She also likes to find creative solutions for ugly or broken things around the house – to the delight of her husband.

You can see more of her work with fiber, paper and words at www.thewaywardsheep.com

~*~*~*~*~*~*~*~*~*~*~*~*~*~*~*~*~*~*~*~*~*~*~*~*~

.

.

Are you a Multitasking Artist?

~ * ~

This article was written by Ann Strecko Koeman

As a multi tasking mixed media artist I find the need to use multiple sources to market my work and to earn an income. I make different kinds of crafts and art which I try to sell through word of mouth, my ETSY store, and in my booth at a local flea market. I also teach various art making techniques in a local scrapbook store. Now when I teach I have another customer base to which I can advertise about my wares in my stores. When I am in my booth I advertise that I teach as well. In addition to the paid work I write, run a blog, and do Design work for other blogs. All of these are more ways to market myself.

Multitasking Mixed Media Artist

Operating a small business such as my craft booth at a local indoor flea market is different from my other selling experiences and I am learning about the pros and cons as I go. I am going to focus on the positives right now which are many. The market is another place for me to advertise what I am capable of making. There I can bring my new ideas the good ones and the not so good. I can learn what people like and don’t. I do get more of a learning experience than I make money most of the time, but that is valuable too.The other things I do is sell supplies that I have either grown tired of or have too many of. Now this also allows me to buy more supplies at wholesale prices which in turn makes me save some money on my own art making.

My booth also allows me to make new contacts and gather some interesting material for writing a book one day! The other benefit of operating with in a flea market is that I can shop for some great stuff myself, and usually at a very good price. The other vendors know about me and sometimes bring me used or new supplies they come across in their own treasure hunting. I also get customers who ask if I will do custom work, repairs, or teach . These are all great opportunities and definitely keep things interesting.

Multitasking Mixed Media Artist

Teaching is another opportunity that I overlooked for too long. Now I have learned about the opportunity for more exposure and also gained new knowledge. Besides earning an income from teaching and advertising my work, being part of a store’s creative team has given me access to new materials and a very much appreciated discount whenever I teach. Through this experience I meet new people which leads to other possibilities for teaching and selling.

Multitasking Mixed Media Artist

In addition to the paid work I gain a lot of exposure from participating in social media. I run my own blog ~ Ann Makes, I write and design for other blogs as well as Mixed Media Art. Sometimes this enables me to not only gain valuable experience and make new contacts but free products and discounts to use for more art making.

~*~*~*~*~*~*~*~*~*~*~*~*~*~*~*~*~*~*~*~*~*~*~*~*~

Ann Strecko Koeman is a Mixed Media Artist living and working near Ottawa, Ontario Canada. She is a wife and the mother of two teenage boys. She loves to work with lots of medias from paints to fabrics, papers to metals, used to new, and everything else! Her blog is Annmakes and can be seen at annmakes.blogspot.com

~*~*~*~*~*~*~*~*~*~*~*~*~*~*~*~*~*~*~*~*~*~*~*~*~
.

.

How to Make a Mixed Media Birdhouse

This article is written by Shari Welch

Have you noticed the decoration of your own birdhouses at your local craft store? Are you tired of just slapping paint on them? I will show you how you can make a unique, one of a kind birdhouse using mixed media materials.

I decided on creating a decorative indoor birdhouse.

Here are the materials I choose to use and how I incorporated them into my project.

I wanted to try something new with my washi tape.

It worked perfect for the outside.

Shari Welch Mixed Media Birdhouse

I cut out a series of scalloped shaped strips for the roof, a flower for the opening, and a banner using burlap paper.

Shari Welch Mixed Media Birdhouse

I didn’t want it to just sit on a table. I purchased a wooden candlestick and a round disc of wood. I glued them together and then attached them to the bottom of the house.

Shari Welch Mixed Media Birdhouse

I attached a wire to my roof, and then to a decoupaged wooden bird with E6000 glue.

Shari Welch Mixed Media Birdhouse

To finish, I added 2 types of buttons,small rick rack, shaded the flower and roof-line with Memento Dew Drop Dye Ink Pads and markers.

Now I have a decorative piece for my small table!

Shari Welch Mixed Media Birdhouse

~*~*~*~*~*~*~*~*~*~*~*~*~*~*~*~*~*~*~*~*~*~*~*~*~

Author bio:

Shari Welch is a mixed media artist living in Denton Texas. She is known for using reuse and recycle materials in her artwork. She volunteers for SCRAP Denton where she is on the education committee, teaches workshops, and performs art demos. She is passionate about mixed media art and loves helping bring creativity into the lives of others.

You can follow Shari and her mixed media art at www.facebook.com/my.altered.life
.

.