Michelle G Brown | Mixed Media Art

Mixed Media Mask Making

This article is written by Roger Adell

Here are my first attempts and the basic process. Actually I was pretty pleased with both the process and outcome. I followed the website instructions-

-blew up a balloon, cut strips of paper, mixed the paper mache paste I purchased from Dick Blick (Elmers Glue Paste), and put a layer of paste paper on the balloon. I placed 4 layers on the balloon letting each layer dry separately.

– I cut the balloon in 1/2 using a straight razor and now had 2 faces on which to work.

– cut holes for the eyes and mouth – build a nose out of aluminum foil ( I use that a lot) – paper mached the nose and stuck it on the face with my glue gun (Hobby Lobby).

– I then added more paper mache building up the face to show character.

– I then added all sorts of things- twigs for eye brows, larger lips, big ears out of aluminum foil and paper mache, earrings, a rolled up cigarette in his mouth, a beard from drier lint.

– I then painted it with acrylic paint–done.
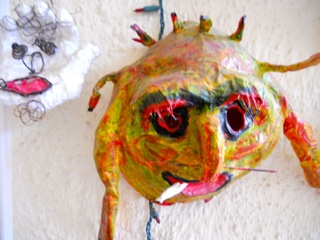
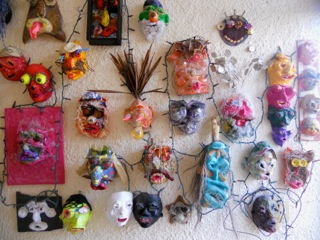
paper macheSince my first mask I have made at least 100 more- all using found objects once I have the basic form from paper mache. I incorporate masks of all sizes on boards with other found objects and paintings and collages.
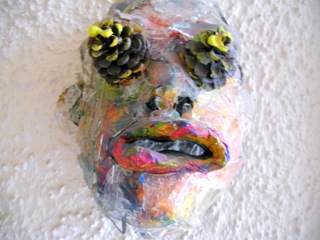
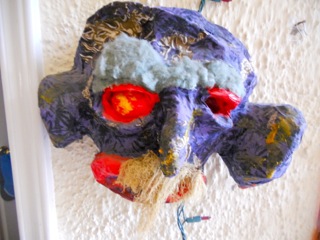
Mask creationHow to create unique masks

Materials-

– anything and everything I can find including-

– broken glass, bottles, shells from nuts, coins, fabric, used fabric softener sheets from the drier, plant leaves, party favors from tables, nails, screws, nuts and bolts, wire, hats, keys, yarn, found pieces of animal skulls, egg shells wrapped in paper mache used as eye balls, palm fonds, candle wax, drift wood from beaches, shells, tequila bottle stoppers, crepe paper, grapefruit and orange pits, stuffing from old pillows used for beards and hair, milk cartons as forms for heads, packing material, flattened soda cans for noses, found metal pieces from junk yards, spoons, knives and forks used for noses and ears.
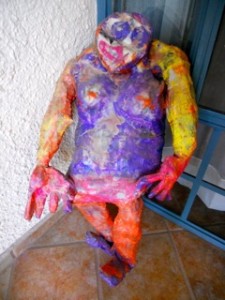
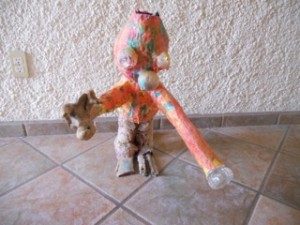
paper macheMask Making Ideaspaper mache

Where the journey has taken me since-

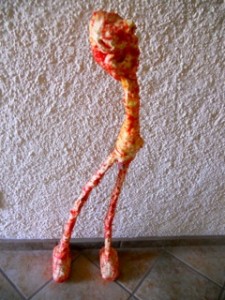
– Once I got comfortable experimenting with paper mache I started to make life size figures which started looking like ET invaded my studio- I covered up all sorts of life-size materials such as discarded pinyatas, used paper towel rolls, large wadded up rolls of newspapers and Walmart bags, etc.

– Once I have the figure made I go back to my roots and cover it in paper mache and found objects and a new process I am enjoying- melted candle wax from old candles just lying around. I have also been known to “borrow” old candles from friend’s houses when I notice the wick gone. I save every broken glass from every dinner party my wife and I give or attend. Mas Tequila sometimes does that. I have also applied melted candle wax (with old brushes) to boards mounted with painted masks and the effect is wonderful.
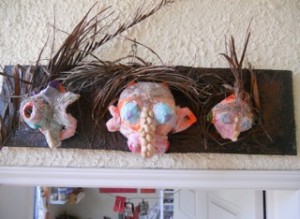
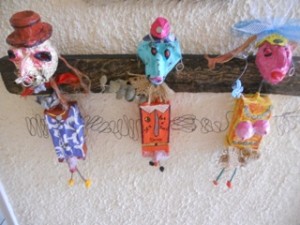
Things that you can create from scrap materials

Create masks

Masks

– I have started making large mixed media pieces on wooden boards I get from the Carpenteria across the street- Much cheaper than canvass and just as effective- the boards also handle candle wax very well. I use an inexpensive electric hot plate to melt the candles (outside in ventilation is best). Candle wax for my purposes is fine and much less expensive than an encaustic process, which I still wish to learn.

~*~*~*~*~*~*~*~*~*~*~*~*~*~*~*~*~*~*~*~*~*~*~*~*~

Roger Adell has been a B and W film photographer for 40 years (until now) and wanted to try some other types of expression. Roger loves faces and one day he checked out a book on mask making at the Santa Fe public library (He is residing in Mexico for the past 2 years). When he saw some of the mask creations he thought it would be fun to make some of his own. Not knowing what to do. He “googled” mask making and a lot appeared including how to make paper mache masks with directions and materials. That day, 4 years ago, he started creating masks.

~*~*~*~*~*~*~*~*~*~*~*~*~*~*~*~*~*~*~*~*~*~*~*~*~
.

.
A Canvas Journal

This article is written by Francesca Albini

I am always exploring ways to organically blend digital with traditional media. I love the versatility and portability of digital, all its different and new brushes, the infinite palette, the possibility of integrating text and images, but often I find that digital art looks very flat and cold when printed.

On my latest trip to America, I thought it would be fun to keep a digital journal, more practical, quicker, less messy. But messy is good, it’s tactile, three dimensional, just like travelling. I felt that I had to find a way to bring to life my digital journal, so that it would be true to my travel experience, the emotions and adventures.

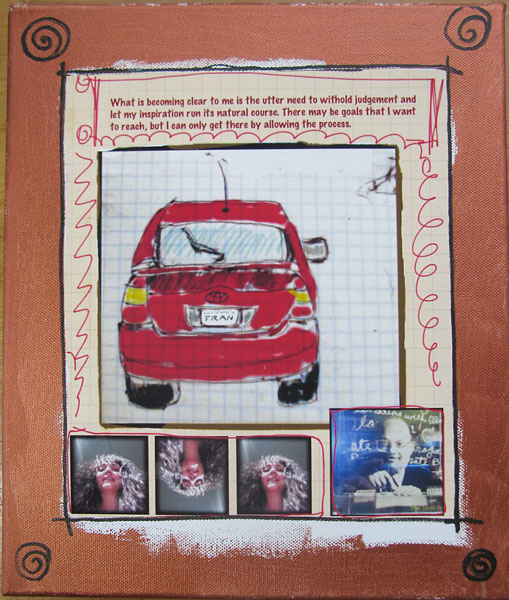
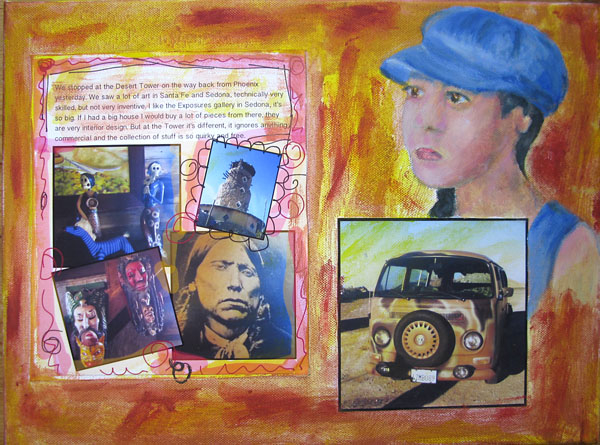
So here are two “pages” of my journal. Originally I drew the car with a ballpoint pen in a notebook. I photographed it and digitally coloured it in and framed it. Then I imported it into the journalling app and added text and marks. For the second journal page, I used various photos I had taken with my mobile phone.

creating journalling on canvas

I decided to use stretch canvas as support, printed the digital journal pages and other photos on printable canvas, glued them to the big canvas with pva, and then added all the paint splashes and details that I felt communicated the heat, the light, the atmosphere.

travel journalling and photos collaged onto canvas

Lastly I also painted a self portrait as a dreamy observer . I am satisfied that the digital elements in these two pictures have a warm, natural feel about them, and gel well with the acrylics and paint markers.

Perhaps keeping a journal on stretch canvas is not very practical, but one or two meaningful pages per trip could turn the walls of your home into an inspiring memory lane.


~*~*~*~*~*~*~*~*~*~*~*~*~*~*~*~*~*~*~*~*~*~*~*~*~

Francesca is a visual artist using pretty much everything she finds around her to record and relive feelings and memories of places and emotions. She collages, paints, draws, photographs. Francesca loves mixing modern technology, such as mobile phone apps, with the simplest of tools such as glitter glue, crayons and other children’s art supplies. Read her blog at franjournal.blogspot.com

~*~*~*~*~*~*~*~*~*~*~*~*~*~*~*~*~*~*~*~*~*~*~*~*~

.

.
Jenny Panda shares her Mixed Media Painting

This article is written by Jenny Panda

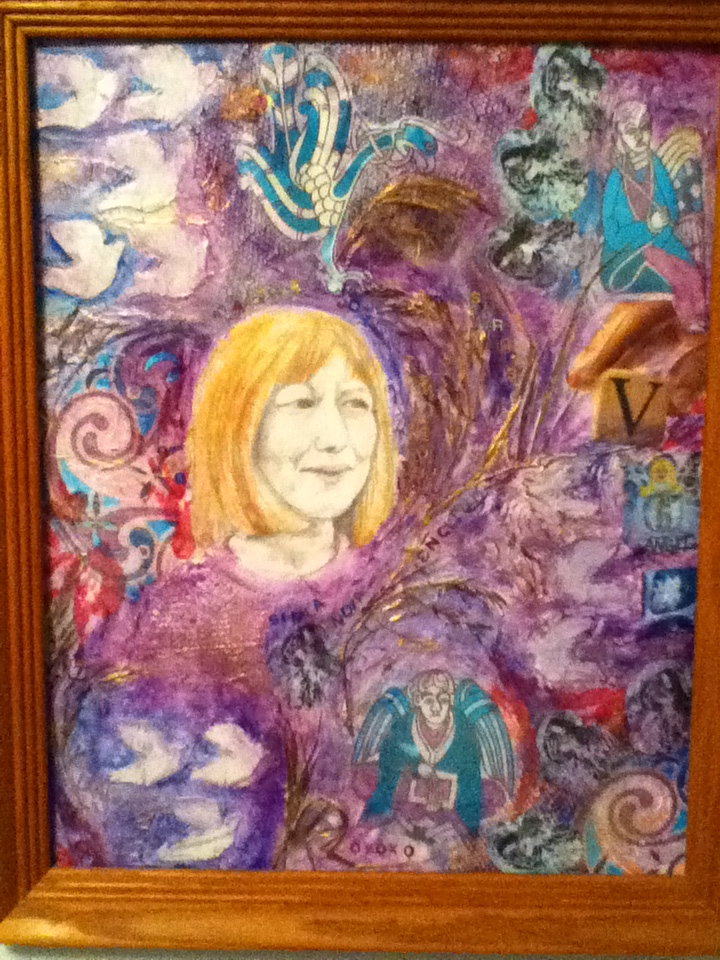
Last year I made a collage/mixed media picture based on my sister Val’s life. She was born in India, moved to England and  I tried to combine all kinds of fleeting glances of memories from her life into the picture.

Using mixed media to celebrate a special person

I used matte media to build up certain parts of the pic: doves and textures of various things. I drew her portrait and used a photocopy of that which I embellished with gold for her hair and various parts of the rest of the pic.

I used photocopies of an Indian dancer painting I had done to add patterns here and there, also some Celtic pics as we have theological and Celtic roots.

There were many varied memories to incorporate into the composition.

I was so glad to have made the pic as she recently died and now I have this with which to remember her.

~*~*~*~*~*~*~*~*~*~*~*~*~*~*~*~*~*~*~*~*~*~*~*~*~

Jenny was born in India, during British Raj, educated in England, then moved to Canada in 1970. She has taught in England and Canada for 34 years with an emphasis on creativity; art, drama, music, children’s literature and computer exploration.

Jenny is now an Executive Member of Fine Arts Society of Milton

You can see more of Jenny’s work on her blog Jenny Panda

~*~*~*~*~*~*~*~*~*~*~*~*~*~*~*~*~*~*~*~*~*~*~*~*~

.

.
Die Cut Articles

This article is written by Debbie Ward from Lucky Girl Paper Arts

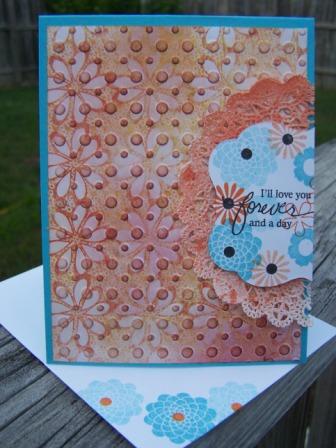
I love die cuts…there I said it.  Like most people I started out with my Cricut to cut shapes from cardstock.  While I still use my electronic cutter, I find that I use my Cuttlebug more often.  The reason is that I have switched to using metal dies as opposed to cartridges.  For the longest time I was using the die cuts just the way they were when I cut them on my cards and scrapbook pages.  I decided to start altering my die cuts to “fit” what I needed as opposed to what I had.  I started doing this because of some smaller sentiment stamps I had just bought.  Here is one of the first cards I came up with:

You can see that the sentiment was stamped on a die cut that was cut in half.  If I were to use the sentiment stamp on the whole die cut, the sentiment would have been lost.

Since this first card I have experimented with more of the die cuts that I own.  One of the best things about this little experiment is that I may have just doubled the amount of dies that I have without spending additional money; and that makes any crafter happy.

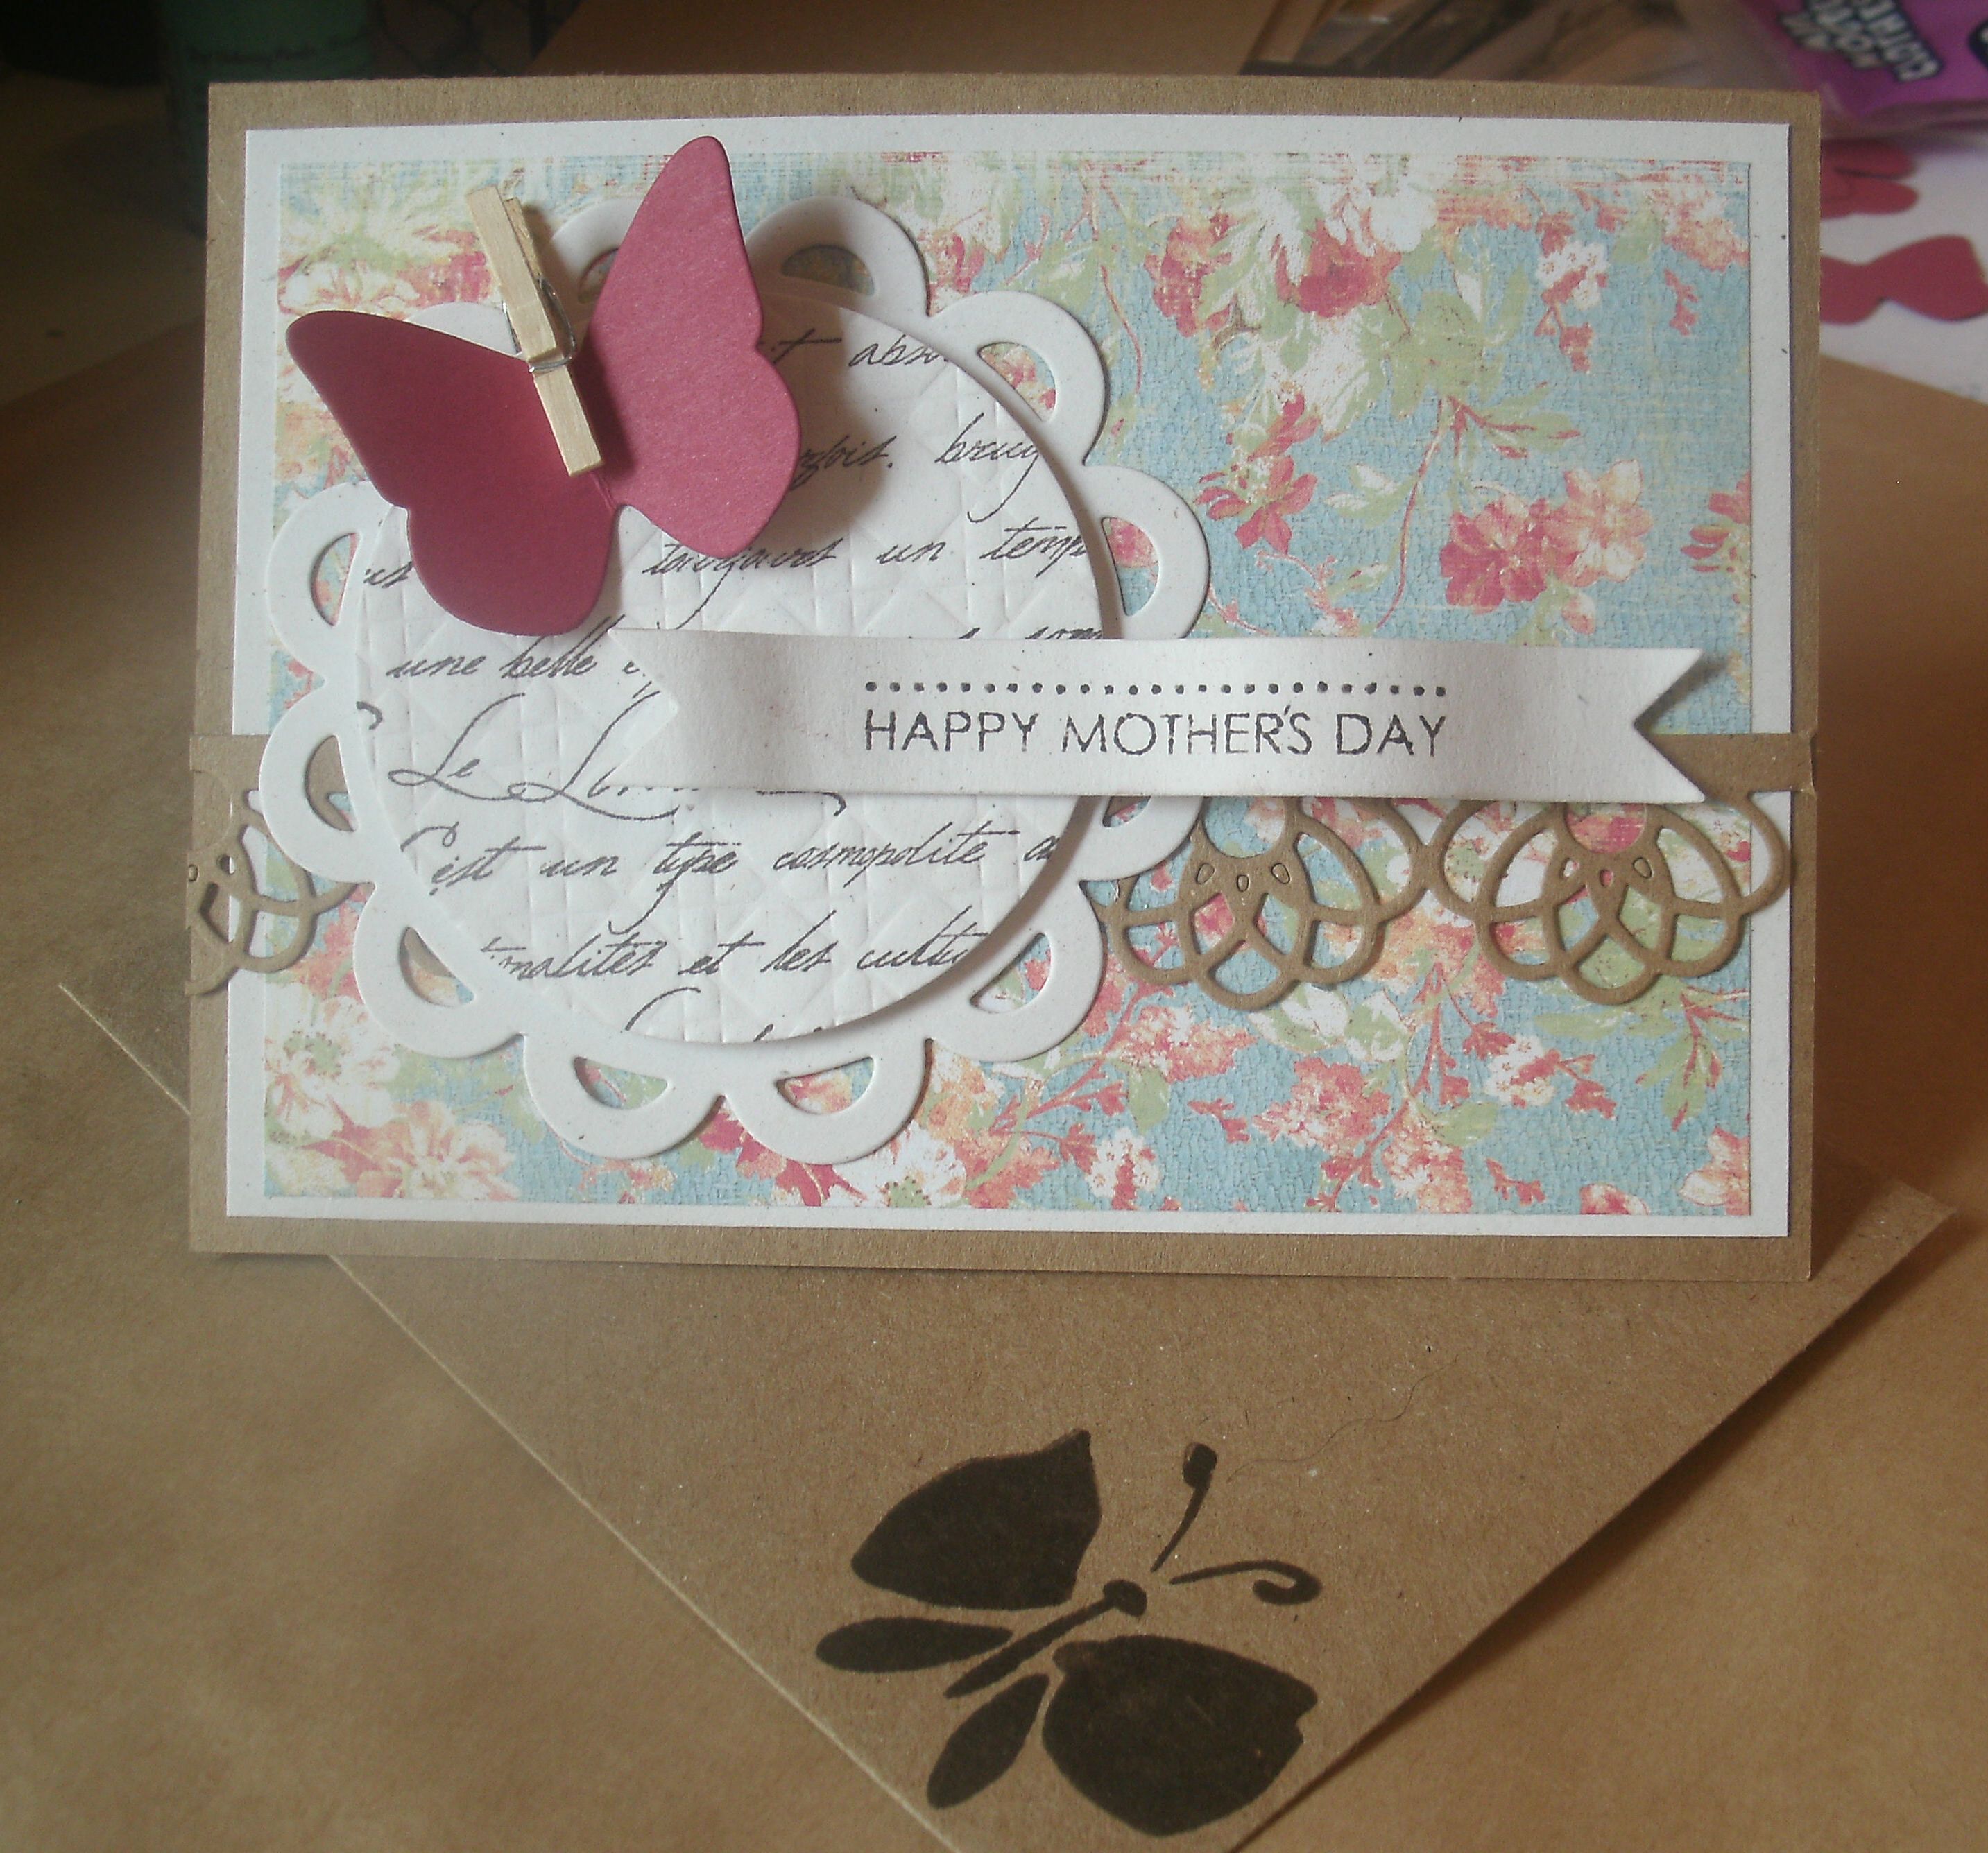
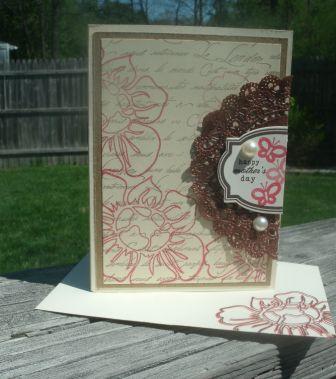
This year I decided to make Mother’s Day cards for a few very special mothers in my life, I decided to challenge myself even more on these cards:

On the one card, I die cut the circle and then I stamped a script image on it and then used an impression plate to emboss it and give it a little texture.  The other die cut was a butterfly and I clipped it to the circle with a small clothespin…the clothespin also was used as the butterfly body.

The second card mirrors the first card that was shown above with a die cut that was cut in half and the sentiment stamped on it.  I didn’t just cut the die cut in half on this card…I also cut the doily in half as well and sprayed it with Glimmer Mist.

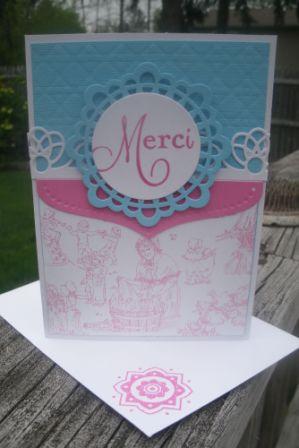
Another great way to get more mileage out of my die cuts is to layer them on a card together.  I used to be afraid of using too many of anything on my cards, now I know that if I use them the correct way together, they actually complement wach other as opposed to competing with each other for the focal point.  Here is a card that used four different dies:

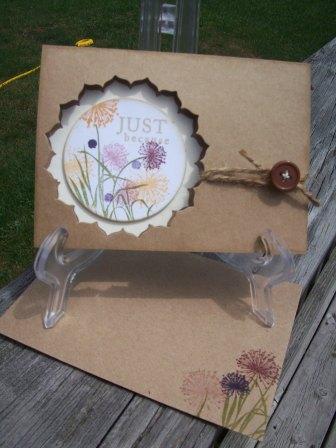
The last card is using the metal die to cut a window into my card:

This technique works well when you want to draw attention to a special sentiment or image.

Debbie Ward has been paper crafting for many many years. She loves to create cards, scrapbook pages and altered items. She designs for a local scrapbook store, Hannah’s in Antioch Illinois.