Michelle G Brown | Mixed Media Art

Coming Full Circle with Laura Heilman

This article is written by Laura Heilman of Wildwood Mama
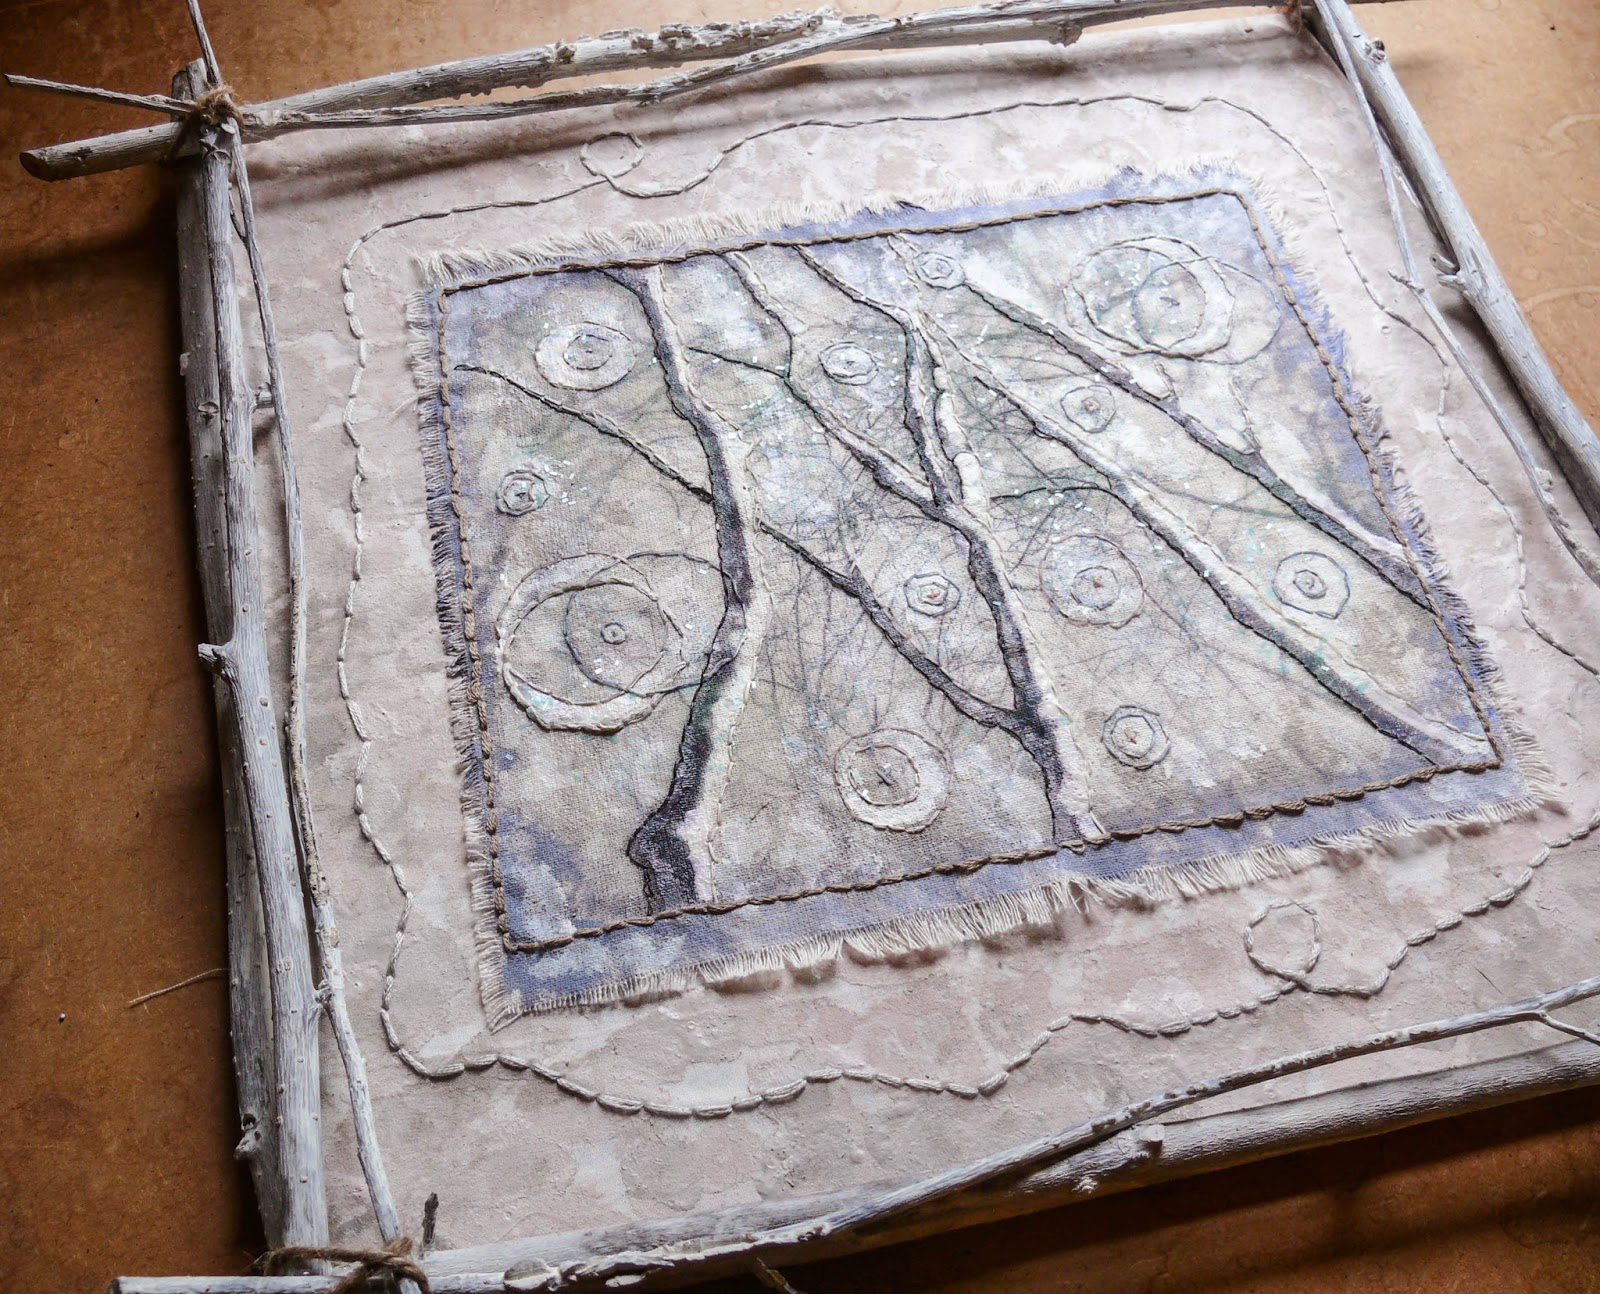
Laura Heilman's fabric mixed media artwork

When I was in high school, I entered an art contest. I remember sitting on the floor upstairs, with all of my supplies and whatnots around me. I drew an owl flying over the moon, an image I had seen on the cover of one of my favorite novels. Then I got creative and free and had fun with it. I glued on fabric for the owl’s body. I did some pen and ink, some watercolor. Who knows what else…I don’t have the piece anymore. Then I entered it in the contest, sure that I would never win. Turns out, I won first place. How did I feel about it? Embarrassed and insecure, which galls me now thinking back. I didn’t think I deserved it. The other pieces in the contest were sharp, finished…glowing with technique and artistic prowess…so much more advanced than my amateurish, childish effort.
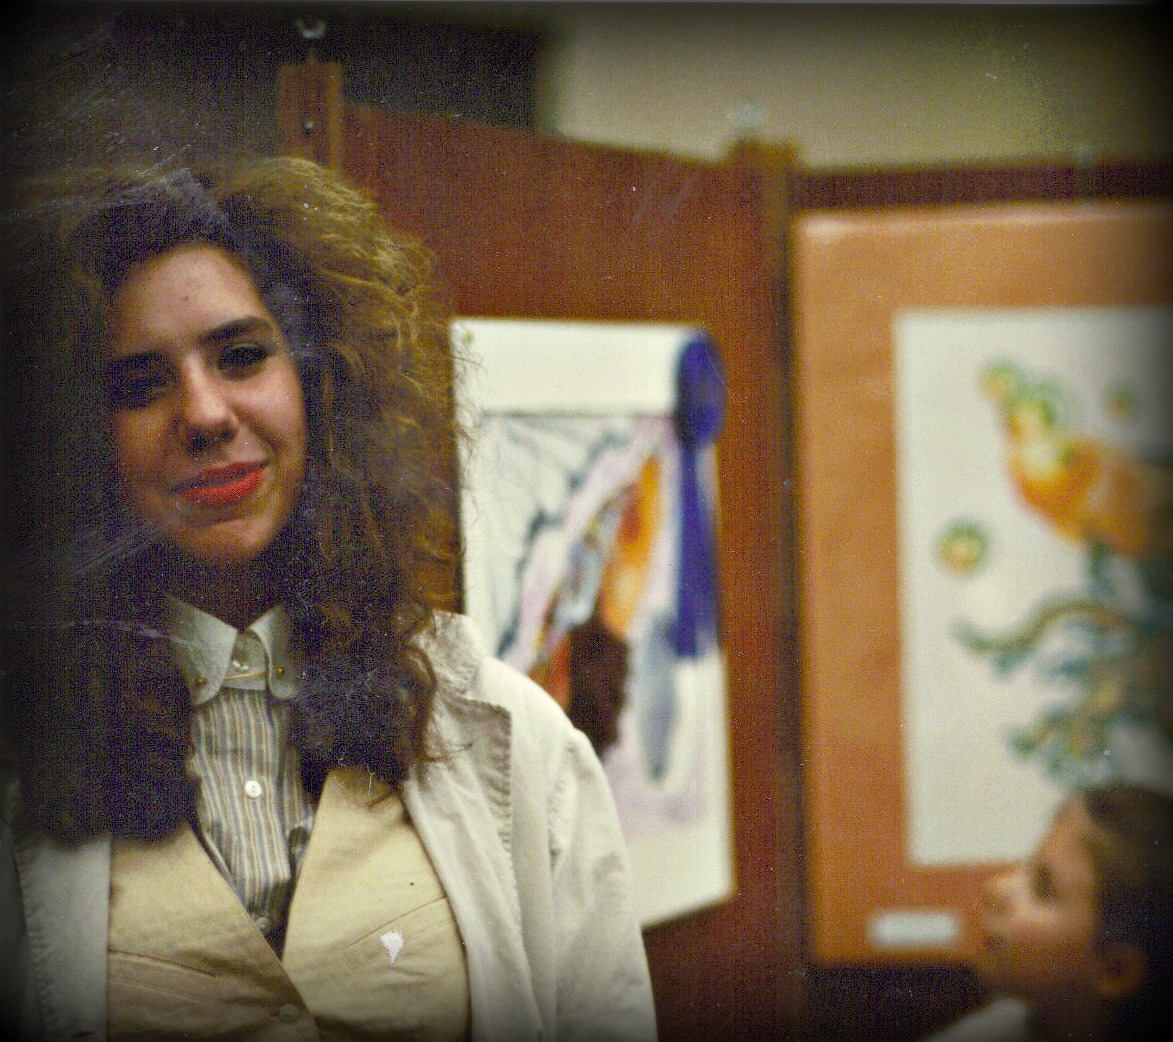
Laura in High School

It took me a long time to get back to doing mixed media art like that… free spirited and fun and devil may care. It wasn’t a conscious thing, I’d forgotten all about that contest until I started hand sewing again. Even though I had the complete and utter support of my artistic parents, I did what a lot of people do, in a lot of different ways. I devalued my natural talents and yearned for what I didn’t have. To be fair, it does take some of us longer to figure these things out. Maybe I’m just a late bloomer.
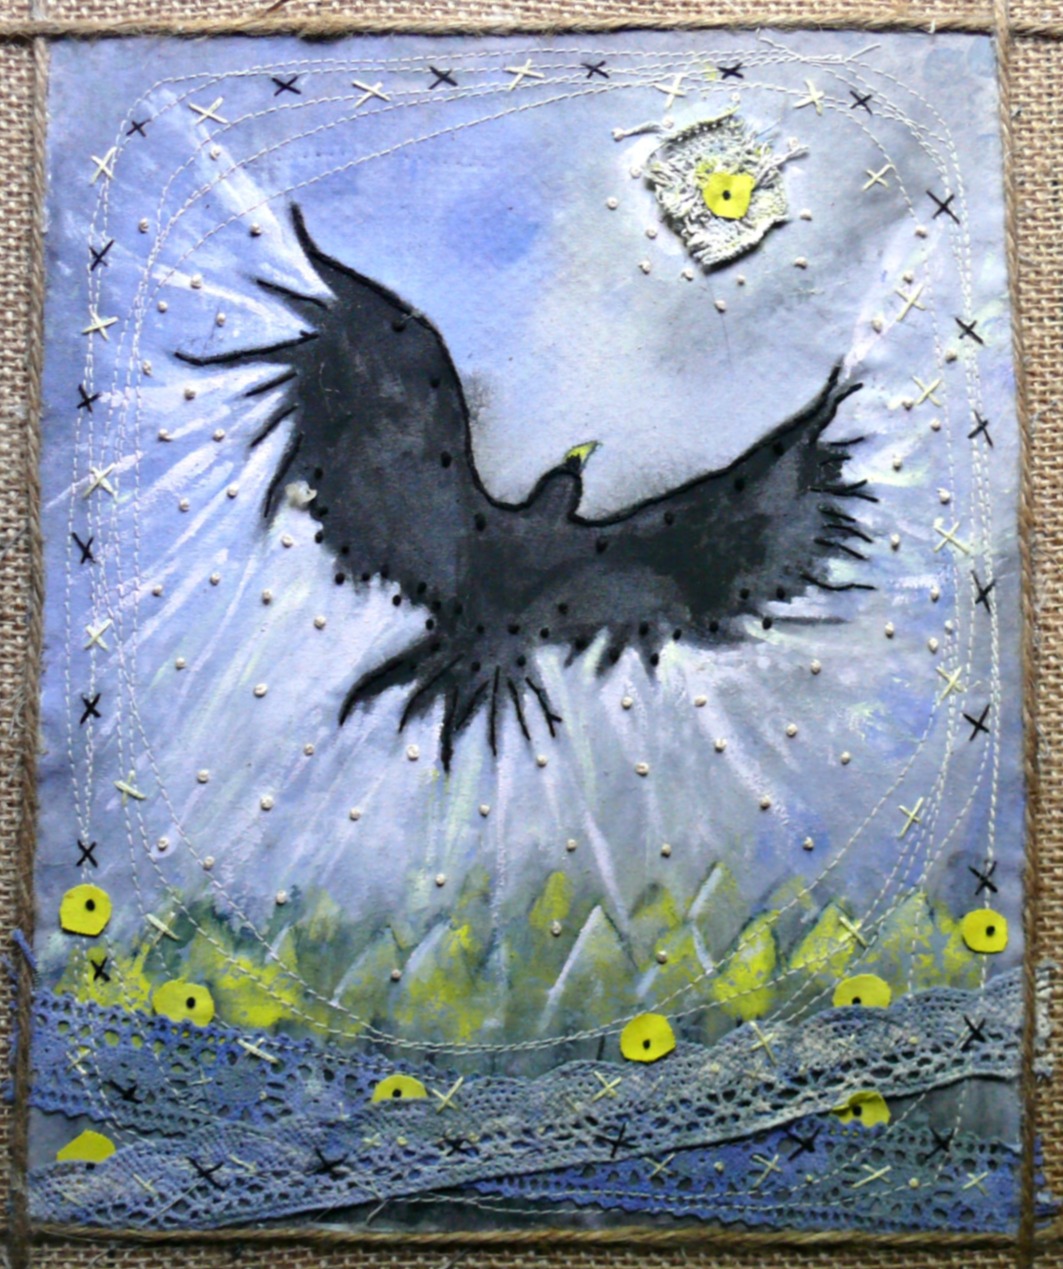
Mixed Media collage by Laura Heilman

I suppose that was part of my journey too. I needed to walk a straight line first in order to walk any which way I pleased. You see, now my free spirit yearns for change, flexibility and spontaneity in art. That is exactly what mixed media allows me to explore.  The imperfect symmetry of nature is my inspiration where mistakes become new pathways to self realization.
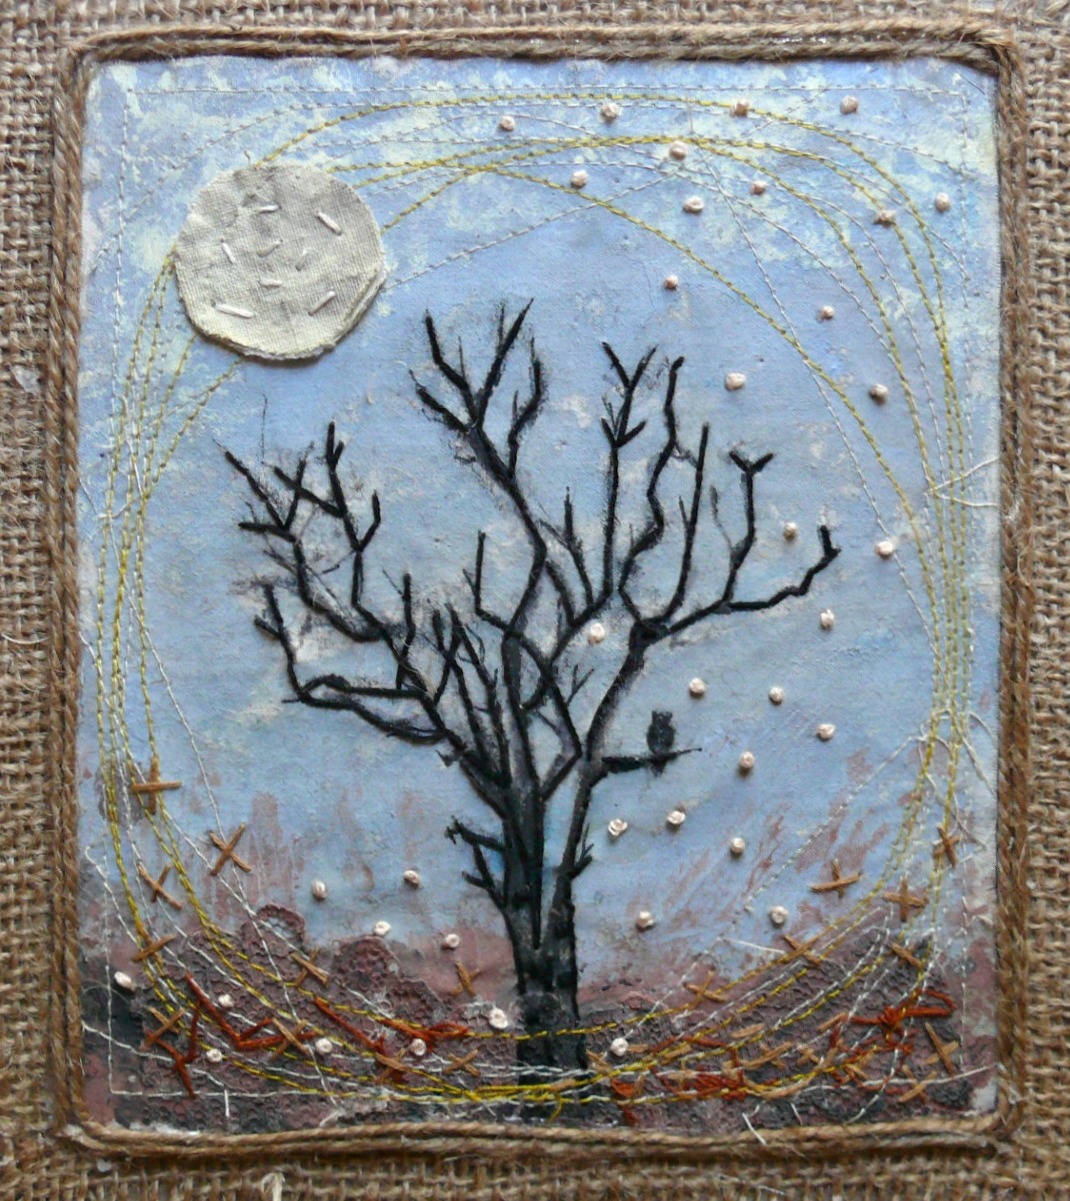
Mixed Media collage by Laura Heilman

My favorite medium is fabric…I can paint on it, glue things to it, stitch it up and then glue it down to just about anything. A thread gone astray becomes a wild stalk of grass. When my daughter bumps my hand accidentally as I’m painting, the mistake can be transformed into a bird or a pathway or maybe even just a random blob.  I have come full circle with my art, I have learned to let go. As I sit surrounded by paint bottles, brushes, muslin, scissors and thread, I wave merrily to that teenage girl I used to be, the one who made art with such abandon, such free spirited creativity…but she is too busy creating her masterpiece to pay me any mind.

~*~*~*~*~*~*~*~*~*~*~*~*~*~*~*~*~
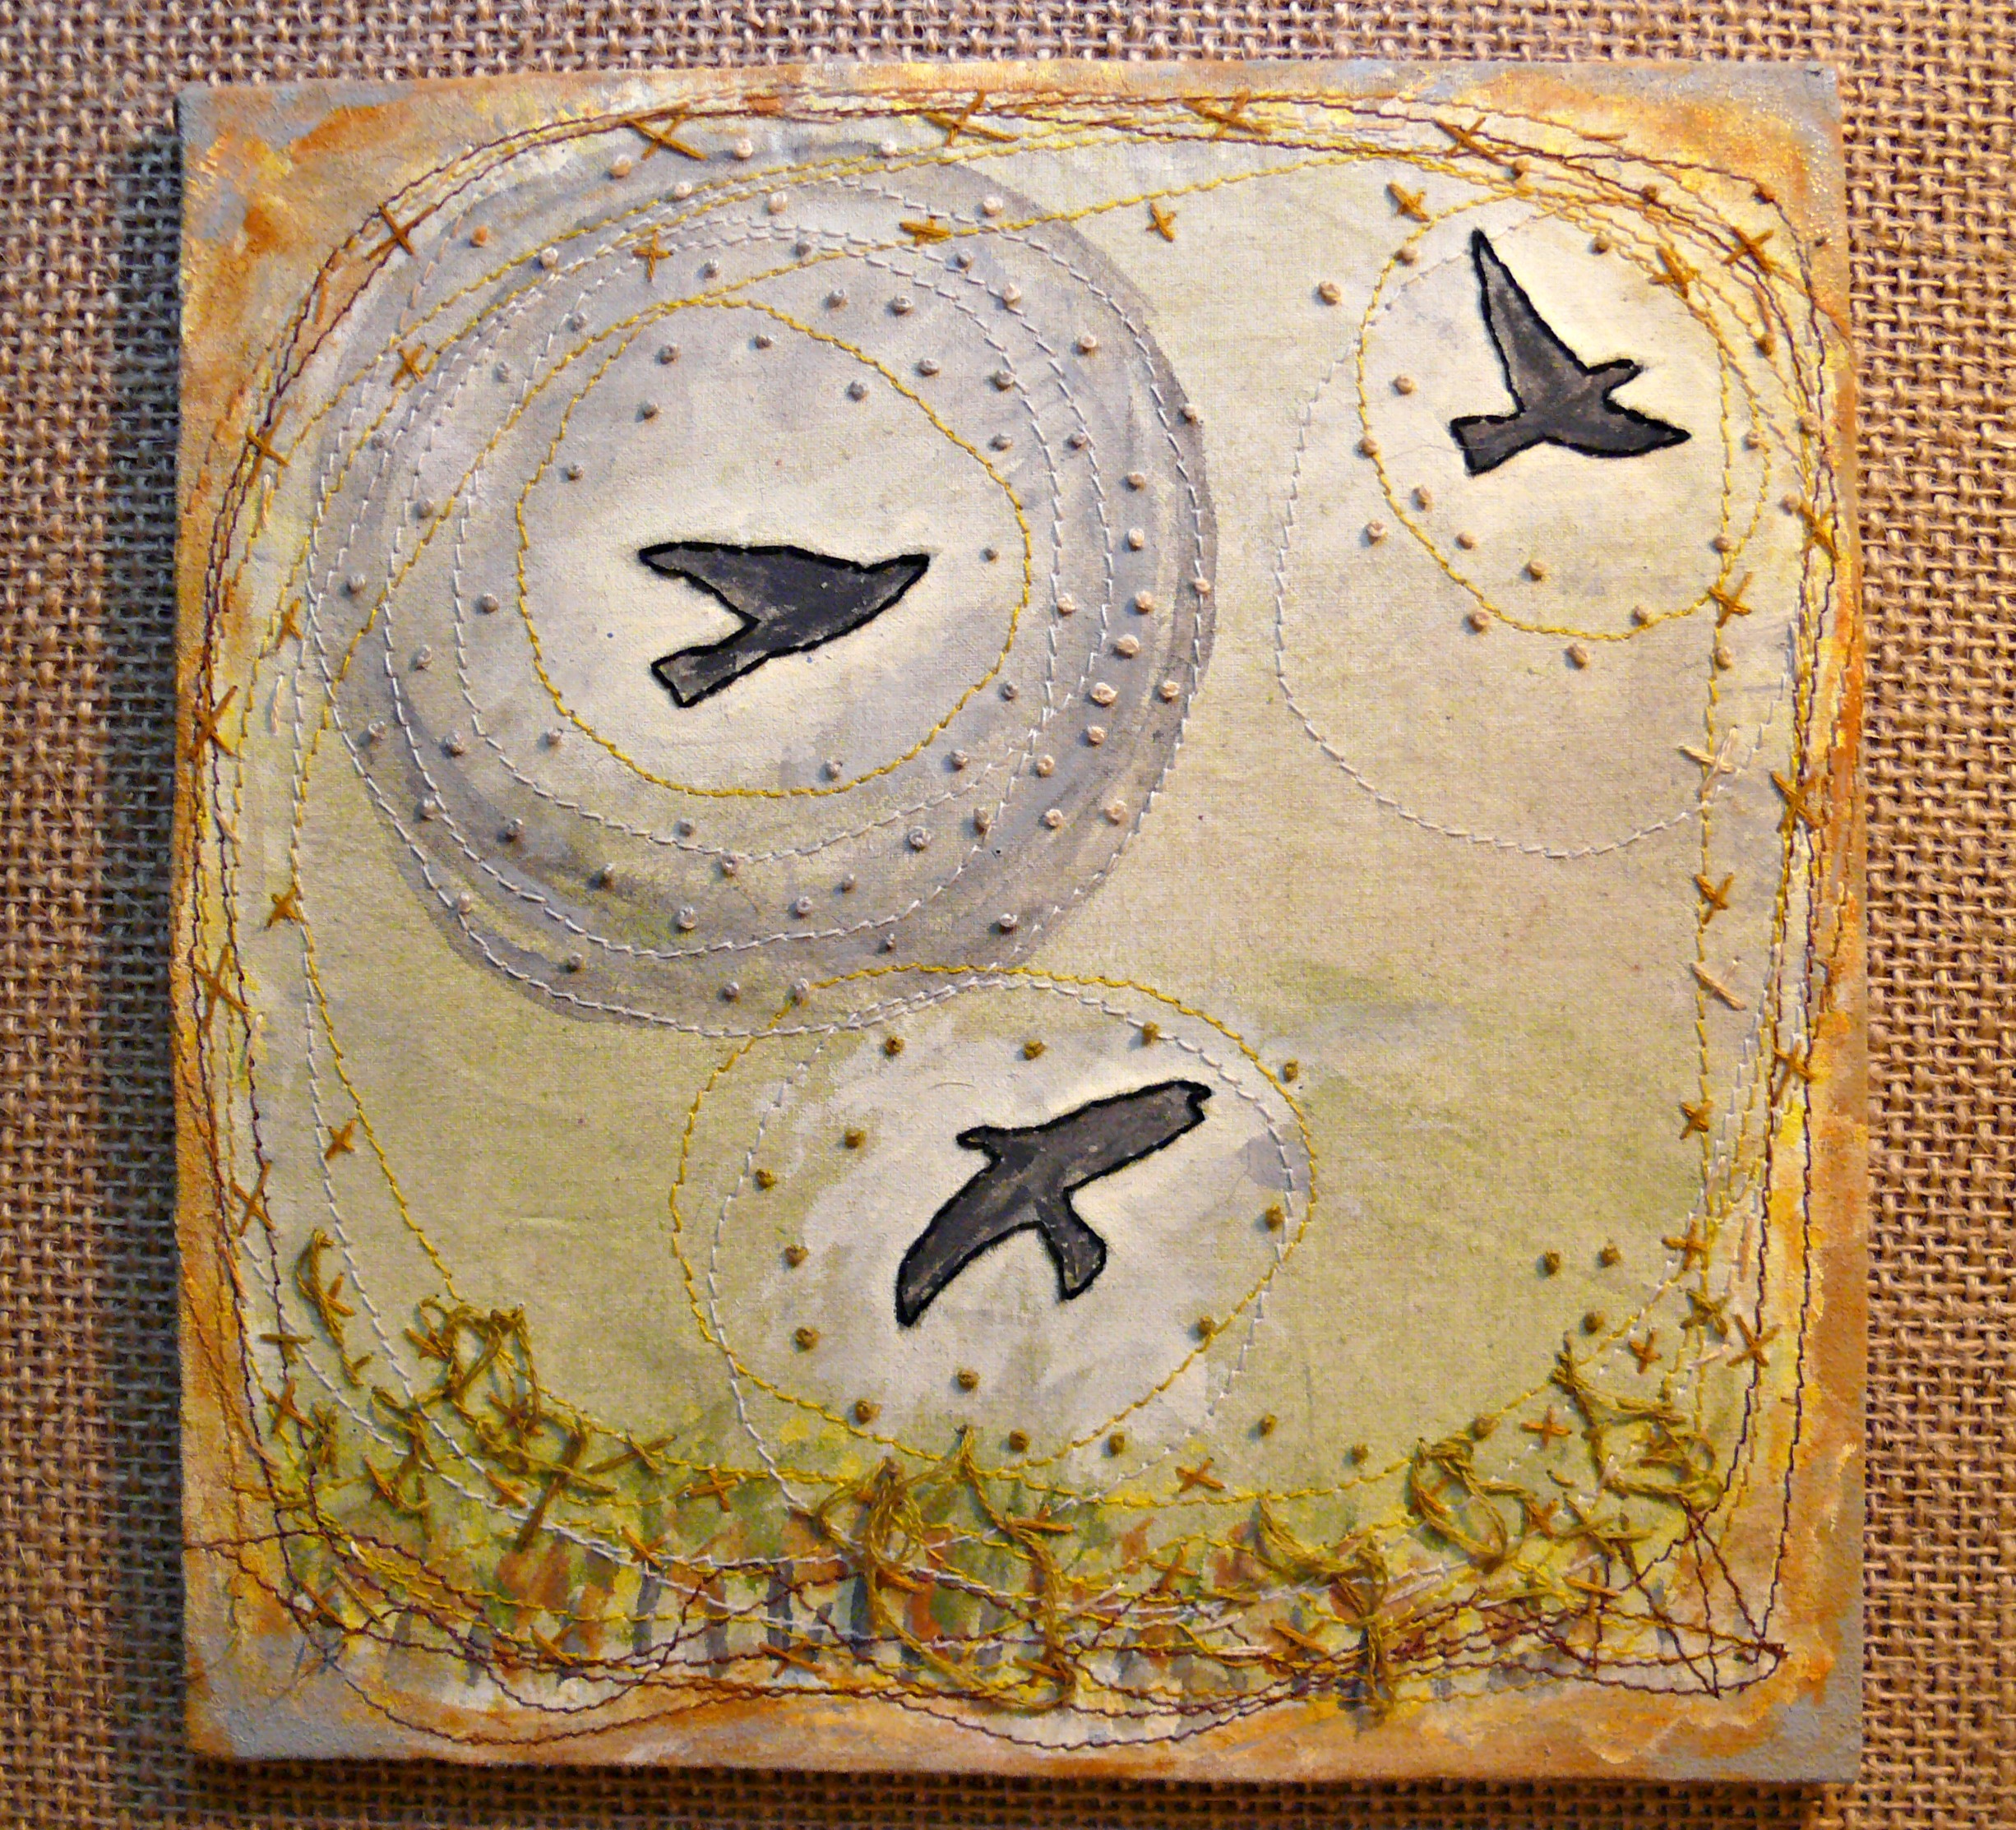
Mixed Media collage by Laura Heilman

To see a step-by-step tutorial, pop over to this tutorial on Laura’s blog – Mixed Media Textile Art & Sewing Tutorial

You can also see more of Laura’s work over at her blog ~ Wildwood Mama and her Etsy store ~ Wildwood Family Studio

.

.
Mixed Media Artist Christine Marshal

Christine Marshal was born in England and now resides in Boston, and is a self-taught artist. Here she is to tell us a bit about herself – take it away Christine 

~*~*~*~*~*~*~*~*~*~*~*~*~*~*~*~

I am a self-taught, abstract artist, originally from Manchester, England but been living in Boston, Massachusetts for almost 11 years working with teenage youth with learning disabilities/mental health problems. Qualified as a Reflexologist in 1999 (no I don’t have a foot fetish, but I do believe in holistic therapies:) Also enjoy black & white photography and I’m a crazy “MANCHESTER UNITED” fan. My friends call me Rooney’s Girl :p

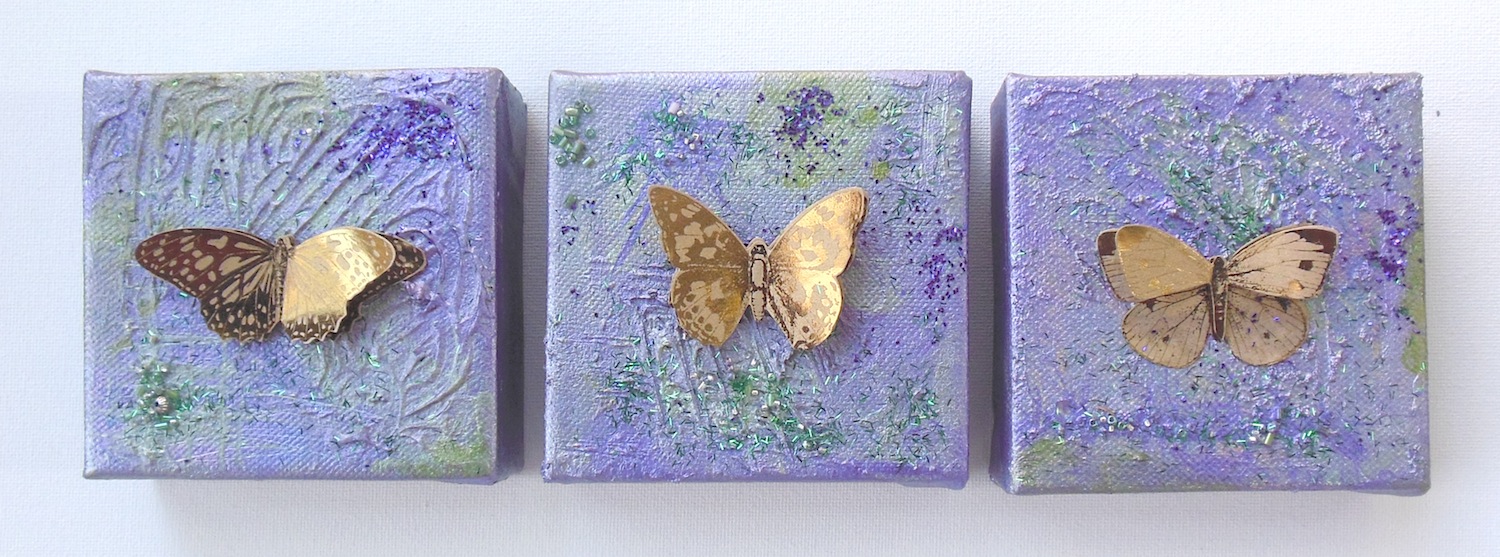
Butterfly three mini mixed media collages

I started painting in Jan 2013 when I couldn’t find a wall art that I liked for a big wall space at home….I thought, “I bet I could do one myself”! I practiced on small canvas and discovered a talent I didn’t realize I had and I absolutely love, love, love it now !!!!.  I’m constantly thinking about my next projects and it’s keeping me awake at night. agghhh. My friends nicknamed me Picastrokes (hee hee)

Although a perfectionist, art has given me the freedom to embrace and enjoy my mistakes in a fun and exciting way. I’ve always loved texture and shimmering objects so you will see these in lots of my artwork. I especially revel in metallics, gel mediums & embellishments that add structure and interest. Many of my favorites include:-

  • Jewelry
  • Mica
  • Beads
  • Metal
  • Wood
  • Words/Lettering
  • Thick gel mediums
  • Glass beads
  • Broken ceramics
  • Steampunk
  • Candle wax
  • Sequins
  • Driftwood
  • Glitter
  • Buttons

I never ever plan what I am going to make. I just like to experiment and see where it takes me. I have a large selection of paints, embellishments and found objects surrounding me ready to throw in the mix… I like to call my work “creative accidents”

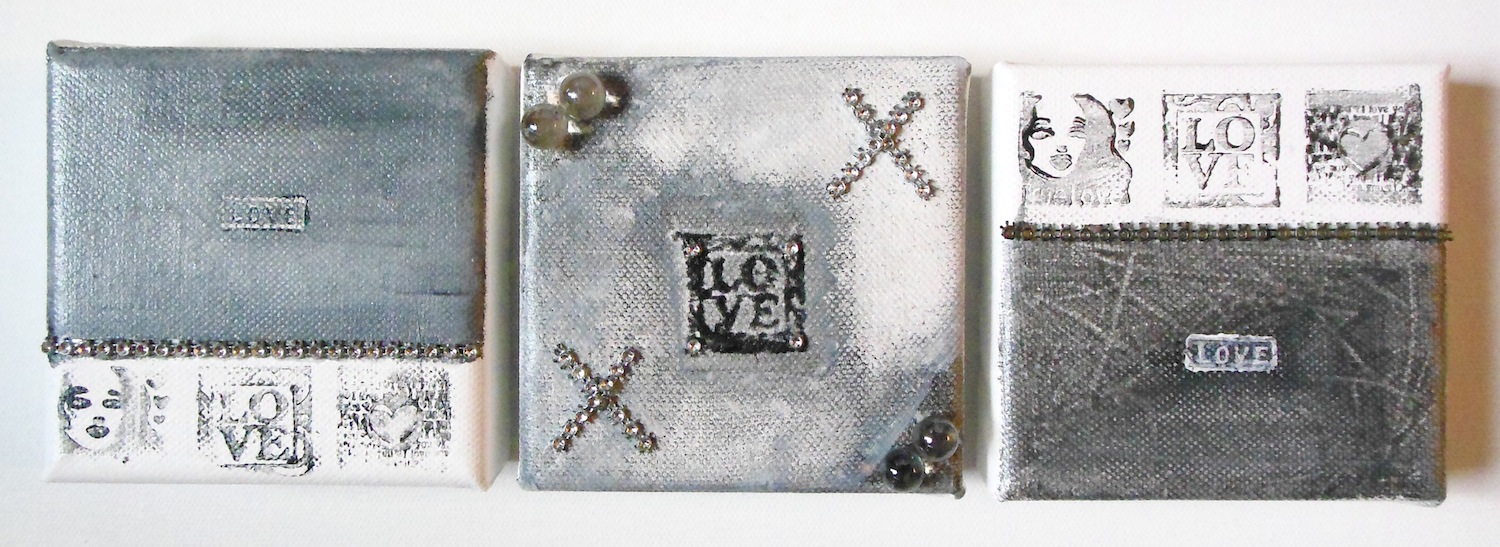
three mini canvas in greys

This year (without any experience or help) – I created my first online gallery shop on Etsy, called “Key2MyArt” as well  as  creating a Facebook page “Key2myart – Christine Marshall“.  Please feel free to post your pictures of YOUR art on my page…Would love to help independent artists share and sell their work!

I was also very happy to sell numerous mixed media art at my first ever arts and craft show at ASSEMBLED in Somerville, MA. (with no experience in this field at all). This is all very new to me, as is learning about all the different art techniques available. I’m so eager to dabble in everything, but right now I’m hooked on mixed media and can’t absorb myself enough in all the beautiful art that I’ve viewed on so many websites recently. There are so many unique artists out there. I’d love to own a large castle to display all of YOUR work!!!  I hope you enjoy my art as much as I enjoyed creating them for YOU !!

Butterfly three mini mixed media collages

The Butterfly Effect-  Used acrylic and metallic paints with gel mediums on deep gallery wrapped canvas and threw in some glitter and tiny beads to add sparkle & more texture. Finished with 3d gold foil adhesive butterflies.

three mini canvas in greys

Gimme Some Lovin’ –  Acrylics on deep canvas. Ink stamped with love and face motifs. Adhered 2x glass beads and silver sequins to add a little bit of glitz.

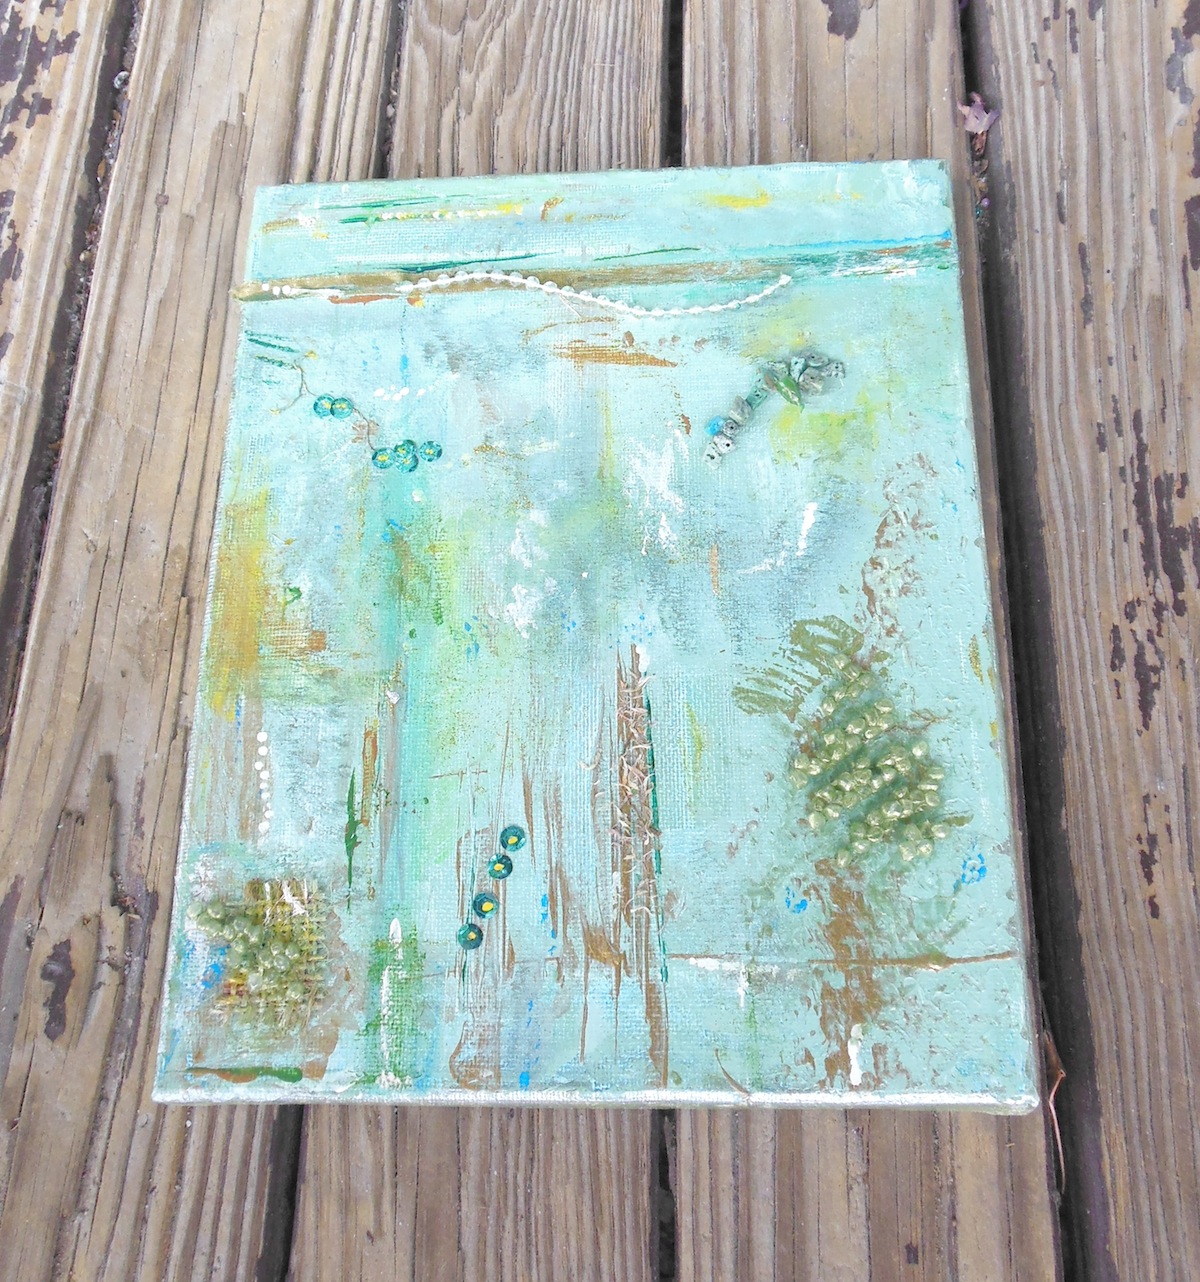
mixed media canvas collage

Tealing Earth – This canvas art is painted in a teal and metallic bronze acrylics. I then carefully glued the following embellishments to the canvas:-

  • TURQUOISE and JADE STONES from a broken necklace,
  • OLIVE GREEN RIBBON
  • METALLIC OLIVE painted PEARLS
  • GOLD GLITTER PAINT
  • TEAL SEQUINS
  • FRAYED YARN
  • BURLAP
  • PENCIL WOOD SHAVINGS .. Yep I will use anything and everything in my art work if I think it will work 🙂

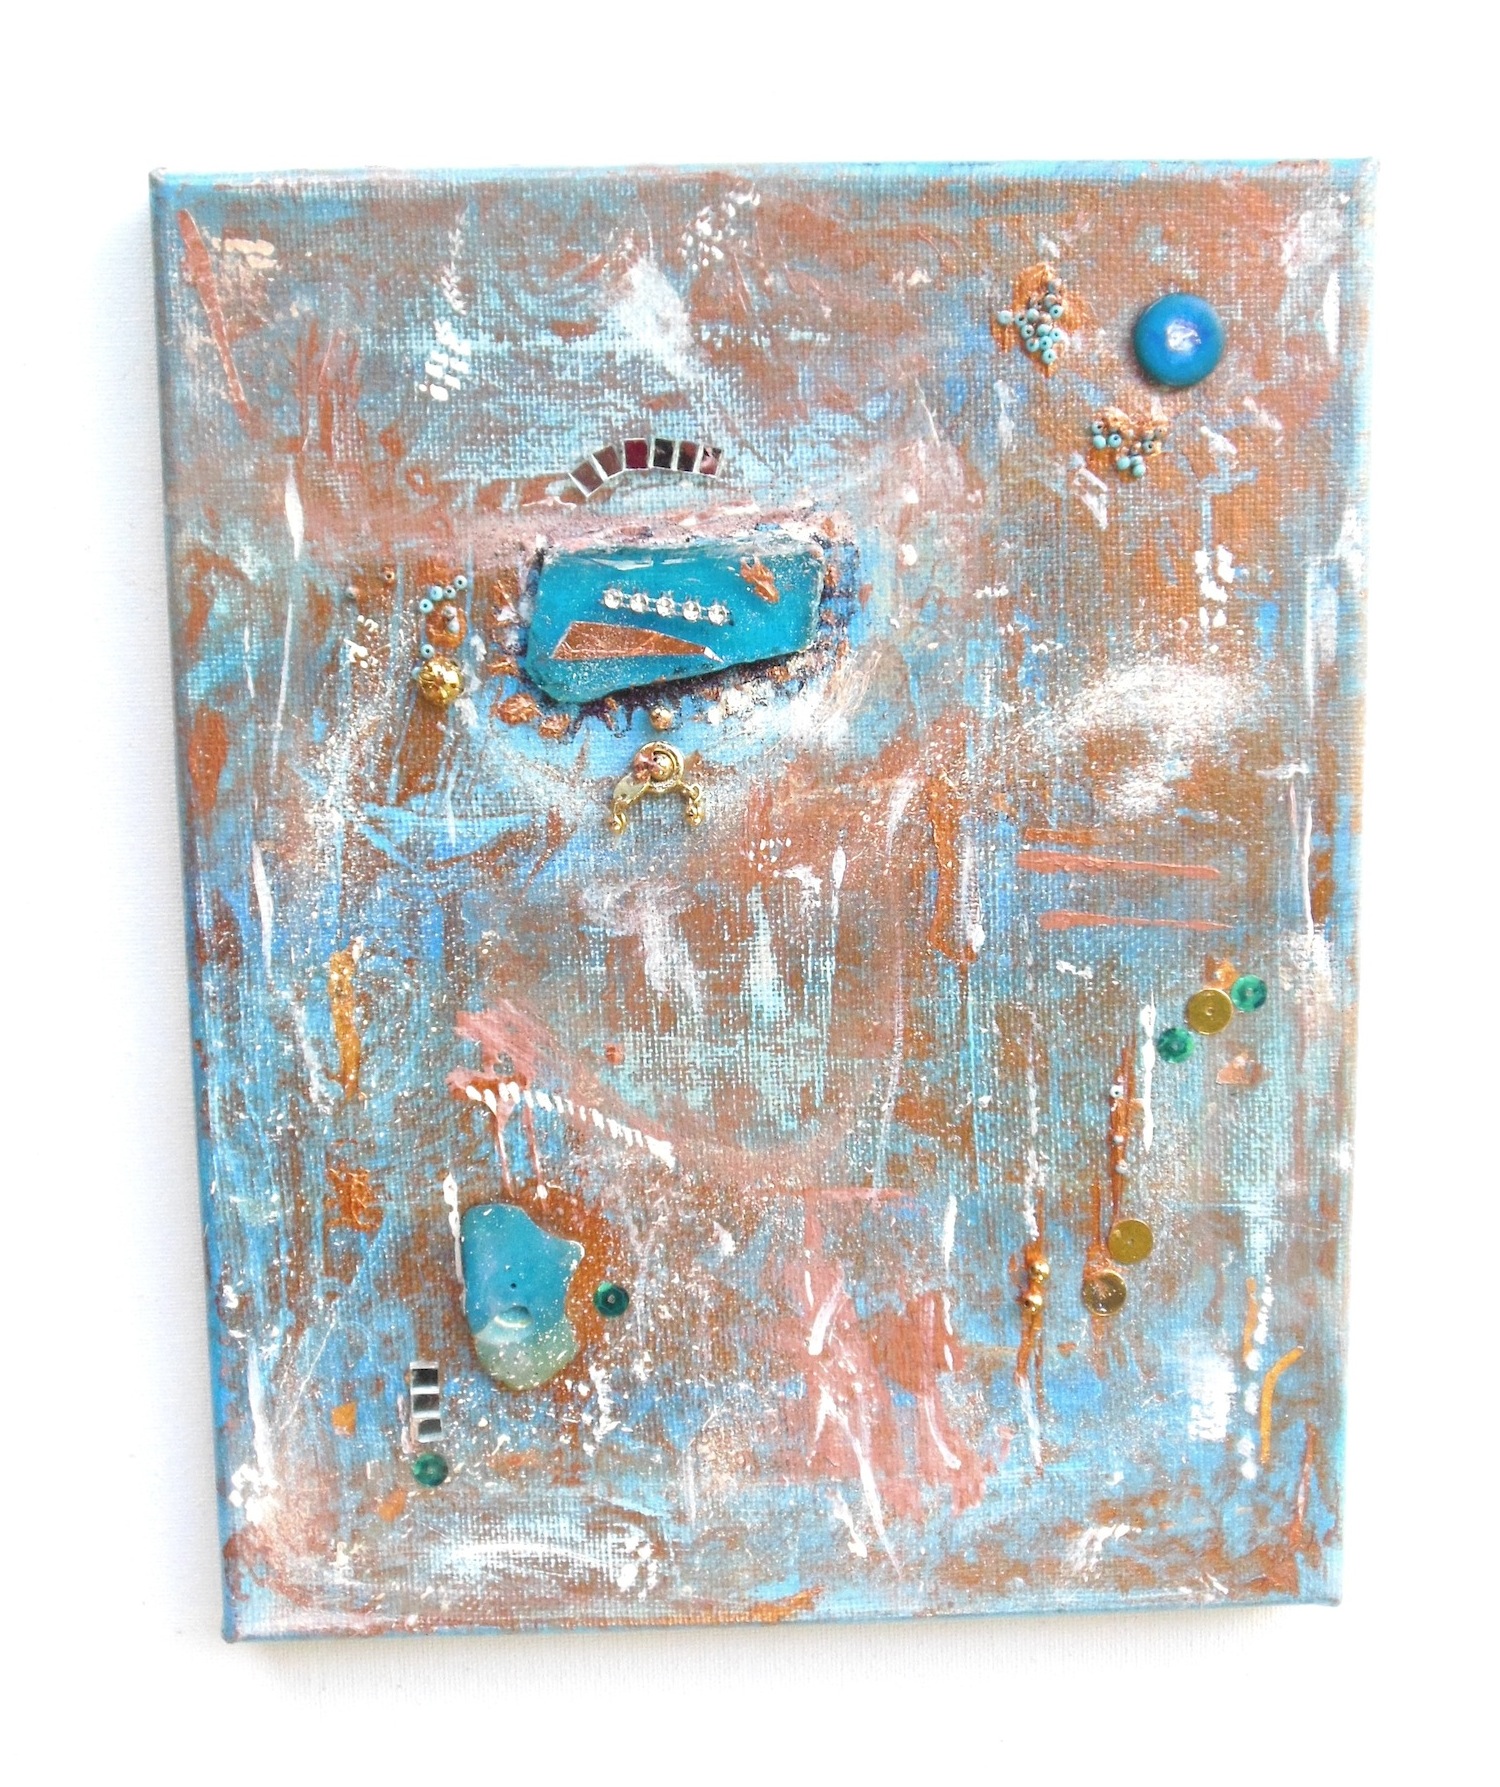
mixed media canvas collage with beadsMr Blue & Mrs Bronze-  –  Coated the canvas in turquoise blue acrylics and once dry added a copper metallic paint with a few dabs of titanium white. I then adhered buttons, tiny beads, sequins, broken ceramic, broken jewelery, blue glass, tiny square mirrors and copper colored foil from a chocolate wrapper.

3D mixed media canvas painting

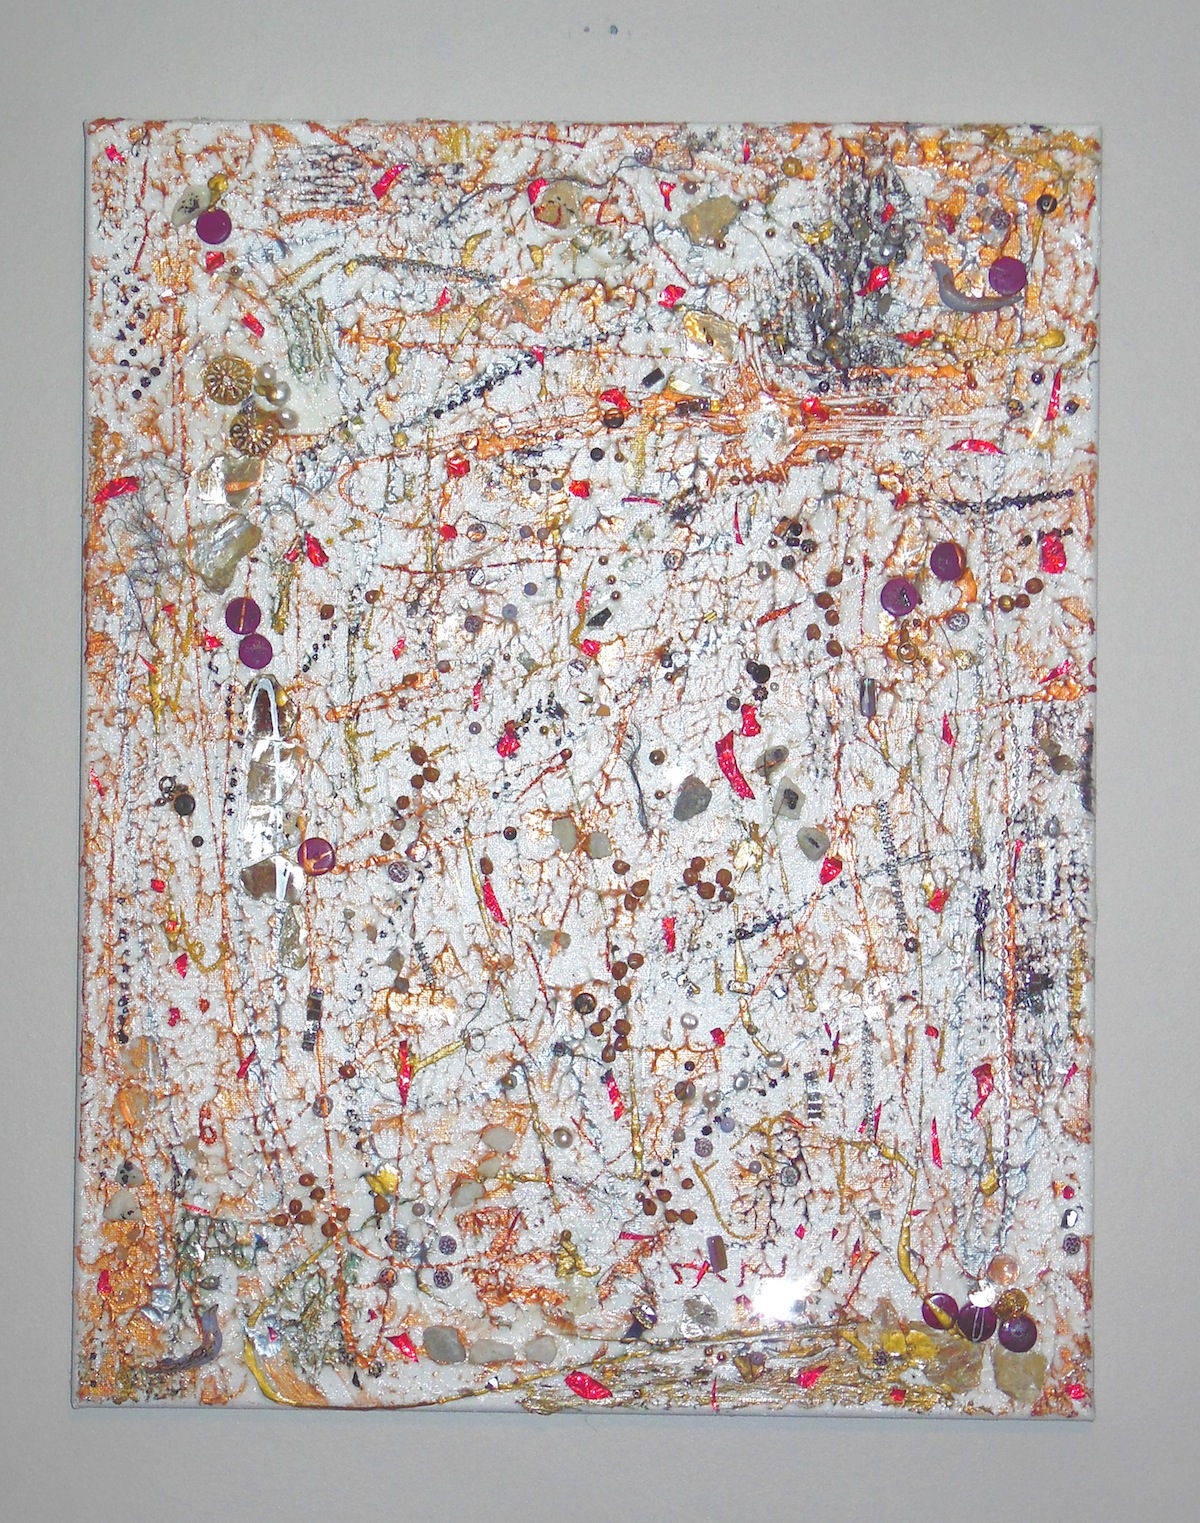
Birds In Chaos – I wanted to create a modern crazy, mish-mash of shimmering embellishments with a mixed media 3D  effect that would capture the viewers eye and pique their imagination with this shiny collection. I like to view this art as an exciting waterfall of objects that blend together perfectly and looks stunning when natural light captures it.  I first covered the canvas in a very thin layer of gel medium and then dropped handfuls of embellishments upon it. Some objects need to be adhered securely with glue. When dry I dabbed a little black with metallic gold and copper acrylics to add more color, then drizzled some fluid paint across the whole project. Finished with a gloss sealant to add more shine and protection. Look closely to find all the embellishments. Can you find the birdies?? 🙂

    • Gallery canvas = 16x20x3/4
    • beads, buttons, metal and mirrors
    • shimmering mica
    • Metallic acrylic paints
    • gleaming broken jewelery
    • two purple ceramic birds
    • gold and red foil
    • sequins
    • stones
    • pearls

.

.

Layering Mediums for a Unique Art Journal Page

*

Kate Palmer, also known around at “Sparkle Tart” is based in Queensland Australia and she shares her multi layered art journaling process with us, with stunning results.

Take it away, Kate…

~*~*~*~*~*~*~*~*~*~*~*~*~*~*~*~

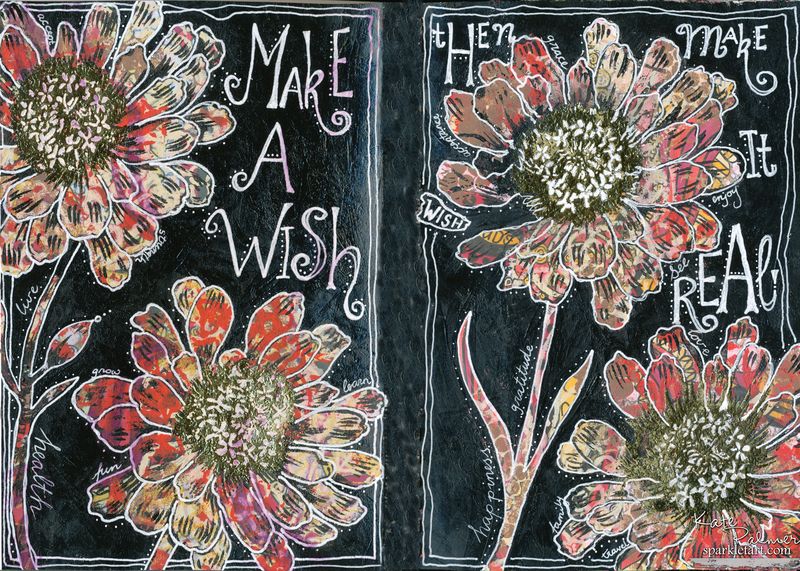
 Hi – I’m Kate Palmer better known as Sparkle Tart, I’m a mixed media artist, Sparkly Experimentalist and lover of all things colourful – you can find me online at www.sparkletart.com  I was a slow starter when it comes to art and sort of fell into creating, while self taught for much of my life, in the last few years I’ve been extremely fortunate to have taken classes online from some amazing women and just recently, my first in person class with Tracy Verdugo.  Tracy’s class opened my eyes to the depth that can achieved through layering, and while this page does not follow her process it was inspired by it.  I was determined after these amazing experiences, to find a way to make to large scale canvas ideas work on smaller scale art journal pages, cards and the much smaller projects I love to create.  So without further rambling from me, this is how I have created ‘Make a Wish’ double page journal spread.

Art Journal layers with paints and stencils to create a brilliant layout

What I’ve used:

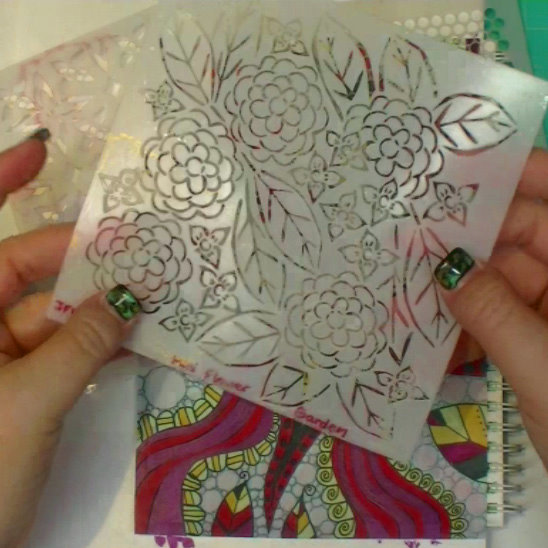
  • Stencils:  The Crafters’ Workshop – Mini Punchinella, Mini Flower Garden, Mini Flower Piecing.
  • Copic Markers – R27, R29, R39, Y32, Y35, Y38
  • Copic Multi Liners 0.3 & 0.5
  • Golden Fluid Acrylics: Iridescent Gold Deep Fine & Carbon Black
  • Jenni Bowlin Acrylic Paint: Malted Milk & Brown Sugar
  • Adirondack Acrylic Dabber: Watermelon
  • Molotow Signal White Paint Marker Fine tip
  • Jumbo Zinnia Set (flower stamp) from Stampendous
  • Create with Abandon stamp from Stampington and Co
  • Gold Foil
  • Stippling brush
  • Ranger’s Sticky Embossing Powder
  • Silks Acrylic Glaze in Vavoom Red
  • Liquitex Matt Medium

What I Did:

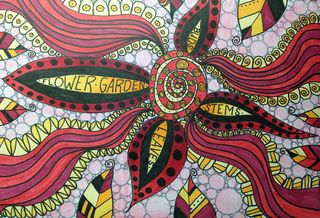
Draw and colour a simple page of doodles using Copic Multi Liners and Copic Markers – I used R27, R29, R39, Y32, Y35, Y38  and Multi Liners 0.5 & 0.3.  This shouldn’t be some amazing work of art – just background colour.  You can also use copies of previous pages, collage or even magazine photos for this step if you are not a ‘doodler’.
Make a colour copy (or scan and print) your art onto a piece of paper.  Complete all of the following steps directly onto your original doodle (after scanning or photographing) as well as the facing page – to complete a matching 2 page spread.

Art Journal layers with paints and stencils

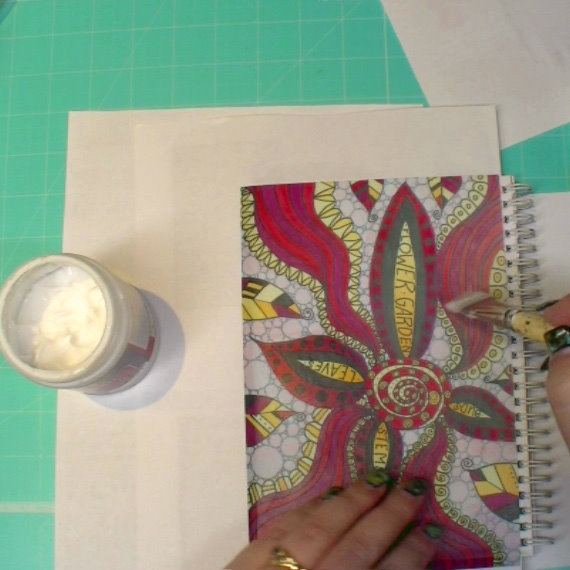
Cut the copy to size and glue onto facing journal page using Liquitex Matt Medium Gel and leave to dry – coat front and back of copy with Matt Medium for added strength.

Art Journal layers with paints and stencils

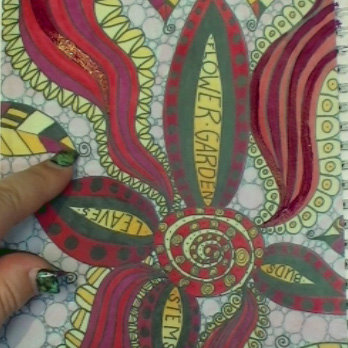
Paint Vavoom Red Silks over the darkest Copic coloured areas and let dry, you will find this makes all the other colours appear more vibrant.

Art Journal layers with paints and stencils

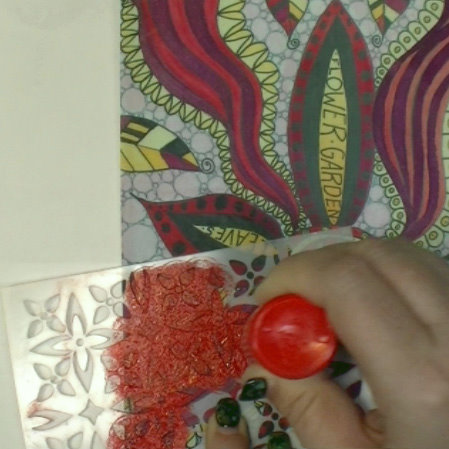
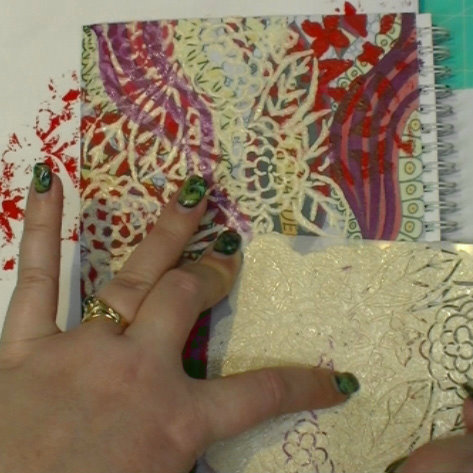
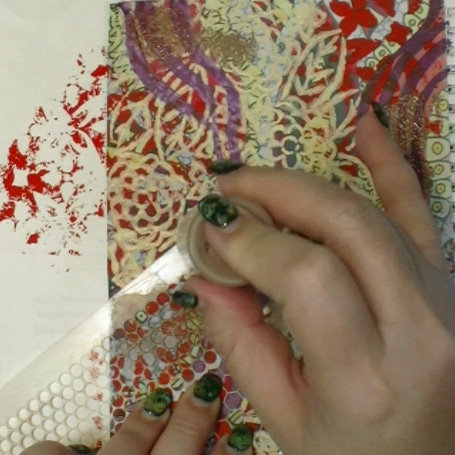
Time to get out those stencils!  Choose 3 patterned stencils and 3 colours of acrylic paint – use one stencil and 1 colour of paint at a time and dry between colours.
Apply paints through stencil onto page to break up the original pattern.

Art Journal layers with paints and stencils

Add colour no 1 (Watermelon) & allow to dry, you can use a heat gun to speed this up.

Art Journal layers with paints and stencils

Add colour no 2 (Malted Milk) & allow to dry.

Art Journal layers with paints and stencils

Add colour no 3 (Brown Sugar) & allow to dry.

Art Journal layers with paints and stencils

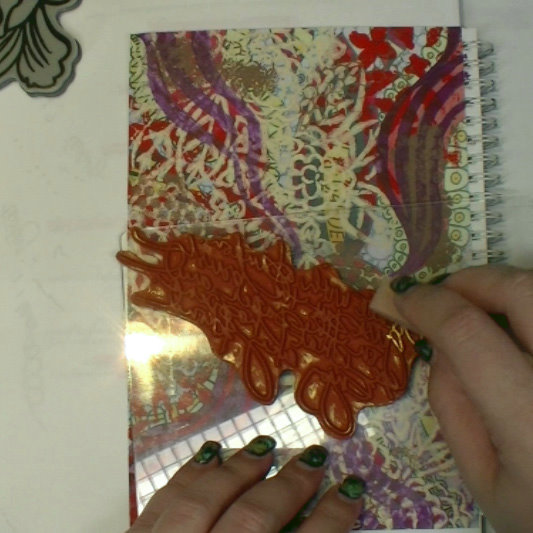
Ink text stamp with Golden Fluid Acrylic Iridescent Gold Deep Fine (I used a sponge to apply the paint) and randomly stamp text onto page.

Art Journal layers with paints and stencils

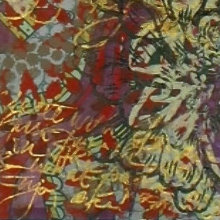
It should look a bit like this – it won’t be as crisp as it would be stamped in ink, but you will still get a lovely impression.

Art Journal layers with paints and stencils

Ink flower stamp with Carbon Black Golden Fluid Acrylic Paint and use this to stamp flower onto page multiple times.

Art Journal layers with paints and stencils

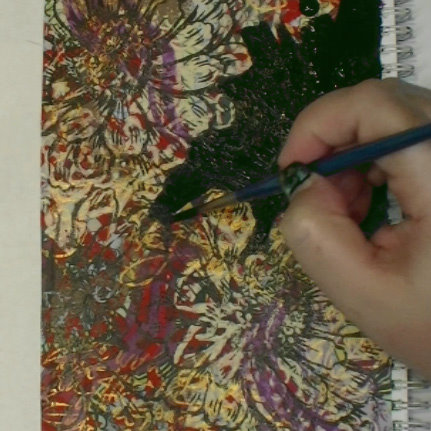
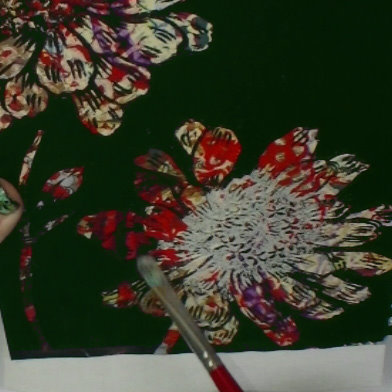
Using Carbon black paint, paint all of the page around flowers, until only the flowers are showing colour.  You may want to draw stems and leaves on before doing this and paint around those as well.
Leave paint until completely dry.

Art Journal layers with paints and stencils

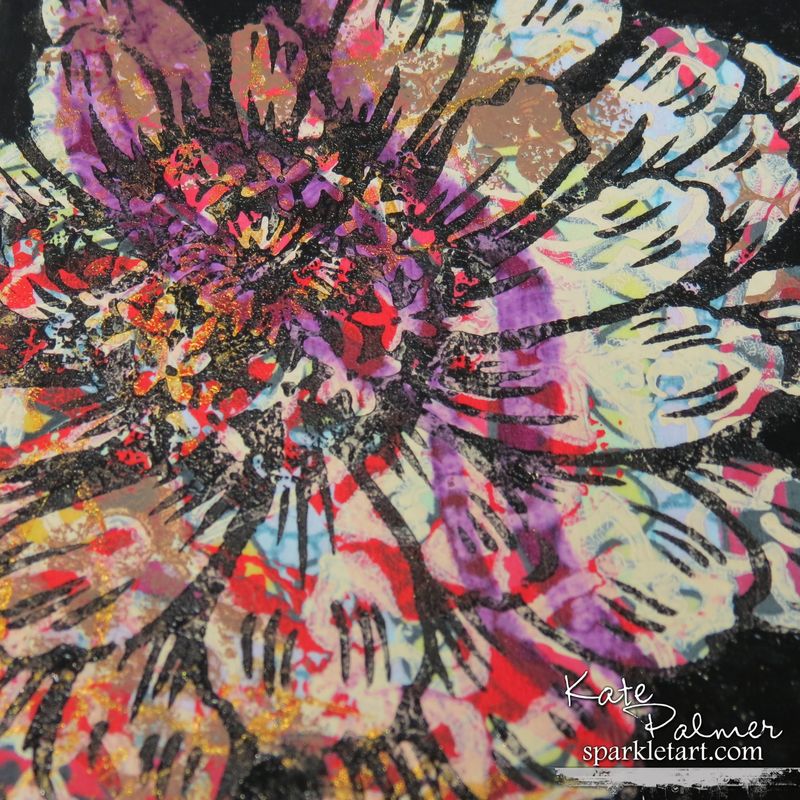
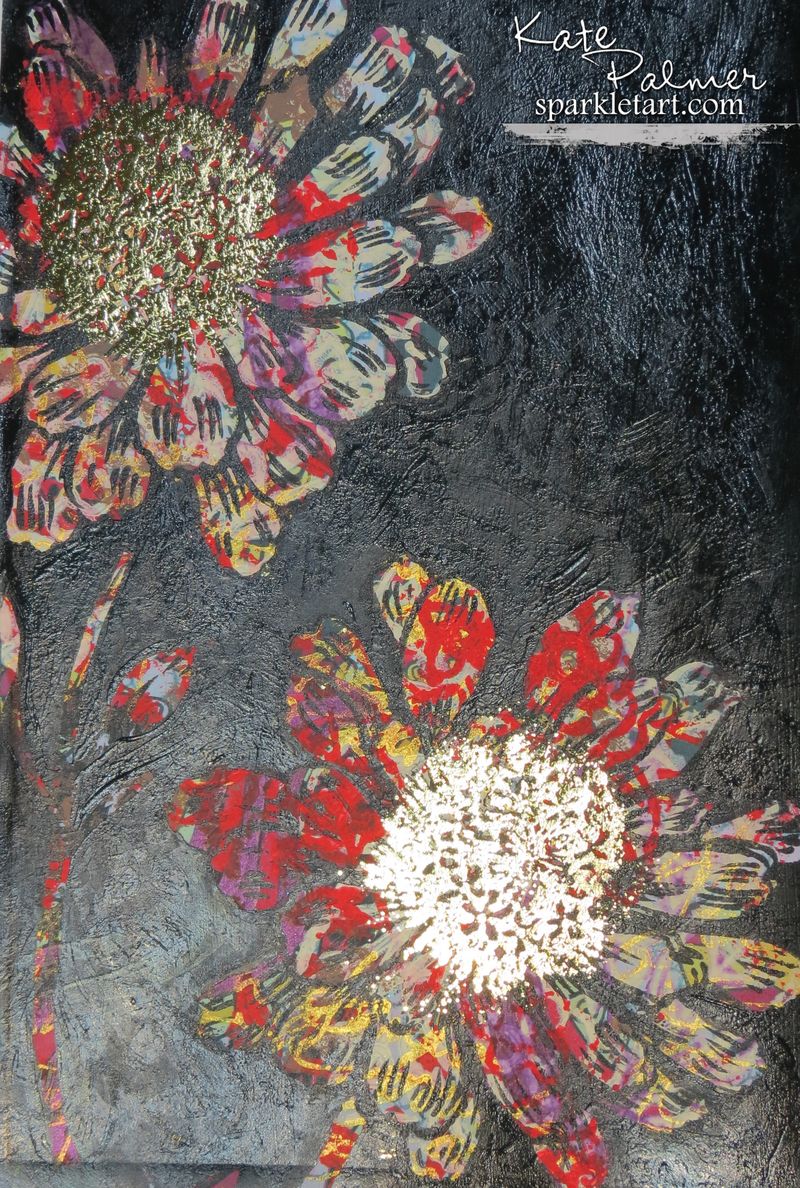
I know I know – I’ve just painted over most of my background!  It’s really an important step though, as without these layers and elements, your flower would look pretty flat and boring.  Have a look at this close up image, you can see each layer that has been added, every colour each layer of paint and it all works together to create something with complexity and interest.

Art Journal layers with paints and stencils

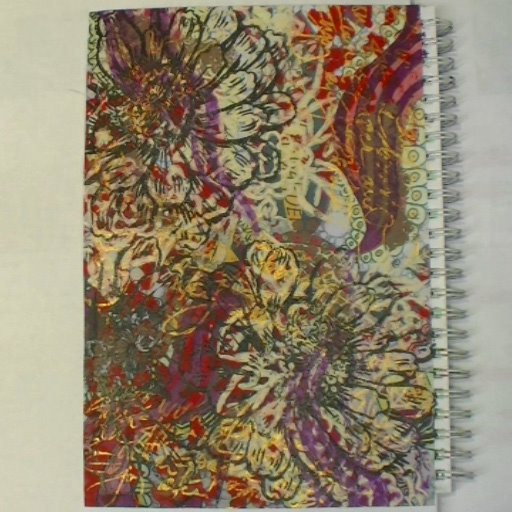
Ink the centre of flower stamp with Versamark ink, using a stamp positioner stamp over flowers and add sticky embossing powder – carefully brush off any excess powder.

Art Journal layers with paints and stencils

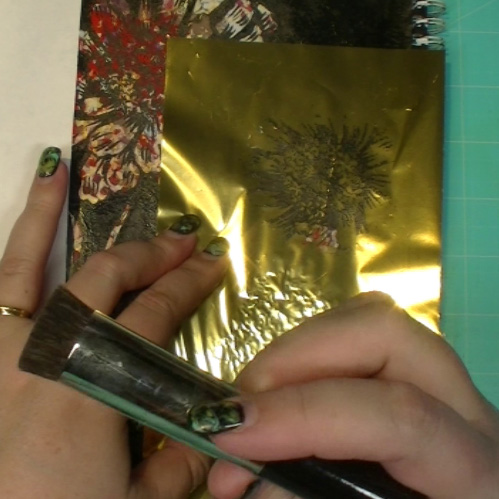
Heat sticky embossing powder with a heat gun until clear, and while hot add gold foil.  If you don’t have these items (foil & sticky e.p.) you may choose to skip this step and embellish the centre of your flower some other way, glitter, paint, gel pen, micro beads etc.

Art Journal layers with paints and stencils

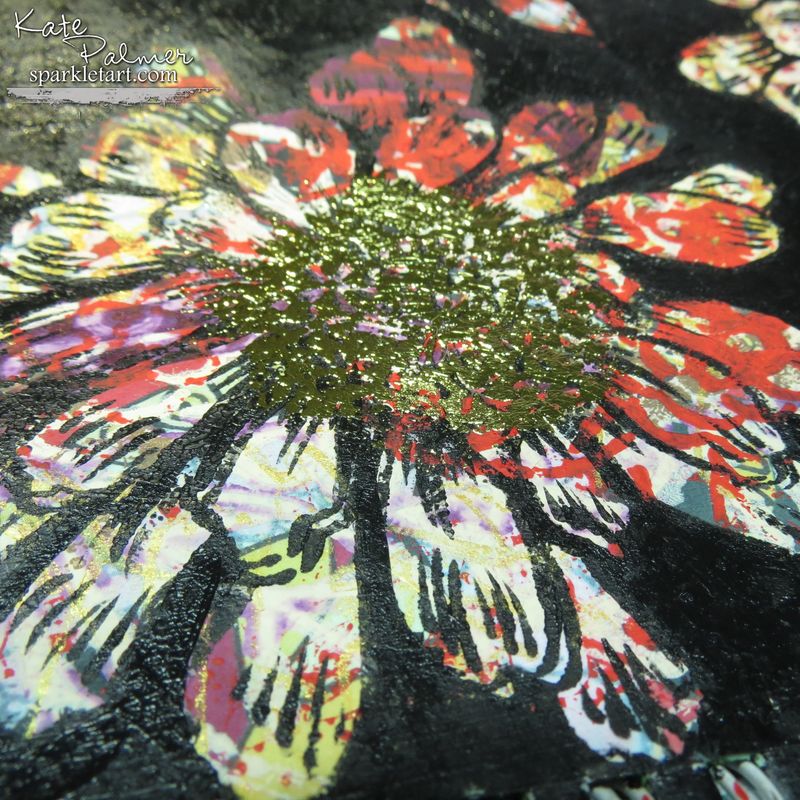
The gold foil is massively blingy – it may not be to your taste, it turns out looking like this.

Art Journal layers with paints and stencils

At this stage your page will look fairly unappealing, the colours don’t pop, the image is not very defined – this is UGLY stage.  Don’t give up, as the only difference between this and something stunning is a little white paint!

Art Journal layers with paints and stencils

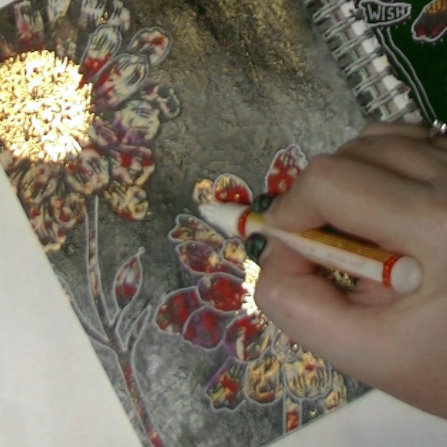
Use a white gel pen (my preference is the Molotow White extra fine nib) to edge the design in white,  colour the patterns in the centre of the flower, draw around each individual petal, the stems and leaves (if you drew any) and add doodling and text as desired – all in white so that it stands out.  You may need to go over the doodling more than once to make the white really pop.

Art Journal layers with paints and stencils

And when you look at the 2 pages together, the result is something like this…
doesn’t the white gel pen make a difference!

Art Journal layers with paints and stencils to create a brilliant layout

I hope you’ve enjoyed this quick tutorial and that it sparks some ideas for your own creations.

May your day sparkle,

Kate

Jennifer’s Eiffel Tower

This article is written by Jennifer Truett

My name is Jennifer Truett (Jennifer Shorter on Facebook) I live in Seaside, California.  I am married, with one son who is 7 years old, two baby dogs and one big dog, a Chihuahua a Chiweenie and a  very sweet Pit Bull.  I love the outdoors but can enjoy staying inside with a good book just as much.  I am new to Mixed Media I just started this journey in April of this year.

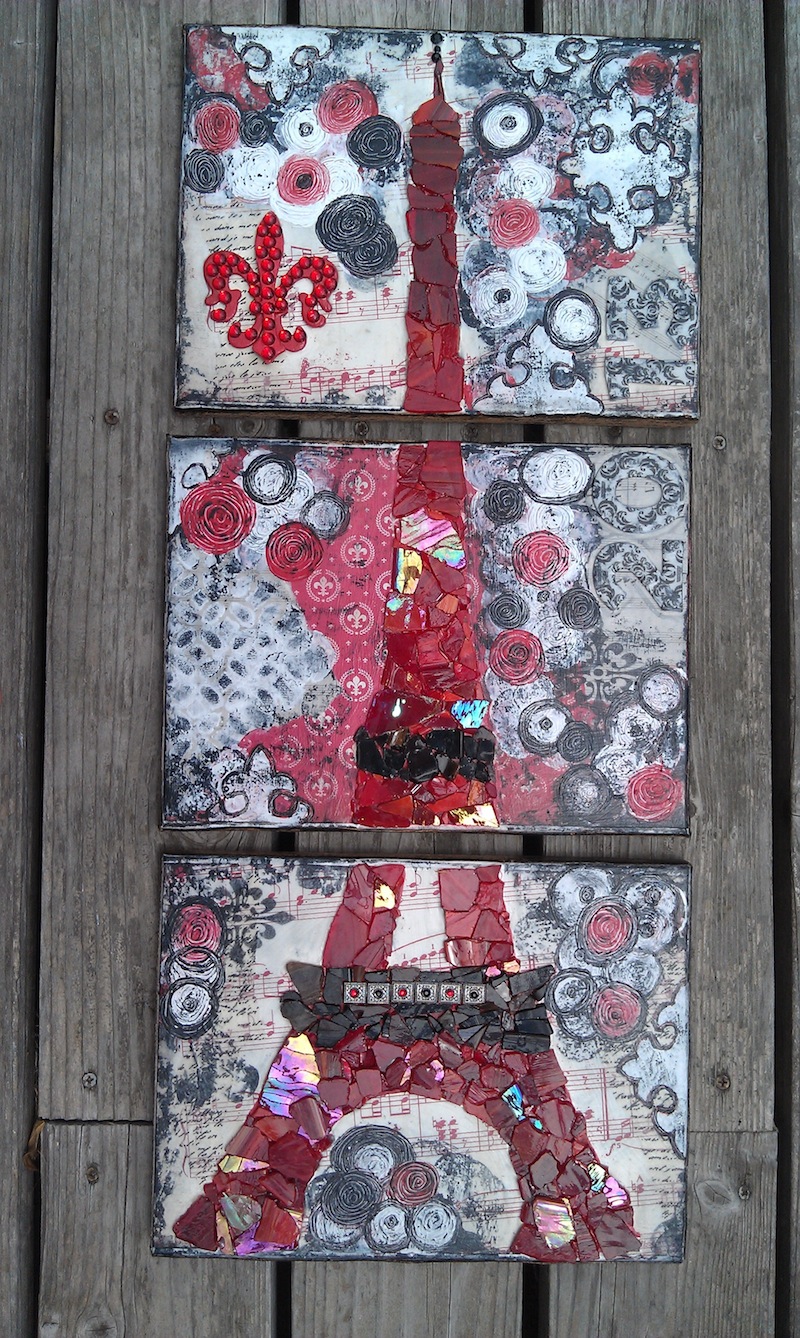
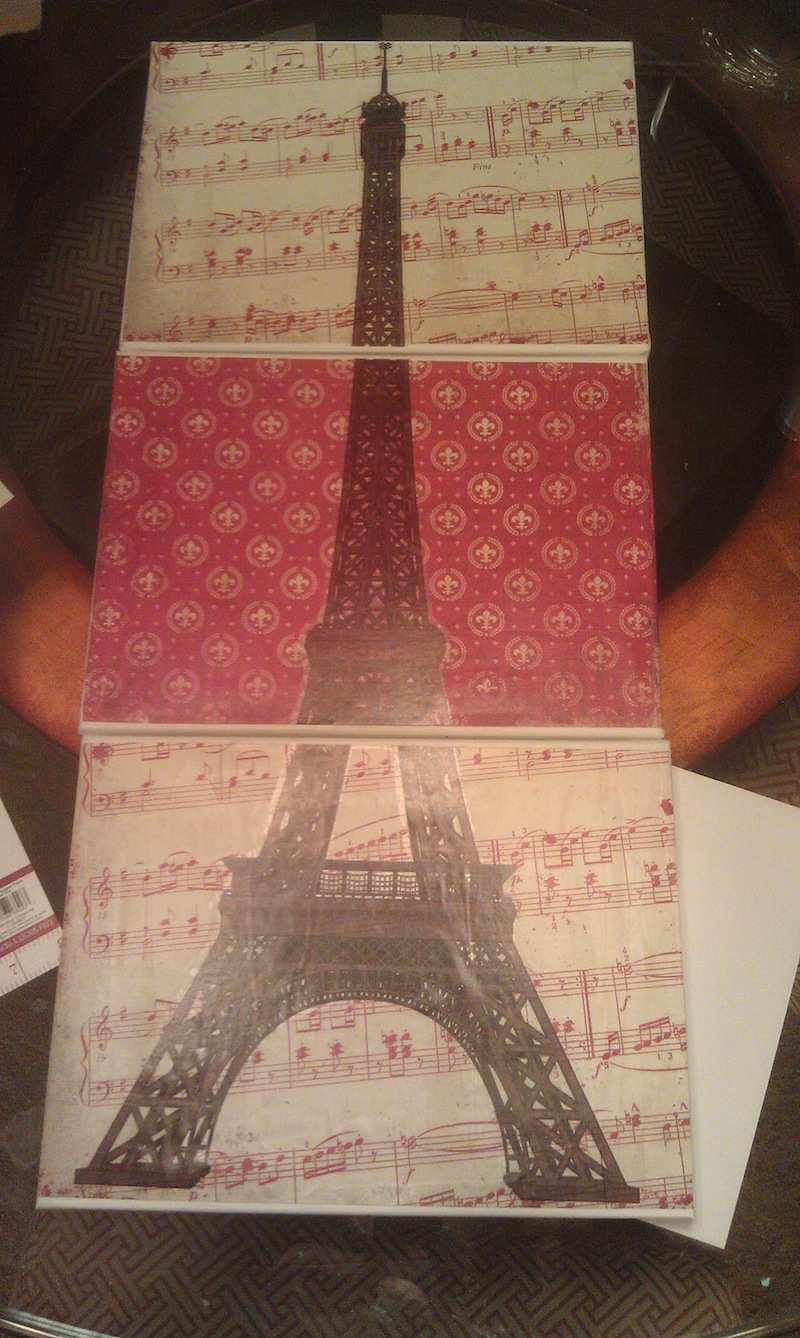
Scrapbooking papers, canvas and an Eiffel tower decal were used to create this amazing piece

I created this piece for my Niece Emilee who just graduated High School.

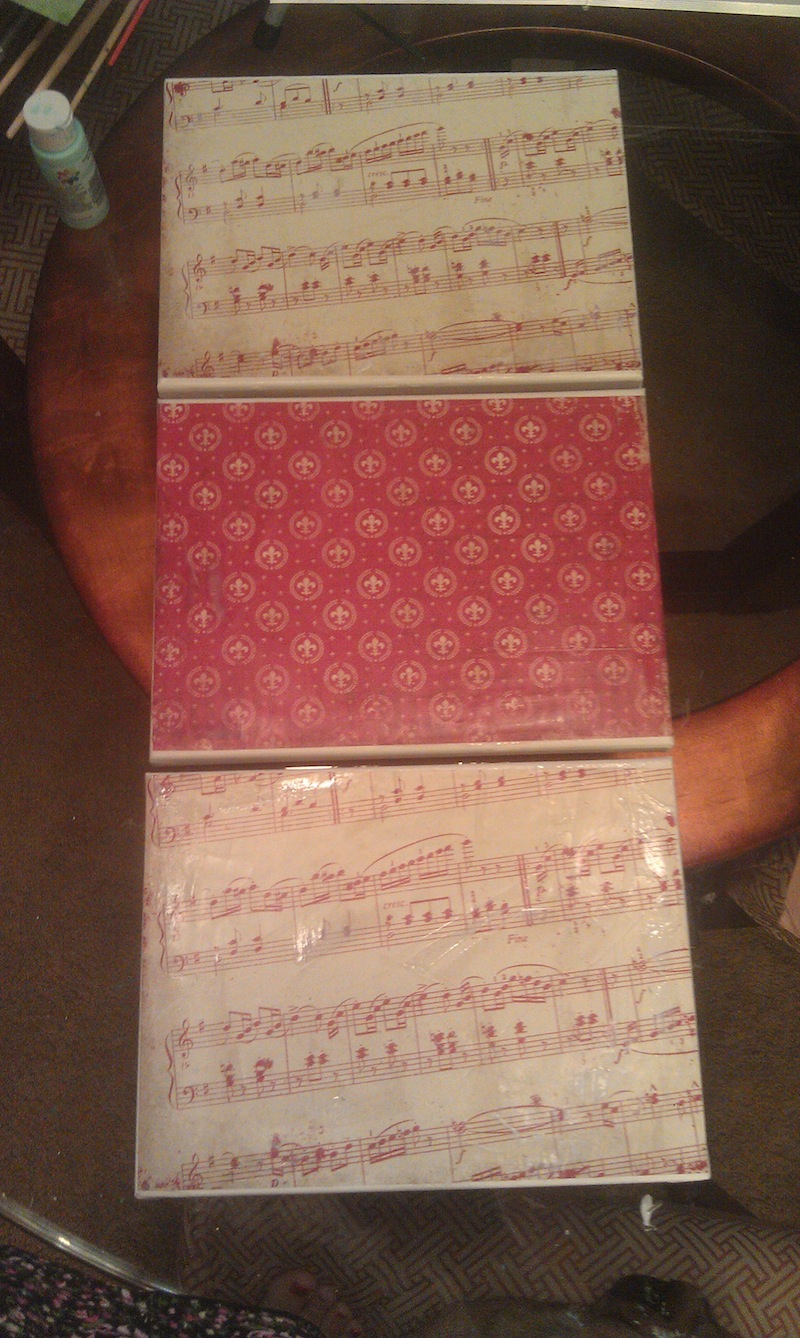
I started by Mod Podging scrapbook paper to canvas.

Scrapbooking papers, canvas and an Eiffel tower decal were used to create this amazing piece.

I added wall art decal of the Eiffel Tower.

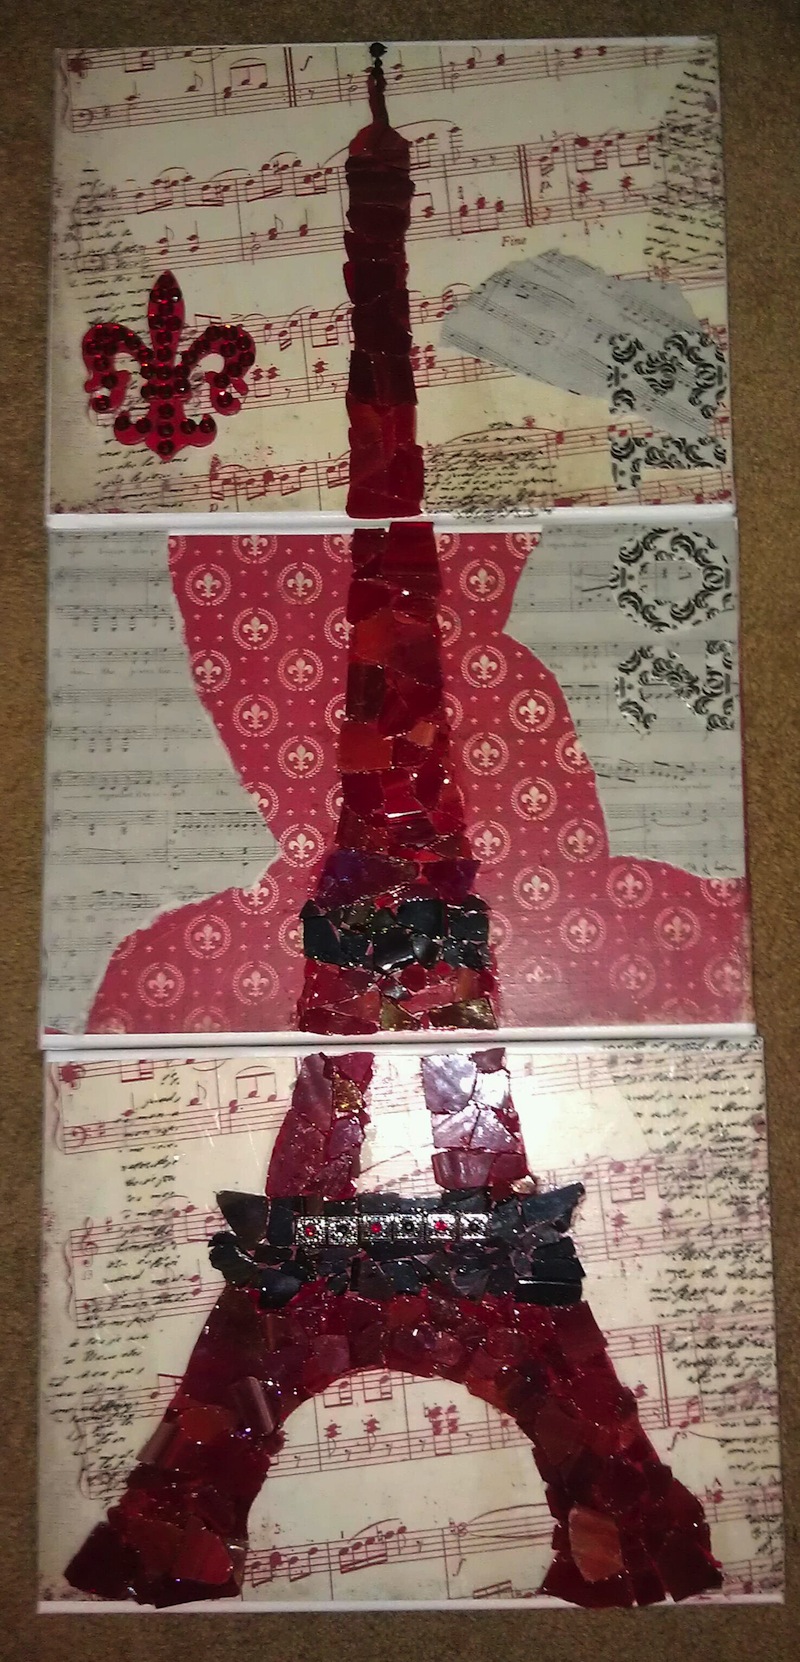
Scrapbooking papers, canvas and an Eiffel tower decal were used to create this amazing piece.

I layered it with more paper, painted a wood Fleur De Lis with some gems to add some bling and covered the tower with stained glass pieces.

Scrapbooking papers, canvas and an Eiffel tower decal were used to create this amazing piece.

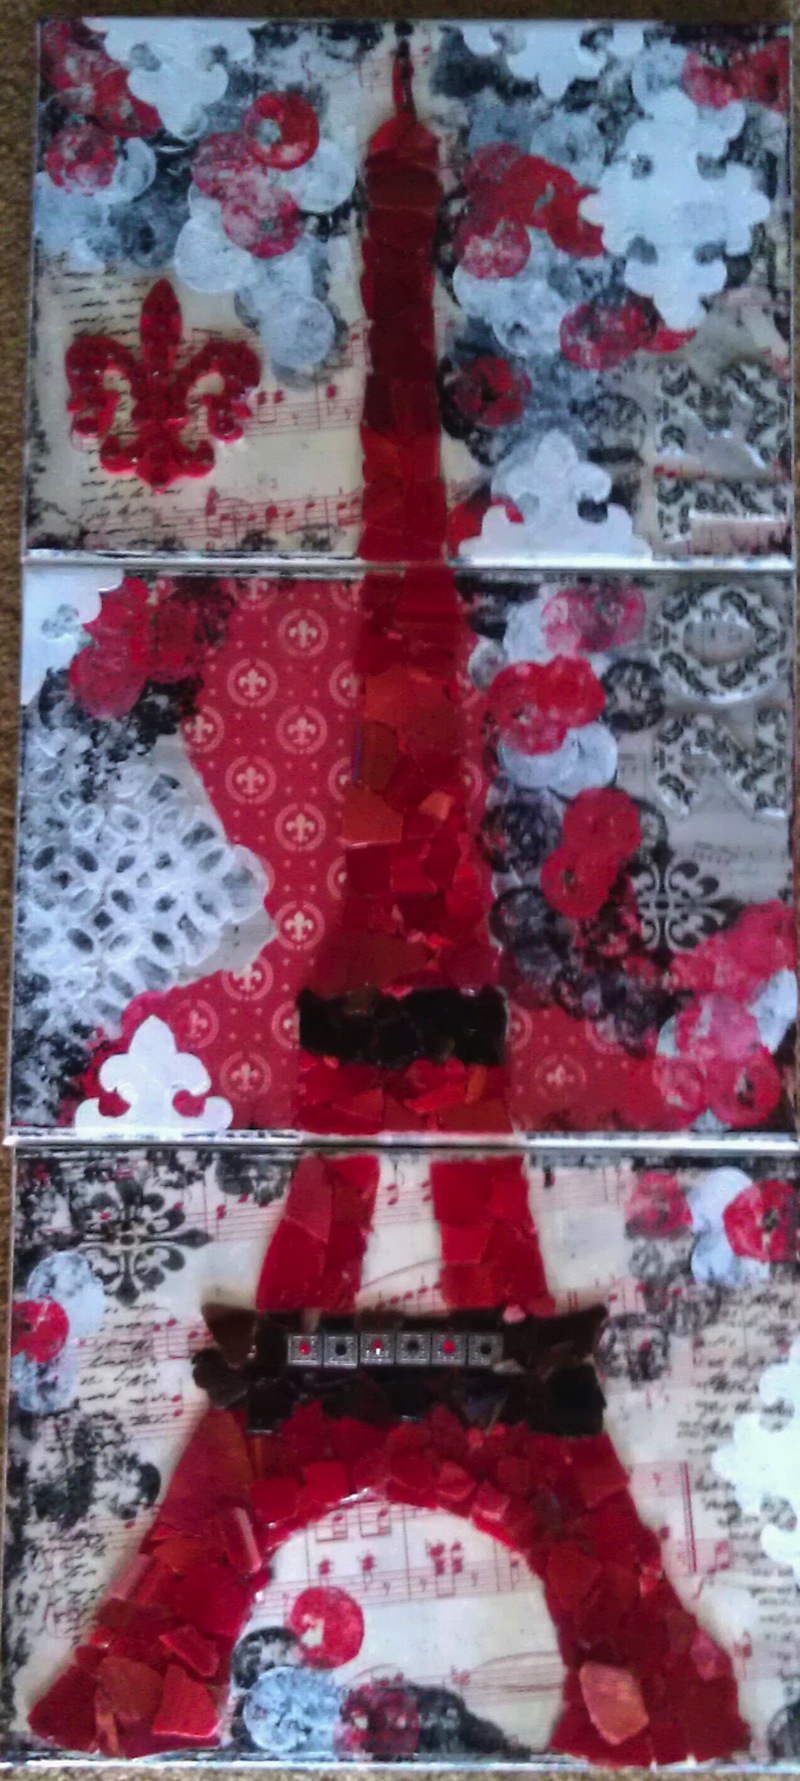
With acrylic paint, gesso, stencils, ink, felt numbers, mod podge, and my imagination I created this Eiffel Tower piece.

Scrapbooking papers, canvas and an Eiffel tower decal were used to create this amazing piece

This was a fun piece to create and for being my Fourth Mixed Media piece I was pleasantly surprised or should I say super excited when I received a message from Michelle Brown about it from a picture I posted on the Creating Mixed Media Facebook page. I have already learned so much from reading the different posts and from Michelle’s book, “Creating Layers in Mixed Media Art.”  I want to thank Michelle and all of you for your inspiration and beautiful art as I continue my Mixed Media Art journey.

Thank YOU, Jennifer!

.

.