Michelle G Brown | Mixed Media Art

Upcycle Paper Roll Mini Book

~ * ~

This article was written by Melanie Statnick

We all have paper towel rolls and bath room tissue rolls. It’s recyclable and reusing able and some save it for all sorts of things. Something I have learned to do with it is make books and or note pads. These ideas can be found on Pinterest. There are many different ways to make and design these and I encourage you to find them and come up with something new and share your ideas in the comments. You can get your children involved also. They are fun and easy.
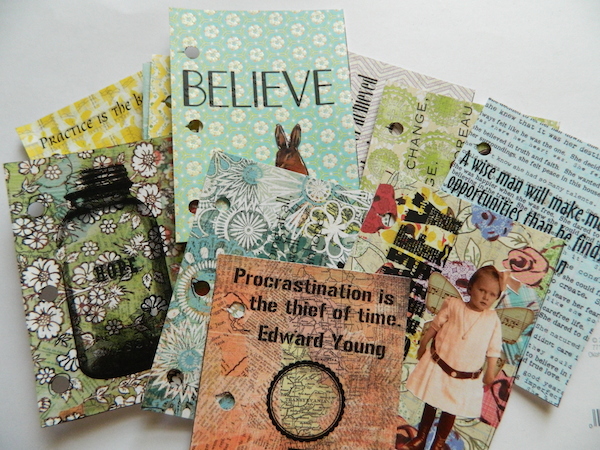
Melanie Statnick created this fun up cycling mini book

Supplies:

Paper roll

Craft paper or Scrap book

Gel medium/Mod Podge

Hole Punch

Binder Rings or Craft wire

Images, letters, word art

Micron or Copic Pens

Process for Creating your Mini Book

Begin by flattening out the paper roll. Here I used bathroom tissue, you can use a paper towel roll and cut it in half. Glue the inside of both rolls to create your front and back cover and let dry.
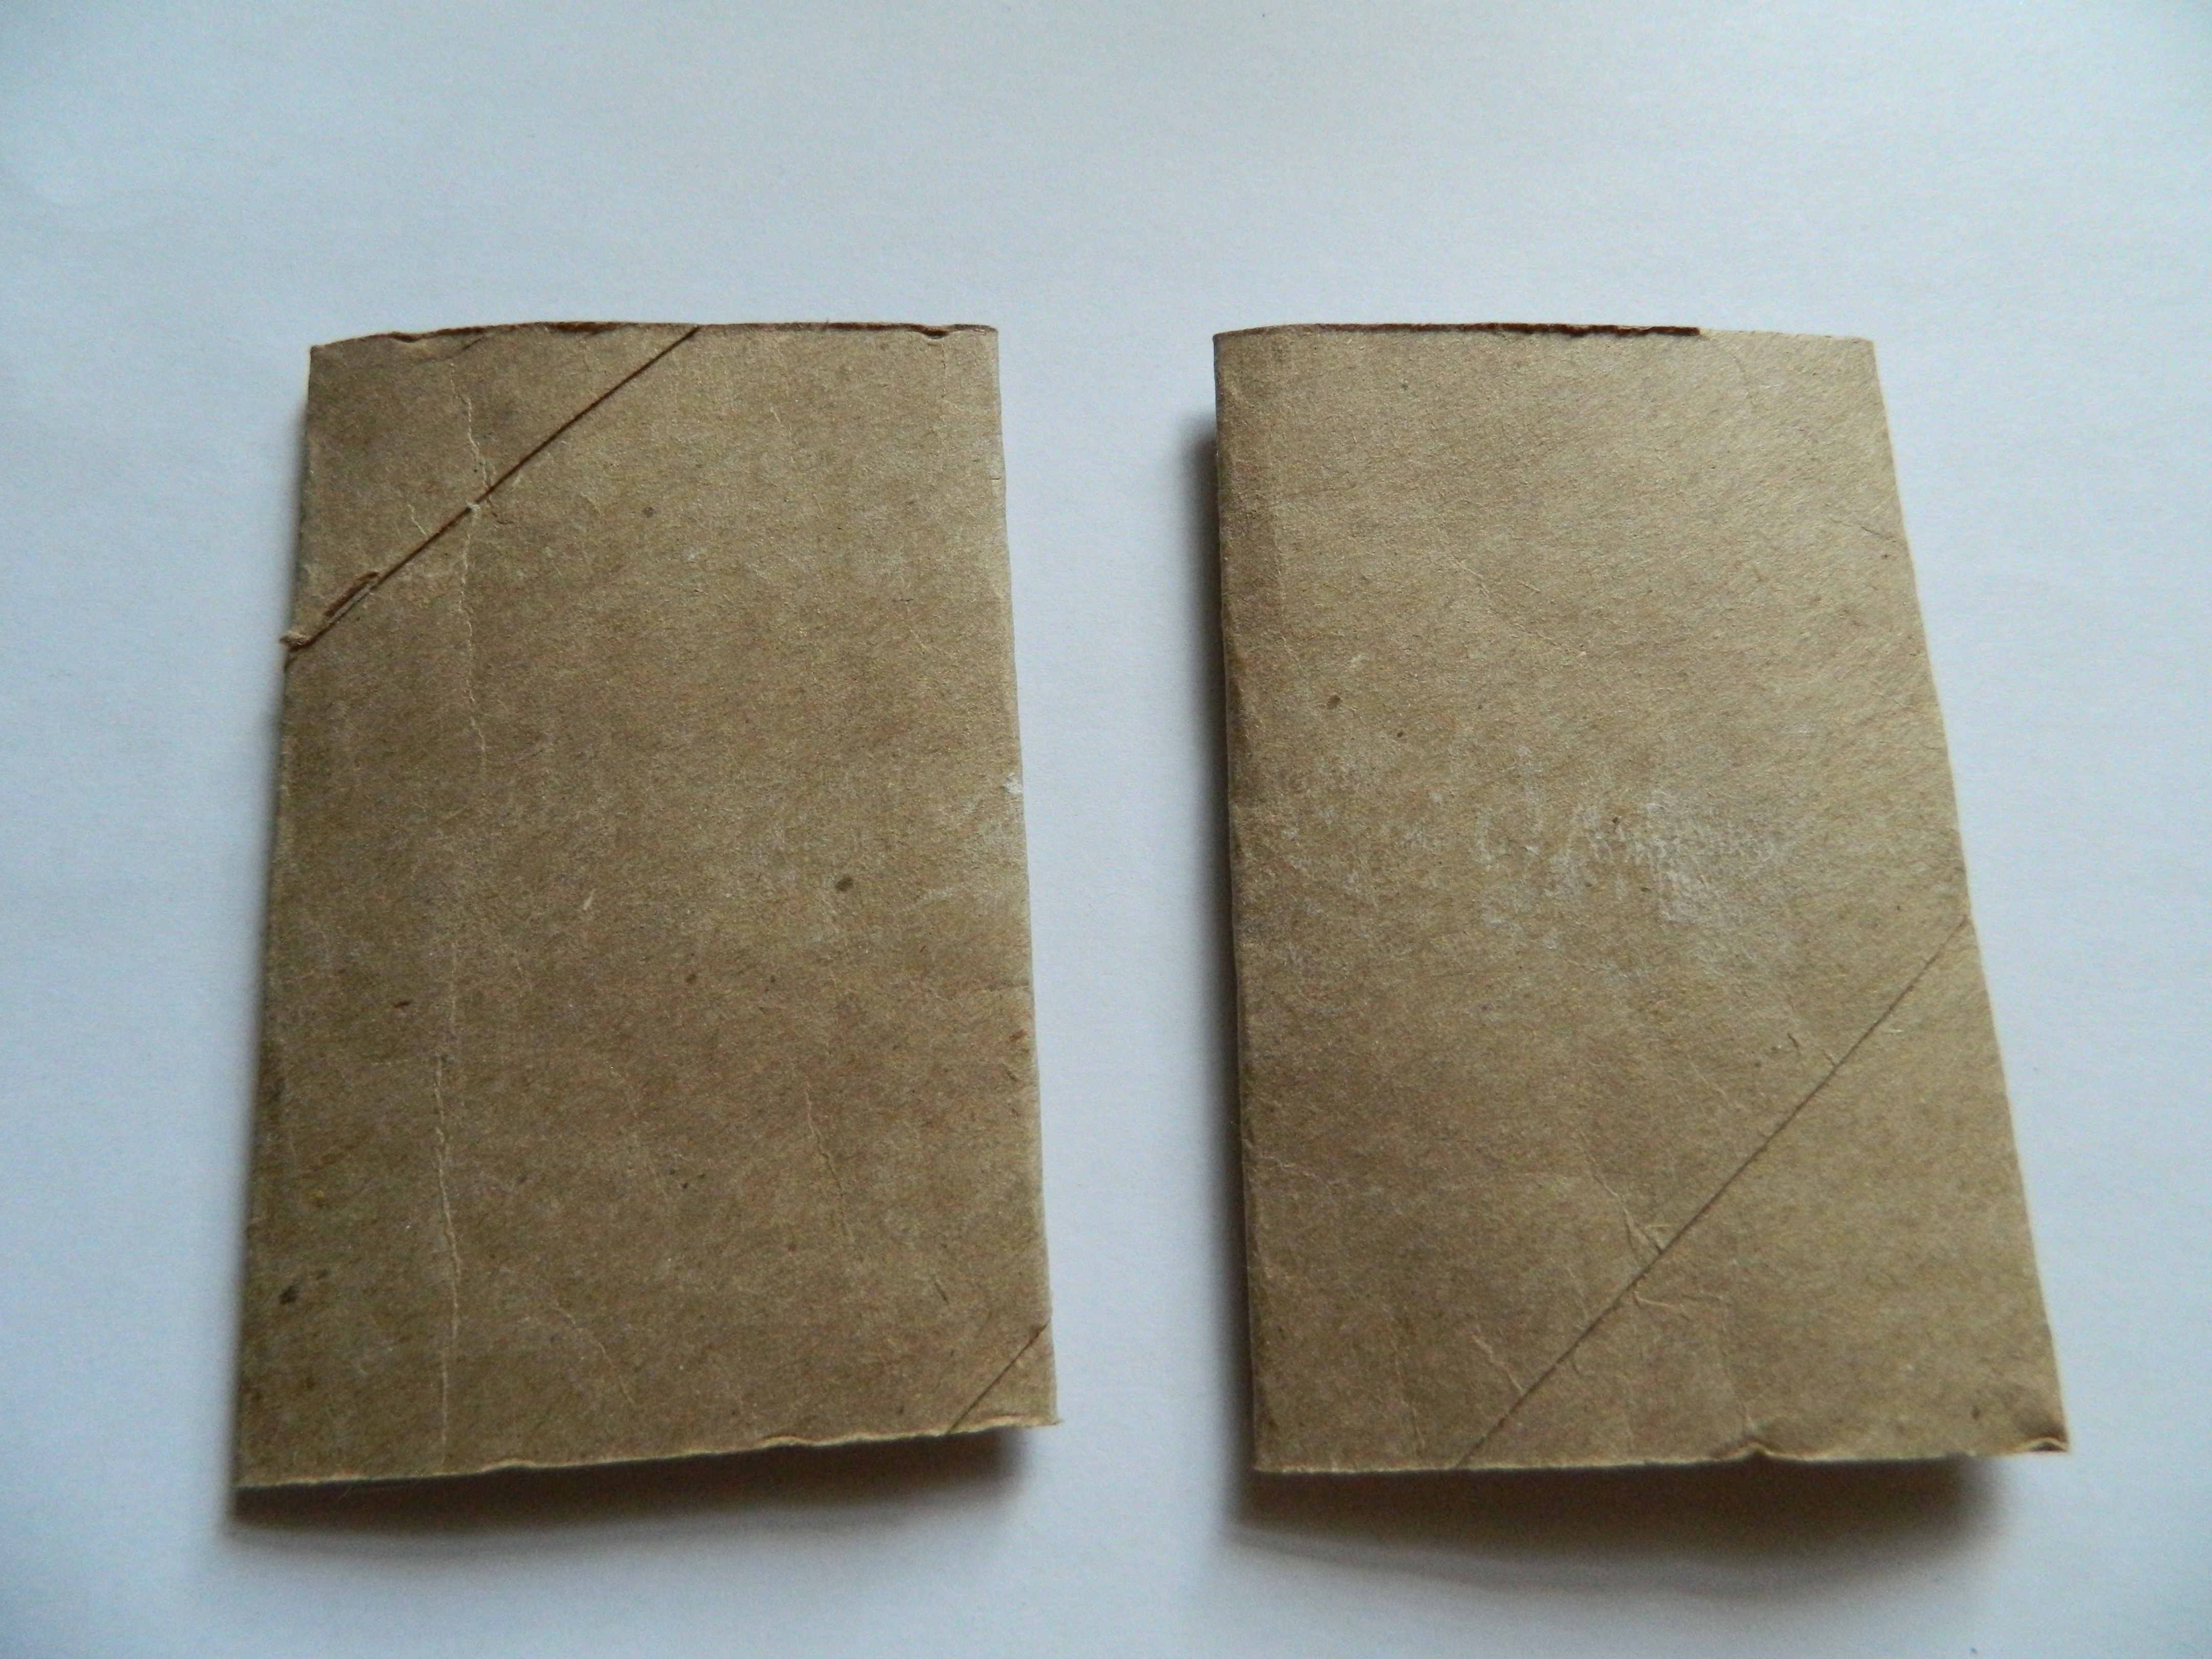
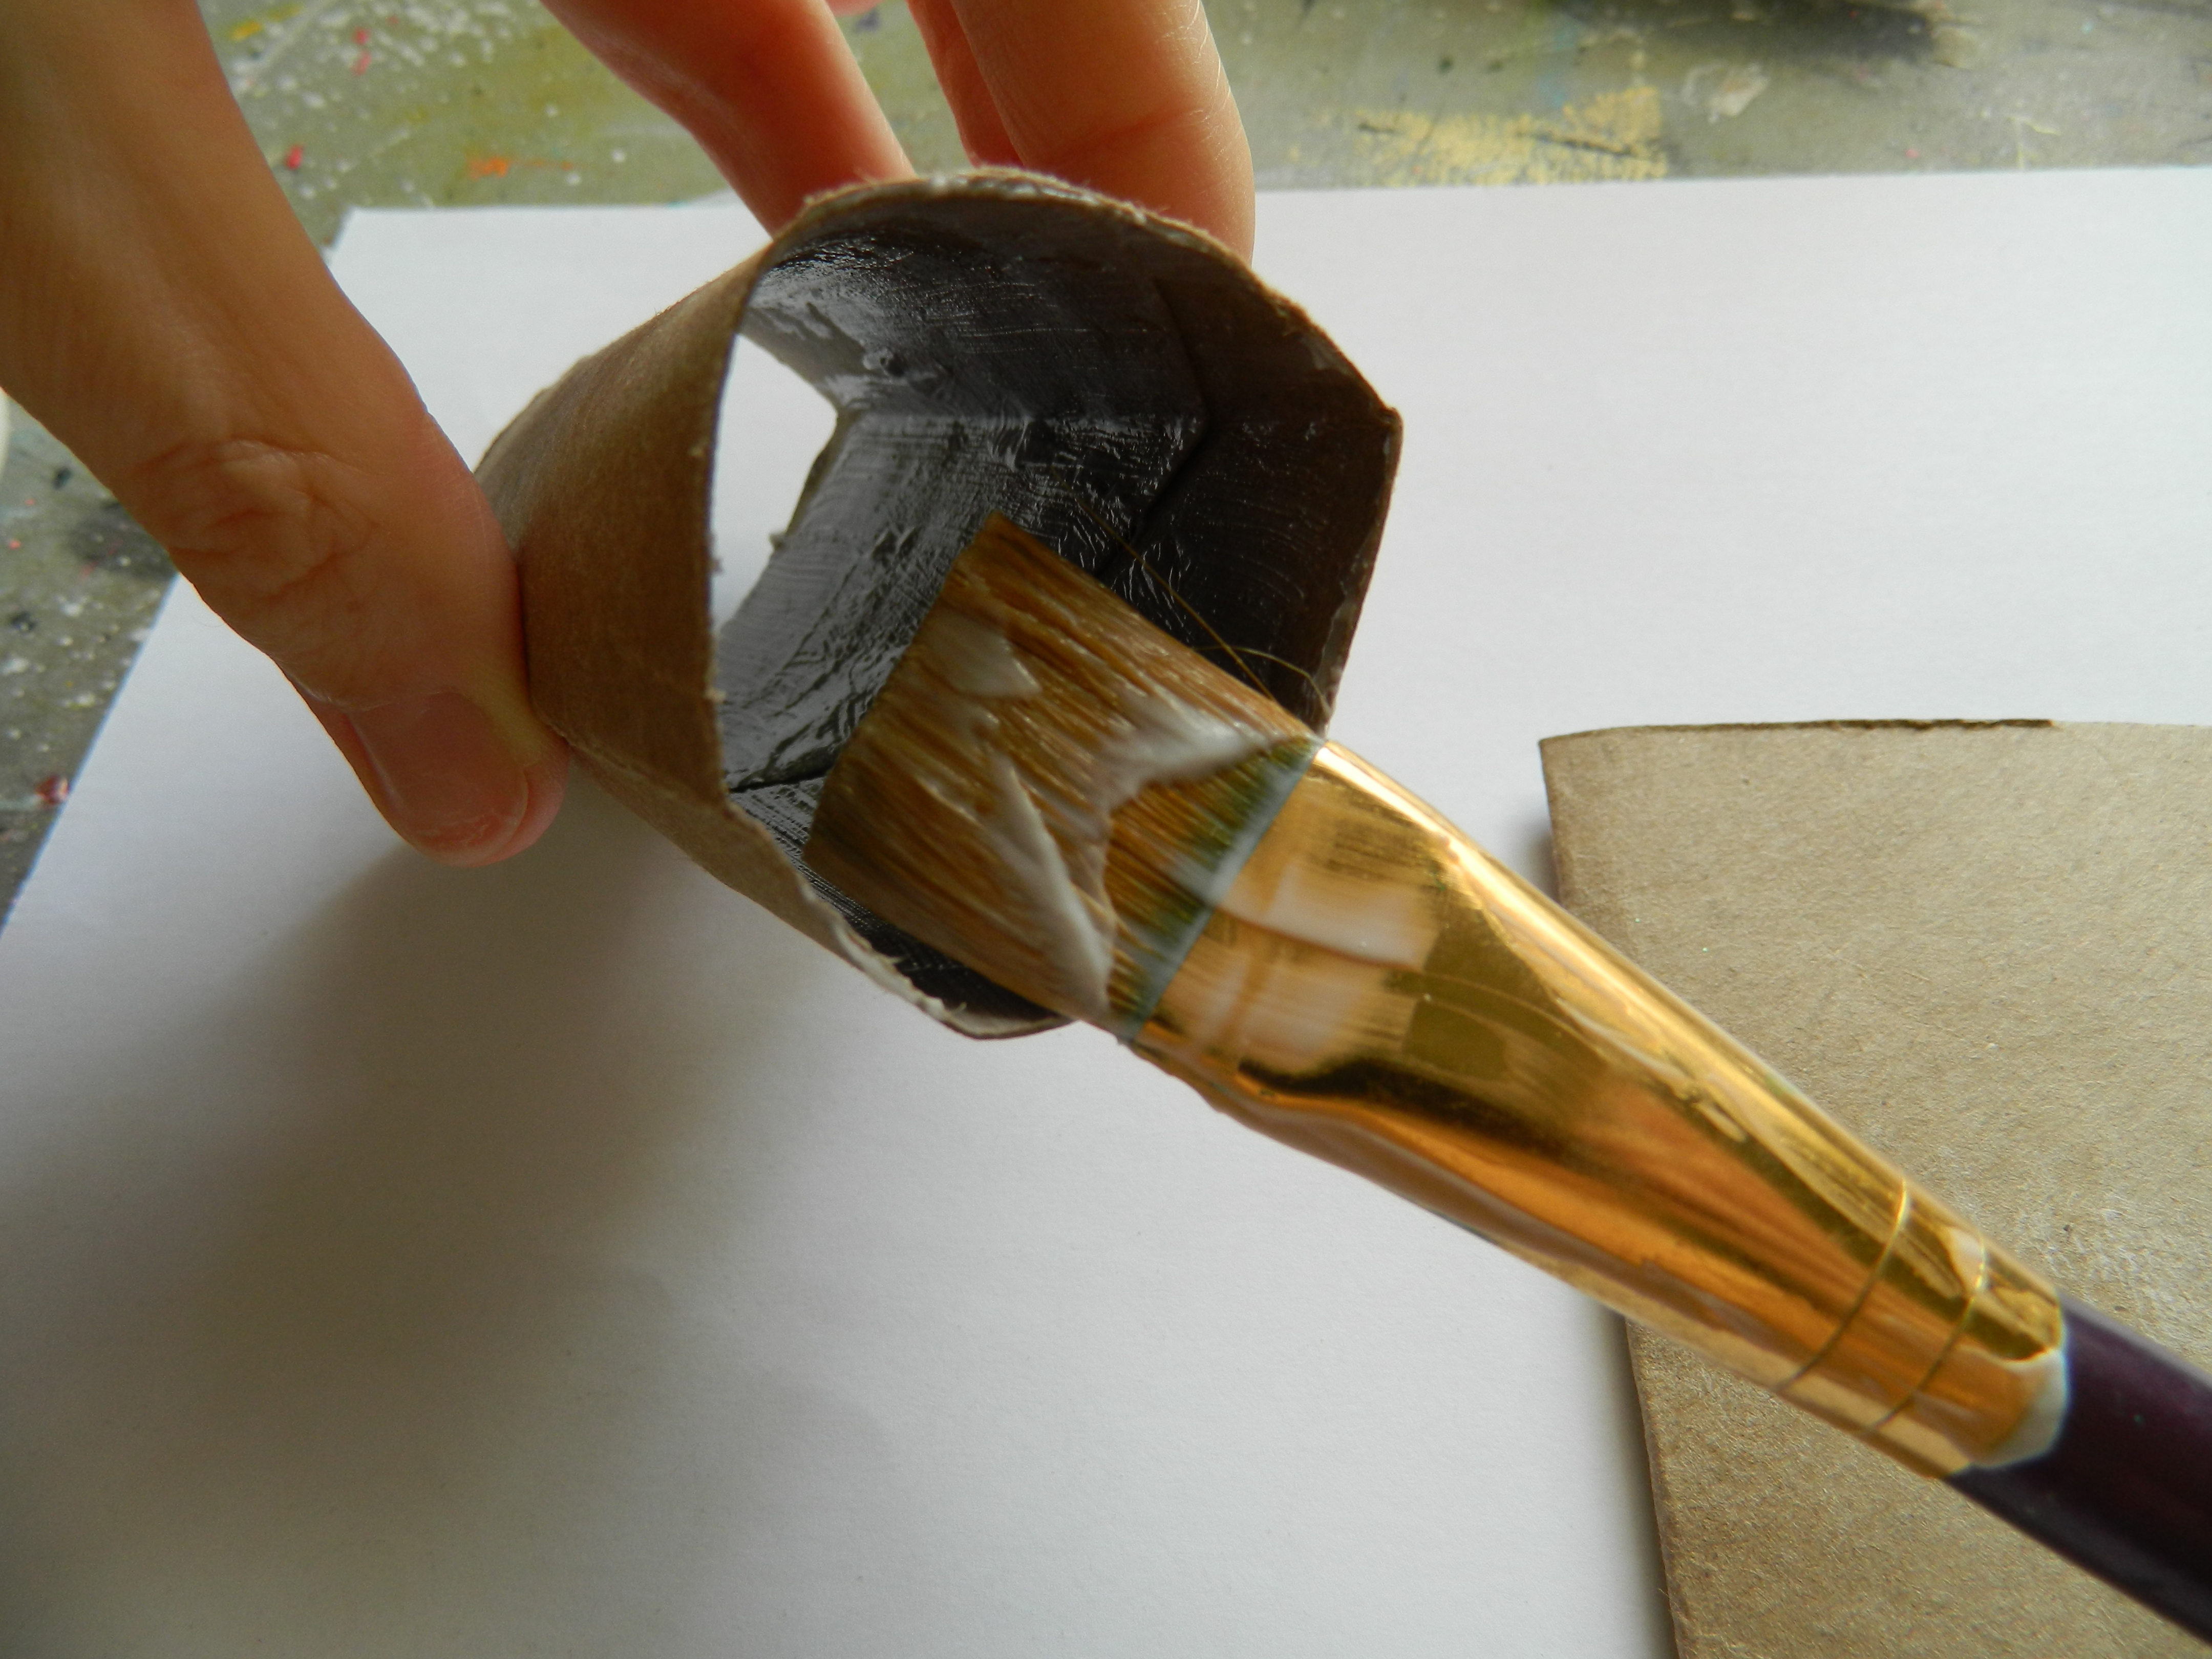
handmade books with paper towel and toilet paper rolls

handmade books with paper towel and toilet paper rolls

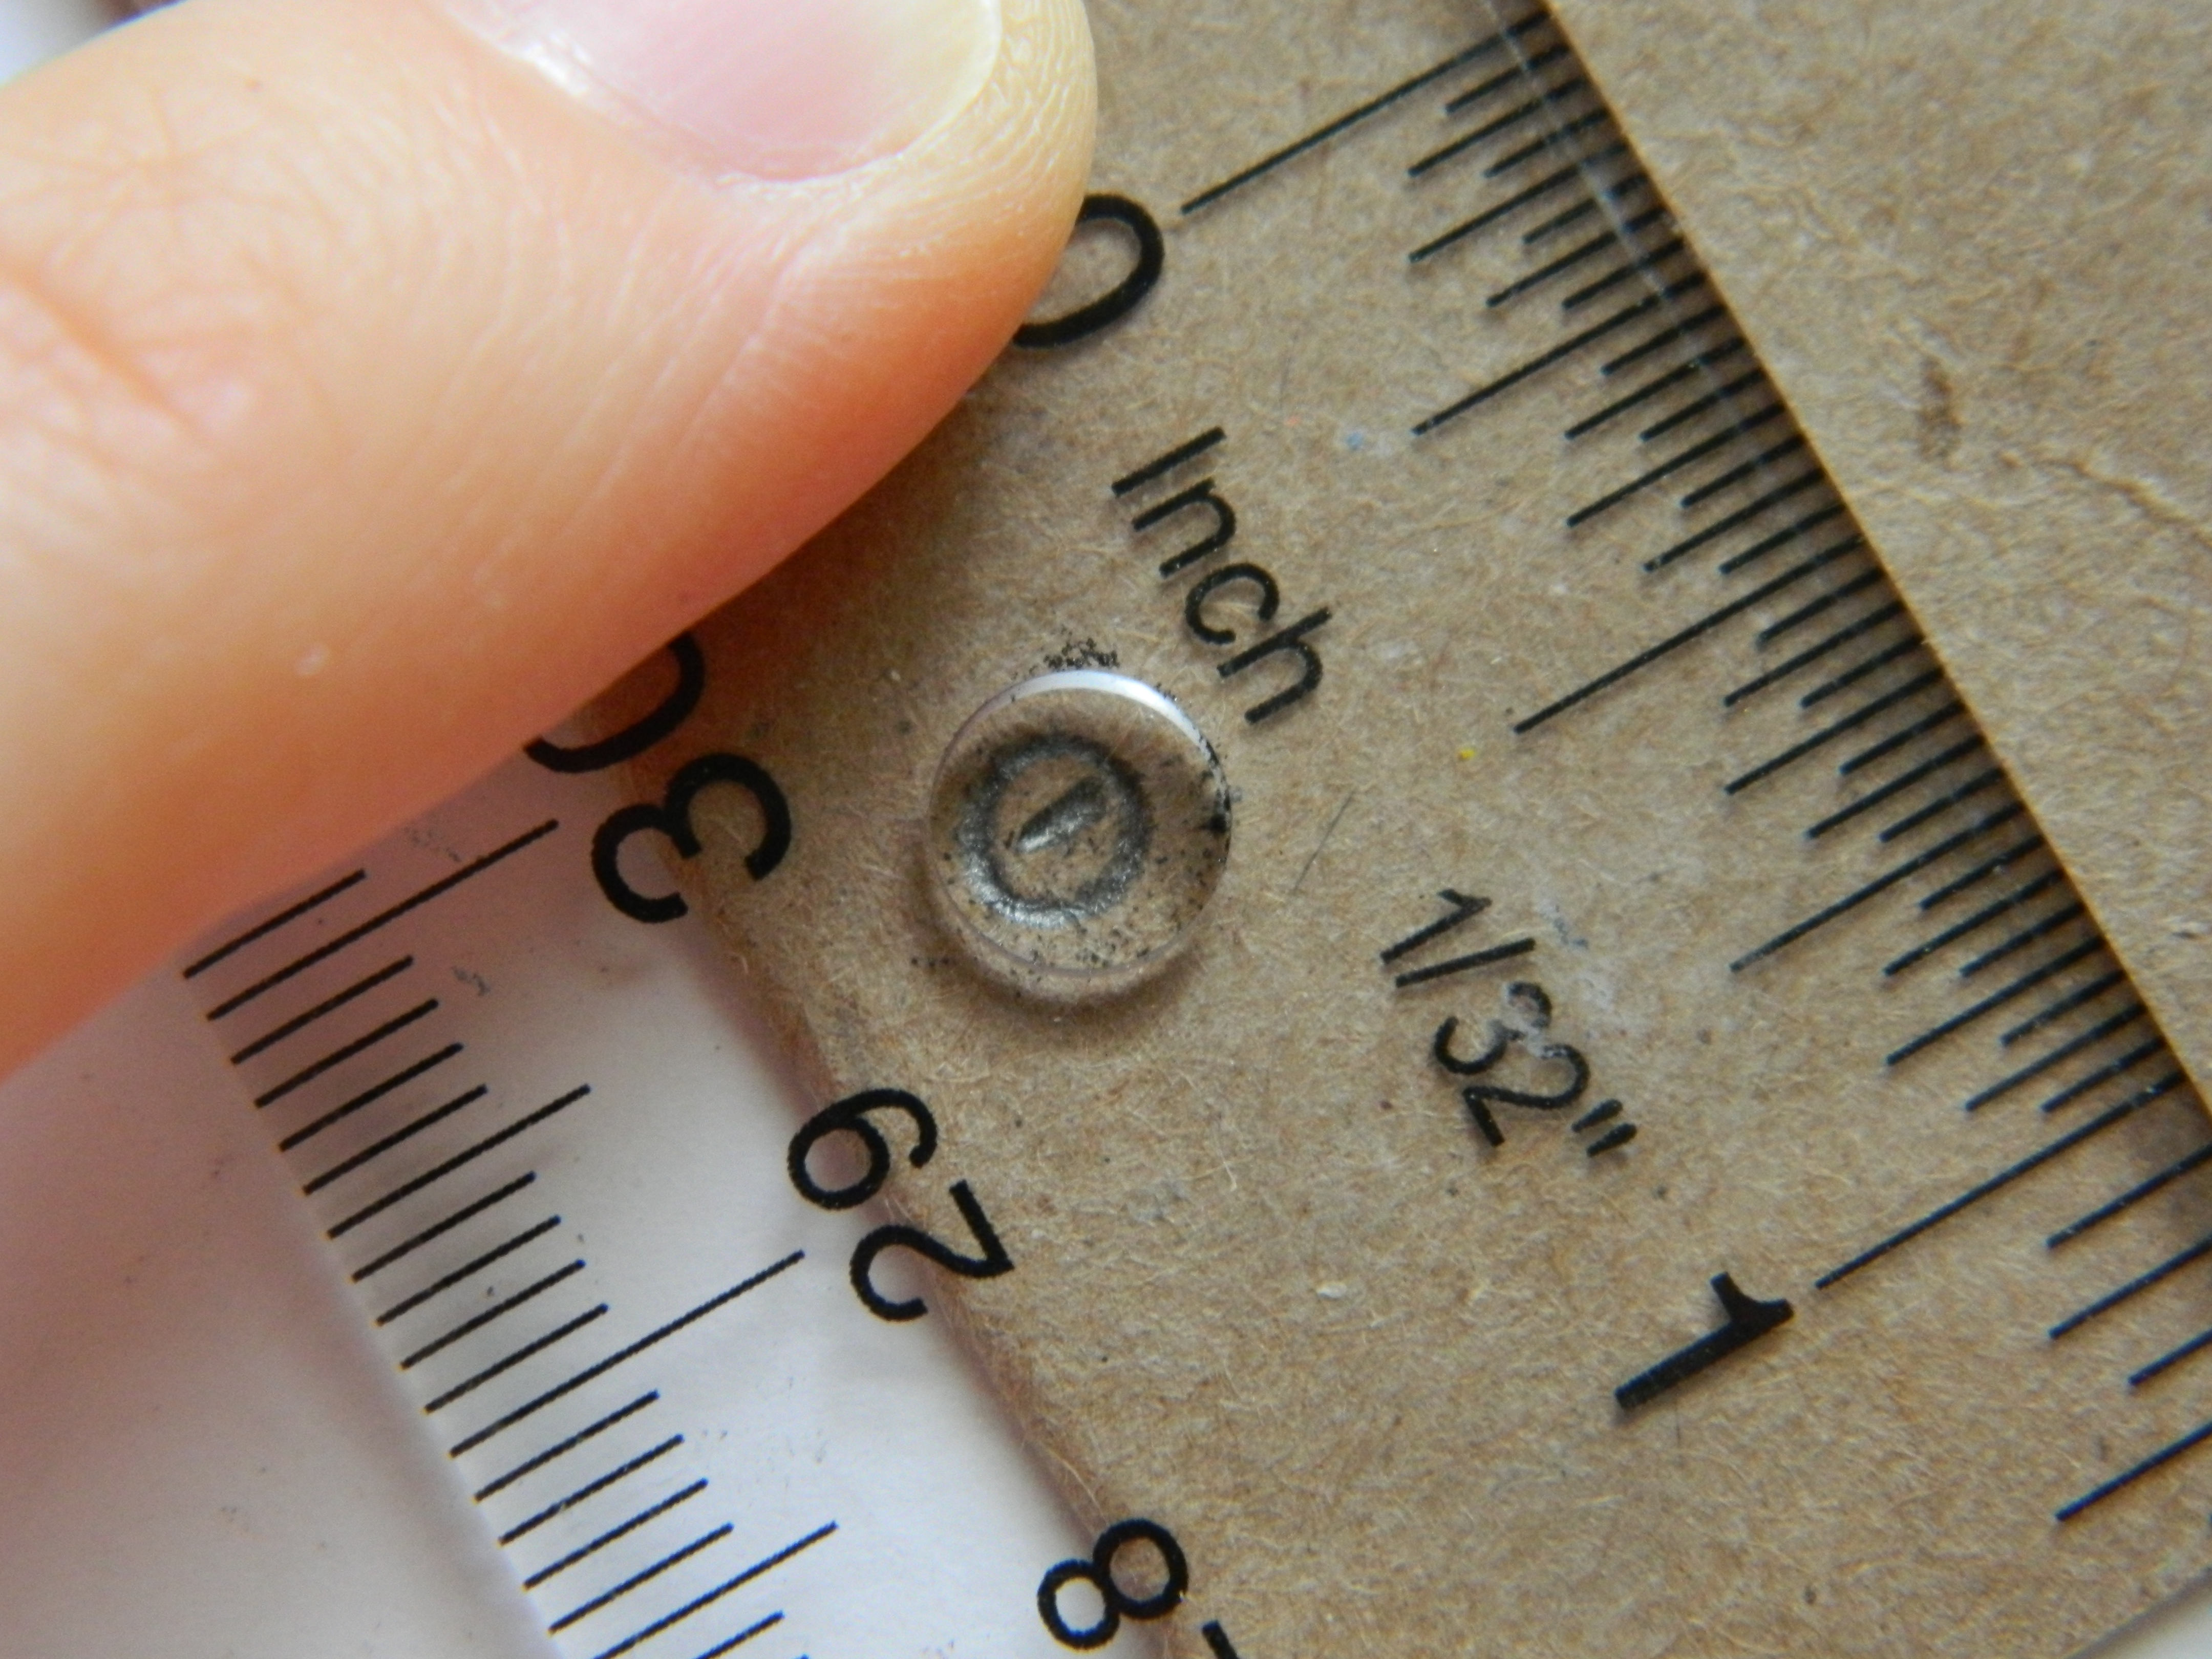
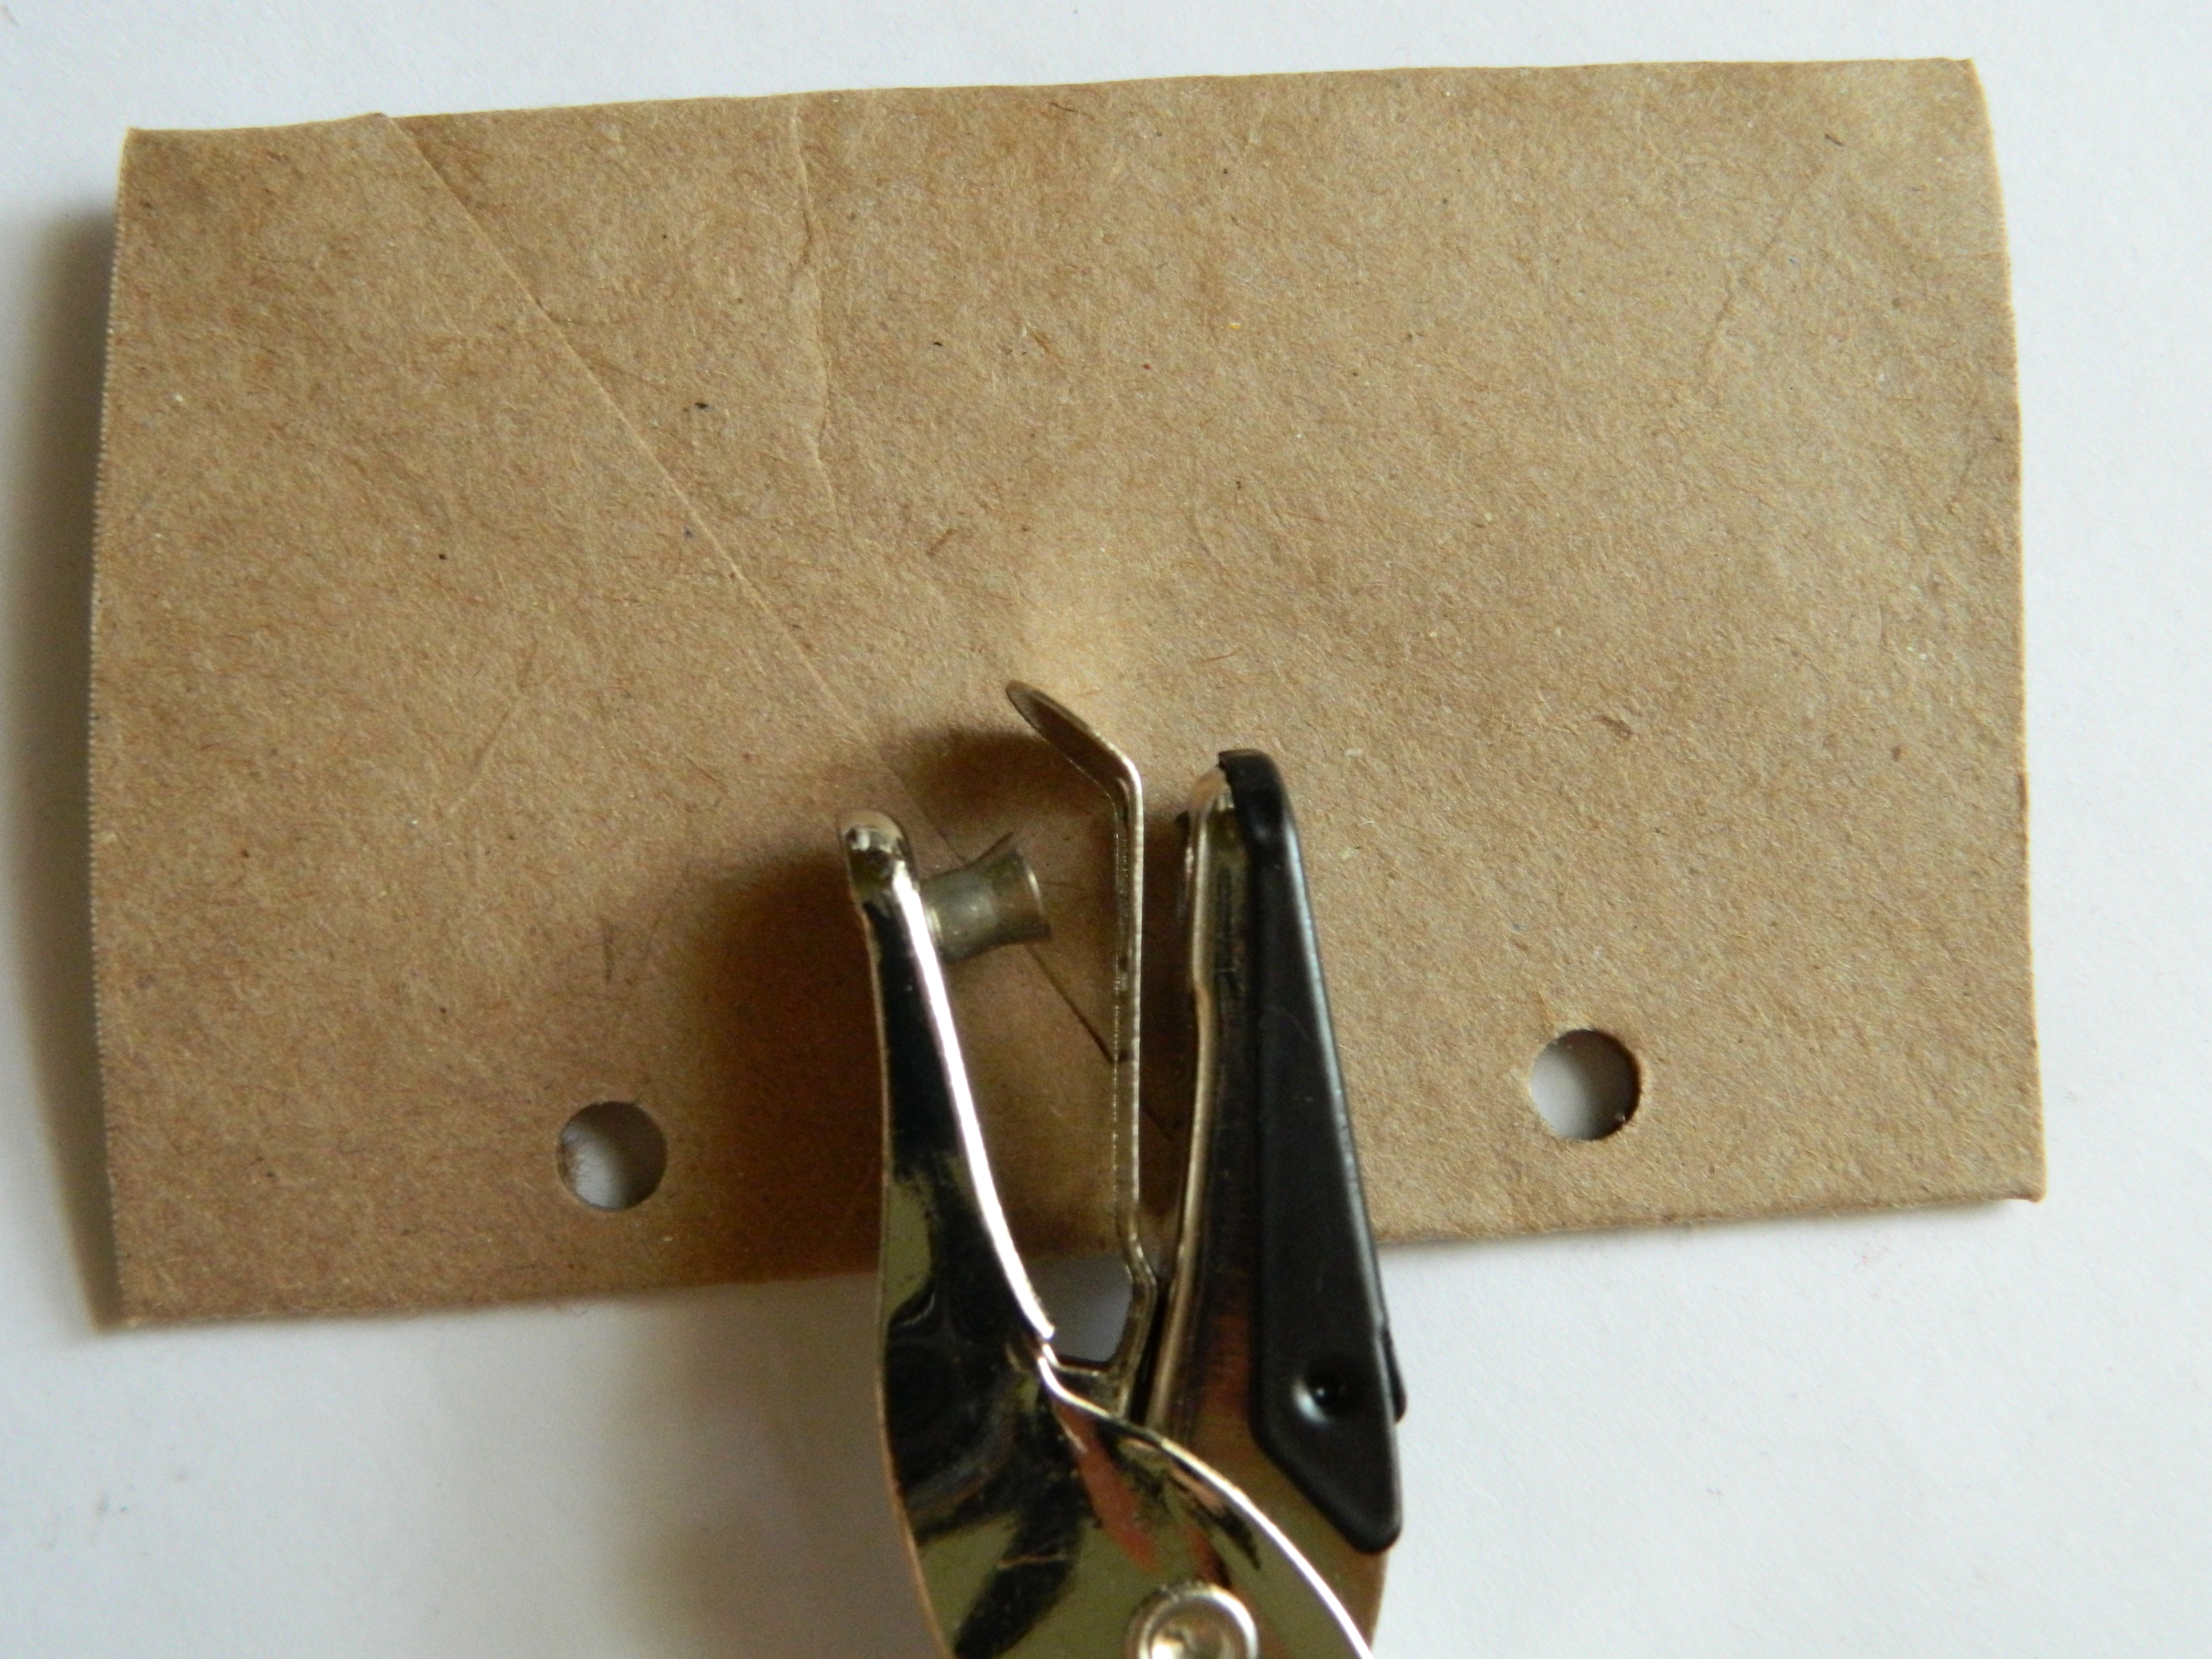
Next you want to take a ruler and measure approximately were you want to your holes and use the hole punch to punch through. Once you have them punched measure and cut your craft paper the same size as your roll covers and punch holes in each to match your covers.
handmade books with paper towel and toilet paper rolls

handmade books with paper towel and toilet paper rolls

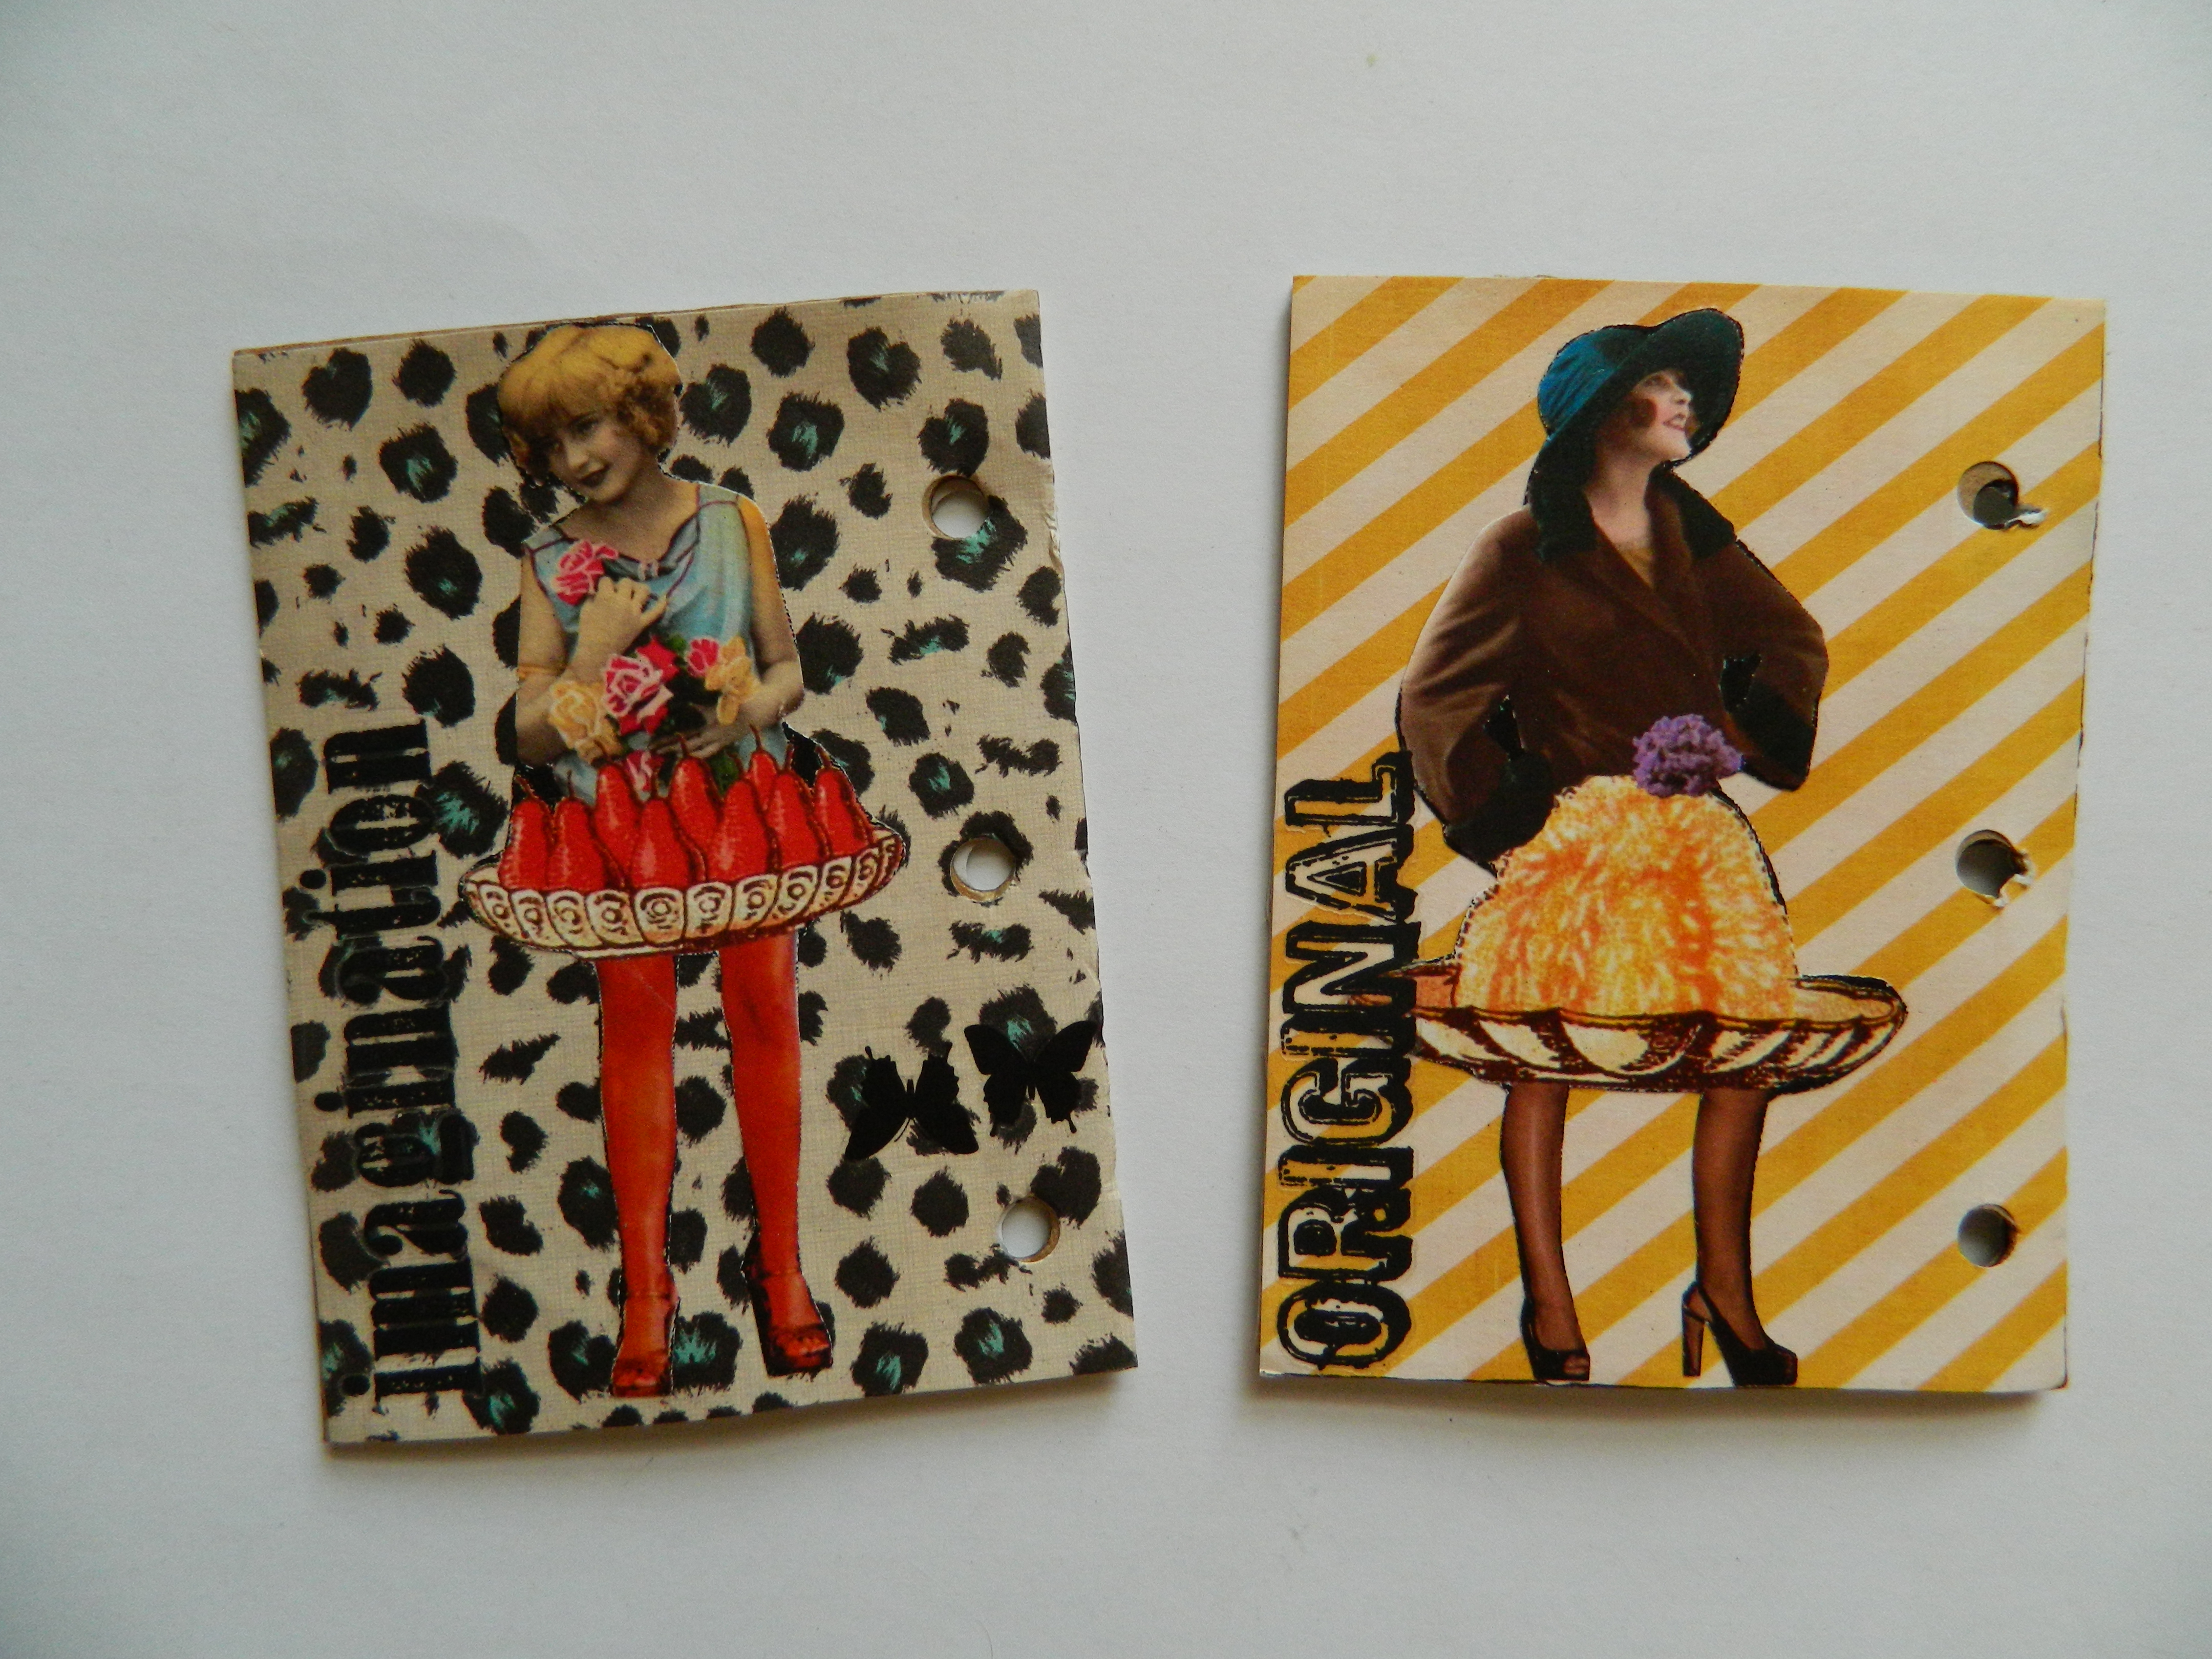
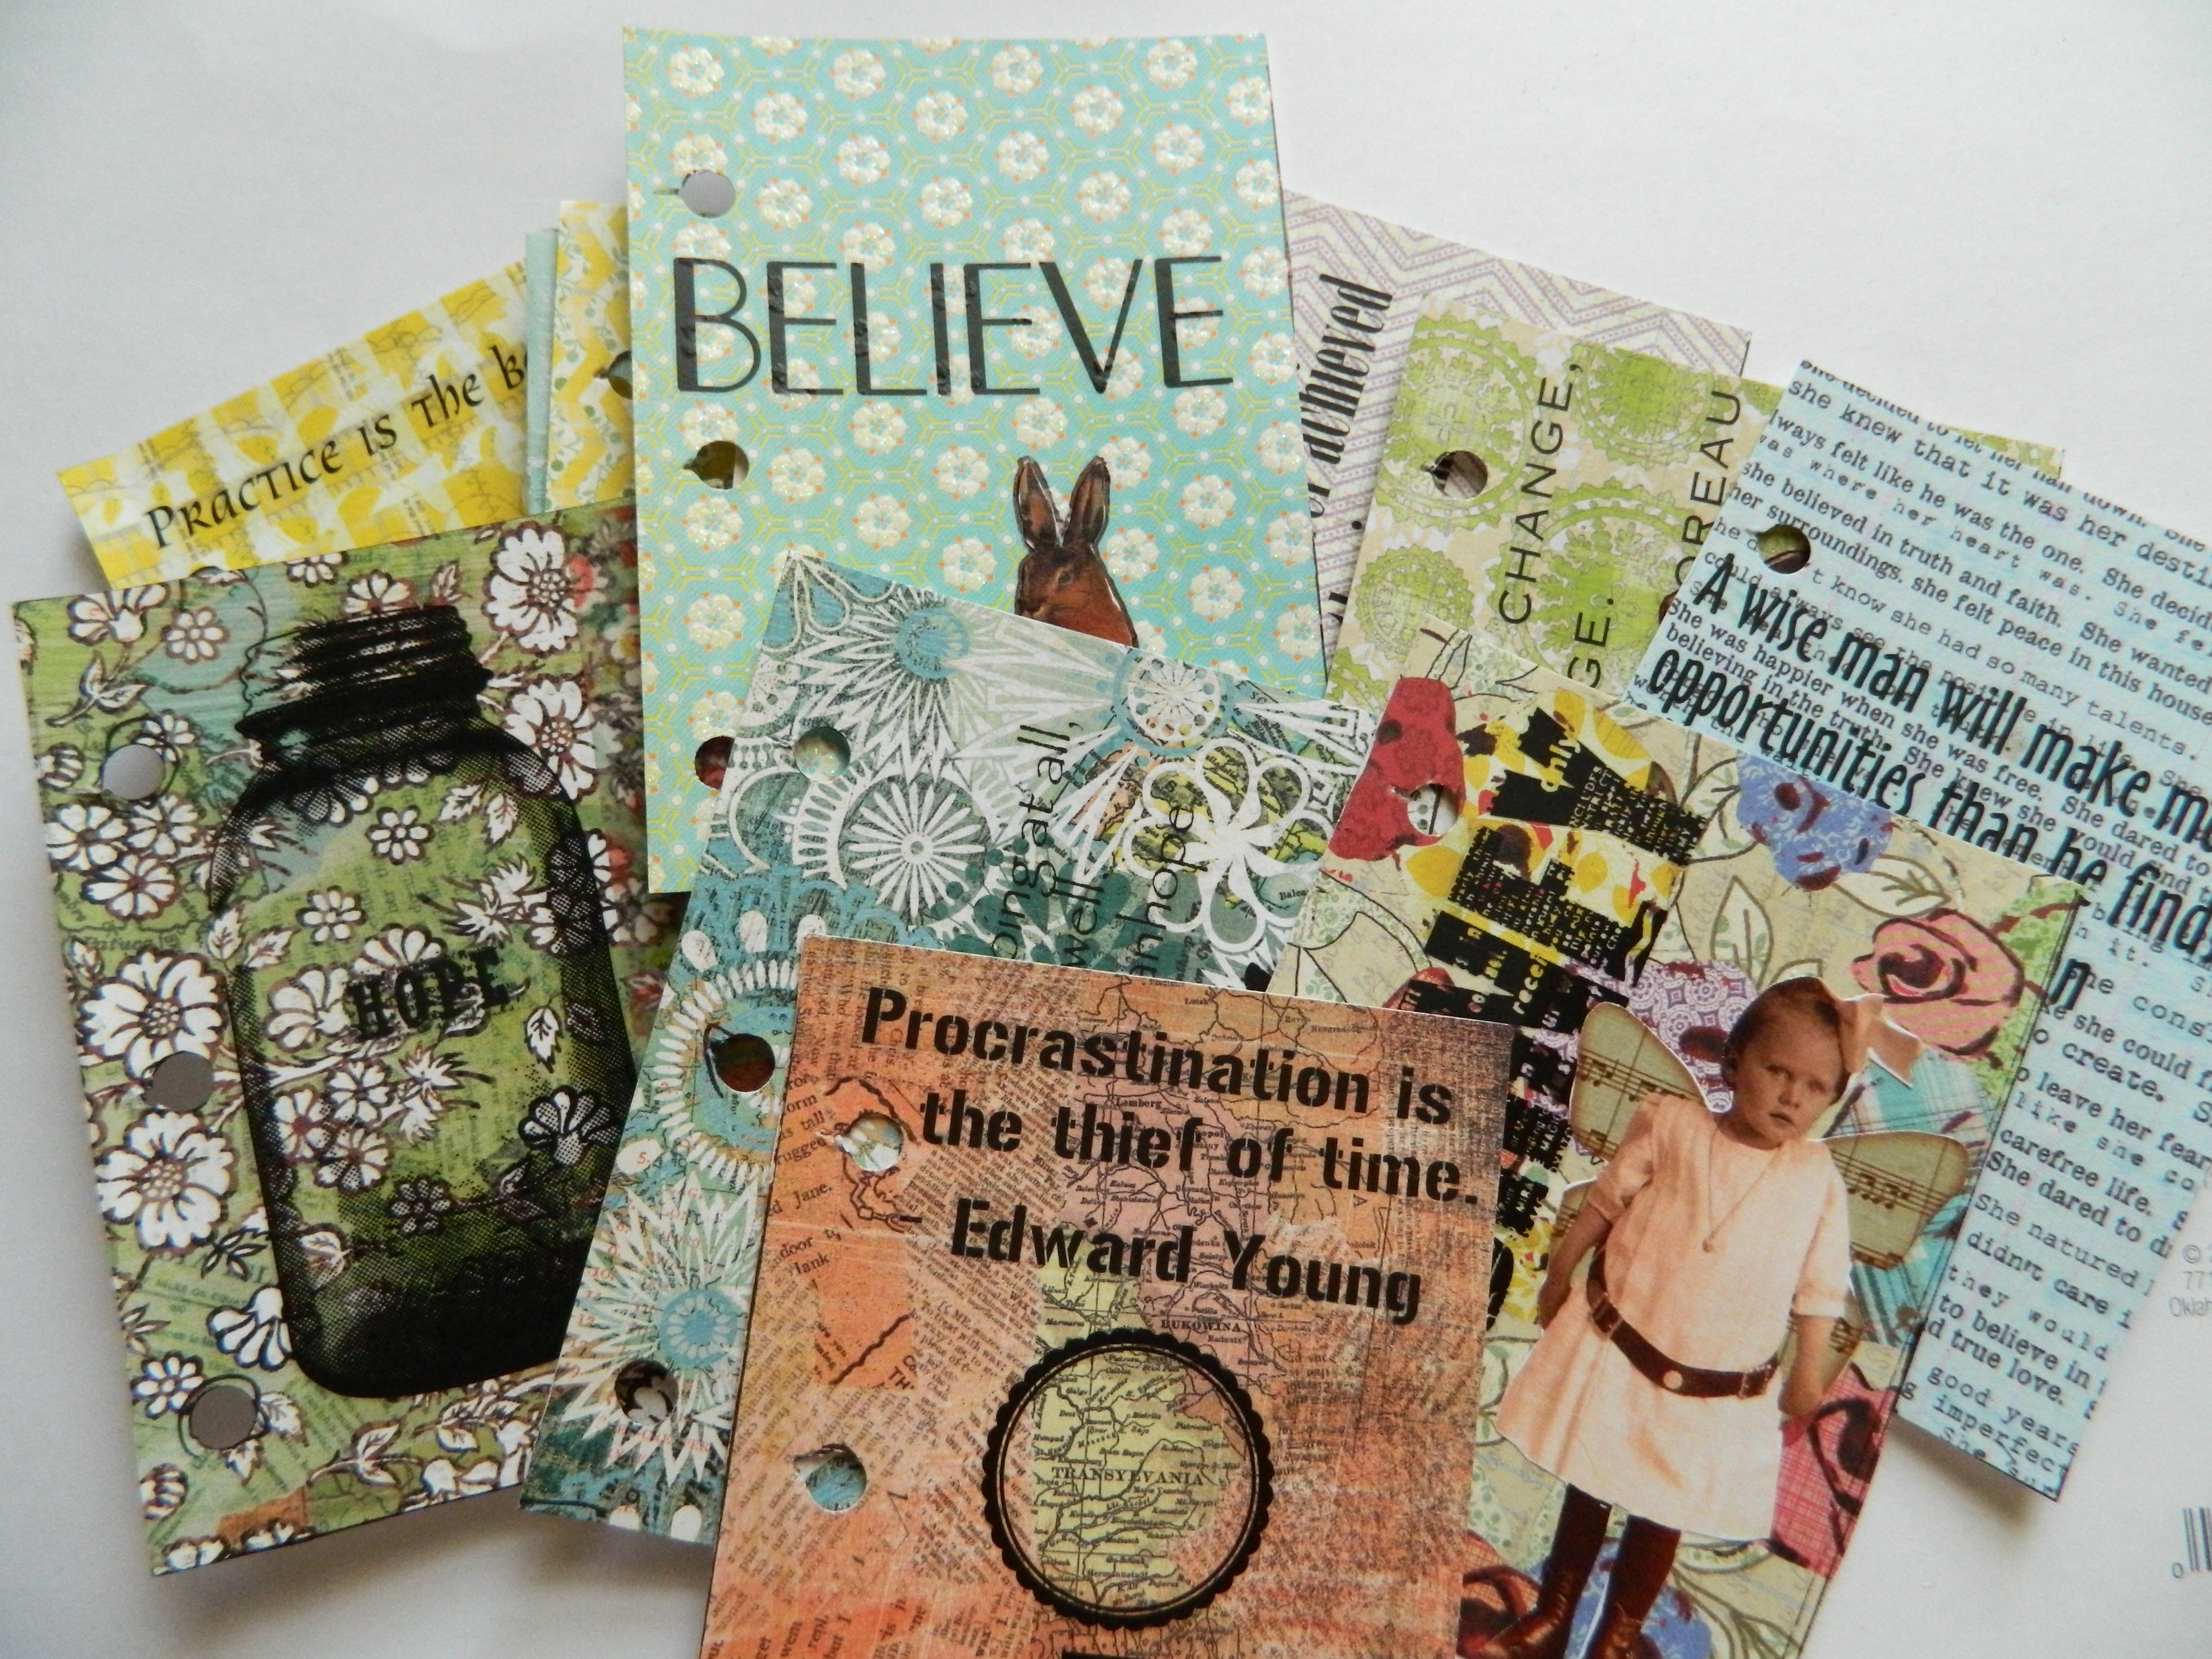
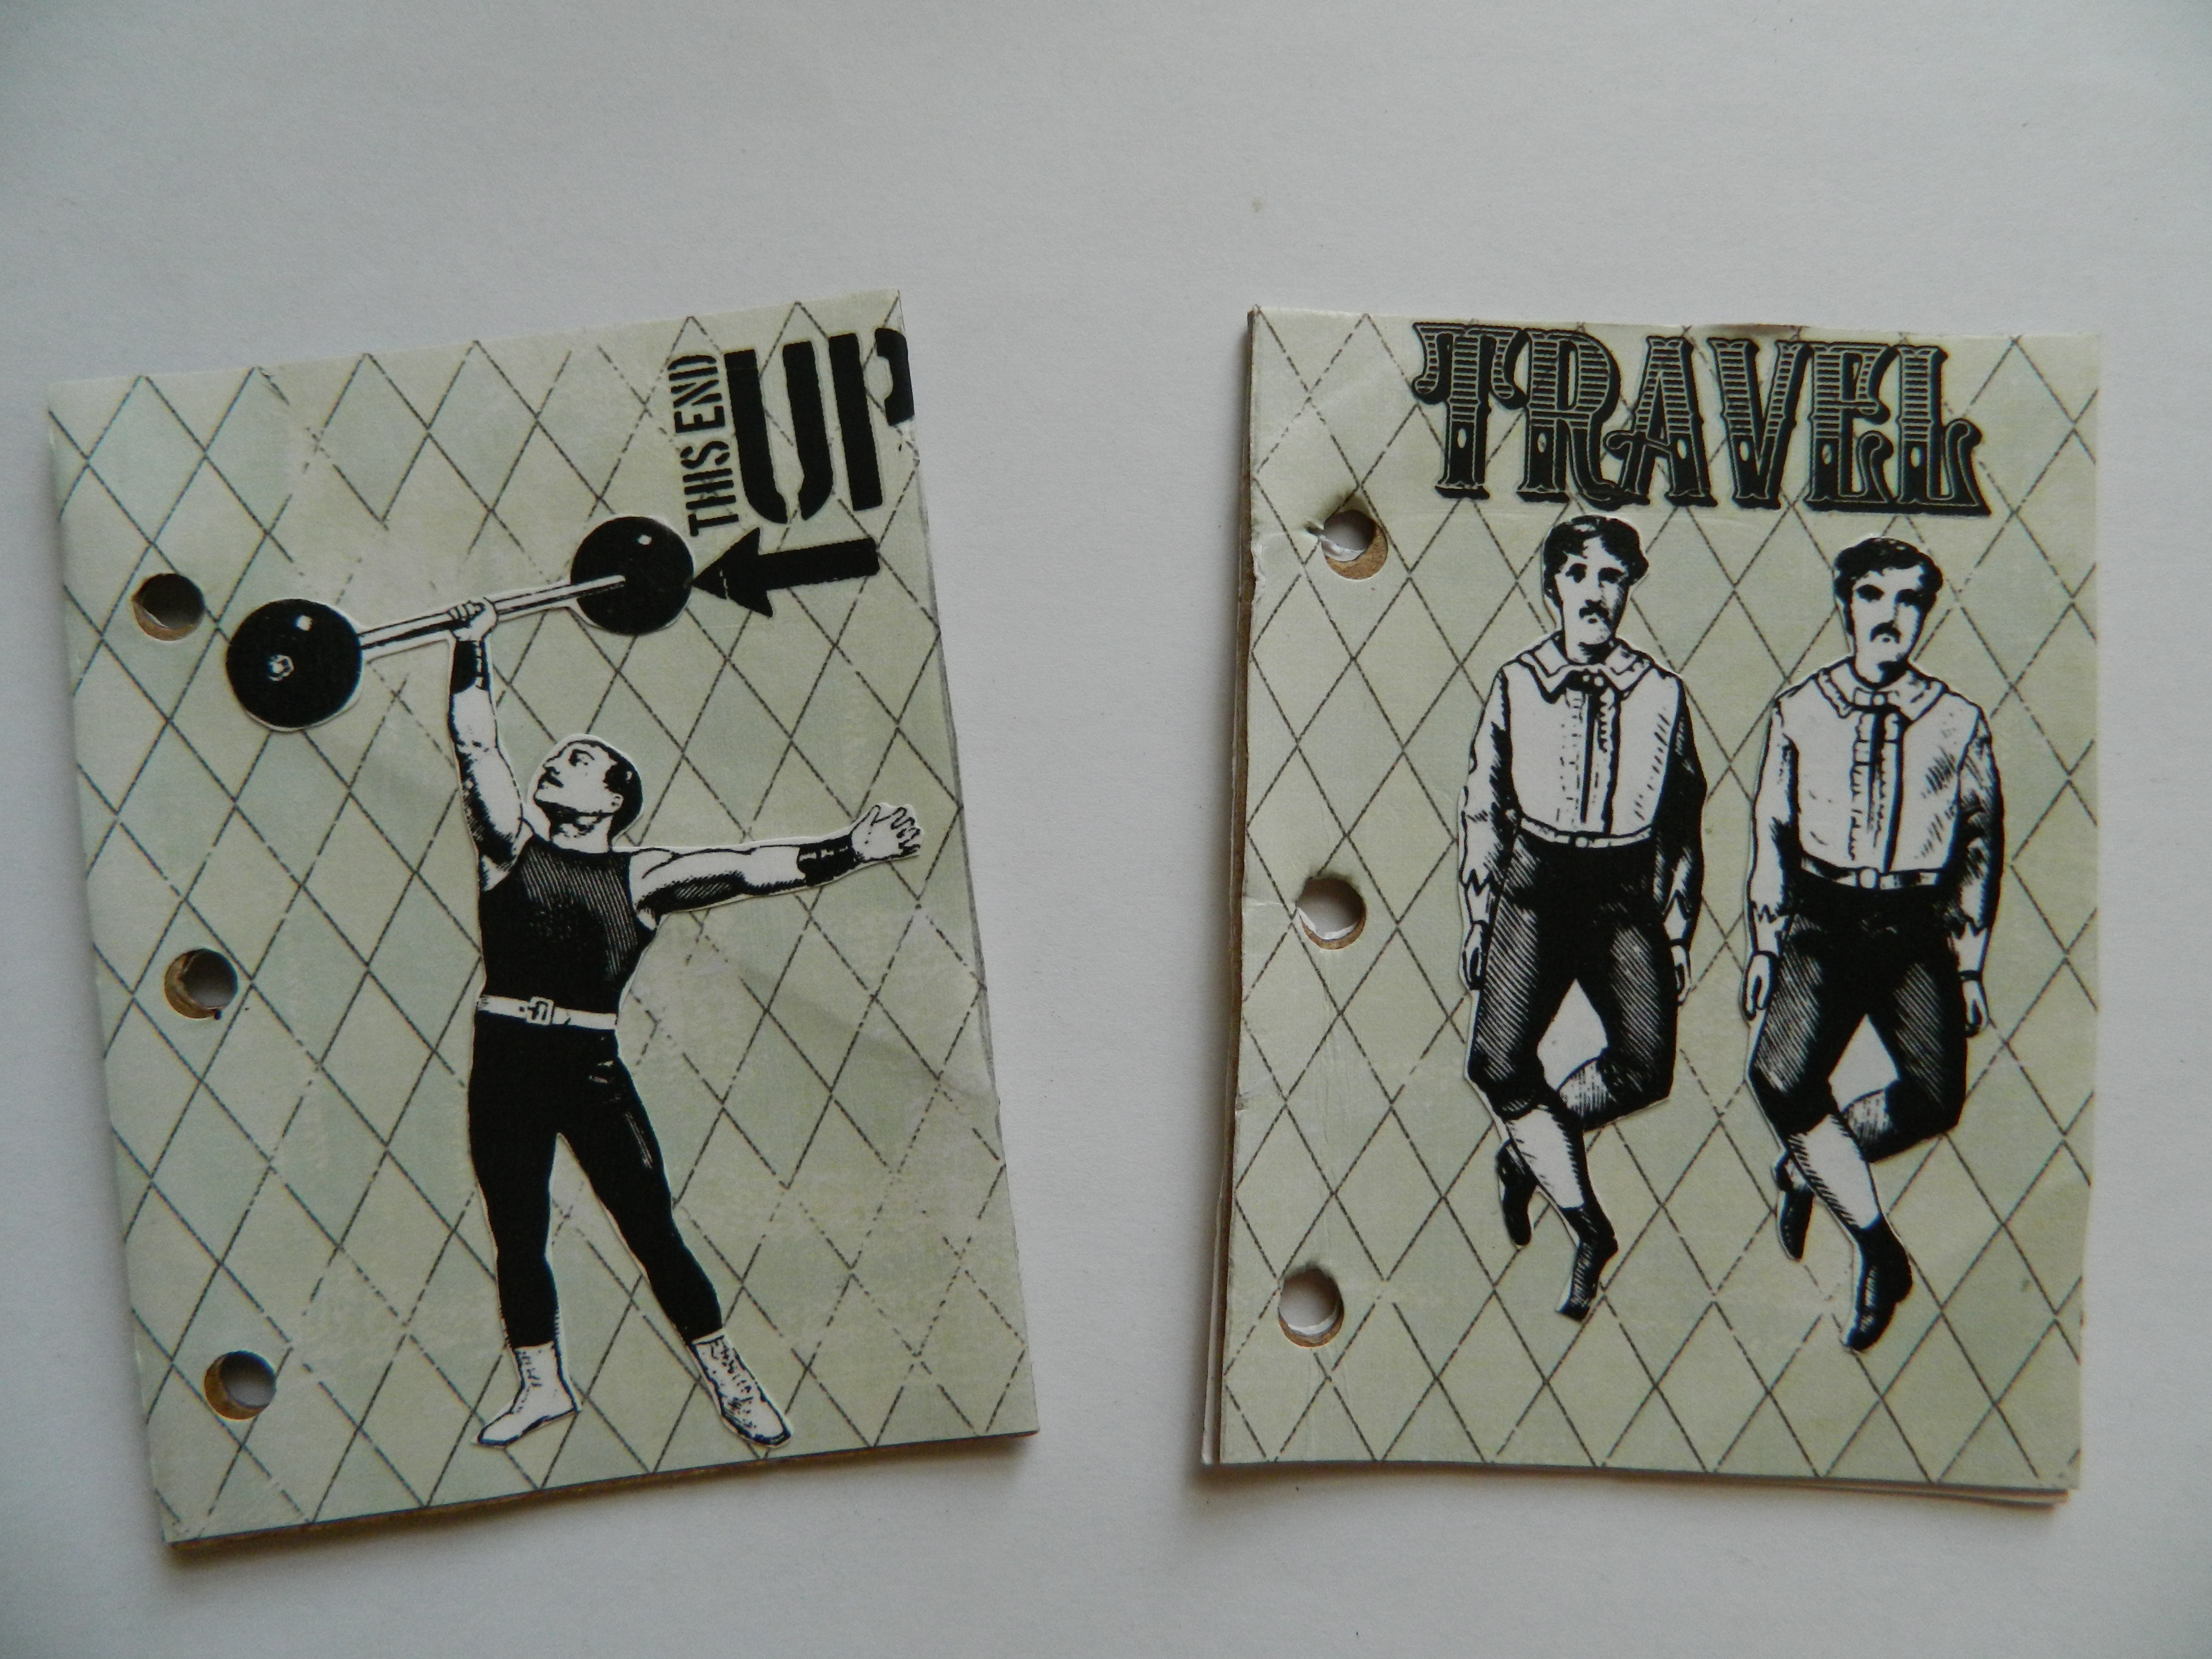
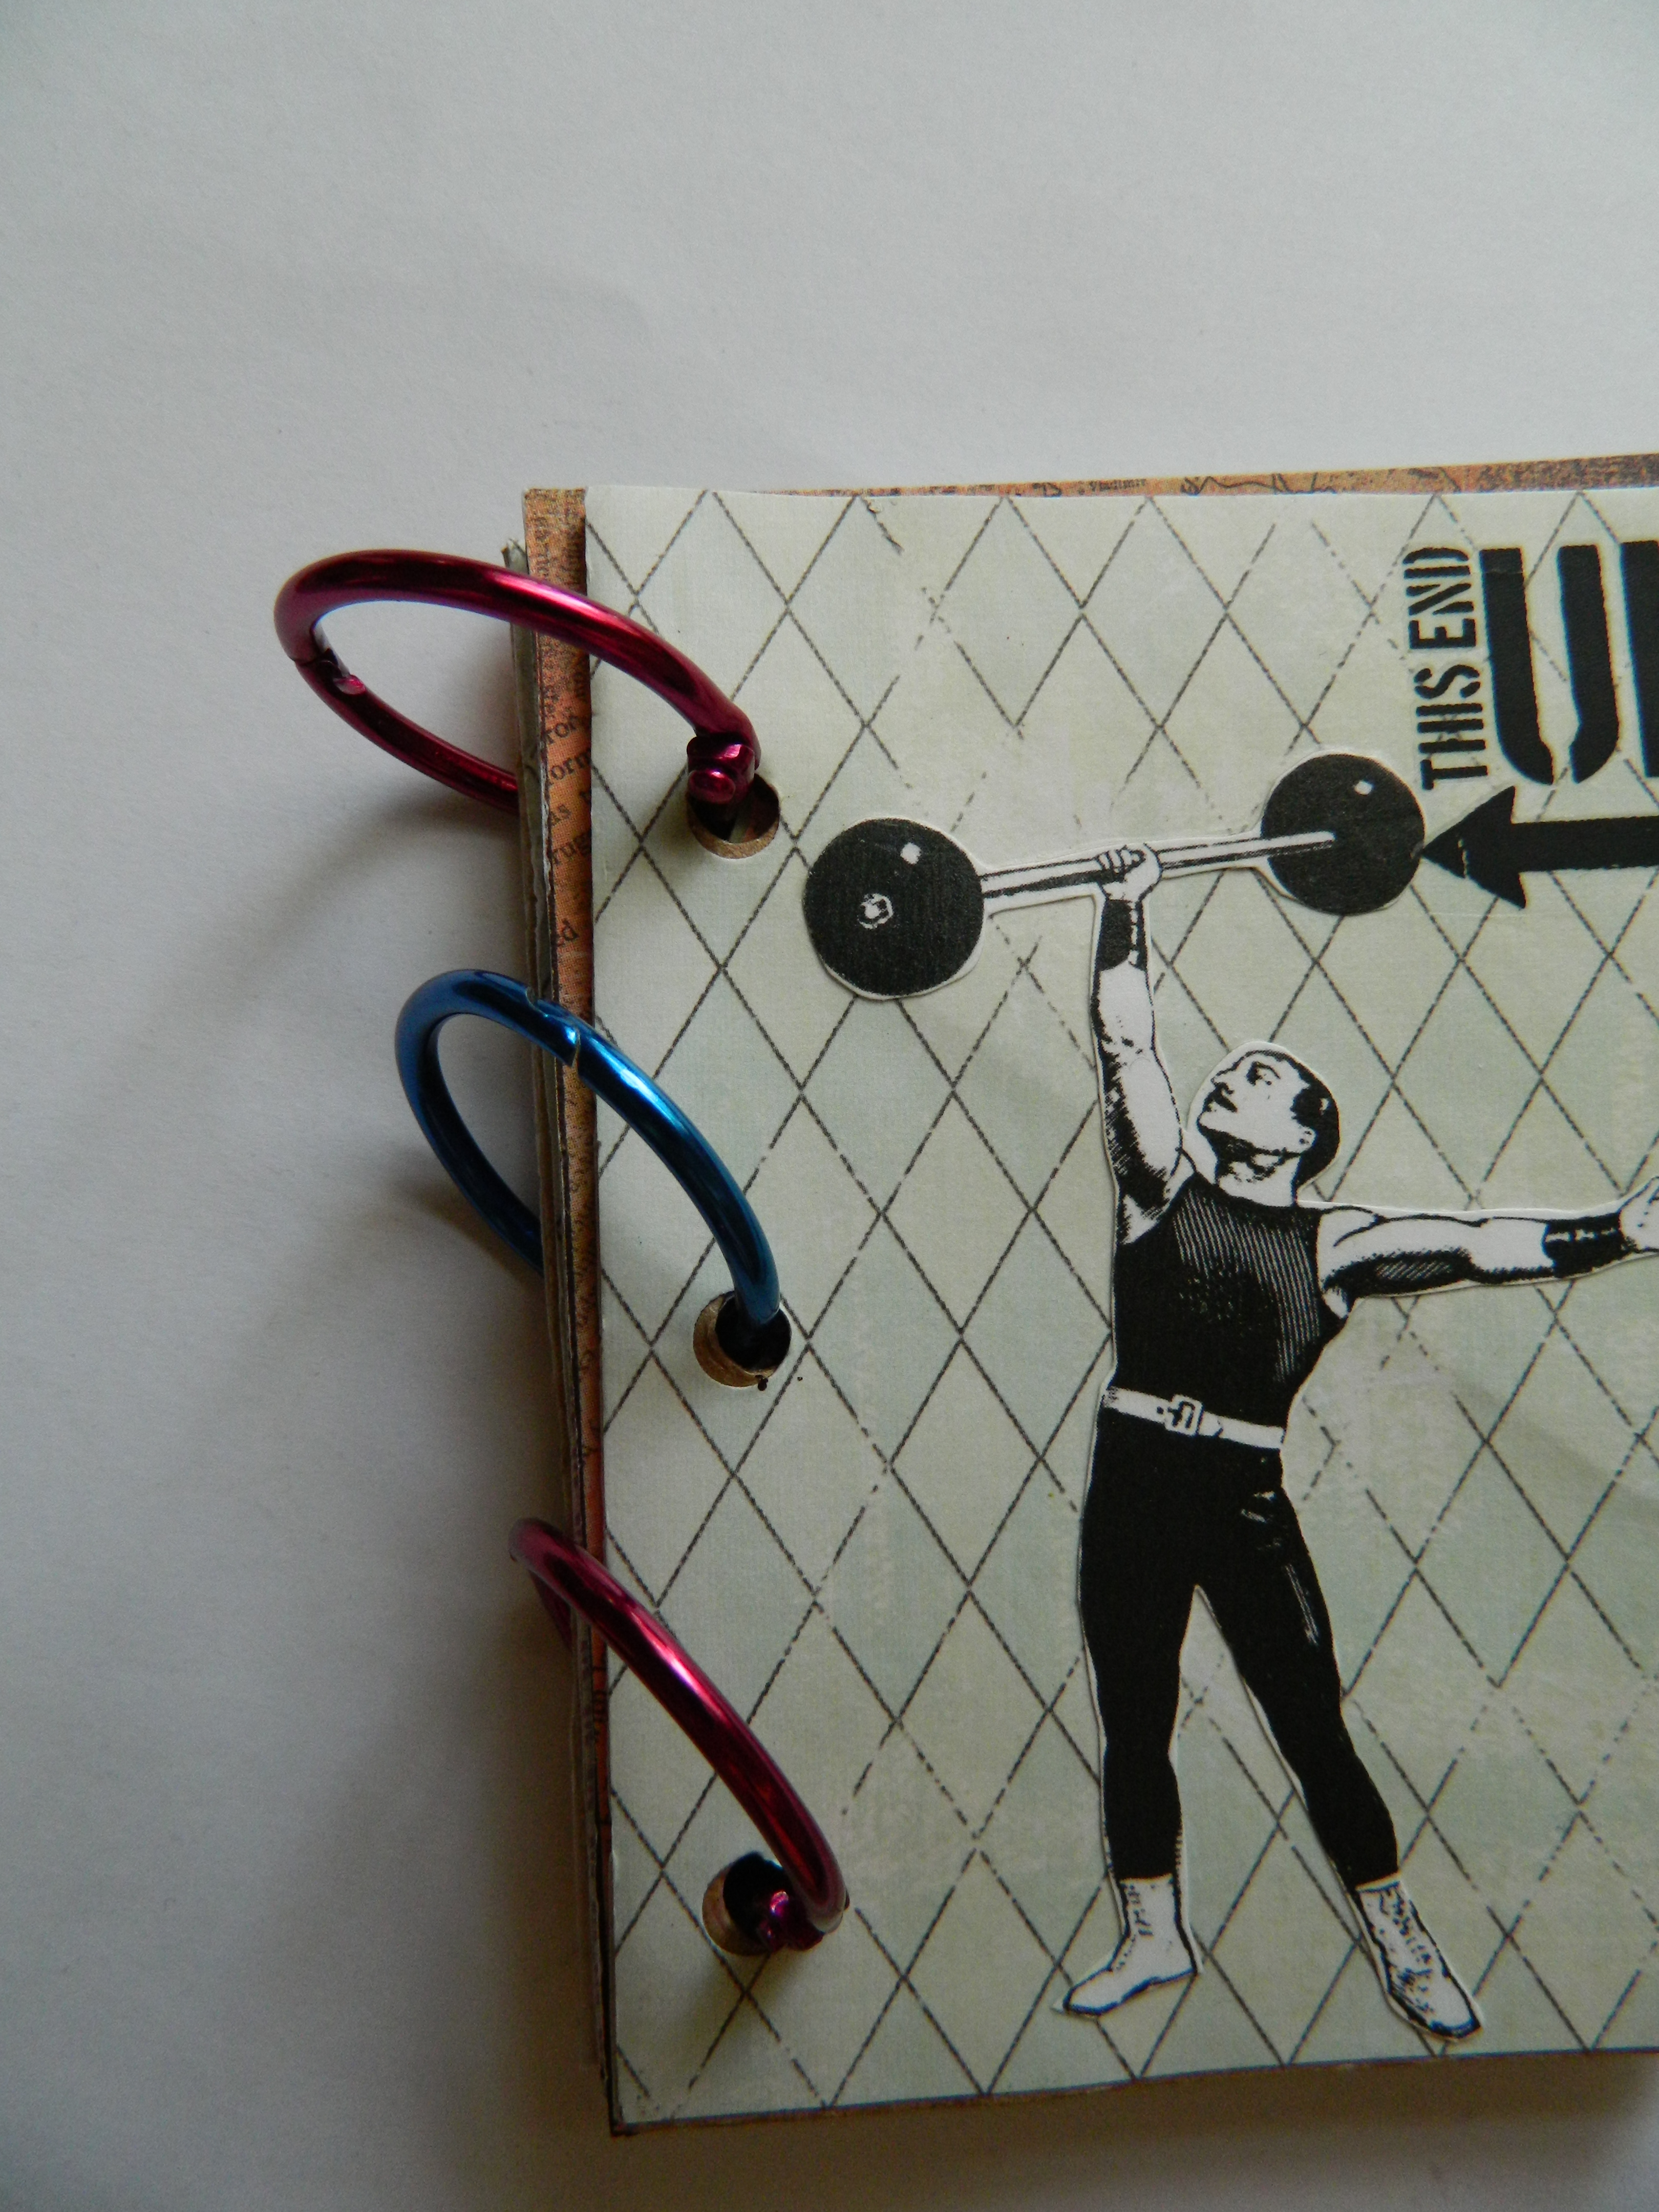
When you have your papers cut use four and glue them to your covers front and back. The excess will be your pages. You can place images and word art on these as you like. Design the covers the same way.
handmade books with paper towel and toilet paper rolls

handmade books with paper towel and toilet paper rolls

handmade books with paper towel and toilet paper rolls

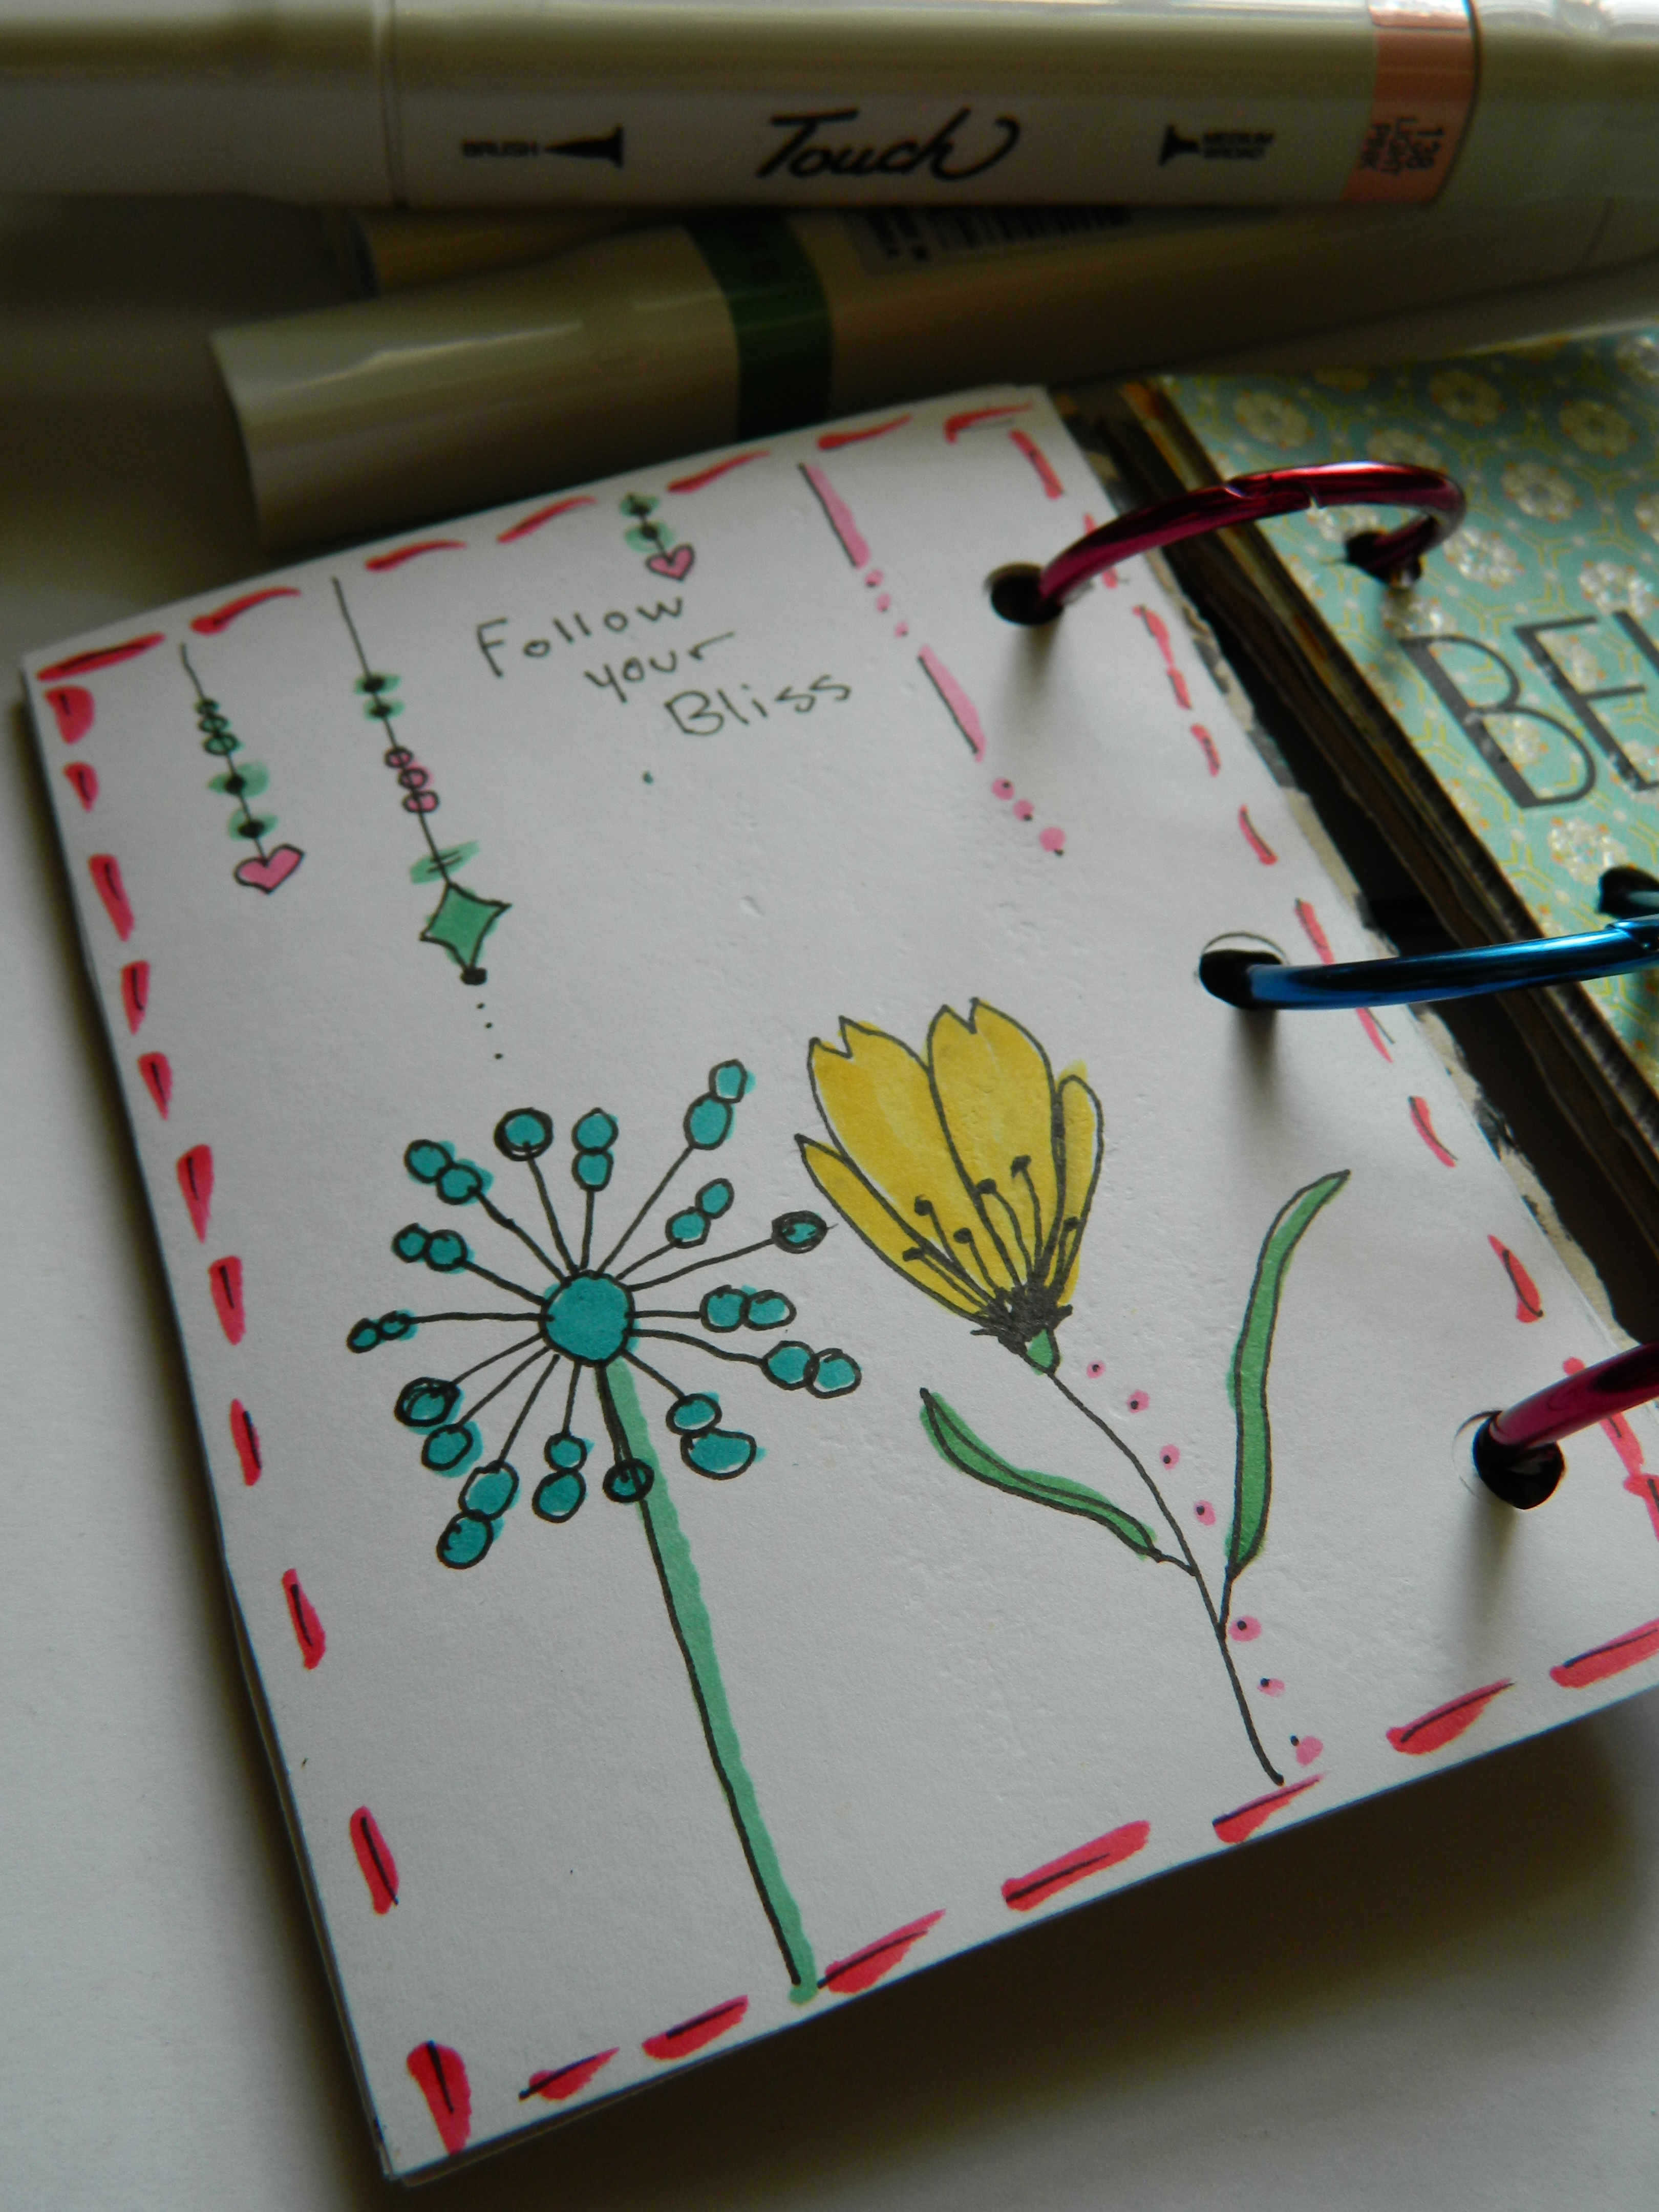
When you are finished with your pages use your binder rings to hold the book together.  On the blank side of the pages you can draw in your own pictures and create your phrases.   Happy Creating.
handmade books with paper towel and toilet paper rolls

handmade books with paper towel and toilet paper rolls

~*~*~*~*~*~*~*~*~*~*~*~*~*~*~*~*~*~*~*~*~*~*~*~*~

Melanie Statnick is a Canadian Mixed Media & Collage Artist out of North Carolina. Melanie creates art daily from her private studio. Her style is fun, whimsy and eclectic. Melanie is also an Art Instructor for local venues and community colleges for students of all ages.

handmade books with paper towel and toilet paper rolls

~*~*~*~*~*~*~*~*~*~*~*~*~*~*~*~*~*~*~*~*~*~*~*~*~

.

.
Basic Encaustic – Part 1: FAQ’s about Encaustic Painting

~ * ~

This article was written by Elaine Brady Smith 

A lot of people are fascinated by encaustic painting. I meet so many that say…”oohh, I’ve always wanted to learn how to paint in encaustic!” And I love to hear that kind of enthusiasm for this medium. However, getting started in encaustic painting can seem like a daunting task, especially when you don’t even know yet if you will like it or not.

I’d like to help take the mystery out of “getting started” with encaustic painting and show you how to gather tools and equipment in an easy and economical way in this 3 part series. Yes, there is a lot of information to relay, but I want you to be thoroughly informed so you will have fun with this exciting medium. Here is what will be included in each of the articles:

  1. July – Encaustic Basics-Part I-FAQs about Encaustic Painting
  2. August – Encaustic Basics-Part II-Preparing Substrates, Fusing Methods, Adding Color
  3. Sept – Encaustic Basics-Part III-Adding Collage and Embedding Objects

Learn how to do encaustic painting. Learn how to paint with beeswax. Set up your own encaustic studio and learn the basics of getting started in encaustic painting.

What Does Encaustic Mean?

“The word encaustic originates from the Greek word enkaustikos which means to burn in, and this element of heat is necessary for a painting to be called encaustic.” Wikipedia.com

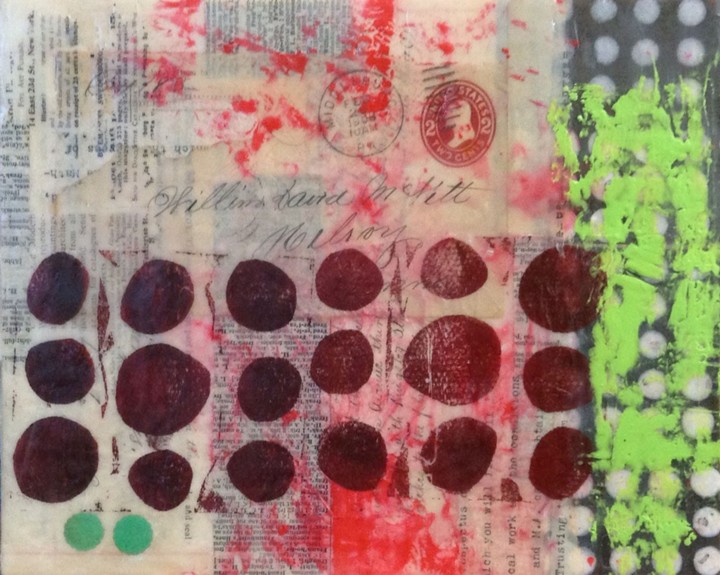
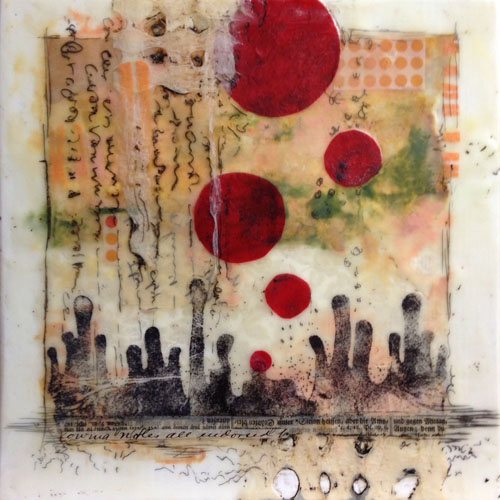
Encaustic painting is an extremely versatile medium with techniques and styles that are as individual as the artists who use them. There are numerous techniques to use in encaustic painting that can produce a wide range of results from a smooth flat finish to very textural surfaces. Encaustic can also be used to add collage and assemblage elements to your work and surprisingly it is also a superb sculpting medium. I am always amazed at how different artists approach encaustic with similar techniques and get such varied results. It’s really incredible!

There are many artists using plain beeswax for collage art and that is perfectly okay provided it is done on a stable surface and fused properly. I will be discussing “encaustic painting” here, which uses a medium made of beeswax and damar resin and the paint (color) made from encaustic medium and powdered pigments.

Learn how to do encaustic painting. Learn how to paint with beeswax. Set up your own encaustic studio and learn the basics of getting started in encaustic painting.

What is Encaustic Medium?

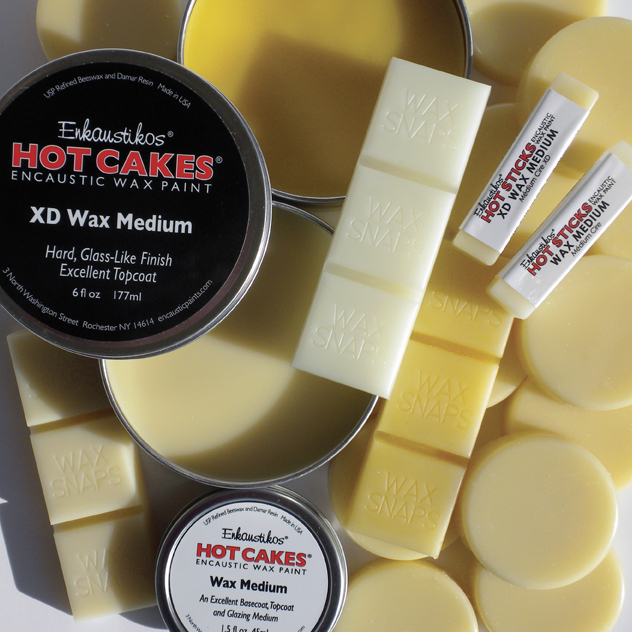
Encaustic medium is made with beeswax melted with Damar resin. I usually purchase refined beeswax and Damar resin from Swan’s Candles to make my own medium.

The ratio between the beeswax and damar resin can be 5:1 up to 10:1. I prefer the 5:1 ratio for hardness and shine factor. It is not recommended to ever use bleached beeswax for encaustic painting. And if you have a local beekeeper who can supply you with beeswax, that is fine to use too. Just know that there will still be a good amount of pollen suspended in the beeswax, which acts as a pigment and darkens the color of the wax.

It is less expensive to make your own encaustic medium than to purchase ready-made medium; however, ready-made medium is as clean and pure as you can get for clear coverage and bright colors. I make my own medium to economize, but I also love using ready-made encaustic products for their convenience and consistency.

Milled, powdered pigments are added to the medium to make colored pigment cakes that are used as your paint. You can make your own pigment cakes with medium and powdered pigments, but it is labor intensive and extreme safety precautions must be taken when handling the dry pigments.

Learn how to do encaustic painting. Learn how to paint with beeswax. Set up your own encaustic studio and learn the basics of getting started in encaustic painting.

Learn how to do encaustic painting. Learn how to paint with beeswax. Set up your own encaustic studio and learn the basics of getting started in encaustic painting.

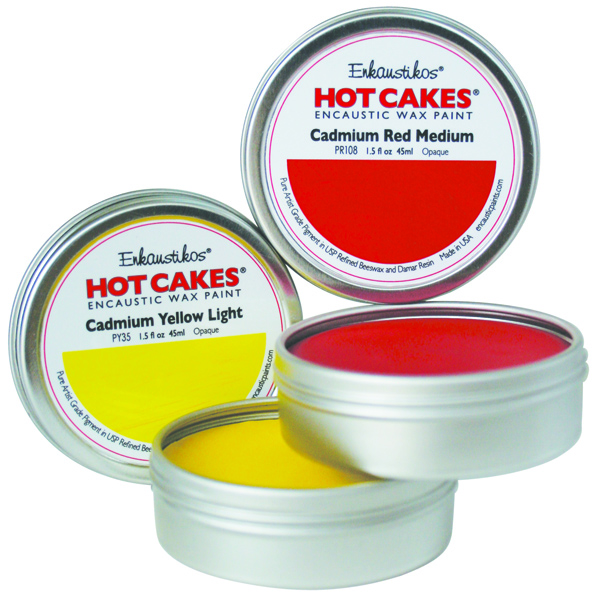
For beginners, I recommend purchasing medium and pigment cakes from Enkaustikos. They are one of my favorite companies and the quality vs. cost of their products is outstanding. They have made encaustic painting affordable with convenient product sizes and pricing. Go to their website to find a retailer near you to purchase their products. There are also many online sources for Enkaustikos products like The Fine Art Store.

What Substrates Can I Paint Encaustic On?

Wax will adhere to a variety of surfaces. The most important thing to remember is that the surface must be absorbent and porous. If it is not absorbent and porous, the wax will eventually crack and flake off the surface.

Some excellent choices are: Birch Plywood, Regular Plywood, Unfinished Pine, Un-tempered Masonite, MDF, and Cradled Panels. The wax can be painted directly onto most unfinished wood surfaces, but by preparing the surface with Encaustic gesso or Bristol paper, the look of the piece will be enhanced and give brighter color results. I’ll cover prep of wood surfaces in the next article.

Stretched canvas is not a good surface for encaustic work. It is too flexible and the give is too unstable over a long term. Most paper is absorbent and porous and does provide a good surface for encaustic monotype and printing. It does not, however hold a great amount of wax and will become saturated at some point.

There are many surfaces available for purchase from retail artist supply companies that are perfect for encaustic art. More and more companies are making products that are compatible with encaustic work. I often purchase ½” unfinished pine boards from the lumber yard and have them cut into convenient sizes. Many hardware stores like Home Depot or Lowe’s (in the US) will cut the wood for you, but I like a bit more control over my sizing, so I usually ask a friend to make the cuts for me. You can also purchase unfinished wood painting panels from many art stores and online.

What Equipment do I need for Fusing?

Each layer of wax that you brush onto your painting surface cools very quickly and hardens almost immediately as you work. As you add additional layers of wax they each become individual layers, one on top of the other. If you were to leave them as separate layers, they would eventually become unstable and begin to flake off over time. And you wouldn’t want that to happen after you have worked so hard on a piece!

It is necessary to fuse, or add heat to each and every layer in encaustic painting. This may seem tedious at first, but it is a necessary part of the process. As you fuse, each layer becomes one with the previous layer. As you add layers and fuse after adding each layer, your work becomes one solid layer of wax. This will make it strong and last many lifetimes.

Fusing is the process of adding heat to the surface until you see a slight shine, then remove the heat and allow the wax to cool. It is possible to fuse very large areas with a heat gun or acetylene torch, and it is possible to fuse very small areas with a small butane or crème Brule’ torch or a mini quilting iron. As you practice with different heat sources, you will begin to know which you prefer and which to use for different techniques.

I prefer a heat gun that has low/high settings so I can control the amount of air when fusing my layers and I believe the heat gun is the best heat source for beginners. There is no flame involved and that alone eliminates much fear when you are just learning. The torches are great for large works of art and to experiment with, but I recommend getting used to the basic process of encaustic before using them!

Inexpensive heat guns are available at many hardware stores. I purchased one for $15 at Harbor Freight. I have used many other more expensive heat guns, but this by far my favorite!

Learn how to do encaustic painting. Learn how to paint with beeswax. Set up your own encaustic studio and learn the basics of getting started in encaustic painting.

Can I do Encaustic Painting in my House?

You do need a bit of space to work on encaustic, and just like many other art mediums, in an area of your house that you do not have to worry about the mess. You should have a sturdy table to work on, be close to electric outlets and have sufficient ventilation. My work station is in my basement studio near a window and I have a fan sitting in the window to draw the air out of the room. As long as your area is well ventilated and your wax in not heated at too high a temperature, you will be fine. The proper temperature for melting encaustic medium and encaustic pigment cakes is between 170 degrees and 200 degrees. If anything starts smoking, you know your temps are set too high.

What Equipment do I need for Encaustic Painting?

You will need a palate on which to melt your medium and pigment cakes. Many encaustic artists start out using a pancake griddle, which is an easy item to find. I checked on Amazon.com and for $25-30, there is a huge variety of pancake griddles so I won’t recommend a specific one. I would however, recommend getting one with a numbered temperature gauge to control the heat setting. If you have a griddle that has low/high heat settings, then I would recommend getting a flat surface thermometer. There are commercially made encaustic electric palettes with anodized aluminum surfaces that are great, however I would recommend starting with an inexpensive pancake griddle until you find what suits your needs.

Learn how to do encaustic painting. Learn how to paint with beeswax. Set up your own encaustic studio and learn the basics of getting started in encaustic painting.

What Other Tools do I need for Encaustic Painting?

In addition to a heat gun (or other heat source) and pancake griddle (palate), you need tools to apply the wax to your surface. Cheap bristle brushes are great for this and can be purchased at the hardware or craft store. Don’t use synthetic brushes, as the heat will eventually melt them. And once you’ve used a brush with pigmented wax, it is best to dedicate the brush to that color, as it is difficult to completely clean brushes once they are used with wax. In fact the tools I use for encaustic are all dedicated to just encaustic work. You will also need metal containers to hold your medium and paints. I used aluminum or tin cans. It’s a great way to recycle cat food or tuna cans. Just make sure they are very clean and dry before putting your encaustic paints in them.

So this is basically what you will need to get started in encaustic painting. Of course there are many more tools that you might collect to use in your encaustic work, but this is a basic list to show you that it is not that expensive or difficult to get started. You can begin to collect your tools and equipment and next month we will discuss how to prep your substrates, fusing methods and adding color to your work. There is a lot more to talk about. We are just beginning to have fun!!!

 ~*~*~*~*~*~*~*~*~*~*~*~*~*~*~*~*~*~*~*~*~*~*~*~*~

Elaine Brady Smith loves creating acrylic mixed media and encaustic collages. Key ingredients in her work are vintage papers and her own collage papers made with repetitive marks, simplistic shapes and transparent layers.  She also enjoys other art mediums such as art journaling, oil painting and colored pencil drawing in addition to writing, teaching and spending time with her family. Find more on her website: elainebradysmith.com and on Facebook: Elaine Brady Smith Art

~*~*~*~*~*~*~*~*~*~*~*~*~*~*~*~*~*~*~*~*~*~*~*~*~

.

.
Handmade Candle Holder

~ * ~

This article is written by Sandra Parés

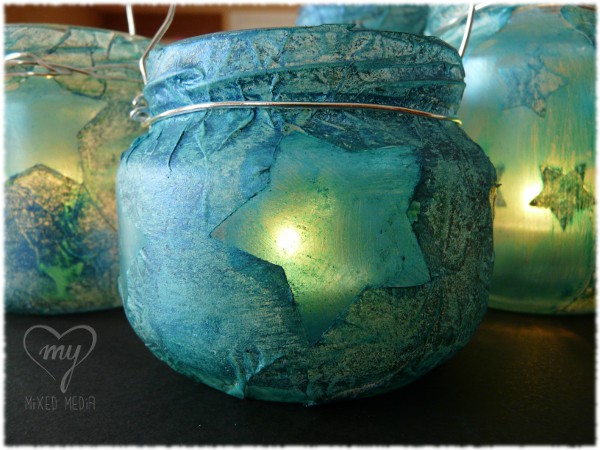
Today I am going to show you how to make a candle holder with a magic light to illuminate our summer nights.

Candle holders with a magic light for our most special nights

The supplies I will use are the following:

  • An open top container glass (to make these candle holders usually I use recycled glass jars)
  • white tissue paper
  • the big shot and a star die
  • 8”x10” Gelli Plate
  • a brayer
  • black acrylic paint
  • a stencil
  • extra heavy gel medium (gloss)
  • 2 paintbrushes
  • Facetten-Lack metallic platin Vica Deco
  • a makeup brush
  • Primary Elements of LuminArte
  • hairspray
  • wire and a candle

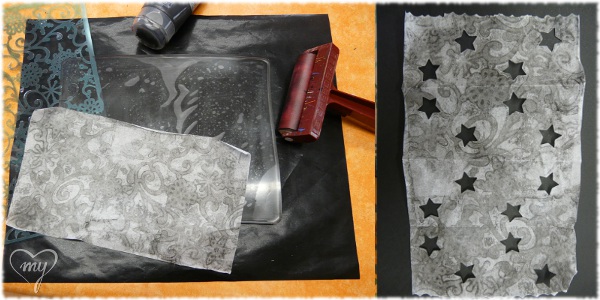
First of all we will start using the Gelli Plate: we will use the brayer to put the black paint over the stencil, then we will press the stencil over the gelli plate. With this step we can print the mark of the stencil over the gelli plate. Then we will take a piece of tissue paper, it must be large enough to surround our glass jar. And we put the tissue paper over the gelli plate to print the texture. With this step, the mark of the stencil will print in our tissue paper.

And with the Big Shot and the star die we will open a few holes in our piece of tissue paper.

Create a pattern with black ink and gelli plate over the tissue paper

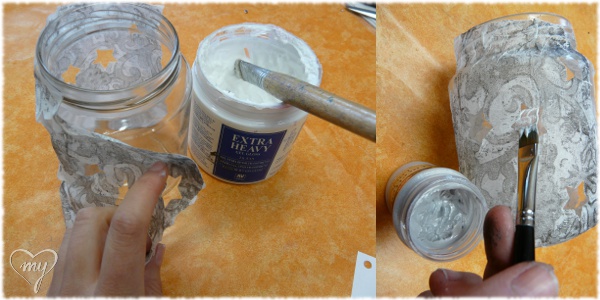
Then we will paste with extra heavy gel medium the tissue paper around our glass jar and we will leave it to dry. Then we will paint the holes with Facetten-Lack to give a touch translucent at the glass. For this step, also you can use any paint or paste that allows you to do this translucent effect.

Paste the tissue paper around the glass jar

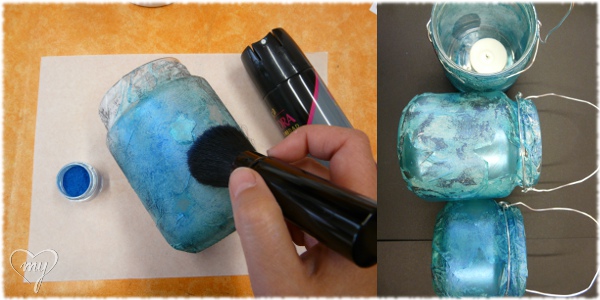
Once dried we can add the color. I will paint with the Primary Elements of LuminArte, I will use the pigment directly. First of all we have to spray the entire glass jar with hairspray, you will see how the jar is wet. Taking advantage of this dampness, we will catch the Primary Elements pigments (the color or colors that you want) with a makeup brush and we will paint with them making circles. When we run out of pigment or hairspray dries, we will go back to add more product to get the whole jar painted.

Finally, if we want to hang it somewhere, we only need to put some wire around the jar. And don’t forget to put the candle inside!

Painting with Primary Elements the whole glass jar

You will see that the result will be beautiful and shining: a candle holder with a magic light for our most special nights. The first time I used these candle holders was at my craft stop in the “Enchanted Night“, the shopping night from my city, and they produced an amazing shine!

Candle holders with a magic light for our most special nights

~*~*~*~*~*~*~*~*~*~*~*~*~*~*~*~*~*~*~*~*~*~*~*~*~

Sandra Parés loves working with mixed media! The colors and textures leave her amazed and she enjoys creating and getting their hands dirty with paint and gesso! On her site My mixed media you can find a mixed media online store, art and craft products, mixed media workshops in Spanish, tutorials, ideas and mixed media techniques.

~*~*~*~*~*~*~*~*~*~*~*~*~*~*~*~*~*~*~*~*~*~*~*~*~

.

.
Magnetic Chalk Board

~ * ~

This article is written by Gloriann Irizarry

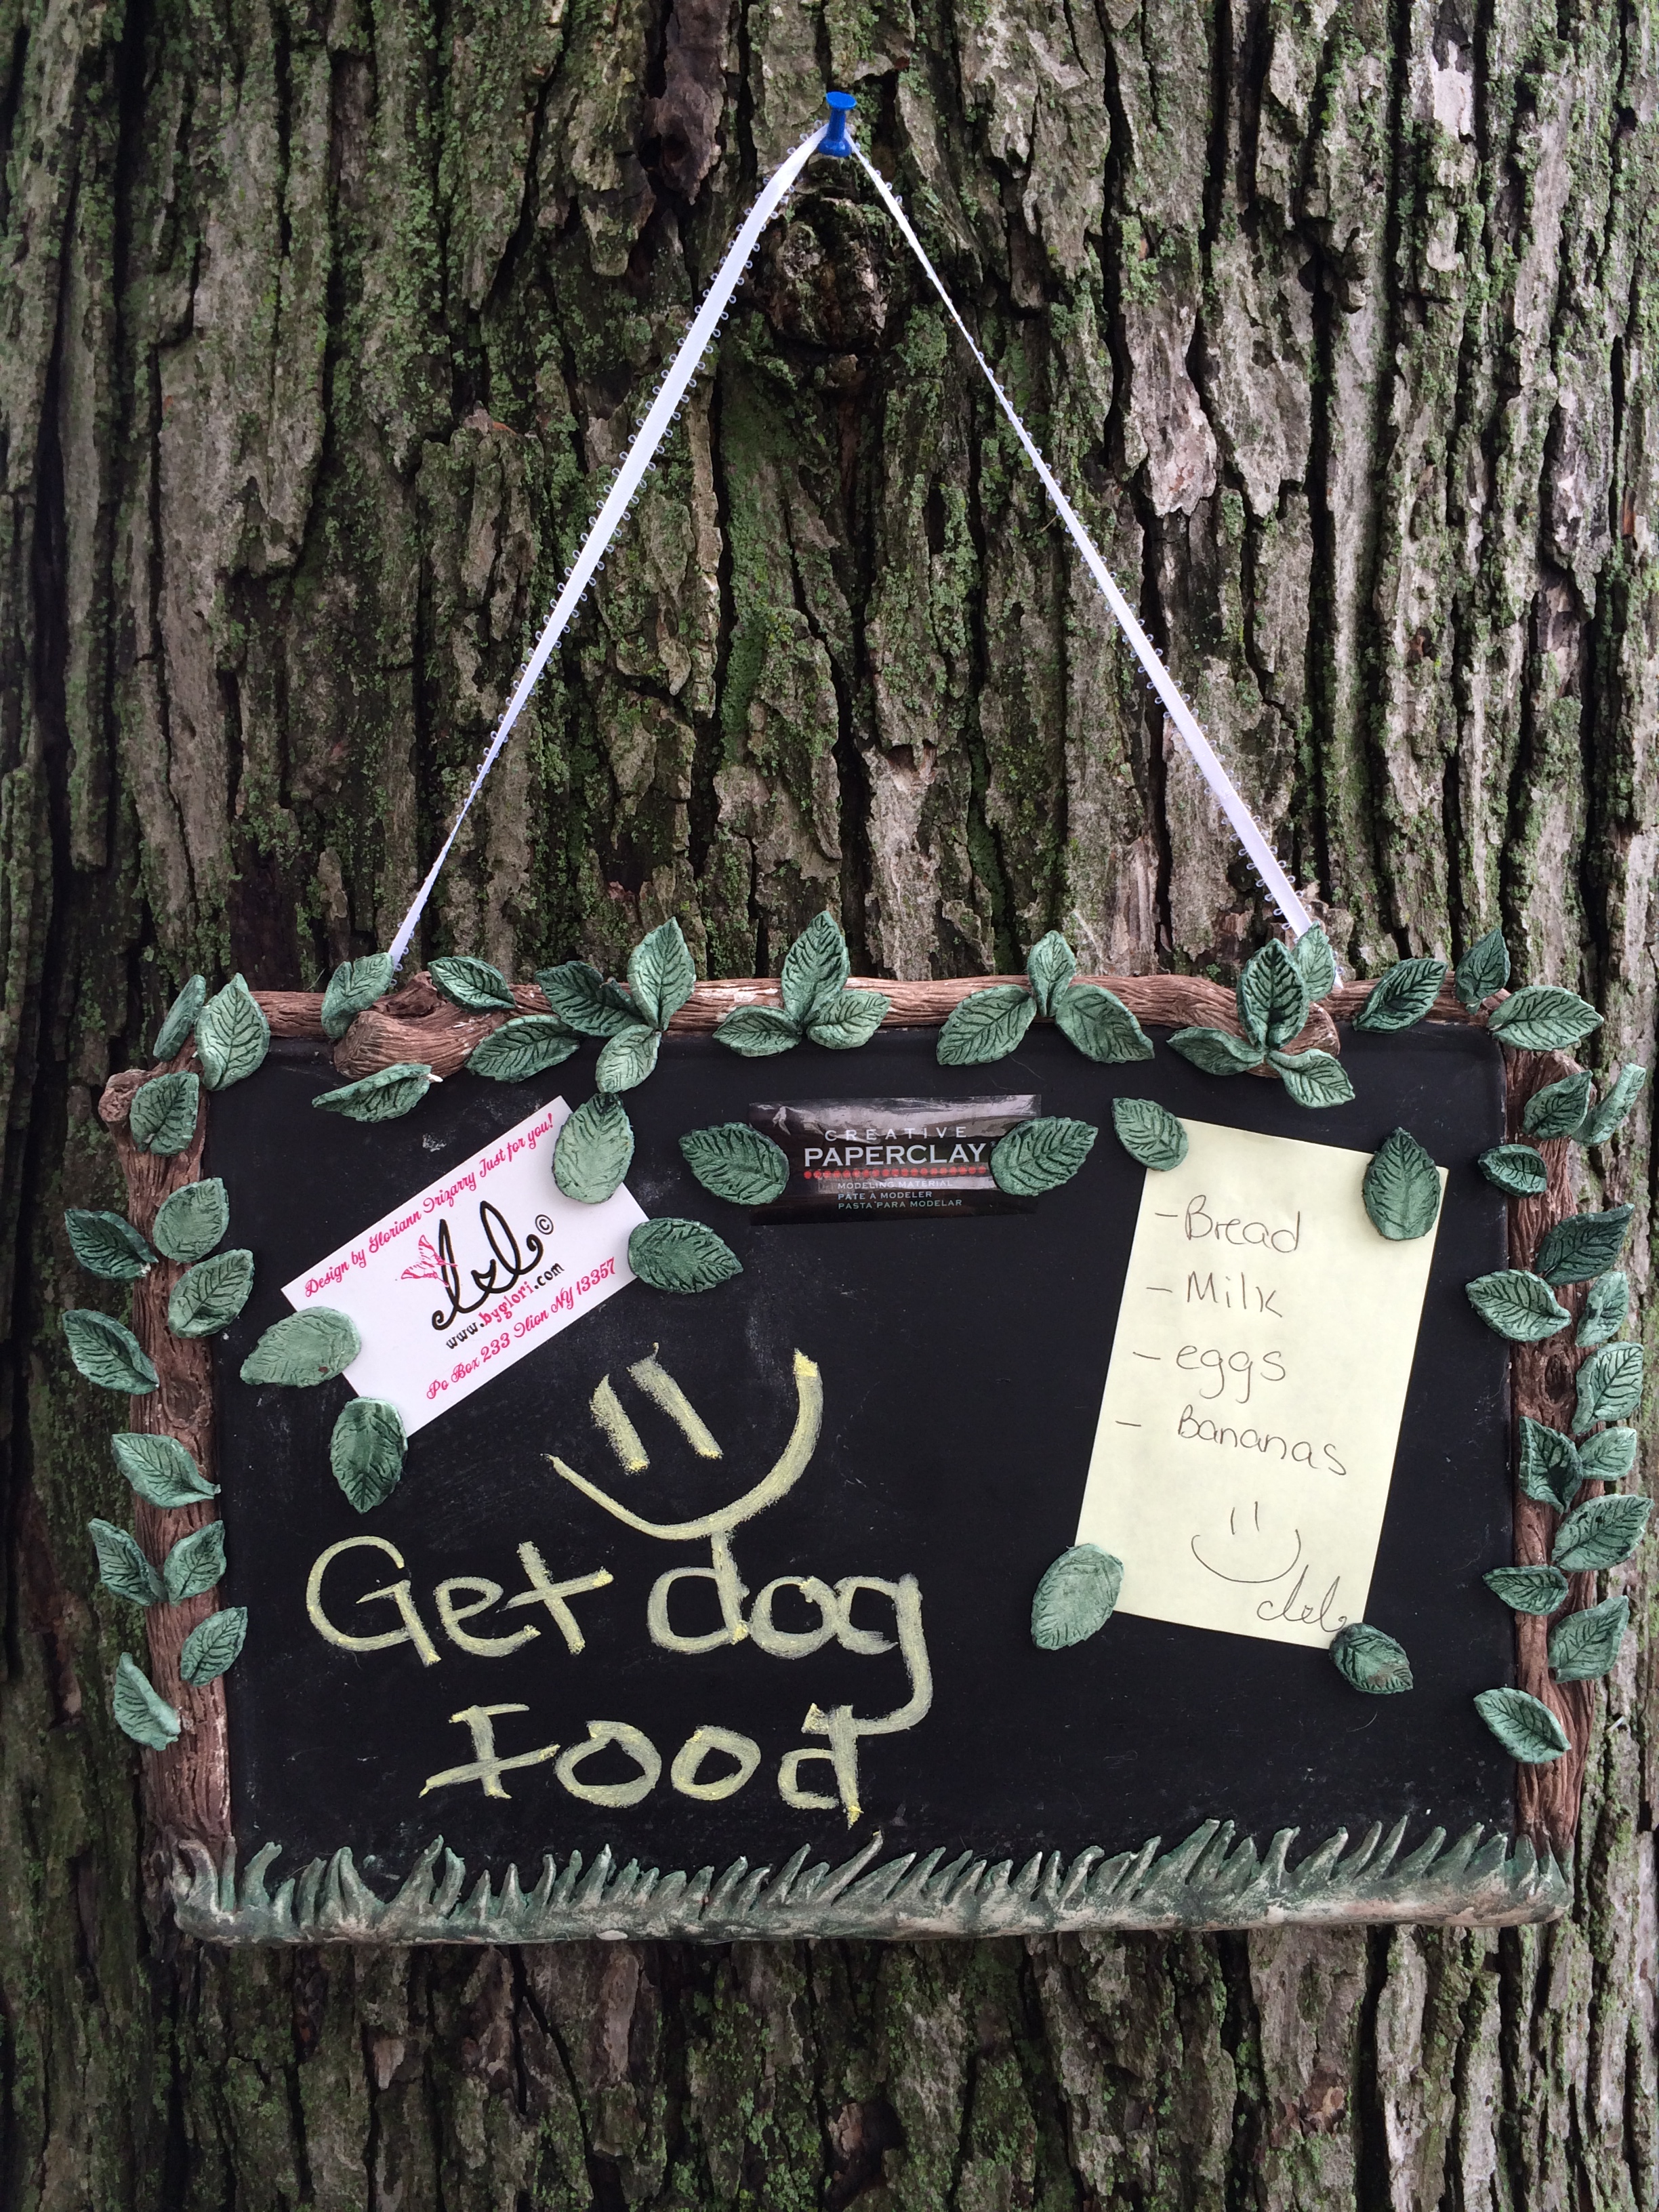
Hi my dear friends, followers and collectors. I been a little absent minded lately so I wanted to create a piece that will help me out getting a little organized. What’s better than a bulletin board. Not any ordinary board but a multi uses one.

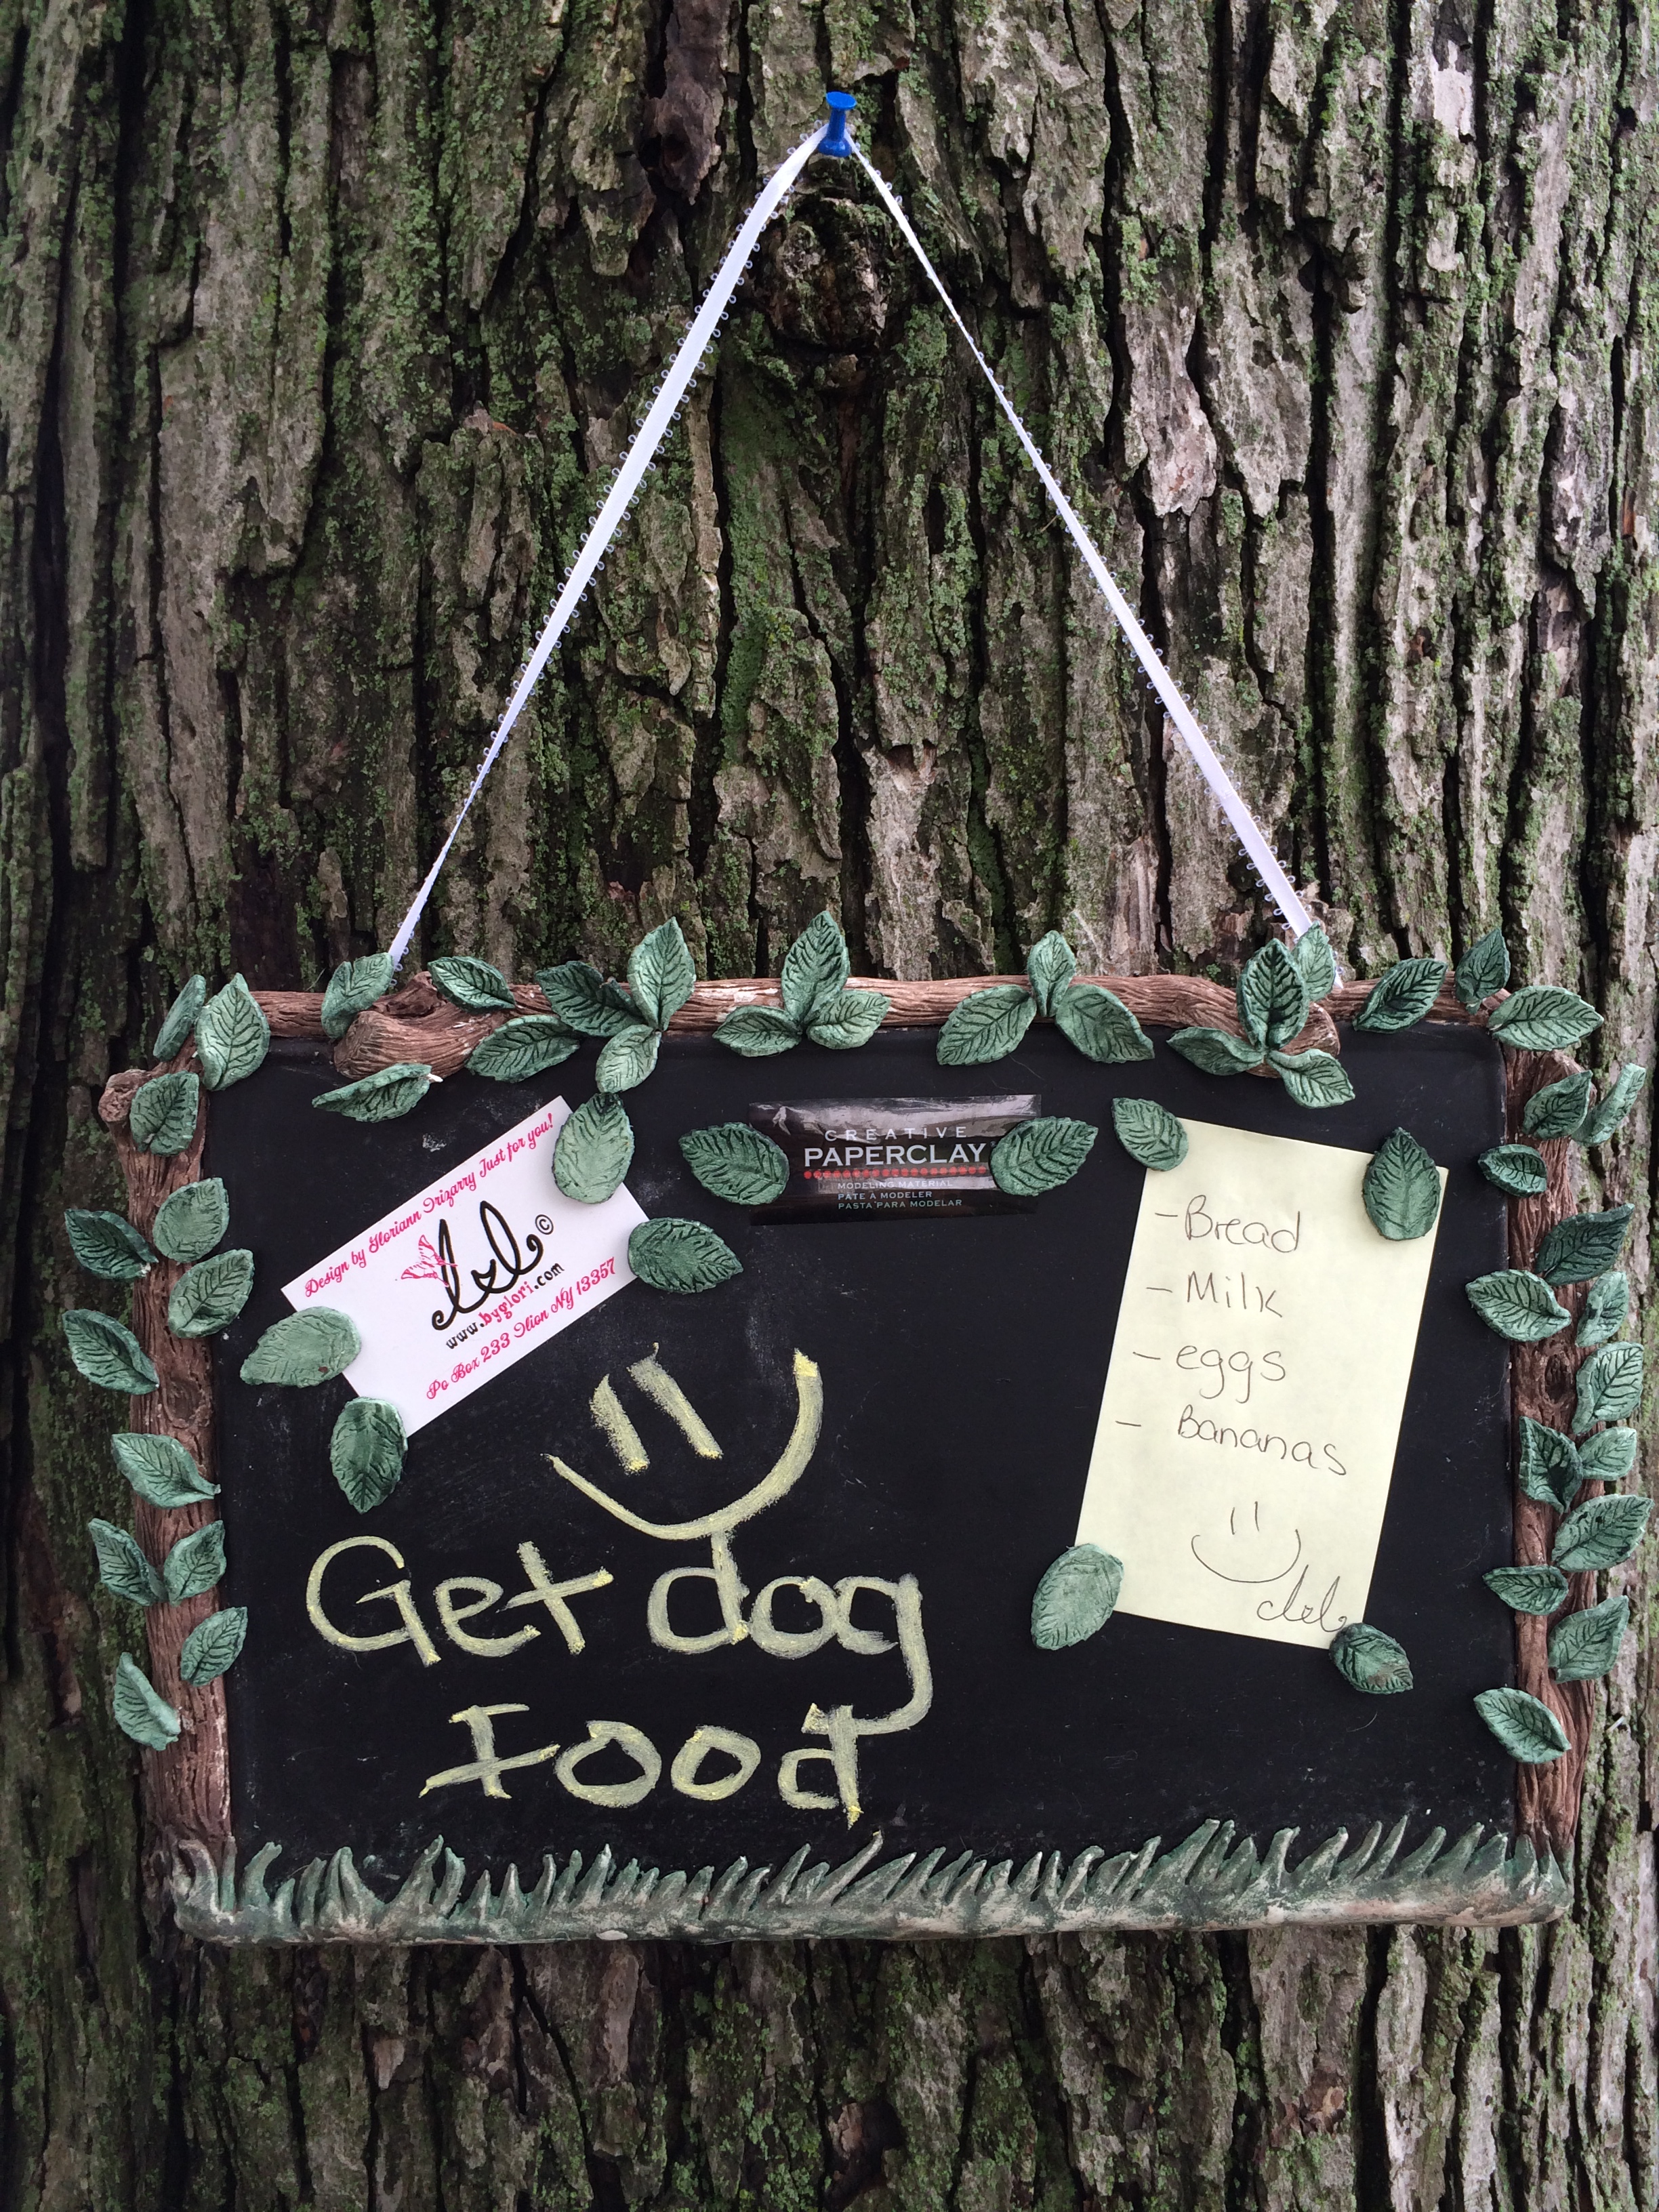
Yes a great Magnetic Chalk Bulletin board. Here I will now show you how to make your own OAK board.

create your own chalkboard with a paper clay boarder

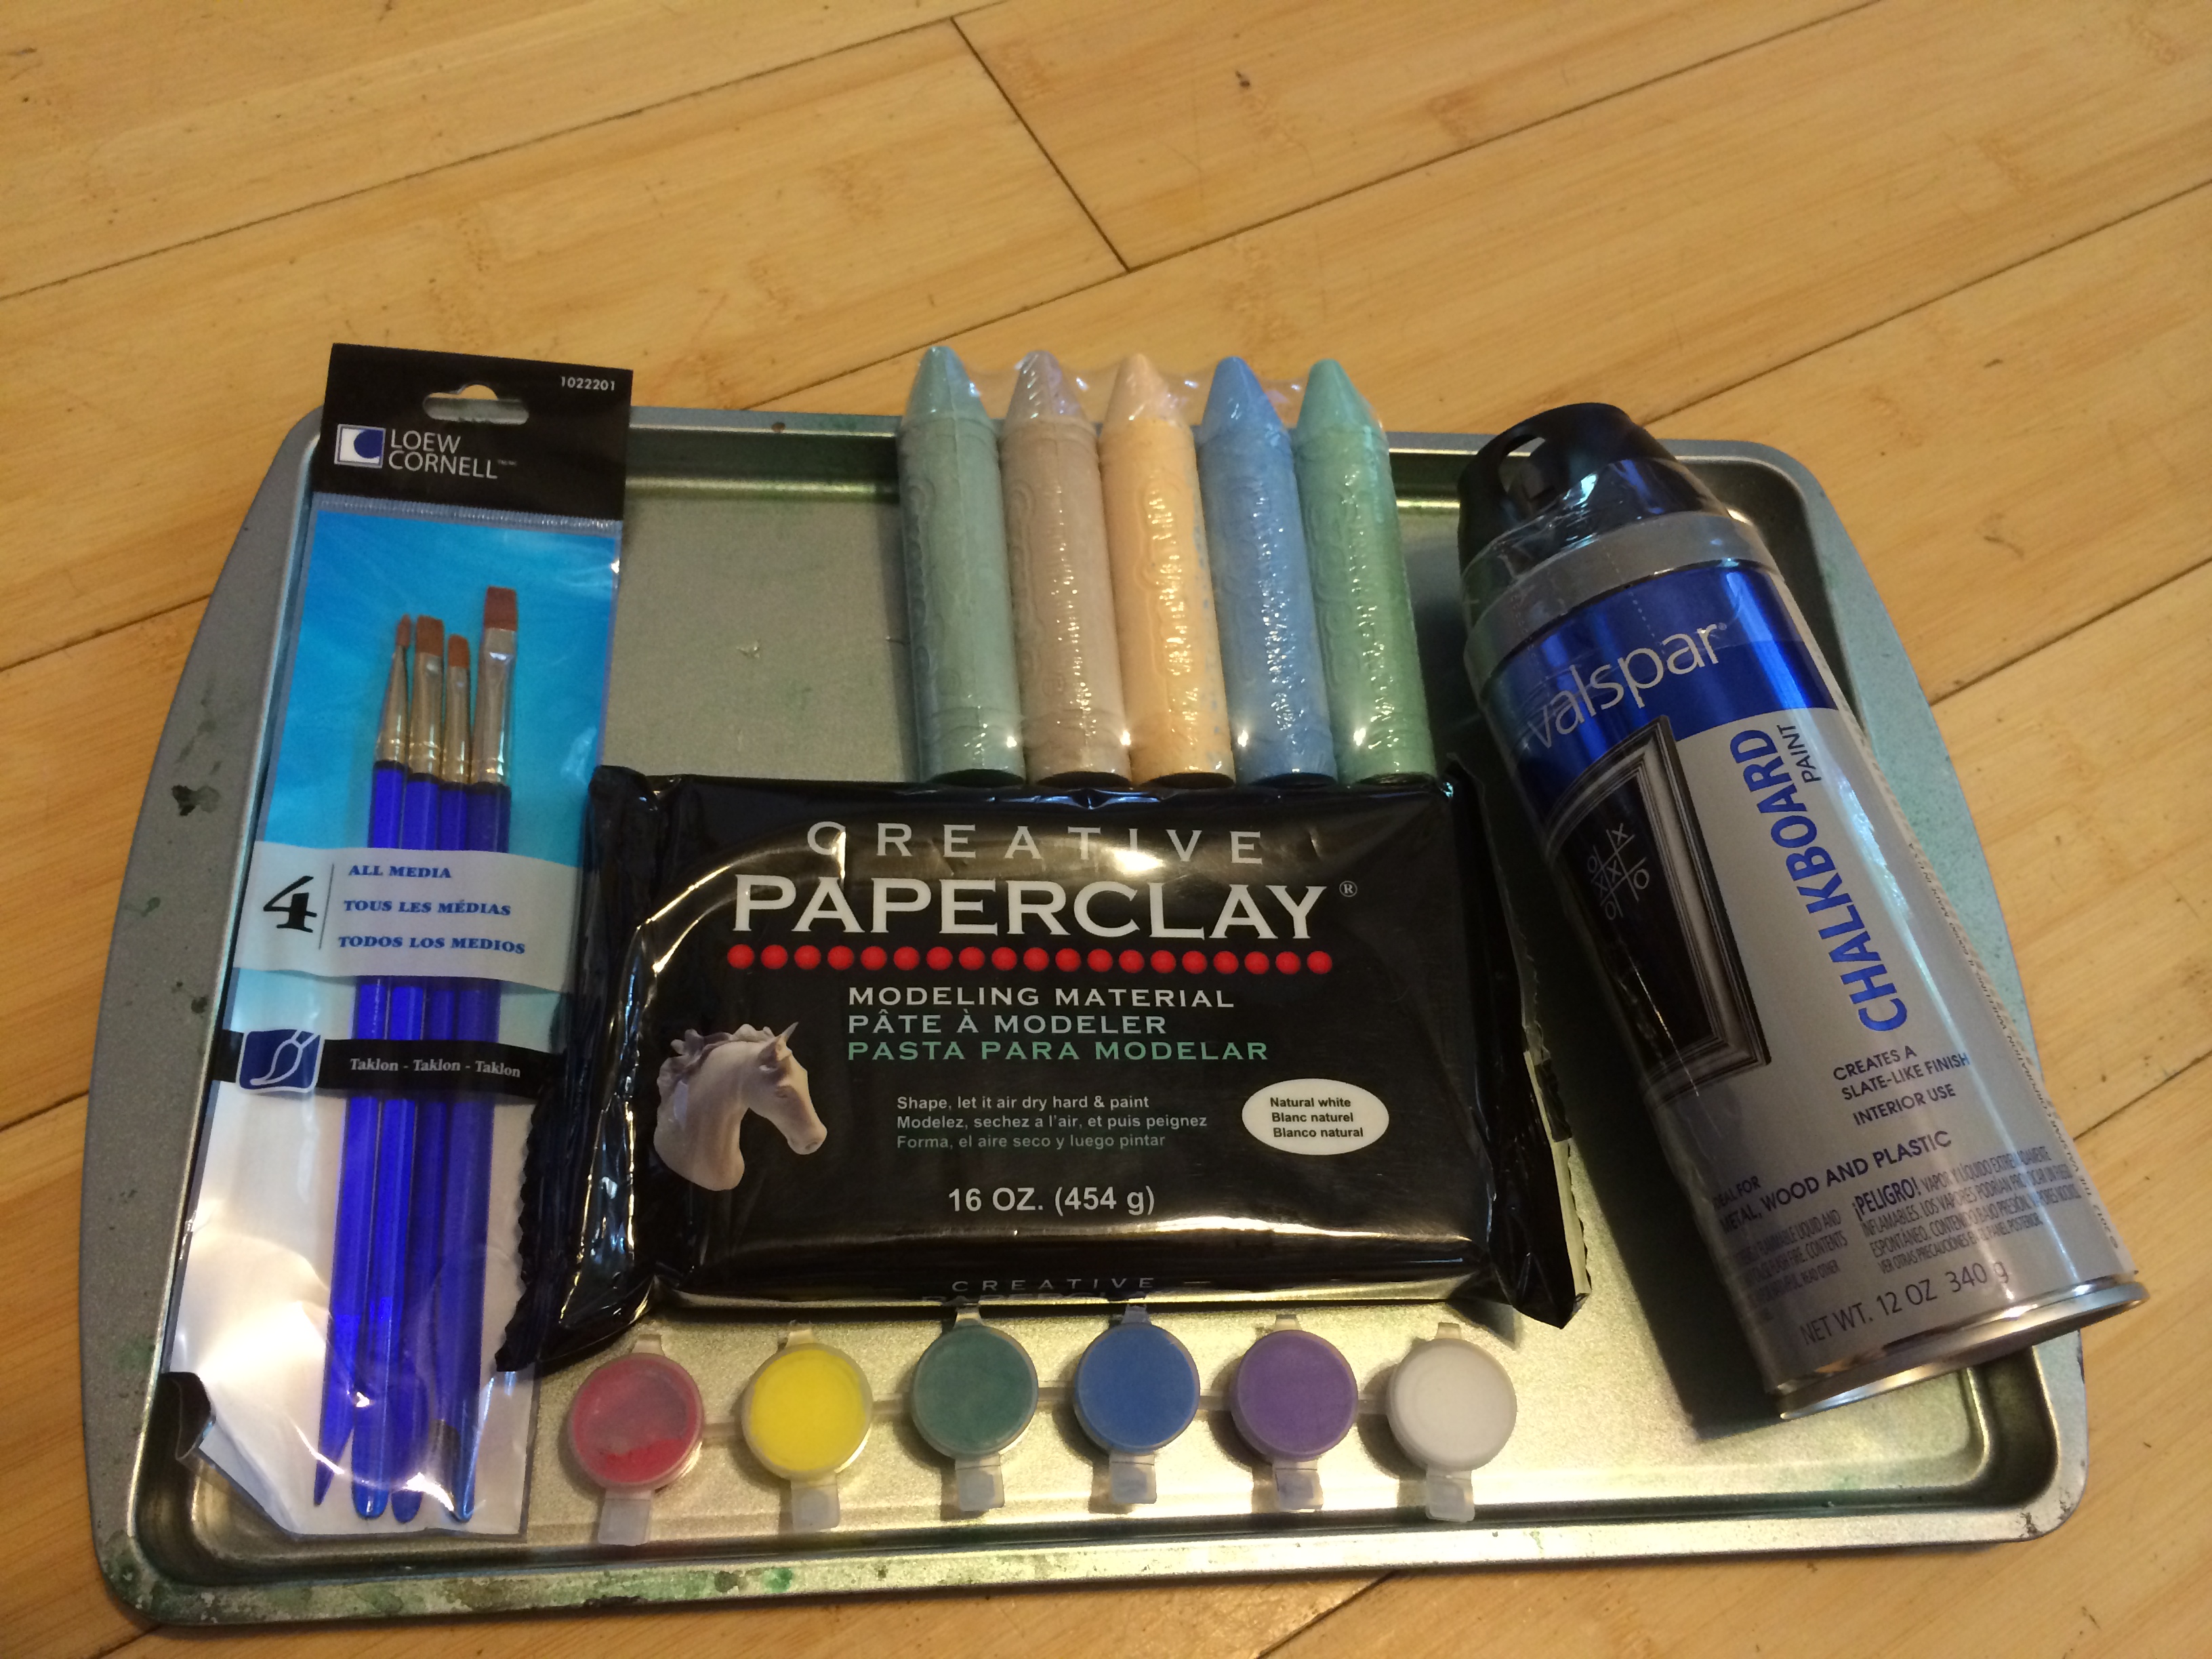
Materials

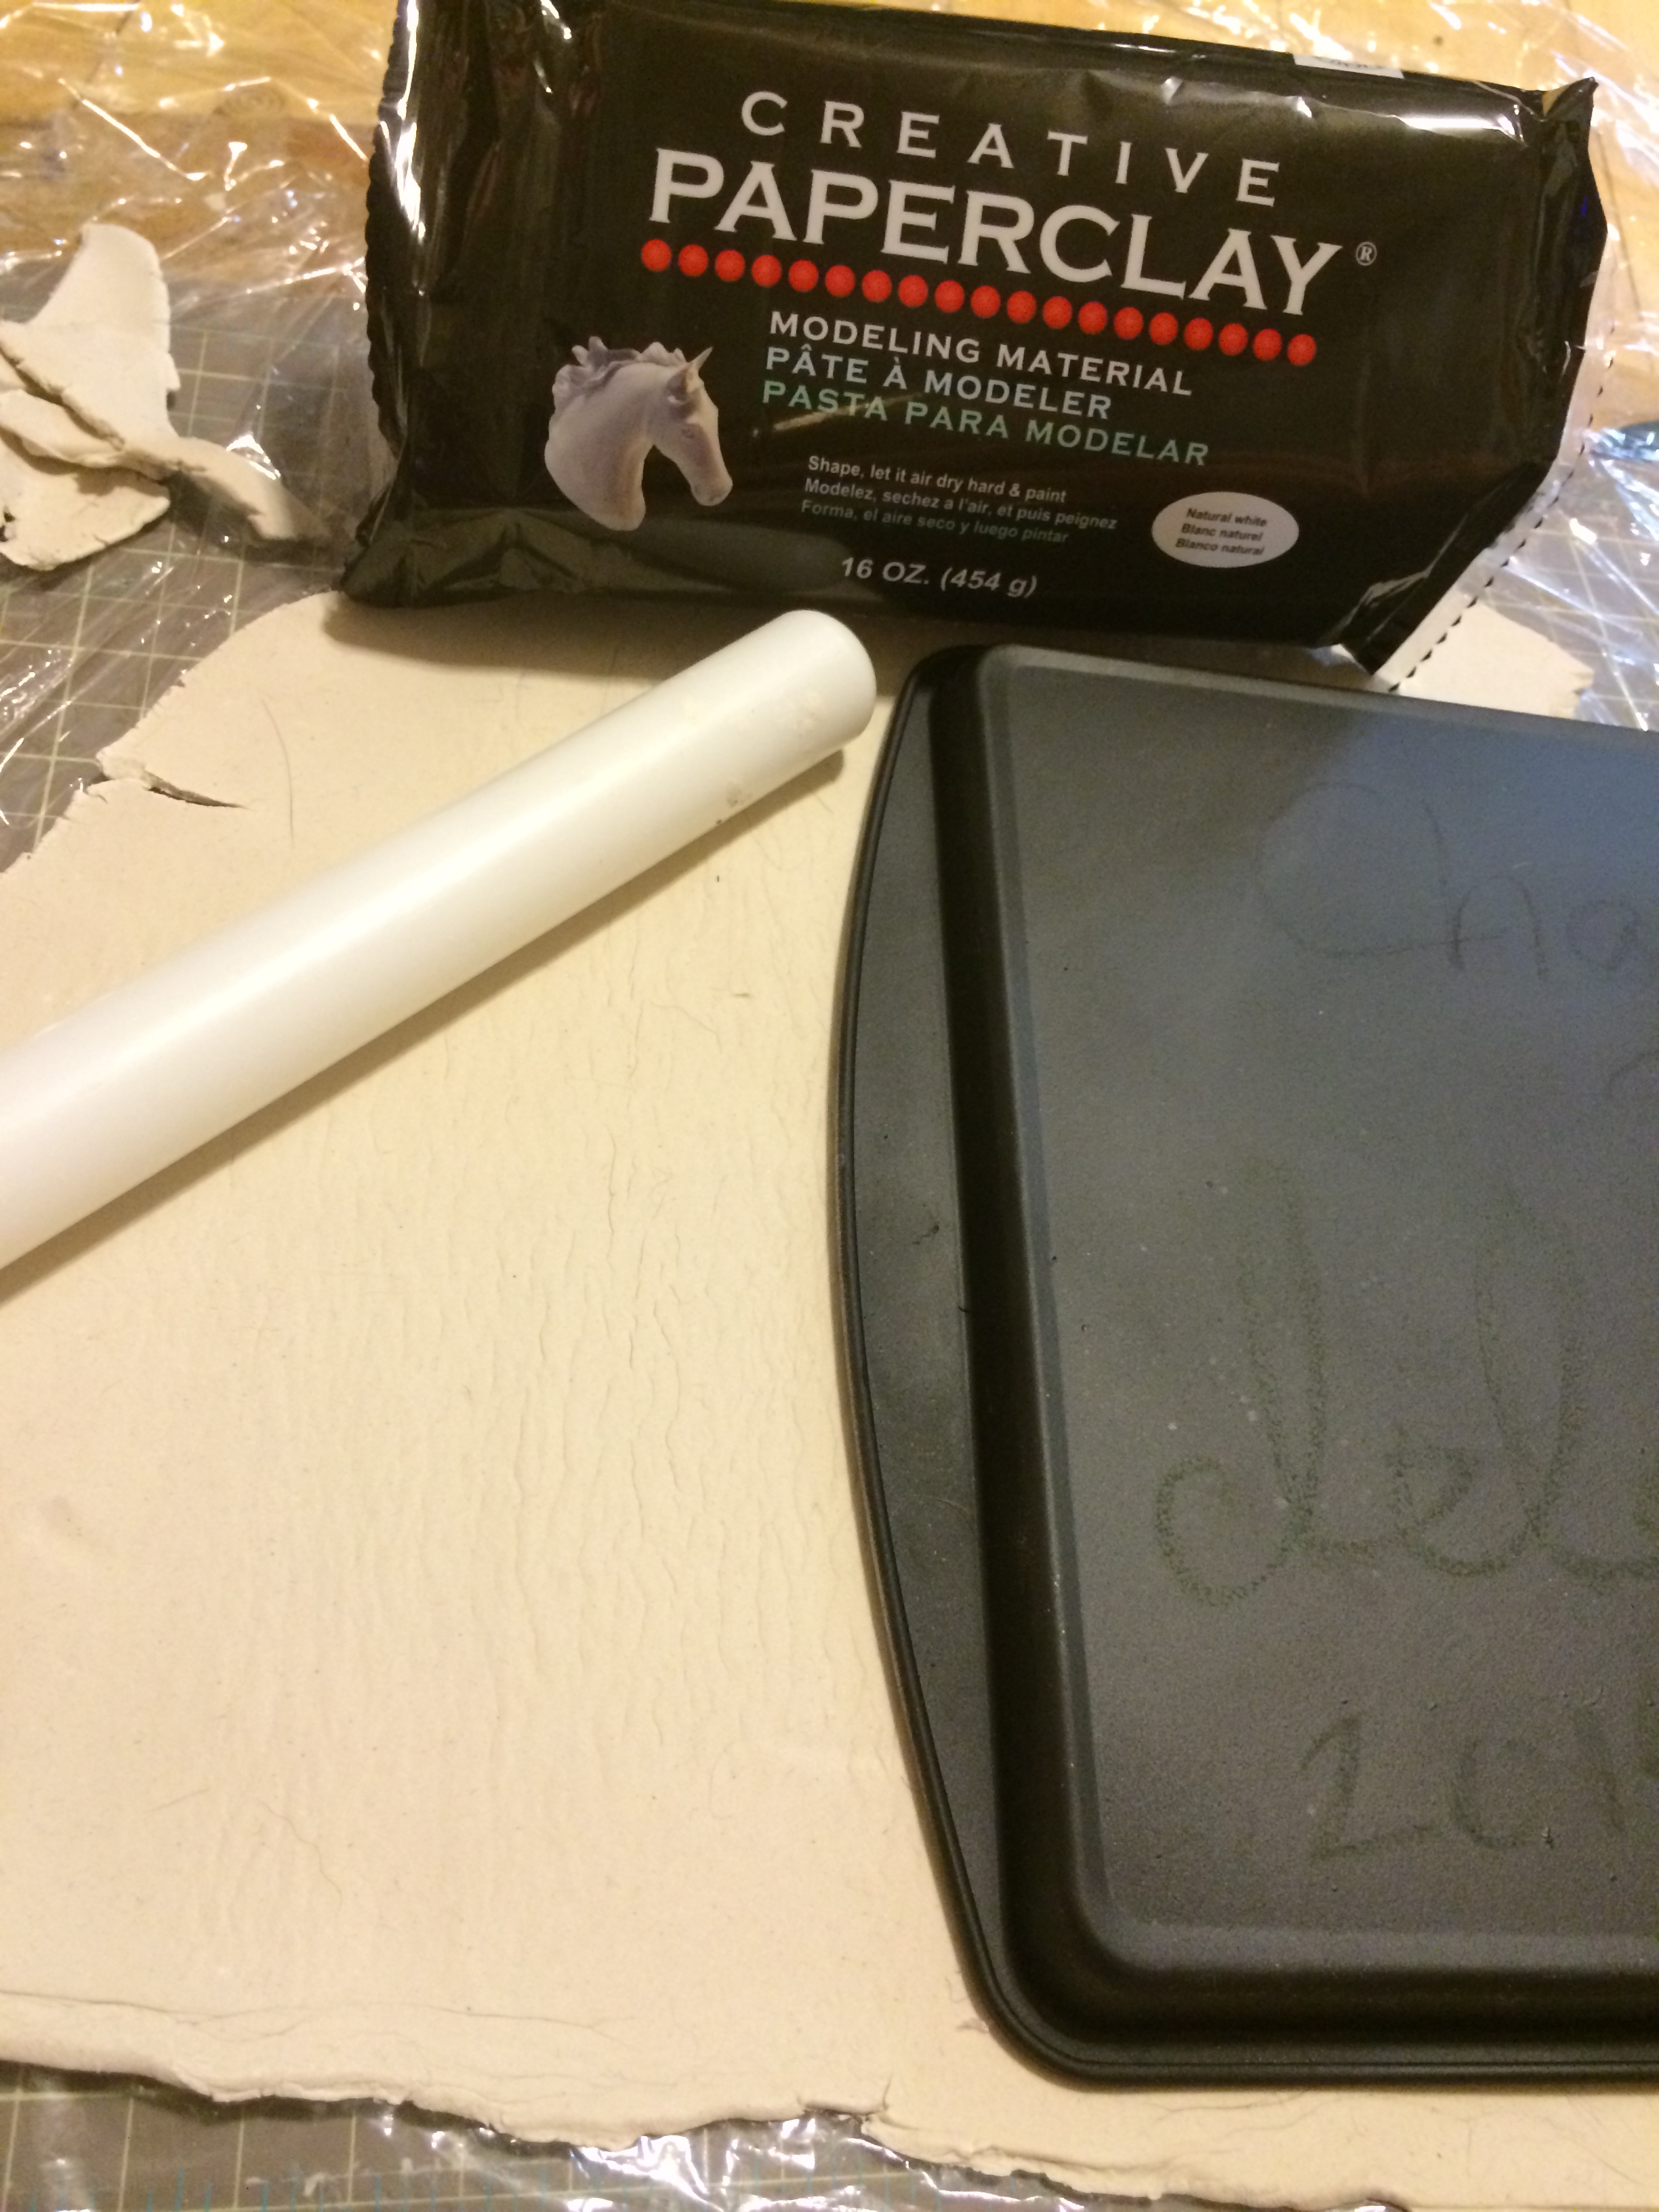
Creative Paperclay 16 0z

Cookie baking sheet ( I found mine at the dollar Store)

Chalkboard Valspar Paint

Acrylic paints

Paint Brushes

Super Strong Magnets

Fast Grab Tacky Glue

Leaf Cutters

Creative Paperclay board

Creating your own Magnetic Chalk Board

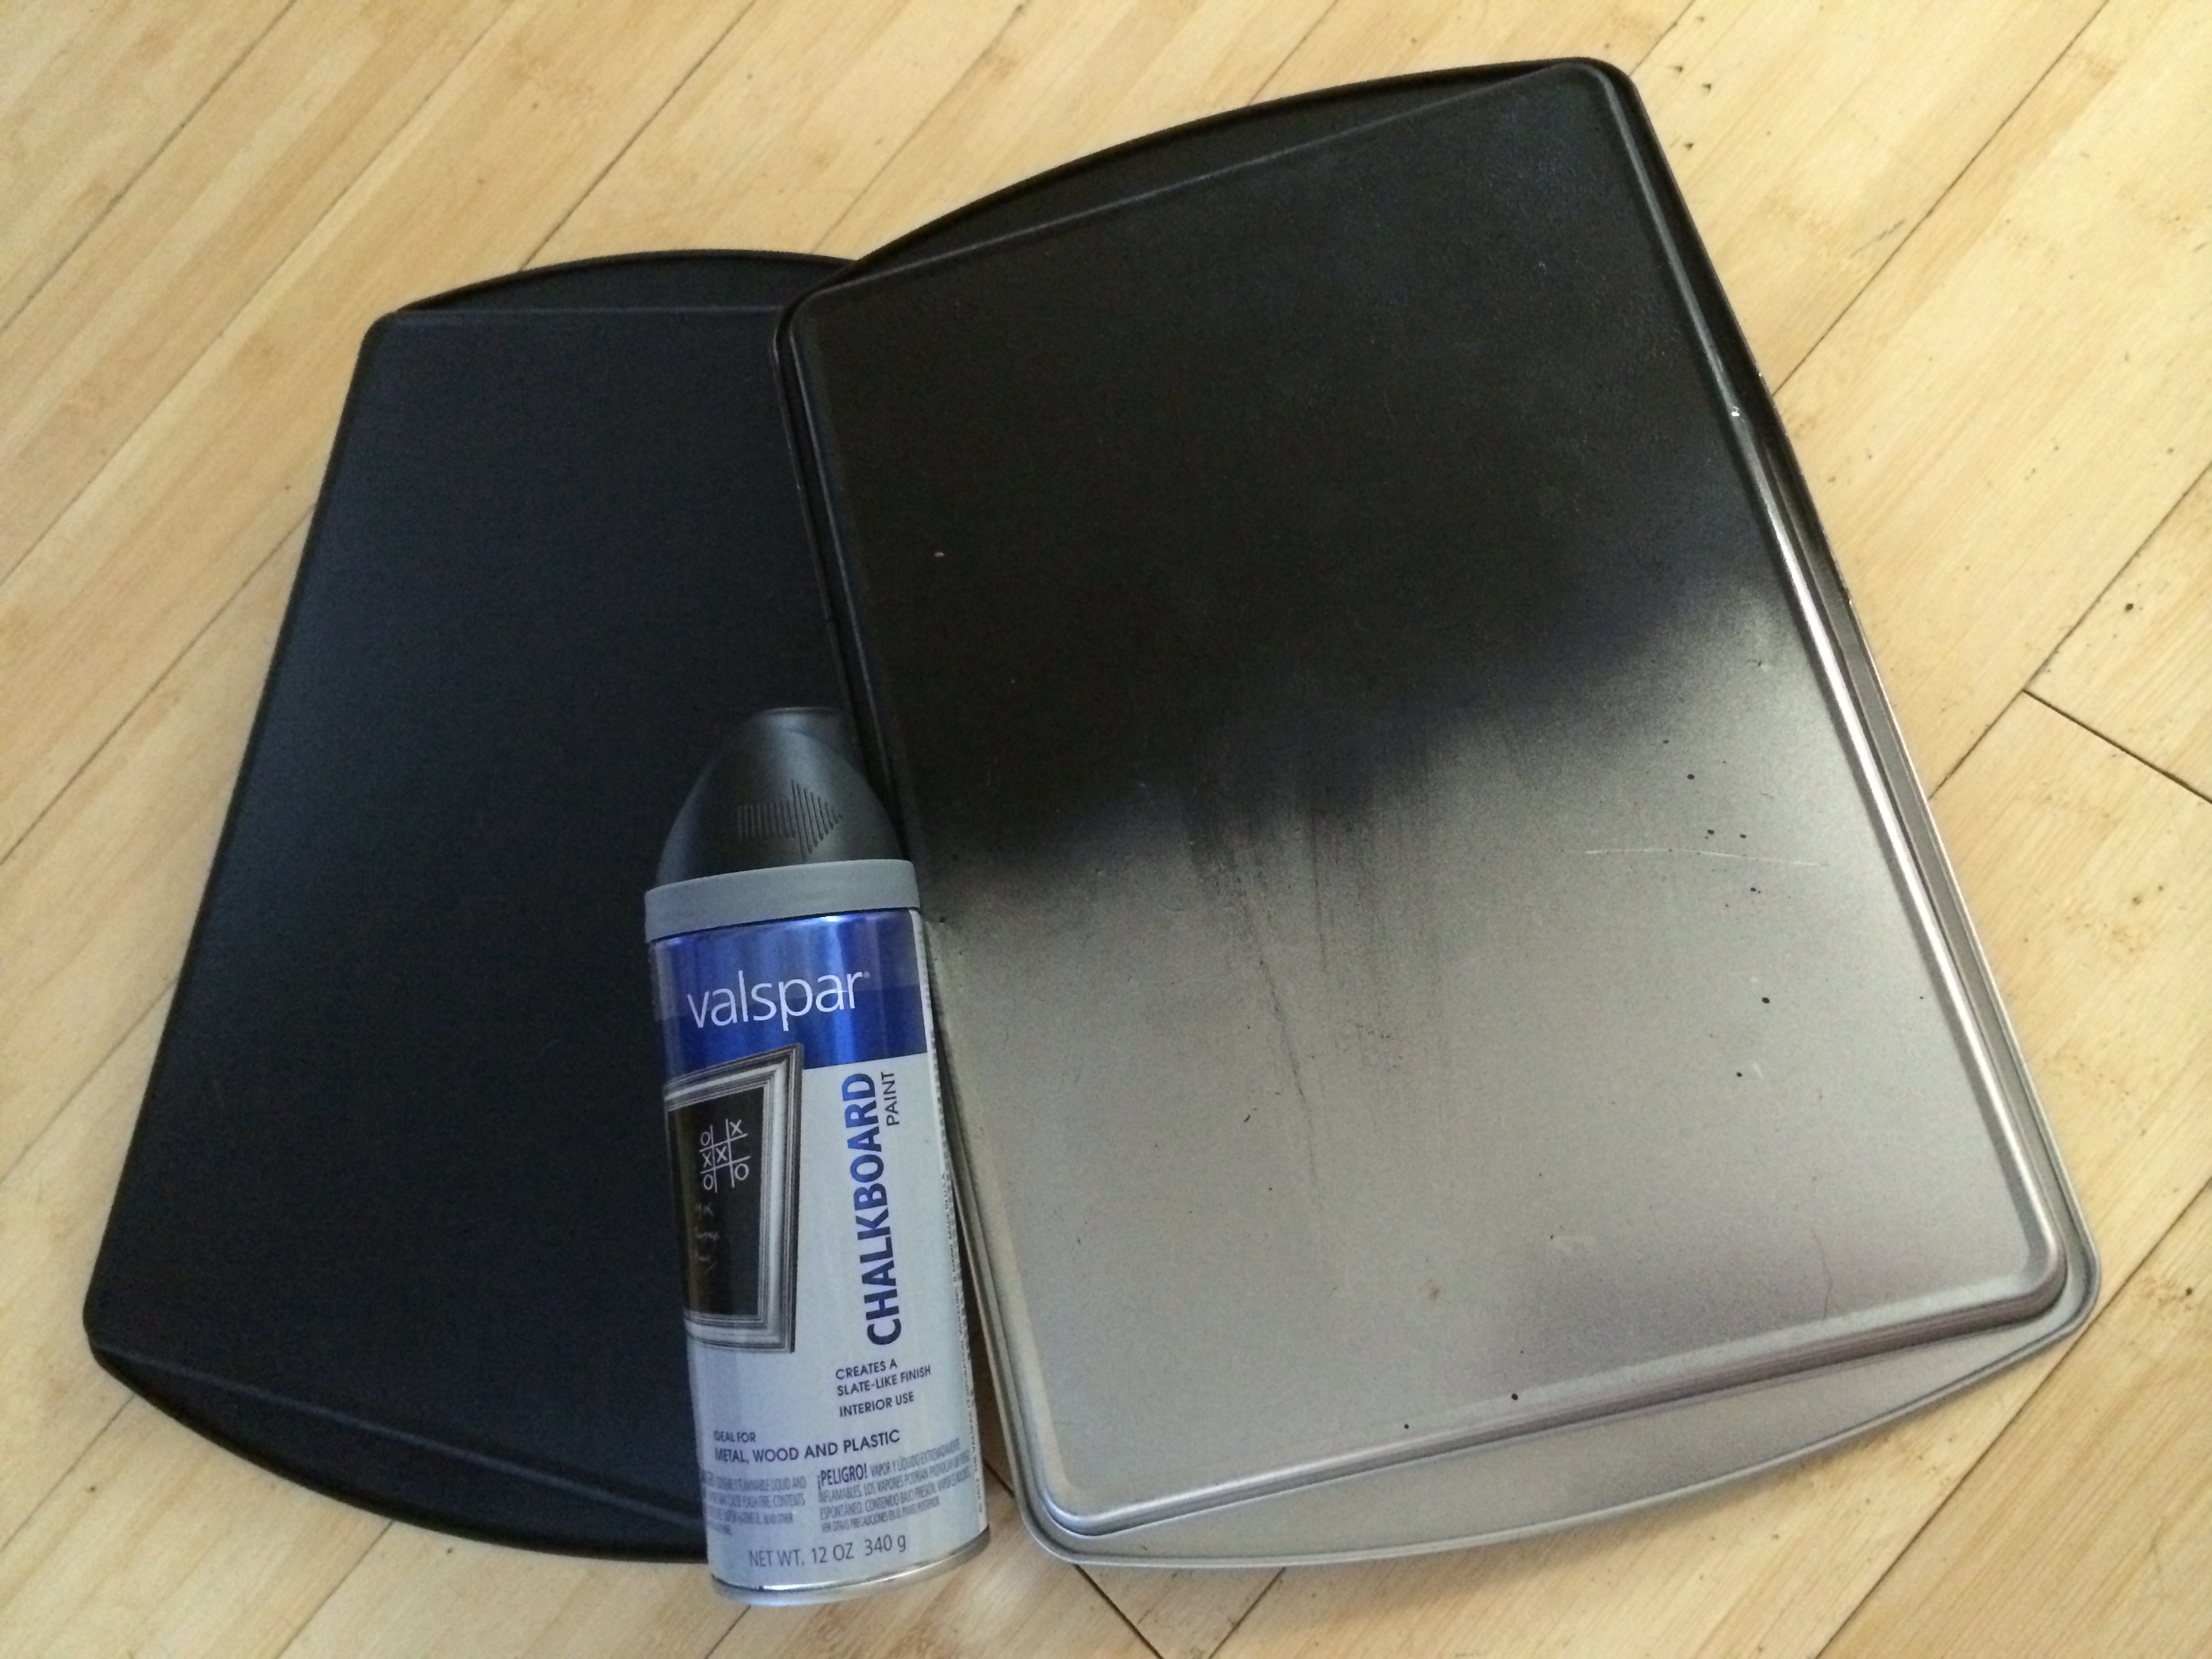
I started this project by spraying the can of the Chalkboard spray paint all over the back of the baking cookie sheet and let it dry. For a better chalk writing, I spray 2 coats of the paint.

Creative Paperclay board

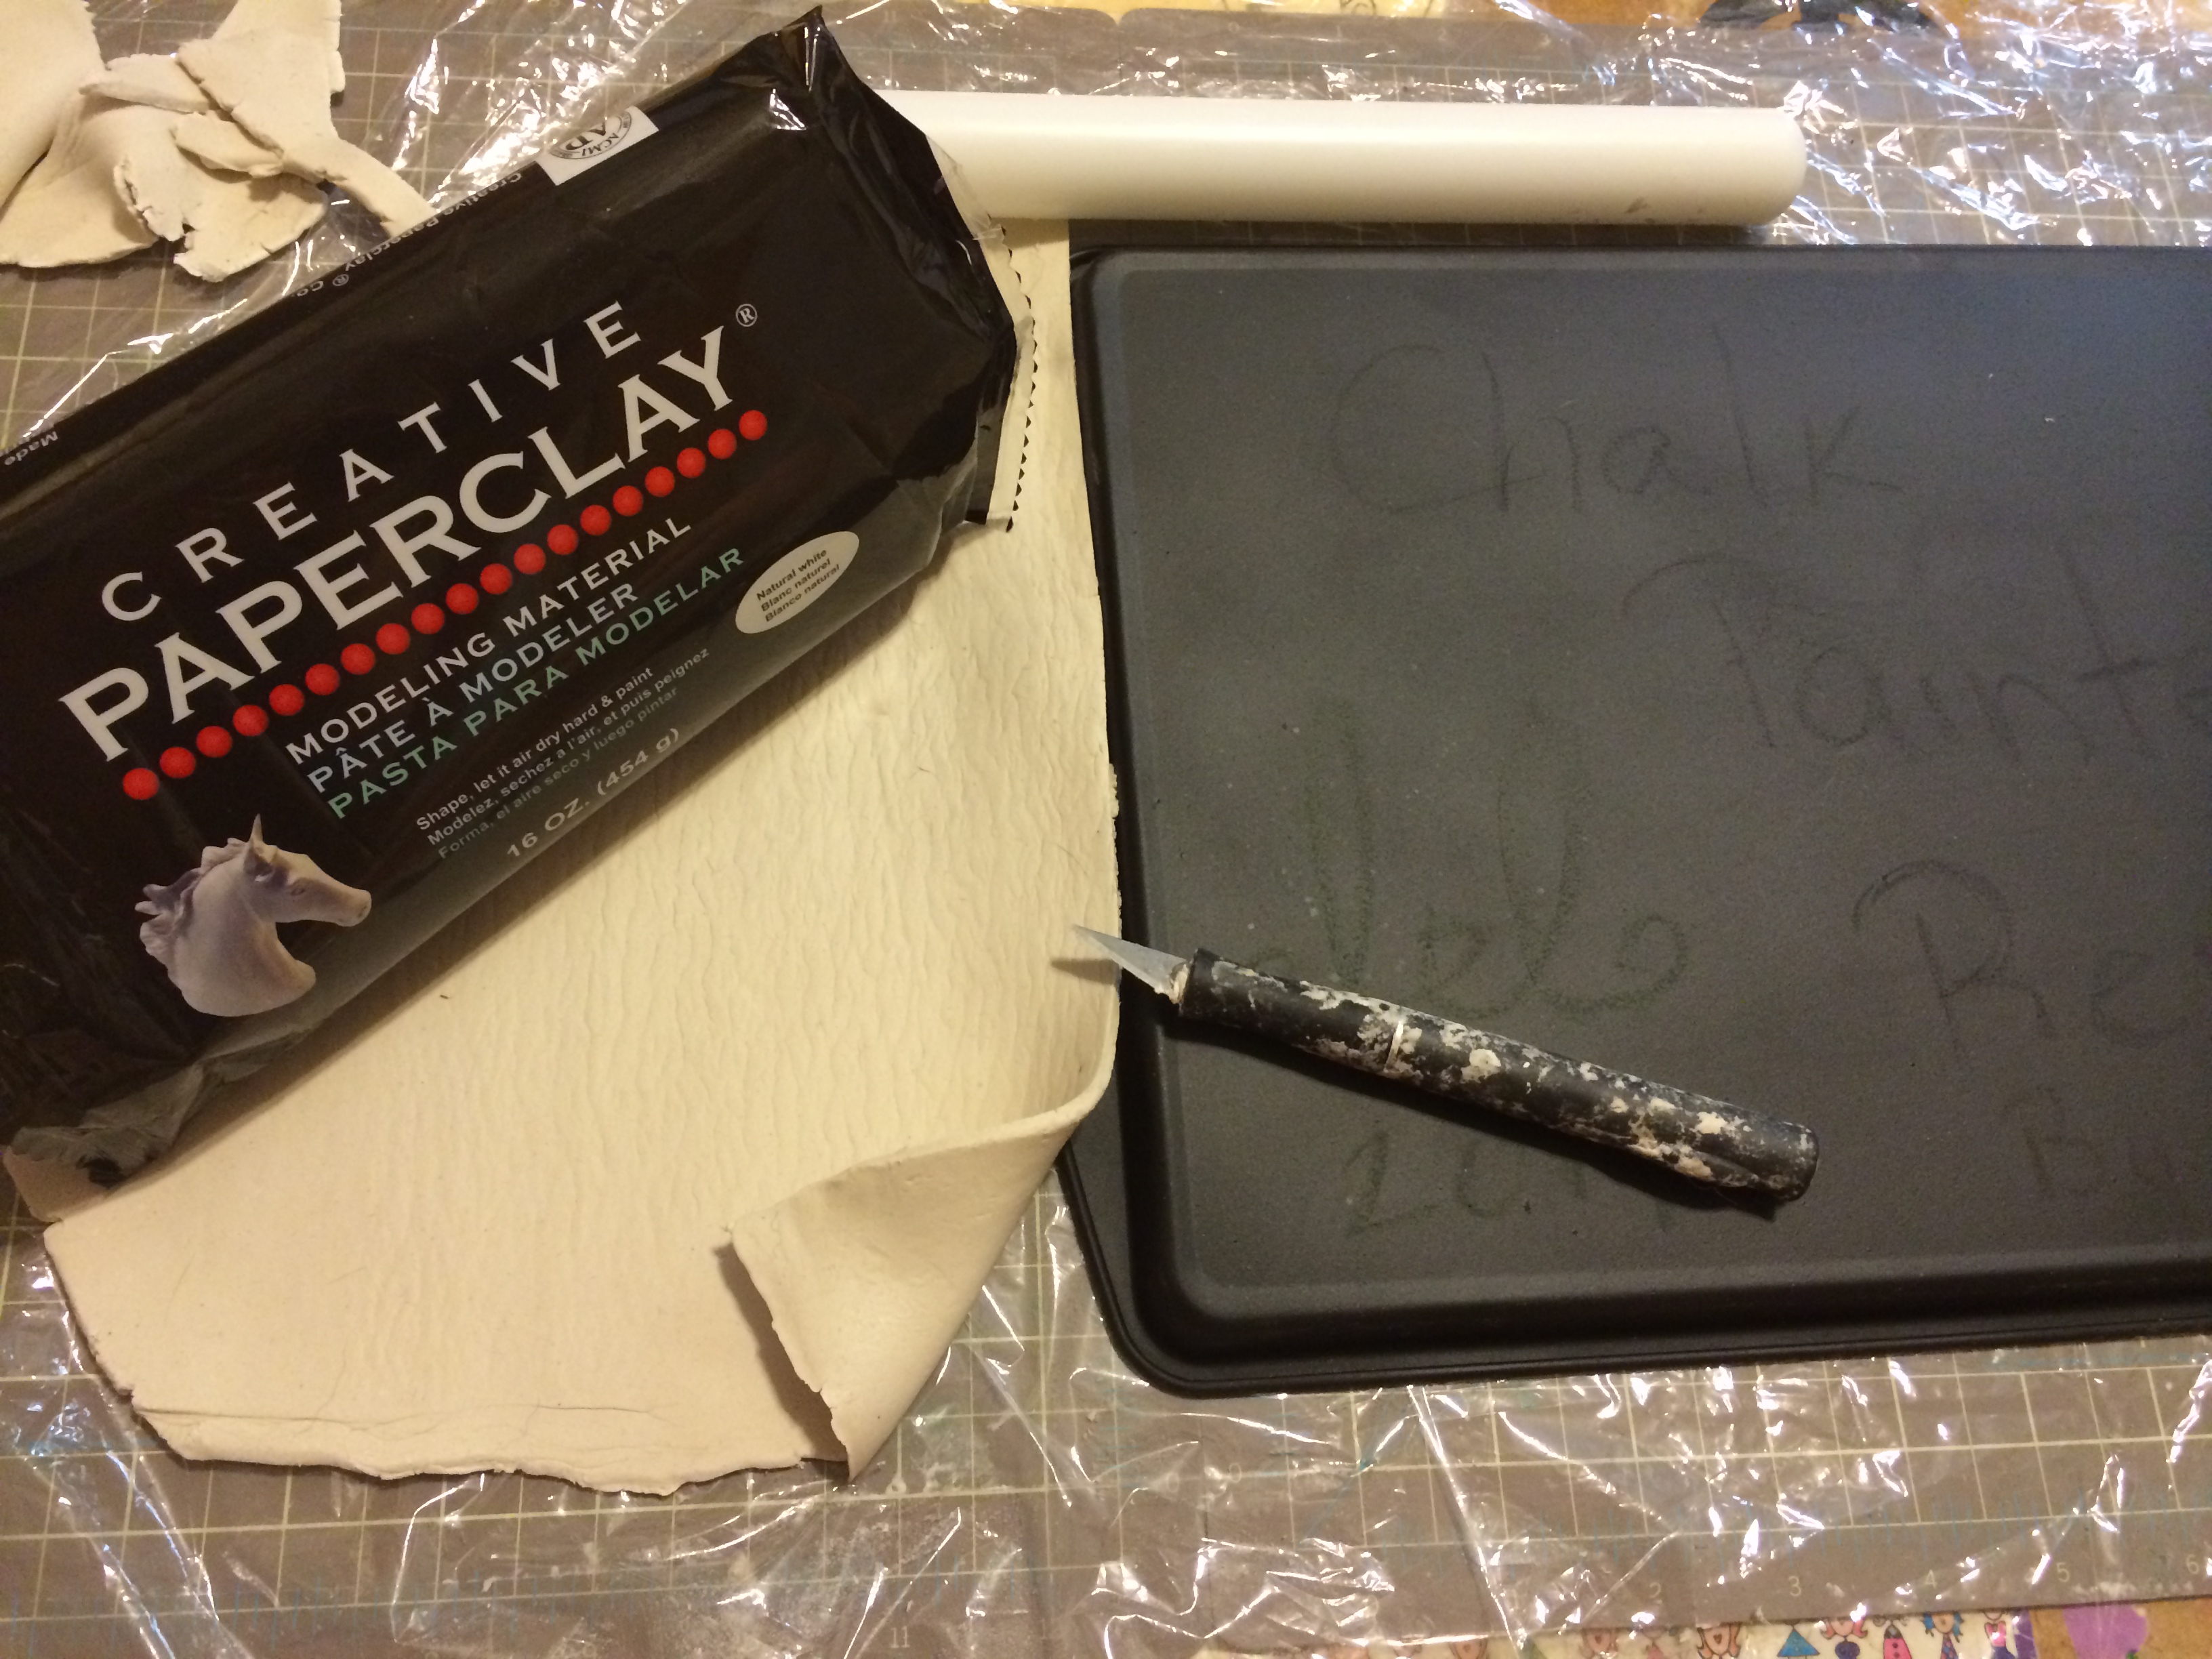
To get this project going I rolled a big clay sheet manually to a ¼ in thickness.

Creative Paperclay board

I pre drill 2 holes one on each top corner of the cookie sheet. So I can thread a ribbon to hang the board up. Now use your Xacto or hobby knife to cut a big rectangle that will cover both sides of the cookie sheet.

Creative Paperclay board

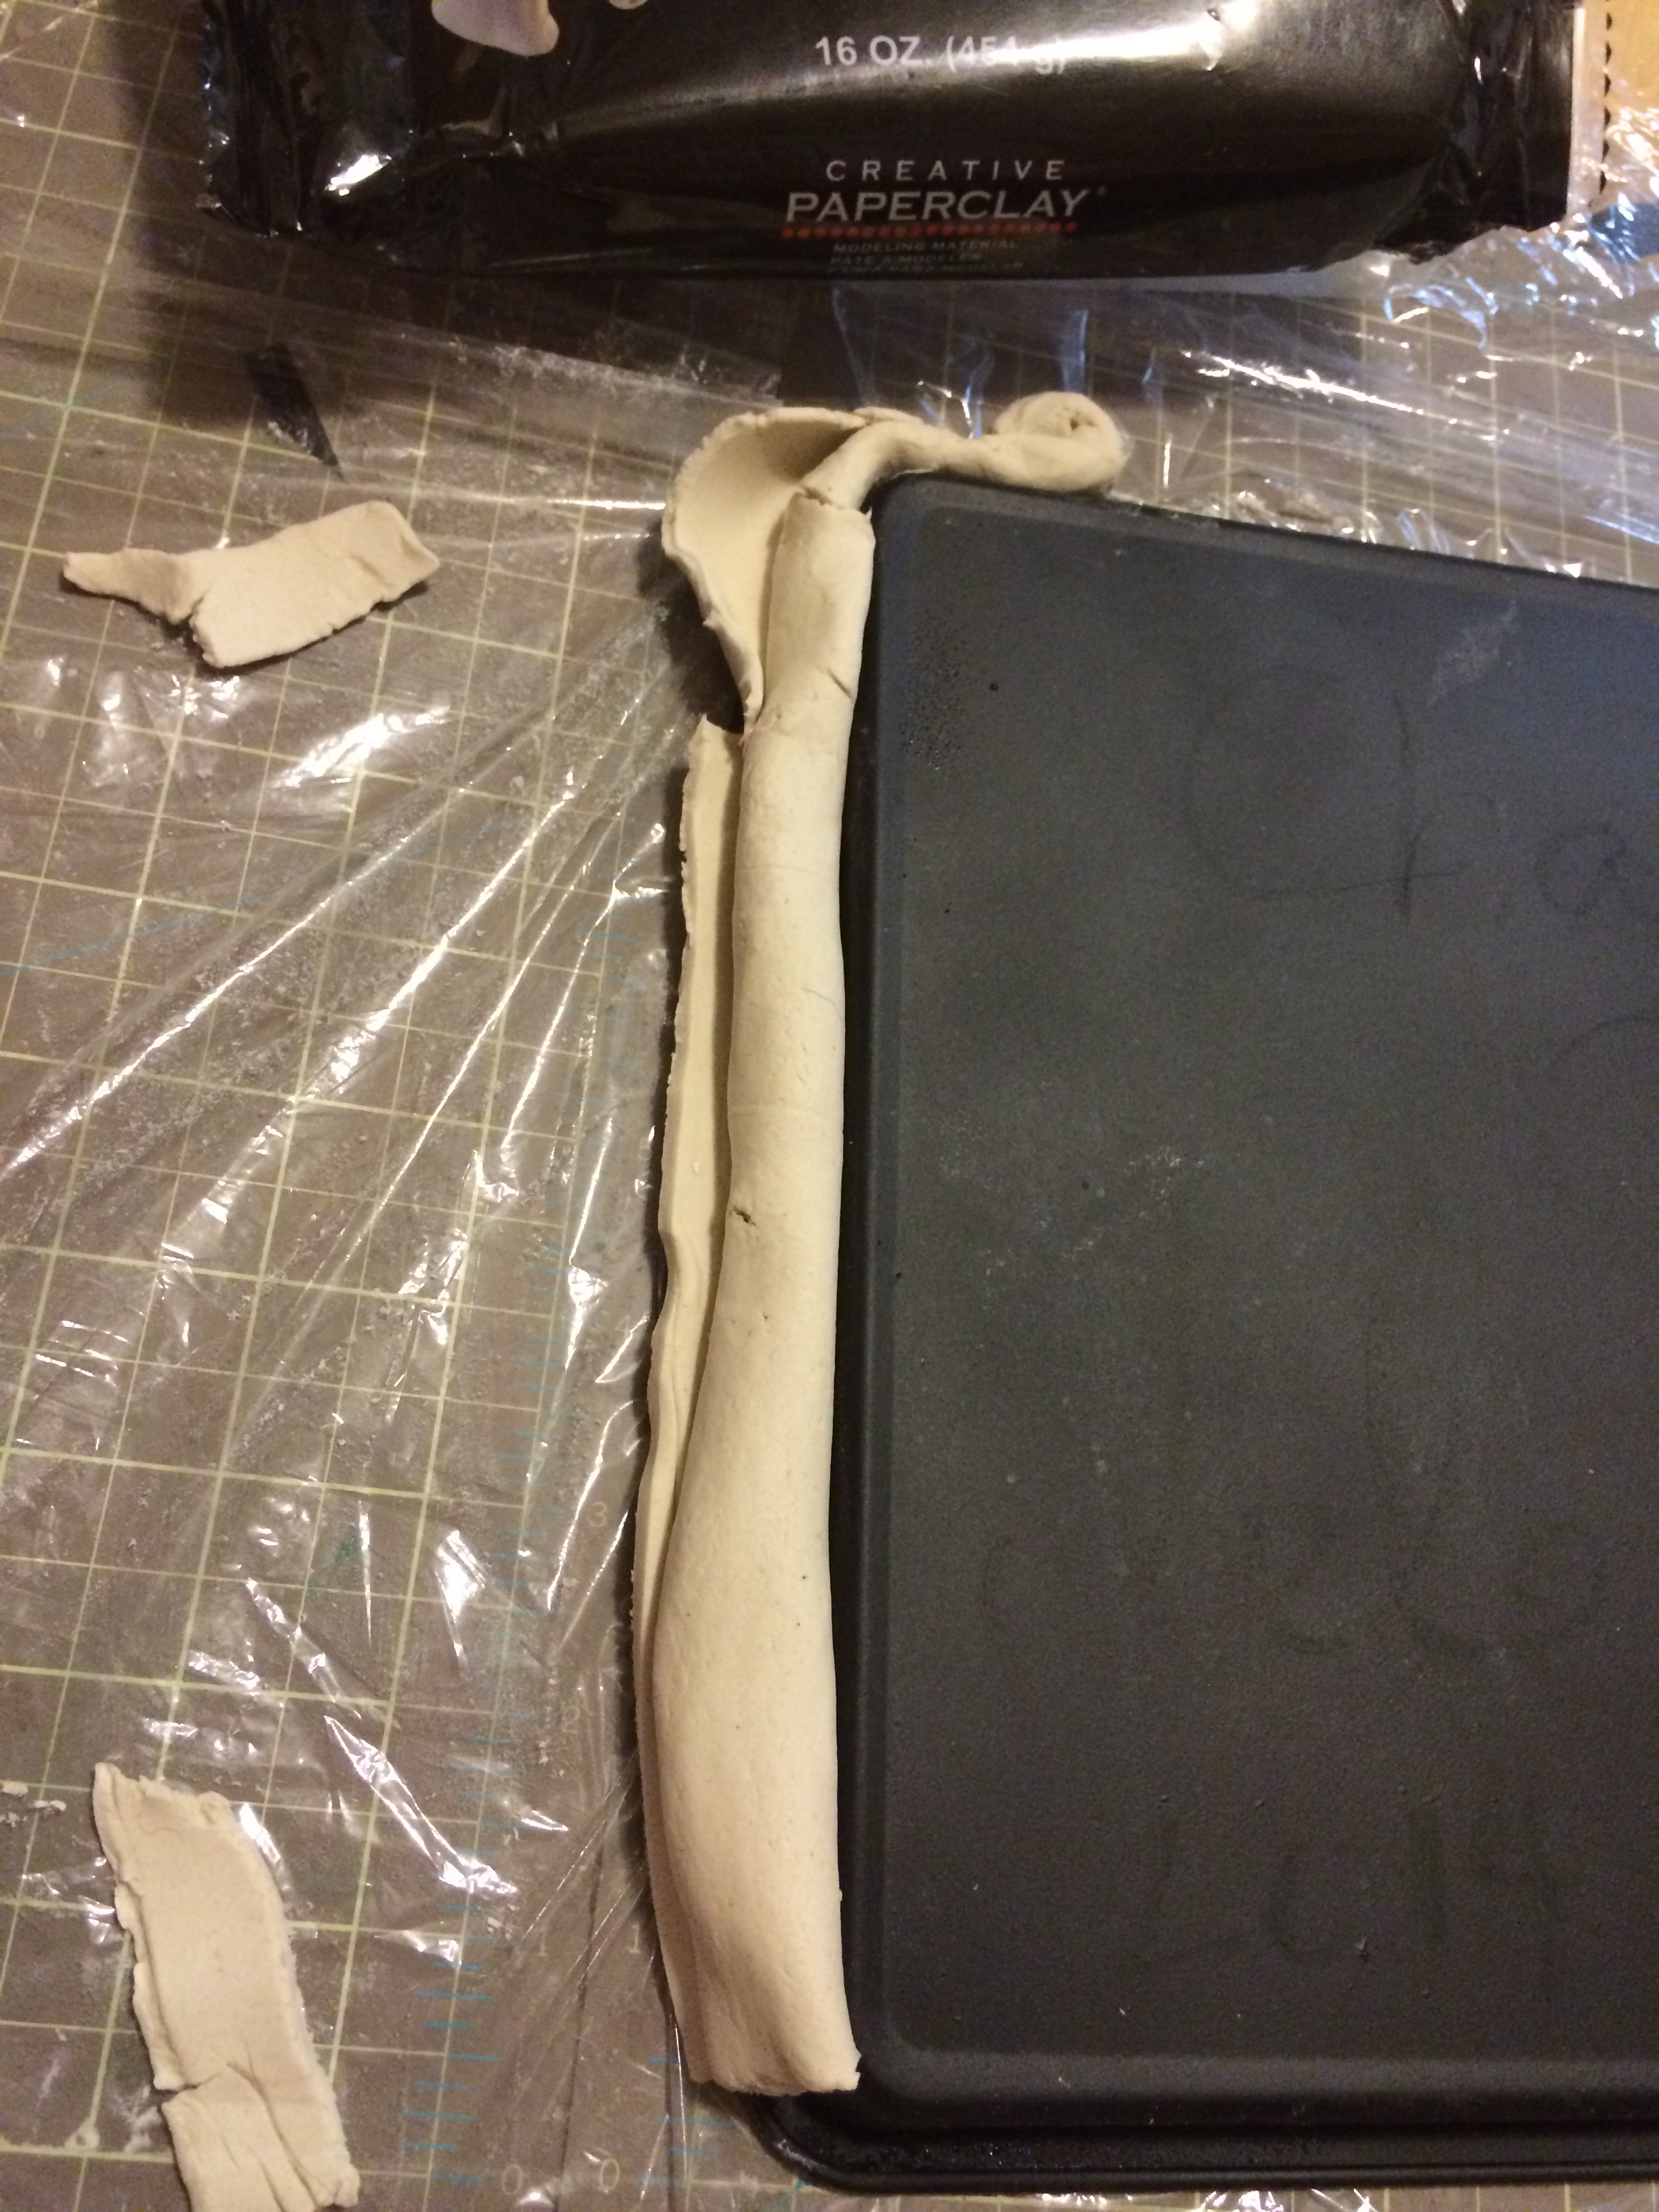
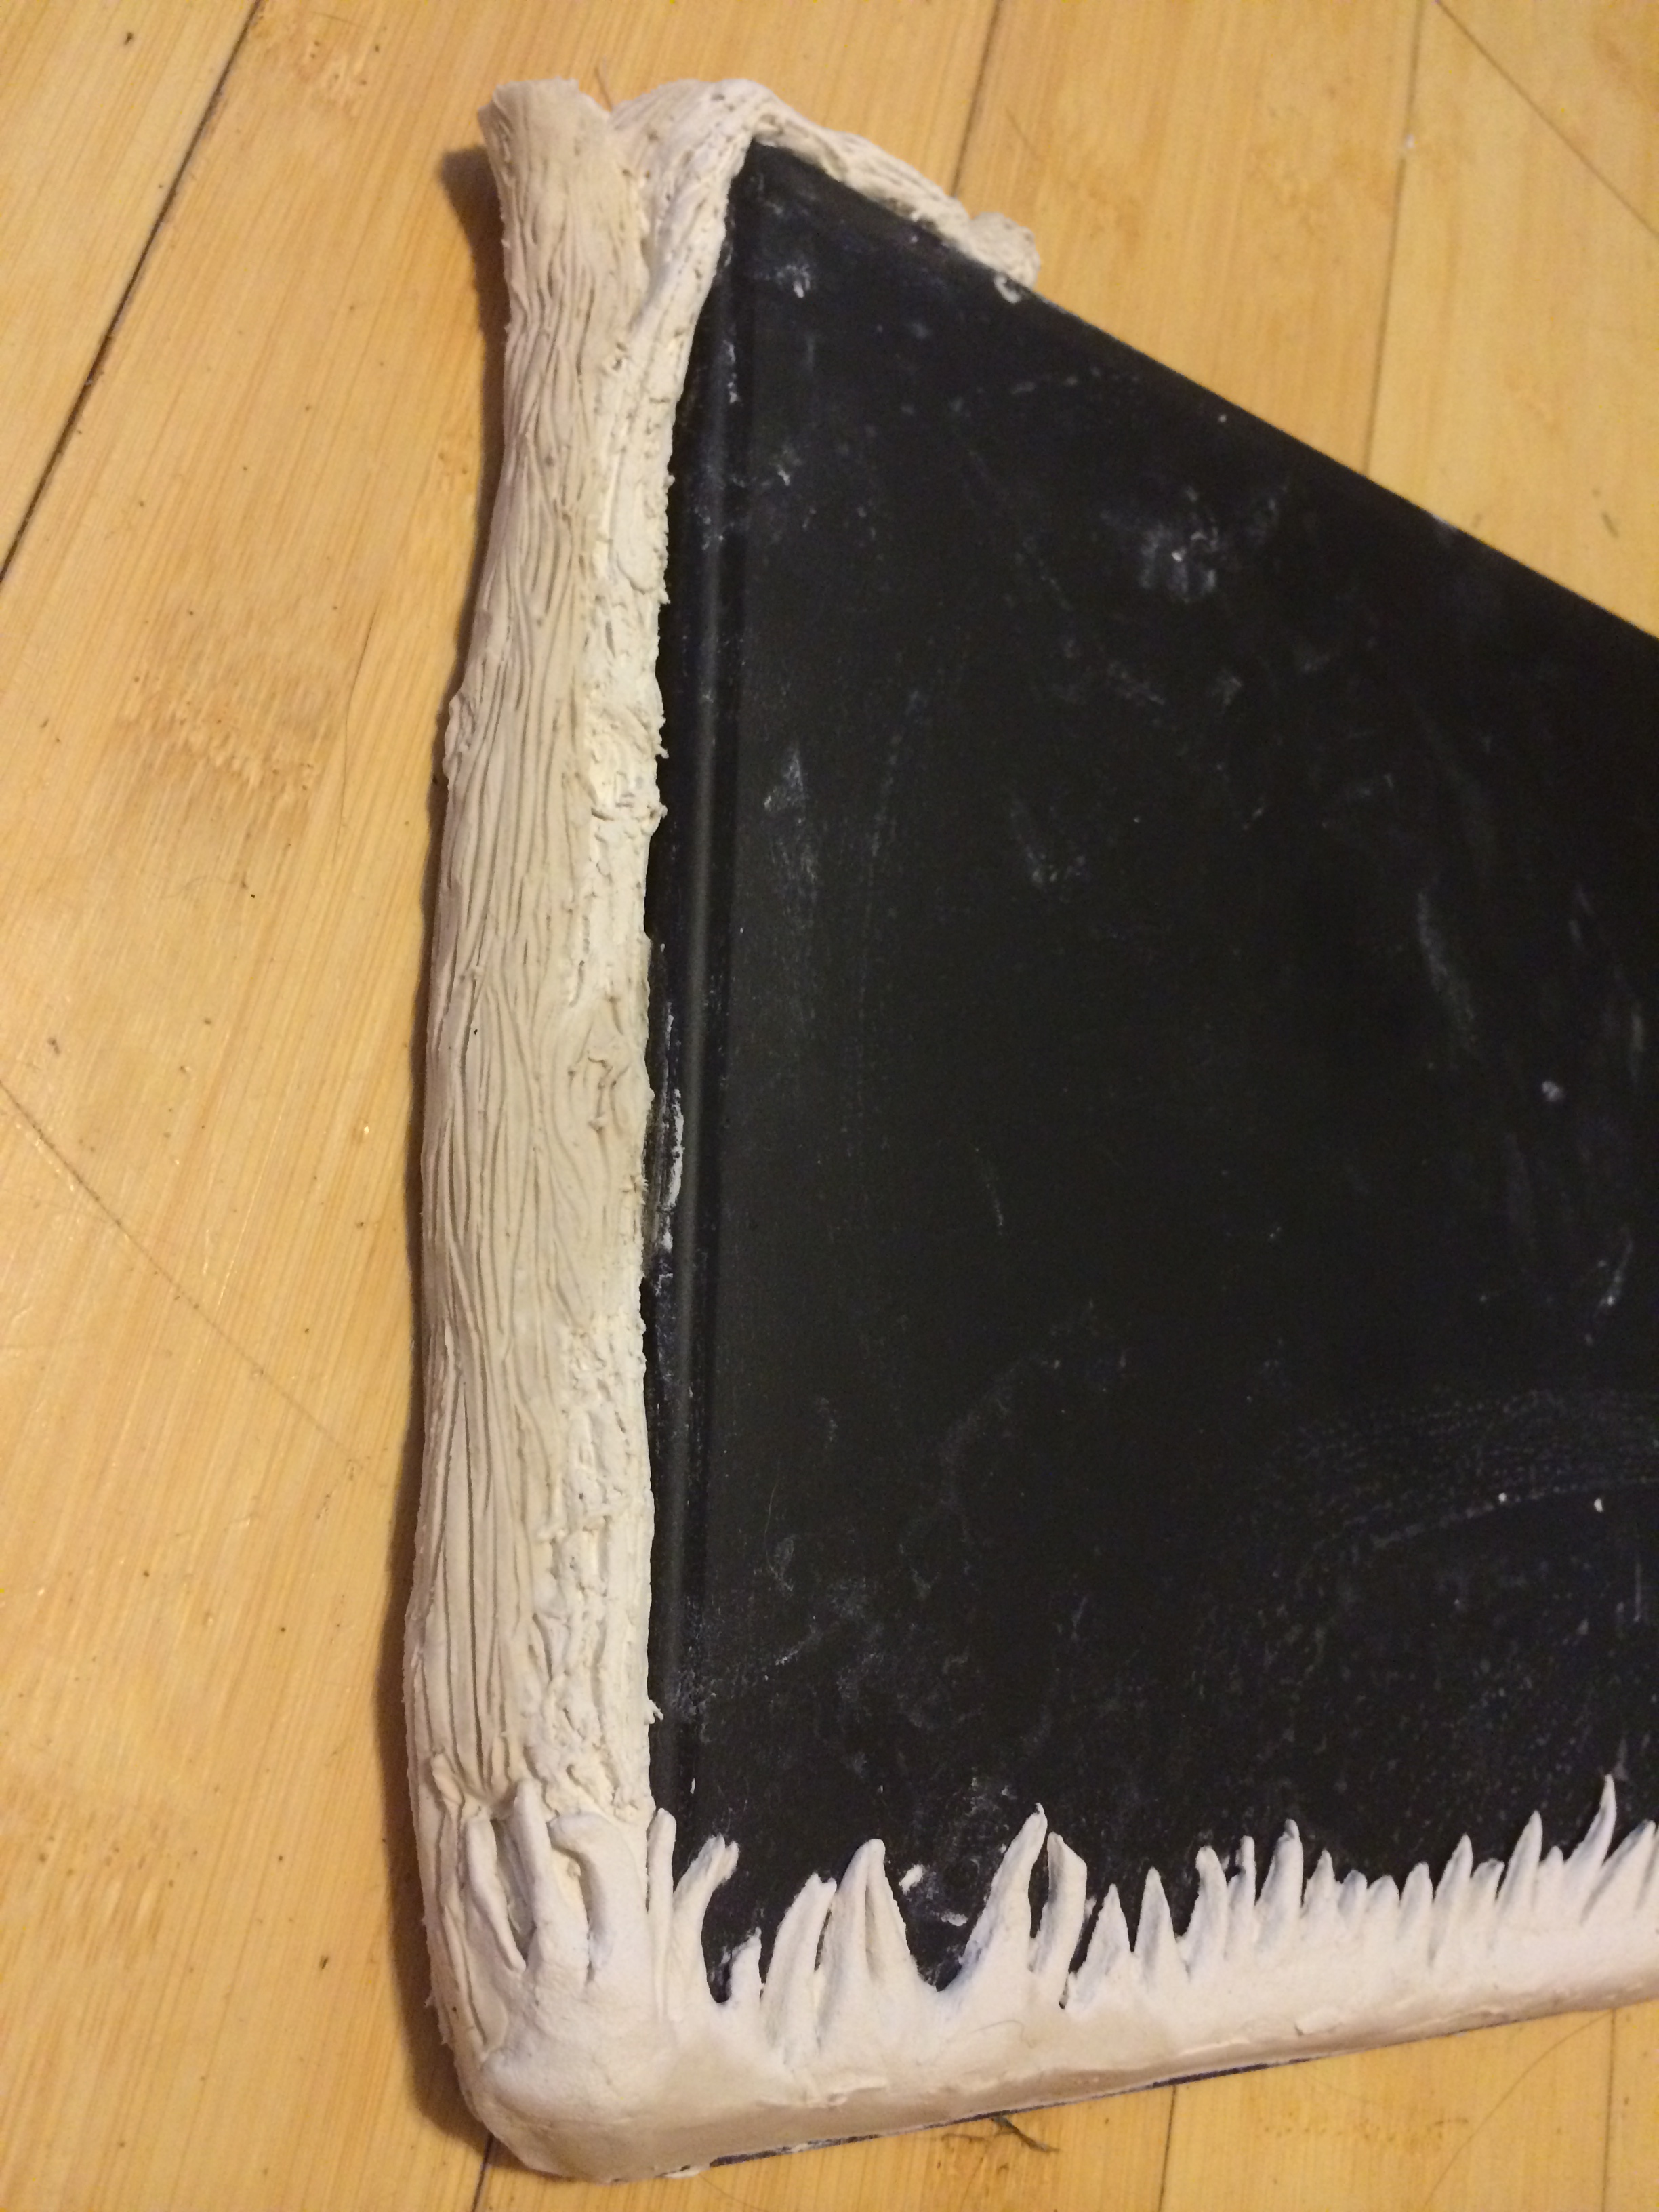
Roll the clay sheet you just cut so we can start to create the trunks for the trees that will be covering the frame of this Magnetic Chalk board

Creative Paperclay board

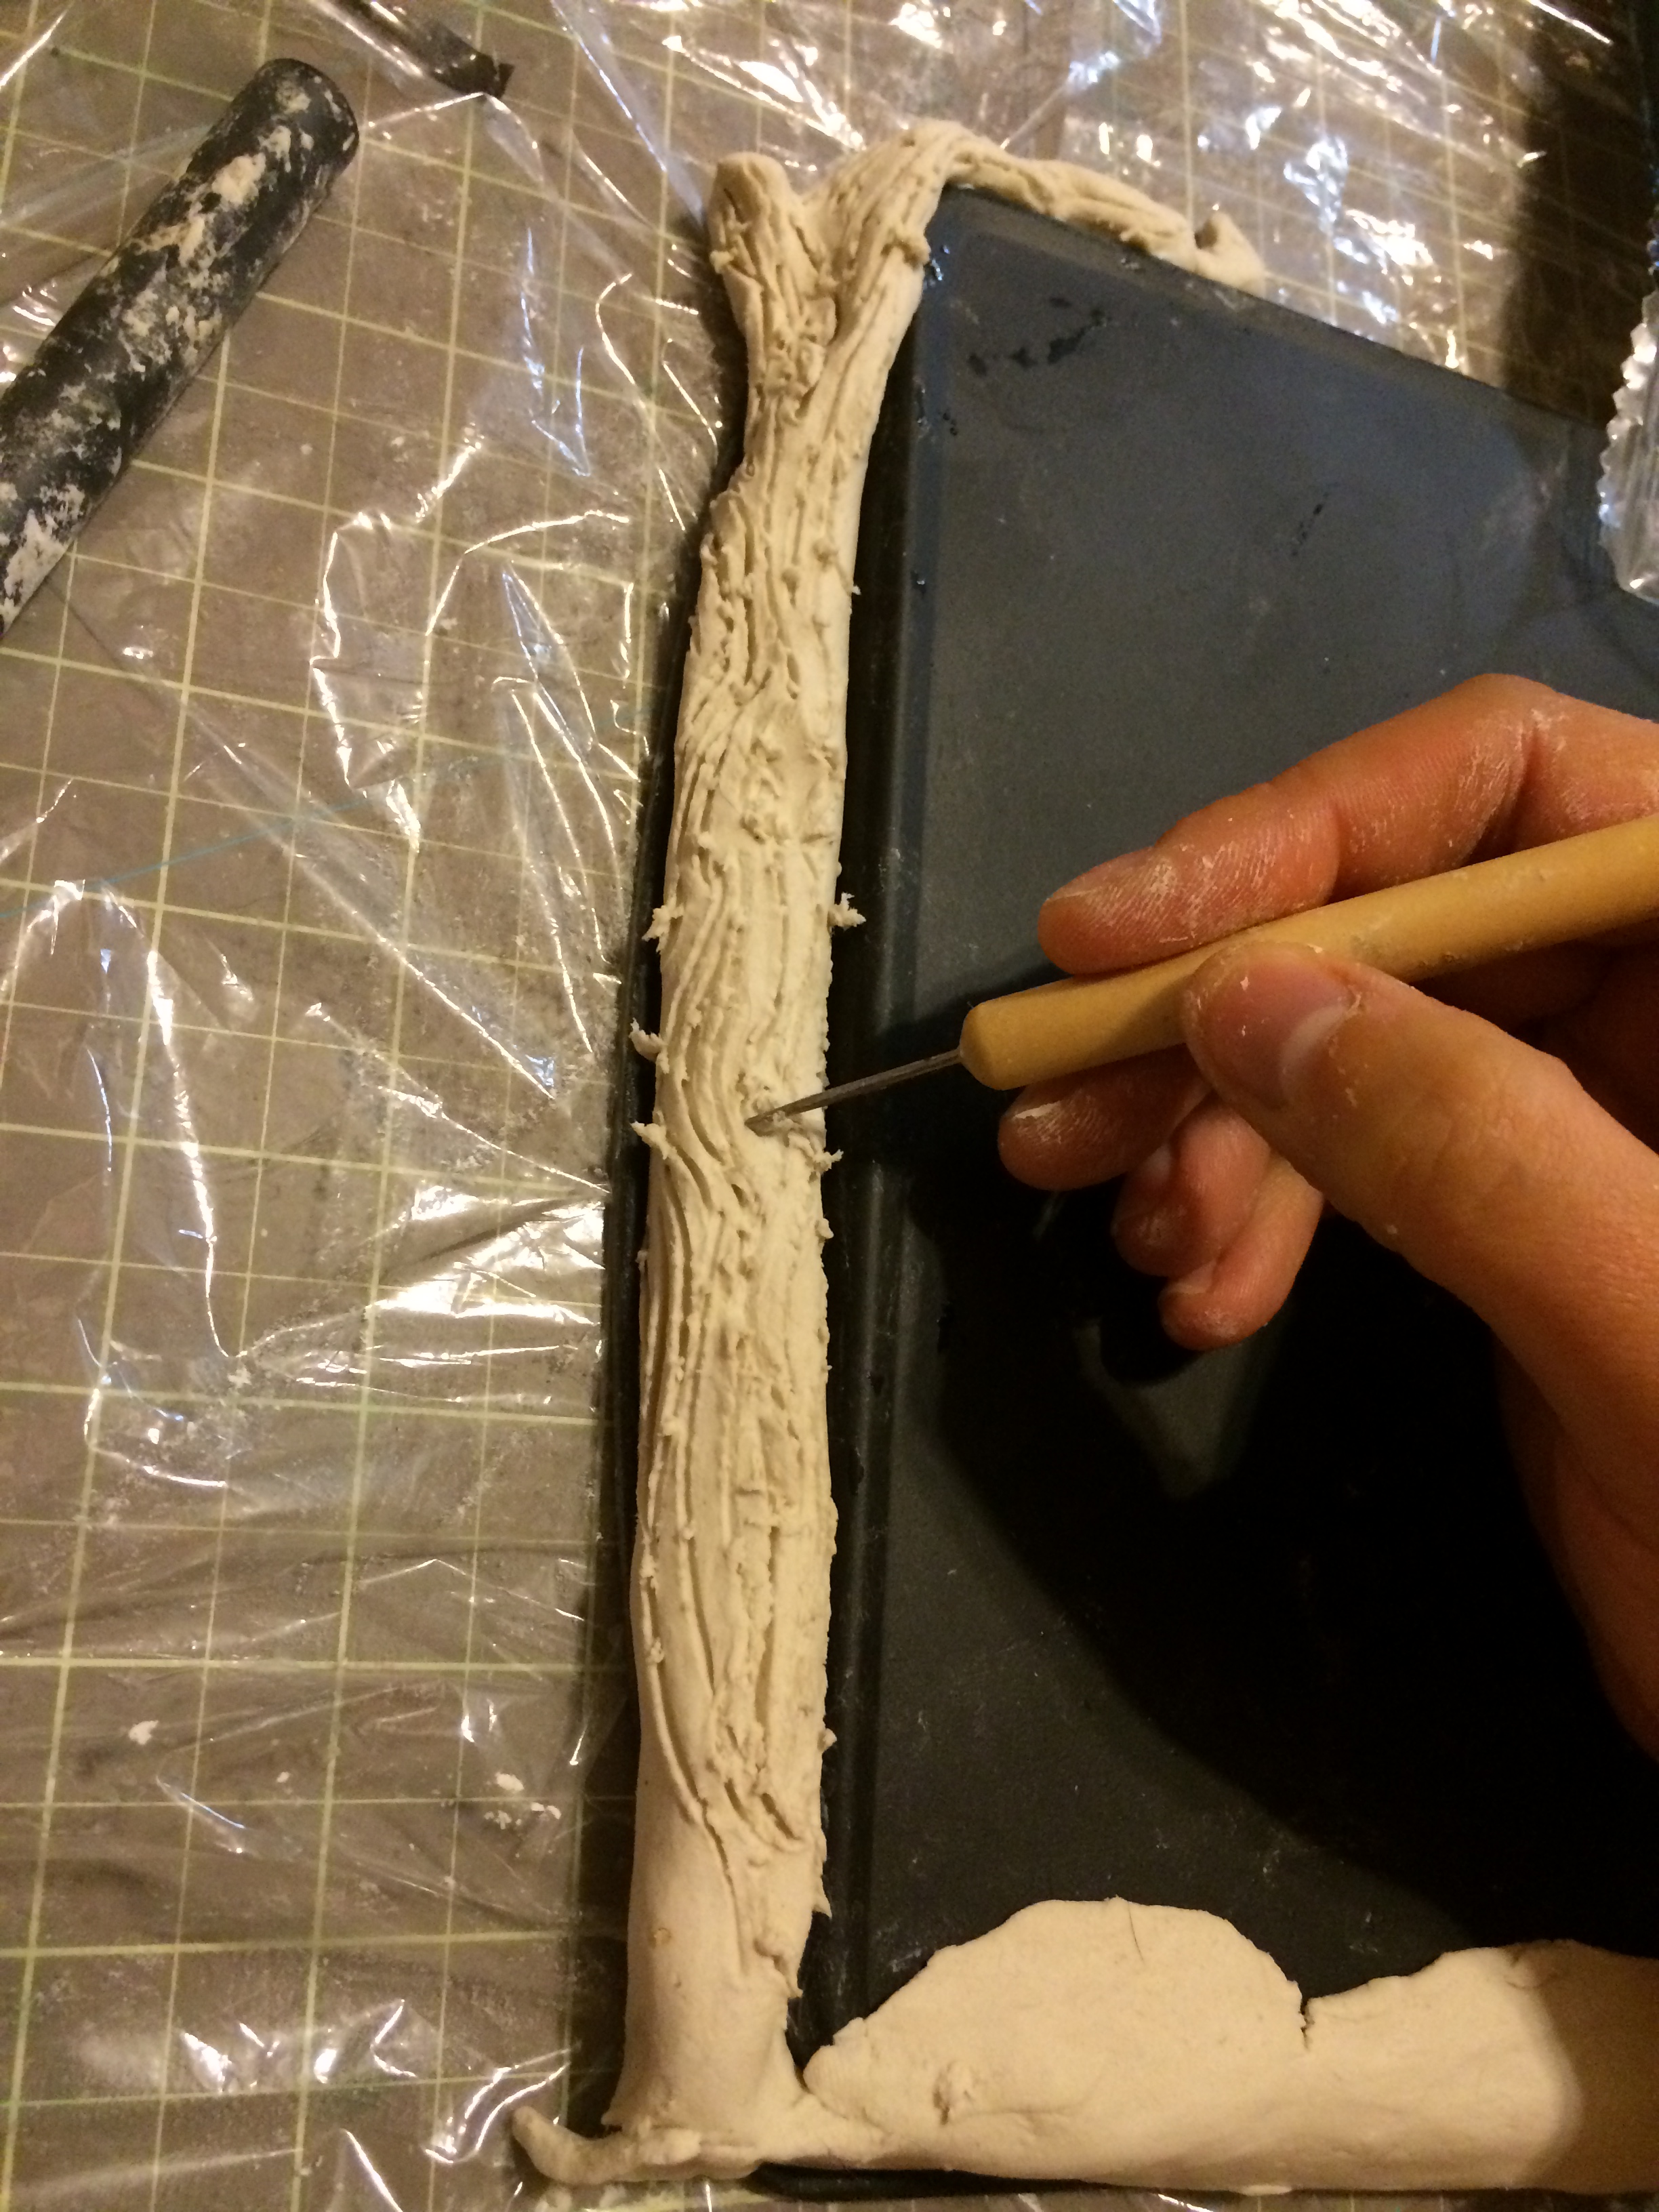
I use a needle tool to draw and create the wood grain effect for the tree.

I will do the same procedure with the other side tree.

Creative Paperclay board

Since nature is so beautiful to begin with the wood grain don’t have to be perfect. Feel free to draw lines along the trunk.

Creative Paperclay board

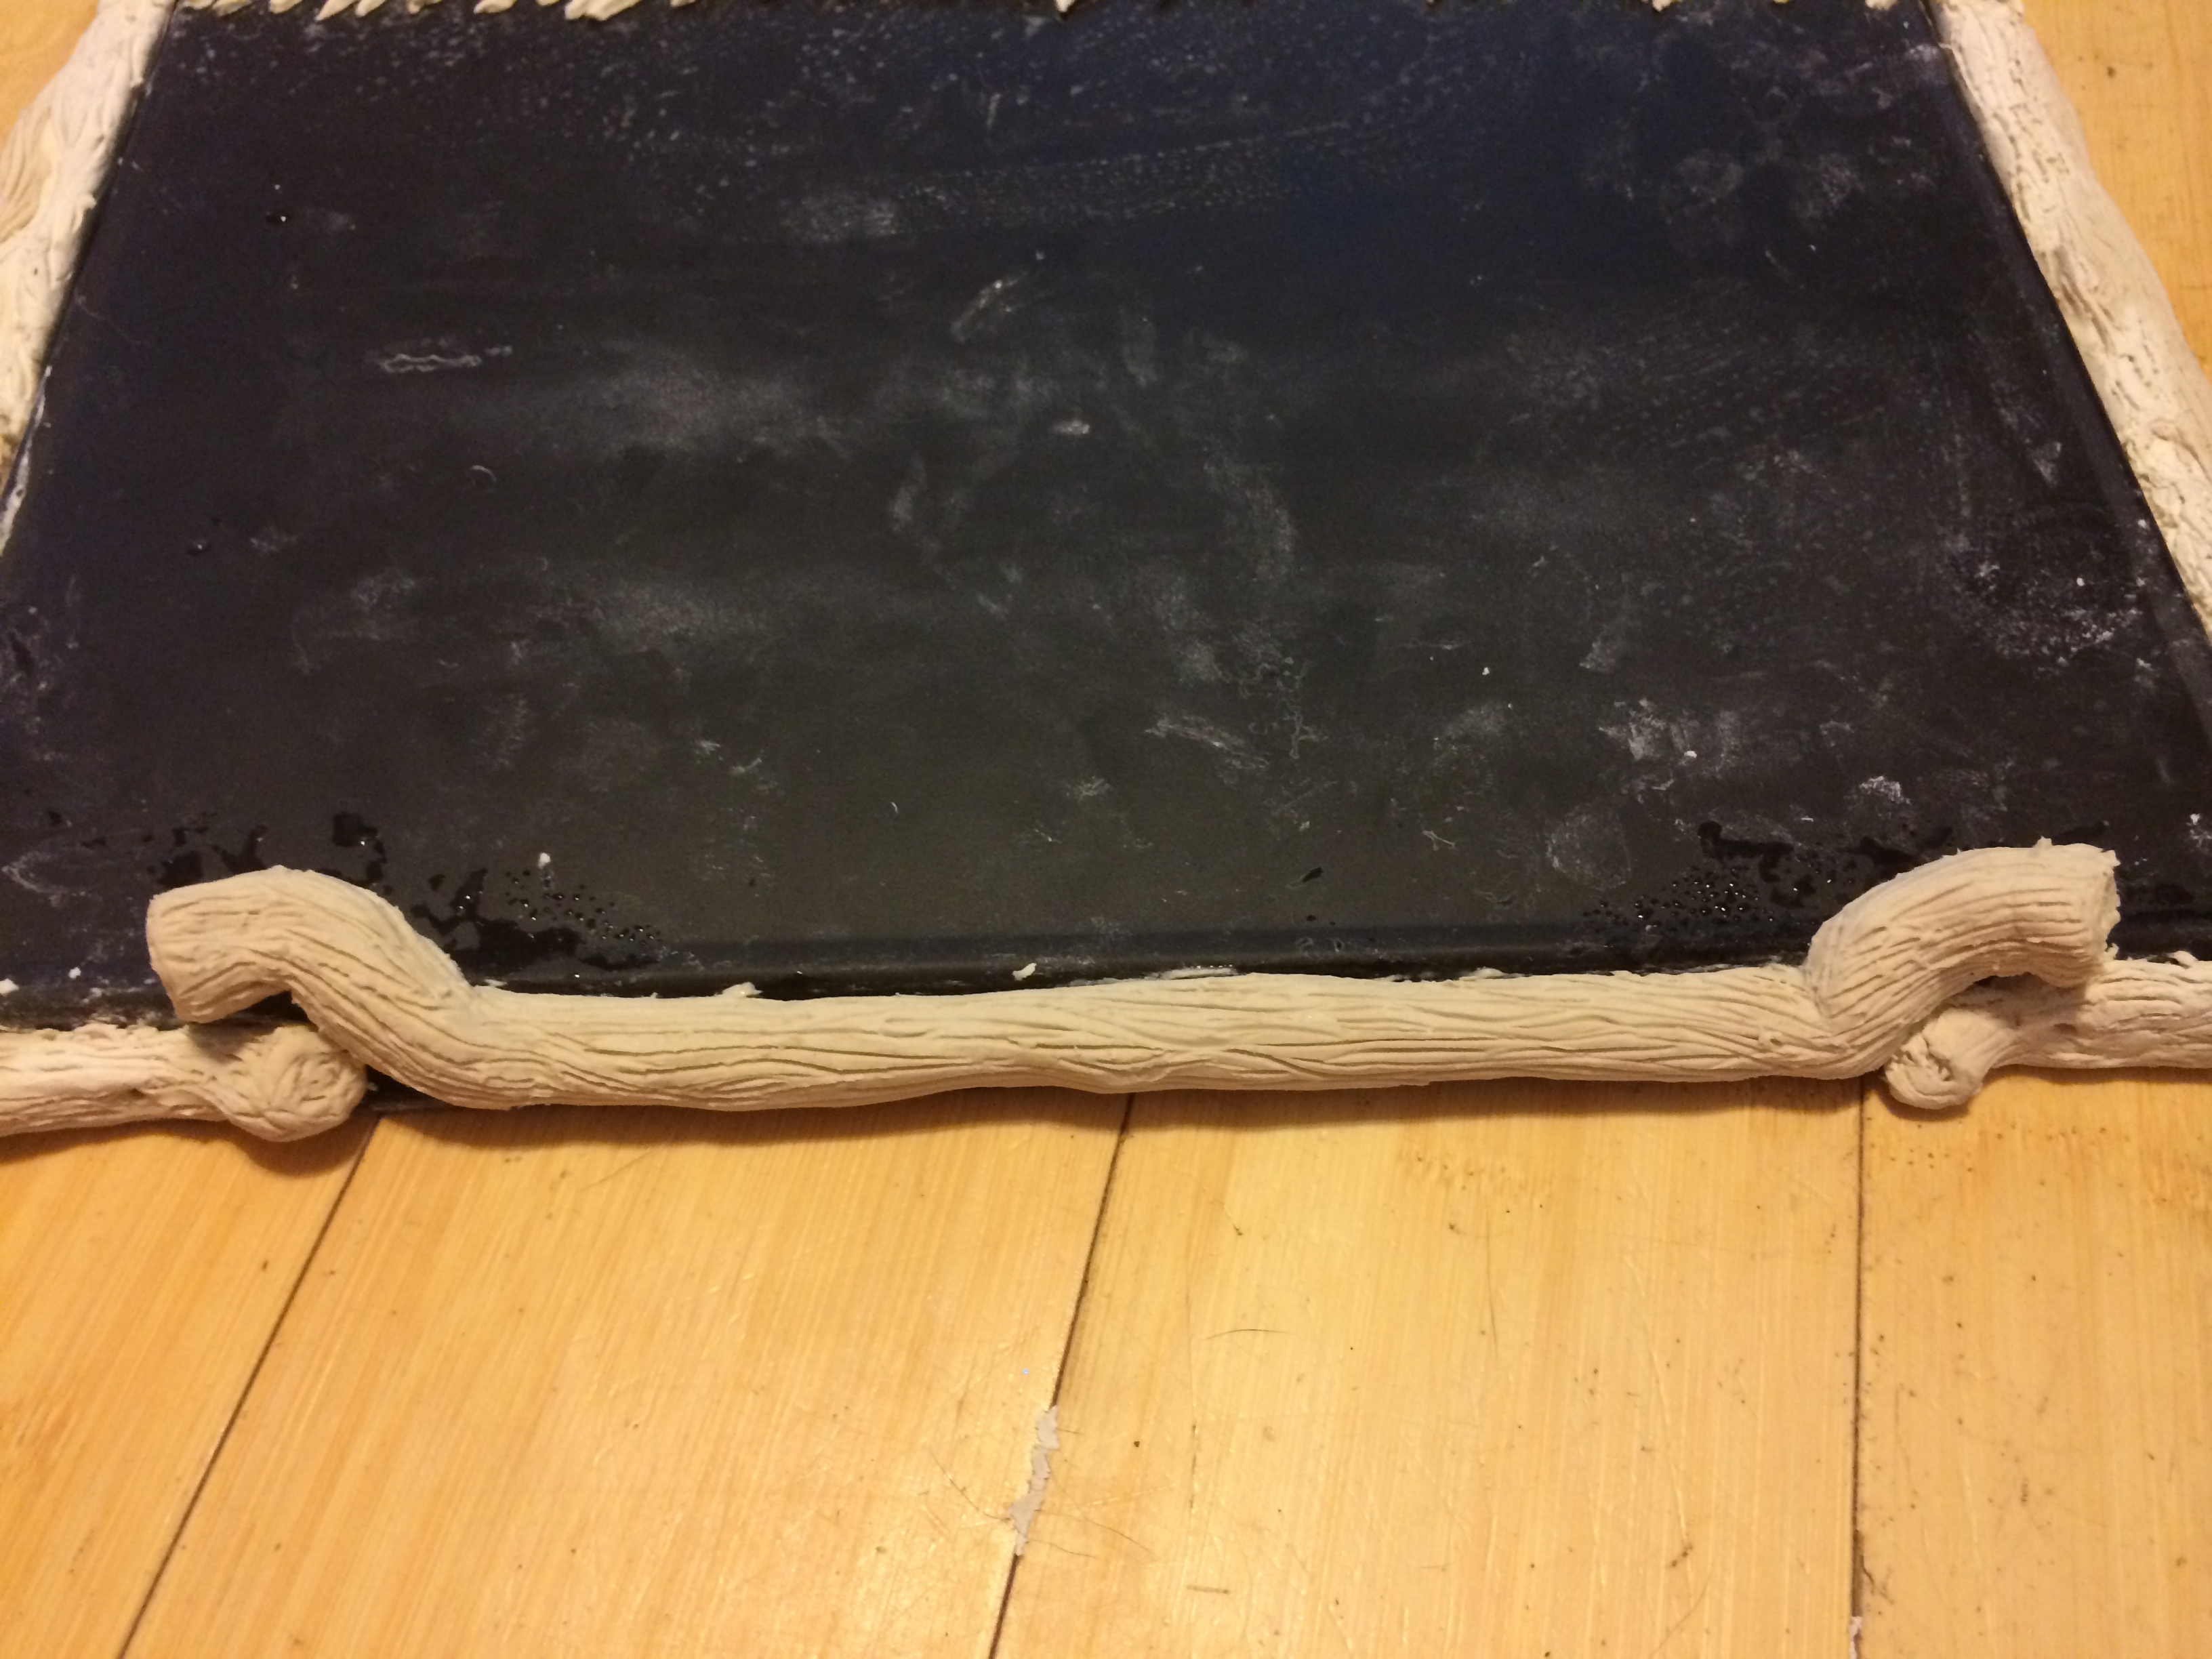
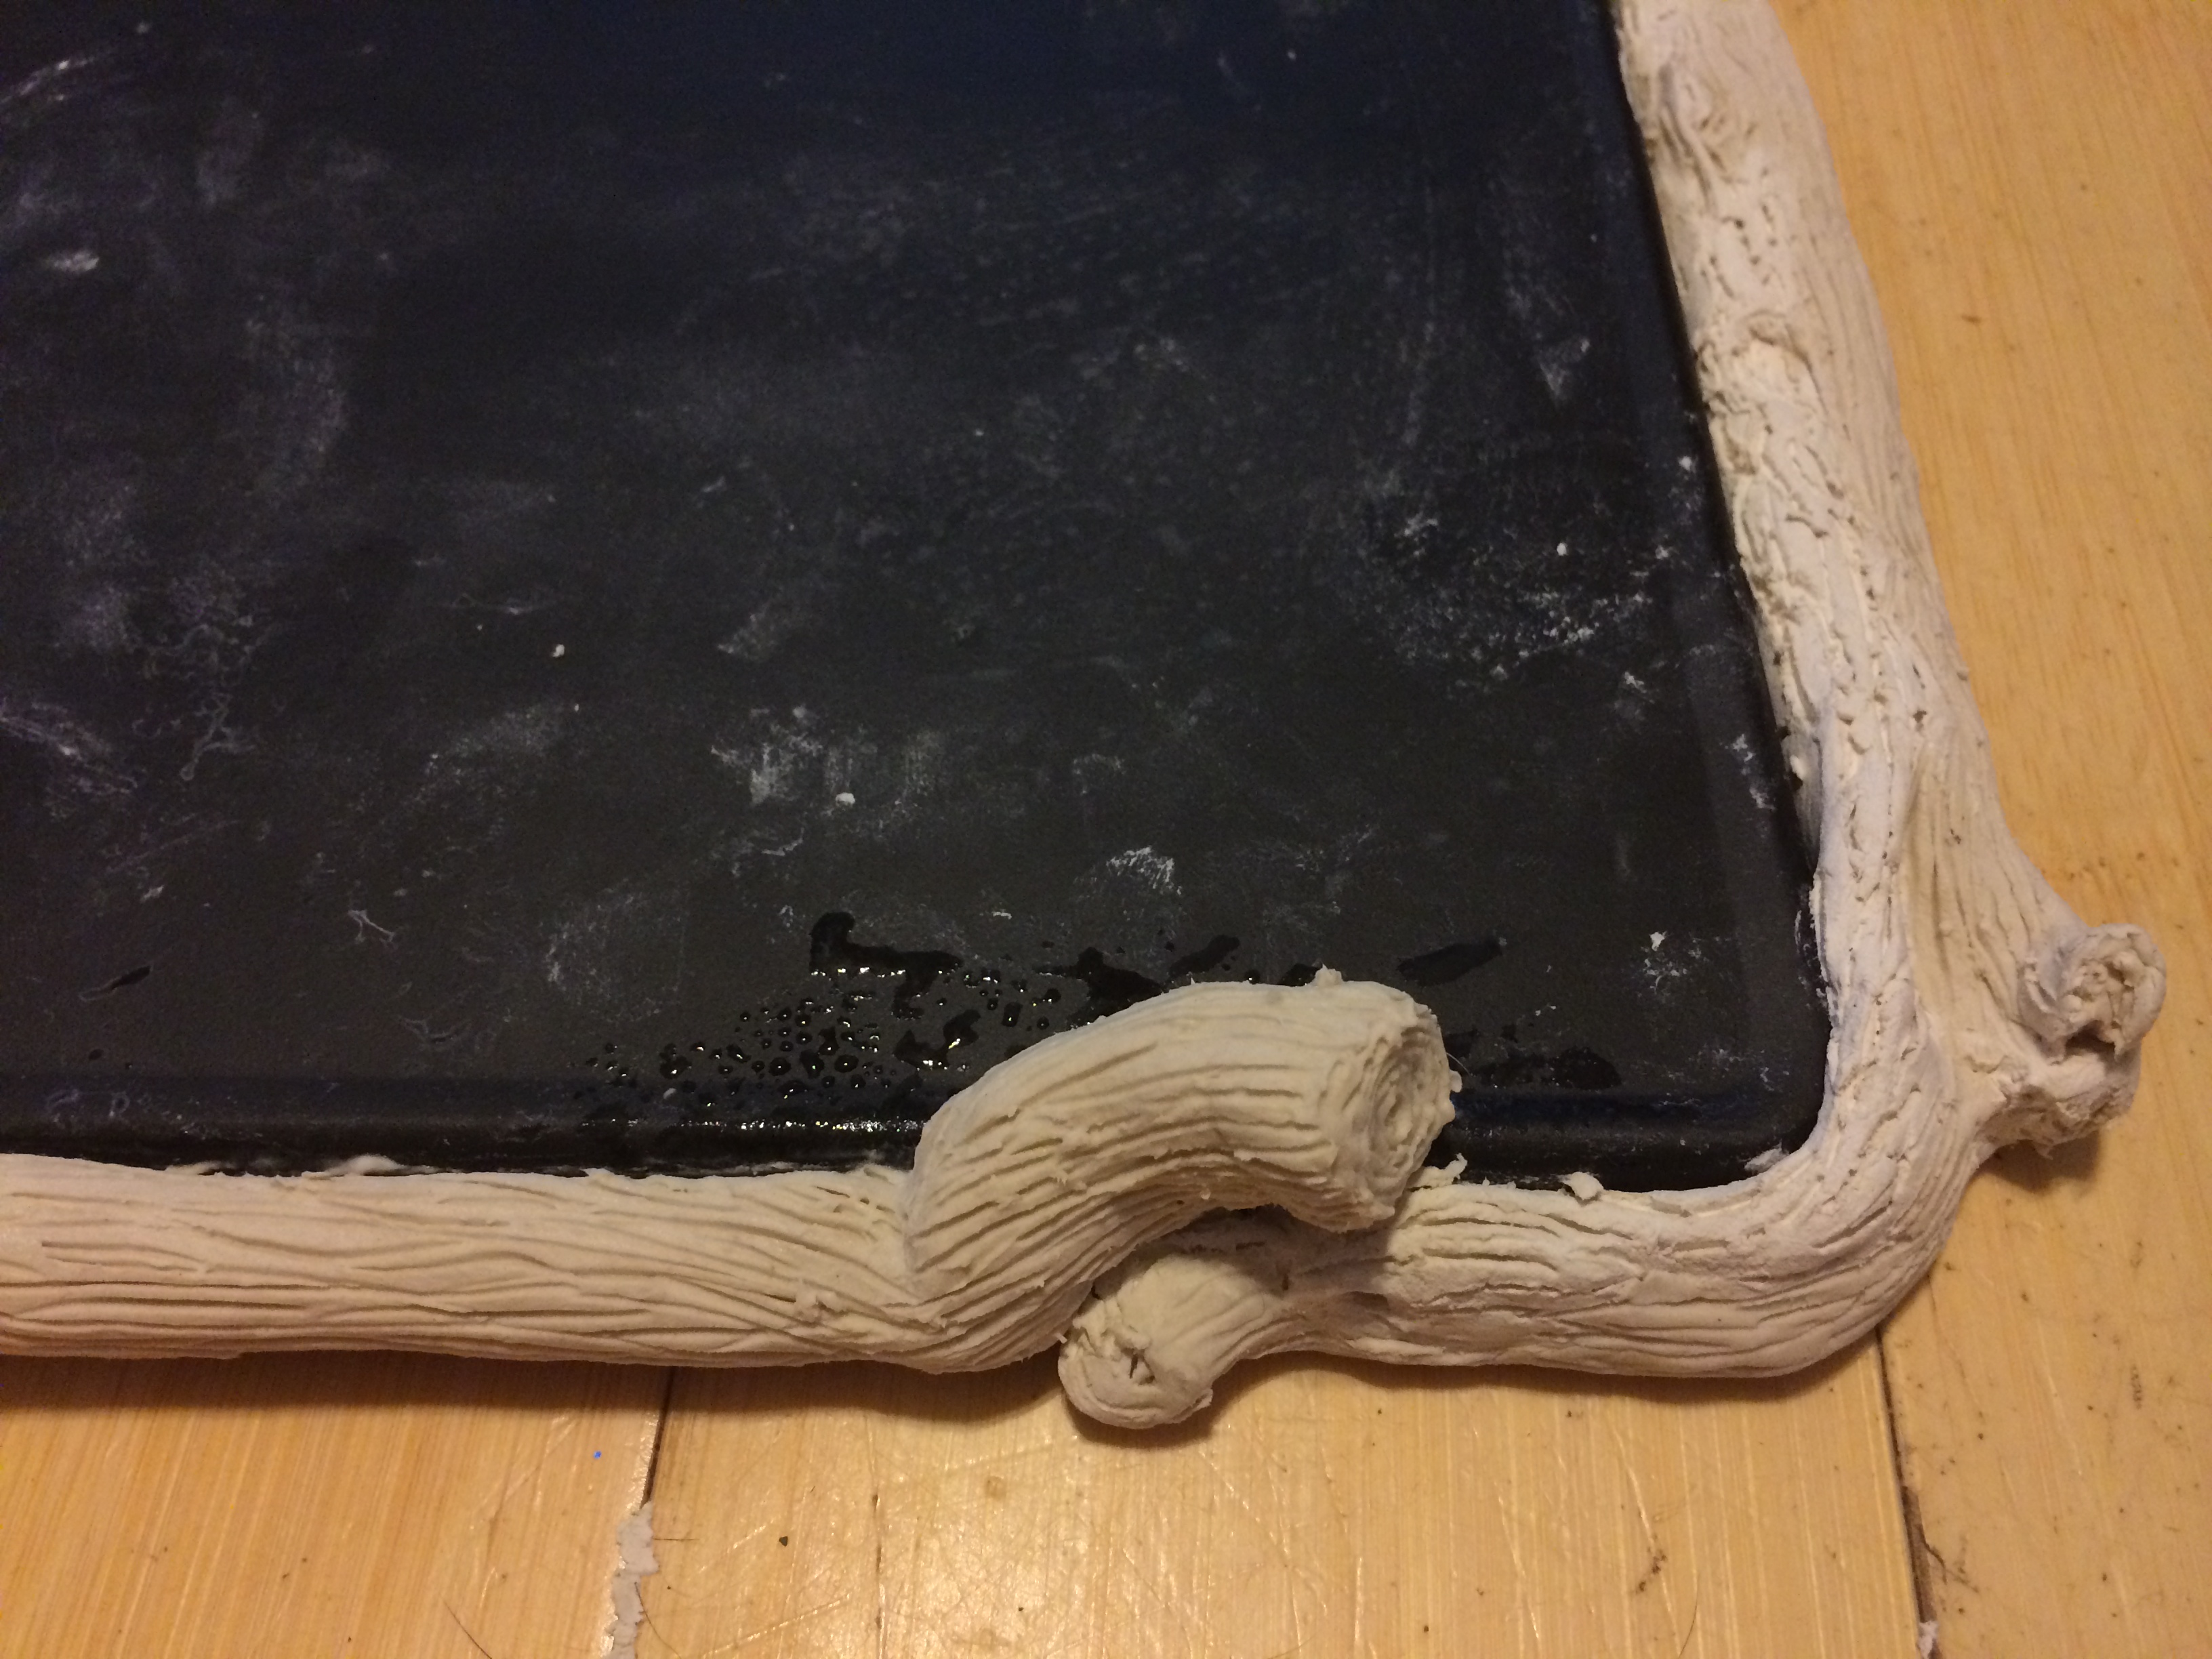
I carry the trunk all over the top and draw more wood grain lines.

Creative Paperclay board

I dint wanted to be all flat so I give the over lapping trunk effect to give more interest to the piece.

Creative Paperclay board

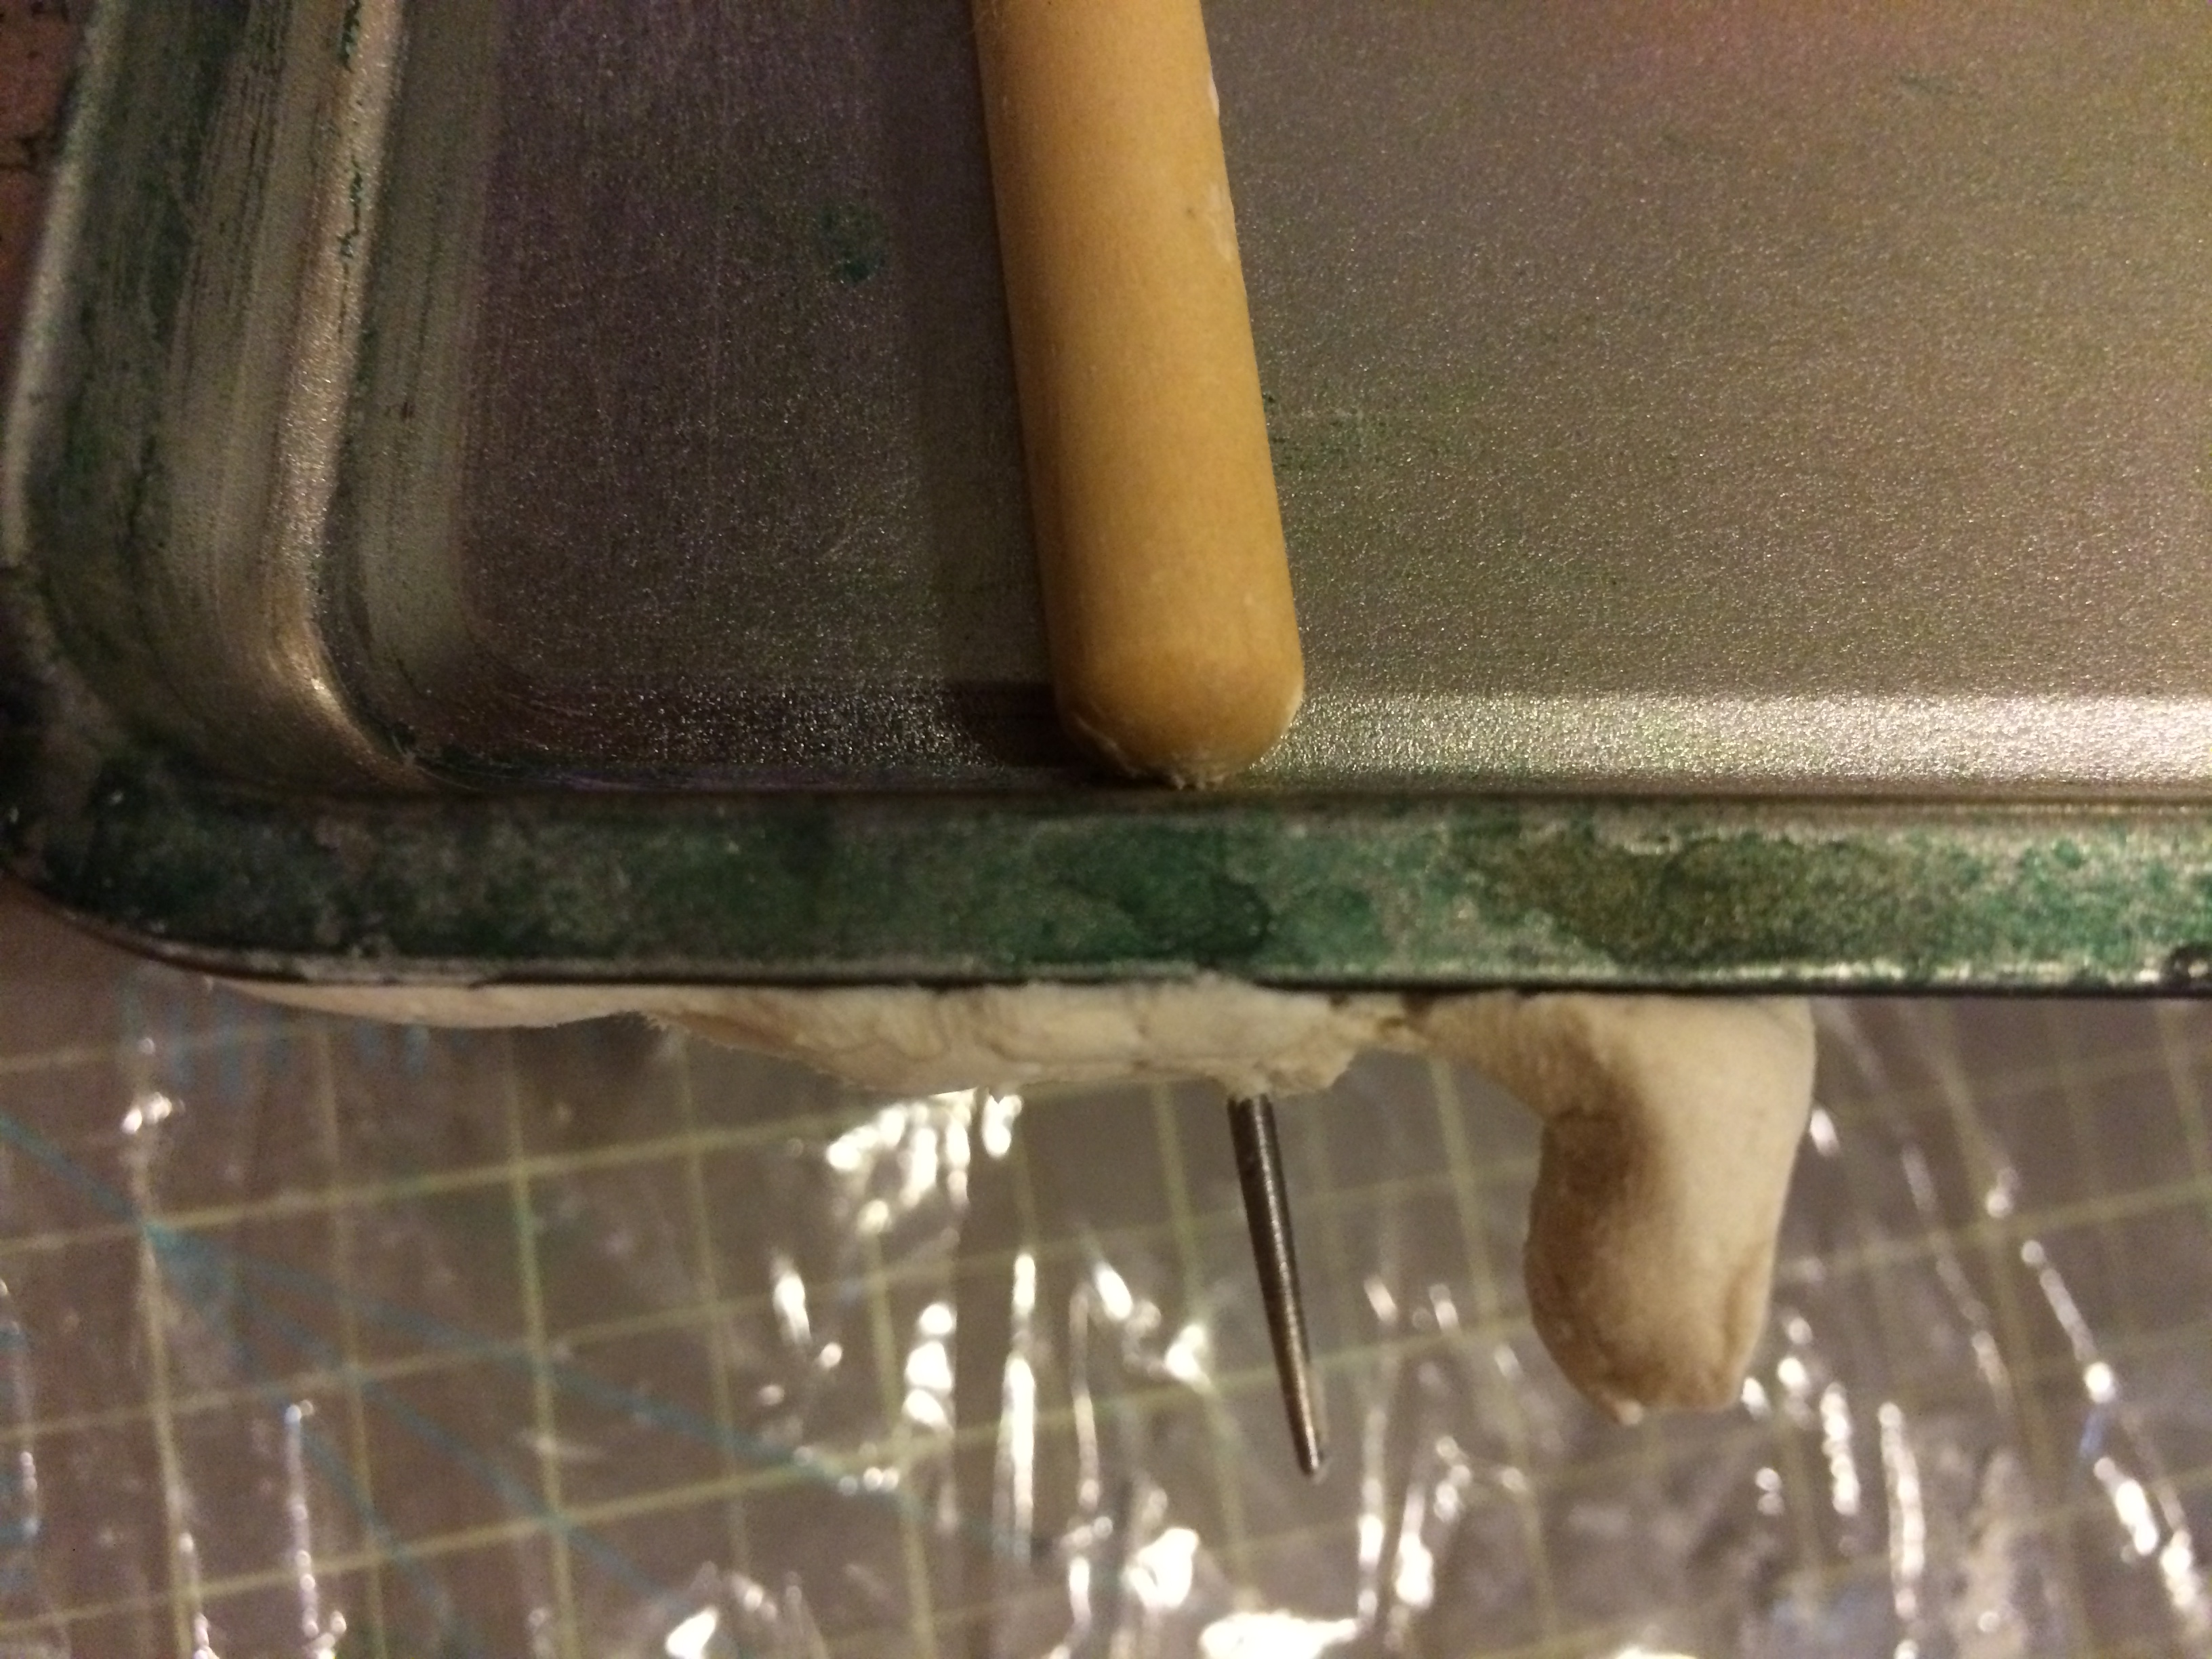
Before the completed top wood trunk dry, I use my needle tool to pierce the pre drilled holes in the clay and let it dry.

Creative Paperclay board

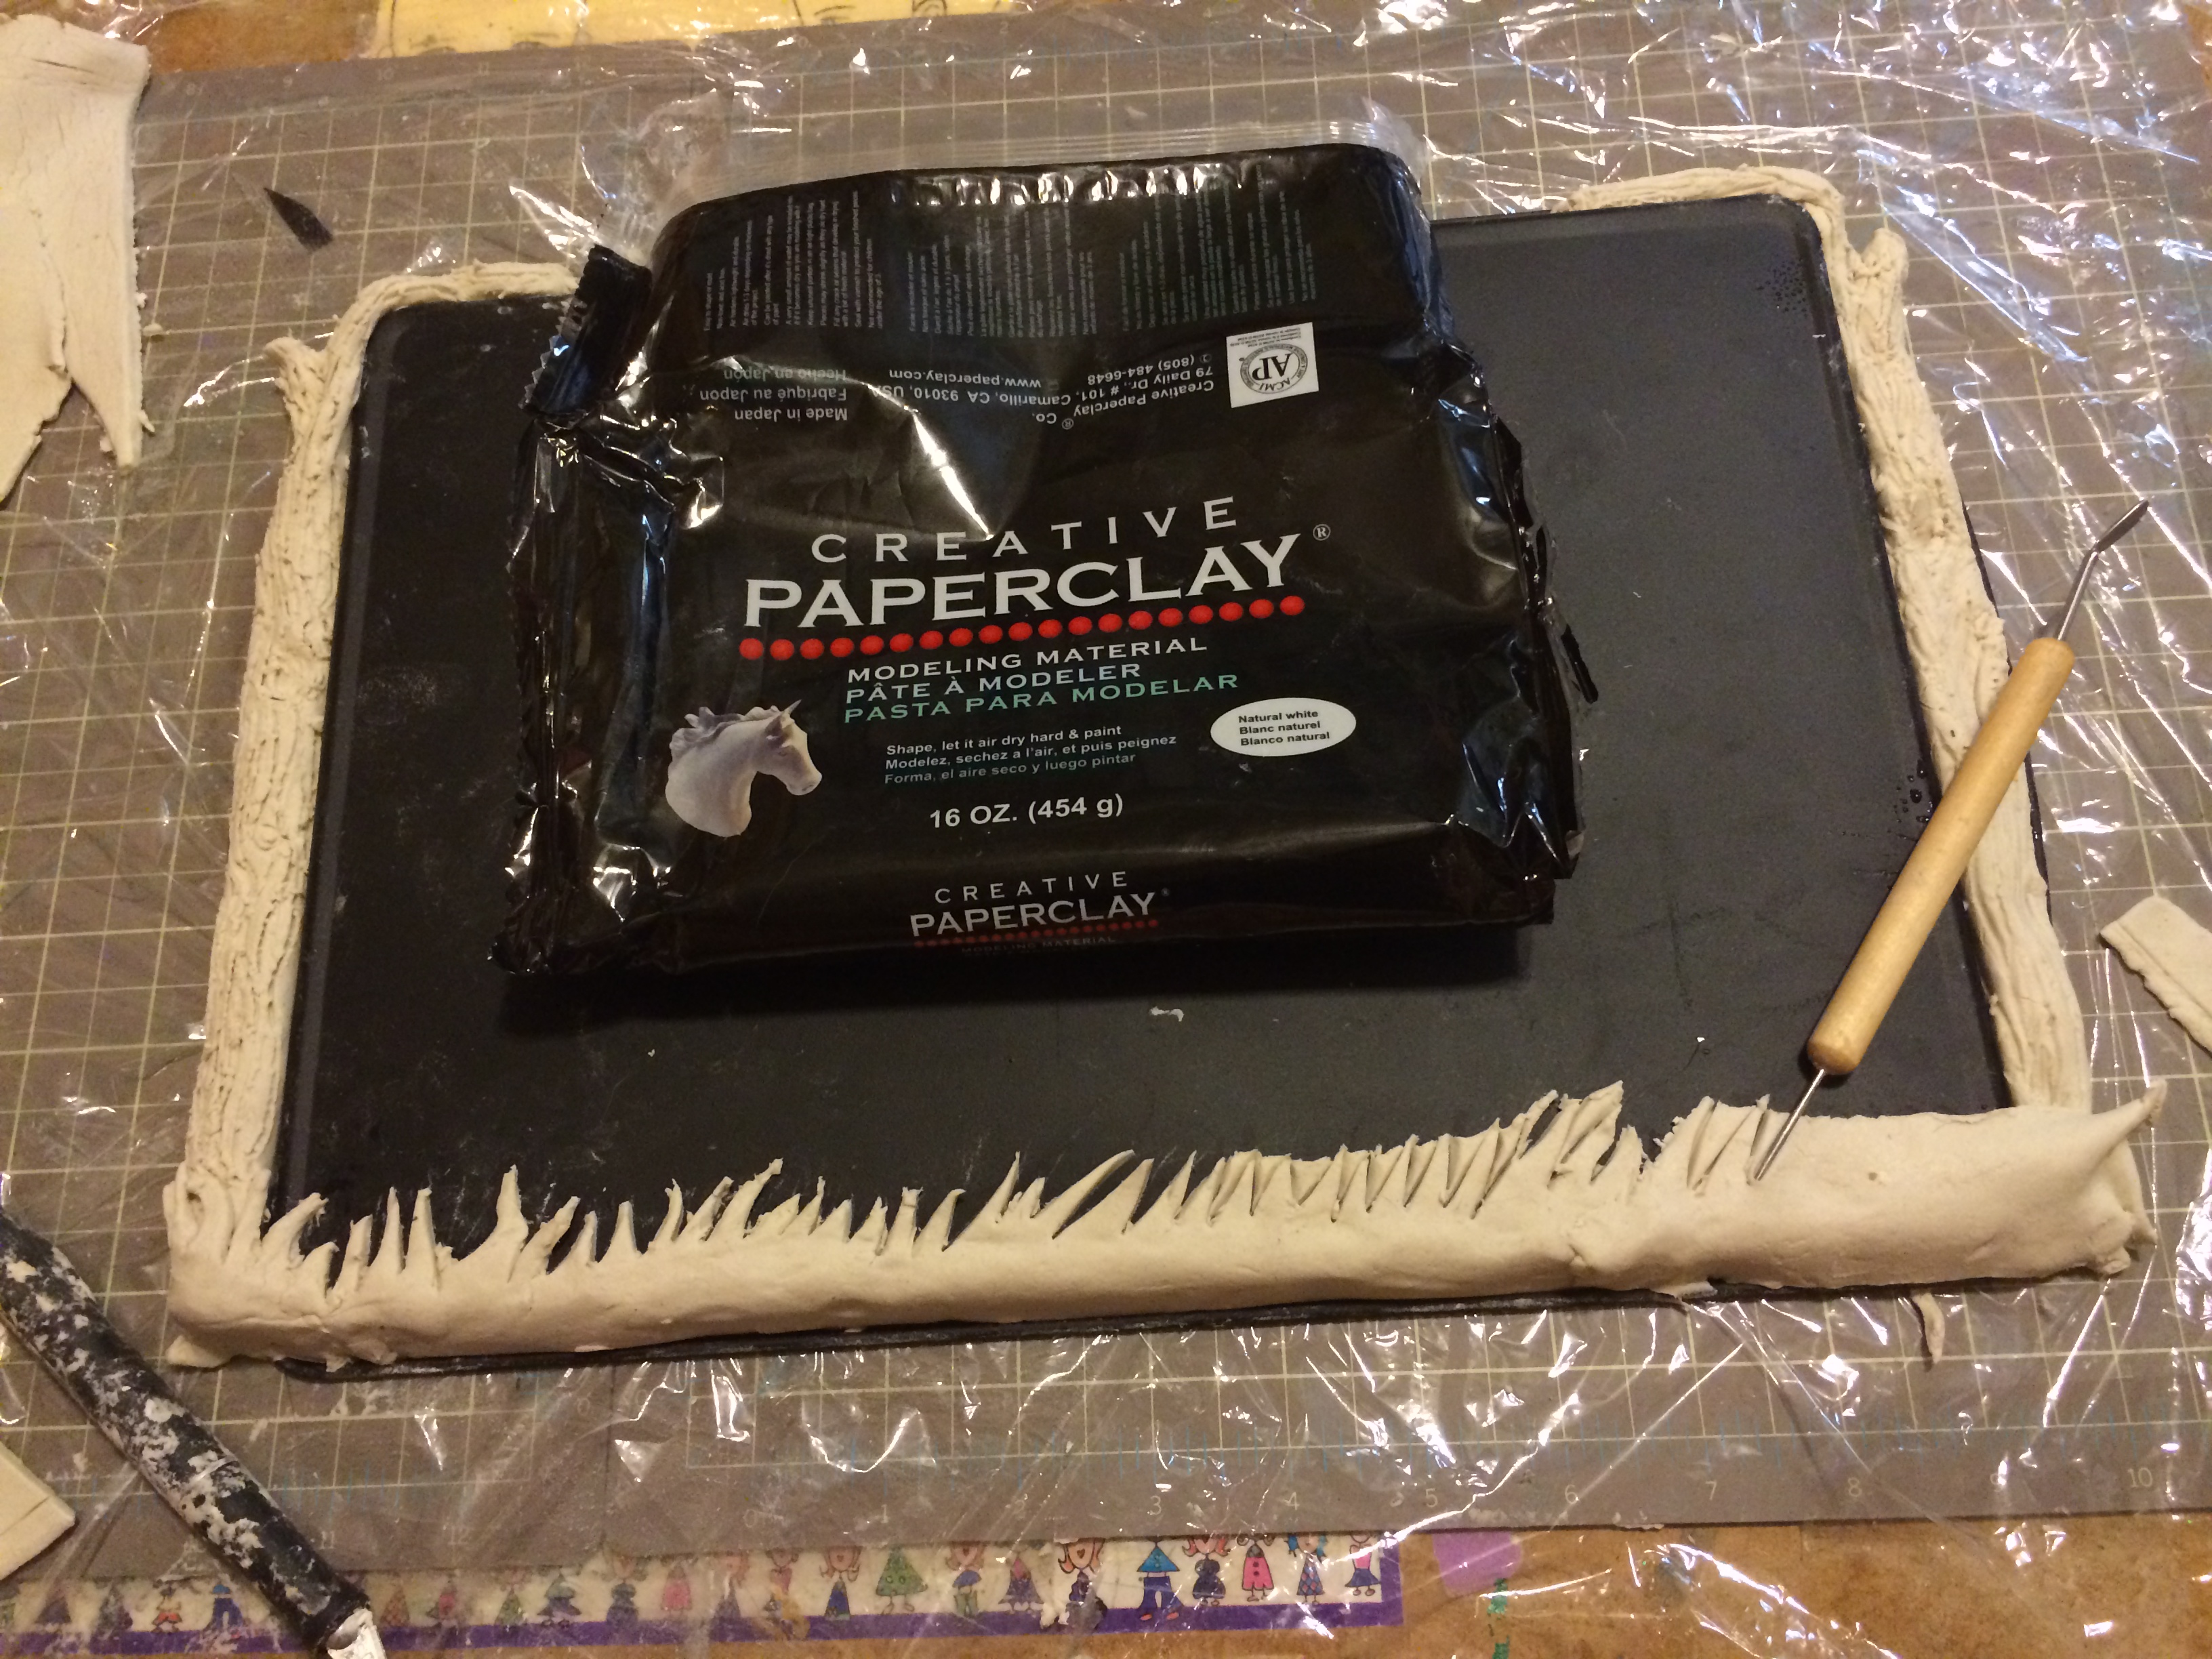
I wanted to add a nice grass effect to the lower portion of the board. I did this by rolling a Creative Paperclay sheet to a ¼ in thickness. Place it on the bottom and with my needle tool cut the grass off.

Creative Paperclay board

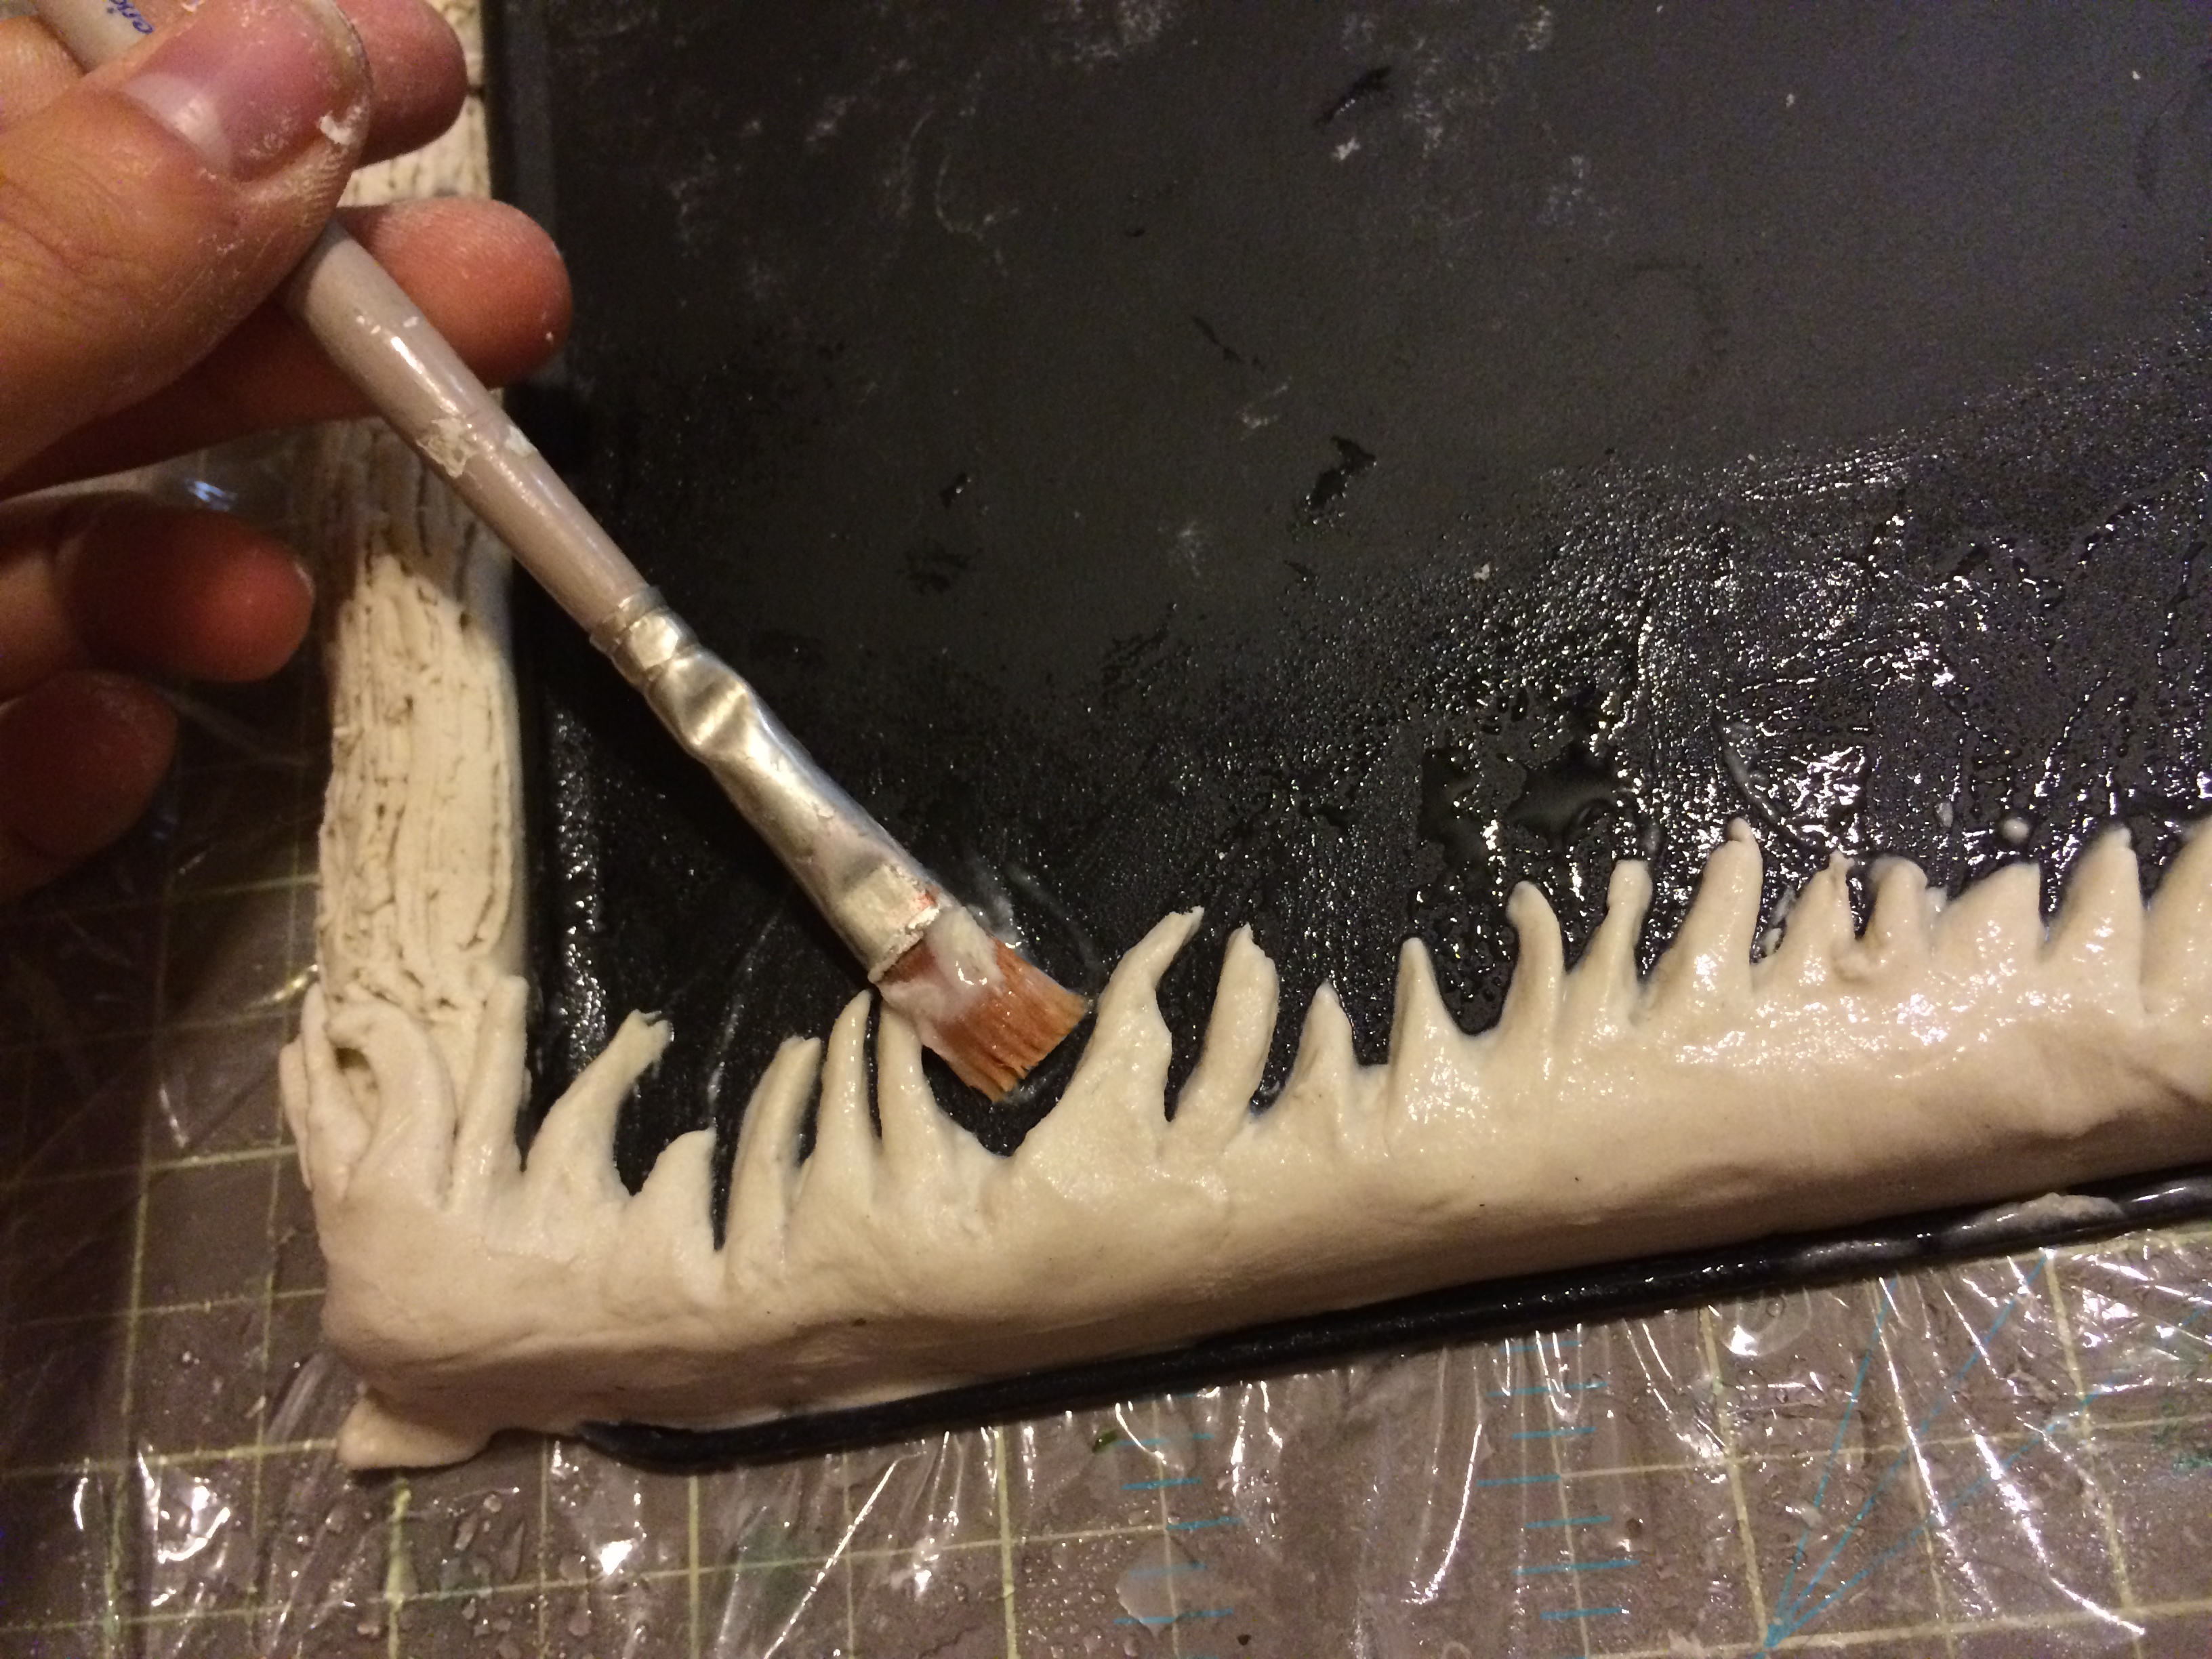
Spray it with water so we can then soften it with a soft wet brush and set aside to dry.

Creative Paperclay board

It is Painting time!

Creative Paperclay board

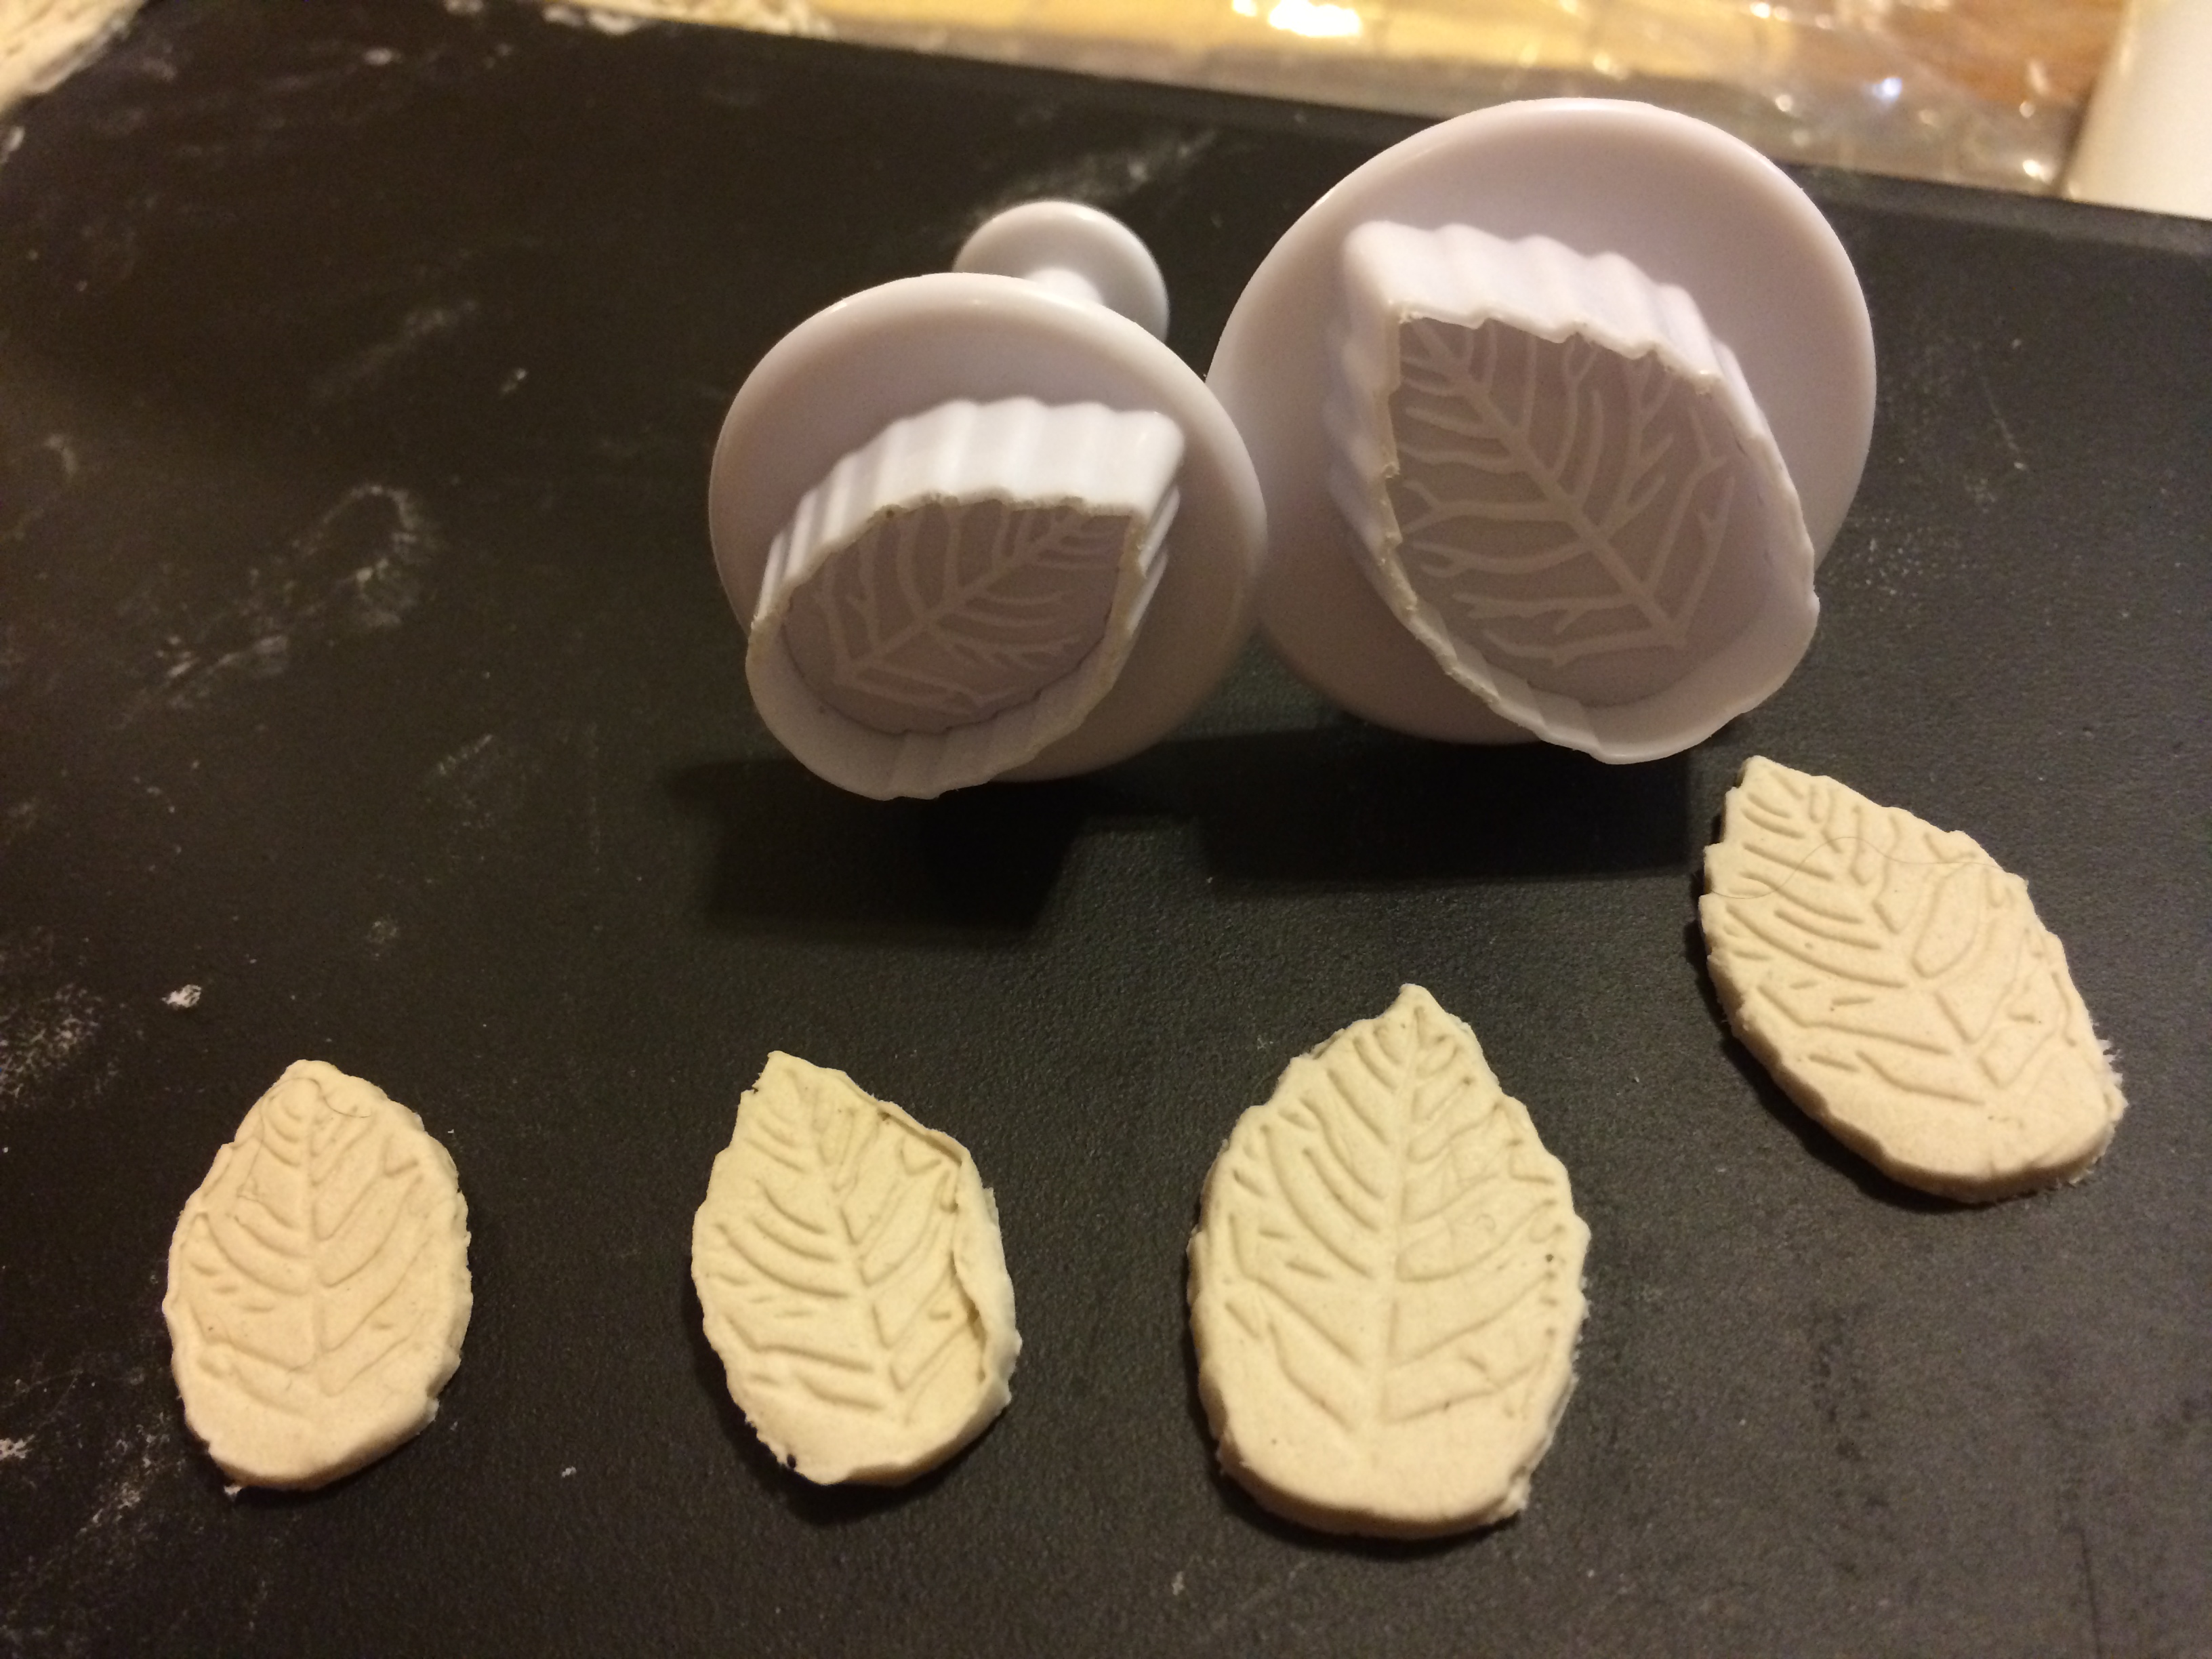
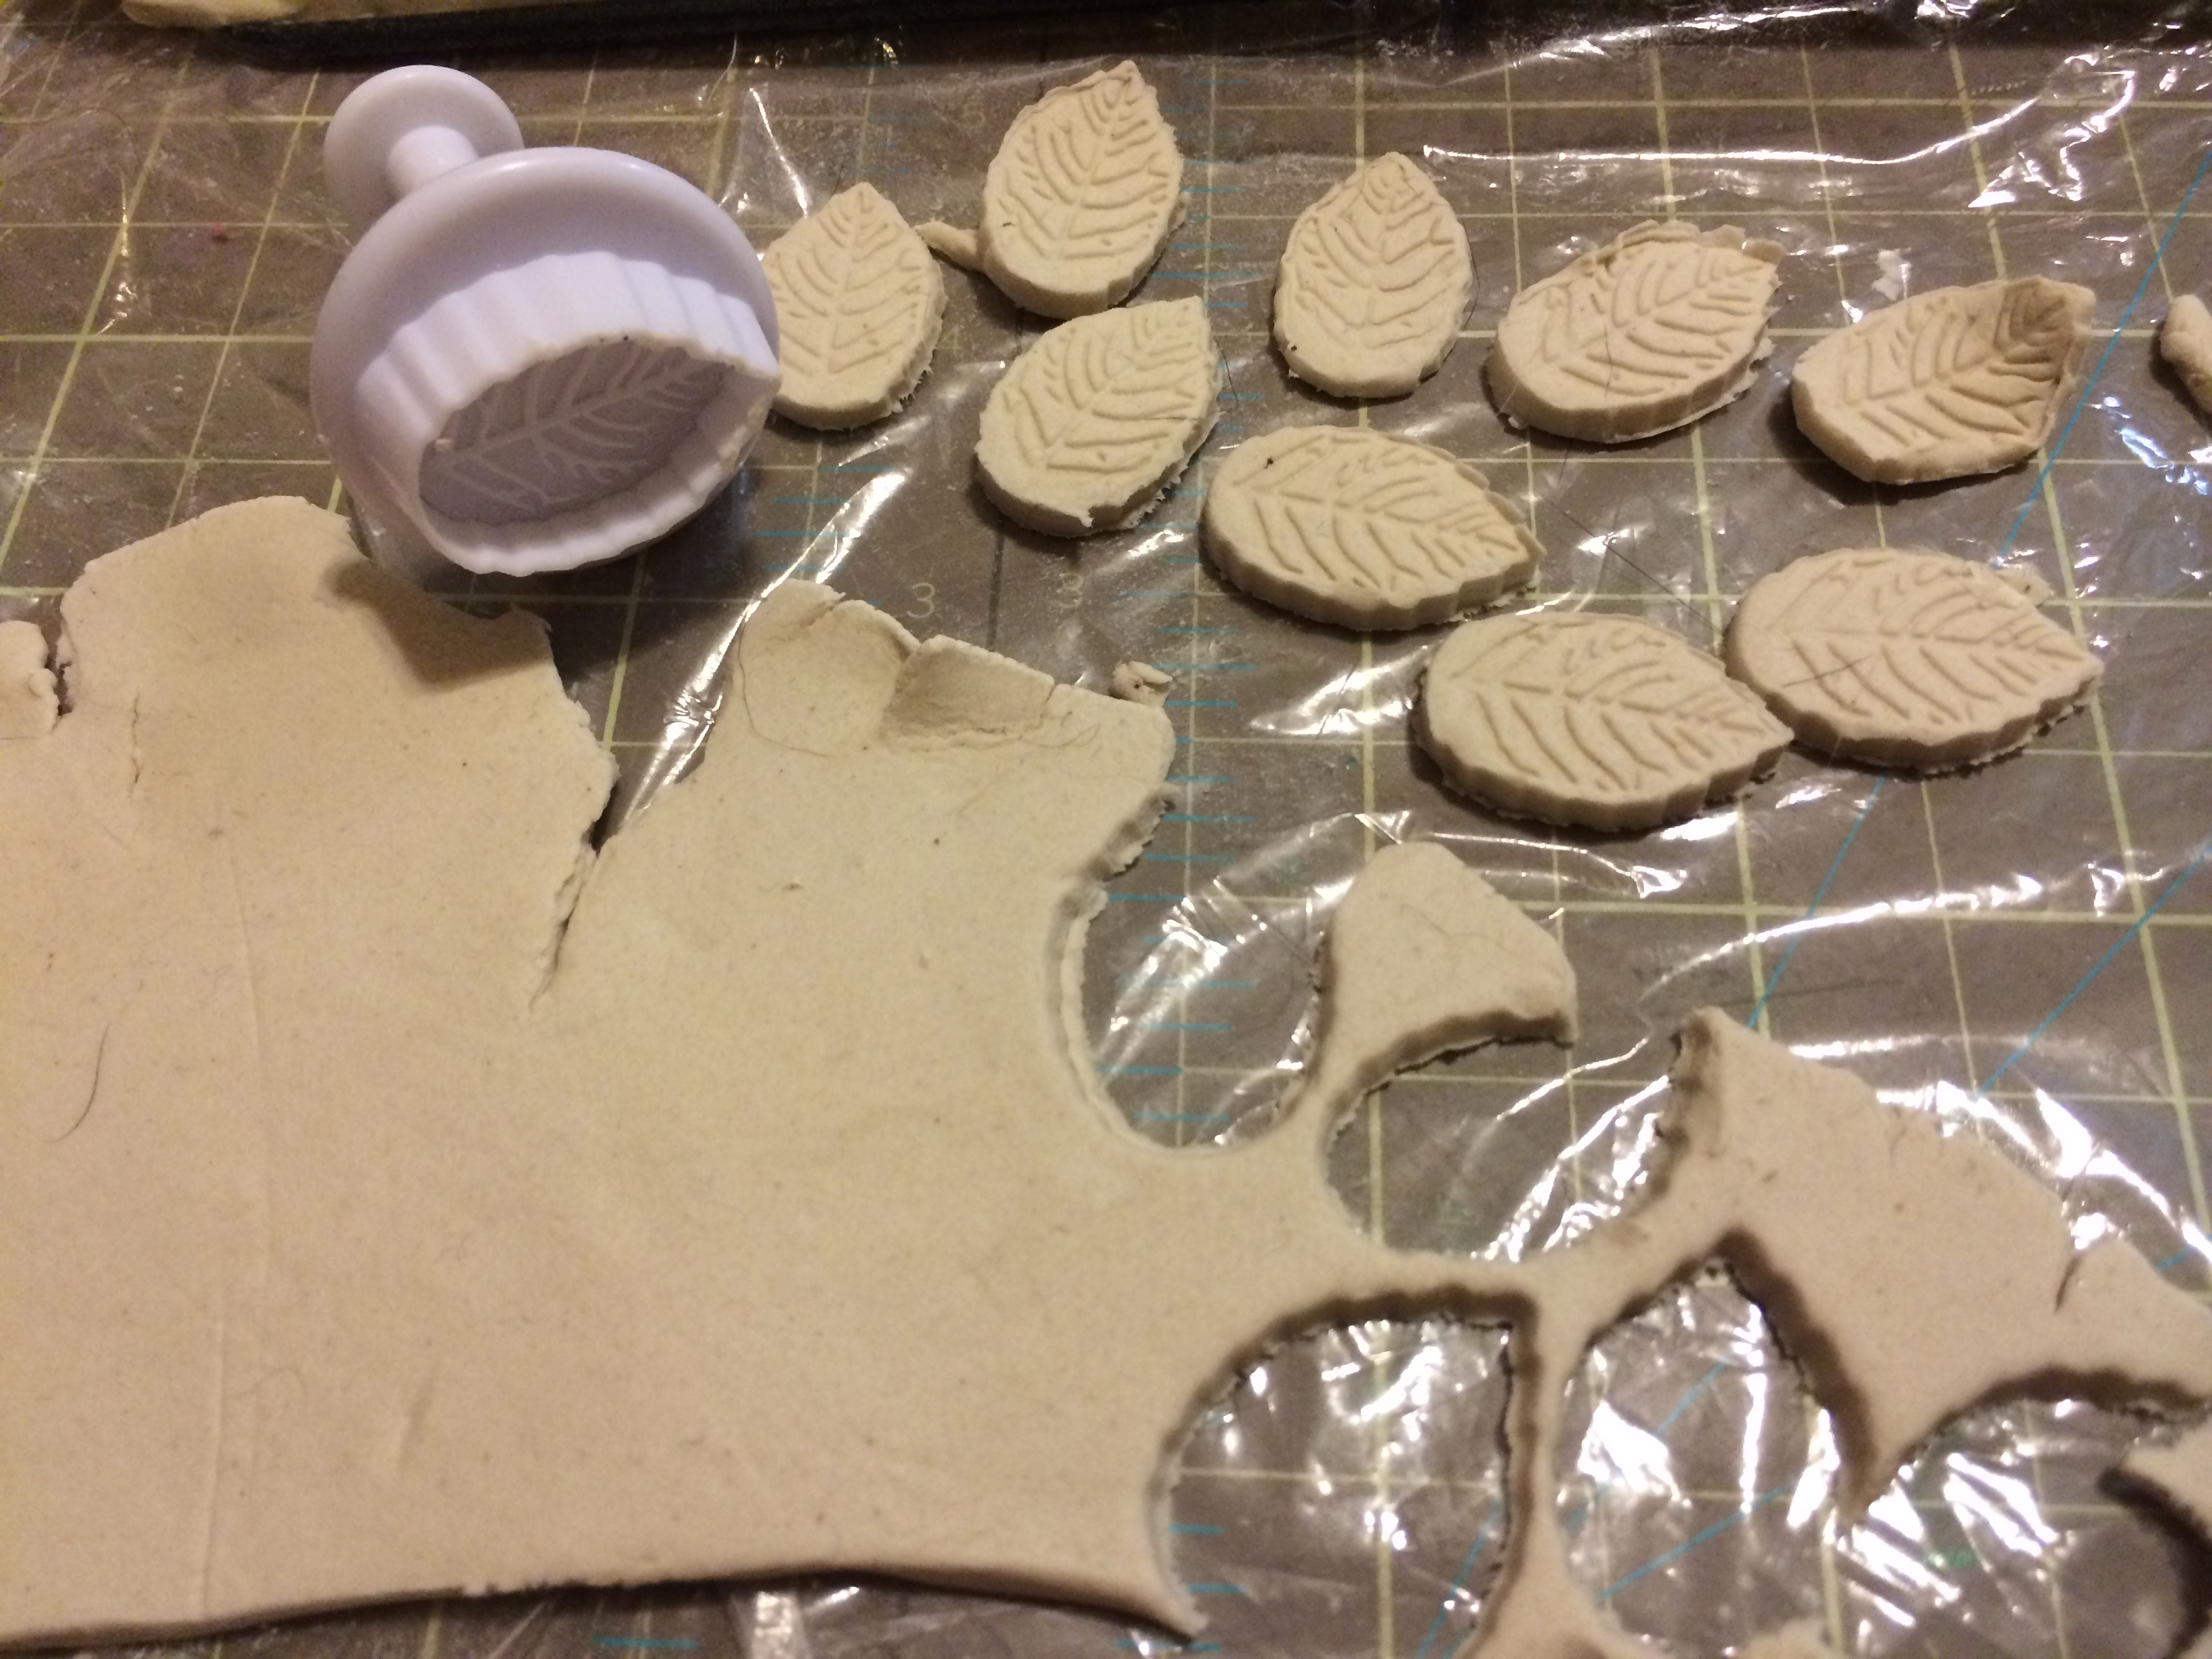
To create the leaf for decoration I rolled again some Creative Paperclay to a ¼ thickness.

Once it is rolled, I let it dry a little not much.

Creative Paperclay board

Grab your favorite leaf cutters and start stamping away.

Creative Paperclay board

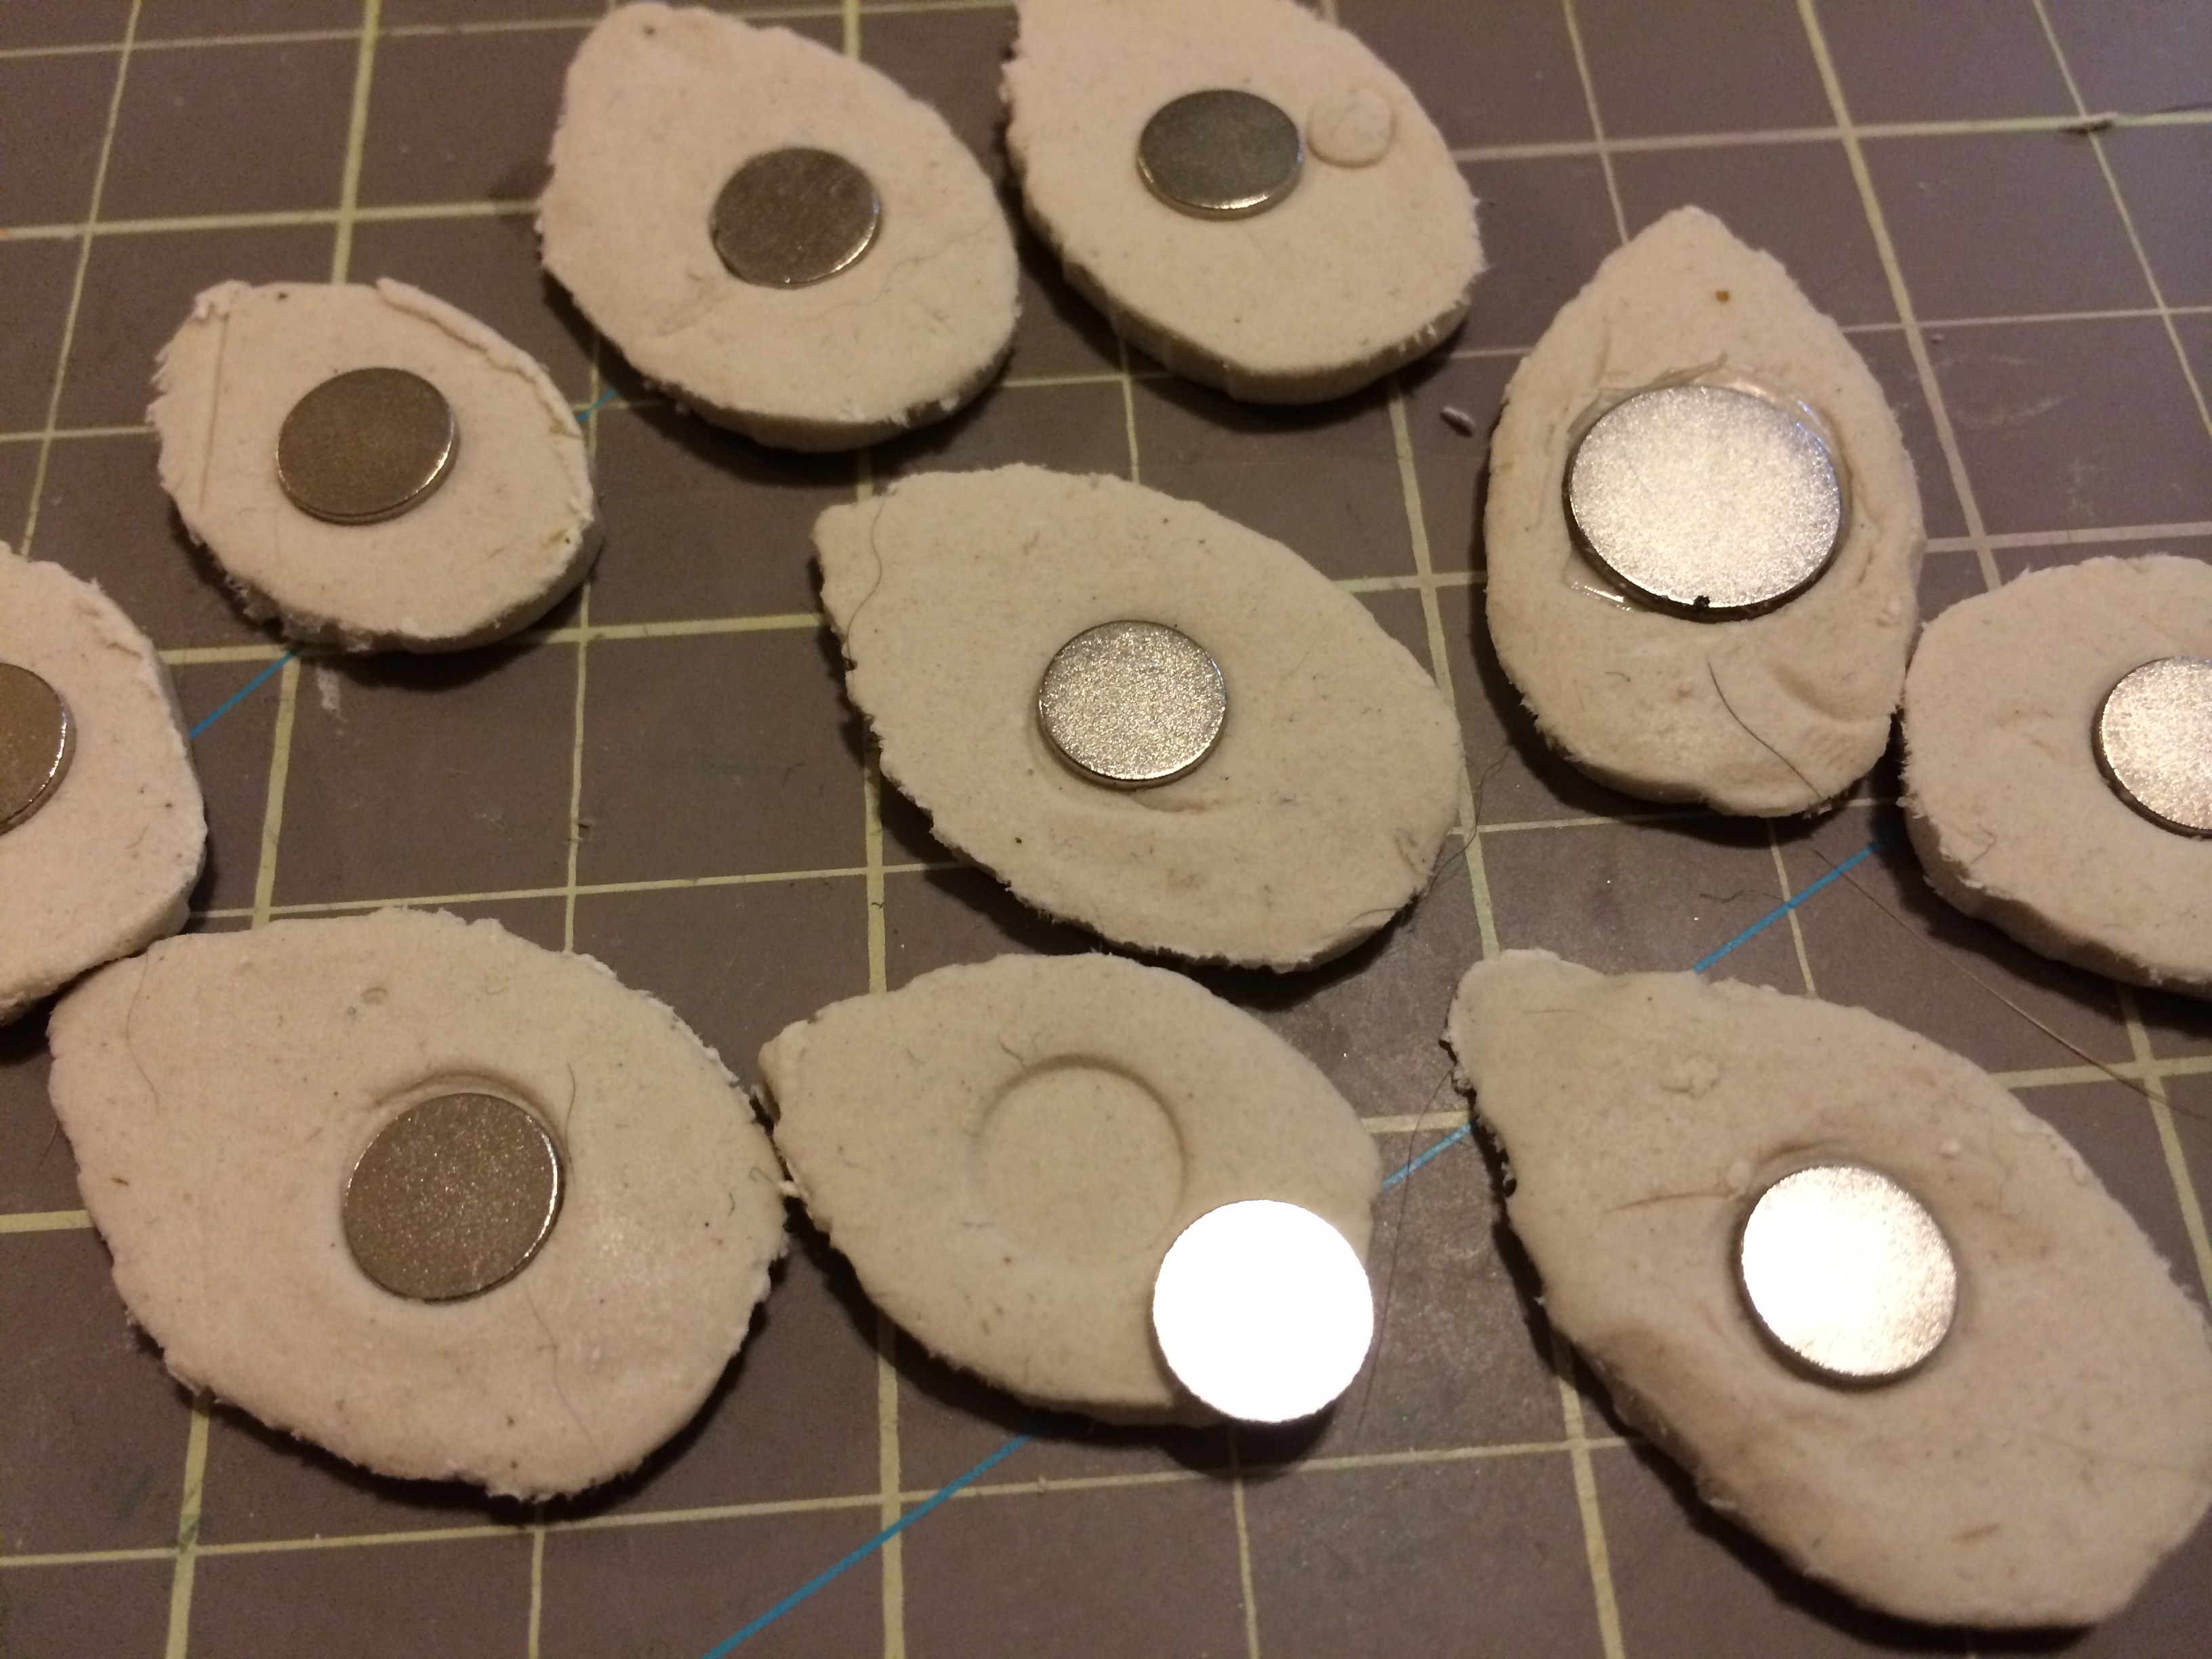
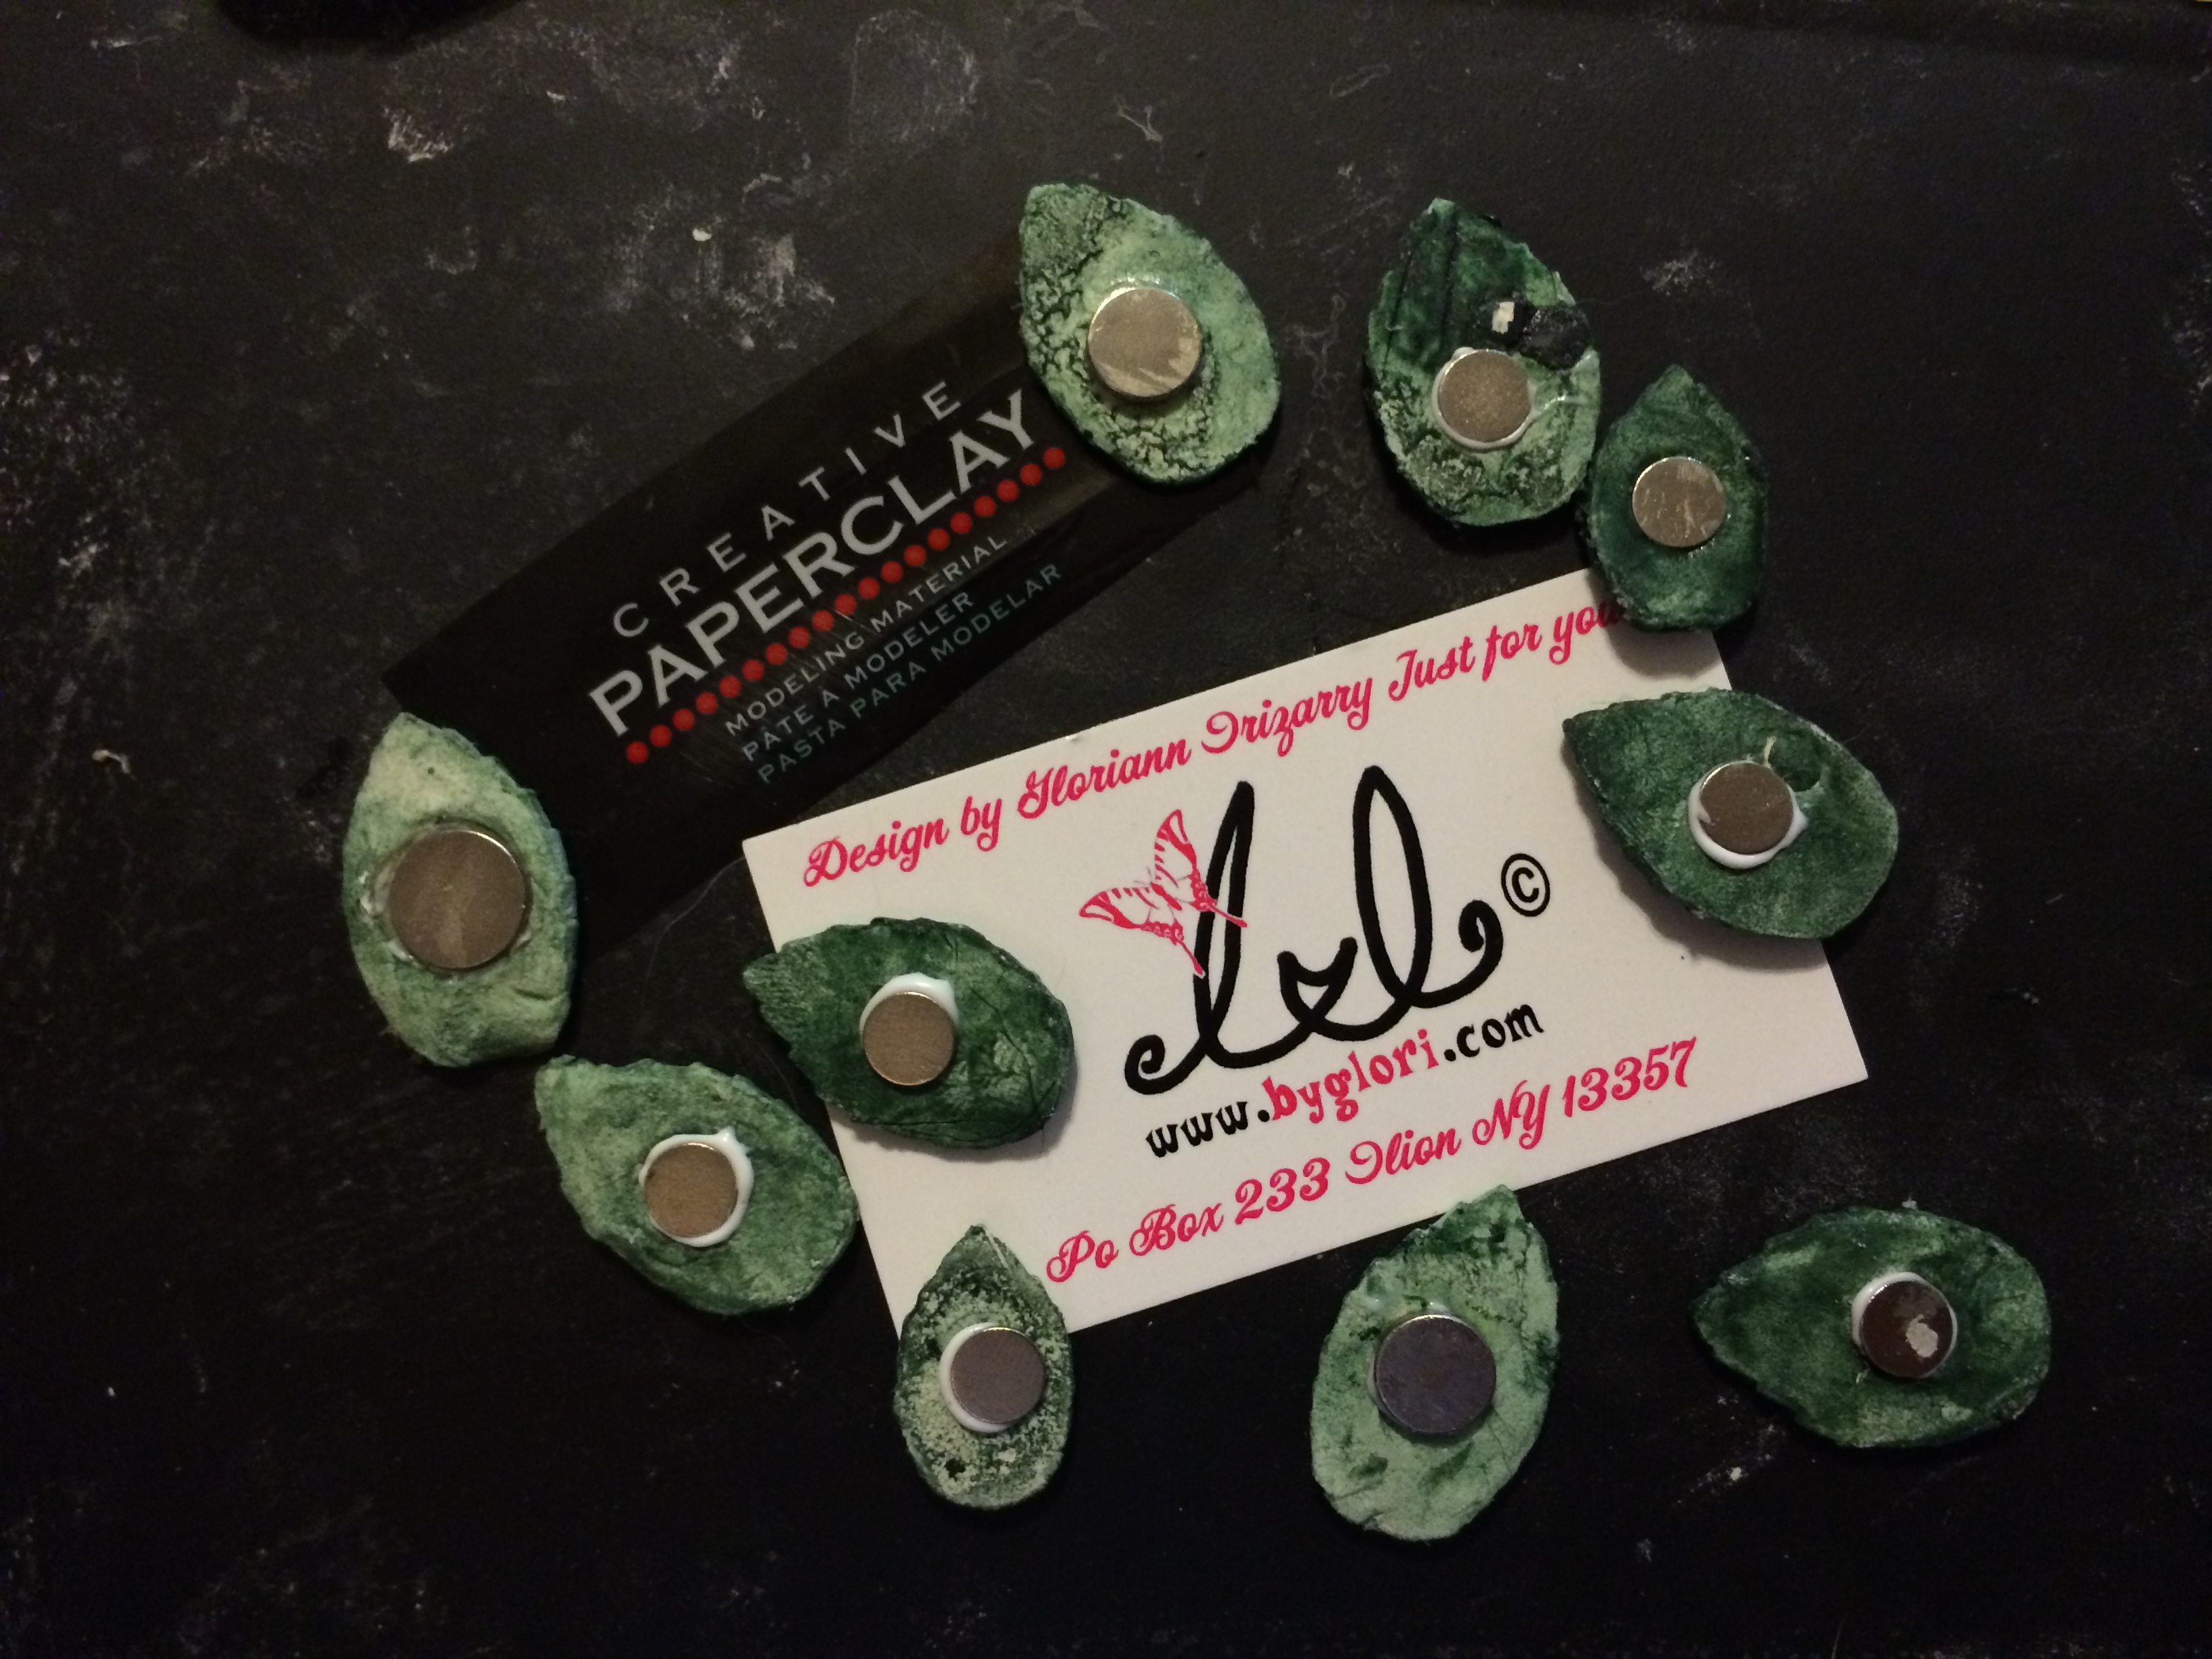
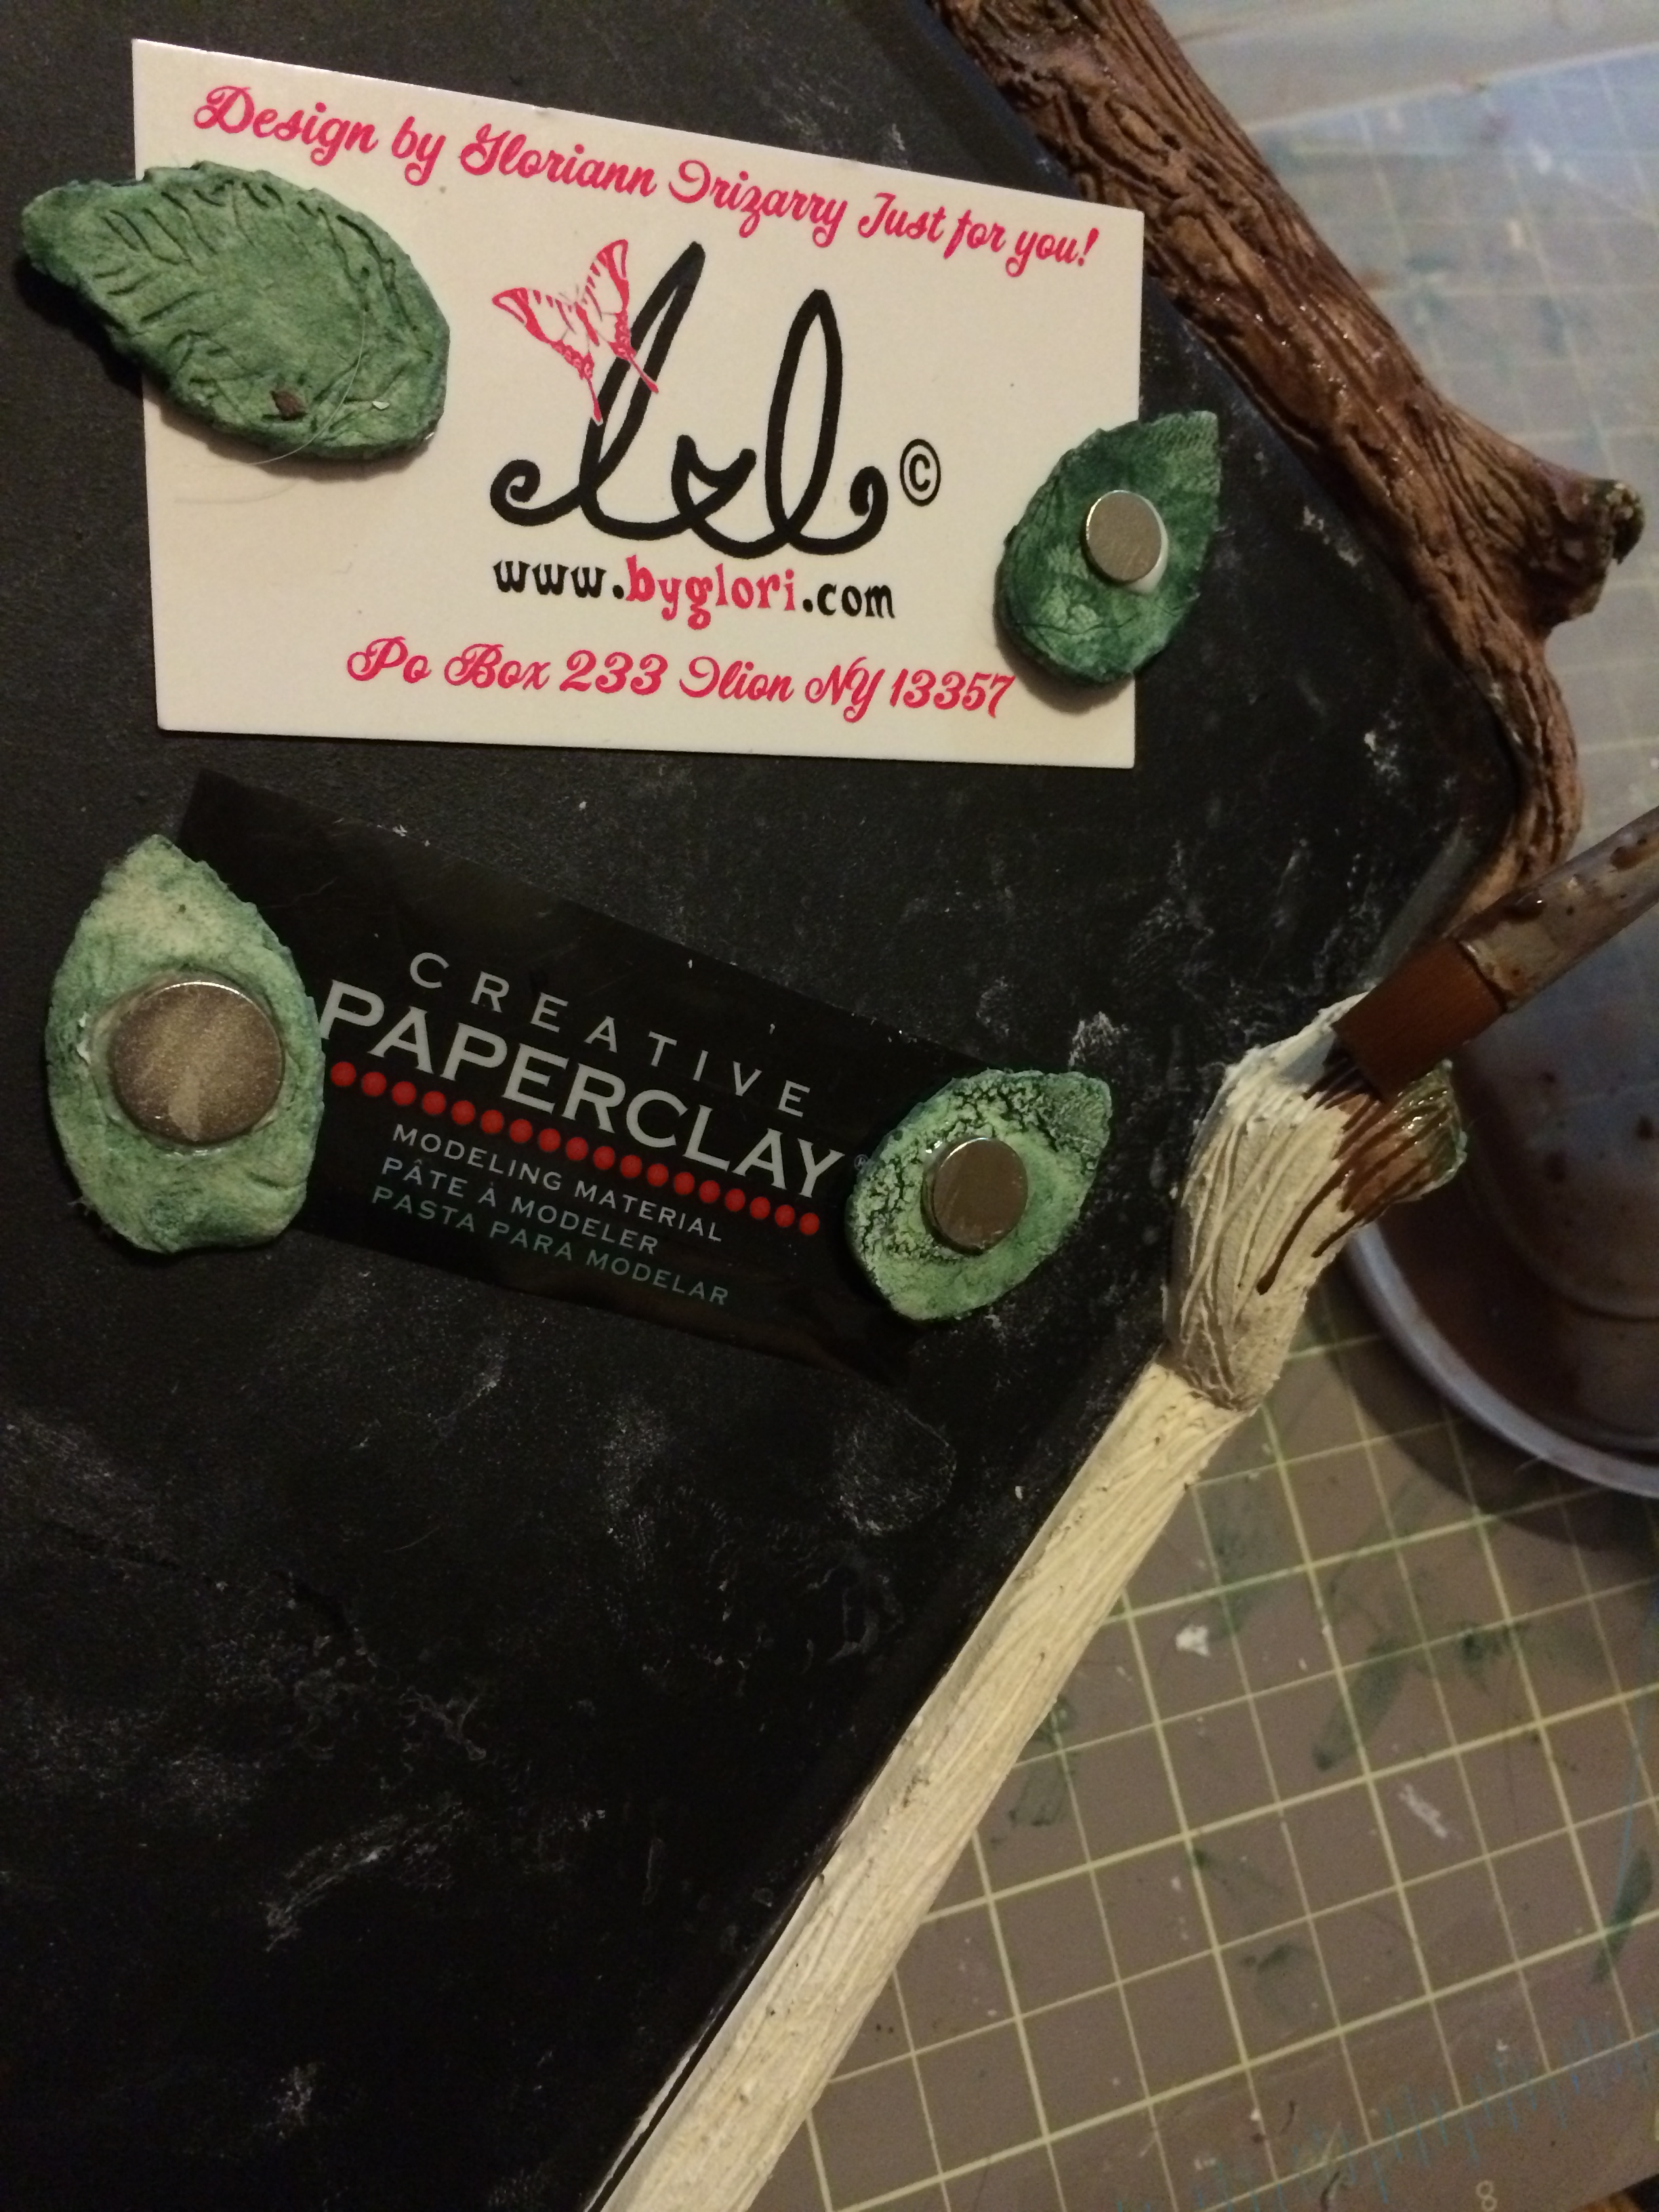
I wanted the magnets to be flush to the board so before they fully dry I pressed the magnet to each leaf that will become a magnet.

Creative Paperclay board

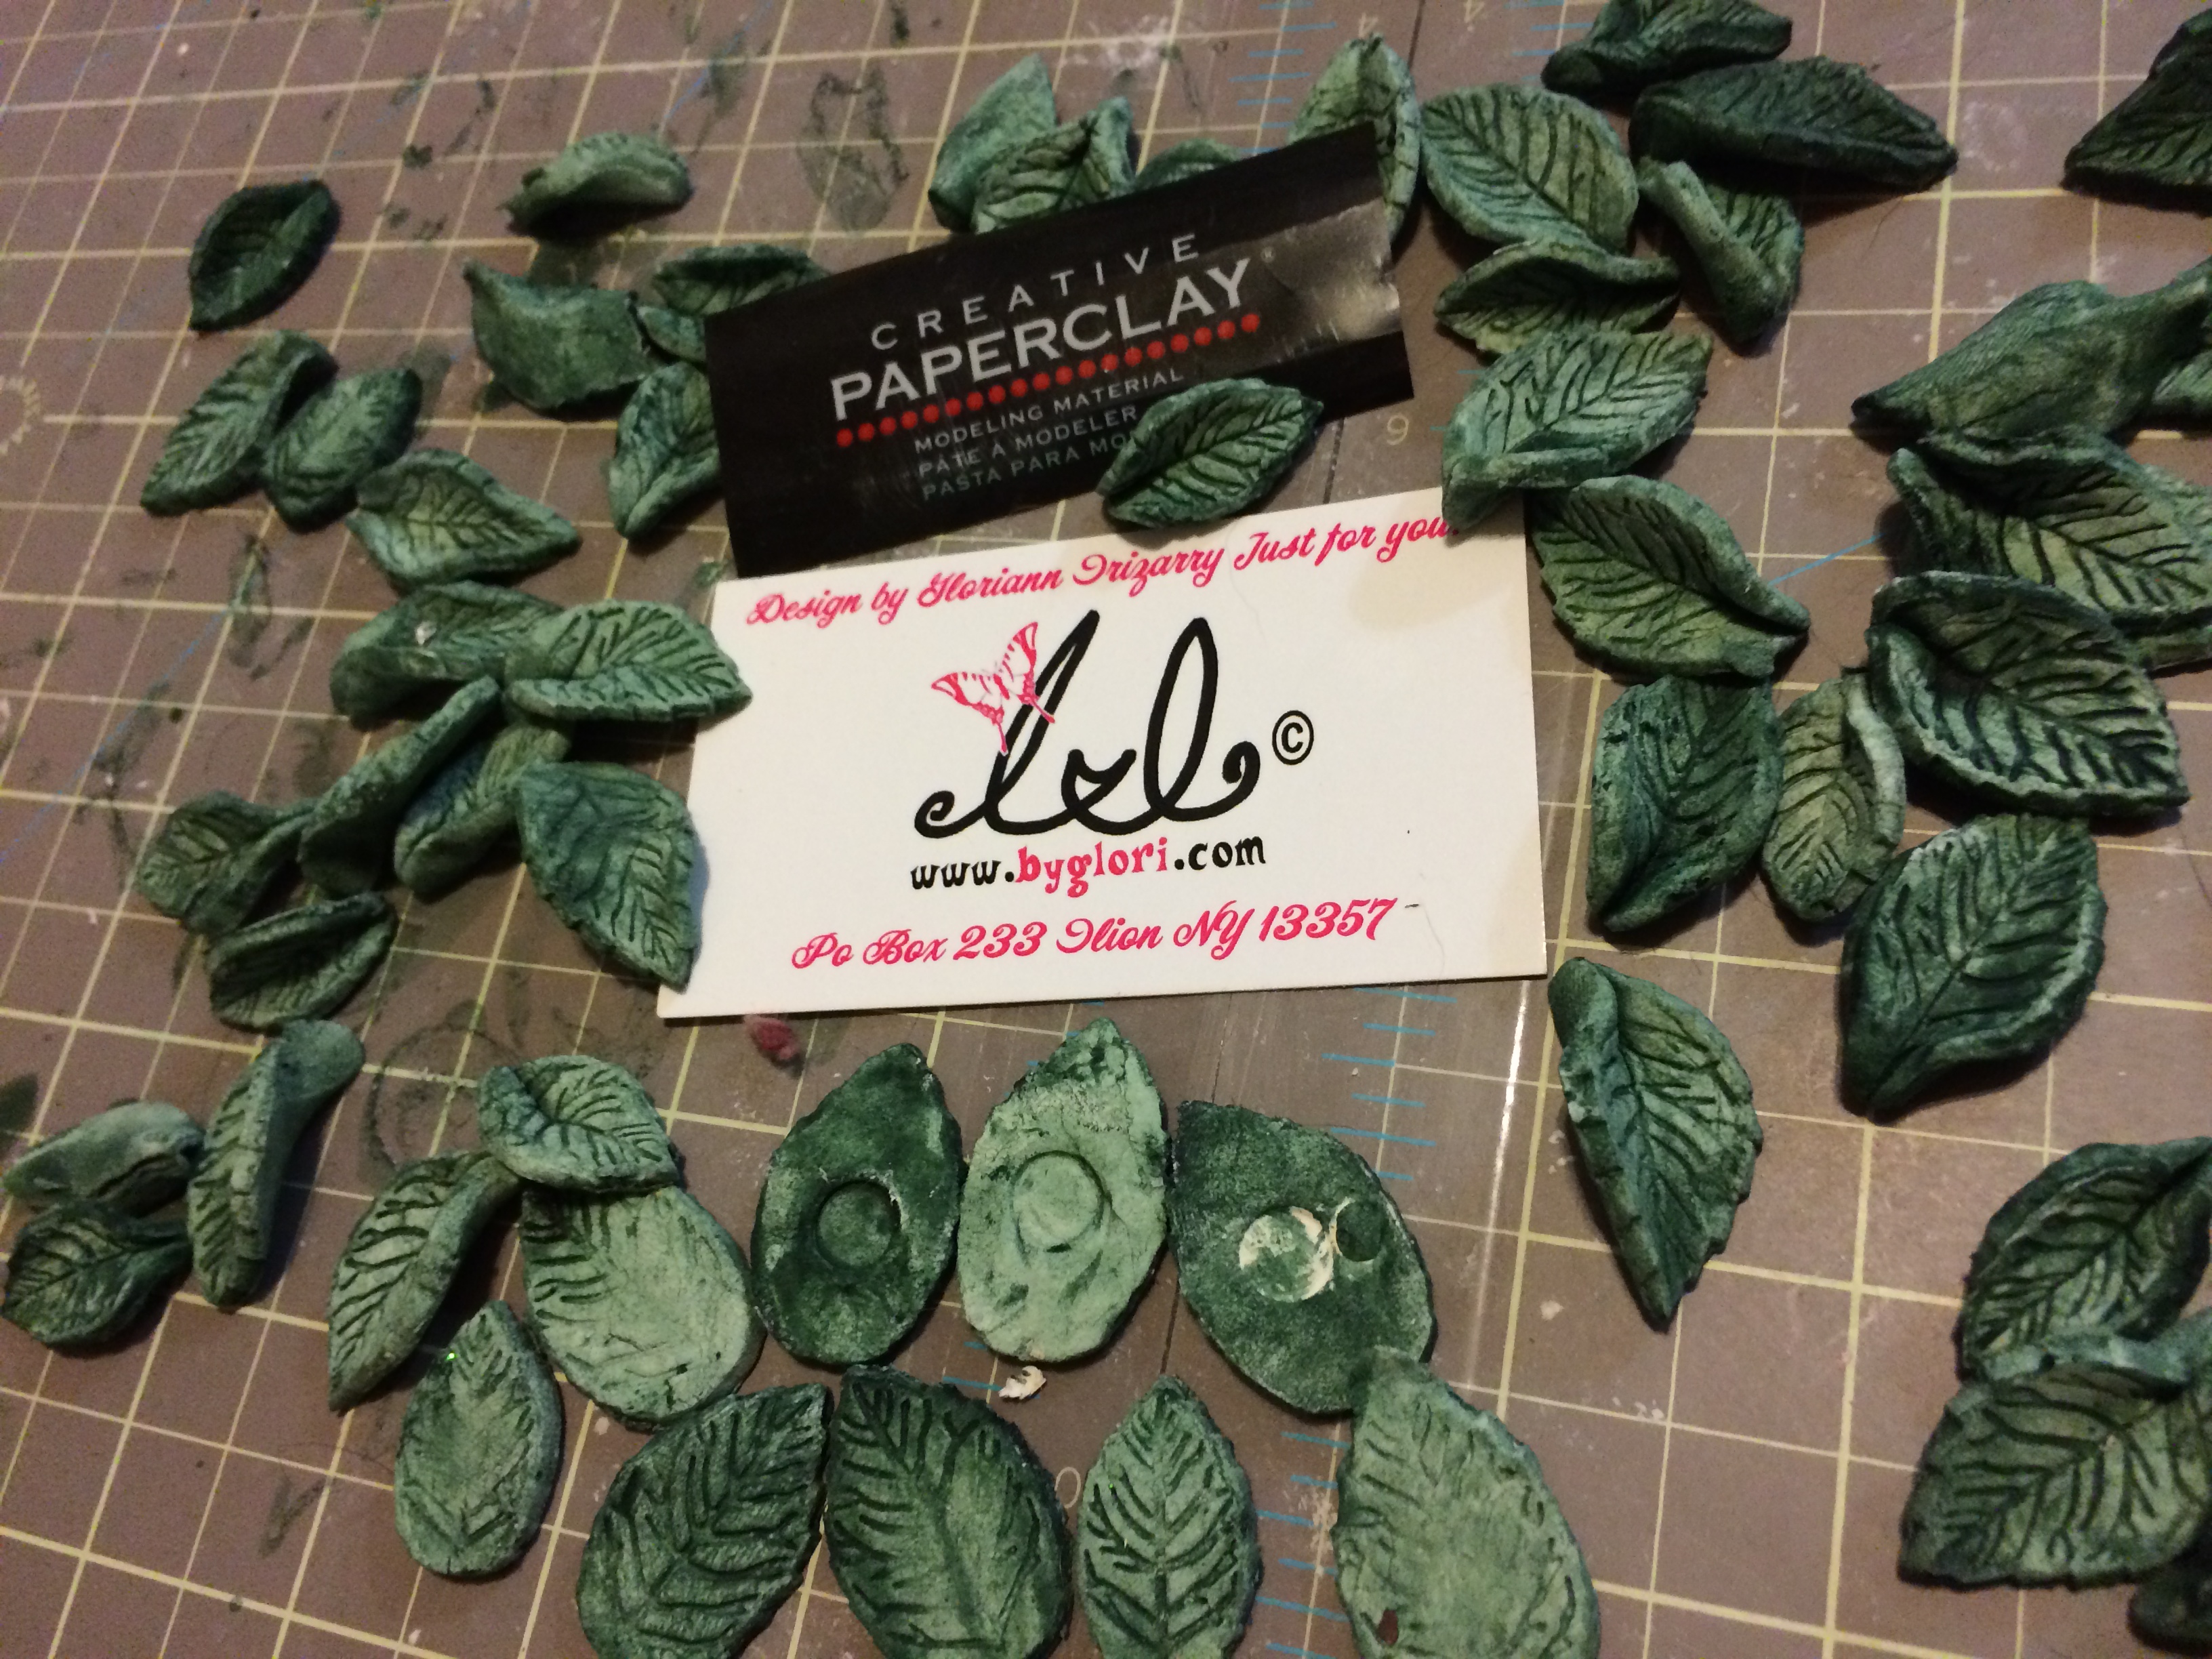
I water the acrylic paint down and started brushing the grass bottom

Creative Paperclay board

Also painted the leaf and set aside for them to completely dry.

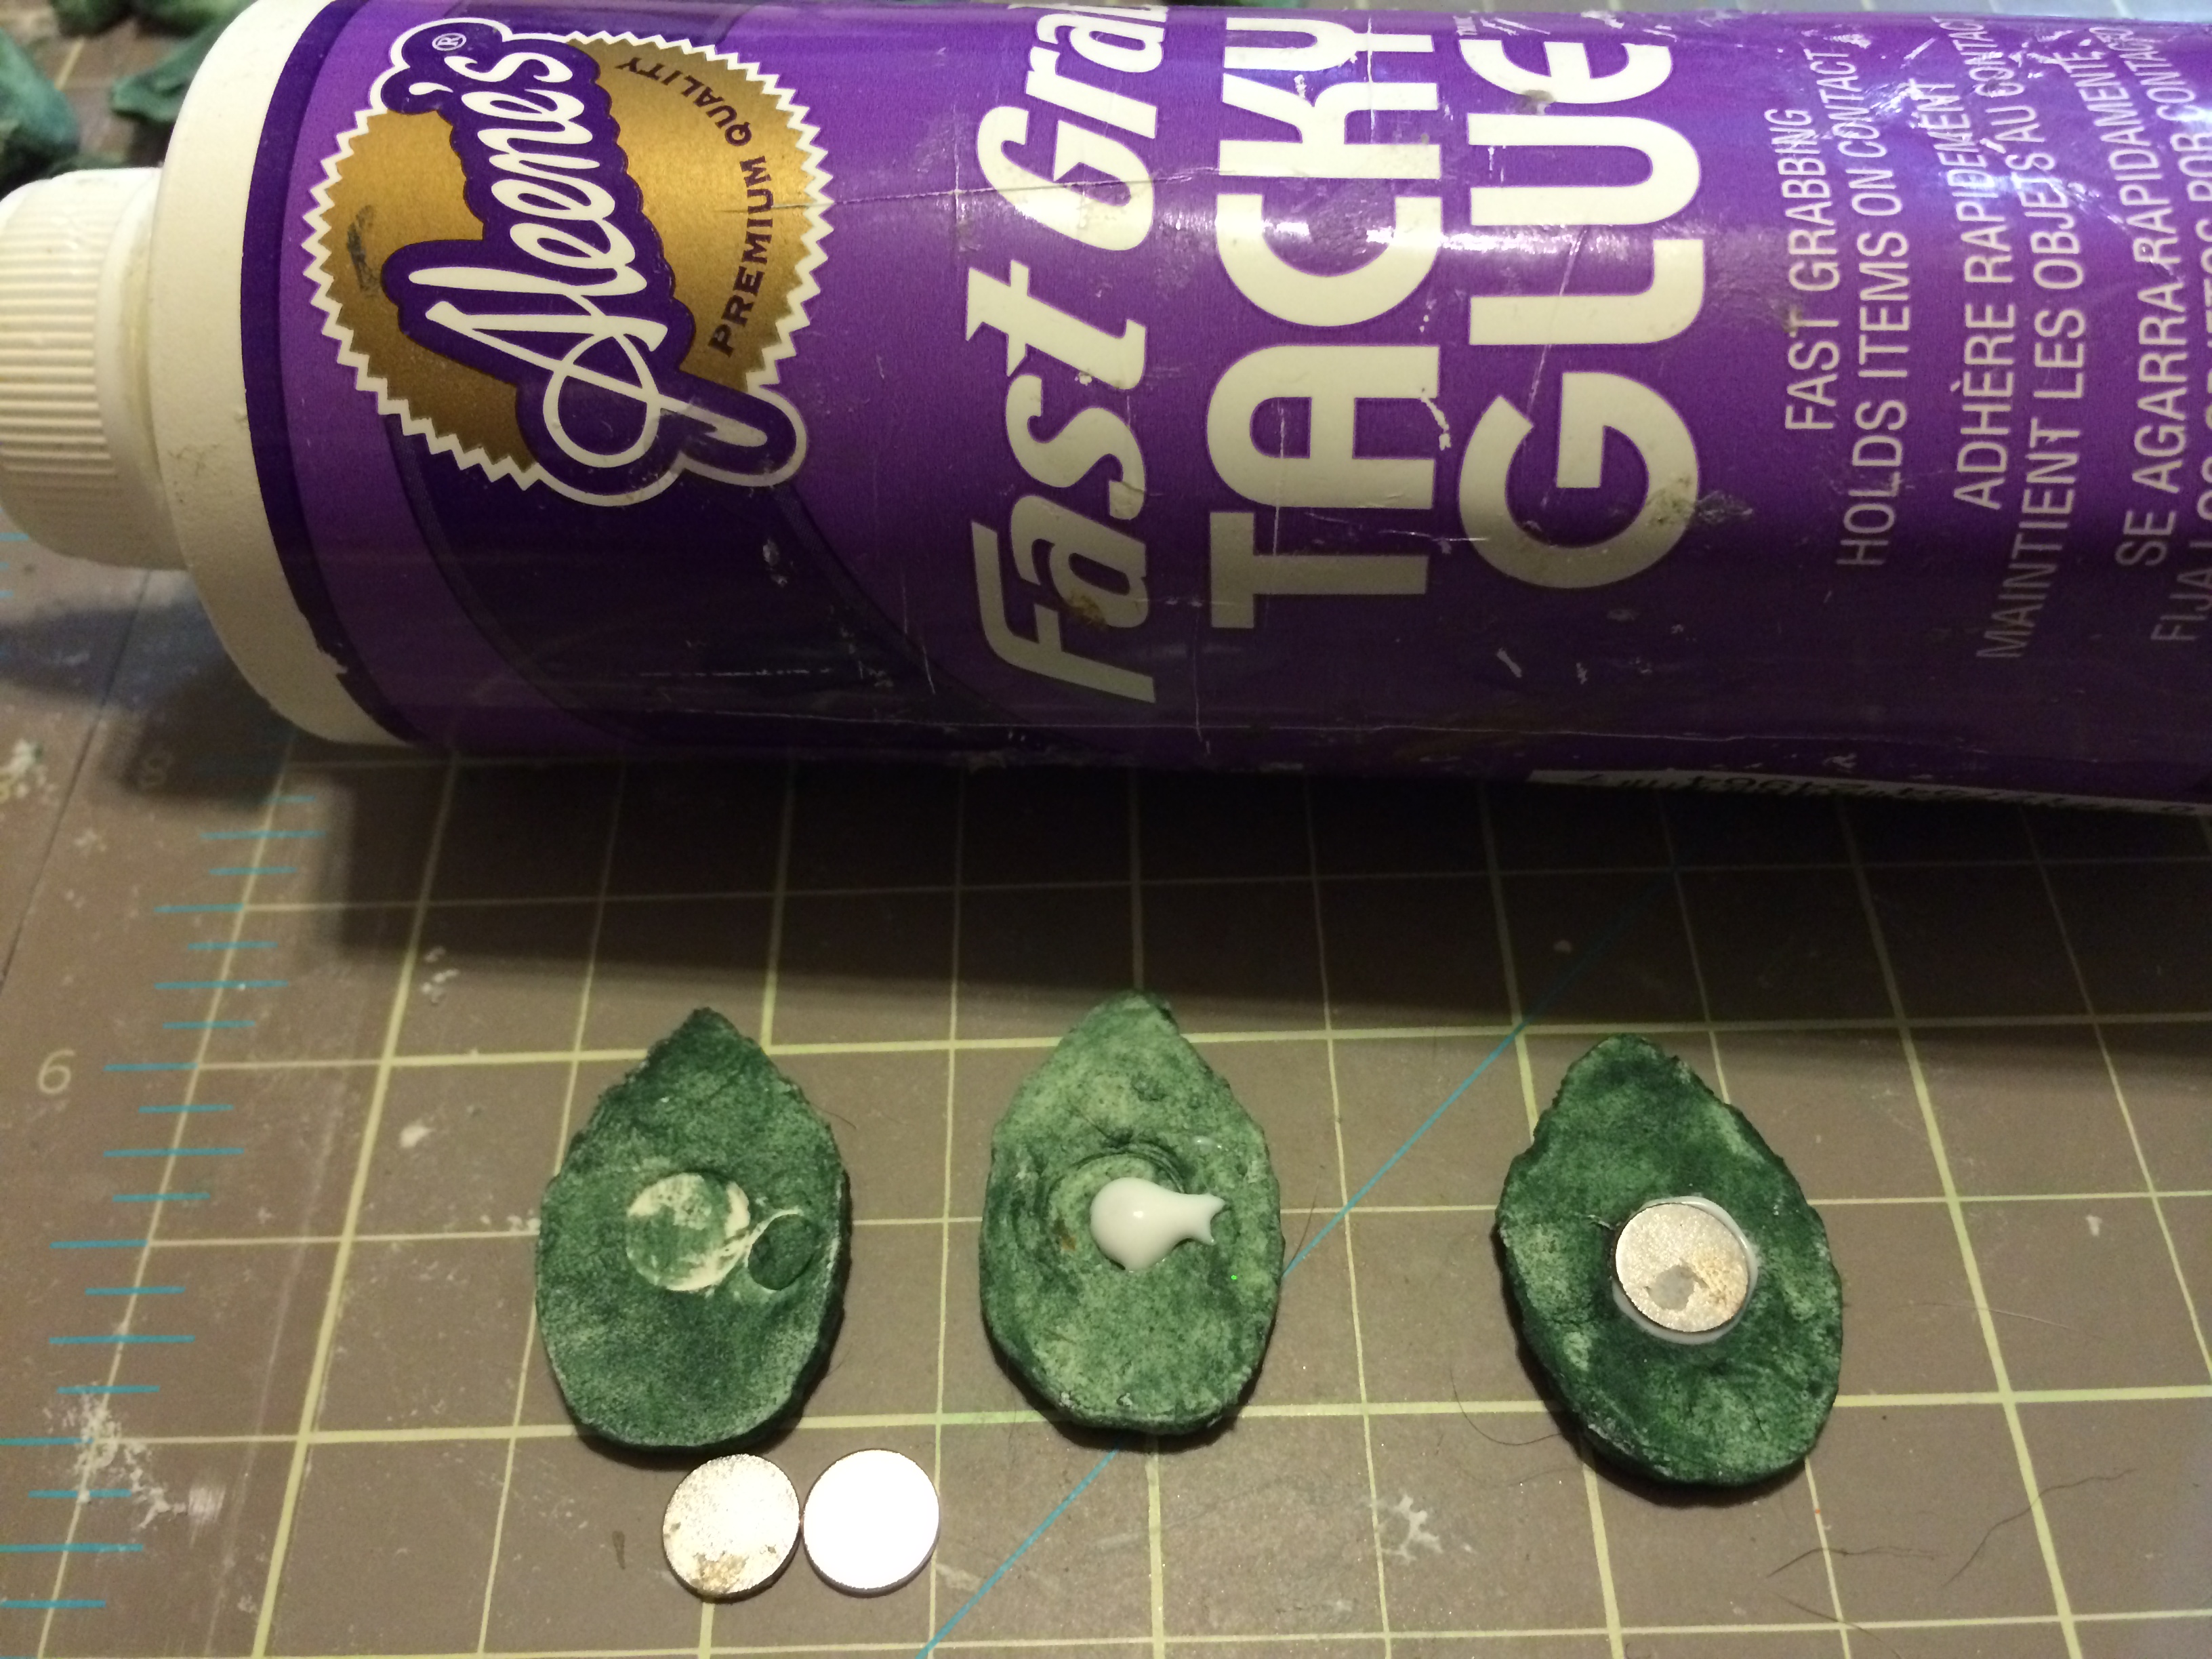
Once they dry, I used my Fast Grab Tacky Glue and glued the super strong magnet to the leaf I had chosen to be the magnetic holder.

Creative Paperclay board

I set the magnets to dry backward on the magnetic board so they will hold while the glue dries.

Creative Paperclay board

To paint the tree trunk, I water down the brown acrylic paint and brush it lightly to the dry trees.

Set aside for the paint to completely dry.

Creative Paperclay board

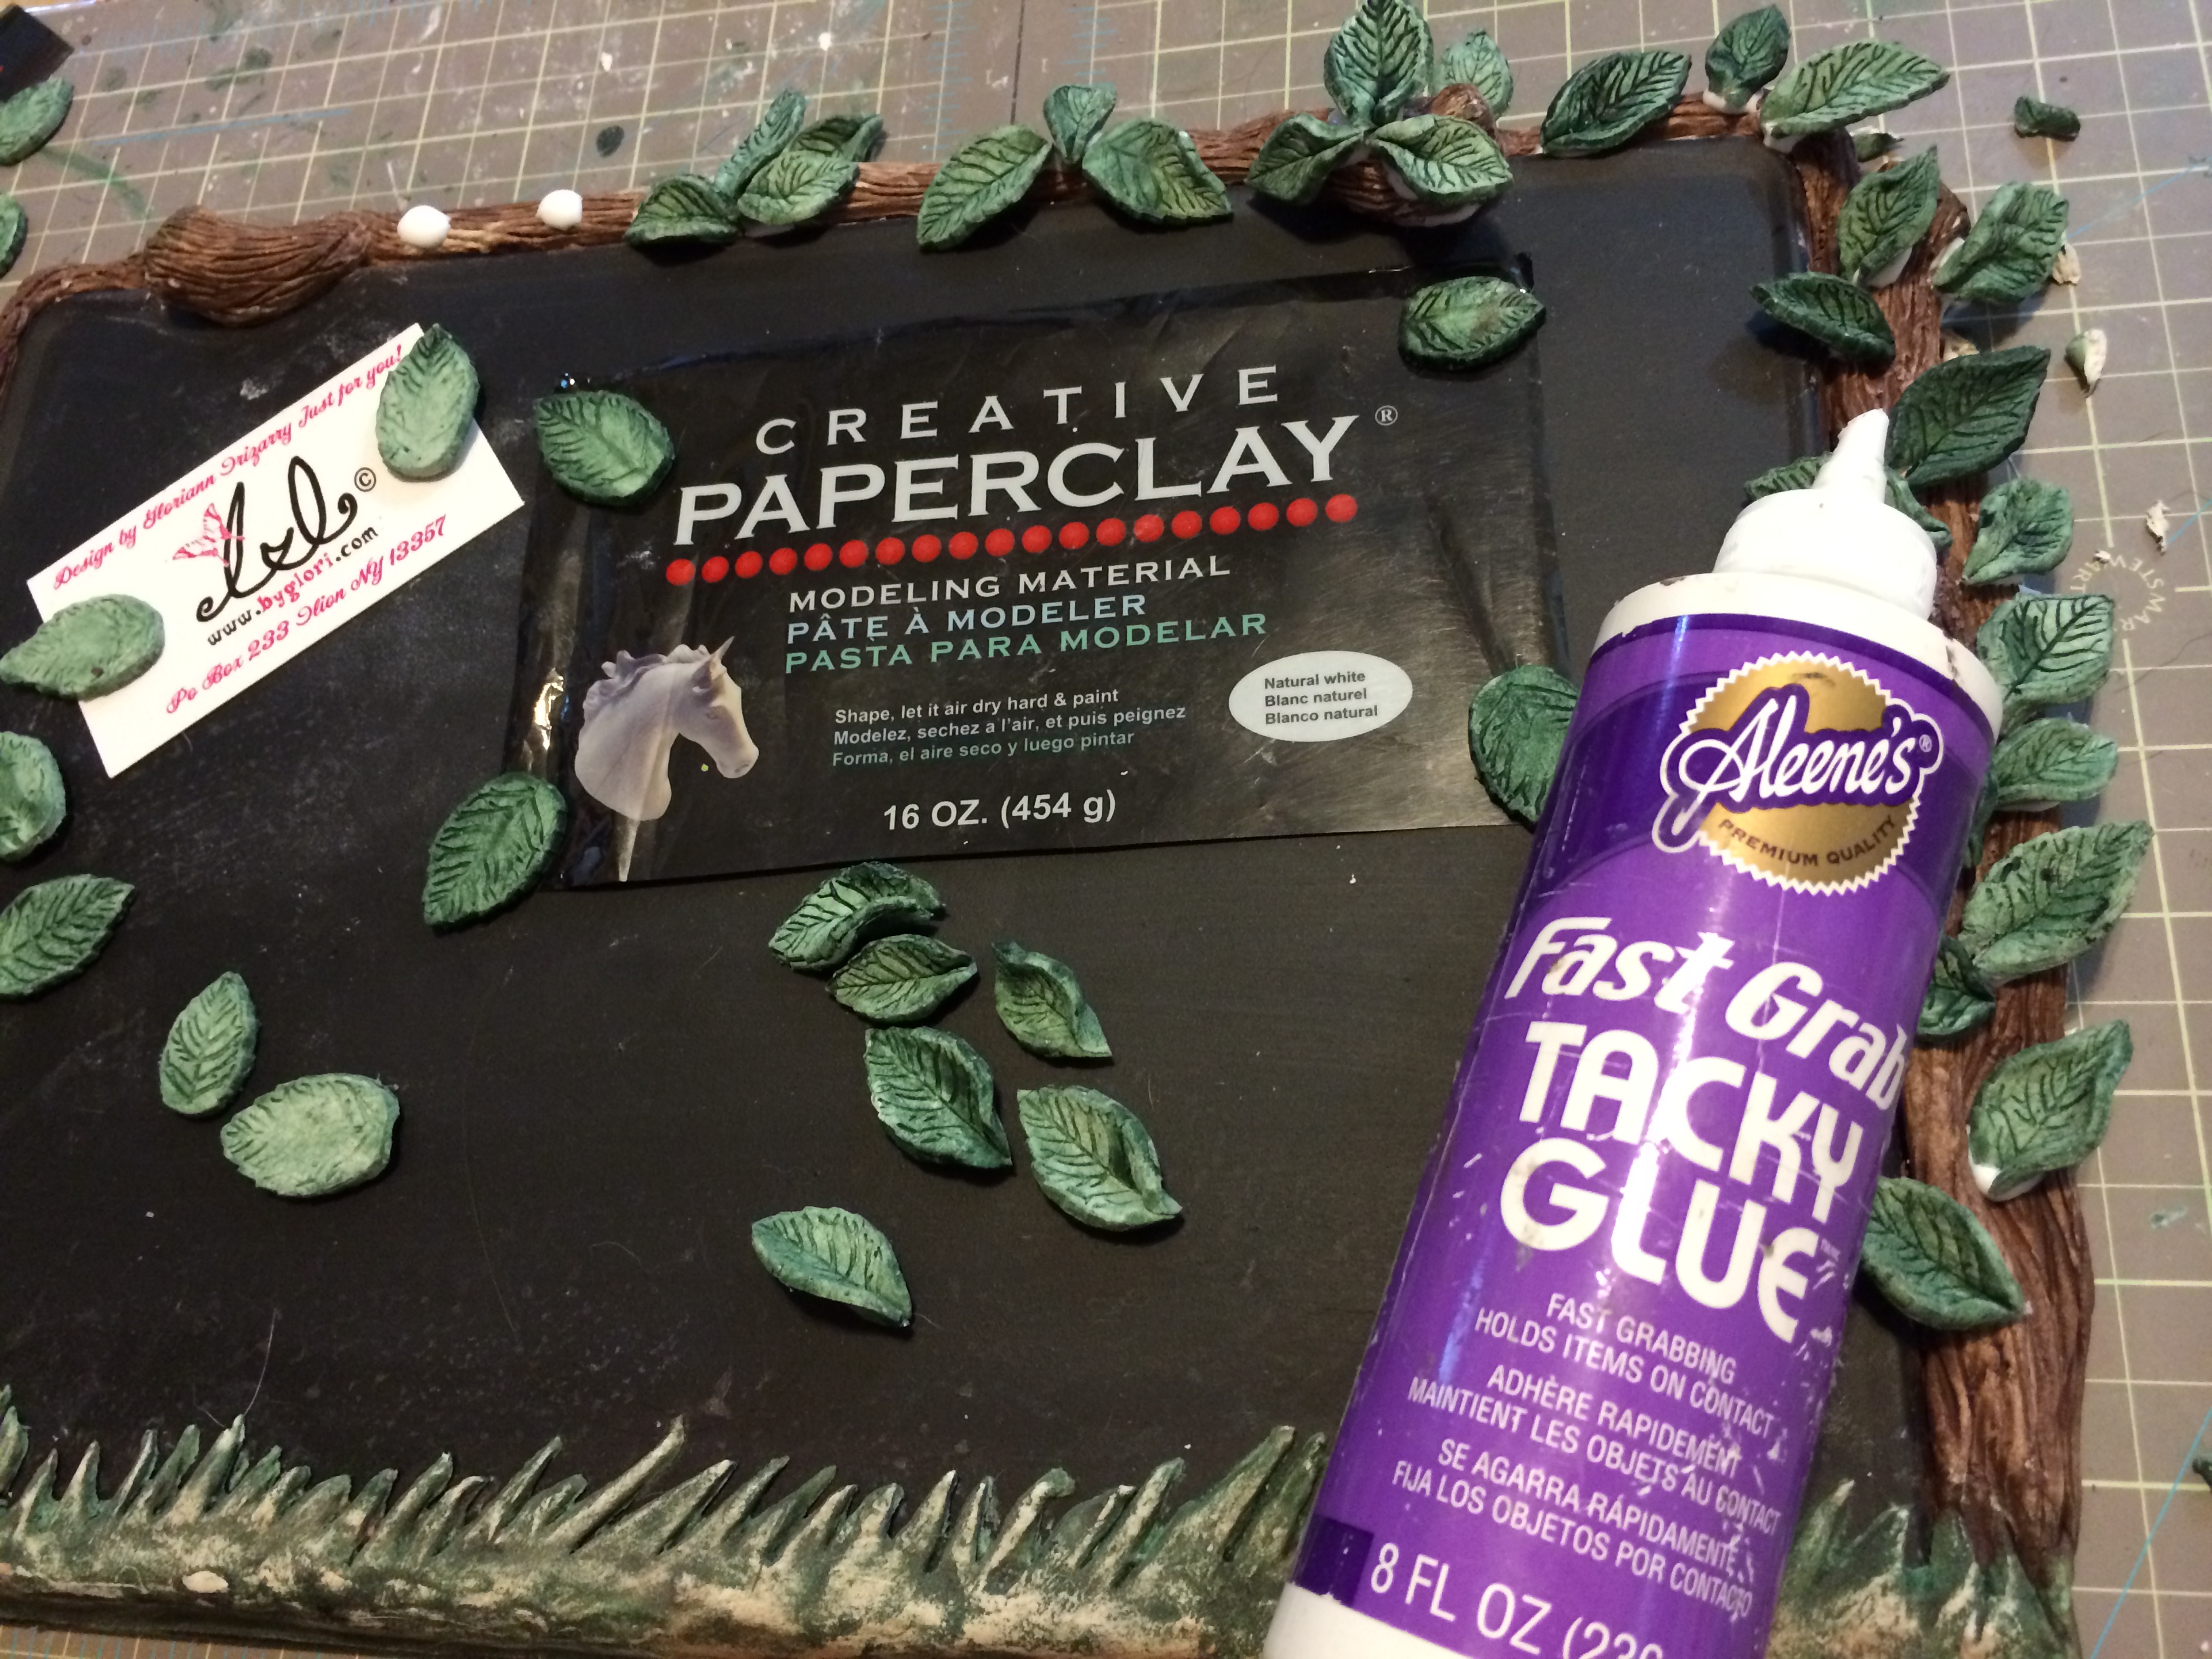
Once the paint had dry, it is time to glue some of those leaf we had work on.

Use your favorite adhesive. Mine is Arleenes Fast Grab Tacky Glue.

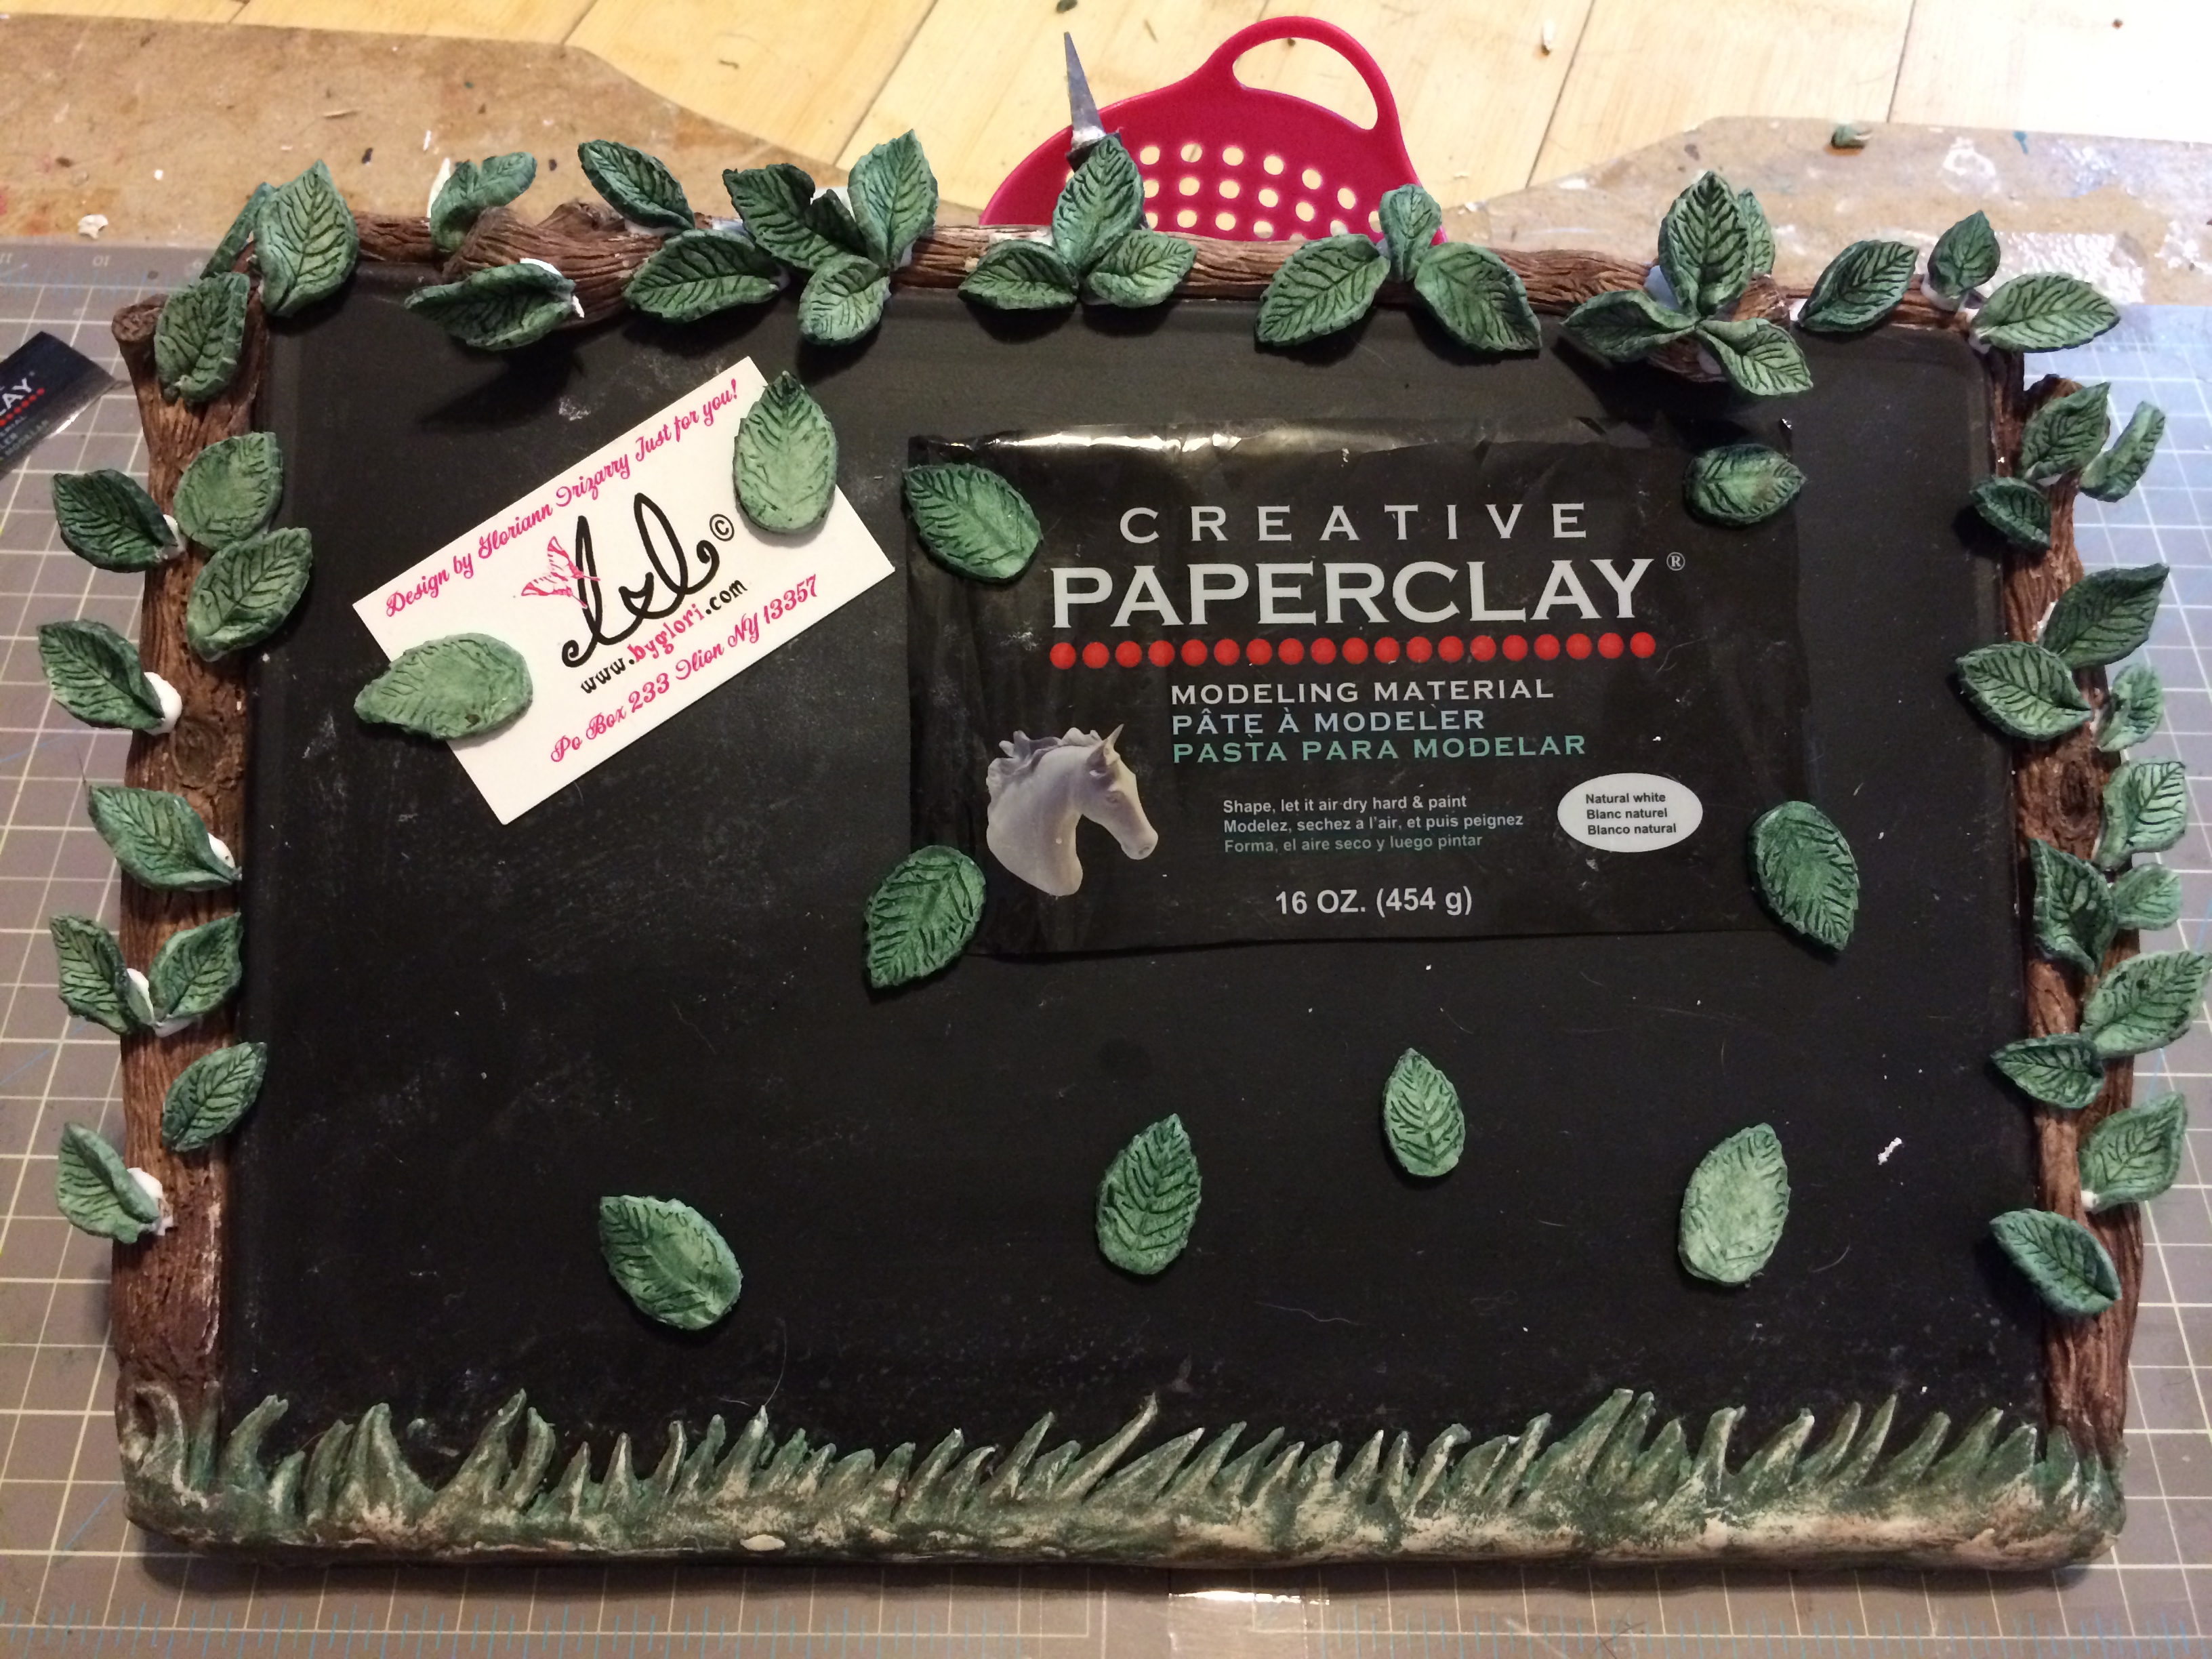
Grab each leaf and one by one place a glue dab to the leaf and place it to the tree trunk. Alternate positions to make the leaf look natural while they flow on the Magnetic bulletin Chalk board.

Creative Paperclay board

Now it is the time for you to check and see if you like the leaf placement. If you are satisfied, all you need to do is set aside for the glue to completely dry.

After the glue dry get you favorite sealer and brush it on the piece to help it stand the test of time. I choose matte to keep the natural look and keep it looking beautiful.

Creative Paperclay board

With the help of a needle you can tread a ribbon cut to size to proudly hang your master piece.

Creative Paperclay board

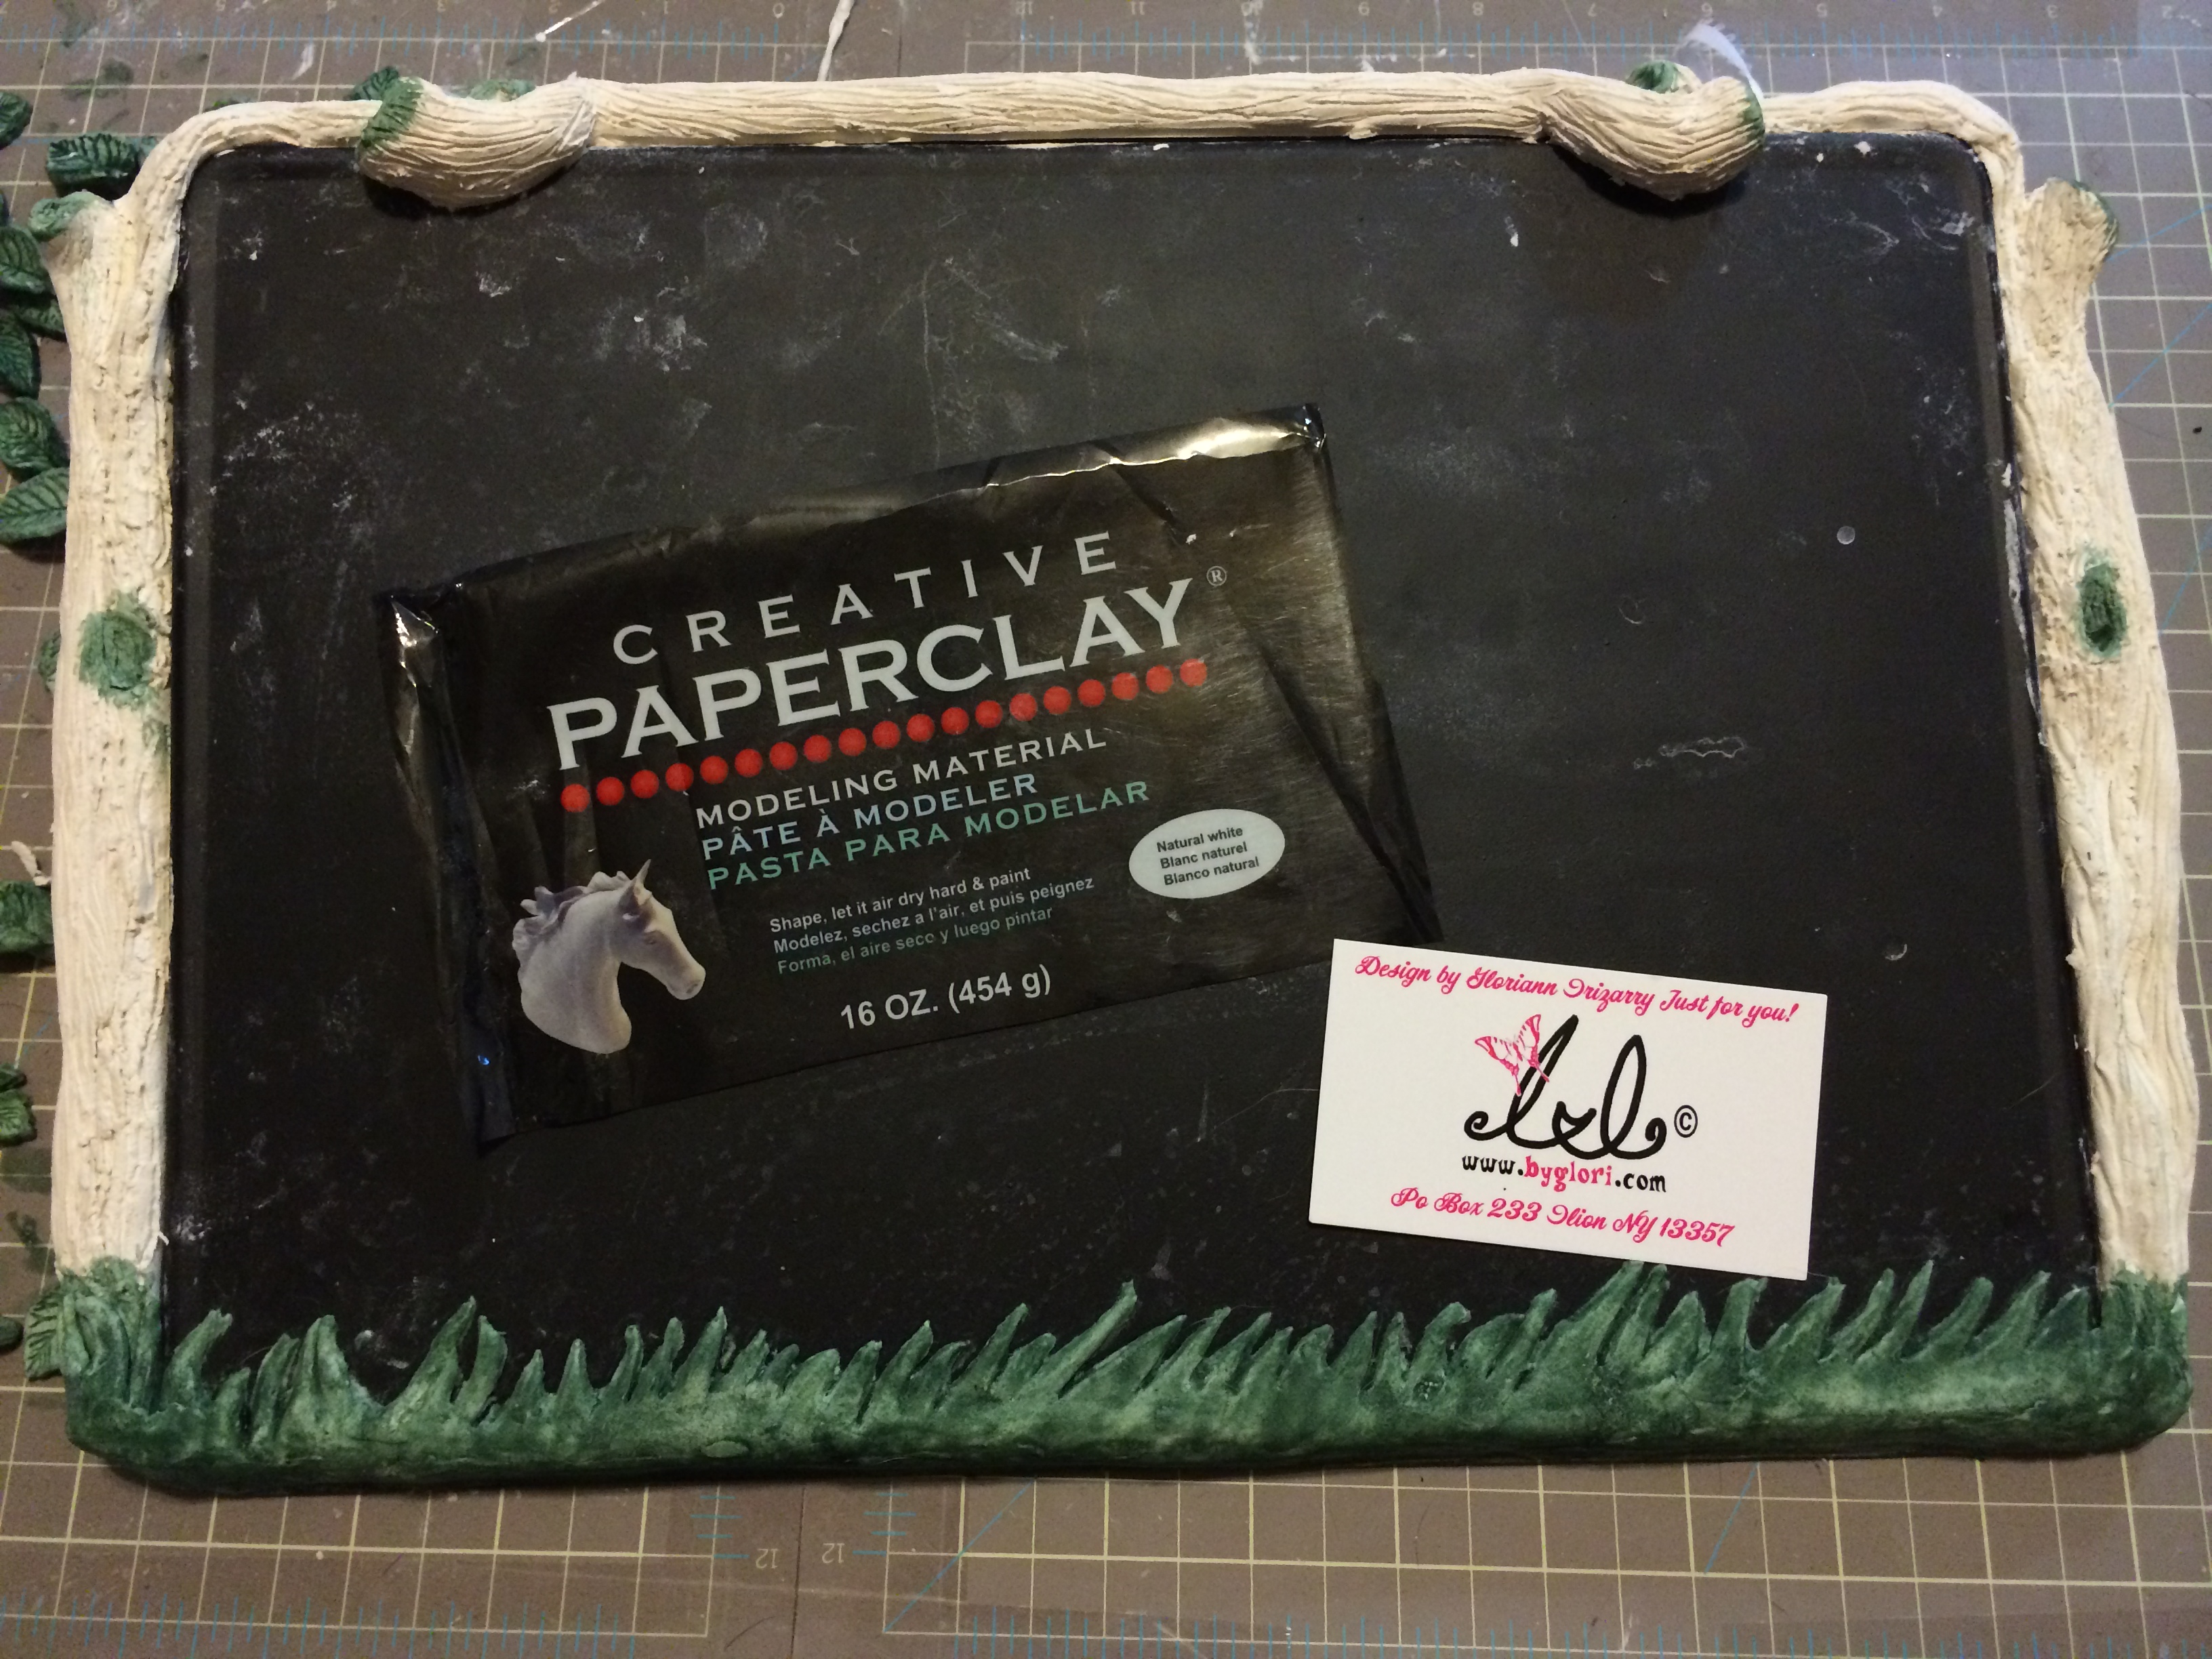
Now your new Magnetic Bulletin chalk board is ready to be hang. Feel free to write, pin or stick all your reminders.

I hope this help and allow you to keep track of your events. Please email , post or comment down any question you might have.

Sincerely,

Gloriann Irizarry

~*~*~*~*~*~*~*~*~*~*~*~*~*~*~*~*~*~*~*~*~*~*~*~*~

My name is Gloriann Irizarry. I was born and raised in the beautiful Caribbean island of Puerto Rico. Ever since I can recall, I always had my hands on crayons, scissors and paper. My parents knew from the start how much I love to create!

As a mother of three young wonderful daughters, I find myself working, caring for my family, and taxiing kids from here to there for various sporting events.  I have to say I’m never bored!  I enjoy every little moment I spend with my girls, but will always continue to work time to create art into my daily schedule as that means doing what I love the most. My girls are learning the joys of creating also!

I love to sculpt and will never stop creating. I was born this way and for that I thank GOD every day. Art has been a great way to be creative and to express myself.  I like to keep my hands busy creating – whether it is unique jewelry, art dolls, oak sculpture figures, fairy wings for all your project needs, or even wigs and clothing for your sculptures.  I love all the variety in art! Why? because ART is so rewarding. Seeing your creation take form is an awesome feeling.

You can see more of my work on my website – ByGlori

~*~*~*~*~*~*~*~*~*~*~*~*~*~*~*~*~*~*~*~*~*~*~*~*~

.

.