~*~
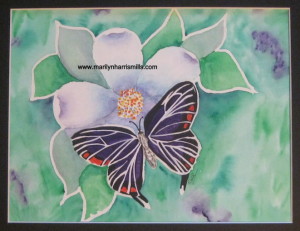
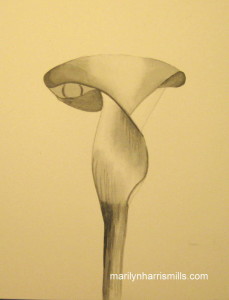
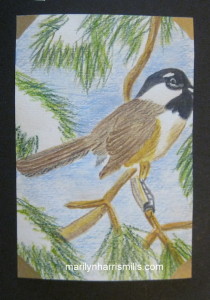
This article was written by Marilyn Harris Mills
Recently, the market has been flooded with all types of surfaces for all types of media. Whether you’re using watercolour pencil, acrylics, oils or simply gluing and pasting, there’s a substrate for everything. How does one go about making sense of it all? Remember, even though the various companies market substrates for specific purposes, you are not confined to their suggestions. Explore and have fun.
I’ll outline here various choices and you can decide what is best for both yourself and the choice of media you will be using.
Let’s first start with watercolour paper with so many choices.
Hot-pressed Watercolour paper (HP)
– the smoothest of all w/c papers
– requires a great deal of control especially when using more water. It isn’t porous, which causes pigment to puddle on the surface.
– excellent for detailed paintings with crisp sharp edges
Choose this type of paper if you like working with wash techniques or you want to concentrate on work that requires small amounts of paint applied in a controlled manner.
Cold-pressed Watercolour paper (CP or NOT)
-medium tooth
-absorbs more water (more porous) than hot-pressed paper
-produces paintings with a looser style and look
-liquefied pigment can be removed from these papers by “scrubbing” with water and a brush
– will stand up to a fair amount of re-wetting and re-working
Choose this paper if you want a reliable general all-purpose paper that will suit most techniques and subject matter. This paper is good whether you want to work with lots of control and detail or in a much more spontaneous manner.
Rough Watercolour Paper
-has even more tooth than cold-pressed paper and will hold up to repeated applications of water and pigment removal. This makes correcting mistakes easier than with any other watercolour paper.
Choose this paper for broad expressive work in which texture is important as well as other techniques such as dry brush, broken washes, lifting out and scratching back.
Weights of Watercolour Paper
The weight of a watercolour paper describes its thickness. A paper’s weight is determined by how much a ream (500 sheets) of the particular paper weighs. Thickness will vary slightly from paper to paper, because some have different densities and moisture content. The most popular weights for watercolour papers are 140 lb. (300gsm) and 300 lb. (640gsm) it’s safe to use 140 lb. for paintings that require less water. Just be aware that it may buckle under even moderate applications of water. Although more costly, 300 lb. paper is a better choice for more serious watercolour painting projects. As a beginner, 140 lb. paper is a good choice. Look for paper that is acid free because this means the paper does not contain chemicals that will degrade the sheet and cause yellowing later on.
Paper can be purchased in sheets, blocks or pads. The choice is yours. Spiral pads are super for travelling. Sheets of paper need to be cut/torn into the size you want but they are much cheaper to purchase than any other form. I might as well tell you now how to tear a piece of w/c paper. Yes you can simply cut it…but if you want a torn edge, which is so becoming, then take a good fat round brush filled with water and stroke it along the paper. Do this several times for the water to absorb. Then either pulling the paper toward yourself or away from yourself you’ll get a beautiful torn edge. Try both methods…..tearing toward yourself and tearing away from yourself. A different effect both times. Watercolour paper also comes in a block format. The paper’s edges are glued on three sides, thus forming a block of paper. One side is usually left unglued for easy removal from the block. I love working with blocks, more expensive yes but I don’t need to use tape to secure to the placemat (dependent on the size of the block). Should you decide to purchase sheets of paper, cut to the size you wish to use, or a pad of paper in a specific size, then you will always need to use painter’s tape to adhere the paper to your placemat, otherwise the paper will buckle from water absorption.
With most watercolour papers, there is very little difference with the surface texture of one side and the other side. Traditionally, with embossed and watermarked papers, the correct side is the one on which the watermark appears the right way round. Other papers will have a “mold” side. If you hold it up to the light, you will notice that it has a more regular surface texture than the other side. It is a matter of preference as to which side you choose.
Watercolour paper is a good choice for acrylics, charcoal, markers, pen, and especially for mixed media because of its weight. Great for journals since it’s easy to fold.
Boards
There’s art boards, illustration boards, bristol boards, multi-media boards and speciality boards. Basically they are boards with different types of surfaces, they are chosen according to the media chosen. Bristol Board provides two working surfaces, front and back. The better quality bristol boards are archival. Illustration Board is only finished on one surface. An illustration board is intended as a surface for creating artwork that will be scanned or reproduced onto other mediums. Art boards are a fine art paper mounted on an acid-free museum board, ready for framing or mounting.
Marker paper
If using markers, pens, ink, paper, then marker paper is a good choice. It’s smooth, non-bleeding and translucent. It responds well with colour with both permanent and watercolour markers.
Mixed Media Paper
This is my favourite when working with lots of different media in one painting. It has the characteristics of watercolour paper but the nice smooth finish of a drawing paper. I also like the weight of the paper thus holding up to many mediums. It is heavily sized for both wet and dry applications. It also erases well and blends easily if that is what you need. Acrylics, charcoal, watercolours, inks, pastels, markers can all be used on this mixed media paper. Canson has just brought out a spiral bound book of this paper type – look for it – it has a blue cover and has fast become my favourite substrate if I want to work small. I like this paper for journals too since it folds well.
Vellum Paper
This paper is extra smooth and very translucent. It’s resistant to scratching and erasing so it might not be viable for mixed media is those are the techniques you use. It’s a beautiful paper though for tracing, design, penned calligraphy and even drafting.
Paper Terminology
The texture of the surface substrate is a determining factor when working with different media. Texture is also a personal choice. When I’m using my watercolour pencils I may use cold pressed watercolour paper, but when using lots of mediums for my mixed media journals, then I’ll use a heavy hot pressed watercolour paper or the mixed media paper specially made for this. Choice depends on whether you want the substrate to be smooth or rough.
Archival
This is a durable acid-free paper that is also PH balanced. Simply put, non-archival means that it will discolour as well as changing the composition of the substrate. If you want your colours to maintain their richness, choose archival papers.
Sizing
Sizing is the process of adding water-soluble gelatin or starch to the paper when the paper is being made. The amount of sizing used determines how absorbent the paper is. It’s similar to when you purchase a new brush, each brush has sizing in it to protect the brush hairs when travelling. One must wash out the sizing in the brush before using. Sizing in the paper controls how water, and other media penetrate the surface.
~*~*~*~*~*~*~*~*~*~*~*~*~*~*~*~*~*~*~*~*~*~*~*~*~
Marilyn Harris Mills, aka Maer, lives in Ottawa, Ontario, Canada and is passionate, creative and eccentric..at least that’s what her girlfriends tell her!. Marilyn a professional and published artist, designer and teacher. She journey through life with her dogs Lucy and Mozart. Practicing yoga, journalling, meditating & walks in the forest nourish and excite her. Some days she tries to knit but that’s not quite working out! One of her favourite quotes is this one because it so her!”I work in whatever medium likes me at the moment!” (Marc Chagall)
~*~*~*~*~*~*~*~*~*~*~*~*~*~*~*~*~*~*~*~*~*~*~*~*~


Recent Comments