Black Altered Book Page

This article is written by Linda Giese

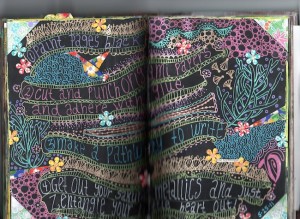
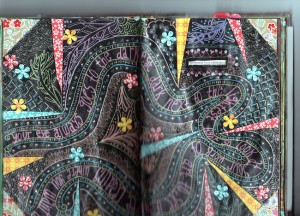
The process and materials for this page spread are fairly easy, but when people turn the page and come upon it, they often say,”Wow!”  It is bright and active with a lot of pattern and color.

Materials & Tools

  • Americana lamp black acrylic paint in the bottle(not tube paint)
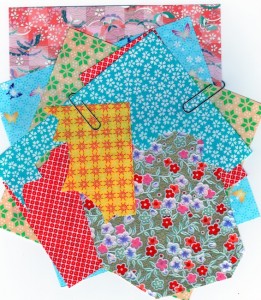
  • 3-5 different sheets(I used some scraps) of origami paper.

mixed media collage

  • Scissors
  • Small punch like heart, flower or star
  • Aleenes tacky glue (or other white glue)
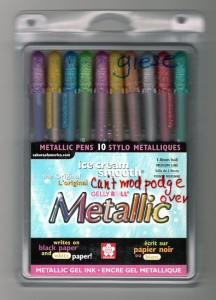
  • Sakura metallic gelly roll pen set, 10 count.
    [Ignore my note on the package, “can’t mod podge over”.  You can work over the pens if you let them dry completely first.]

mixed media pens

Technique

mixed media collage

1. Paint your page spread with black acrylic . Let dry.

2. Cut and punch origami paper and adhere with glue. Origami paper comes in two styles.  The washi papers are more expensive and have a toothy, fibrous texture.  The less expensive papers are like thin wood pulp papers.   For punches the less expensive papers work better.  I used washi for the corners and some cut papers.  I tried to spread the colors around the page with some of the flowers going off the edge.  This way you can punch partial flowers along the edges of your papers to use every pretty bit of them.  I apply a small amount of glue with a toothpick so I don’t get it on the other parts of the background which makes the surface better for the pen work.

3. Draw a pathway (or several of them) with one of your pens to contain your writing.  You can write a favorite quote, something you want to say, or perhaps about your joy in creating art.  I used words I had chosen on the page spread (before I painted with black) to tell me what to write.  One page had the words “the technique” and the other “between two extremes”.  On the technique page I drew the parallel lines over half the page spread and expanded them as needed.

mixed media collage and writing

On the extreme page I wound my lines across both pages and turned and came all the way back across. I used my spears of origami paper to help find the route.  My words happened to cover it all.  I don’t preplan, just start writing, but if they hadn’t filled the space, I may have filled in the line with stars or other symbols.  I don’t really stress over it.

4. The last part is all the fun.  I usually begin with borders along my lines.  These can be as simple or elaborate as you like.  Then I start to fill in areas with my favorite zentangle patterns.I try to repeat patterns in different areas and to repeat colors in the same way.  This helps move your eye around the composition.

There are wonderful zentangle books and many online sites for patterns.  Zentangle was created by artists Rick Roberts and Maria Thomas.  Their website is www. zentangle.com  Other sites I like are www.LifeImitatesDoodles.blogspot.com and TanglePatterns.com

Finishing

I put a coat of gloss varnish over the extreme page spread.  Although I like the look of acrylic paint with varnish over it, I think it detracts from the brightness of the metallic pens.  The technique page has no finish on it.  I hope you have as much fun as I did with this page spread.

I encourage questions and comments!

Hugs to you,

Linda

~*~*~*~*~*~*~*~*~*~*~*~*~*~*~*~*~*~*~*~*~*~*~*~*~

Linda Giese encourages comments, questions, and sharing your art journey at linda.giese@yahoo.com

She teaches classes privately and at a local scrapbook store, The Stamp Addict

~*~*~*~*~*~*~*~*~*~*~*~*~*~*~*~*~*~*~*~*~*~*~*~*~

.
“Stash and Smash” by Cindy Shepard

~ * ~

This article is written by Michelle G. Brown

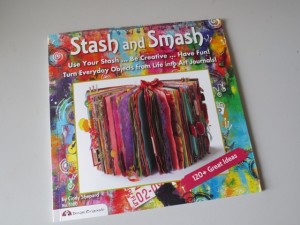
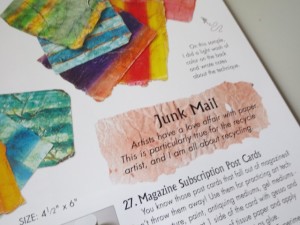
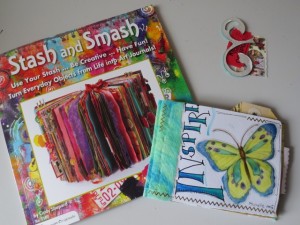
Cindy Shepard has created a fun little book called “Stash and Smash”, published by Design Originals, 2011.

“Stash and Smash”, published by Design Originals, 2011

Cindy encourages us to get out our stash of ephemera and bits and pieces and turn them into a work of art. “It’s time to rescue your memorabilia and present it in a manner that pays due homage to the emotion of the memory”, she says in her introduction. This book leads us through a series of inspiring techniques to help us to just that!

“Stash and Smash”, published by Design Originals, 2011

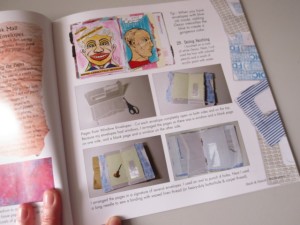
“Stash and Smash” includes over 120 individual techniques, grouped into 19 categories, with a few step-by-step photos, where needed, and a simple overview for the creative prompts that are self-explanatory

“Stash and Smash”, published by Design Originals, 2011

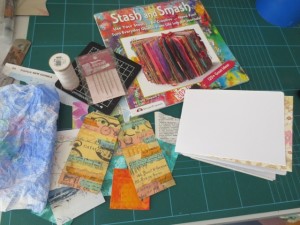
I created by own Stash book with a few sheets of water-colour paper, a few sheets of scrapbooking paper and a pile of ephemera I had lying around.

“Stash and Smash”, published by Design Originals, 2011

Close up of a few pages:

“Stash and Smash”, published by Design Originals, 2011

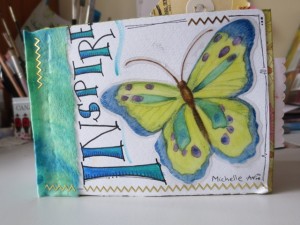
Cover with dried baby wipe, butterfly and doodling. Letters coloured with Derwent Inktense Block and gold sticker trim

“Stash and Smash”, published by Design Originals, 2011

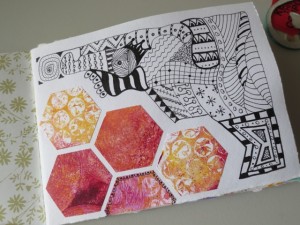
Punched out left over Gelli Prints with a touch of Zentangling

“Stash and Smash”, published by Design Originals, 2011

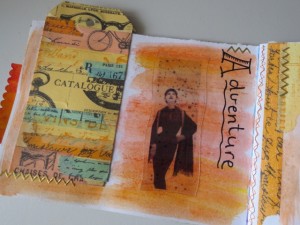
Tag covered with wash tape, background with Derwent Inktense Blocks, with slide transparency and gold sticker trim

“Stash and Smash”, published by Design Originals, 2011

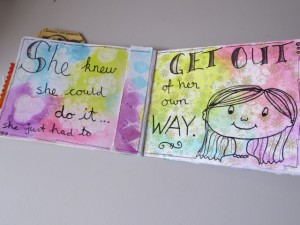
Background with Goosebumps resistance with Gelatoes and quote.

Overall, this is a fun and colourful book that definitely sparked my creativity!

You can see more of Cindy’s work at her blog – Cyndali

“Stash and Smash”, published by Design Originals, 2011

~*~*~*~*~*~*~*~*~*~*~*~*~*~*~*~*~*~*~*~*~*~*~*~*~

Michelle G. Brown is passionate about mixed media art and enjoys sharing her knowledge and techniques with you to allow you to express your own creativity. Michelle understands that many of us have an inner need to create. By learning a few basic techniques the amazing world of mixed media art is accessible to everyone!

Michelle lives with her husband and two boys in Melbourne, Australia.

~*~*~*~*~*~*~*~*~*~*~*~*~*~*~*~*~*~*~*~*~*~*~*~*~

Disclosure: This book was provided by Design Originals for the purpose of review. All opinions are that of the MixedMediaArt team. The links on this page are affiliate links and any purchases help to support the ongoing work by MixedMediaArt.
.

.

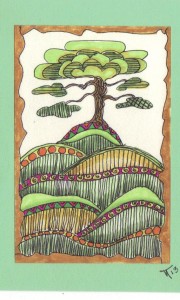
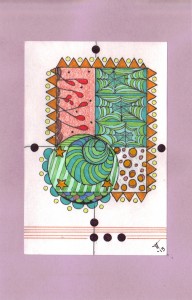
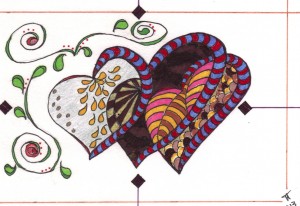
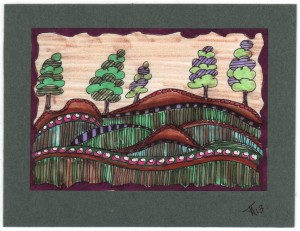
Zentangle Inspired Sketches

Trudy Thayer is a regular contributor to Mixed Media Art and here she shares her story of how she discover the inspiration behind these Zentangle sketches.

Trudy Thayer's zentangles

~*~*~*~*~*~*~*~*~*~*~*~*~*~*~*~*~*~*~*~*~*~*~*~*~

I found zentangles when I was searching for something else online.  They instantly captured my attention with the detail and colors.  I find the level of concentration extremely relaxing  and try to better my skill daily.  I have lots of stencils and some of the art I’ve seen using this is out of this world.  I also use some ideas from these in my quilting and fabric art.

Trudy Thayer's zentangles

I use Micron Ultra Fine point for hair-like tiny tiny work; and Micron Fine for most outlining.  I get my paper in the kids craft section of the stores, a pad with three different types of papers is really cheap and the quality is fine for what I do.  For coloring I use Bic “Mark it”s. The tip is a bit on the fine side which I love.  I use colored pencils for shading and to fill in and make the color seem richer and more full bodied.  And yes, yes, yes…..this is so “zen-like” .

You can read more about Zentangles here

Trudy Thayer's zentangles

~*~*~*~*~*~*~*~*~*~*~*~*~*~*~*~*~*~*~*~*~*~*~*~*~

Trudy Thayer is a 65 year old mom, gramma, veteran, and late-in-life college with a BFA  specialty in graphic design. She lives in Vancouver, Washington and loves the area and the artistic stimulus that abounds there.

~*~*~*~*~*~*~*~*~*~*~*~*~*~*~*~*~*~*~*~*~*~*~*~*~

Trudy Thayer's zentangles

.

.

Using what you know – Mixing your Media

This article has been written by Linda Giese

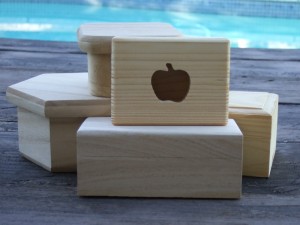
Little boxes provide quick surfaces for a variety of techniques.  People like to collect boxes for storage and for gift giving.  So for those of you who have an annual sale or two, or make your own gifts, boxes are a great source of material.

blank wooden boxes for mixed media collage

No matter which techniques you’ve perfected, or want to practice, try it on a box.  But for wonderful contrast and creating interest, combine two techniques on one box.  Boxes are divided already for you into tops and bottoms – how convenient!

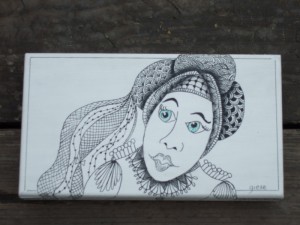
As I was prepping a box for painting or collage, I used white gesso as a sealer and undercoat.  Well, that bright white just called to me to zentangle.  I had Sandy Steen Bartholomew’s book “Totally Tangled”  handy and I’d always loved that face on the cover.

Sandy Steen Bartholomew's book "Totally Tangles"

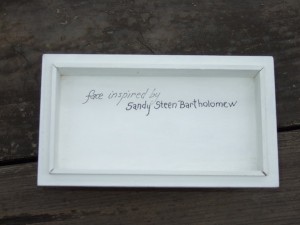
Now faces are not my strong suit, so I copied hers to have a successful outcome.  (Just remember to give the original artist credit.  I put this information inside the box lid.) I set the box aside for months not wanting to mess up that beautiful face by not so great art work.  Sometimes you just have to be in the right mood to create.

Using the inside of the lid for artistic credits

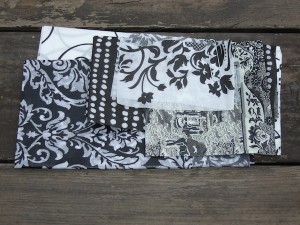
But now the sale was looming and I had to produce and finish projects I had started.  I came across this box.  It would take a lot of time to zentangle the whole thing!  I was going through my stash of napkins to share with a new student.  That’s what gave me the idea to pull out black and white napkins and tissues.

Black and white napkins

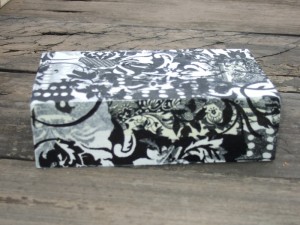
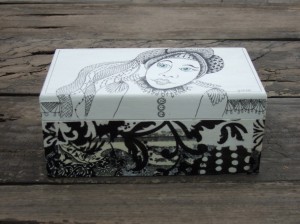
One of the secrets to combining two techniques successfully is to think of the color palette.  Since my box was white with black pen work for the zentangles, I had a natural fit. The same or compatible colors should work for a successful combination.  If I used the napkins and tissues to collage the bottom of the box, I could finish my project much quicker. I used DecouPage by Americana to apply the napkins and tissues.  I began with one napkin and tore it into pieces after separating out the white layers. I put the straight edges of the napkins along the straight edges of the box.  I applied the first pattern around the box on the four sides and the bottom.  Then I started with the second napkin the same manner.  I continued with the other napkin and the tissues until the entire box bottom was covered.

base of gift box covered with black and white napkins

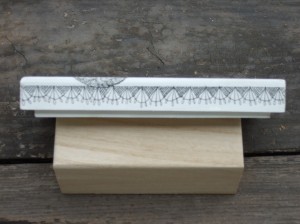
It looked so pretty. It reminded me of a dining room with chair rail separating the smooth painted upper wall and the textured wallpapered bottom wall. I was anxious to finish the zentangled top.  Nothing like a bit of excitement for inspiration!  I used some of my favorite patterns for each segment.   I used a micron pen for the zentangles.   The lid needed a border to make it look finished.  I drew a line on the top using a ruler to frame my woman.  The side still looked too plain.  The lace pattern was just the thing and tied it to the woman as I had used it on her dress.

decorating the edge of the box lid

I decided to use just a bit of color for the eyes. I used a green IDentipen on the smaller tip to make the lines for the iris.

adding color to zentangle face

I used black acrylic paint and a floating technique for shading.  I found to my dismay on another project that if you plan to varnish over your work, pencil shading may spread over the entire surface instead of staying where you want it. The top was then finished with two coats of Delta Ceramcoat Satin Varnish.  This is also why it is very important to use the right pens.  The Sakura IDentipens and Sakura Micron pens won’t bleed when you varnish over them.   If you are unsure about your pens, be sure to test them in advance on something other than your project.

black and white zentangle box

As a mixed media artist, I’m sure you have several techniques in your repetoire.  How about combining them on a special box?  This turned out so pretty that it may not go into my sale.  If you are like me and sell or give away the majority of your art, every now and them you surprise yourself and find a piece hard to part with.  That’s when your art becomes a gift to yourself  or perhaps a favored family member.  Now go grab some boxes and start playing!

~*~*~*~*~*~*~*~*~*~*~*~*~*~*~*~*~*~*~*~*~*~*~*~*~

Linda Giese has an altered book in the current issue of ArtJournaling, Autumn 2012.
She welcomes emails, questions and comments at linda.giese@yahoo.com

~*~*~*~*~*~*~*~*~*~*~*~*~*~*~*~*~*~*~*~*~*~*~*~*~