Handmade Candle Holder

~ * ~

This article is written by Sandra Parés

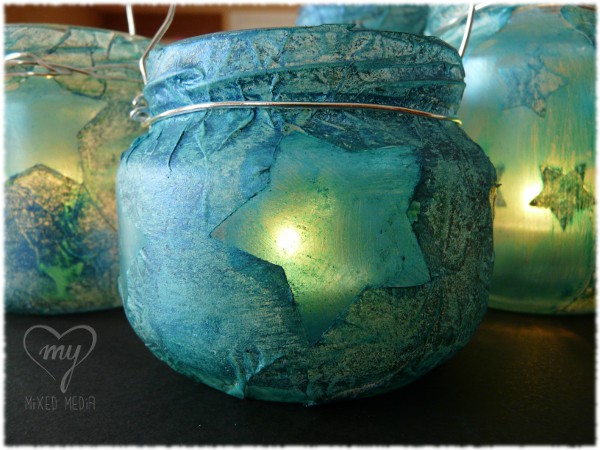
Today I am going to show you how to make a candle holder with a magic light to illuminate our summer nights.

Candle holders with a magic light for our most special nights

The supplies I will use are the following:

  • An open top container glass (to make these candle holders usually I use recycled glass jars)
  • white tissue paper
  • the big shot and a star die
  • 8”x10” Gelli Plate
  • a brayer
  • black acrylic paint
  • a stencil
  • extra heavy gel medium (gloss)
  • 2 paintbrushes
  • Facetten-Lack metallic platin Vica Deco
  • a makeup brush
  • Primary Elements of LuminArte
  • hairspray
  • wire and a candle

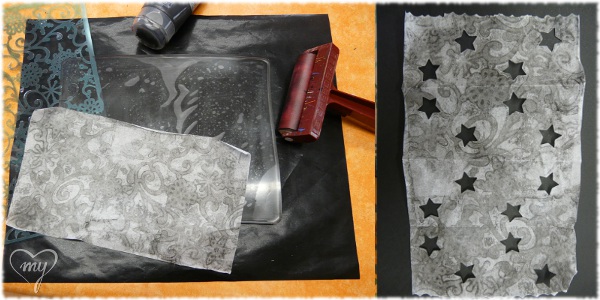
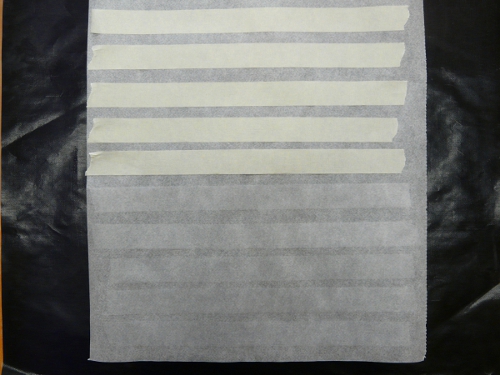
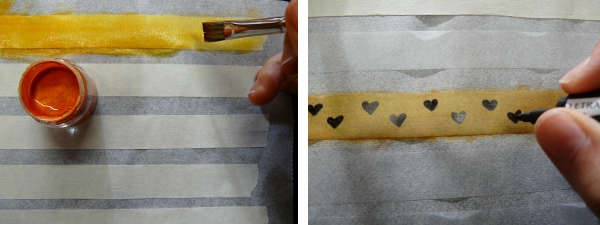
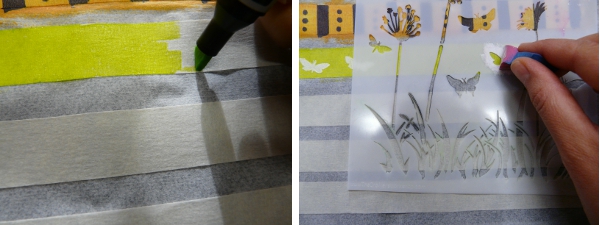
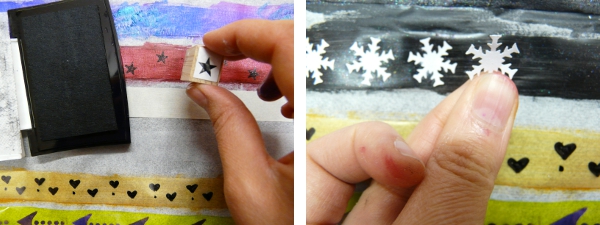
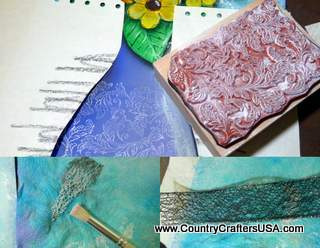
First of all we will start using the Gelli Plate: we will use the brayer to put the black paint over the stencil, then we will press the stencil over the gelli plate. With this step we can print the mark of the stencil over the gelli plate. Then we will take a piece of tissue paper, it must be large enough to surround our glass jar. And we put the tissue paper over the gelli plate to print the texture. With this step, the mark of the stencil will print in our tissue paper.

And with the Big Shot and the star die we will open a few holes in our piece of tissue paper.

Create a pattern with black ink and gelli plate over the tissue paper

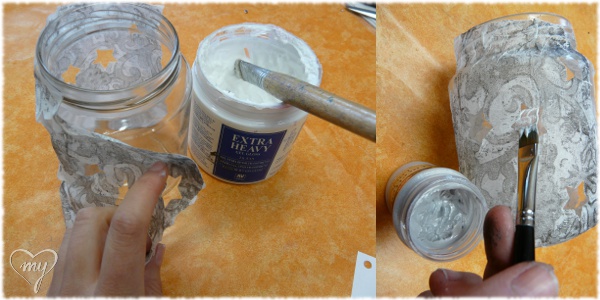
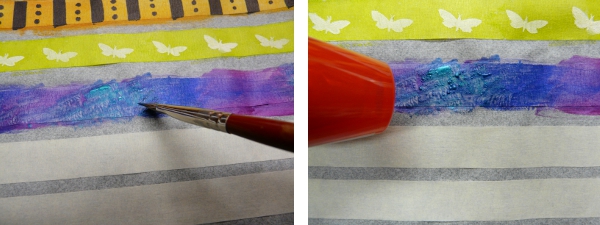
Then we will paste with extra heavy gel medium the tissue paper around our glass jar and we will leave it to dry. Then we will paint the holes with Facetten-Lack to give a touch translucent at the glass. For this step, also you can use any paint or paste that allows you to do this translucent effect.

Paste the tissue paper around the glass jar

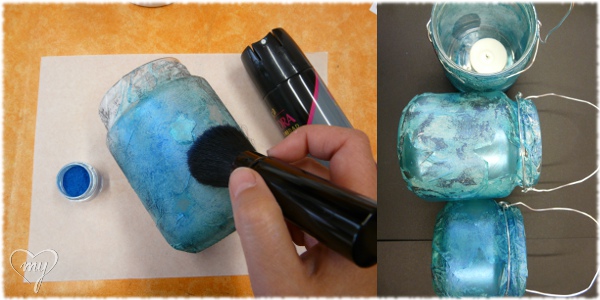
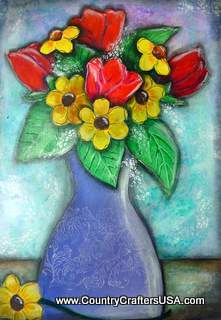
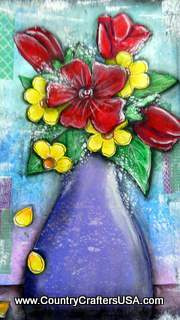
Once dried we can add the color. I will paint with the Primary Elements of LuminArte, I will use the pigment directly. First of all we have to spray the entire glass jar with hairspray, you will see how the jar is wet. Taking advantage of this dampness, we will catch the Primary Elements pigments (the color or colors that you want) with a makeup brush and we will paint with them making circles. When we run out of pigment or hairspray dries, we will go back to add more product to get the whole jar painted.

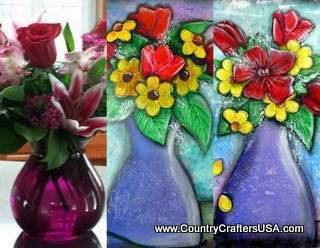
Finally, if we want to hang it somewhere, we only need to put some wire around the jar. And don’t forget to put the candle inside!

Painting with Primary Elements the whole glass jar

You will see that the result will be beautiful and shining: a candle holder with a magic light for our most special nights. The first time I used these candle holders was at my craft stop in the “Enchanted Night“, the shopping night from my city, and they produced an amazing shine!

Candle holders with a magic light for our most special nights

~*~*~*~*~*~*~*~*~*~*~*~*~*~*~*~*~*~*~*~*~*~*~*~*~

Sandra Parés loves working with mixed media! The colors and textures leave her amazed and she enjoys creating and getting their hands dirty with paint and gesso! On her site My mixed media you can find a mixed media online store, art and craft products, mixed media workshops in Spanish, tutorials, ideas and mixed media techniques.

~*~*~*~*~*~*~*~*~*~*~*~*~*~*~*~*~*~*~*~*~*~*~*~*~

.

.

“Stash and Smash” by Cindy Shepard

~ * ~

This article is written by Michelle G. Brown

Cindy Shepard has created a fun little book called “Stash and Smash”, published by Design Originals, 2011.

“Stash and Smash”, published by Design Originals, 2011

Cindy encourages us to get out our stash of ephemera and bits and pieces and turn them into a work of art. “It’s time to rescue your memorabilia and present it in a manner that pays due homage to the emotion of the memory”, she says in her introduction. This book leads us through a series of inspiring techniques to help us to just that!

“Stash and Smash”, published by Design Originals, 2011

“Stash and Smash” includes over 120 individual techniques, grouped into 19 categories, with a few step-by-step photos, where needed, and a simple overview for the creative prompts that are self-explanatory

“Stash and Smash”, published by Design Originals, 2011

I created by own Stash book with a few sheets of water-colour paper, a few sheets of scrapbooking paper and a pile of ephemera I had lying around.

“Stash and Smash”, published by Design Originals, 2011

Close up of a few pages:

“Stash and Smash”, published by Design Originals, 2011

Cover with dried baby wipe, butterfly and doodling. Letters coloured with Derwent Inktense Block and gold sticker trim

“Stash and Smash”, published by Design Originals, 2011

Punched out left over Gelli Prints with a touch of Zentangling

“Stash and Smash”, published by Design Originals, 2011

Tag covered with wash tape, background with Derwent Inktense Blocks, with slide transparency and gold sticker trim

“Stash and Smash”, published by Design Originals, 2011

Background with Goosebumps resistance with Gelatoes and quote.

Overall, this is a fun and colourful book that definitely sparked my creativity!

You can see more of Cindy’s work at her blog – Cyndali

“Stash and Smash”, published by Design Originals, 2011

~*~*~*~*~*~*~*~*~*~*~*~*~*~*~*~*~*~*~*~*~*~*~*~*~

Michelle G. Brown is passionate about mixed media art and enjoys sharing her knowledge and techniques with you to allow you to express your own creativity. Michelle understands that many of us have an inner need to create. By learning a few basic techniques the amazing world of mixed media art is accessible to everyone!

Michelle lives with her husband and two boys in Melbourne, Australia.

~*~*~*~*~*~*~*~*~*~*~*~*~*~*~*~*~*~*~*~*~*~*~*~*~

Disclosure: This book was provided by Design Originals for the purpose of review. All opinions are that of the MixedMediaArt team. The links on this page are affiliate links and any purchases help to support the ongoing work by MixedMediaArt.
.

.

5 Easy Ways to Make Your Own Tape

~ * ~

This article is written by Sandra Parés

I love mixed media because it allows me to create my own decorations and customize to my personal style. Today we will see how we can make our own washi tape in an easy and simple way to incorporate it into our scrapbooking or mixed media projects.

The supplies I will use are the following: masking tape or repositionable and transparent tape (with transparent tape, at the end our tape will have more transparency), some Silks Acrylic Glaze , some permanent markers like Promarker, acrylic paint, heat gun, templates, some stamps, black permanent ink like Stazon, paper figures punched and 1 piece of baking paper.

Before we start, we have to prepare our tape. We cut a piece of baking paper and paste it a few strips of masking tape or repositionable tape. You will see that the tape isn’t paste good on the baking paper. The advantage is that we can work well with paints and, in addition, the tape retains good its adherence so then we can stick it right in our projects.

Put strips of tape on the baking paper

1st way

We choose a color of Silks Acrylic Glaze and with a brush we paint the whole tape to give it a basic background color. Silks Acrylic Glaze gives us a good transparency and they add a nice shiny appearance to the tape. When the paint has dried (Silks dry very fast) with a permanent marker we draw a continuous pattern in our tape. And our first whasi tape is ready!

Painting with Silks Acrylic Glaze and draw with Promarker

2nd way

We choose a Promarker color to paint the background of the tape. The Promarker pen also paints with transparency so it is ideal for quick backgrounds in our handmade whasi tapes. When we have our background ready, we choose a template and we can stencil a pattern with acrylic paint throughout the tape. When it dries, we already have another type of whasi tape.

Painting with Promarker and stenciling onto stencil with acrylic paint

3rd way

For me one of the easiest and funniest! This time we will use different Silks Acrylic Glaze to paint the background. We have to paint with a large quantity of paint in the tape, and we can mix the colors. It is important that we create paint lumps, I mean, we need areas where we have an accumulation of paint. Before the paint dries, we use the heat gun over the paint, we put the hot air very near the paint lumps. Then you will see that paint makes bubbles and when it dries (and it dries quickly) it has a very original texture.

Painting with Silks Acrylic Glaze and warming lumps of paint with heat gun.

4th way

In this case we also do a background with paint or permanent marker. After it dries, we stamp a stamp with a permanent ink making again a pattern throughout the tape.

5th way

And in the last easy way to make a whasi tape, again we do a background with paint or permanent marker. And in this case we paste small paper figures (mine are made with die cutting shapes) in our tape with matte gel medium.

Painting with Silks Acrylic Glaze, stamping and pasting a paper figure.

And here you can see the final result:

Paper tape decorated with mixed media

~*~*~*~*~*~*~*~*~*~*~*~*~*~*~*~*~*~*~*~*~*~*~*~*~

Author bio: Sandra Parés loves working with mixed media! The colors and textures leave her amazed and she enjoys creating and getting their hands dirty with paint and gesso! On her site My mixed media you can find a mixed media online store, mixed media workshops in Spanish, tutorials, ideas and mixed media techniques.

~*~*~*~*~*~*~*~*~*~*~*~*~*~*~*~*~*~*~*~*~*~*~*~*~

.

.

Spring Bouquet Inspired Mixed Media

~ * ~

This article is written by Tamara Dinius Spring Bouquets

Inspiration comes in many forms, shapes, and sizes. The inspiration for this artwork came from a floral delivery I received. You will notice that the original floral bouquet is quite different from my finished floral still-life piece, but I think that is what art is all about. We take something we like, use it to inspire us, and turn it into our own individual art style. I completed two pieces at the same time, with quite different results. We will be focusing our attention on the vase in the middle of the above photo for this step-by-step process.

Start with watercolor paper (any brand will work) cut to approximately 8×10 inches. I used Dylusion sprays in Vibrant Turquoise, London Blue, and Crushed Grape. I sprayed the Dylusion sprays randomly on the paper and then rolled my paper towel roll over them. The imprint on the paper is from the design on my paper towels.

Background using Dylusion Sprays by Tamara Dinius

To set the Dylusion sprays I used a Krylon clear satin spray, Next, I applied a thin coat of Liquitex Matte Medium.

Adding a vase using scrapbook paper and shading with acrylic paint.

Pick out a piece of paper for the vase. Cut out your shape and adhere it to the paper (I used Golden Heavy Gel Matte Medium). Apply a thin coat of lavender/purple in three different hues. Concentrate the darkest hue on one side moving to the lightest on the opposite side.

Shadow with charcoal

In this step we will be adding some shadows with charcoal pencil. I first lay in the shadow with the pencil. I soften the edges by using my fingers or a blending stump. At this point, we will also add some green foliage to lay our flowers and leaves on. Be loose with this process, as most of the foliage will be covered up.

Flowers and leaves in rubber stamps

These are the hand-carved stamps I used for my project. Any leaf or flower stamps you have will work for this project. You can also freehand your designs if you prefer.

Adding depth to your rubber stamped images

Once stamped (in your desired colors) I used Derwent Inktense Pencils and Derwent Inktense Blocks to color in the leaves and flowers. Use varying hues of your colors to add depth to the flowers and leaves.

Nair Cloth Strips used in Mixed Media

I recently cleaned out the bathroom cupboard and found Nair Cloth Strips. I thought I would be adventurous and use them in this project. I wanted to see how they would hold up to paint, ink, and various medium. I really like how velvety they were and how they brought out the intensity of the colors.

Flowers cut out and ready to adhere to your mixed media background

Cut out the leaves and flowers.

Adding your flowers and leaves to your vase

Adhere your flowers and leaves onto the foliage (I used Golden Heavy Gel Matte Medium).

Shadow adds depth to your mixed media project

Add a dark shade (I used Delta Black/Green Acrylic) to indicate items that lie in front of another. You will notice that the daisy lies in front of the leaf and the rose. This is indicated by adding a shadow to the outside edge of the daisy.

Black and white Sharpies work well for adding highlights and defining your mixed media

Add highlights using a water-based Sharpie white paint pen or similar pen. Add an outline using a black Sharpie Ultra-fine or similar pen.

Complete your project using stamped images and stencils

Using paper, create a mask for your project so only the vase is visible. Add a design of your choice in a light lavender. You can also add baby’s breath by using a stencil or sponge. I used a piece of ribbon as a stencil. I cut my shape out of the wired ribbon shown in the photo.

End result is ready for framing.

Add a horizontal line with a dark color wash to indicate a table or counter top. I used Derwent Inktense Blocks.

Congratulations! You have created a wonderful mixed media spring bouquet suitable for framing.

Second mixed media painting depicting spring floral bouquet

This is the second version I created using the same techniques. I added Washi Tape and white paint to the background. Although the two pieces are similar, they are also quite different. I like both of them equally and will be making prints from them to sell on my website.

~*~*~*~*~*~*~*~*~*~*~*~*~*~*~*~*~*~*~*~*~*~*~*~*~

Tamara Dinius lives in the Pacific Northwest with her husband and chocolate lab. She has two grown daughters who make her life meaningful. They support her, ground her, embrace her, and are amazing people in their own right.

Her love for mixed media has taken over most aspects of her creative journey. She believes mixed media allows for a broad range of styles and anyone can find success in this form of artistic expression.

You can find more of Tamara’s work, and on her website www.countrycraftersusa.com or via her Facebook www.facebook.com/countrycraftersUSA

~*~*~*~*~*~*~*~*~*~*~*~*~*~*~*~*~*~*~*~*~*~*~*~*~

.

.