Transparent Stamped Collage Layer Technique

~ * ~

This article was written by Elaine Brady Smith

I love adding collage to my mixed media art whether it’s in journals or on a piece that will hang on the wall. The collage papers that I make often spark ideas and I’m excited to mix and match to see how I can combine the layers. I am always prepared to get working when I have papers ready and on hand, so one of the things I do on a regular basis is to have paper making days when all I do for the day is make a whole lot of papers! Then on art making days, that big ole pile of collage paper just beckons to me to dive in and create something awesome!

One of my favorite go-to methods is adding transparent collage layers to my work. This adds depth and history which creates a more interesting piece of art. I can go crazy layering patterns, colors, and designs that all allow what is underneath to show through. This is added as a second stage, so after I’ve collaged or painted a start, I am ready to add the first transparent layer. There are many ways to add transparent layers to your work. The one I will talk about today is stamped layers on tissue paper that will be made transparent. When the process is complete, only the printed areas remain visible. It’s a lot of fun, so let’s get started!

Layering patterns and designs with transparent stamped collage layers.

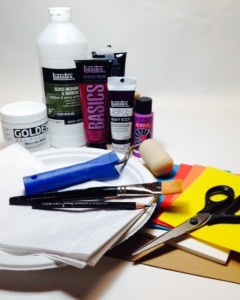
Here is the supply list for this project:

Cardboard, Mat board, or Foam Core Board

Fun Foam

Pencil or Fine Point Marker

Scissors or XActo Knife

Gel Medium

White Tissue Paper

Sponge Roller

Large Paper Plate

Acrylic Paint (can be cheap 2oz bottles or tube paint)

Wax Paper

Large White Trash Bag (not the flex bags, they have pattern on them)

Masking Tape

1” Flat Paint Brush

Plastic or Paper Cup

Liquetex Gloss Medium & Varnish

Layering patterns and designs with transparent stamped collage layers.

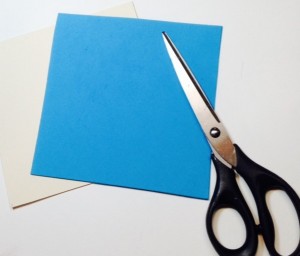
Cut both the board and the fun foam to the same size. I have cut mine to 5” square.

Layering patterns and designs with transparent stamped collage layers.

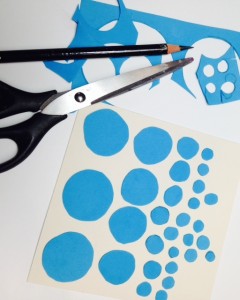
Draw your design on the fun foam with pencil or marker and cut out the pieces with scissors (or you can cut them out with an XActo knife).

Layering patterns and designs with transparent stamped collage layers.

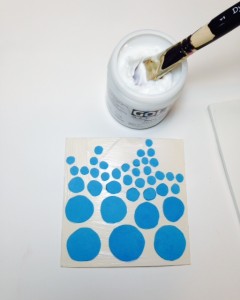
Glue the pieces to the board by brushing a layer of gel medium over the board surface with a paint brush, and then place the pieces where you want them. Press the pieces down and make sure each piece is secured with gel medium. Wipe excess gel medium and allow the stamp to dry.

Layering patterns and designs with transparent stamped collage layers.

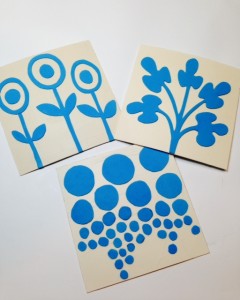
I have made 3 different stamps that I plan to print and then use in a collage.

Layering patterns and designs with transparent stamped collage layers.

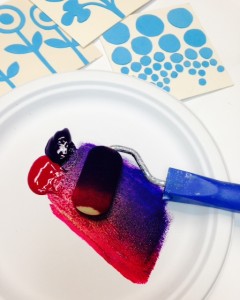
Place 1 or 2 colors of acrylic paint on one side of a paper plate and if you are using multiple colors, place them side by side on the plate. Tip the sponge roller into your paint and begin rolling out from the paint piles until the sponge roller is filled evenly with paint. This takes a good amount of paint. If you are using 2 colors, roll in a slightly left and right motion to mix the colors in the middle of the roller21.

Layering patterns and designs with transparent stamped collage layers.

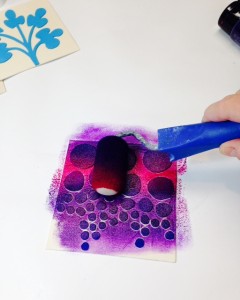
Place your stamp foam side up and roll the paint filled roller over it until it looks like the stamp is covered sufficiently with paint.

Layering patterns and designs with transparent stamped collage layers.

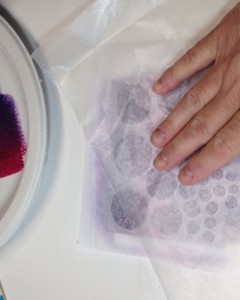
With the stamp facing up, place a piece of white tissue paper over the stamp. Place a piece of wax paper on top of the tissue paper and smooth out with your fingers making sure the tissue has made good contact with the stamp.

Layering patterns and designs with transparent stamped collage layers.

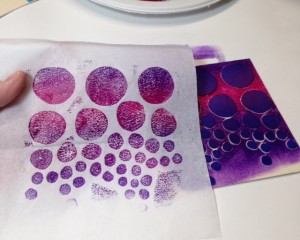
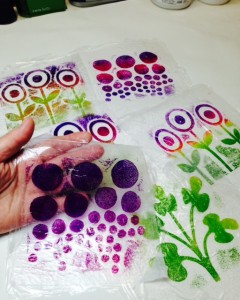
Remove the wax paper and gently pull the tissue off the stamp to reveal your image. You can repeat this process to produce a “ghost” image with another piece of tissue paper, or spritz the stamp with water from a spray bottle to revive the remaining paint. Each print will turn out slightly different as you print.

Layering patterns and designs with transparent stamped collage layers.

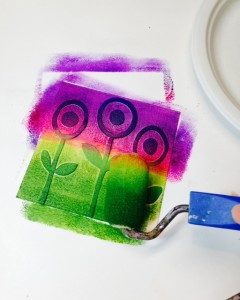
You can experiment and play with the paint colors. Here I have rolled two shades of purple on the top of the stamp with a sponge roller and with another sponge roller, added two shades of green to the bottom of the stamp.

Layering patterns and designs with transparent stamped collage layers.

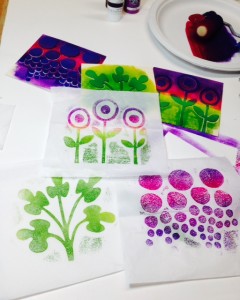
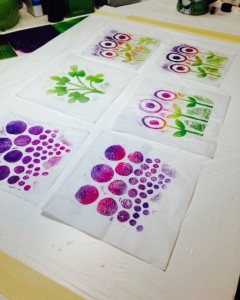
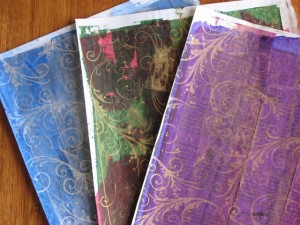
I’ve have made a variety of prints from the 3 stamps I made, so that I have multiple choices when I am ready to collage.

Layering patterns and designs with transparent stamped collage layers.

After your prints are dry, lay them on a white trash bag that has been taped flat to a hard surface such as a table top or board.

Layering patterns and designs with transparent stamped collage layers.

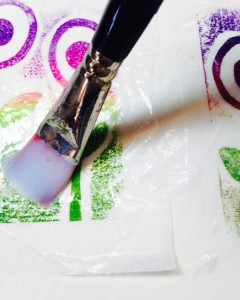
Put a small amount of Liquetex Gloss Medium and Varnish in a plastic or paper cup. With a paint brush begin to generously paint the entire surface of the printed tissue paper with the medium. You can leave a tiny corner of the tissue paper unpainted to use as a lifting point. Allow this to dry overnight.

Layering patterns and designs with transparent stamped collage layers.

When the medium is dry, carefully lift the printed tissue from the plastic bag. It will be completely transparent, except for the parts that have been printed with the paint.

Layering patterns and designs with transparent stamped collage layers.

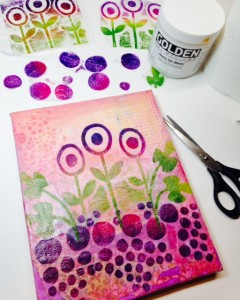
You can now add the transparent collage pieces to your art. My piece was done on an 8” x 10” stretched canvas. I started with paint, collage layers and a bit of stenciling and when the initial layers were dry; I cut and glued my transparent prints down with gel medium. You can add many of these transparent prints with different patterns to your piece to get a unique effect. Try combining different patterns or the same pattern in a variety of positions or colors.

Layering patterns and designs with transparent stamped collage layers. Make your own stamped layers! Learn how to create your own original transparent collage papers! This is an inexpensive technique using Fun Foam and acrylic paint to print on tissue paper that will then be made transparent. Your prints can be layered in your mixed media art producing depth and interest in your art.

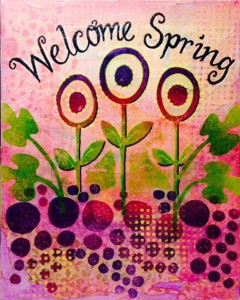
Here is my completed collage that I finished with Sharpie paint pens and some additional stencil layers.

I hope you have fun playing with this technique!!!

~*~*~*~*~*~*~*~*~*~*~*~*~*~*~*~*~*~*~*~*~*~*~*~*~

Author bio:

Elaine Brady Smith loves creating acrylic mixed media and encaustic collages. Key ingredients in her work are vintage papers and her own collage papers made with repetitive marks, simplistic shapes and transparent layers.  She also enjoys other art mediums such as art journaling, oil painting and colored pencil drawing in addition to writing, teaching and spending time with her family. Find more on her website: elainebradysmith.com and on Facebook: Elaine Brady Smith Art

~*~*~*~*~*~*~*~*~*~*~*~*~*~*~*~*~*~*~*~*~*~*~*~*~

.

.
Welcome to Mixed Media Arts

If you are looking for inspiration and great mixed media ideas, then you have come to the right place!

Mixed Media Arts covers such a range of topics and techniques:

Have a look around and feed your inner muse – you never know when inspiration will hit. And remember; everyone can create!

To receive regular updates, special offers and freebies, join the Mixed Media Art community by entering your name and email over on the right to join our mailing list.  As a special bonus, you will also receive the free report on the Top 10 Tools and Materials you need to get started with Mixed Media Arts.

Happy Creating!
Mixed Media Art Team

Creating your own background

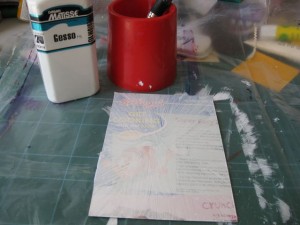
Start with a piece of cardboard – this one is from a cereal box, cut into quarters. Then a layer of gesso is added and allowed to dry.

Starting Materials
Gesso layer

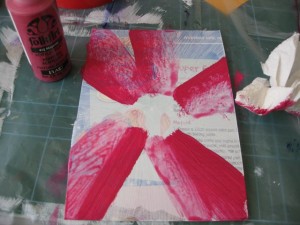
Add the first colour. The intention here was to have the colour radiating out and fading around the circle. The gesso underneath allows the paint to be thinned out and removed, using a dabbing motion with a cloth.

IMG_0281

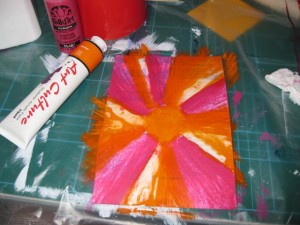
Then the second colour was added.

IMG_0283

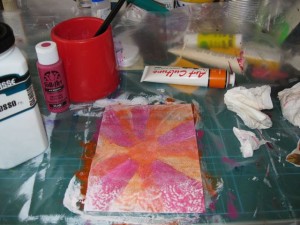
As this colour combination was a little bright, gesso was then added to tone it down and tie the pattern together. Again this layer was blotted to remove some of the gesso to make it thinner in the centre.

IMG_0286

To complete the background, some stamping was added.

IMG_0292

Then your background is ready to add images, text and embellishments.

MMM_Colour

All of these pieces were stuck on with double sided tape. Images from Go Make Something.

Happy Creating!

 Mixed Media Backgrounds with the Credit Card Painting Technique

Creating your own backgrounds is an exciting part of any mixed media art project. While there are many commercially available papers and products out there, creating your own background from scratch is a great way to ensure no one else will have a project looking like yours.Making your own backgrounds also allows you to tune the colours to match your theme.

Credit card painting backgrounds

Credit card painting backgrounds

Background papers can be made in a variety of ways. Today will concentrate on using the credit card painting technique. I’m not sure who created this technique, but the likes of Lisa Vollrath and others have all added to my knowledge and inspired me to give it a go.

The materials we need are items you will have around the house; base paper(mine has text on it from an old conference papers book), two different coloured paints, one metallic paint and an OLD credit card or store card or any other small, flexible plastic card. I read somewhere that using your real credit card with the paints will wreck the magnetic strip on the back, so please do not use your current card! We will also need some backing newsprint or plastic, to protect our working surface from the paint.

The credit card painting technique can create lots of backgrounds in a short space of time, so be prepared with extra text paper and somewhere to put them flat to dry, before you begin to get dirty. Lay out your work surface and place the text sheets on top.Give the paints a good shake and apply a line of the first of the two paints, directly onto the top of the page. Hold the top of the page with one hand and use the credit card in the other. Hold it angled towards you and carefully drag in down the length of the page. When you’ve reached the bottom of the text page, lift the credit card and move across the the next bit of paint. Again, angle it towards you and carefully drag in down the length of the page, going parallel to the first strip on paint. Continue until you’ve covered the text page or run out of paint. Sit aside this first paint layer to dry. Move onto the next sheet, with the same paint.

As you experiment with the mixed media technique, you will find different paints have different runniness (or viscosity) and this will vary how well it spreads down the page.Also the different in angles the credit card is held will change the effect that is created. These are the fun aspects of this technique as each attempt produces a slightly different result.

Once the first layer of paint is dry it is time to repeat the process with the second colour or shade. Depending on how different the two colours are will alter the results. If the second colour is a lot darker than the first, then I often apply it sparingly, so the colour comes out patchy,rather than having the second colour obscuring all of the first colour.  Once more, give the paint a good shake and apply a line of the paint directly across the top of the page. Hold the paper with one hand and use the credit card in the other. Hold it angled towards you and carefully drag in down the length of the page, then move across the the next bit of paint.  Drag the card down the length of the page, going parallel to the first strip on paint. Sit aside to dry.

The third, metallic layer of this technique is often what bring this background to life.Spot the gold or silver or bronze paint across the top of the page and lightly drag the credit card down the page. The metallic paint brings a sparkle to the painted paper that adds a wonderful finishing touch.

So that’s the basics for creating a mixed media background using the credit card painting technique. Feel free to experiment with different paint and paper combinations to see what wonderful creations you can make. You can even elaborate on these painted sheets by adding some stamping, or adhering them straight on to your next mixed media art project.

Happy creating!