How to Make an Accordion Book

~ * ~

This article is written by Melanie Statnick

Recently I have noticed the trend in creating our own style of journals, mini books, according books and more. Pinterest is full of inspired artists in the present and in the past each with their own style. Some tell a story and others like the accordion book, are one long piece of art. This can be done in a horizontal or vertical fashion. It is up to your imagination. I had more fun with this book then I thought and it became somewhat addictive. Here is how to make yours, in a fast and simple way in case you’re making art at the speed of life.  You can always add more and take as much time as you need.

How to Make an Accordion Book with your own style

Supply list:

Watercolor paper 140lbs cold press

Cardboard (craft) or heavy card stock

Watercolors

Gel Medium

Stamps and/or other word stickers
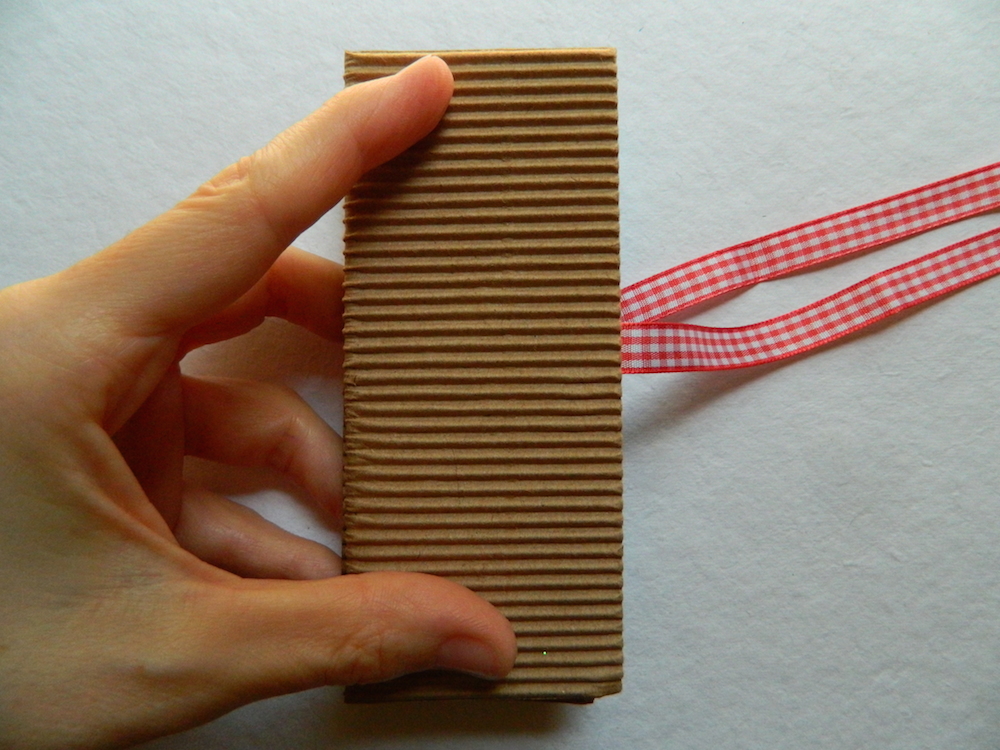
Ribbon

Instructions

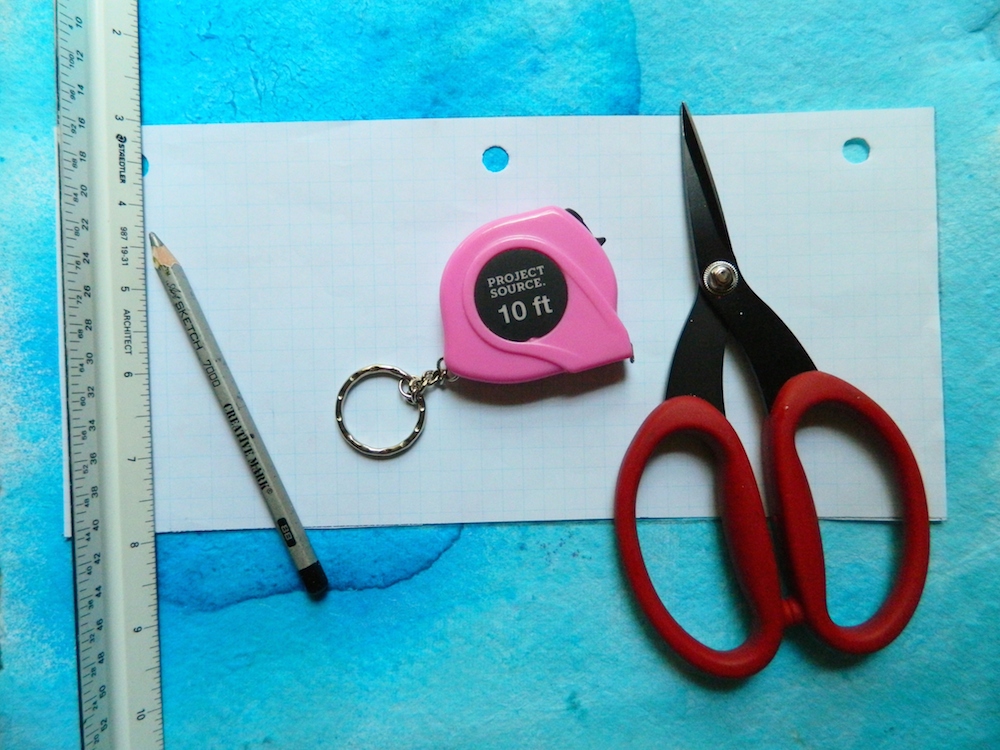
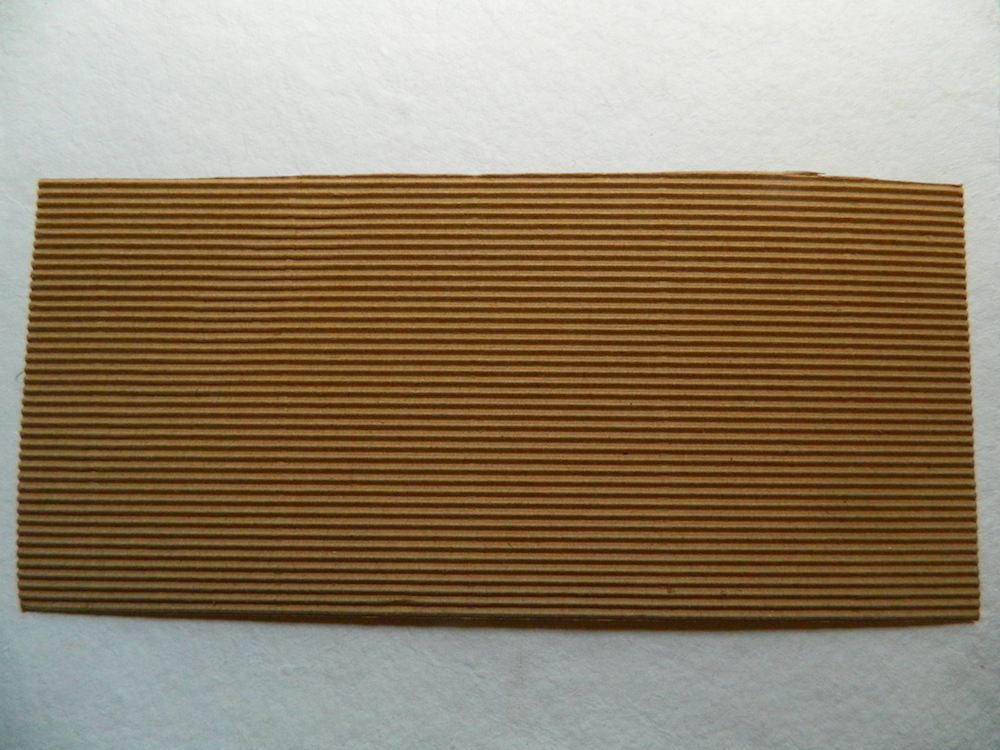
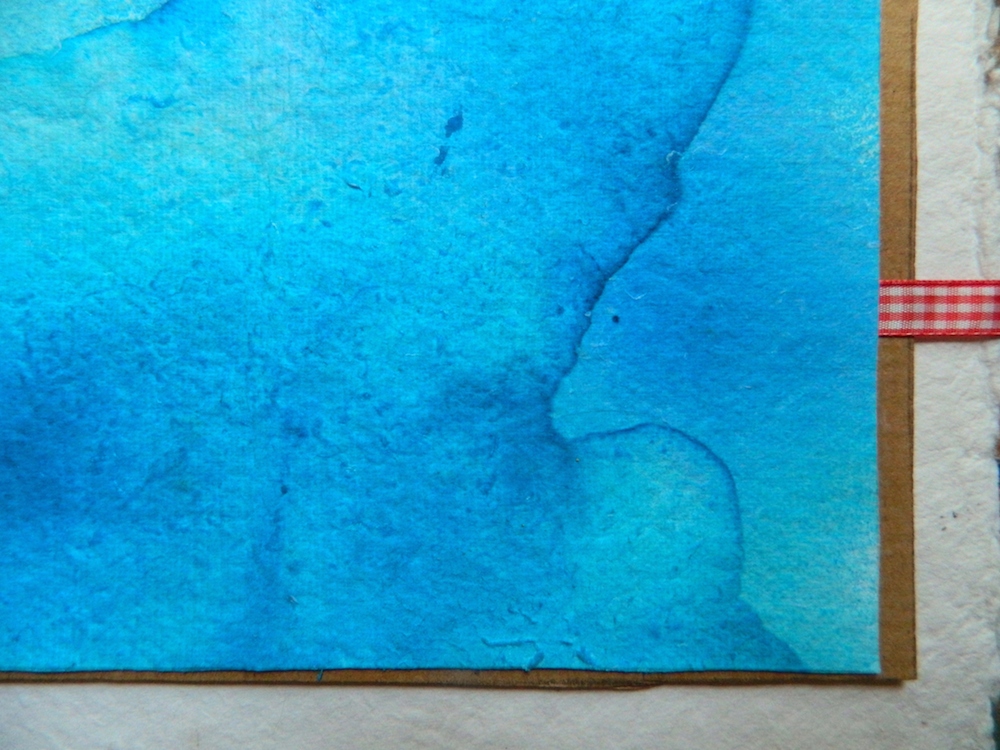
Begin with measuring your watercolor paper approx. 11”x4”.  You can go as big or as little as you want. Measure your cardboard the same to a bit larger 12 x 5”.  Paint your watercolor paper any way you wish.

How to Make an Accordion Book with your own style

How to Make an Accordion Book with your own style

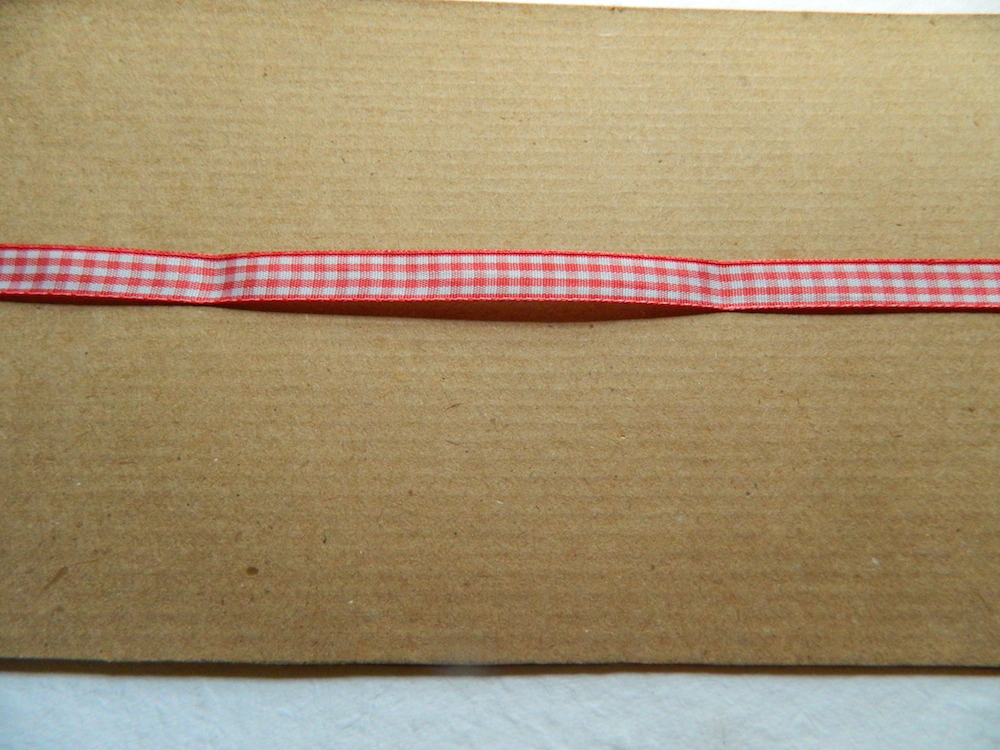
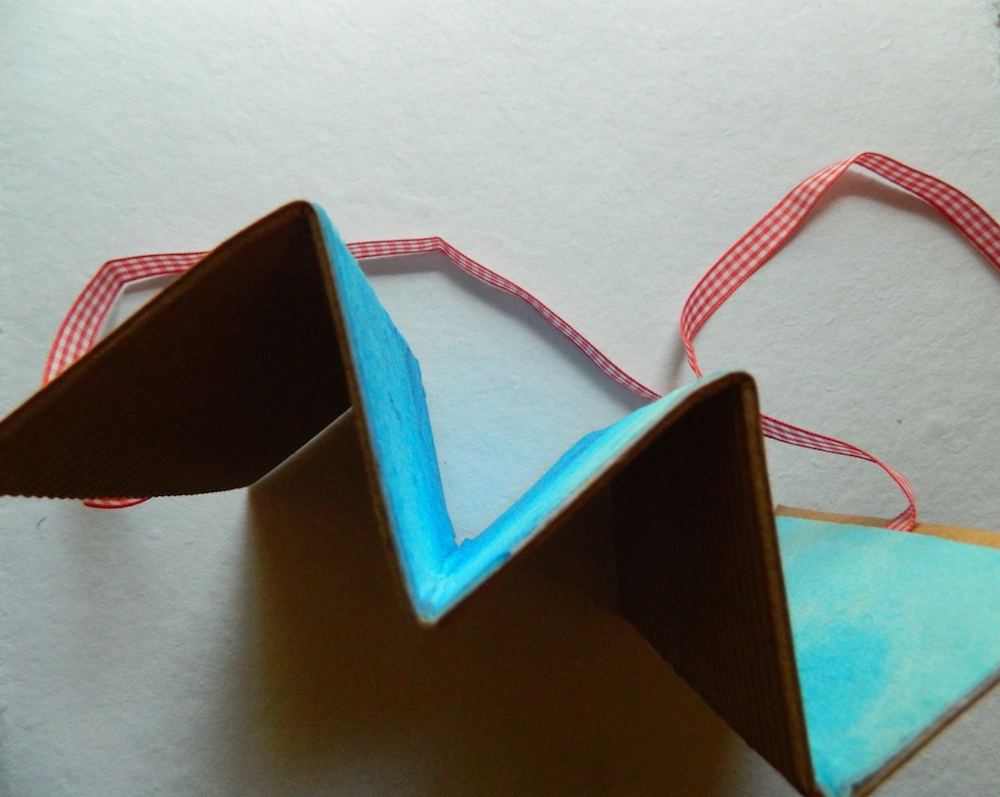
Apply gel medium (glue) to the cardboard piece you’ve cut. This is the cover of your book. Lay your ribbon down onto the glued cardboard, then lay your painted watercolor paper on top of your ribbon. You may want to use a brayer to make sure all your corners are flat and everything is glued well.

How to Make an Accordion Book with your own style

How to Make an Accordion Book with your own style

Begin to fold paper into itself in an accordion fashion.

How to Make an Accordion Book with your own style

How to Make an Accordion Book with your own style

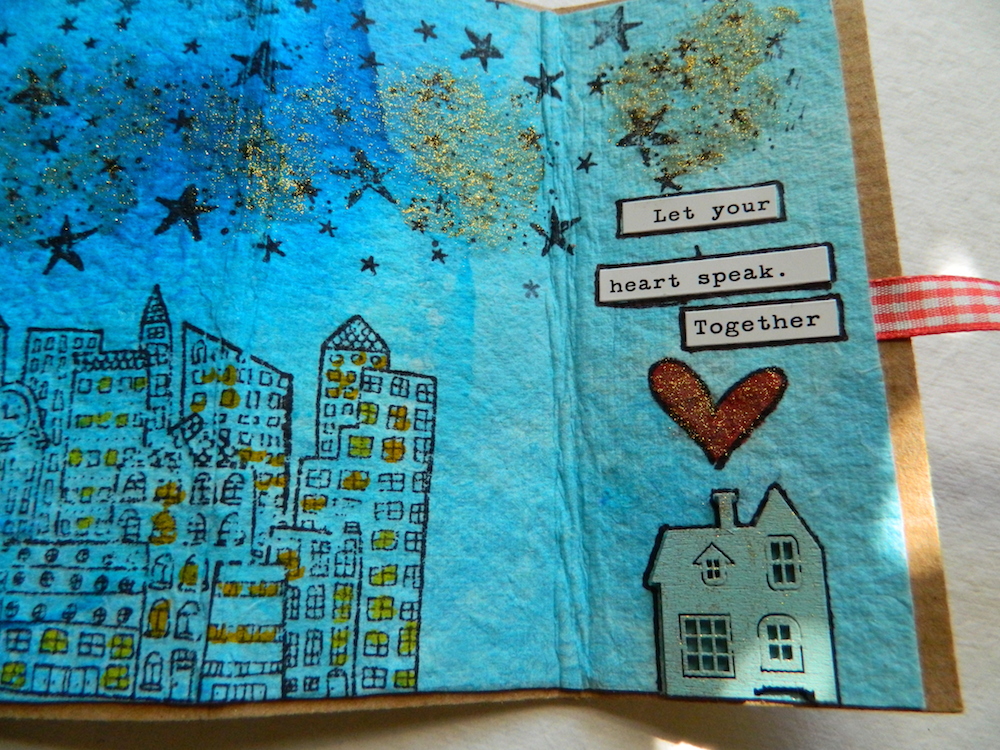
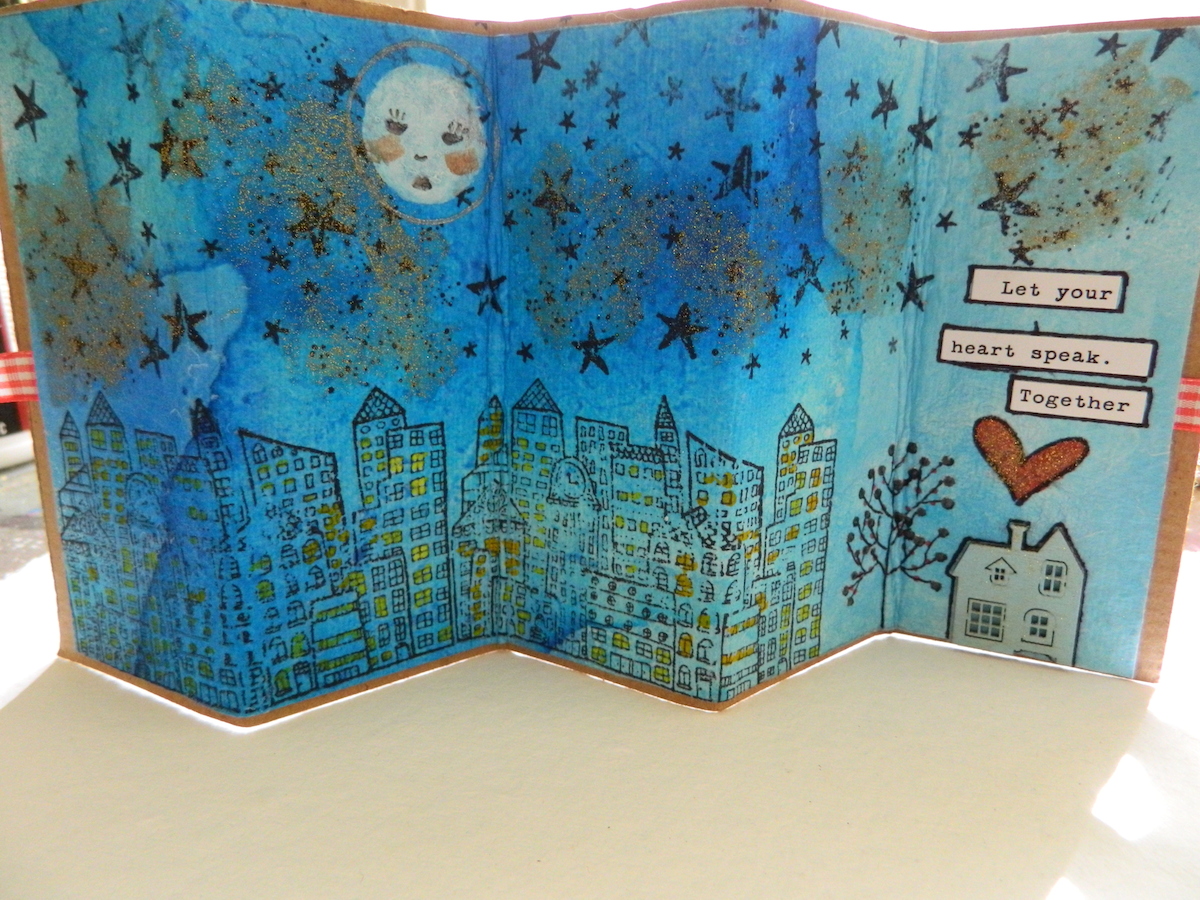
Here is where it becomes fun! You can stamp or draw anything you want to create one long piece of art. I used one of my favorite stamps, my city stamp and my star stamp. I found a heart stamp, some word art and a mini wood house. I painted the house, added some sparkle to my night sky and hand drew the moon using acrylic paint and Micron pens.

How to Make an Accordion Book with your own style

How to Make an Accordion Book with your own style

How to Make an Accordion Book with your own style

When you are happy with your end result use the ribbon to wrap around your book if you have cut it longer. Tie it up in a bow and use it for a gift or make a shelf full.

Happy Creating.

~*~*~*~*~*~*~*~*~*~*~*~*~*~*~*~*~*~*~*~*~*~*~*~*~

Melanie Statnick is a Canadian Mixed Media & Collage Artist out of North Carolina. Melanie creates art daily from her private studio. Her style is fun, whimsy and eclectic. Melanie is also an Art Instructor for local venues and community colleges for students of all ages.

~*~*~*~*~*~*~*~*~*~*~*~*~*~*~*~*~*~*~*~*~*~*~*~*~

.

.

Materials to get you started in Mixed Media Art

Over the last few Tips Videos we have covered using cereal box cardboard, using found objects in our mixed media painting and the tools needed to get started. In this episode, we look at the mixed media materials you need to get started.

Materials for Mixed Media Art - Mixed Media Art Tips Video

Michelle runs through the basic materials and mediums she uses in many of her mixed media creations. She reminds you that you don’t need all of these materials to get started. After you have a few of the basic paints and mediums, and had fun creating a few mixed media pieces, you can then extend your collection.


***********************

Here you can see the range of shades you can achieve with two paint colours and a white for creating shades – this allows your paint collection to expand into many different colors and hues. This gives each of the three canvases a range of colors, from the very dark violet to the light pink wash.

Mixed Media materials and canvas backgrounds

The colors used were violet or dark purple, magenta or maroon and a plain white.

using two paints and white gives a range of shades

To mix the colors, I use an old styrene tray (as shown in Tools needed to get started in Mixed Media Art) and put the two colors at each end and the white across the middle. This makes it easier to create a 1:1 mix for each colors, and then a 1:2 mix by adding white to the 1:1 mix.

use a simple paint tray to mix paints

***********************

References for the products mentioned in the video:

Creating Layers Online Tutorial

Gesso

Gel Medium

Impasto Medium

Varnish

Acrylic Paints

Spray Varnish

So thank you for joining us here for this Mixed Media Tips Video. As always we are happy to hear from you and LOVE seeing your artwork – you can do that by emailing us at CreateMixedMediaArt @ gmail.com or heading over to our Creating Mixed Media Art Facebook page.

.

Do What You Love, Love What You Do

This article is written by Stacy Steinborn

DO WHAT YOU LOVE, LOVE WHAT YOU DO…This quote has actually stirred controversy in the aspect of making a living and not making a living.  It is mostly interpreted in a thought of what you should do or not do to make money.   Whatever it is you do, you should love it.  The argument for some is, yeah, but you will most likely be broke. Living in Nashville Tennessee the music Capitol of the world, this city is full of thousands upon thousands of broken dreams and hungry musicians.   Now I can’t even begin to write about this argument.   I’m still figuring that one out.  However, I can look at this quote and read into it a little deeper.

honky tonk woman in mixed media collageBut first, how I came to the conclusion of my interpretation.

As a creator of mixed media art, have you ever finished a piece and shown it to someone and they don’t really react like they like it. I truly feel some people just “don’t get” mixed media.  And I’ve simply come to the conclusion that, that’s okay.

This is a scenario that has happened to me on more than one occasion: At a gathering or function, a group will be talking and someone introduces you to an artist.  In the introduction they state that you do artwork as well.  Then you are questioned, what kind of art do you practice, what style of painting do you prefer? What do you use? And do you sale your art?  To answer these questions I usually say: mixed media, I guess my own style and, I have sold some pieces.  Then you are probed to show your work and you get out your phone show the other artist your pictures, and….crickets.  I find myself for a week or more after this scenario, questioning my talent, my ability, my work in general as an artist.  What an empty feeling to have when it comes to something I love so very much!

If you have ever had a doubt because of other opinions of your work, or because you are just not to the point that you are sure of yourself… I want to encourage you to think about you and your art in a new way.

That bookmark, painting, shadow box, frame, whatever you  have put your hands to do, to make; it has never existed before, not ever.   There may have been other things created like it or similar, you may have looked at something else for inspiration but that very thing you made is the only thing with the brush stroke you made, the glitter you sprinkled, the paper you added, whatever it is you do to your piece of art, it can never be duplicated.  It can never be done the exact same way again.

You are a creator.  You created something.

cre·a·tor   (kr-tr)

n.

1. One that creates

cre·ate   (kr-t)

tr.v. cre·at·ed, cre·at·ing, cre·ates

1. To cause to exist; bring into being. See Synonyms at found1.

2. To give rise to; produce: That remark created a stir.

3. To invest with an office or title; appoint.

4. To produce through artistic or imaginative effort: create a poem; create a role.

adj. Archaic Created.

What a great definition of you!

The next time an “artist” or the “art community” tries to snub, insult you or your work because your not in the right circle or are not up to their standards please read the above definition.  You my dear are amazing because you brought something into existence with your hands and your mind and it is here now.   Take joy in your creation!

This finally brings me to the quote, DO WHAT YOU LOVE, LOVE WHAT YOU DO.  Now think about it again.

DO WHAT YOU LOVE = If you love to paint in circles, in lines, sideways, cross-ways, glue everything but the kitchen sink to your painting, cut strips of paper, add salt to your watercolor, do image transfers, paint the same subject over and over, use stamps, whatever style it is that you use, and you love it…then DO it.

DO WHAT YOU LOVE! When it comes to creating YOUR piece of art…you are the only one who can decide if you love how you do it.  If you are passionate about it you will keep on working at it until you figure out what you love if your not there yet.

Now the second part to that quote.

LOVE WHAT YOU DO = If you have finished your work.  You owe it to yourself to love it. If your not in love with it, love the fact that you did it, you learned from it, even if its what not to do next time, love it.   Don’t let someone’s interpretation of your art become your interpretation of your art.  You did it, you LOVE it! Love your style, love your mistakes(this makes you grow, I promise) love your whimsy, love your boldness, love your subtleness, love the colors you put together, love the lines, love the stamps you chose to use, love your paint covered clothes, love it…love yourself!

If you’ve been struggling with your ability or your style, if its because you are still growing or you have been snubbed or insulted.  Remember three things..

You CREATE

DO WHAT YOU LOVE

LOVE WHAT YOU DO

Sharpie sketch on packing paper

I’m closing with a painting that I created using an image transfer of a sketch I did with a sharpie on packing paper.  I used ephemera from an old love story from the thirties and the colors that make me think of the honky tonks in Nashville. I used a heavy gel medium and a stencil to make the star pop and added layers and scraped off layers until I had the texture I desired.   This lady looks as if she sang in the honky tonks of yesteryear and she was happy, because she did what she loved.

gel medium image transfer

She has earned her laugh lines, her wrinkles from  her hurts and her worries.  She wore the stories of her life written on her face. But she smiled because she did what she loved.

honky tonk woman in mixed media collage

I hope you are inspired to love what you do.

Flood your art with your inner light,

Stacy Steinborn


~*~*~*~*~*~*~*~*~*~*~*~*~*~*~*~*~*~*~*~*~*~*~*~*~

Stacy Steinborn lives in a little suburb outside of Nashville called Spring Hill TN in the USA. More of Stacy’s work can be found on her Flooded in Light blog.

~*~*~*~*~*~*~*~*~*~*~*~*~*~*~*~*~*~*~*~*~*~*~*~*~
.

.

Mixed Media Christmas Ornaments

It’s that time of year again when we love to create handmade gifts. Here is a simple way to make cute little Christmas ornaments using your mixed media materials.

Holiday ornaments

~ ~ ~ ~   ~ ~ ~ ~   ~ ~ ~ ~   ~ ~ ~ ~   ~ ~ ~ ~   ~ ~ ~ ~   ~ ~ ~ ~   ~ ~ ~ ~   ~ ~ ~ ~

Using MS Word, draw a few start shapes in different sizes to make your template.
Print it out and cut it out.

Collaged mixed media Christmas star

Cut two pieces of cereal box cardboard to fit your template.
Glue the two pieces together and allow to dry.

Holiday ornaments

Trace out the star template.

Collaged mixed media Christmas star

Cut out

Mixed Media Christmas Ornaments

Using an emery board, remove the sharp edges of the cardboard.

Mixed Media Christmas Ornaments

Cover with a layer of gesso, both sides

Collages ornaments with tissue and gel medium

Holiday ornaments

Tear up an old dress pattern and cover your crafting table with cereal box
plastic or another protective surface.

Christmas star Collaged mixed media

Cover cardboard star with a layer of gel medium

Collaged mixed media Christmas star

Put your first piece of tissue paper onto the start.

Run a layer of gel medium over the tissue.

Add another piece

Continue adding pieces, covering with gel medium until your base shape is fully covered.
Overlapping pieces will give you an interesting finish. Each layer will show through.

Create a blend of gel medium, walnut ink and a little glimmer mist. Add this layer on
top of the wet gel medium. This will give your ornament a lovely deep colour.

Mixed Media Christmas Ornaments

Mixed Media Christmas Ornaments

Allow to dry. Gel medium is slow drying so leave it overnight.
Repeat with the other side of the cardboard shape.

Carefully cut away the excess tissue paper, back to the cardboard shape.

Carefully sand the edges again. Edge with metallic leafing pen.

outlining Christmas ornament

At the top of the ornament, punch a hole and add an eyelet
[see here for details on eyelet setting]

Collages ornaments with tissue and gel medium

Now it’s time to add the finishing touches.
Here I’ve added Collections pre-printed words and some stamped swirls
in bronze Brilliance Ink.

Collages ornaments with preprinted words


Collaged mixed media Christmas star with stamping

Now your ornaments are ready to run some cotton or ribbon through and ready to give.

Collaged mixed media Christmas star

Happy Holiday creating!


~ ~ ~ ~   ~ ~ ~ ~   ~ ~ ~ ~   ~ ~ ~ ~   ~ ~ ~ ~   ~ ~ ~ ~   ~ ~ ~ ~   ~ ~ ~ ~   ~ ~ ~ ~

.

.

.