“It Takes Courage” Art Journal Page

~ * ~

This article is written by Tamara Dinius

Tamara shares her fun art journaling process, showing we don’t need to be great at drawing to get started! The videos (Part 1 and Part 2) show the process of completing an art journal layout, start to finish.

Mixed media art journal layout with Dylusion sprays, stamping and collage

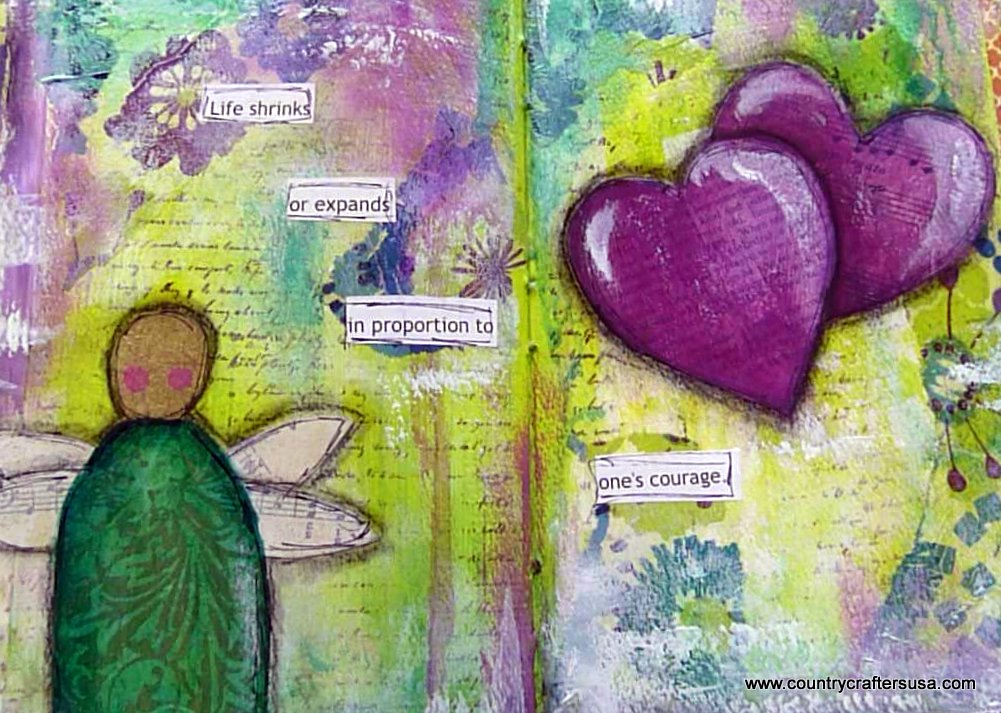
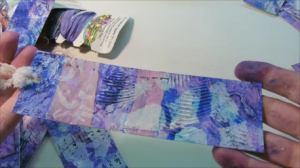
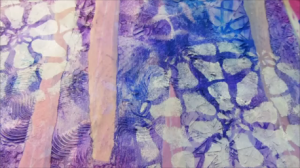
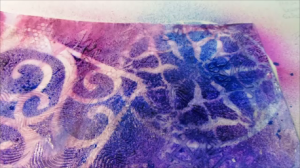
The layout was completed using Dylusion Sprays, Liquitex Acrylic Inks, stamps, stencils, papers, paper napkins, as well as other items.

Follow along and complete a layout in less than 30 minutes.

Part 1

Part 2

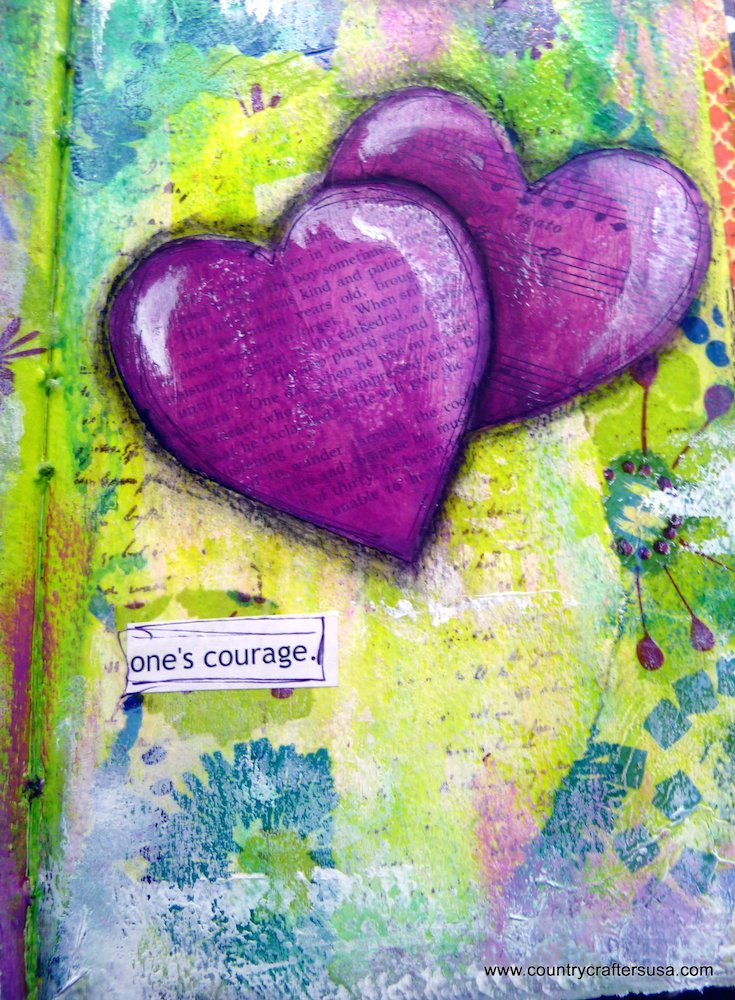
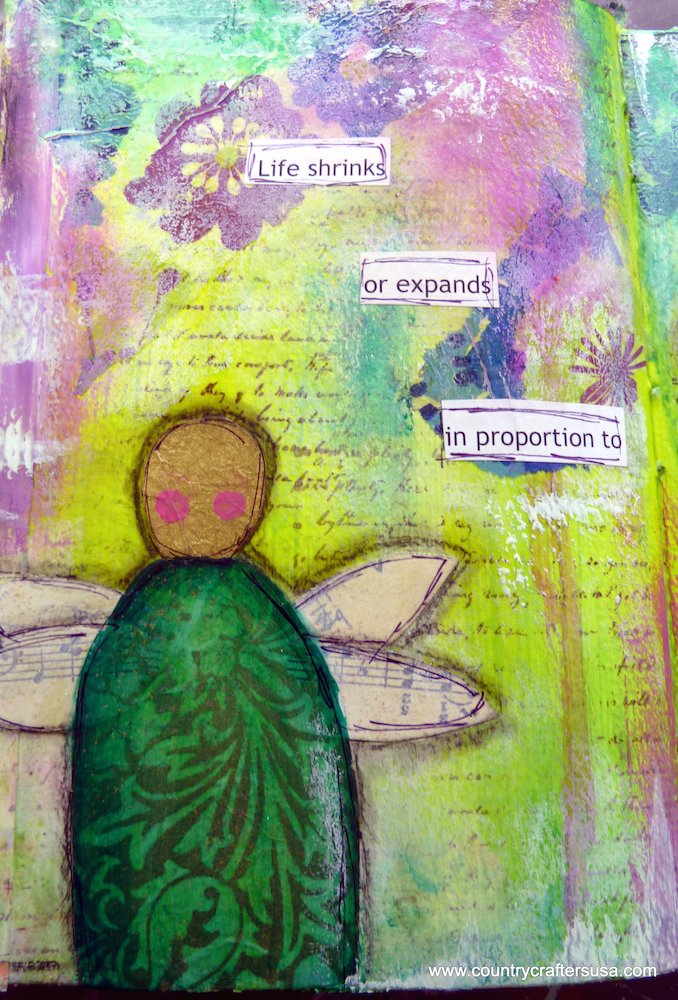
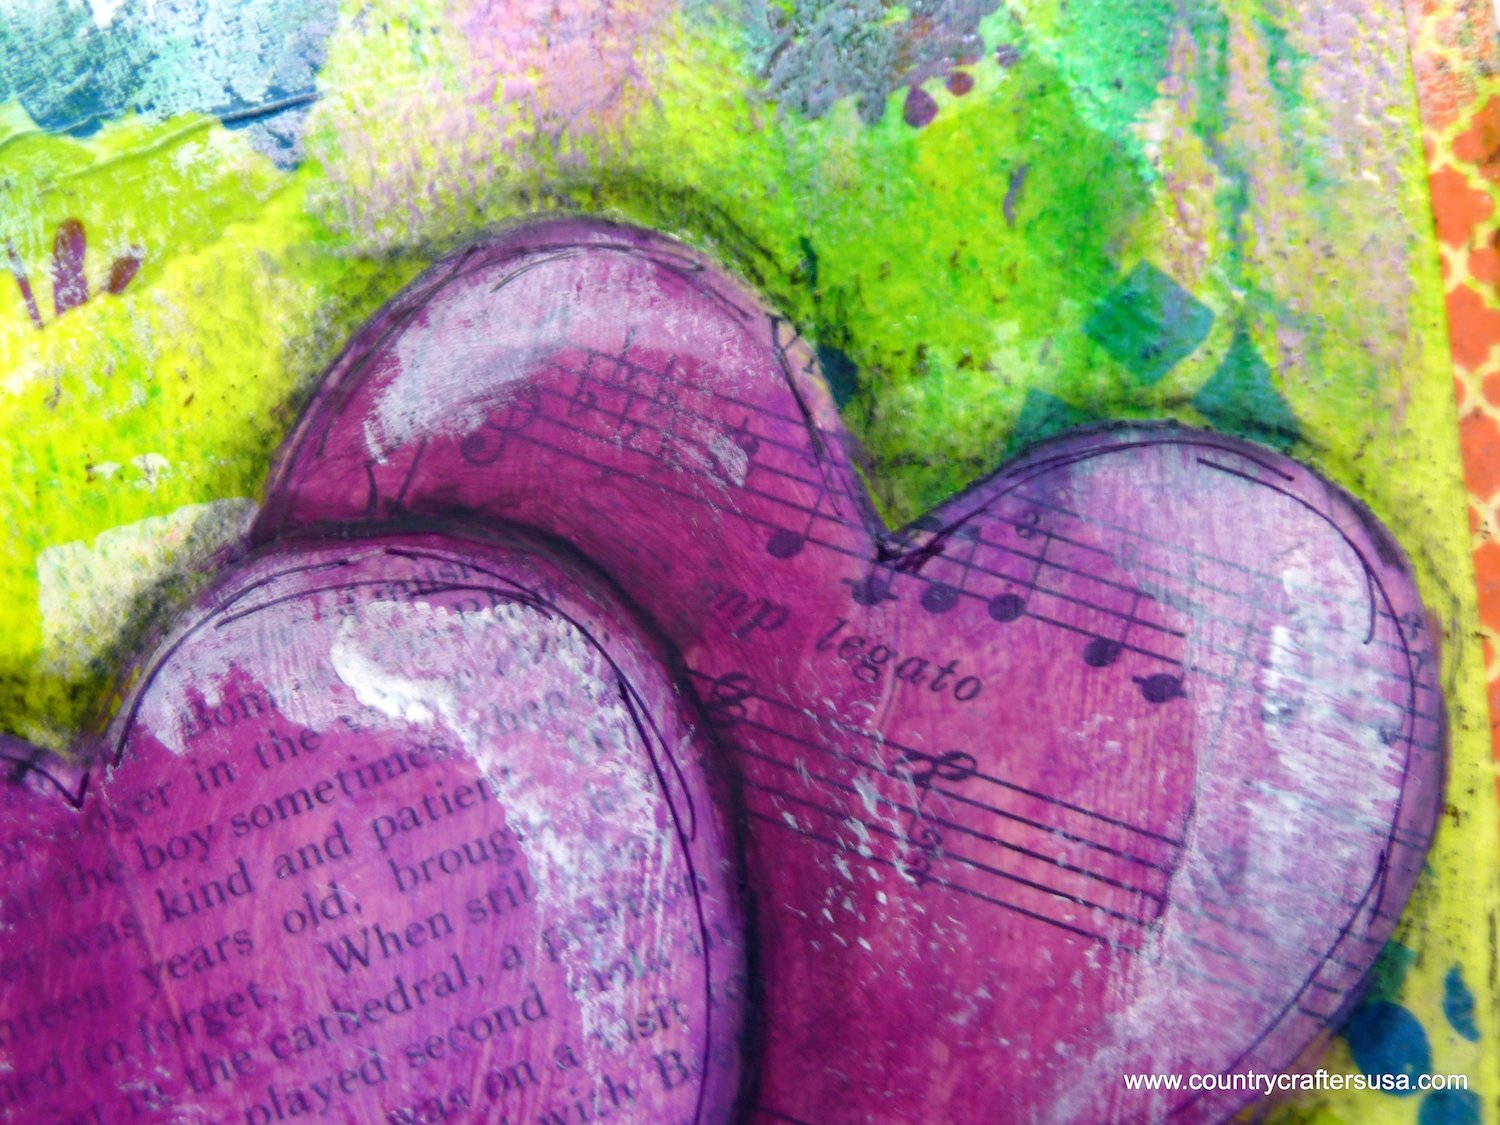
Here are a few close-ups of the layout elements:

Mixed media art journal layout
Angel in art journal by Tamara Dinius
mixed media ephemera hearts

~*~*~*~*~*~*~*~*~*~*~*~*~*~*~*~*~*~*~*~*~*~*~*~*~

Tamara Dinius lives in the Pacific Northwest with her husband and chocolate lab. She has two grown daughters who make her life meaningful. They support her, ground her, embrace her, and are amazing people in their own right.

Her love for mixed media has taken over most aspects of her creative journey. She believes mixed media allows for a broad range of styles and anyone can find success in this form of artistic expression.

~*~*~*~*~*~*~*~*~*~*~*~*~*~*~*~*~*~*~*~*~*~*~*~*~

.

.

Black Altered Book Page

This article is written by Linda Giese

The process and materials for this page spread are fairly easy, but when people turn the page and come upon it, they often say,”Wow!”  It is bright and active with a lot of pattern and color.

Materials & Tools

  • Americana lamp black acrylic paint in the bottle(not tube paint)
  • 3-5 different sheets(I used some scraps) of origami paper.

mixed media collage

  • Scissors
  • Small punch like heart, flower or star
  • Aleenes tacky glue (or other white glue)
  • Sakura metallic gelly roll pen set, 10 count.
    [Ignore my note on the package, “can’t mod podge over”.  You can work over the pens if you let them dry completely first.]

mixed media pens

Technique

mixed media collage

1. Paint your page spread with black acrylic . Let dry.

2. Cut and punch origami paper and adhere with glue. Origami paper comes in two styles.  The washi papers are more expensive and have a toothy, fibrous texture.  The less expensive papers are like thin wood pulp papers.   For punches the less expensive papers work better.  I used washi for the corners and some cut papers.  I tried to spread the colors around the page with some of the flowers going off the edge.  This way you can punch partial flowers along the edges of your papers to use every pretty bit of them.  I apply a small amount of glue with a toothpick so I don’t get it on the other parts of the background which makes the surface better for the pen work.

3. Draw a pathway (or several of them) with one of your pens to contain your writing.  You can write a favorite quote, something you want to say, or perhaps about your joy in creating art.  I used words I had chosen on the page spread (before I painted with black) to tell me what to write.  One page had the words “the technique” and the other “between two extremes”.  On the technique page I drew the parallel lines over half the page spread and expanded them as needed.

mixed media collage and writing

On the extreme page I wound my lines across both pages and turned and came all the way back across. I used my spears of origami paper to help find the route.  My words happened to cover it all.  I don’t preplan, just start writing, but if they hadn’t filled the space, I may have filled in the line with stars or other symbols.  I don’t really stress over it.

4. The last part is all the fun.  I usually begin with borders along my lines.  These can be as simple or elaborate as you like.  Then I start to fill in areas with my favorite zentangle patterns.I try to repeat patterns in different areas and to repeat colors in the same way.  This helps move your eye around the composition.

There are wonderful zentangle books and many online sites for patterns.  Zentangle was created by artists Rick Roberts and Maria Thomas.  Their website is www. zentangle.com  Other sites I like are www.LifeImitatesDoodles.blogspot.com and TanglePatterns.com

Finishing

I put a coat of gloss varnish over the extreme page spread.  Although I like the look of acrylic paint with varnish over it, I think it detracts from the brightness of the metallic pens.  The technique page has no finish on it.  I hope you have as much fun as I did with this page spread.

I encourage questions and comments!

Hugs to you,

Linda

~*~*~*~*~*~*~*~*~*~*~*~*~*~*~*~*~*~*~*~*~*~*~*~*~

Linda Giese encourages comments, questions, and sharing your art journey at linda.giese@yahoo.com

She teaches classes privately and at a local scrapbook store, The Stamp Addict

~*~*~*~*~*~*~*~*~*~*~*~*~*~*~*~*~*~*~*~*~*~*~*~*~

.

Creating Mixed Media Bookmarks

~ * ~

This article was written by Tamara Dinius

Mixed Media Bookmarks

In this video, you can complete several bookmarks using mixed media techniques on watercolor paper. By using one large sheet, you can have fun decorating one sheet and then cutting in up into many pieces. You will be ready for summer reading and have a few extras for gift giving.

Follow along and complete a layout in less than 10 minutes (plus drying time)

The layout was completed using a range of moulding pastes and other similar products, Derwent Inktense blocks Dylusion Sprays, Liquitex Acrylic Inks, stamps, stencils and papers, as well as other items.

Mixed Media Bookmarks

Mixed Media Bookmarks

~*~*~*~*~*~*~*~*~*~*~*~*~*~*~*~*~*~*~*~*~*~*~*~*~

Tamara Dinius lives in the Pacific Northwest with her husband and chocolate lab. She has two grown daughters who make her life meaningful. They support her, ground her, embrace her, and are amazing people in their own right.

Her love for mixed media has taken over most aspects of her creative journey. She believes mixed media allows for a broad range of styles and anyone can find success in this form of artistic expression.

You can find more of Tamara’s work on her Etsy shop.

~*~*~*~*~*~*~*~*~*~*~*~*~*~*~*~*~*~*~*~*~*~*~*~*~

.

.

Dare to Share: Giving the Gift of Creativity to Others

~ * ~

This article is written by Laura Thykeson

As artists, we may have endless amounts of Vision, Talent, Techniques, etc. that we use when creating something magical from nothing more than a thought. Such is the miracle of art! But there is one more piece to the recipe that has to be included in order to be productive, starting from the first time you began creating, all the way through your creative journey right up to the end. It is this particular attribute that I wish to address.

The final item, often taken for granted, is DESIRE! We must have the “desire to create” something physical driving us to take action or we would never complete a creative project! Our wonderful, unique designs and abilities would just drift through our imaginations forever and never see the light of day, much less be shared with others in a physical, tangible form. Desire drives us, compels us, even obsesses us to try capturing that ephemeral bit of idea and create and form it into some substantial, artistic representation that can be touched, seen, shared with others for moments or even decades. Something solid and permanent that will remind the world for years, that “We were here”. This Desire is what I feel we should consider sharing and passing on to others and has little to do with “talent”. It could be that driving  “desire to create” that may be the main quality we should think about fostering in others when sharing our gifts with others. People of all ages and walks of life may be hungry for even the simplest form of self expression but don‘t realize it yet. That is where we come into the mix. We need to bring to others the desire to begin, and a few items to begin with. I have some ideas for accomplishing this, and all it involves is a little bit of effort, things you are going to be doing anyway because you can’t help yourself, and a tiny bit of brainwork or networking with different groups or gatherings of people.

Laura Thykeson suggests we can spread our creativity by giving some mixed media materials to help our friends start their journaling process

First, gather some inexpensive items to include as “artistic desire supplies“. I suggested the items below, feel free to change it up to better suit the recipients. Remember-those receiving the items don’t yet know that they are going to develop the Desire to use them, all they know at first is they received a “gift”. Later, they will realize what the REAL gift is! Anyway, here’s the basic list, all are sold at dollar or discount stores:

A bound book with blank(lined or unlined) pages. (I use plain composition notebooks. They are sturdy and cheap, fun to embellish, handle collage and light watercolor decently)

Mechanical pencil(s) and 2 permanent black markers (Sharpie works great)

Eraser

Glue (gluesticks and/or school glue- I add 1 or more of each.)

Scissors

Children’s pan watercolors (Crayola makes a great set for kids or adults for less than $5)

Waterbrush or 2 inexpensive brushes and a small plastic bottle of water (for the watercolors)

Magazine(s) with suitable words and pictures for collage work

Finally,  you need a container. You can find great used totes from resale shops or garage sales, get blank canvas totes and embellish or leave blank for the recipient to personalize after they are consumed with the “desire to create“! Finally, not fancy but functional, use a large ziplock bag.

Laura Thykeson suggests we can spread our creativity by giving some mixed media materials to help our friends start their journaling process

To jumpstart the creative process, inside the book you included, do a page(s) yourself in SIMPLE collage, combining images and text, done on an easy, colorful watercolor background. Have the collage convey an emotion, or simple theme. Handwrite a word or two on the page in black marker.  Lastly, (do in Word, then print copies), include an artist bio and mission statement, and include your email address, along with an idea of the “real” gift you are hoping to pass on.  A few ideas on using supplies and tips for how to get started are helpful. Then, it won’t be long before the “desire to create“ hits them and off they go! Underprivileged or at risk youth groups, hospitals, assisted living and nursing homes are all great places to put this project to work! You never know whose life you may change!

~*~*~*~*~*~*~*~*~*~*~*~*~*~*~*~*~*~*~*~*~*~*~*~*~

Laura Thykeson has been totally immersed in mixed media art for many years. She discovered altered books and art journals about a year ago and have been hooked ever since! She has always loved mixed media art because of the variety and the “no rules” aspect! Laura lives in Granbury, Texas USA.

~*~*~*~*~*~*~*~*~*~*~*~*~*~*~*~*~*~*~*~*~*~*~*~*~

.

.