Get Your Mixed Media Creative Mojo ON!

~ * ~

This article is written by Gail Green

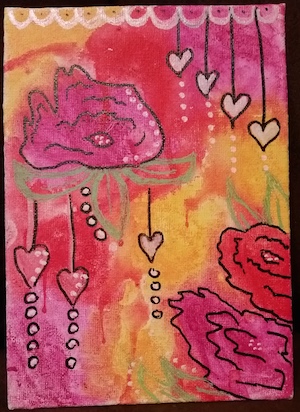
Mixed Media is all about experimenting with interesting (and often unusual) combinations of materials, mediums and techniques. Color, texture, images, phrases, dimension and our own unique interpretation and story make our pieces come alive. It is also about the unexpected. And THAT’S what drives us creatively!

However, that doesn’t’ mean Mixed Media Artists need to spend hours creating unique components to use in their creative projects. While attending the Craft and Hobby January trade show (CHA Show) and a few other recent trade shows, I’ve discovered some really awesome new products and product lines that either help us feel the mojo or do the tedious time consuming parts for us…allowing us the freedom to just be CREATIVE!

This article will be the first of several product reviews.

Do you love the look of Shabby Chic? Do you love the look of stitched canvas and embellishments? I know I do! Fortunately, I found the PERFECT line of canvas products at the CHA Show when I stopped by the Linnie Blooms booth! Owner and founder Linda Barutha was EVERYWHERE at CHA. I’m so glad I kept running into her because it offered us lots of opportunities to chat about her product line. Her products are amazing!

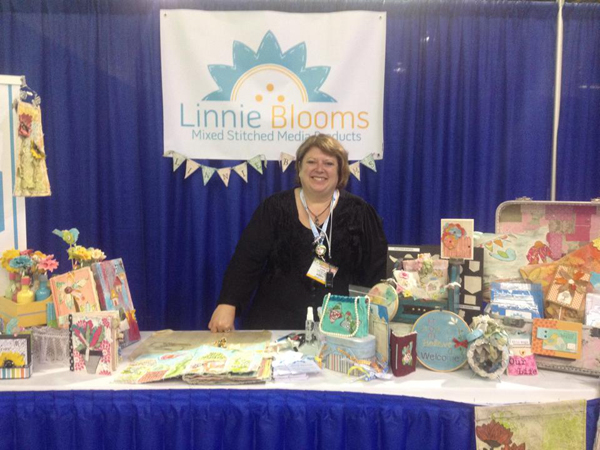
Here is Linda Barutha and just a sampling of her array of products (Photo used with permission, Linda Barutha, Linnie Blooms)

Simply put, Linnie Blooms products include canvas shapes (trees, hearts, leaves, stars, and much more) and canvas items like journals, bookmarks, envelopes and tags with a stitched component already added to them. How cool is this?! They are all ready to paint, sponge, spritz, stamp or stencil. These pieces are also very sturdy so they can hold up to lots of techniques, as well as for their intended use. It’s easy to attach embellishments by sewing or gluing because they have a secret in between the canvas layers that prevents glue drip –through…and also makes these products TOTALLY unique! This is definitely a new twist on the concept of re-purposing because recycled encyclopedia pages are part of the Linnie Blooms multiple layer canvas products.

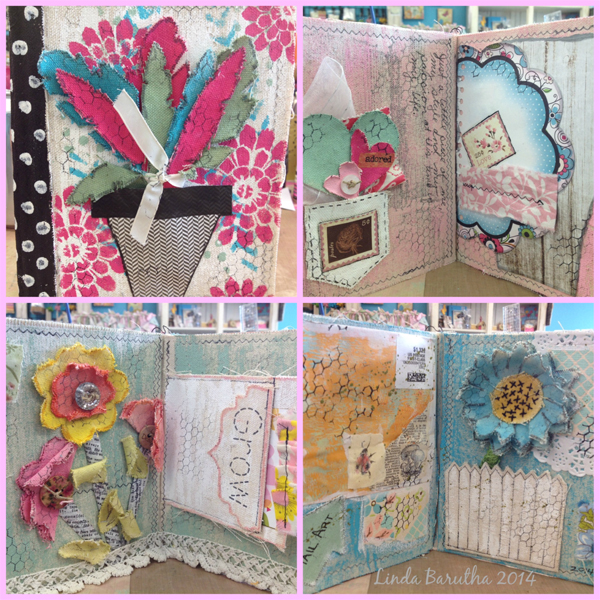
A Mixed Media Art Journal project (Photo used with permission, Linda Barutha, Linnie Blooms)

I personally love all the projects, but the journal is TO DIE FOR! The pages inside include pockets, tabs, stitched edges. They just cry and beg to be transformed into a Mixed Media Art piece!

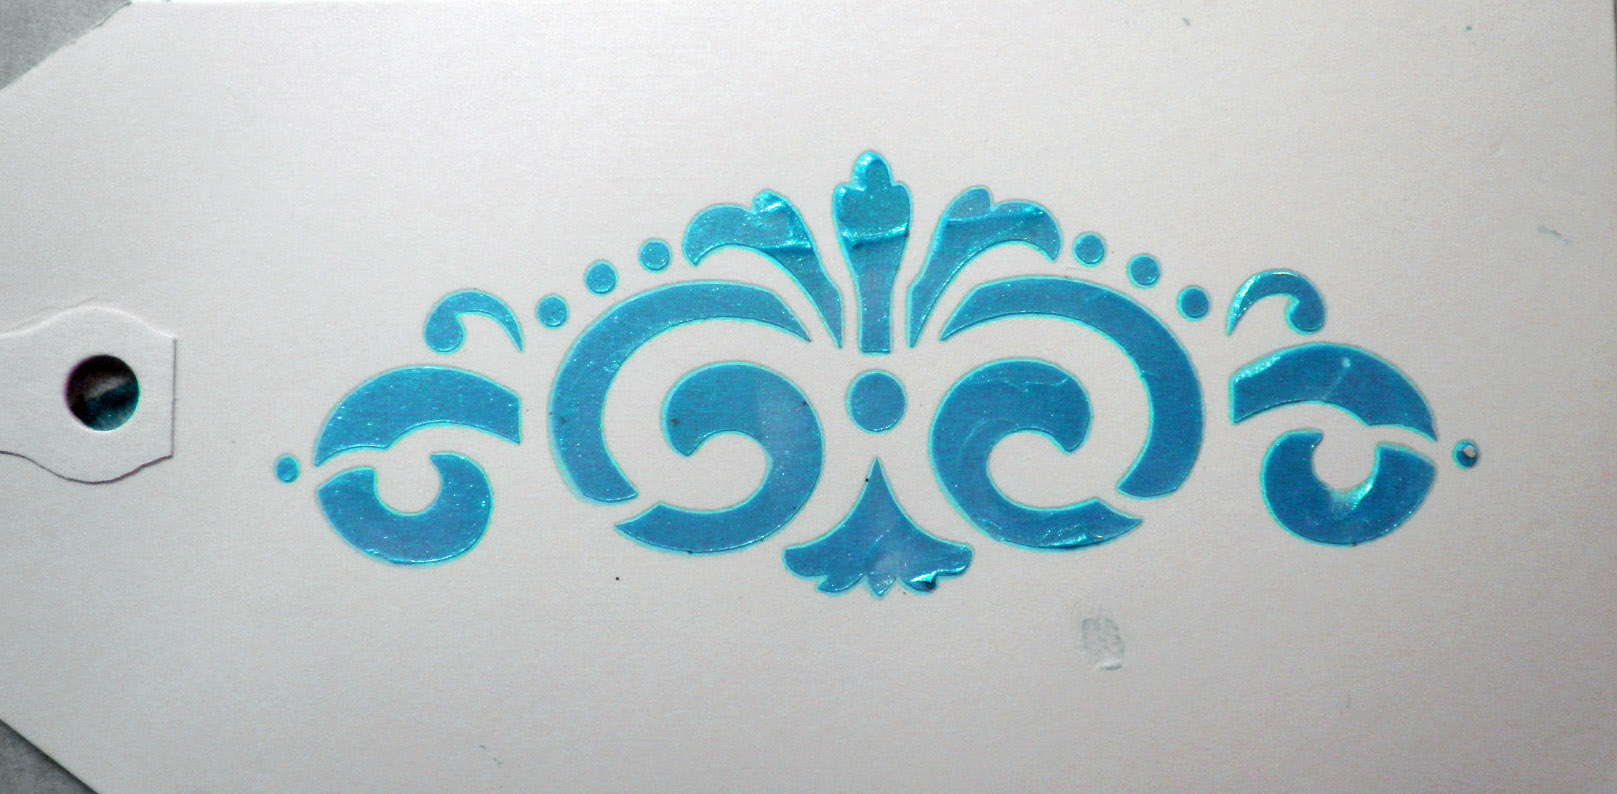
In addition to all the canvas items, Linnie Blooms also offers other products, including some very interesting stencils. Unlike most stencils, Linda also includes the “knock outs” (or inside cut sections) so mixed media artists can use both the negative space stencils for techniques like sponging, stippling, stamping, etc. AND the positive space “knock outs” to create masks for those same techniques…but with obviously different results! Plus, the shapes are so unique, they can be used very interpretively in multiple ways and combinations.

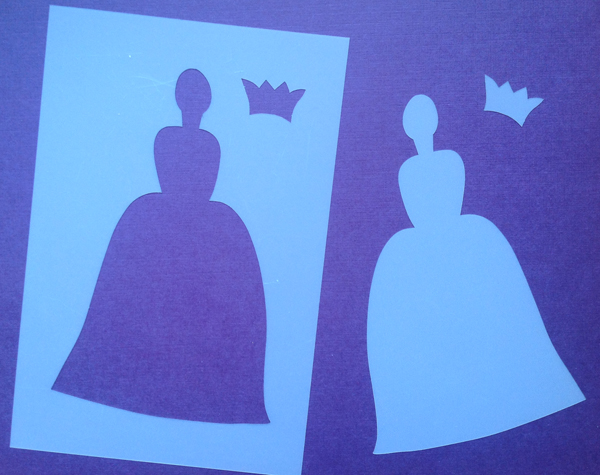
This photo shows a stencil with all the different components…both stencil and knock outs! (Photo used with permission, Gail Green)

As if that weren’t enough, Linda has also come up with fun stamps and phrases to use on the canvas pieces, as well as on traditional cardstocks for card making. For example, create a card on cardstock and then….insert it into an over-the-top-cool canvas envelope that has been turned into a Mixed Media work of art! Did you know that rubber stamping originally started as a way to decorate mail and envelopes? Now that you do, isn’t this a perfect way to go a little retro and celebrate the roots of stamping? After all, Mixed Media Art is ALL about TOTAL fun and creativity!

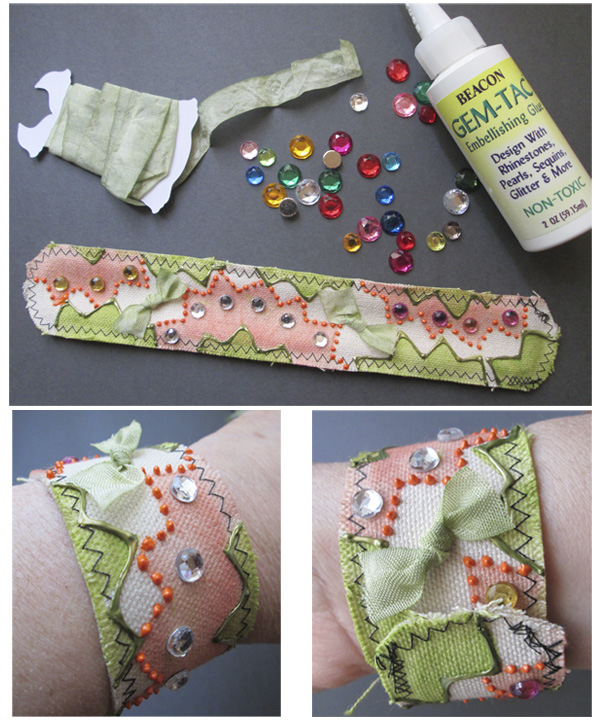
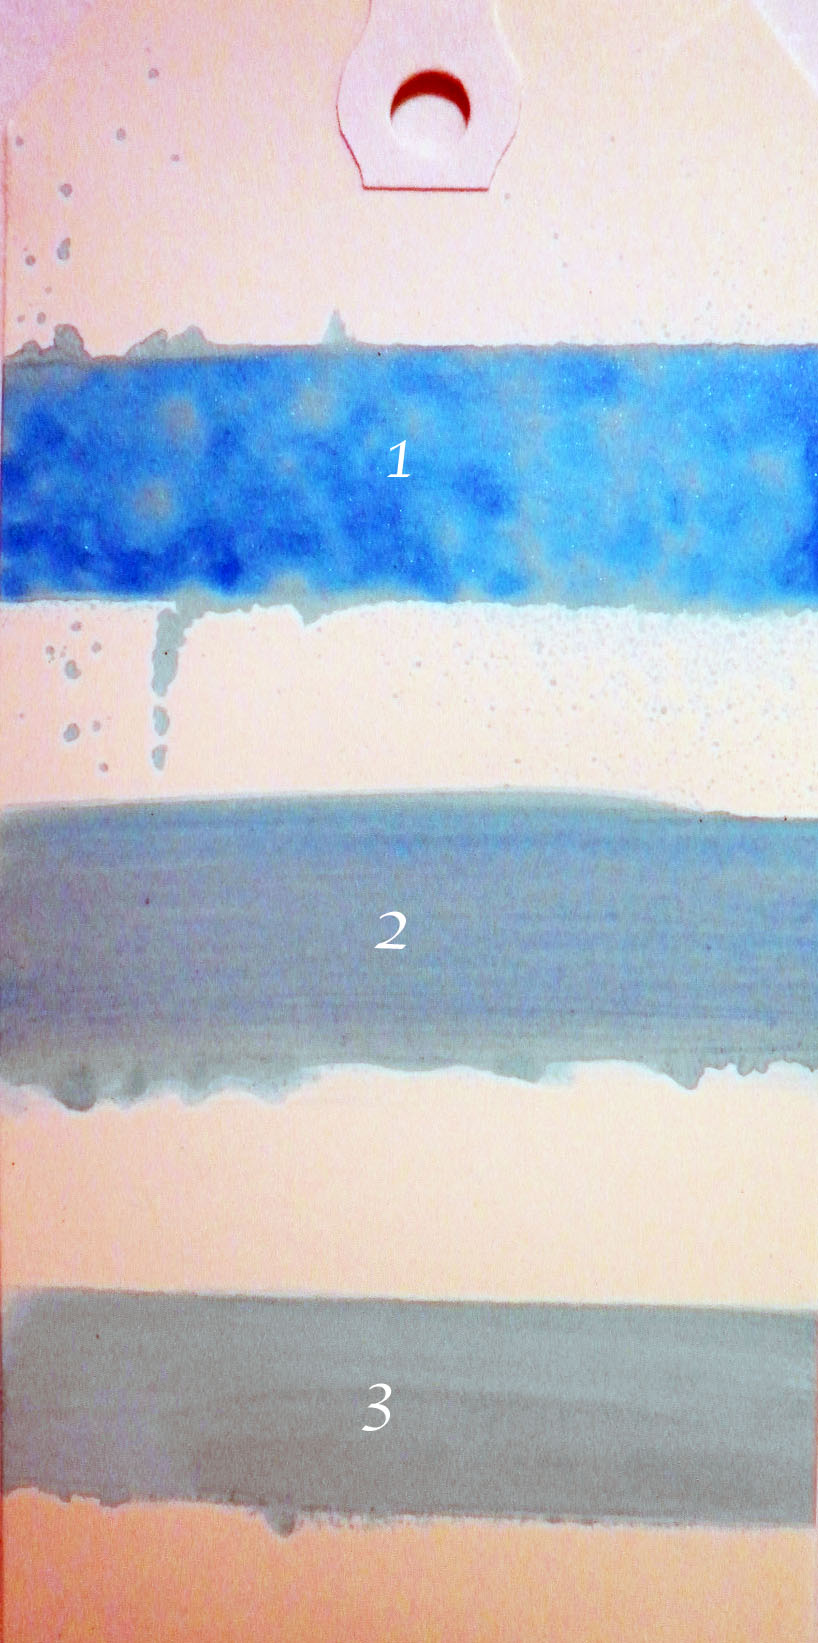
Linnie Blooms Canvas Bracelet is the perfect start to a Mixed Media project!(Photo used with permission, Gail Green)

You can find out more about Linnie Blooms by visiting their website www.linnieblooms.com. But know they are a lot like potato chips. You will never be able to just have one!

~*~*~*~*~*~*~*~*~*~*~*~*~*~*~*~*~*~*~*~*~*~*~*~*~

Gail Green is a Chicagoland crafty book author and feature article writer/columnist for Scrap & Stamp Arts magazine. Known as the “designer in the hat” and creator of the Sweet PETatoes® art brand, Gail has licensed her illustrations on products in multiple global markets, including her own line of rubber stamps with Impression Obsession. For more information, please visit her ETSY store sweetpetatoes.etsy.com or blog gailgreen.blogspot.com for fun adventures with Ollie, Gail’s crafting parrot and his pet doggie, Lacy Lulu.

~*~*~*~*~*~*~*~*~*~*~*~*~*~*~*~*~*~*~*~*~*~*~*~*~

Disclosure: These products were supplied by Linnie Blooms for the purpose of review. All opinions are that of the MixedMediaArt team. Some links on this page may be affiliate links and any purchases help to support the ongoing work by MixedMediaArt. 
.

.

ColourArte Products Review

~ * ~

This article is written by Barbara Rankin

ColourArte is the manufacturer of some amazing paint products, such as Radiant Gels, Radiant Rains, Primary Elements Artist Pigments™, Silks Acrylic Glaze, and Twinkling H2Os In this article, I am going to share some examples of the diversity, as well as my observations, using these products.

Photo of a group of the products

Following each product description, I have prepared a white tag, all exactly the same, to show you the diversity of each ColourArte product, simply by varying the mediums.  For beautifully finished projects, I would invite you to visit the ColourArte Blog.

Let’s start with Radiant Gels Dimensional Paint, the newest product in the ColourArte line. This is a thick, shimmery paint that can be used for many different mixed media applications.  It not only can be used as a paint and brushed out to a beautiful, transparent color, but can also be spread with a spatula,leaving brush strokes and lots of texture behind.  It is perfect for applying through stencils, too. It currently comes in 20 luscious colors.

Tag Sample of Radiant Gels applications

  1. Gel brushed directly onto tag with paint brush, dries dimensional and textured    with my brushstrokes.
  2. Gel brushed directly onto tag with a wet paint brush, just enough water to thin the gel to a more spreadable consistency without losing color depth.  Some brush stroke textures remains.
  3. Gel brushed directly onto tag with paint brush and water to add a very smooth, light color to the tag.  The color value does not change.

Radiant Gel spread through a stencil and left to dry.  A thicker image can be made by spreading more gel over the stencil, while the colors remain true.

Tag Sample of Stenciled Radiant Gels

Next up, we have Radiant Rains in two different bottles.  The Color Concentrates come in dauber bottles, while the Shimmering Mists come in, you guessed it, mister bottles.  There are 21 Color Concentrates and 26 Shimmering Mists.

Tag Sample of Shimmering Mists applied with mister and paint brush.

  1. Mist sprayed directly to tag.  Variations in colors, textures, and shimmer are achieved with the mister bottle, and can be diluted with water when working on your mixed media projects.
  2. Mist sprayed onto a craft sheet and color picked up with a brush and painted onto tag.
  3.  Mist sprayed onto a craft sheet and color picked up with a very wet brush and painted onto tag.  The water lightens the color but does not lose its color value.

Tag sample of Radiant Rains daubers applied

  1. Dauber applied to tag with one swipe.
  2. Dauber applied to tag with 2-3 swipes, added color depth.
  3. Dauber applied to tag with 5 swipes for increased intensity.

Colors can be applied very quickly to backgrounds using the dauber bottles.

Then there are the well-known Twinkling H20s Shimmering Watercolors.  These are cakes of intense shimmering watercolor that you activate with water.  The colors are so concentrated that a little goes a very long way.  You can add less water to turn them into a creamy watercolor paint, or add more water to increase transparency without losing color value.  There are 210 colors and sold in sets or individually, as well as in two jar sizes.

Tag sample of Twinkling H20s color variations

  1. Twinks mixed with small amount of water to a creamy consistency for true color depth and shimmer.
  2. Twinks applied with a bit more water for lighter color and increased transparency.
  3. Twinks applied with even more water, increasing color lightness and transparency without losing color value.

Next we have the Primary Elements Artist Pigments™.  Artist Pigments are powdered, highly concentrated colors that are perfect for everything, including mixed media.  They can easily be mixed with gum arabicbinders or any acrylic medium to make your own paint.  They can also be mixed with water-based acrylic glazes, gel mediums, and even thicker mediums like molding pastes.  Imagine the possibilities.  And it takes the tiniest amount of powder to make vivid colors, or use less pigment and more medium to decrease it’s intensity. They are available in 198 sumptuous colors.

Sample tag of Primary Elements

  1. PE (Primary Elements) added to gel medium
  2. PE added to white gesso (gives a chalky appearance)
  3. PE added to clear gesso (feels chalky, but does not change the color)
  4. PE added to pouring medium (does not change the color and allows the shimmer to show through, as well as drying hard and thick.  Can be poured, dropped, or drizzled onto project for added dimension.
  5. PE added to Gum Arabic.  I think this gives the truest color and shimmer, most closely resembling Twinkling H20s.
  6. PE added to hard molding paste.  Dries with texture without losing color intensity.

Last, but not least, are the gorgeous Silks Acrylic Glazes. These are the most luscious, shimmery paints I’ve ever seen. They are iridescent, semi-transparent, and mix beautifully together, giving you even more color choices. They come in 92 colors, with six new colors just coming out this month.

Sample tag of Silks Acrylic Glazes

  1.  Forest Green Silks
  2.  Bolivian Blue Silks
  3. Forest Green and Bolivian Blue Silks combined
  4. Pomegranate Silks
  5. Emperor’s Gold Silks
  6. Pomegranate and Emperor’s Gold Silks combined

This is just a “drop in the bucket” as to all of the possibilities for using these products.  I have touched on just a few.  Think about making your own sample book of “recipes” for color mixtures, using tags such as these, to refer to when you need just that right color or texture.

~*~*~*~*~*~*~*~*~*~*~*~*~*~*~*~*~*~*~*~*~*~*~*~*~

Barbara is a mixed media artist who loves to teach.  She loves to learn new techniques and to share her knowledge with other artists.    She is a contributing artist in a book:  Make it in Minutes: Mini Albums, and has been published in several paper and online magazines.  She is currently on four design teams, ColourArte, Sin City Stamps, Altered Pages, and House of Cards Challenge Blog, and has served as a design team member for The Robin’s Nest and Creative Paperclay®, as well as guest designer for Craftwell USA, Unruly Paper Arts.  She has also been asked to be the guest designer Gina’s Lasercut Designs in June 2015.

She lives in the Memphis, Tennessee are with her very supportive husband of 32 years, and her two Yorkies, Chloe and Zoe.

You can see more of Barbara’s work on her blog at Black Hole Art Studio or via Facebook – Black Hole Art Studio.

~*~*~*~*~*~*~*~*~*~*~*~*~*~*~*~*~*~*~*~*~*~*~*~*~

Disclosure: These paints were given to me by ColourArte for the purpose of designing projects as part of the design team.  All opinions are my own and may not reflect those of the MixedMediaArt team. Some links on this page may be affiliate links and any purchases help to support the ongoing work by MixedMediaArt.

.

.

Neocolor I v Neocolor II – A Funny Story

~ * ~

This article is written by Terri Sproul

Funny story, I found a newer product for me called NeoColor II

Neocolor ii by Caran D’Ache

Off the the store to purchase, first off they do not have them at Michael’s.
Got mine at Dick Blicks, BUT I did not purchase the right ones; I pick up NeoColor I

Neocolor i by Caran D’Ache

NeoColor I are Water Resistant Wax pastels

Well I came home with the NeoColor I and play with them and figured out they were NOT the product I was looking for??? Hum…. back to the store. This time got the NeoColor II, which are water solvent wax pastels, basically water color crayons.

This is a canvas I made using NeonColor II

mixed media art canvas

Are Journal page using Neoncolor II

mixed media art journal

~*~*~*~*~*~*~*~*~*~*~*~*~*~*~*~*~*~*~*~*~*~*~*~*~
You can see more of Terri Sprouls on her weekly show, live on Tuesday at 6 PM PST / 7 PM MST / 8PM CST / 9PM EST (New York Time)
Join her group on Facebook to get links weekly and details.

~*~*~*~*~*~*~*~*~*~*~*~*~*~*~*~*~*~*~*~*~*~*~*~*~

.

.

Handmade Foam Stamps & Printing Plates

This article was written by Martice Smith II

Handmade Foam Stamps & Printing Plates


Handmade Foam Stamps & Printing Plates, tutorial by artist Martice Smith II

Supplies to gather:

  • cardstock or cardboard
  • dried baby wipes or paper towel
  • craft foam (with adhesive backing)
  • glazing medium (DecoArt)
  • heavy-bodied acrylics
  • foam brush
  • brayer
  • scissors
  • IrRESISTible Pico Embellisher (optional)

Handmade printing plate by artist Martice Smith II. Tutorial: 'Handmade Foam Stamps & Printing Plates'

1. Create a printing plate with craft foam.

Cut shapes out of the foam, peel off the paper backing and adhere them to a piece of cardboard (or cardstock) to make a printing plate.

Handmade printing plate, with circles and paint by artist Martice Smith II. Tutorial: 'Handmade Foam Stamps & Printing Plates'

2. Add paint to the printing plate with foam brush.

Baby wipe printed with handmade foam printing plates'. Handmade printing plate on cardstock by artist Martice Smith II.

3. Stamp onto dry baby wipe.

Repeat the design by rotating your printing plate.

Use a brayer for a crisp impression onto the surface. Let dry for one minute.

4. Apply a glaze over the paint. 

Mix one part glazing medium to one part of the heavy-bodied acrylic color of your choice. (I applied DecoArt’s Banana Cream -Yellow, mixed with DecoArt’s Glazing Medium

Dip brush into water and then into the glazing mixture.

Apply a generous wash over a section of the baby wipe, using a clean foam brush.

There are many benefits of using acrylic glazes as you build up layers and texture on delicate surfaces. This method is great because it offers a very graphic way of featuring a stamp’s design. Layers of visual texture can be achieved without the bulk and concern of ruining a delicate surface.

Glazing medium allows you to work with the acrylic paint longer and creates layers that are slightly translucent. Although the glazing medium changes the paint color slightly, it’s very cool to see how the paints interact! Experiment with different colors to find your favorite color combos.

Adding paint to handmade stamp; painting dots with handle end of paintbrush; Tutorial: 'Handmade Foam Stamps & Printing Plates'

5. Add paint to another stamp. 

Using a foam brush, apply a mixture of one part glazing medium and another color of paint.

Stamp onto the paper, repeating the image a few times.

Try this! Use the handle end of a paintbrush to add dots, in varying sizes.

Adding paint onto handmade triangle stamp; stamping randomly onto baby wipe.

6. Add another stamp design.

Mix up a new color with more glaze, apply the mixture with a foam brush and press the stamp onto the painted baby wipe.

Continue layering the background with overstamping to get a look you like.

Try this! For dimensional texture, outline a few of the shapes with an IrRESISTible Pico Embellisher (Imagine Crafts/Tsukineko).

Happy stamping! Be sure to share a link to your creation, down in the comment section!

~*~*~*~*~*~*~*~*~*~*~*~*~*~*~*~*~*~*~*~*~*~*~*~*~

Photo of artist Martice Smith II

Martice Smith II is creative director of Martice Smith II – Illustration & Design Studio, based in Missouri and owner of Uneek Art Boutique. She established herself as a freelance Illustrator and graphic designer after receiving her Bachelor of Arts Degree. Specializing in mixed-media illustrations, Martice’s love for fashion, typography and wildlife are infused with a combination of traditional and digital art techniques.

Be sure to join the Uneek Art Letter, -Martice’s monthly newsletter- that offers art biz tips, advice and more digital goodness that will keep you inspired to be the artist you envision yourself to be!

~*~*~*~*~*~*~*~*~*~*~*~*~*~*~*~*~*~*~*~*~*~*~*~*~

.

.