Beeswax Collages for Christmas

This article is written by Debbie Davis from In Art Therapy

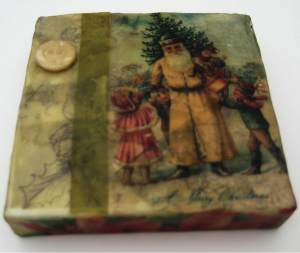
Debbie davis beeswax collage

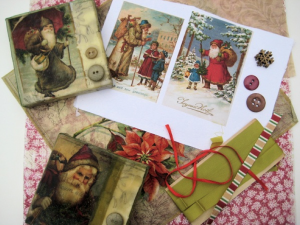
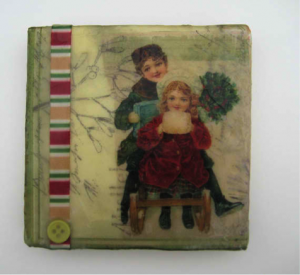
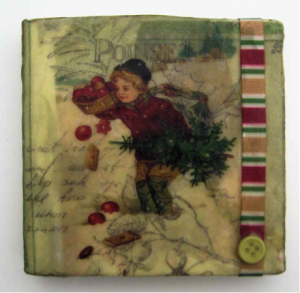
I love creating collages using beeswax as the decoupage medium.  For these collages I used 4 x 4 inch canvases, some paper napkins with Christmas designs, vintage images along with some buttons and ribbon for added texture.

Debbie davis ephemera beeswax collage

Here’s how to create a beeswax collage:

  1. Gather the items you would like to you use in your collage such as papers, napkins, buttons, ribbons, etc.  If using decorative napkins, remove any layers of white paper from the back of the napkins by lightly tearing a corner and rubbing until you are able to peel back and remove the layers.  I like to save the white layers to use for cleaning up in other projects.
  2. Melt beeswax in a small crockpot.  You will not be able to use the crock pot for anything else after you have melted the wax in it.
  3. Using a cheap, natural bristle brush, paint a layer of wax onto the canvas top and sides.
  4. Next add a napkin to the top of the canvas and paint over it with beeswax.  You can wrap the napkin around the sides of the canvas or use pieces of napkins or other papers torn or cut to fit the sides.  Once you have coated the napkins in wax, use a hot mini iron to smooth out the wax and remove any air bubbles.   This also fuses the wax layers together.
  5. I wanted the design/words from the napkins to show through my Christmas images so I printed the images onto tissue paper (see instructions below).  The thinner the paper, the better the images/papers underneath each layer will show through.  Place the printed image on the canvas and paint on more wax.
  6. You can now continue adding whatever embellishments you would like to add to the collage.  For the buttons, I added a puddle of wax and pressed them into it.  Be careful not to burn your fingers on the hot wax.

beeswax collage with images and mixed media ephemera

Printing on Tissue Paper using an Ink Jet Printer

Using a heavier printer paper, such as card stock, rub a glue stick around the edges.  Next lay a piece of tissue paper onto the cardstock and smooth down into the glued edges.  Trim off any excess tissue paper.   Once the glue has dried, place the paper in your printer and print your image onto the tissue paper.  This may take some practice.  I jammed a few papers when I first started printing on tissue!  Remove the image by cutting or tearing around the edges.

printing images on tissue papers

~*~*~*~*~*~*~*~*~*~*~*~*~*~*~*~*~*~*~*~*~*~*~

My name is Debbie and I live in Morton, Illinois, USA. I’m happily married and have a wonderful family that includes a daughter, son, son-in-law and 2 of the sweetest grandchildren ever!

What I love most about mixed media art is that you don’t have to be an expert at anything to create beautiful art. It is a great way to recycle found objects. Art is such a wonderful stress reliever. I just wish I had more time to play!

I have a shop on Etsy called Artful Explorations where I place some of the art I have created for sale. Having been inspired by others who are willing to share their techniques and ideas, I decided to start a blog called In Art Therapy and hope you will visit me there.


A Mixed Media Art Canvas for my Mother

This article is written by Wilna Cremers

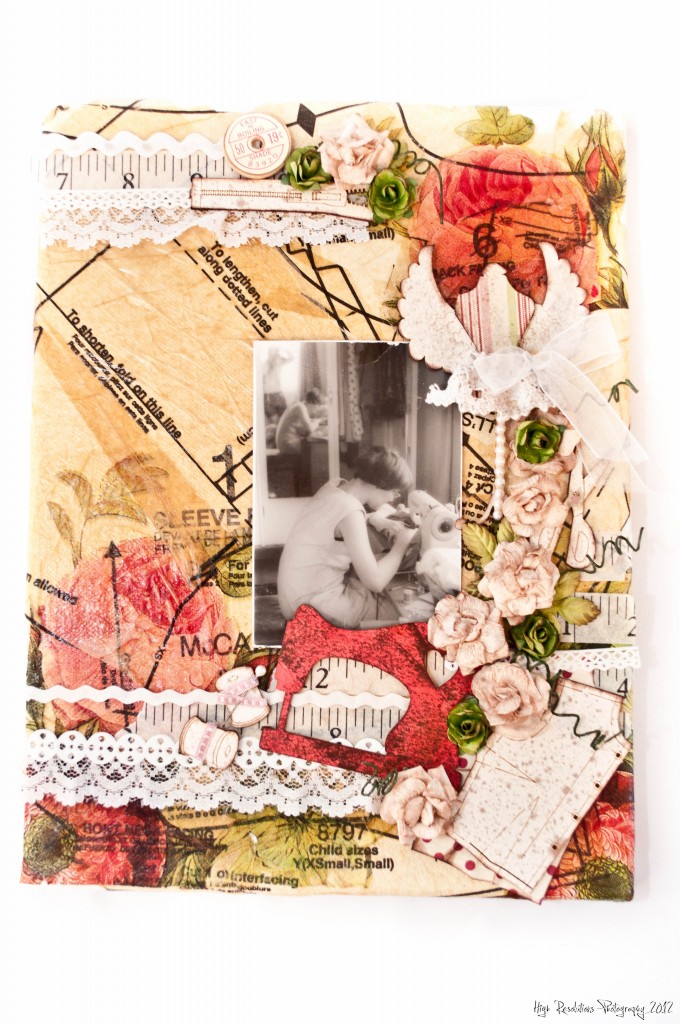
This canvas was inspired by my late mum, she was an extremely talented seamstress and nothing was impossible for her to tackle.  The chipboard items are from Enmarc and were perfect for this project.

Materials:

  1. Canvas recipe
  2. Canvas
  3. Serviettes
  4. old sewing pattern
  5. Plain embellishment –sewing
  6. Solo – Angel
  7. Podge
  8. Assorted Lace & ribbon
  9. paper roses
  10. 7 Gypsies tape
mixed media collage

Process:

  1. I decoupaged pieces of serviette to form the background.
  2.  I then decoupaged old pattern pieces on top of the serviette.  I was not very careful because I wanted a crumpled , textured effect.
  3.  I cross hatched about 3 – 4 layers of podge onto canvas.
  4.  I chalked all the chipboard and coloured some in with Copics, also sprayed with dye spray.
  5. I layered a washi tape measuring tape with lace, ric rac and some gel embellishments.
  6. I covered part of the dress form with paper and added a string of flat backed pearls.
  7. I spritzed the roses with Perfect Pearl mist as well as chalking them.

This is a weekend project as time is required for the podge to dry between layers.

~*~*~*~*~*~*~*~*~*~*~*~*~*~*~*~*~*~*~*~*~*~*~*~*~

I am a happy crafter who is happiest when playing with paper and beads.  I have crafted for many years and dabbled with fabric painting, decoupage, mosaic etc, but when I discovered Scrapbooking I fell in love.  I first started scrapping about 9 years ago and taught craft classes at my own coffee shop. This adventure co-incided with my Mom fighting breast cancer.   In 2006 my life turned upside down as my Mum lost her fight, and we immigrated.  To recover from all this I started teaching part time and then worked full time in a local craft store.

I have realised a dream and now part-own my own craft store.

I have been published in local South African magazines; I was on Let’s Scrap DT team for two terms and am currently on Enmarc Designs DT.

I am really enjoying mixed media as I can combine so many of my craft skills and there are no rules.  I am passionate about people exploring their creative spirits and am challenged when a client says “I am not creative” my answer is always, “have you explored different mediums, because you will eventually find a craft you like”.

~*~*~*~*~*~*~*~*~*~*~*~*~*~*~*~*~*~*~*~*~*~*~*~*~

.

.

A Canvas Journal

This article is written by Francesca Albini

I am always exploring ways to organically blend digital with traditional media. I love the versatility and portability of digital, all its different and new brushes, the infinite palette, the possibility of integrating text and images, but often I find that digital art looks very flat and cold when printed.

On my latest trip to America, I thought it would be fun to keep a digital journal, more practical, quicker, less messy. But messy is good, it’s tactile, three dimensional, just like travelling. I felt that I had to find a way to bring to life my digital journal, so that it would be true to my travel experience, the emotions and adventures.

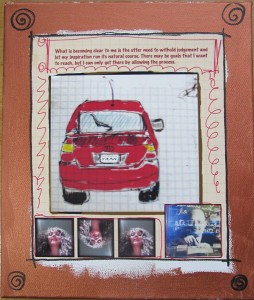
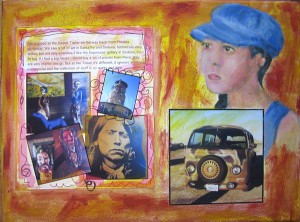
So here are two “pages” of my journal. Originally I drew the car with a ballpoint pen in a notebook. I photographed it and digitally coloured it in and framed it. Then I imported it into the journalling app and added text and marks. For the second journal page, I used various photos I had taken with my mobile phone.

creating journalling on canvas

I decided to use stretch canvas as support, printed the digital journal pages and other photos on printable canvas, glued them to the big canvas with pva, and then added all the paint splashes and details that I felt communicated the heat, the light, the atmosphere.

travel journalling and photos collaged onto canvas

Lastly I also painted a self portrait as a dreamy observer . I am satisfied that the digital elements in these two pictures have a warm, natural feel about them, and gel well with the acrylics and paint markers.

Perhaps keeping a journal on stretch canvas is not very practical, but one or two meaningful pages per trip could turn the walls of your home into an inspiring memory lane.


~*~*~*~*~*~*~*~*~*~*~*~*~*~*~*~*~*~*~*~*~*~*~*~*~

Francesca is a visual artist using pretty much everything she finds around her to record and relive feelings and memories of places and emotions. She collages, paints, draws, photographs. Francesca loves mixing modern technology, such as mobile phone apps, with the simplest of tools such as glitter glue, crayons and other children’s art supplies. Read her blog at franjournal.blogspot.com

~*~*~*~*~*~*~*~*~*~*~*~*~*~*~*~*~*~*~*~*~*~*~*~*~

.

.