Create a Little Luck of the Irish – Hand Painted Wine Glass and Charm

~ * ~

This article is written by Shari Welch

Hand painting on glass is easier than you think, especially when using DecoArt Americana® multi-surface paints. They come in such a large range of colors it makes it so easy to bring your project to life.

One of my favorite things to do when invited over to a friends house is to bring a hand made hostess gift. I really enjoy making it and the recipient get to enjoy a gift made straight from my heart.
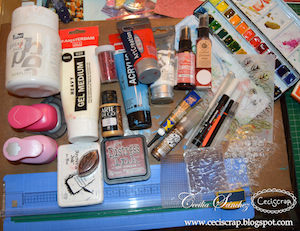
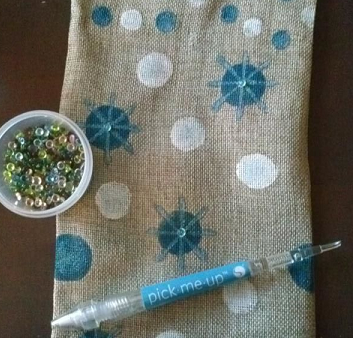
SUPPLIES
1. – Wine glass
2. – Rubbing alcohol
3. – Cotton makeup pad
4. – Paint brushes
5. – Americana® Multi-surface acrylic paints
6. – Beads
7. – 20 gauge wire
8. – Charm
9. – Wire bending and cutting tools

First I chose a large wine glass to paint my image on. I washed my glass in mild soap, rinsed it out really well, and dried it. I saturated a cotton make-up pad with rubbing alcohol and cleaned the areas I was going to paint.

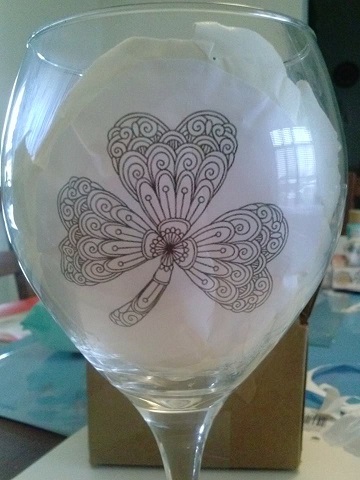
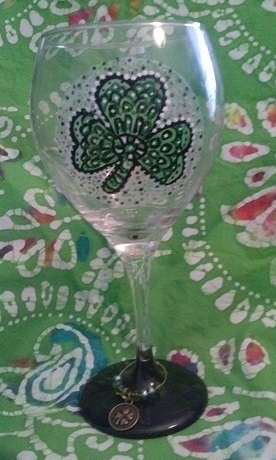
I searched for a shamrock inspiration image online. I didn’t need it to be exactly like I wanted my shamrock to turn out like. I was just looking for the size and something similar to what I wanted to create on my glass. I cut out the image just enough to fit inside the glass. I taped it on the inside making sure the image was centered on the glass.

alternative description

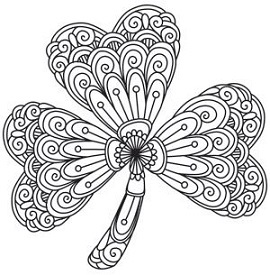
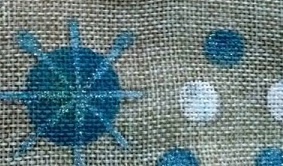
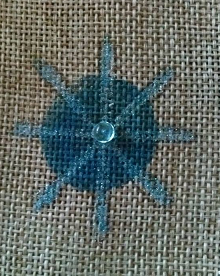
Using the image as a template I painted the shape of the shamrock. When this layer was dry, I painted my version of the shamrock details.

alternative description

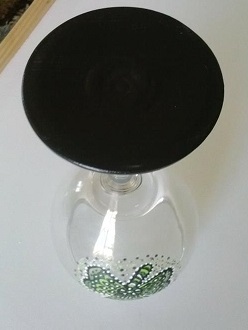
Instead of painting the top of the base of the glass I turned it upside down and painted the bottom. It is much easier to paint and it looks great when you turn the glass over.

bottom of wine glass

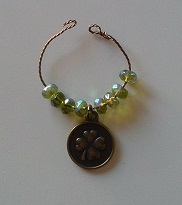
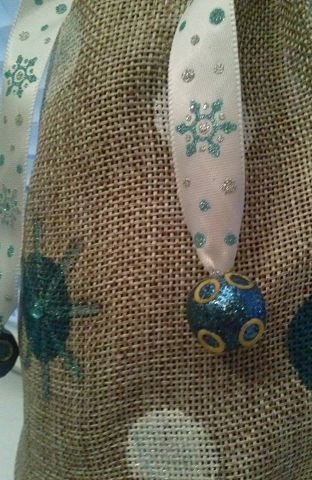
While the paint was drying I started on my charm for the neck of the glass.

charms, beads, wire

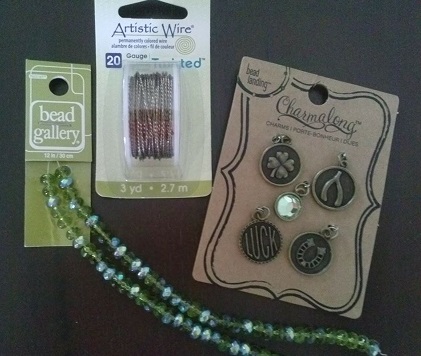
I measured out 5” of 20 gauge wire and cut. I made a small loop on one end. I added 4 beads, a charm and another 4 beads. I made a hook on the other end. I shaped the wire into a circle and it was ready to put on my glass.

charm


finished wine glass

Note: Let the paint air cure for 7 days.
If you would like a top rack dishwasher safe glass air cure for 4 days. Put in a non preheated oven and bake for 30 min at 325. Let cool in the oven with the door open.

I hope you enjoyed this quick and easy glass painting and wine charm tutorial.

Shari

~*~*~*~*~*~*~*~*~*~*~*~*~*~*~*~*~*~*~*~*~*~*~*~*~

Shari Welch is a mixed media artist living in Denton Texas. She is known for using reuse and recycle materials in her artwork. She volunteers for SCRAP Denton where she is on the education committee, teaches workshops, art camps, and performs art demos. She is passionate about mixed media art and enjoys helping others discover their creativity.
Shari studied graphic design in Portland, Oregon before moving to Denton. Besides writing for mixed media art, she is currently a blogger for DecoArt, has been featured in Mixed Media May, and has been in a number of art shows in her hometown of Denton including GDAC “It’s in the bag”, Thirty for thirty art show, and 3arthwurks gallery show.

You can see more of Shari’s artwork at facebook.com/my.altered.life and on her blog shariwelch.blogspot.com

~*~*~*~*~*~*~*~*~*~*~*~*~*~*~*~*~*~*~*~*~*~*~*~*~

.

.

Love Bookmarks for Valentine’s Day

This article is written by Cecilia Sanchez Peralta

How many things can be used to make a bookmark?
While I’m working on something with mixed media techniques, I am not aware of all the material I use.

I use a little of everything on the fly.
When I finished these bookmarks, I’ve put together all the material.

Here is all together:

Love Bookmarks

Supplies:

Gesso,  gel medium, acrylic painting, watercolors, markers, inks, acrylic stamps, glimmer mist, embossing paint, markers, glitter, pastel, stencil, cardboard, brushes, cutters, etc ..

And here are my bookmarks for Valentine’s Day. Full of love.

Love Bookmarks

Love Bookmarks

Love Bookmarks

~*~*~*~*~*~*~*~*~*~*~*~*~*~*~*~*~*~*~*~*~*~*~*~*

My name is Cecilia Sanchez (CeciScrap) and I live in Málaga, Spain.

I am married and we have three gorgeous sons. They inspire me every day with their crazy ideas.

Since my childhood I liked the photography, drawing, collage and make photo albums with cuts and travel souvenirs. I also love crafts in general. In 2006, a few months after birth my twins, I discovered scrapbooking, digital first and then the traditional. I love to do 30X30 pages, cards and mini albums, and for a while now I am fascinated with the Art Journal and Mixed Media, and I do not imagine scrapbooking without getting my hands dirty.
I am inspired by everyday things, feelings … The art journal is a real diary for me, because sometimes I need to express feelings with colors and shapes.

I love learning and discovering new techniques and materials.
I am part of the European design team of KURETAKE, and I am also designer for a monthly blog challenge Sweet Card Club. I contribute with some blogs and digital magazines and organized Scrapbooking workshops in Malaga.

You can see more of me at:

ceciscrap.blogspot.com.es

facebook.com/ceciscrap

~*~*~*~*~*~*~*~*~*~*~*~*~*~*~*~*~*~*~*~*~*~*~*~*

.

.

Making a Hand Painted Bubbly Gift Bag

~ * ~

This article is written by Shari Welch

Soon Christmas will be winding down and New Years Eve will be on our mind. Champagne and ringing in the new year go together like peanut butter and jelly. Here is a project that you can make in a few hours and will look so cute holding your bubbly until the clock strikes twelve.

SUPPLIES

1. DecoArt media fluid acrylics paint (cerulean blue)
2. DecoArt Americana acrylic paint (white wash)
3. DecoArt Glamour dust ultra fine glitter paint (ice crystal)
4. Plain fabric wine bag
5. Decorative ribbon
6. Decorative beads and robin’s nest dew drops
7. Assorted sizes of round sponge pouncers
8. Detail brush
9. Aleenes tacky glue

Note: DecoArt products work seamlessly together. You don’t need to worry that you were not using all of the same product line when creating.

You will want to start out by cutting a piece of card stock or scrap paper the same size as your bag. Insert this into the bag. This will make sure your paint is not going to bleed on to the other side of the bag.

cloth gift bag

Put small amounts of your paint on a paper plate far enough apart to be able to blend together later on. Start with your largest pouncer. Load paint sparingly on the pouncer. Dab off excess on a clean paper plate. Do this same process with the other colors and sizes of pouncers. Let dry several hours or use a hair dryer on low setting.

alternative description

I added some interest to a few of the circles by mixing the blue and glitter paint together.

add any shapes you like

I added a few dew drop accents.

decorating a cloth bag

layer shapes for interest

I filled the inside of a large bead with glue and stuffed the end of each ribbon in the hole. Let dry

decorative ribbons and beads

To finish, add your favorite bubbly in the bag, wrap the ribbon around, tie a bow, and
and it’s party time!

completed cloth gift bag

~*~*~*~*~*~*~*~*~*~*~*~*~*~*~*~*~*~*~*~*~*~*~*~*~

Shari Welch is a mixed media artist living in Denton Texas. She is known for using reuse and recycle materials in her artwork. She volunteers for SCRAP Denton where she is on the education committee, teaches workshops, art camps, and performs art demos. She is passionate about mixed media art and enjoys helping others discover their creativity.
Shari studied graphic design in Portland, Oregon before moving to Denton. Besides writing for mixed media art, she is currently a blogger for DecoArt, has been featured in Mixed Media May, and has been in a number of art shows in her hometown of Denton including GDAC “It’s in the bag”, Thirty for thirty art show, and 3arthwurks gallery show.

You can see more of Shari’s artwork at www.facebook.com/my.altered.life and on her blog shariwelch.blogspot.com

~*~*~*~*~*~*~*~*~*~*~*~*~*~*~*~*~*~*~*~*~*~*~*~*~

.

.

Personalized Gift Tags – On the Gelli Plate

This article was written by Martice Smith II

Personalized Gift Tags

Who says small details don’t matter?! Not us mixed-media artists! As a mixed-media collage artist, I love building upon several layers of paint, doodles and various mark-making techniques to set my work apart from the rest.

If you’re looking to develop your own approach, try these ideas to create your own, personalized gift tags. There’s no need to spend a fortune on commercially made products when you can add a unique touch of your own- using what you already have. Just the extra spark needed for a one-of-a-kind gift!

Here are a few supplies to help get you started:

  • Gelli plate
  • acrylic paints
  • paintbrush
  • brayer
  • white ink pen (for doodling)
  • cardstock / kraft paper
  • stencils (I used Tags & Labels stencil from DecoArt)
  • metal eyelets
  • embroidery floss / twine

Personalized Gift Tags – on the Gelli Plate

1. Create the gelli prints, use prints from your stash, or paint directly onto paper.

Using acrylic paints, use a brayer and roll an even, smooth layer to the Gelli plate. You can also use a round tip paintbrush and paint directly on top of the Gelli plate. Make sure to paint loose brushstrokes, going in various directions. This will give you visual interest.

2. Next, lay down a sheet of cardstock (or your choice of paper) and pull a print.

Photo of Tags and Labels stencil by DecoArt, Inc.

3. Use stencils.

Create a large tag template to use or trace through and cut out the Tags & Labels stencil from DecoArt.

Example of embellished Gelli plate gift tags by Mixed media artist and designer, Martice Smith II

Example of embellished Gelli plate gift tags by Mixed media artist and designer, Martice Smith II

4. Preserve your work!

It’s important to seal the paintings on your tags, especially if there’s any water soluble media. I like to use a spray varnish first. (Remember to do this in a well-ventilated area, to avoid any irritation.)

For one of my tags, I’ve brushed on a thin layer of Crackle Glaze to give a cracked, eggshell appearance.

After drying for several minutes, I brushed on a layer of Triple Thick Gloss Glaze to keep my colors intensely vibrant and shiny. (Both products are from DecoArt.) 

5. Add the finishing touches. 

Eyelets, embroidery floss and twine makes these tags look more polished and really sets the tone for the special gift inside. I love things that twinkle, so I used Sheer Shimmer Spritz in Sparkle (from Imagine Crafts) for some drama.

Add other embellishments to underscore the theme of your tags and you’re done!

Check out these one-of-a-kind gift tags!

Example of embellished Gelli plate gift tags by Mixed media artist and designer, Martice Smith II

Example of gift tag on box by Mixed media artist and designer, Martice Smith II

I’ve used a combination of different elements and techniques, such as:

Acrylic paints and rub-on stickers on Kraft paper, DecoArt’s chalky finish paint (Remembrance), gelli paper scraps on foam dots, threading glass beads, faux stitching, and a cute snowman stamp from RubberMoon

Other ideas to try:

▪   Think about how the tag ‘feels’ in your hands. You may want your tags to have a smooth, velvety feel to them. If so, try Dura Clear – Soft Touch Varnish (from DecoArt). This stuff is really impressive!

▪   Incorporate symbols and doodles.

There’s nothing like the repetition of shapes to add dimension and rhythm to your tags. I’ll be sharing more doodling and intuitive painting techniques in my online, art course ‘Cultivate Your Symbology.

Check out sneak peeks of the lesson I’ll be teaching in the ‘My Color is Beautiful Art’ workshop HERE and HERE

Do you include gift tags on your presents? If so, do you prefer making them yourself or spending a little extra money for the pre-made ones? 

Happy creating!

~*~*~*~*~*~*~*~*~*~*~*~*~*~*~*~*~*~*~*~*~*~*~*~*~

Mixed media artist and designer, Martice Smith II

Martice Smith II is creative director of Martice Smith II – Illustration & Design Studio, based in Missouri and owner of Uneek Art Boutique. She established herself as a freelance Illustrator and graphic designer after receiving her Bachelor of Arts Degree. Her stunning illustrations reveals her love for fashion, typography and wildlife- using a combination of traditional and digital techniques

You can see more of her work via her Facebook page or The Uneek Art blog.

Be sure to join the Uneek Art Letter, -Martice’s monthly newsletter- that offers art biz tips, advice and more digital goodness that will keep you inspired to be the artist you envision yourself to be!

~*~*~*~*~*~*~*~*~*~*~*~*~*~*~*~*~*~*~*~*~*~*~*~*~

.

.