Evolution of a Mixed Media Artist

~ * ~

This article was written by Anjuli Johnson

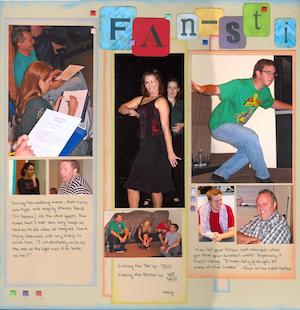
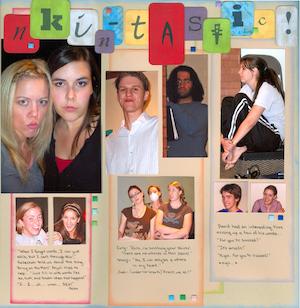
I remember clearly my first scrapbook. I was almost 12 years old, and my mother helped me cover a basic three ring binder with fabric and lace. I used plastic sleeves to hold all my paper treasures- school awards and church certificates, hand-outs with quotes, pictures of friends and all different kinds of ephemera from my middle school days and on into high school. When I was in college, I quickly became enamored of the scrapbooking craze, which seemed especially strong in the Northern Utah town where I ended up.  I spent a little too much on classes and supplies, but I justified myself by the reminder that it was all for preserving memories and having a way (a very fun, rather expensive way) of cataloging my life and being able to share it and pass it on. As years passed and my talent improved, I began to see the work of other artists whose work was not the result of cataloging memories, yet appealed very strongly to me.

The left side of a layout I created.                      The right side of a layout I created.

I began to have this strong desire to use my artistic talents in other ways, but I couldn’t get past my old justification. If I was spending money with a purpose, like preserving memories and photos, I was ok. I just didn’t see the purpose in the lovely, amazing creations I was seeing around me. And I was intimidated by the creative thinking, care, and time that was so obviously a huge part of the work that I was seeing. As long as I could tell myself that what I was creating had a purpose, I could make something that wasn’t quite up to standards and still find value in it. The pictures and memories were still meaningful, even if my layout didn’t turn out quite the way I wanted, and if I couldn’t get my layouts to turn out the way I wanted, even after years of scrapbooking, how could I possibly think I’d be able to make anything else well? It wasn’t until I moved out east, and left all of my art supplies in storage (unwilling) for two years that my thinking began to change. I missed my engagement in the creative process. I missed working with my hands. I missed the satisfaction I felt in finishing a piece and I missed most of all the clarity and balance that spending time at my craft table brought to me. At one point, I started learning an entirely new hobby- working with polymer clay- as a way to get back some of what I was missing so much.

The first mixed media canvas I created.

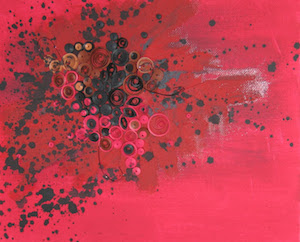
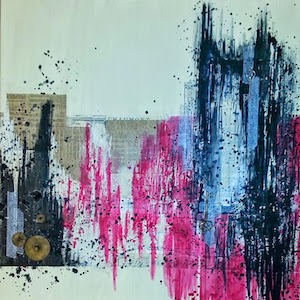
Then came the blessed day all of my long lost supplies and books were returned to me. I began to create again, and that time of fasting did for me what I couldn’t have done on my own- it gave me the courage and determination to finally jump into mixed media art- to create without a purpose. I began buying new supplies, but I also used so many of my old supplies I was surprised. Old paper I’d been collecting, old tools, old embellishments, and old ideas I recycled into new creations. I even used some polymer clay in my new pieces, and as I began to work every day, I realized that I was creating with a purpose. I was focusing my thoughts and learning more about my beliefs as I worked to incorporate meaning and symbolism in my pieces. My talents were developing and ideas were flowing more regularly.  I was learning discipline and patience as I struggled with new supplies and techniques. As I started a blog and began to share my pieces, I saw others find meaning and understanding in what they saw in my work, and I was likewise moved and inspired when I began to learn about the effort and meaning in the work of other artists. It’s been amazing to realize how important and sacred the act of creation is. As we create, we become. We become better artists, but even more than that, we can become better people, and we help others do the same. It’s become a defining lesson; understanding that the process of creating is just as important, if not more important, than the final result of each piece.

A commission collage I just finished.

I am still intimidated by the awesome art I see around me, but I no longer feel that my scrapbooks are the only valuable art I create.  I have grown in courage and my comfort zone is getting bigger and bigger. So whether you are a full-time artist making millions of dollars, or a beginner full of self doubt and fear, let’s get creating and let the process refine us.  It will- I guarantee it.

~*~*~*~*~*~*~*~*~*~*~*~*~*~*~*~*~*~*~*~*~*~*~*~*~

Anjuli Johnson is a Mixed Media Artist from Raleigh, NC.  She began her art career as a scrapbooker, and it’s been an evolutionary process every since.  She loves all things mixed media- paper, glue, paint, canvas, pens, wire, gears… the list goes on and on.  She is constantly trying to push through her fears to discover and develop her talents, meet new people, and learn from those around her. You can see more of Anjuli’s work on her Facebook page or Website – the Far Pavilion

~*~*~*~*~*~*~*~*~*~*~*~*~*~*~*~*~*~*~*~*~*~*~*~*~

.

.

Mixed Media Art Yarn

~ * ~

This article was written by Katja Blum

I love yarn!

Imagine a hysterical, yet manly cackle in the background, as my husband marvels at this bold understatement, surveying the yarn-filled tubs and baskets and boxes that are taking over our apartment. I am endlessly fascinated with the colors and textures of yarn. A skein of silk, wool or bamboo yarn is a feast for the senses – even for your nose, if you happen to enjoy the faint whiff of vinegar bath on hand-dyed yarn. But yarn is not just pretty; it is a ball or hank of raw artistic potential. A ball of yarn could become anything – a sweater or hat, obviously, but also a piece of jewelry, a fuzzy pom-pom or a prayer flag woven saori-style. It could be wrapped around a canvas as a textural background or dipped in glue and molded around a balloon or bowl for a yarn sculpture. It can be painted, stitched, knotted, cut, braided … you get the idea.

If there is one thing I like more than using yarn, it would be making it. Spinning is my very favorite craft activity – I spin way more yarn than I could ever knit or weave up. It’s great fun to make the big, crazy, textured yarns that are commonly referred to as “art yarns”. Bobbles and beehives and beads, oh my!

Several kinds of textured, embellished yarns

If you are a spinner, grab some fiber, decorations and a tutorial and start making art yarn. If spinning isn’t your thing, you can find beautiful art yarns from fiber artists at craft fairs and online. If you need just a few yards of a special embellished yarn for an art project, you can make it yourself. No spinning required.

You’ll need:

  • Yarn
  • Craft wire, 28-30 g
  • Fabric strips, paper strips, ribbons, beads, sequins – any embellishments that can be strung or spiked on your thin craft wire
  • A sturdy clamp or vise

You need yarn, craft wire and embellishments

The base for your art yarn is, well, yarn. Ingenious, I know. Any fiber content and thickness will work, but bear in mind that your finished yarn will be quite a bit bulkier than the base strand. You can, of course, combine different yarns for a marled look.

Prepare the wire:

A length of craft 28g craft wire is going to be the “spine” of your yarn. Obviously, yarn is made by twisting fibers, so that they for a long string and hold together. Your no-spinning art yarn is held together by twisting the base yarn with thin wire, which will make it hold its shape and secure the embellishments. For one yard of finished yarn, you’ll need to string about ½ yard’s worth of embellishments, if you want them fairly closely together.

Prepare your craft wire by threading different embellishments on it

Paper strips are best spiked on the wire in a harmonica fashion for a firm hold, but with fabric and ribbon, you can just poke the wire through one end and secure the loose length of material while twisting. You should leave the wire on the spool while threading your embellishments. They will be spaced out later, and it’s best not to run out of wire. If you do want to use wire scraps or different colors, you can twist the wire ends together and smooth them into the other materials.

Secure the ends of your base yarn and wire in a heavy clamp or vise. If you don’t have any, that’s fine – just knot and wrap the ends around something stationary. They have to stay in place as you twist. I once duct-taped the ends to the leg of my desk. It worked.

Twist away. Make sure to twist in the same direction throughout. Longer fabric strips tend to wrap around everything else, so take care to have the wire wrap around the outside of all materials. When a length of yarn is completed, move it up in the clamp or vise for a convenient working distance. Don’t crush beads and other embellishments when securing the yarn – ask me how I know this is an issue.

Make as much yarn as you need and embellish to your heart’s content. Obviously, the wire-reinforced yarn is going to be stiffer than regular yarn, but it is a wonderful addition to mixed-media collages, jewelry, sculptures and art dolls.

Close-up of the finished mixed media yarn

~*~*~*~*~*~*~*~*~*~*~*~*~*~*~*~*~*~*~*~*~*~*~*~*~

Katja Blum is a writer and translator from Tulsa, OK. As an artist, she started with yarn, fabric and papier mache (rarely together), branching out into collage and other paper arts about ten years ago. Her latest obsession is making soft stuffies and art dolls – to the delight of her toddler. She also likes to find creative solutions for ugly or broken things around the house – to the delight of her husband.

You can see more of her work with fiber, paper and words at www.thewaywardsheep.com

~*~*~*~*~*~*~*~*~*~*~*~*~*~*~*~*~*~*~*~*~*~*~*~*~

.

.

Mixed Media Jack-o-Lanterns with Creative Paperclay

~ * ~

This article is written by Gloriann Irizarry

Welcome back and hola to all my wonderful followers, collectors and friends.  It’s Gloriann Irizarry here to show you how easy it is to use household items like LED lamps to light has an armatures to light up your paper sculpt projects.

mixed media jackie o lantern handmade halloween decorations

I have to say this is a great way to enhance any project and to give is a little bit of pizzaz to any sculpture. I do have to thank one of my wonderful friend and amazing Folk Art artist Mr Patrick Gill. He create the most amazing art challenges and welcomes us artist to create pieces. His group Every Witch Way Lane is full or great artist whiling to lend a hand and guide you through the sculpting process. His group can be also found under #EWWL. His guidance was my inspiration for this piece Jack O Lantern or in my case a Jackie O Lantern .

Now let me show you how I sculpted this piece and what I choose to be the lighting source will make you look at house hold items differently from now on.

handmade jack-o-lantern halloween decorations

Now let hunt down some LED battery operated lamps. I like to start any search at my Dollar Tree Store and could not believe it I could not believe what a find. I found these great solar LED desk lamps and I couldn’t resist them. I have to say this one was a big successful hunt.

Let purchase a few for this and future projects

handmade jack-o-lantern halloween decorations

I start by taking the LED lamp apart. I will not be using the top lamp shade only the lamp, post and the base. So I discarded those out.

handmade jack-o-lantern halloween decorations

I grab a pack of Creative Paperclay and roll the clay  into a ¼ thick sheet. I recycled a old thick wrapping paper roll and used it to roll the clay sheet.

handmade jack-o-lantern halloween decorations

I decided to create a folk art Jack O Lantern. Use the clay sheet and cover the top of the lamp

creative_paperclay_ewwl_jackie_o_lantern_mix_media_article_5

Pinch the clay all around the top of the lamp make sure you cut any excess out and smooth all the edges with water to make it easy to work with.

creative_paperclay_ewwl_jackie_o_lantern_mix_media_article_6

For the facial expression I wanted her to bring a smile to you.

To give your sculpt the smile you’re looking for grab a sewing needle and free hand cut the eyes, nose and mouth off. Remove any excess paperclay.

creative_paperclay_ewwl_jackie_o_lantern_mix_media_article_7

Make sure the head smile is what you’re looking for test it by turning the lights on.

I did turn mine by covering the solar panel. It looks good!

creative_paperclay_ewwl_jackie_o_lantern_mix_media_article_8

While the head dries you can start working on the dress.

I grab the aluminum foil and sculpt a dress form.

creative_paperclay_ewwl_jackie_o_lantern_mix_media_article_9

Use has much foil you want to create the desire shape you are looking for. Press, twist and turn until you are completely satisfy with the form.

creative_paperclay_ewwl_jackie_o_lantern_mix_media_article_10

After your satisfy with the aluminum foil form cover completely with a rolled ¼ thick Creative Paperclay sheet and let it dry completely to create the base for your Jackie O Lantern

creative_paperclay_ewwl_jackie_o_lantern_mix_media_article_11

While we wait for the dress core to dry I work sculpting the face. I add a little more clay on the eyebrows, cheeks and jaw. Moist your tools or fingers and smooth the clay by moving in place little by little. Add a little more or take some out depending on your taste.

creative_paperclay_ewwl_jackie_o_lantern_mix_media_article_12

I like to add clay little by little and let the sculpt speak to you. For the most part it will tell you when to stop adding or removing Creative Paperclay.

creative_paperclay_ewwl_jackie_o_lantern_mix_media_article_13

I added a more clay and move it in shape to create the desire smile. You can make if chunky or thinner is all up to you. Just make sure to smooth all the clay edges with the water bottle or with the soft wet brush blender.

creative_paperclay_ewwl_jackie_o_lantern_mix_media_article_14

The key to add more character to any piece is the on the details. So focus on these to give your sculpt your signature style. For this piece I wanted to give her a female look by adding some hair bands and little stomp hat.

creative_paperclay_ewwl_jackie_o_lantern_mix_media_article_15

I’m not quite done yet my friends. I wanted my pumpkin head to look natural and spooky at the same time, so I created the pumpkin vertical seems and I also added some more detailed to the head. Like a couple leaves to decorate the pretty root hair bands.

creative_paperclay_ewwl_jackie_o_lantern_mix_media_article_16

Add a couple wrinkles here and there. This will give your folk art paperclay sculpt the spookiest and unique character ever

creative_paperclay_ewwl_jackie_o_lantern_mix_media_article_17

I also smooth the edges all around the head to make sure is all round a plump. This will give Jackie O Lantern the pumpkin look you are looking for.

creative_paperclay_ewwl_jackie_o_lantern_mix_media_article_18a

Make sure your leaving the solar panel cell free from shadows and excess clay.

You have to remember this solar panel is the one will recharge your batteries to illuminate the Jackie O Lantern face.

creative_paperclay_ewwl_jackie_o_lantern_mix_media_article_18

I waited for the dress form to be completely dry to start giving the dress the neck and sleeves.

Add a little more clay to create the top. I added texture to the dress by pressing the lace fabric to the ¼ thickness sheet. This will give a nice fabric finish to the dress.

creative_paperclay_ewwl_jackie_o_lantern_mix_media_article_19

Do the same for the skirt. Roll a long enough piece of paperclay to cover the entire skirt.

creative_paperclay_ewwl_jackie_o_lantern_mix_media_article_20

Now to make sure the skirt flow naturally I cut start by cutting some triangles off from the top portion of the skirt to remove the excess material off.

creative_paperclay_ewwl_jackie_o_lantern_mix_media_article_22

Applied the skirt to the sculpt and adjust the sheet to flow naturally and press the dress edges smooth to the waist. Don’t worry much about the look once the skirt is dry and set you will cover the waist with a thin sheet in shape of a corset.

creative_paperclay_ewwl_jackie_o_lantern_mix_media_article_23

Here you can see the final simple corset piece I made to cover the imperfections of the skirt.

creative_paperclay_ewwl_jackie_o_lantern_mix_media_article_24

Don’t forget to give her a set of arms

creative_paperclay_ewwl_jackie_o_lantern_mix_media_article_27

creative_paperclay_ewwl_jackie_o_lantern_mix_media_article_28

I like to sand the piece in stages with 3M sponge sanders.

I start the shaping with the medium size grit

creative_paperclay_ewwl_jackie_o_lantern_mix_media_article_26

When sanding the pumpkin head sand it vertically so the lines can look naturally once the piece is painted. I like the stress effect this type of sanding gives to the final sculpt.

creative_paperclay_ewwl_jackie_o_lantern_mix_media_article_29

Lightly sand the any imperfection or clay excess of the dress and even out the stand.

creative_paperclay_ewwl_jackie_o_lantern_mix_media_article_30

I mix myself some red and blue to create my very own shade of purple and apply 2 coats of acrylic paint to the entire dress.

creative_paperclay_ewwl_jackie_o_lantern_mix_media_article_31

I wanted to give a nice sheen to the pumpkin head so I used the Martha Stewart pearls orange. I painted the stumps pearl green and accented with a brown dry brush.

creative_paperclay_ewwl_jackie_o_lantern_mix_media_article_33

Add more sheen to the dress with Martha Stewart gold glitter.

I glued a stick to the shoulders of the doll to hold the arms in place .

creative_paperclay_ewwl_jackie_o_lantern_mix_media_article_35

I also use the black acrylic paint to give her some accents here and there.

Use some pink acrylics to blushed the cheeks with the dry brush technique.

Let the paint dry overnight so you can seal your sculpt with a nice spray sealer and the piece is ready to be display once it is all dry.

Now it is time for you to display your new Jackie O Lantern.

Well I hope you enjoy this article and if you have any questions or concern please feel free to send me an email at gloriann@byglori.com

Feel free to like or comment on this article below.

Have a bless day and like always have fun crafting.

Sincerely Gloriann Irizarry

creative_paperclay_ewwl_jackie_o_lantern_mix_media_article_36

~*~*~*~*~*~*~*~*~*~*~*~*~*~*~*~*~*~*~*~*~*~*~*~*~

My name is Gloriann Irizarry. I was born and raised in the beautiful Caribbean island of Puerto Rico. Ever since I can recall, I always had my hands on crayons, scissors and paper. My parents knew from the start how much I love to create!

As a mother of three young wonderful daughters, I find myself working, caring for my family, and taxiing kids from here to there for various sporting events.  I have to say I’m never bored!  I enjoy every little moment I spend with my girls, but will always continue to work time to create art into my daily schedule as that means doing what I love the most. My girls are learning the joys of creating also!

I love to sculpt and will never stop creating. I was born this way and for that I thank GOD every day. Art has been a great way to be creative and to express myself.  I like to keep my hands busy creating – whether it is unique jewelry, art dolls, oak sculpture figures, fairy wings for all your project needs, or even wigs and clothing for your sculptures.  I love all the variety in art! Why? because ART is so rewarding. Seeing your creation take form is an awesome feeling.

You can see more of my work on my website – ByGlori

~*~*~*~*~*~*~*~*~*~*~*~*~*~*~*~*~*~*~*~*~*~*~*~*~

.

.

Creating Mixed Media Hair Tutorial

~ * ~

This article is written by Kate Palmer

Today I’m going to show you how to create interesting Mixed Media hair with depth and texture.  You can use this technique on canvas or paper and it results in a project that you want to reach out and touch – to run your fingers over the pattern and surface (well I do any how!)

Mixed Media Hair

What I used:

  • Lindy’s Stamp Gang Products:
  • Magicals mixed with Gesso for pastel background – Cheshire Cat Cherry and Tea Pot Purple
  • Magicals mixed with Gel Medium for hair base – Cheshire Cat Cherry and Tea Pot Purple
  • Magicals mixed with water as ink – Cheshire Cat Cherry, Tweedle Dee Denim and Tea Pot Purple
  • Starburst sprayed over background for subtle shimmer – Cheshire Cat Cherry and Down the Rabbit Hole
  • Magicals mixed with acrylic paint for face – Cheshire Cat Cherry and Tea Pot Purple

Other Products:

  • Martha Stewart Gesso – white
  • Golden Mediums – Glass Bead Gel and Fiber Paste
  • Stencil Magic Stencil – Floral Accent
  • White pre-gessoed canvas

To Create the Mixed Media Hair:
Sketch image onto your canvas
Mixed Media Hair

Colour the hair using Magicals (Cheshire Cat Cherry and Tweedle Dee Denim) mixed with Gel Medium to create a base layer.

Mixed Media Hair

I applied the cherry all over the hair and then added the denim to darken.

Mixed Media Hair

Once the base layer is dry, cover hair with texture paste, making sure to create loads of peaks and valleys as these will catch the colour and shimmer of subsequent layers.

Mixed Media Hair

Once the texture paste is dry, mix Magicals (Cheshire Cat Cherry and Tea Pot Purple) with water to create a sparkly ink and apply over the hair, make sure to be heavy handed and allow the mica to settle into the valleys in the texture paste and allow to dry thoroughly.

Mixed Media Hair

Using your finger apply a light layer of Inka Gold to the high points created by the texture paste, this picks up the texture and breaks up the colours underneath a little.

Mixed Media Hair

For the final step, you will need some Glass Bead Gel and a bold stencil.  Protect the face and apply the bead gel through the stencil onto the hair.

Mixed Media Hair

You will need to allow each section of bead gel to dry before applying the next.

Mixed Media Hair

Once dry, the bead gel takes on a wonderful glossy appearance and the clear beads pick up the colours from underneath and enhance the sparkle.

Mixed Media Hair

I really adore how this turned out, the hair in real life is truly a show stopper!
Kate

~*~*~*~*~*~*~*~*~*~*~*~*~*~*~*~*~*~*~*~*~*~*~*~*~

Kate Palmer though perhaps better known as Sparkle Tart loved playing with mixed media and techniques.  Most of her work incorporates sparkly media of some sort, which is used on journal pages, canvases, scrapbooks or hand made cards.

You can see more of Kate’s work at Sparkle Tart or via Facebook – Keep It Simply Sparkly

~*~*~*~*~*~*~*~*~*~*~*~*~*~*~*~*~*~*~*~*~*~*~*~*~

.

.