Michelle G Brown | Mixed Media Art

The Woman behind Craft Test Dummies – Jenny Barnett Rohrs

~ * ~

This article was written by Michelle G Brown, Creative Director at Mixed Media Art

art and craft product reviews and tutorials are the key at Crart Test Dummies

I can’t remember now how I came across the Craft Test Dummies website in internet-land but I was certainly captivated by the simple product reviews and tutorials that the Craft Test team were undertaking. I loved seeing markers used on different papers, inks used across different mediums and interesting and unusual ways to make cards and other craft projects. I was so intrigued by the work that Jenny and her team do that I wanted to know the behind-the scenes details of this remarkable website. So, with the wonders of the internet, I reached out to the women-behind-the-website, Jenny Barnett Rohrs and we had a great Skype chat, all about life, crafting and mixed media art.

Craft Test Dummies are the premium website for art and craft product reviews and tutorials

Craft Test Dummies started from humble beginnings in 2008. Jenny had an extensive crafting background, and along with her background as a cognitive behavioural therapist, wanted to get into the details of the “why”s and “how”s of crafting products. She wanted to know which markers were suitable to include on her fabric quilts and how long should this adhesive take to dry. After searching for these answers online , Jenny realised that there wasn’t anyone consistently reviewing the products with transparency and honesty. So Jenny set out to review these products on our behalf and share them via her website, in a fun way – like talking with a best friend or sister, not as a consumer report.

And so the Craft Test Dummies website was started and has been steadily growing and attracting like minded people who what to play, create and answer questions – to be our online craft mentors. Jenny now has four other “Testers”, all volunteers.

The key to the Craft Test Dummies success is their two key principles:-  “we are provided product to review, but the review will be honest first, and helpful second” Jenny says “our audience can smell a fake and we will turn stuff down if it’s not right for the blog”. Not only does Jenny and her Testers tell us about what these products can do, they also provide feedback to the manufacturing companies if there are problems with the product, like one coloured marker tends to dry out before the others, or if measurements in instructions are incorrect.

“You need to believe in what you are doing”,  Jenny continues – and we can see how her passion for all things crafting shines through.

~*~*~*~*~*~*~*~*~*~*~*~*~*~*~*~*~*~*~*~*~*~*~*~*~

As with every working mother, Jenny juggles her family and business; having a supportive partner helps and the family understanding that CTD is a business and needs time to support it. Jenny is lucky to have a third floor studio, like a mini apartment, complete with bathroom but minus the computer and internet access. Her day starts with some exercise and the morning focusses on the writing and social media side of CTD. After lunch, until the kids come home from school, it’s crafting time. Jenny enjoys a range of craft and will “play with anything”.

“Paint, mist, stencil, draw, Zentangles – what ever is at hand”, Jenny says with a laugh. “I taught myself how to quilt. It’s like free drawing, not the patterns or matching prints, but quilting on newspapers, and up-cycling and painting with fabric”.

With a professional background in music therapy, painting found objects became a collision of her two worlds. Jenny started painting guitars and drums, and then moved into making her own drums and decorating them.

~*~*~*~*~*~*~*~*~*~*~*~*~*~*~*~*~*~*~*~*~*~*~*~*~

When asked whether social media is a blessing or a curse, Jenny laughs. “I just marvel at the wonders of the internet,” she says. “It wasn’t around 10 years ago and look at what we can do with it now”. Jenny finds that each social media channel (Facebook, Twitter, Google +, Youtube, Pinterest) all have their own personality and following. Being a social person and an extrovert, Jenny loves keeping in touch with the crafting community and it helps to offset the potential loneliness with working form home.

We discussed the rise of the popularity around the mixed media art movement. We note that scrapbooking seems to be in decline but crafters are moving towards pocket journals and other transportable art forms, including all sorts of media. “I’m so pleased to see the “product vomit”approach to scrapbooking slip away; this doesn’t tell a story” Jenny comments. ” We want to use our personal style”, she continues “Long live mixed media” Hear, hear, we all say!

Jenny reminds us that we are all creative and craft is everywhere. We need to know our products and be confident with the tools and materials we do have, so we can create without restrictions. and if you need a “quick craft fix”, Jenny tells us you can’t go past making a handful of greeting cards. Jenny donates cards to Operation Write Home every year and uses the extra materials from product reviews to make the cards.

~*~*~*~*~*~*~*~*~*~*~*~*~*~*~*~*~*~*~*~*~*~*~*~*~

The Craft Test Dummies meet up each year for their Winter assault at the Craft and Hobbies Association show in January 2014. Jenny and her team were on the look out for the latest crafting trends and you can find their reviews at Craft Test Dummies: CHA 2014 New Product Recap

I had a chance to catch up with Jenny and two of her team members at CHA – we FINALLY caught up on the last day and had so much to share. I have a definite feeling that the Craft Test Dummies and the Mixed Media Art team will be collaborating on a project in the near future!

Until then, you can read and see more of Jenny at:

Craft Test Dummies on Facebook

Craft Test Dummies on Pinterst

To see Jenny in all of her crafting glory, watch her here with Julie Fei-Fan Balzer on Scrapbook Soup TV

~*~*~*~*~*~*~*~*~*~*~*~*~*~*~*~*~*~*~*~*~*~*~*~*~

Michelle G. Brown is passionate about mixed media art and enjoys sharing her knowledge and techniques with you to allow you to express your own creativity. Michelle understands that many of us have an inner need to create. By learning a few basic techniques the amazing world of mixed media art is accessible to everyone!

You can see more of Michelle’s work at Mixed Media Art or via Facebook – Creating Mixed Media Art

~*~*~*~*~*~*~*~*~*~*~*~*~*~*~*~*~*~*~*~*~*~*~*~*~

.

.
Ribbon Wrapped Journal

~ * ~

This article is written by Nicole.                                 

I like making crafts and keeping busy. Here is one of the projects I like to make to give as a personalised gift, or to use as a Teachers Gift at the end of the year.

mixed media project ideas for art journal

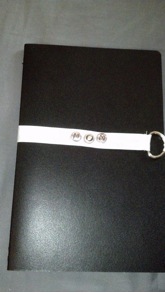
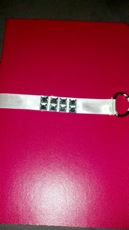
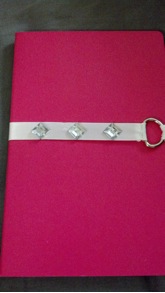
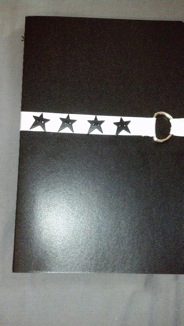
I used 5″ x7″ leather journal that I bought at Wal-Mart in a 3-pack.  They were only about 70 pages so I used a thin ribbon, but a wider ribbon would work just as well.  I got most of my supplies at Wal-Mart except the black star buttons and the “mom” letters; those I got at Hobby Lobby.

Items needed:

Journal of your choice

Ribbon of your choice

Metal D ring

Scissors

Fabric pen or marker

Hot glue gun and hot glue

Velcro strips

Needle and thread

Buttons and other embellishments

Start by wrapping the ribbon about 1.5 times around your journal and cut it off the spool.  This is to ensure that the Velcro closure will be in the back and the D ring will be in the front.

Sew a seam on both ends of the ribbon, being careful if your ribbon has an obvious front and back.  You could also hot glue the seam, but I like the look of a sewed seam.

Sew the D ring on to one end of the ribbon. Then, wrap the ribbon around the journal and thread the ribbon through the ring to determine the placement of the Velcro strip; I placed one end of my closure about 1/2 inch inside the seam of the ribbon to give a pull tab.  Make sure the ribbon is not twisted and the D ring is straight and on the front of the journal.  Mark the placement for the Velcro strips with a fabric pen or marker; remember you will have to make one mark for each side of the Velcro.  While the ribbon is still wrapped around the journal go ahead and mark the place for your embellishments.  I was unsure at first when I started these so I waited until later, which is fine as well.

Remove ribbon and attach the Velcro strip according to package instructions.  I used some that had adhesive on the back, but because my ribbon was satin, it didn’t stick and I ended up having to sew it.  After that you can then add your embellishments.  Use your imagination and be as creative as you want.  Sine I made mine for gifts I used buttons and jewels to represent their personalities.

mixed media project ideas for art journal

When your embellishments are attached to the ribbon, wrap it around the journal again, this time gluing it to the spine (and along the back if you’d like) of the journal.  At the time I made these I did not have a hot glue gun (I’m just starting out in crafting) so the ribbon just slid right off.  I personally think they would have been better if they had been glued down.

Guess what?  You are now finished and ready to enjoy your super adorable and one of a kind journal.

I hope my instructions are easy to follow and that you enjoy your journals.  I would love to see what you create so feel free to send me a pic of them at luckyhandsproducts@gmail.com.

~*~*~*~*~*~*~*~*~*~*~*~*~*~*~*~*~*~*~*~*~*~*~*~*~

Nicole is happily married with 2 adorable kids. She loves to write, using her degree in creative writing. Nicole also enjoy reading, crafting, photography, and cooking (especially chocolate) and loves to stay busy.

journal and mixed media project ideas

mixed media journal project ideas

.

.

Making Your Own Duct Tape Flowers

~ * ~

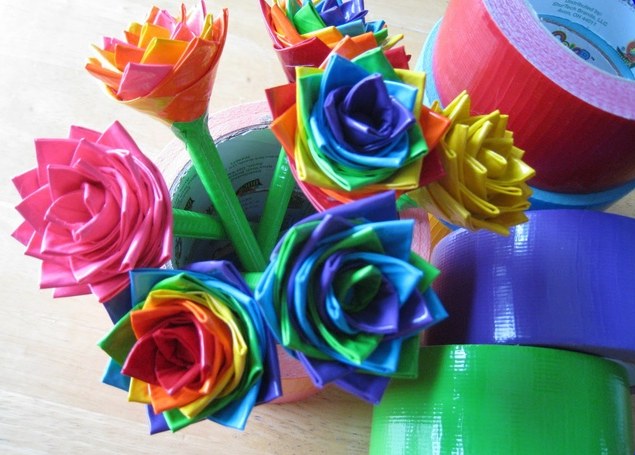
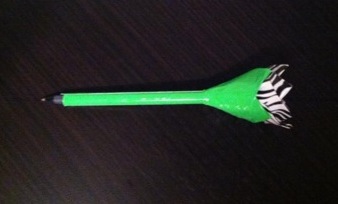
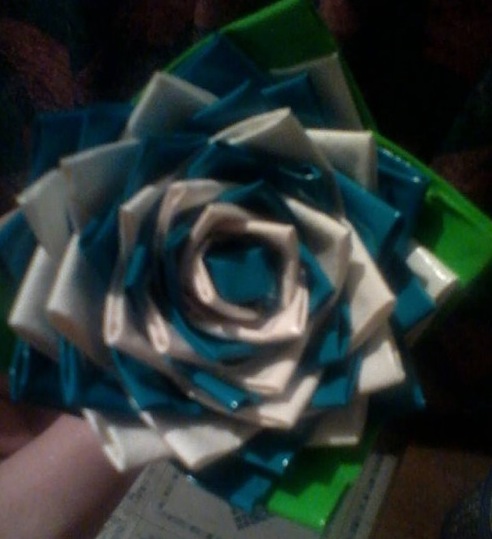
Angee Woodman is crazy about duct tape and has created all sorts of things using this colourful material. Today Angee will run us through making our own duct tape flowers. Here we will add the flower onto the end of a pen or pencil – you are welcome to add a flower onto a skewer or wire, to give you a multiple use design.

Make your own duct tape flowers

Tools and Materials

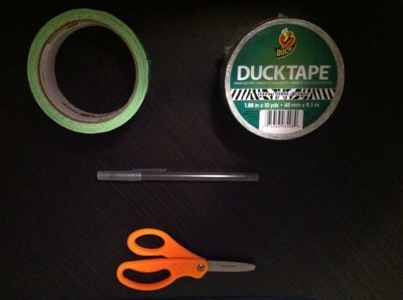
Here are the materials you will need:

– Two colours of duct tape: You can use any design or print you want!

– scissors

– pen, skewer or wire to support flower

Make your own duct tape flowers

Process

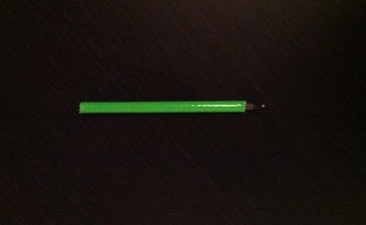
The first step is to cover the pen, wire or skewer base. You take the duct tape lengthwise and wrap the pen in it. Most people like to use green to mimic a flower bases but you can use other colors as well.

Make your own duct tape flowers

The next step is to make the petals. The key is to measure two inches of duct tape of whatever print of color you want to be your petals. Cut 2 inch long pieces. You will need about 20 pieces for a small flower. Remember you can always cut more if your flower isn’t full enough.

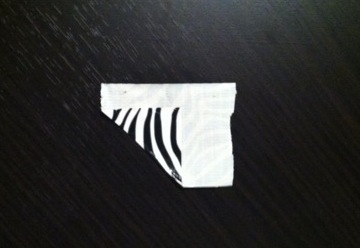
Once you cut the pieces, you’re going to bend one corner over so it looks like a boat sail

Make your own duct tape flowers

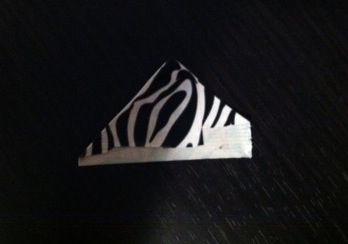
Then you will fold the other edge over.

Make your own duct tape flowers

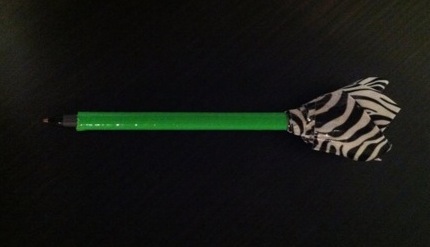
You’re going to wrap this around the very end of the pen opposite of the end you write with. Make sure the print is on the outside and the sticky part of your pedal is wrapped around the pen base. You’ll want a little bit of a point sticking out. Once you do this, repeat the process but stick your petal across from the one you just made. Then put a petal where there is empty space. Do another petal across from that. The object is to put petals in between other petals. As you do this, the flower will take form.

Make your own duct tape flowers

The last thing to do is to add leaves. This is the same process as the petals but I just make the leaves about ½ inch bigger, cutting 2 1/2 inch pieces from the free tape. You will attach the leaves to the bottom of the flower and the great thing about this is that it blends in with the stem.

Make your own duct tape flowers

And there you have it! A duct tape flower pen. You can also use these flowers on the pens for such things as gift wrapping and making smaller ones for rings. The possibilities are endless!

Make your own duct tape flowers

~*~*~*~*~*~*~*~*~*~*~*~*~*~*~*~*~*~*~*~*~*~*~*~*~

You can see more of Angee Woodman and her crazy Duct Tape products on her etsy shop Duct Dynasty

~*~*~*~*~*~*~*~*~*~*~*~*~*~*~*~*~*~*~*~*~*~*~*~*~

.

.
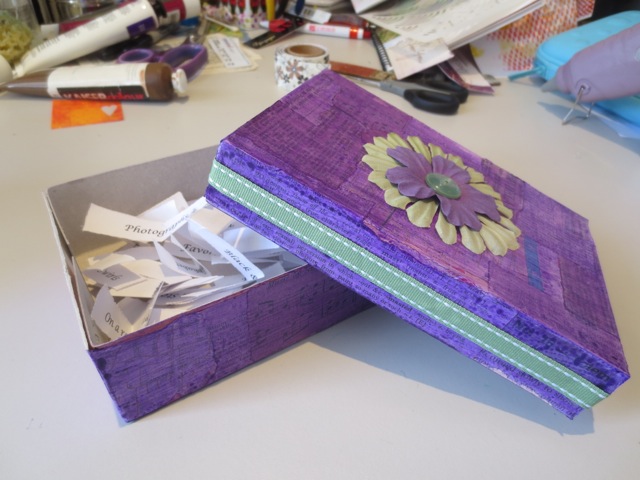
Creative Prompts Gift Box

~ * ~

When we sit down to craft, there are times when we need a little creative guidance to get us started. It may be starting a new project and deciding on a theme can also be challenging.
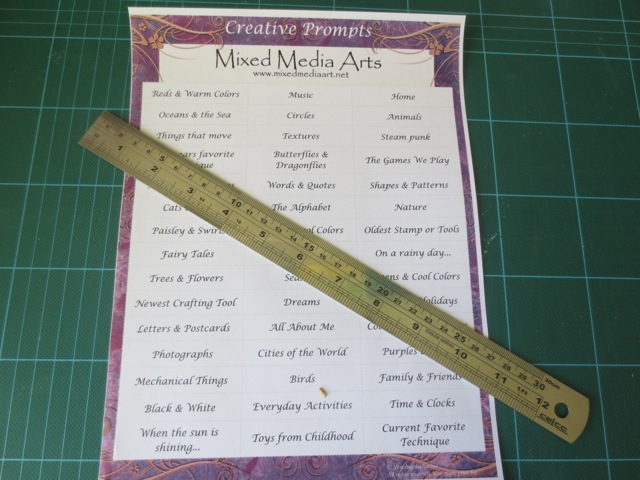
Mixed Media Art has put together this Creative Prompts ephemera sheet – 45 categories and ideas to boost your creativity. These creative prompts can be used to spark an idea, set guidelines for a swap or used as a theme for your art journal. Some of the prompts are quite specific; others give you a general theme to get you started. You can choose to use them however you wish.

mixed media art ideas

Creative Prompts Gift Box

We loved the idea of these creative prompts so much that we wanted to share them with our crafting friends. And what better way to do that than to make a box to store our creative prompts in. Whether you decide to give it to a friend, take it to your crafting group or keep to yourself,  it is entirely up to you!

Materials & Tools

  • Mixed Media Art Ephemera Sheet 19 – Creative Prompts
  • Cereal Box
  • Scissors
  • Craft knife, steel rule and cutting mat
  • Stapler
  • Text ephemera sheets – at least 3 different fonts
  • PVA glue
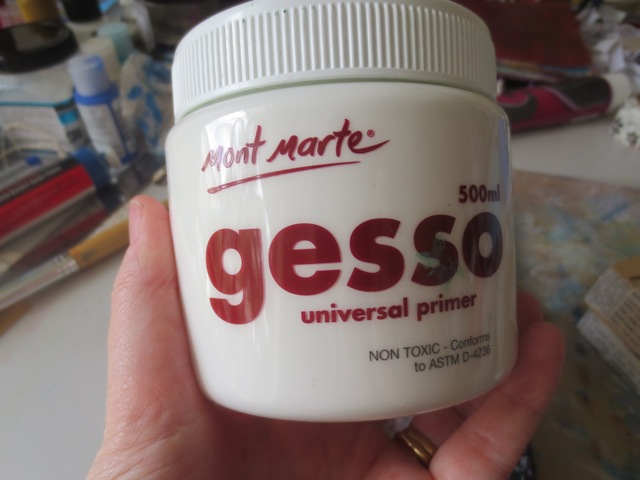
  • Gesso
  • Acrylic paint of your choice
  • Paintbrushes, palette and water pot
  • Spray varnish
  • Your choice of embellishments

Making your Box

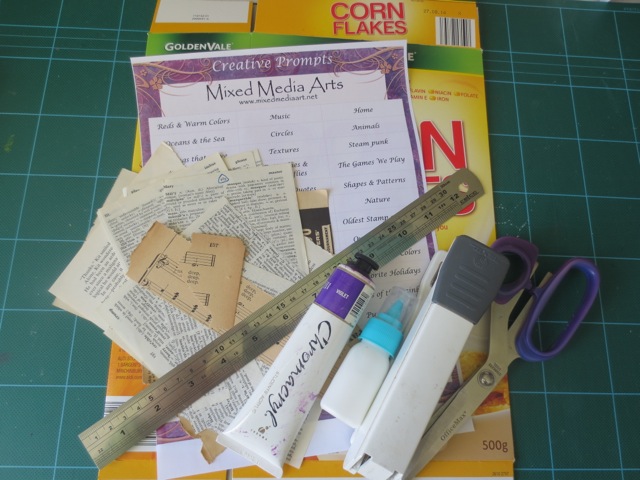
1. Gather up your materials

Mixed Media Creative Prompts

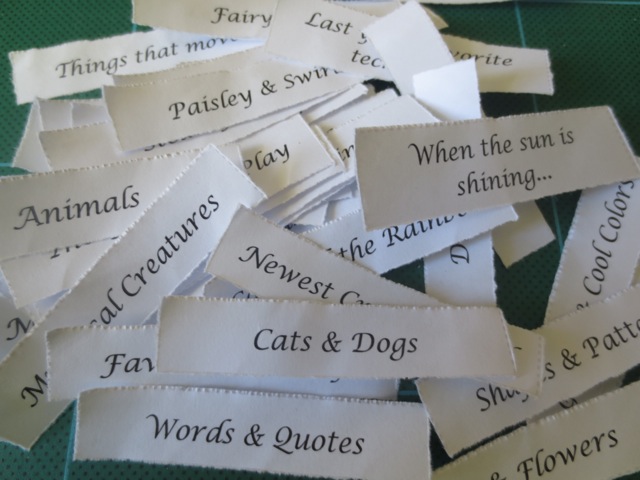
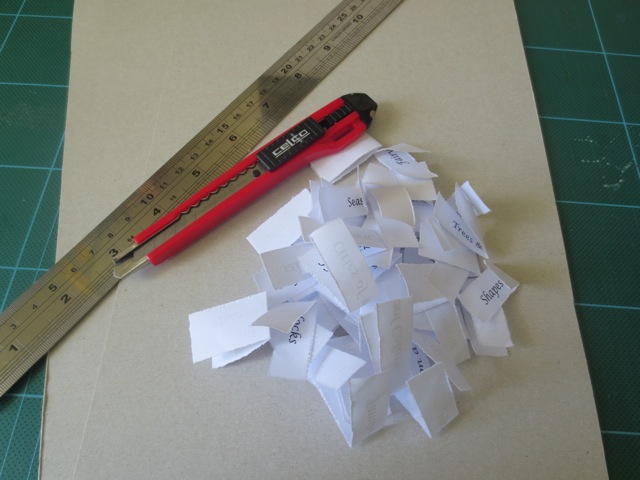
2. Using the steel ruler, tear your creative prompts into individual slips. You could also scissors or a craft knife, but I like the torn edges and find it much quicker.

mixed media art ideas

mixed media art ideas 

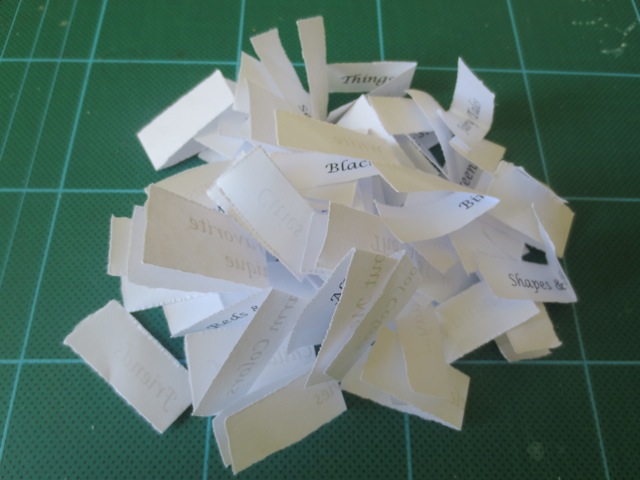
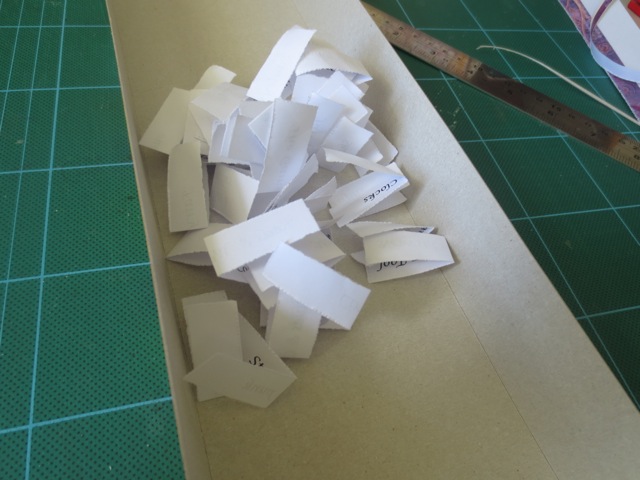
Then fold the prompts in half

mixed media project ideas

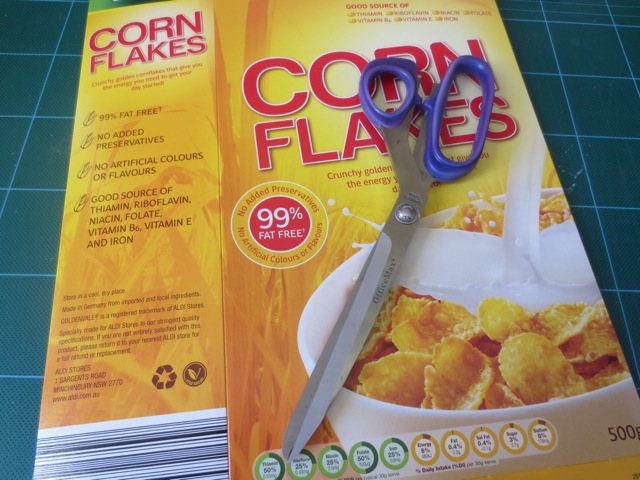
3. Using scissors, cut out the two large panels of your cereal box

mixed media ideas

4. Put the folded creative prompts on top of one of the cardboard panels to give us an idea of the size for our box

mixed media project ideas

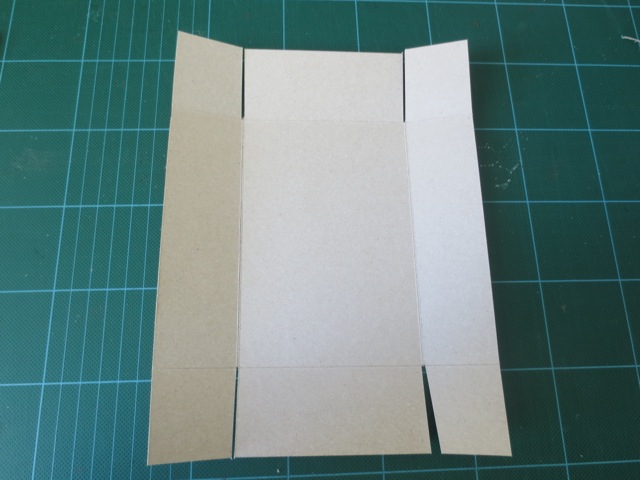
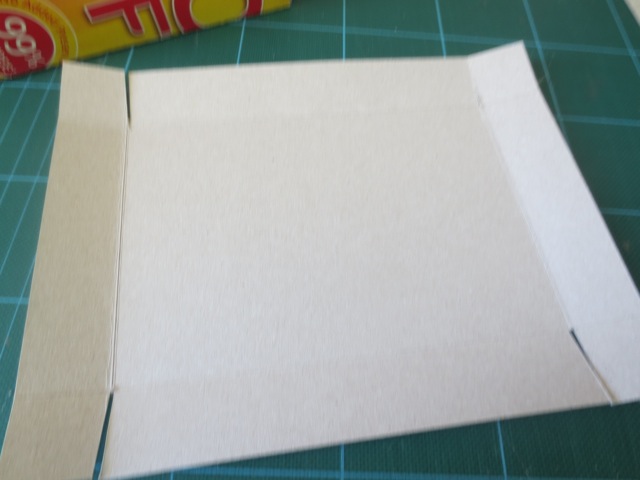
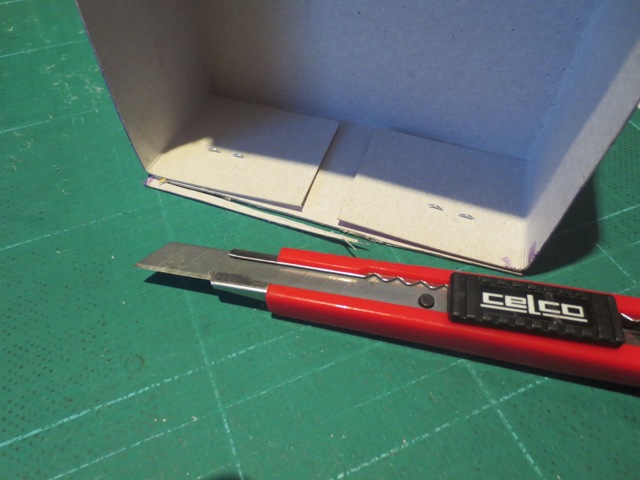
Using the steel ruler and the craft knife, score the box and fold up the edges. A good cutting mat with grids marked on it makes a good reference for getting your scoring and folding straight

mixed media project ideas

5. Repeat with the two ends of the box. Cut the corner tabs as shown in the picture. This gives us the tabs that will make the ends as well is a little bit of clearance to make sure the box is square.

mixed media ideas

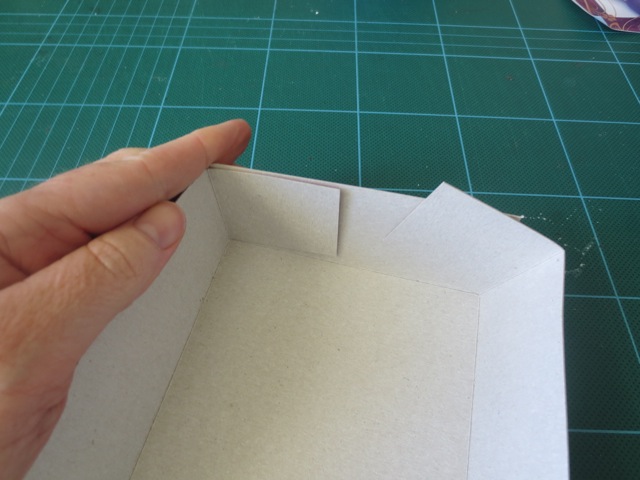
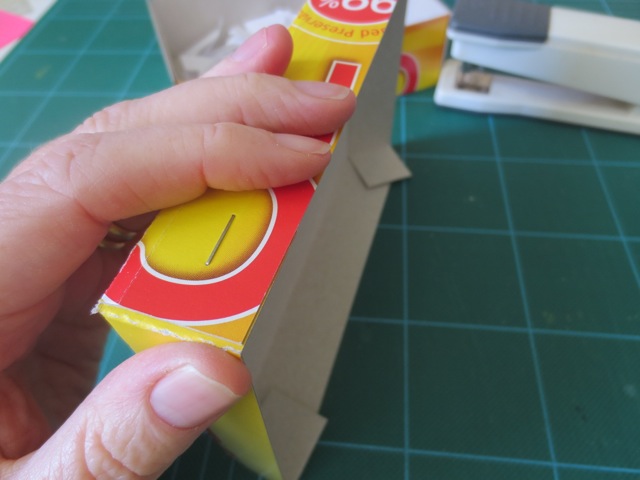
6. Fold in the ends of your box

Handmade gift boxes

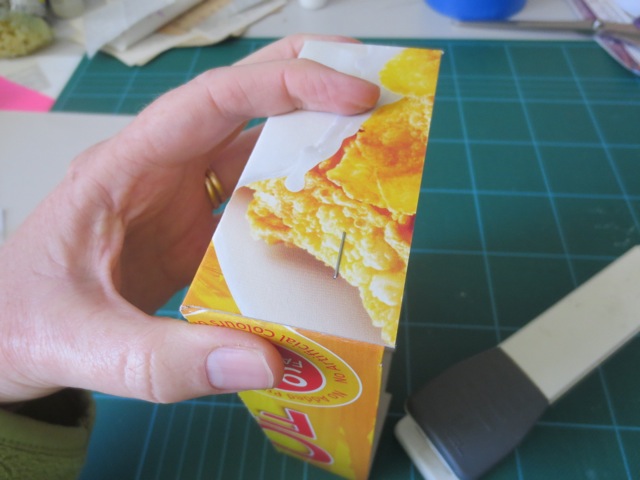
7. Use the stapler to secure these tabs

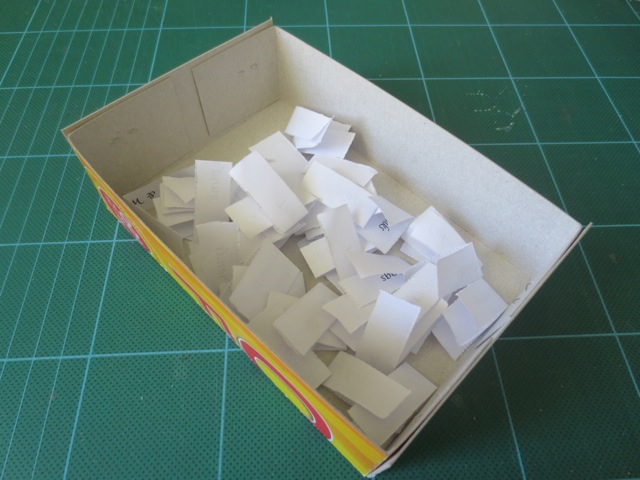
8. The bottom of your box is now complete. Now you can add in your creative prompts to make sure it is the correct size.

Mixed Media Creative Prompts

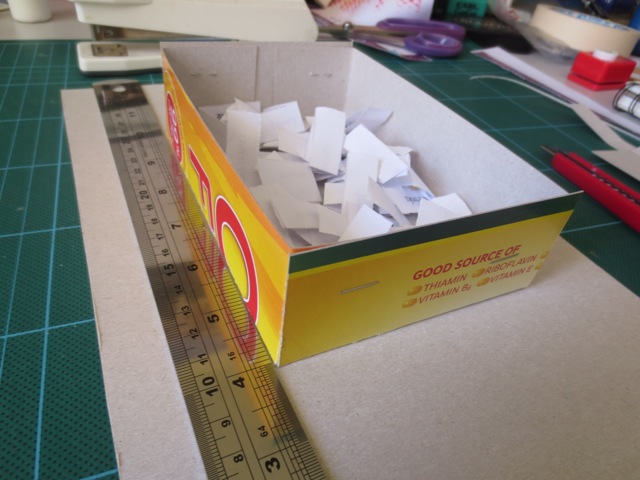
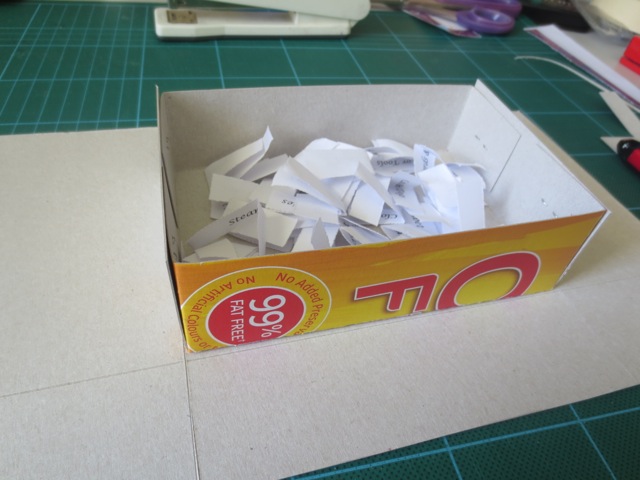
9. The top of the box needs to be slightly bigger than the bottom to make sure it fits on. Place the bottom of the box onto the second cardboard panel. We will use this to show us the size rather than measuring the box.

mixed media project ideas

10. Using the steel ruler and craft knife again score around the box, taking care that your lines are at 90° to each other and parallel. Taking care here will make sure we have a nice box when we are finished

11. Cut down the sides of the top of the box –  these can be smaller than the bottom sides, to make it easier to open. Then fold all four sides and cut the tabs as shown. I prefer to cut my tabs the opposite way to the bottom so that they sit better when closed.

mixed media project ideas

12. Use your stapler to secure the tabs and complete the top of your box

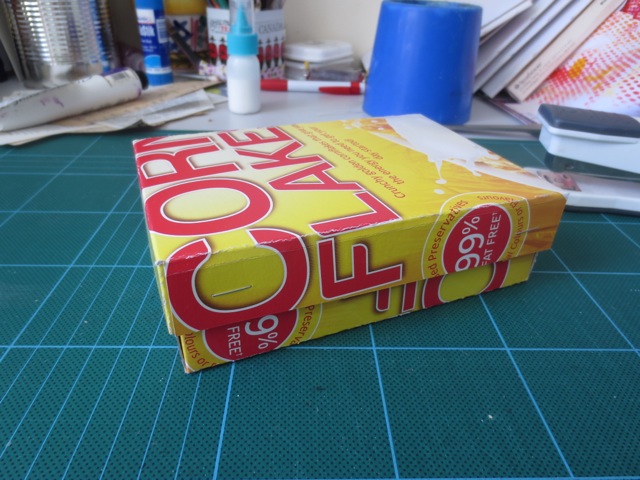
13. Now the structure of your Creative Prompts gift box is complete

mixed media ideas

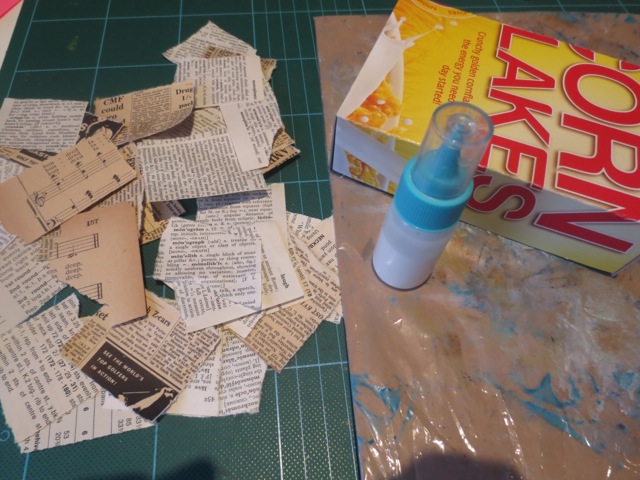
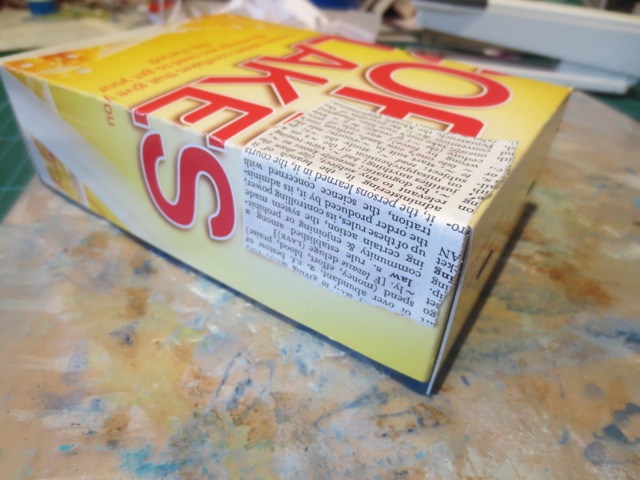
14. Tear your ephemera sheets into 2 inch squares. I prefer to use three different sheets to give a difference of panels as we collage the box.

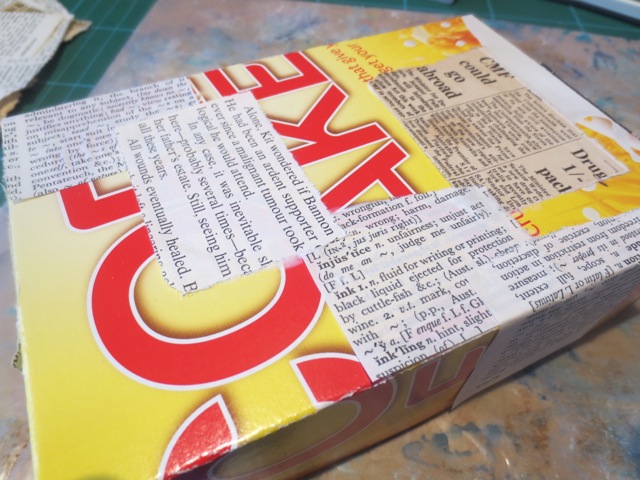
15. Apply some PVA glue to your ephemera square and stick it onto your cardboard up. Remember that the text on the sides of the bottom of the box need to be upside down so when the box the correct way up the writing will be the right way up.

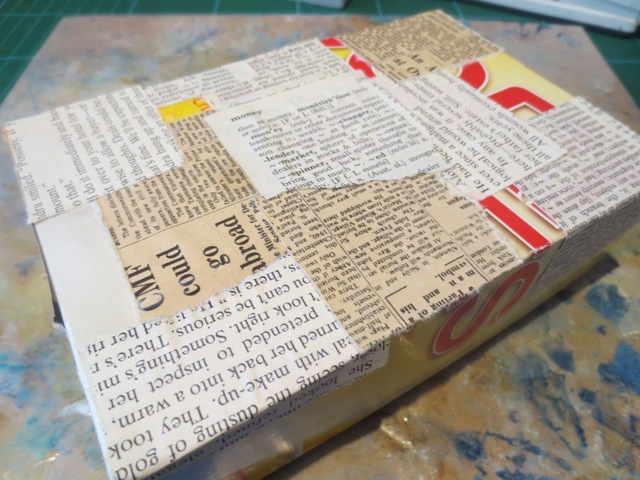
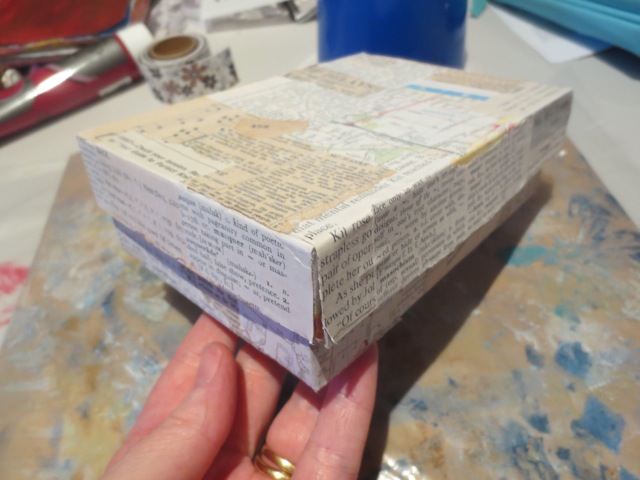
16. Continue adding different ephemera squares until the box is completely covered

mixed media project ideas

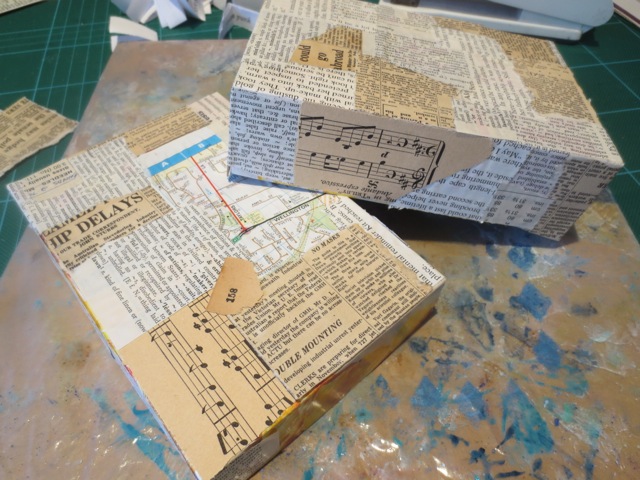
17. Repeat with the lid of the box and allow the glue to completely dry before moving on to the next step.

mixed media ideas

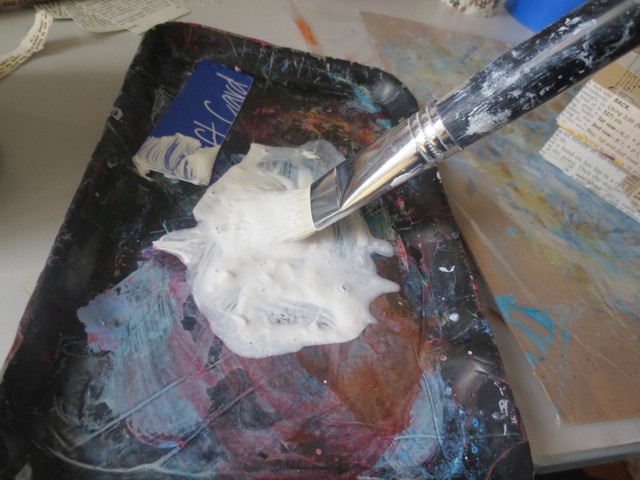
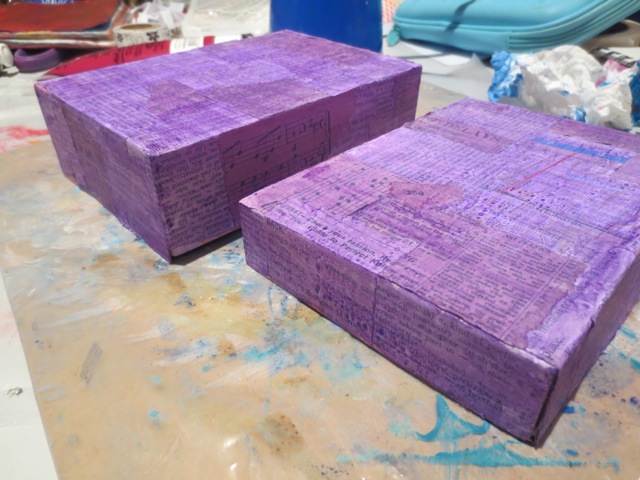
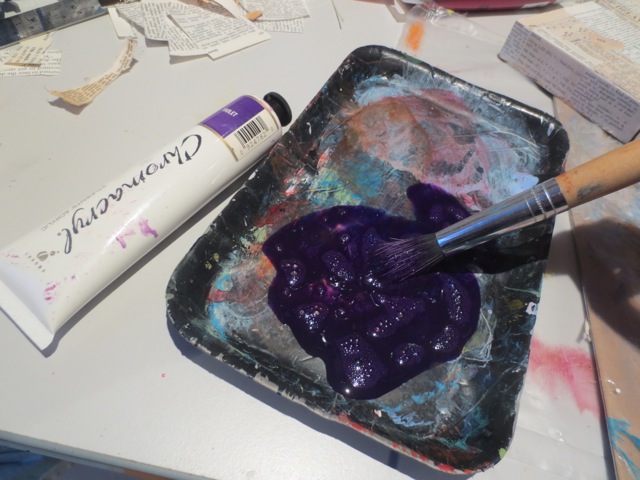
18. To even out the different colours of the ephemera, add a gesso wash to the top and bottom of the box.

Add a little gesso to paint palette and water it down to create the wash

mixed media project ideas

Apply a light coat across the top and the bottom of the box. As the gesso dries it will become more translucent and the colours of the ephemera become more uniform

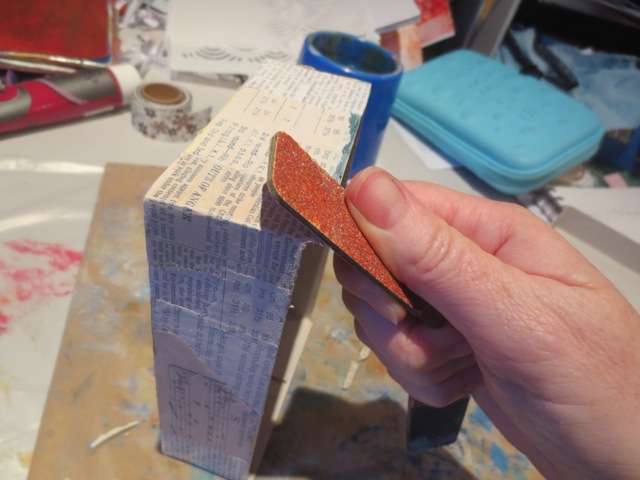
19. Trim up the edges of the ephemera pieces to the box edge using some emery paper. This tidies up the edges.

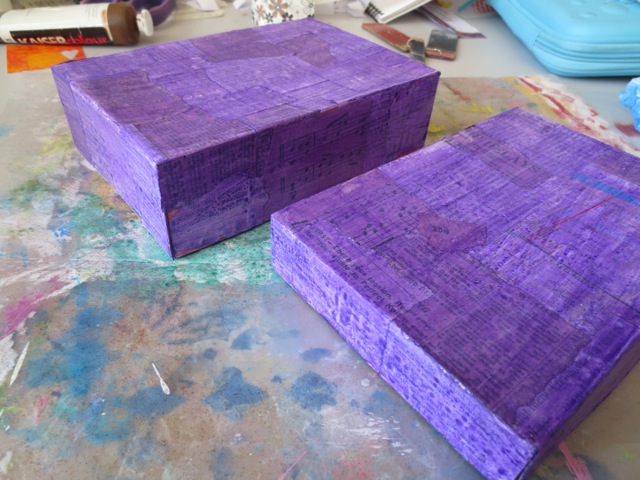
20. Now ready to add some colour to our box. Add a little acrylic paint in the colour of your choice to your paint palette. Add some water to create a wash

Apply the paint to the top and the bottom of your box and leave it to dry

21. Use your craft knife to clean any edges that may be uneven

22. Add a coat of spray varnish to seal the collage ephemera and paint wash. Leave overnight to dry thoroughly

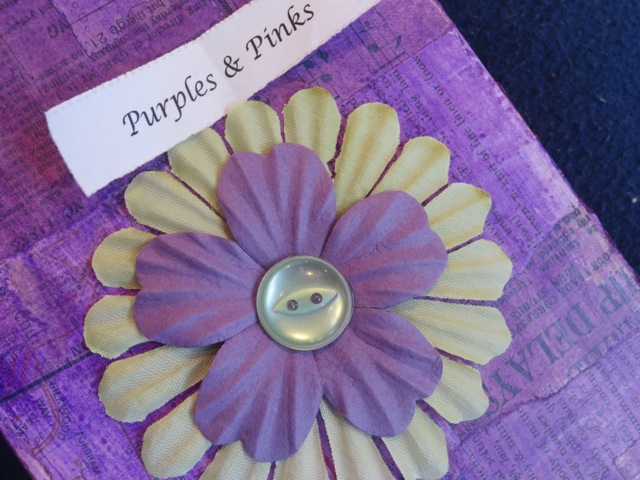
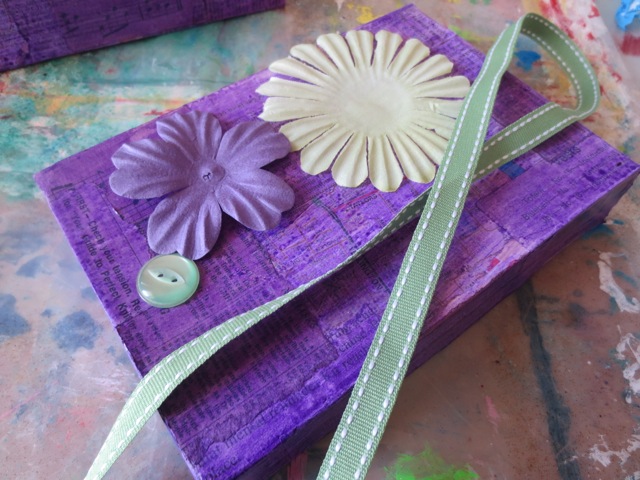
23. Now it’s time to add decoration to your box. Pull out a variety of ephemera that fits your colour scheme. Here I have chosen some paper and silk flowers, a button and some ribbon to go around the edge of the top of the box.

The ribbon and the flowers were adhered with a hot glue gun

24. At your creative prompts into your box and in your project is complete.

mixed media project ideas

Now it is ready to give as a personalised gift to a crafting friend or to have on hand when you need that kickstart to spark your creativity.

~*~*~*~*~*~*~*~*~*~*~*~*~*~*~*~*~*~*~*~*~*~*~*~*~