Michelle G Brown | Mixed Media Art

DIY Candle Holder

~ * ~

This article is written by Sandra Parés

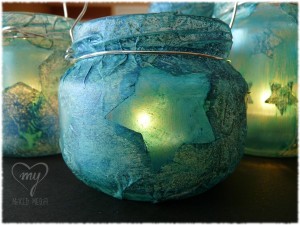
Today I am going to show you how to make a candle holder with a magic light to illuminate our summer nights.
Candle Holder

The supplies I will use are the following:

  • An open top container glass (to make these candle holders usually I use recycled glass jars)
  • white tissue paper
  • the big shot and a star die
  • 8”x10” Gelli Plate
  • a brayer
  • black acrylic paint
  • a stencil
  • extra heavy gel medium (gloss)
  • 2 paintbrushes
  • Facetten-Lack metallic platin Vica Deco
  • a makeup brush
  • Primary Elements of LuminArte
  • hairspray
  • wire and a candle

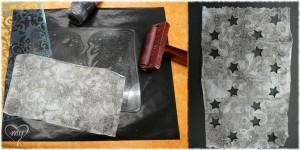
First of all we will start using the Gelli Plate: we will use the brayer to put the black paint over the stencil, then we will press the stencil over the gelli plate. With this step we can print the mark of the stencil over the gelli plate. Then we will take a piece of tissue paper, it must be large enough to surround our glass jar. And we put the tissue paper over the gelli plate to print the texture. With this step, the mark of the stencil will print in our tissue paper.

And with the Big Shot and the star die we will open a few holes in our piece of tissue paper.
Candle Holder

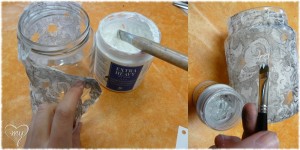
Then we will paste with extra heavy gel medium the tissue paper around our glass jar and we will leave it to dry. Then we will paint the holes with Facetten-Lack to give a touch translucent at the glass. For this step, also you can use any paint or paste that allows you to do this translucent effect.
Candle Holder

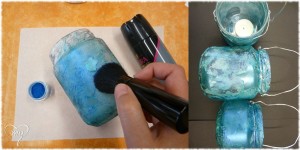
Once dried we can add the color. I will paint with the Primary Elements of LuminArte, I will use the pigment directly. First of all we have to spray the entire glass jar with hairspray, you will see how the jar is wet. Taking advantage of this dampness, we will catch the Primary Elements pigments (the color or colors that you want) with a makeup brush and we will paint with them making circles. When we run out of pigment or hairspray dries, we will go back to add more product to get the whole jar painted.

Finally, if we want to hang it somewhere, we only need to put some wire around the jar. And don’t forget to put the candle inside!
Candle Holder

You will see that the result will be beautiful and shining: a candle holder with a magic light for our most special nights. The first time I used these candle holders was at my craft stop in the “Enchanted Night”, the shopping night from my city, and they produced an amazing shine!

Candle Holder

~*~*~*~*~*~*~*~*~*~*~*~*~*~*~*~*~*~*~*~*~*~*~*~*~

Sandra Parés loves working with mixed media! The colors and textures leave her amazed and she enjoys creating and getting their hands dirty with paint and gesso! On her site My mixed media you can find a mixed media online store, art and craft products, mixed media workshops in Spanish, tutorials, ideas and mixed media techniques.

~*~*~*~*~*~*~*~*~*~*~*~*~*~*~*~*~*~*~*~*~*~*~*~*~

.

.
Mixed Media Family History Collages

~ * ~

This article is written by Anjuli Johnson

When I was finishing my history degree, I worked on a project that quickly became one of my favorites. The main stipulation was that all of my research had to be based on what historians call “Primary Documents”. Primary documents are direct evidence of the topic being researched, and were created by witnesses or recorders of the events. Examples of primary documents include journal entries, birth certificates, and newspaper articles.

Making Family History Collages

I remember researching my project required hours in the library, searching through rolls of microfilm for hundreds of birth and death certificates and interpreting the information I found there. It sounds so tedious, but going through those letters and certificates and seeing the names of actual people, their handwriting, and the tiny portions of their lives that were recorded there- it was fascinating. I’m not sure what it is about old certificates and journal entries- it’s like they contain secrets that are just waiting to be discovered.

Making Family History Collages

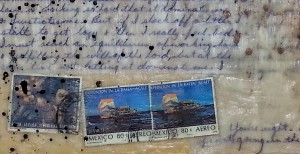
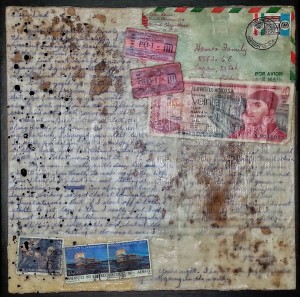
When the journal entries and letters are from your own family, that feeling of fascination triples. A few years ago, my grandparents basement flooded and we had to bring out all kinds of boxes to keep things from being ruined. It was then that I discovered a cache of letters from my father to his family while he was a young missionary in Mexico in 1974-1975. What an amazing feeling, going through those letters, reading about my dad who at the time was even younger than I was. Seeing his handwriting, the little tidbits he had collected, the replies his parents sent him, pictures, etc. were just like a window to the past. As a historian, those documents represent the truth of who my dad is and was, as well as who I am, as his daughter. I want to immortalize that truth, to make sure that it doesn’t get buried at the bottom of a drawer or inside a box. How could I do that in a way that would be respectful, beautiful, and long-lasting?

Making Family History Collages


Making Family History Collages

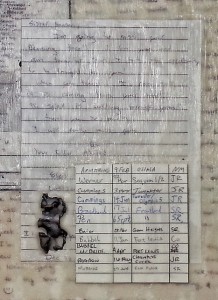
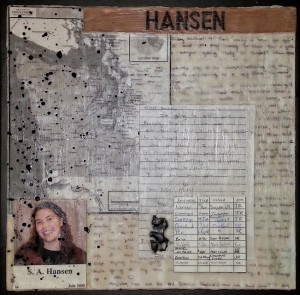
I decided on a set of encaustic collages- one of my Father during his mission and one of me during mine, 30 years later.

Since I knew I was going to be using primary documents, I started by choosing what to include and made copies and scans of every piece. I debated using the originals in my art, but I finally decided that the true value of my collage is in the fact that these are actual pieces of my own history. These artifacts represent my past, and by extension, my present and my future. Using printed copies just didn’t seem right, yet I still needed to make sure that nothing would be lost by including the originals in my collage. Once I have each piece framed, the letters I chose to include will be typed in their entirety and adhered to the back, so that even though parts of the originals are covered in the collage by wax and other elements, the whole letter can be seen simply by looking at the back of the painting.

The collage I created about my father is much more vintage looking than mine- I think the nature of the elements I used for his, and the fact that they are 30 years older adds to that look, but I also used rust in between layers of wax. To use this technique, I soaked a portion of steel wool in a white vinegar and water solution, and shook the droplets directly onto the wax. Once they dried, I was able to add more layers of wax and elements to imbed the rust in the middle of the collage. Adding the drops of India ink to the left side of each collage as a final touch brought more continuity to the set, as well.

Making Family History Collages

Don’t be afraid to showcase your family history through your art.  I will admit, I was a little nervous to be using the original letters of mine and my dad’s but to be honest, they mean so much more in this form than they do stacked in a box.  Collect your family’s primary documents, make copies and scans- you can even use the copies in your art if you prefer- but do something with your family’s memories that will spark interest and ensure that those memories are remembered and cherished, never misplaced or forgotten.

~*~*~*~*~*~*~*~*~*~*~*~*~*~*~*~*~*~*~*~*~*~*~*~*~

Anjuli Johnson is a Mixed Media Artist from Raleigh, NC.  She began her art career as a scrapbooker, and it’s been an evolutionary process ever since.  She loves all things mixed media- paper, paint, pens, wire, gears, clay… the list goes on and on.  She is constantly trying to push through her fears to discover and develop her talents, meet new people, and learn from those around her.  To see more of Anjuli’s art and techniques, check out her website at www.thefarpavilion.com  and like her Facebook page www.facebook.com/TheFarPavilion

~*~*~*~*~*~*~*~*~*~*~*~*~*~*~*~*~*~*~*~*~*~*~*~*~

.

.
Making Unique Photo Frames

~ * ~

This article was written by Cecilia Sanchez

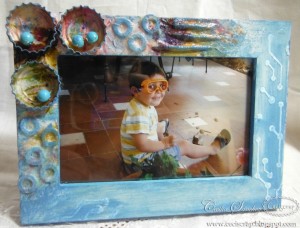
I have made a friendly and funny photo frame, thinking of putting pictures of my naughty children.  It’s pretty simple. They like to play with bottle caps, and so I wanted to include them in the frame.

Photo Frames

List of materials:

A wooden frame 
Bottle caps 
marbles 
metal washers 
glue 
stencil (Stencil girl products)
 gesso 
acrylic paint 
paper towels 
mod podge 
crakle paint 
Zig Painty FX

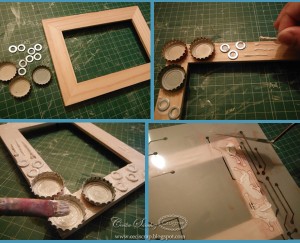
First, glue the metal elements or whatever we want. 
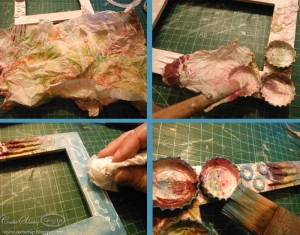
Then, cover with a coat of gesso.

I used a stencil of electronic circuits with gesso to give more texture.

Photo Frames

I like to use the paper towels used, and stained with paint.

I have fixed with Mod Podge.

A layer of acrylic paint.

I remove some paint with a baby wipe.

Photo Frames

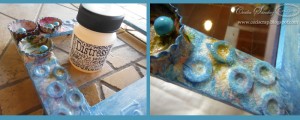
Finally, a layer of Distress Crackle paint, gives an interesting effect.

Photo Frames

~*~*~*~*~*~*~*~*~*~*~*~*~*~*~*~*~*~*~*~*~*~*~*~*~

My name is Cecilia Sanchez (CeciScrap) and I live in Málaga, Spain. I am married and we have three gorgeous sons. They inspire me every day with their crazy ideas.

Since my childhood I liked the photography, drawing, collage and make photo albums with cuts and travel souvenirs. I also love crafts in general. In 2006, a few months after birth my twins, I discovered scrapbooking, digital first and then the traditional. I love to do 30X30 pages, cards and mini albums, and for a while now I am fascinated with the Art Journal and Mixed Media, and I do not imagine scrapbooking without getting my hands dirty.
I am inspired by everyday things, feelings … The art journal is a real diary for me, because sometimes I need to express feelings with colors and shapes.

I love learning and discovering new techniques and materials.
I am part of the European design team of KURETAKE, and I am also designer for a monthly blog challenge Sweet Card Club. I contribute with some blogs and digital magazines and organized Scrapbooking workshops in Malaga.

You can see more of me at  www.facebook.com/ceciscrap

~*~*~*~*~*~*~*~*~*~*~*~*~*~*~*~*~*~*~*~*~*~*~*~*~

.

.
How to Create Mini Altered Houses

~*~

Melanie Statnick has put together the materials list and instructions for these cute mini houses.

Supply List

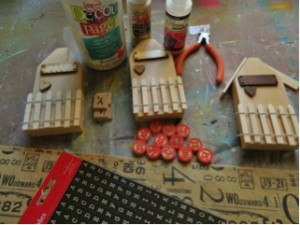
To create your own village, you will need:
  • Wooden houses
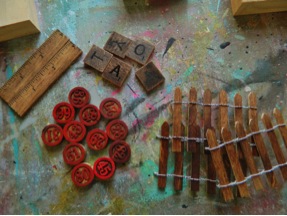
  • wooden pieces including hearts, tags, bingo tiles, fence , rulers.
  • Tissue paper,
  • decoupage,
  • flat brush/glue brush,
  • glossy accents,
  • letter stickers,
  • Walnut Ink Spray
  • a heat gun.

Creating Mini Altered Houses

Instructions

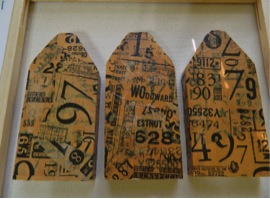
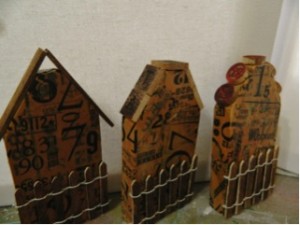
Step 1. Decoupage tissue paper to wood houses. Apply glue directly to wood. The tissue paper will move around and might rip. This is the look we are going for. Grungy, wrinkled look. Dry with heat gun and set aside.

Creating Mini Altered Houses

Step 2. Spray all wood pieces with your Walnut Spray Ink. Dab with paper towel and dray with heat gun. This will the wood an antique look with some grunge.

Creating Mini Altered Houses

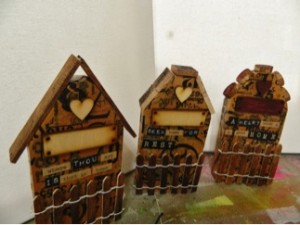
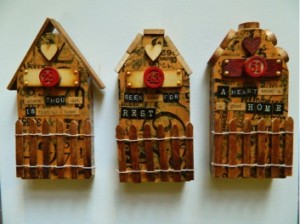
Step 3. Using glossy accents glue fence onto front side of your houses and continue with the other wood pieces. You can arrange them how you like.

Creating Mini Altered Houses

Creating Mini Altered Houses

Step 4. After your pieces are glued and dried, you can now add your word art. Last use Glamor Dust, Liquid Pearls, or Stickles to add details.

Creating Mini Altered Houses

Happy Creating!

~*~*~*~*~*~*~*~*~*~*~*~*~*~*~*~*~*~*~*~*~*~*~*~*~

I’m a Canadian Mixed Media & Collage Artist out of North Carolina . I create art daily from my private studio and my artwork is fun and whimsy . I teach mixed media and art journaling online  and I hold mixed media workshops around the USA.


My artwork can be found in art galleries and shops extensively in NC with international private collections. I have created my personal line of original stamps to purchase and use in your art.  Look in my Etsy shop for my line.

Please visit my website to learn more about me and my work at www.melaniestatnickart.com or become fan on Facebook.

~*~*~*~*~*~*~*~*~*~*~*~*~*~*~*~*~*~*~*~*~*~*~*~*~

.

.