~ * ~
This article was written by Martice Smith II
Remember those little A-B-C blocks you may have played with as a child? This tutorial is a spin on that very concept, although, this one is the “grown-up” version! (Well, if you have a baby Einstein on your hands, that’s a different story…) Each side of the wooden block will have a different design. I will demonstrate how to use various techniques from stamping, cut-outs, stenciling and masking to create a beautiful designer block puzzle. Let’s get started!
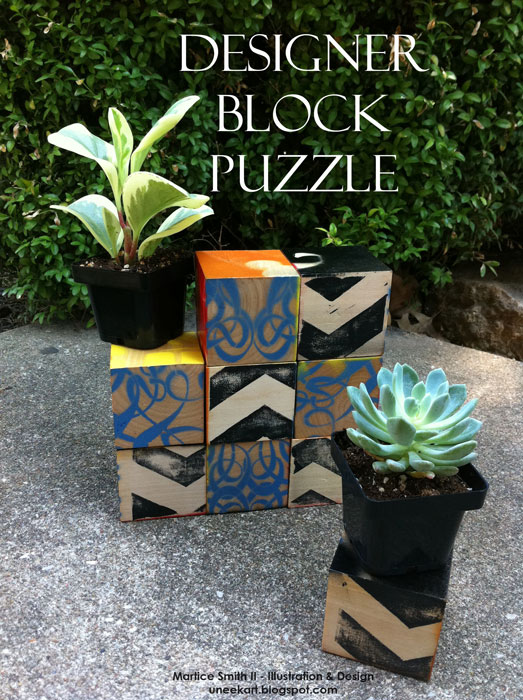
Need to add a bit of visual interest in a corner of your living room, craft space or maybe even a coffee table, this designer block puzzle packs some major punch of creativity! It may look challenging- given that there are 10,077,696 different combinations – but don’t let it fool you. This puzzle is very easy to create yourself.
Gather supplies
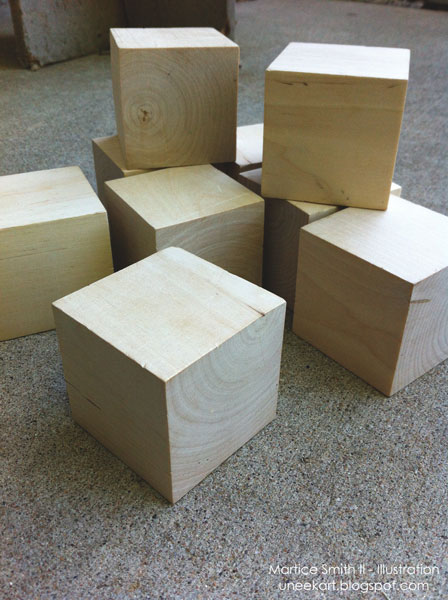
Any size blocks will work. For this tutorial, I used nine 7.5 inch wooden blocks.
Stencils, stamps
Spray paints (various colors) and a face mask
Masking tape
Prepare the wooden blocks
I love the natural look and feel of the wood, so I let them remain that way.
(Other options to consider: use a clear gesso or wood stain on all six sides of the wooden blocks. This will need to be done in stages to ensure that each side is dry before doing the next side.)
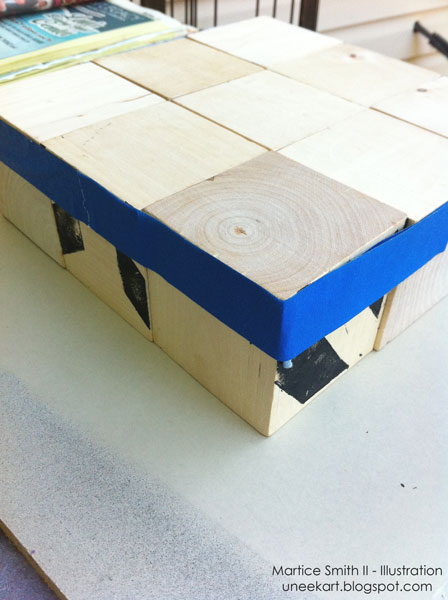
Set up the blocks

Working on an even surface, set up the blocks three wide by three long.
Use low-tack masking tape around the sides to secure them together, leaving six surfaces facing up together to make a 7.5 inch diameter square surface. (The tape prevents any over-spray from the spray paint.)
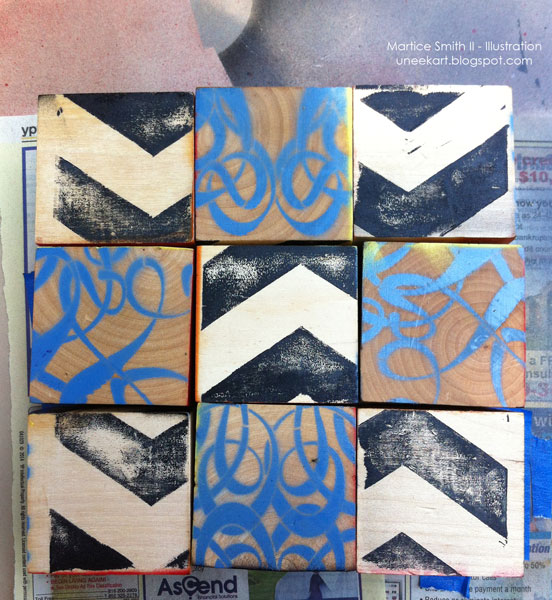
Use a stamp to design SIDE 1
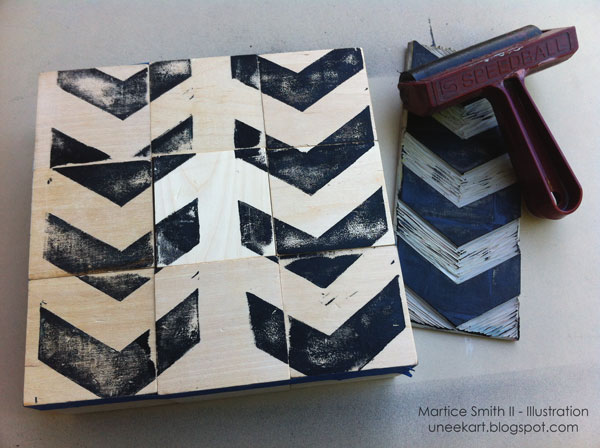
SIDE 1 is designed with my popular chevron stamp (tutorial on how to make your own)
* Let dry and turn each wooden cube to a random side, so that there are 6 blank surfaces on top again. (I will call this step: “Reset the blocks“)
* Re-tape the sides to prevent any over-spray.
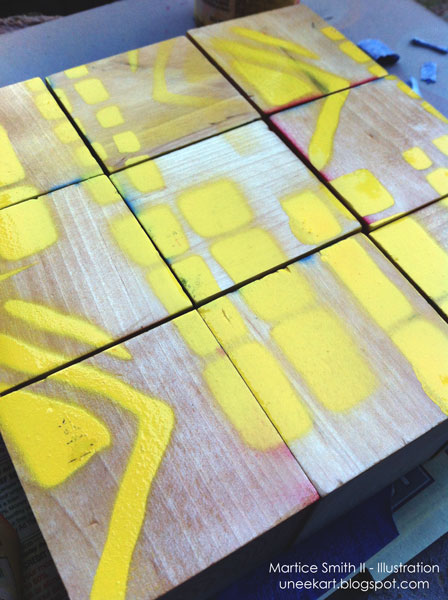
Spray paint the cardboard cut-outs and stencils for the remaining sides
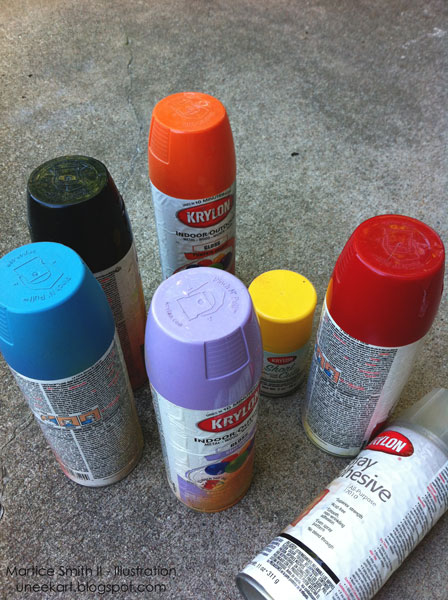
Wearing a face mask and working in a well-ventilated area, spray the first color of spray paint over the cut-outs using a steady, consistent motion.
Design SIDE 2 with lightweight cardboard
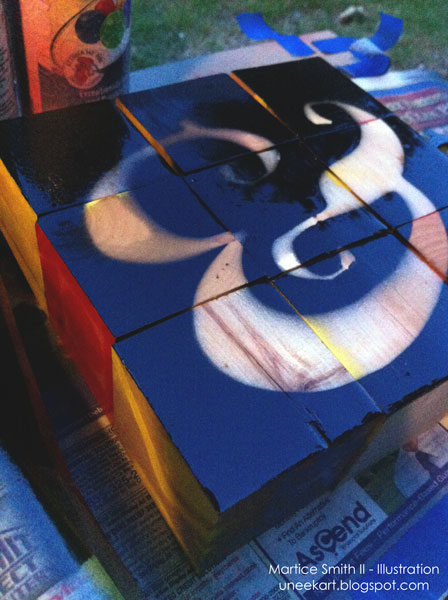
Here’s how cardboard stencils and masks can be used as well. I’ve used circular, hand-cut shapes as masks and my custom made ampersand cardboard as a stencil. (Side note: The ampersand is on SIDE 6).
SIDE 2 shows how I arranged my circular, hand-cut shapes in an interesting pattern. Kind of looks like bokeh from photographs!
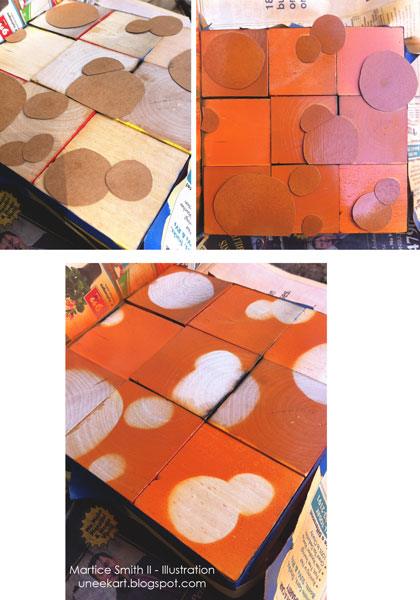
* Apply spray paint. (Note: Spray paint can remain tacky for up to 30 minutes depending on the humidity.)
* Remove the shapes.
* Once the spray paint is completely dry, reset the blocks
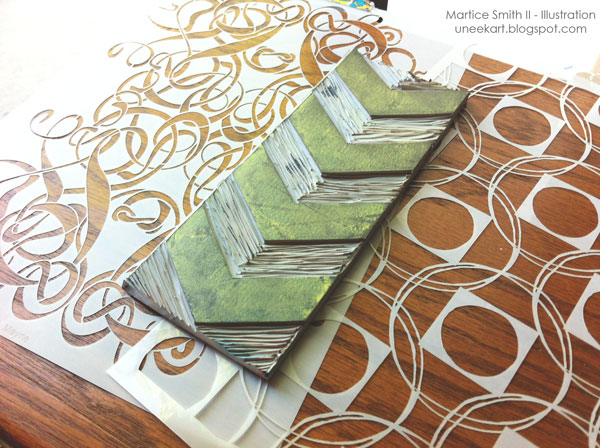
Design SIDES 3 and 4 with commercial stencils
A couple of my favorite commercial stencils from StencilGirl!
SIDE 3 is designed with Square Dance.
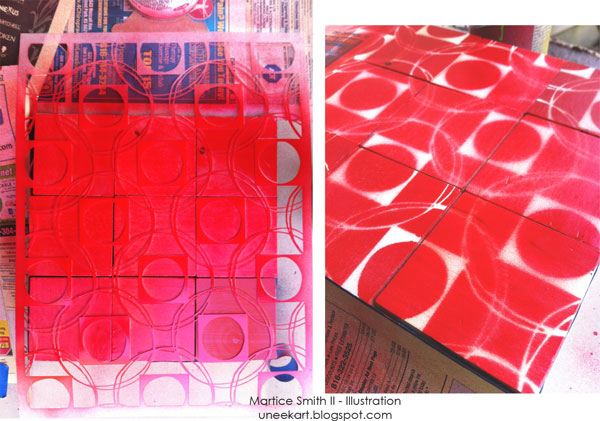
* Spray the stencil; let dry
* Reset the blocks
For SIDE 4, I used the Art Nouveau stencil.
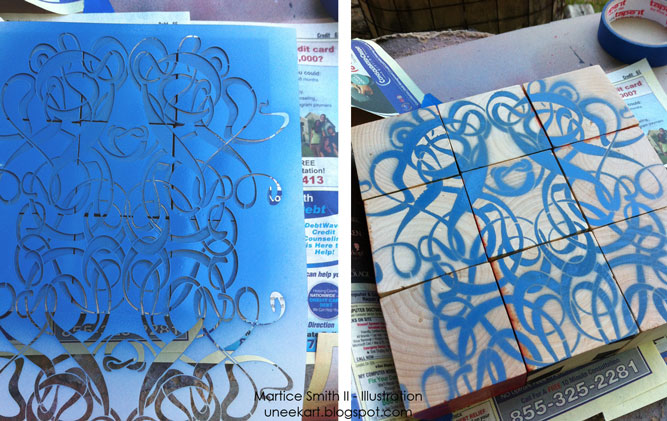
Design SIDE 5 and 6 with handmade stencils
Add more of your own flair to this project! Here are two handmade stencils that I cut out by hand. This one has a tribal and primitive feel, displaying the triangle and rectangular patterns.
Reset the blocks
Finally, for SIDE 6, I took a more bold and graphic approach by using the “and” symbol (technically called, the ampersand. Look how much style this has!)
Now that all sides have been designed, you can create different looks for your visual pleasure! This will keep your imagination fresh and give you a good challenge to recreate your own, unique combinations.
I will use my designer block puzzle as props and a cool backdrop for my product photo shoots!
Try utilizing this puzzle in unexpected ways. Add visual interest in a corner of your living room, craft space or maybe even place them on a coffee table. It’s your choice!
How will you use your Designer Block Puzzle?
~*~*~*~*~*~*~*~*~*~*~*~*~*~*~*~*~*~*~*~*~*~*~*~*~
Author bio:

Martice Smith II is creative director of Martice Smith II – Illustration & Design Studio, based in Kansas City, Missouri and owner of Uneek Art Boutique. She established herself as a freelance Illustrator and graphic designer after receiving her Bachelor of Arts Degree. Her stunning illustrations reveals her love for fashion, typography and wildlife- using a combination of analog and digital techniques.
Martice also contributes as an article writer for the Creating Mixed Media Art website.
You can see more of her work via her Facebook page or her blog. She invites you to join her monthly newsletter, Uneek Art Letter, for art biz tips, advice and free digital goodies!
~*~*~*~*~*~*~*~*~*~*~*~*~*~*~*~*~*~*~*~*~*~*~*~*~
.
.


Such a fun project, Martice! Thanks for sharing it with us!
@MMA_Team- you’re very welcome! I’m glad to know that you enjoyed it. Who knew 10 million+ designs could be so much fun?! Another idea: try gluing some of your favorite gelli prints to each side and embellish. Fun!
Hi Martice,
I’ve also been playing with blocks in my work, there is something so much fun about it! I really enjoyed your project and thank you so much for using StencilGirl products.
🙂
Mary Beth
StencilGirl
@Mary Beth- So cool and nice of you to stop by. Thank you! I’m so glad you enjoyed my project. The stencils are so easy to work with; I especially like the intricate detailing in the Art Nouveau stencil. I’d love to see what you’ve been creating with wooden blocks. I’m so curious 😉
Wonderful done!! And seems so easy to make!
@Cristina- Thank you! Yes, this is such an easy project. The only challenging part, for me, was selecting which stencils to use!
First off I want to say fantastic blog! I had a quick question in which I’d like to ask if you don’t mind.
I was curious to find out how you center yourself and clear your mind prior to writing. I have had trouble clearing my thoughts in getting my ideas out there. I truly do take pleasure in writing but it just seems like the first 10 to 15 minutes are usually wasted just trying to figure out how to begin. Any ideas or hints? Kudos!
Really nice design and style and superb subject material, very little else
we require :D.