~ * ~
This article was written by Katja Blum
One common description of the art of calligraphy is “the art of giving a pleasing, harmonious form to the written word”. This rather terse definition includes masterpieces of calligraphy from the Book of Kells to the scribes of ancient Persia to William Morris and contemporary art.
Many works of mixed media art include text – individual words or text blocks – as a focal point and added layer of texture, color and meaning. One would think that calligraphy and mixed media should be a natural combination. However, as a big admirer of the work of calligraphy artists, I often find myself developing a special form of writer’s block – calligrapher’s block, if you will.
The surface of a piece of mixed media art is often textured and varied, with layers of different materials that make it hard to control the nib or brush, the classic calligraphy tools. And forget aids such as ruled lines and light boxes. So there is just freehand writing. What if I mess it up? My solution for this (as for many other mixed media issues) is to move towards serendipity and relaxed design. I embrace my handwriting, although I can tell you that it has suffered as much as the penmanship of any computer user – and I play with tools. Take a good look at your art tools, kitchen utensils or other implements, dip them in ink or diluted acrylic paint and start writing.
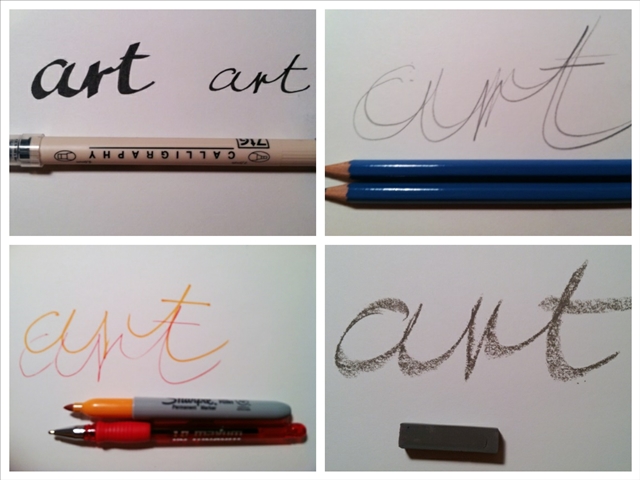
First, let’s look at “simple” writing tools. A calligraphy pen with a broad and fine tip is a good choice for a block of text, perhaps on a journal page. Holding two pencils or colored pens together creates an interesting effect. Try writing with five or six colored pens held together. The result is a fascinating blur. Pastels and crayons look substantial, but still relaxed – lovely in white on a dark background.
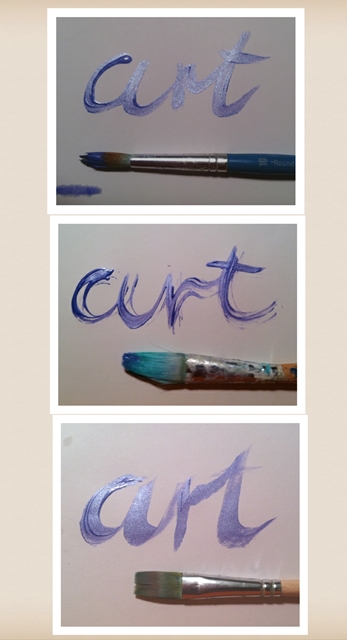
Play with brushes. The top and bottom ones are classic shapes for Asian and Western calligraphy. The middle brush is one I used to apply PVA glue once and forgot to wash. It is one of my favorites for applying color effects and for writing.
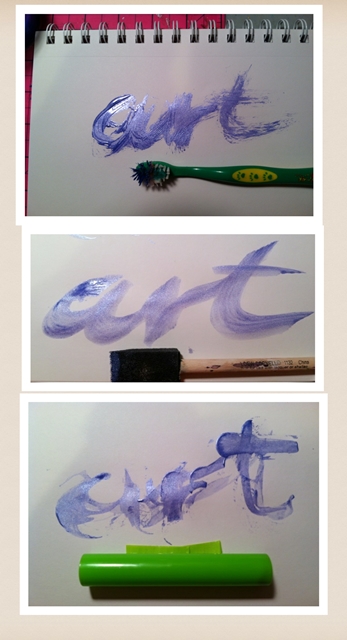
For the third round of writing experiments, I used some unusual writing tool. At the top I wrote with a children’s toothbrush and found I like the feathered effect. This could be very interesting on heavily textured backgrounds with very diluted acrylic paint. The center word was written with a sponge brush. The broad strokes can accommodate all kinds of color effects and decorations. My favorite is the bottom picture. Here, the tool is a hollow polymer clay roller. I love the completely random, unrepeatable strokes. Working with unusual tools is the calligraphy version of a monoprint – you can’t plan every move and you’ll never do two the same.
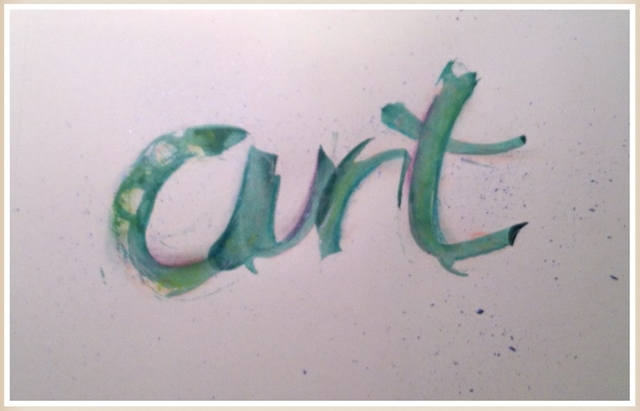
Choose your tool, take a deep breath and just start writing on your artwork. Lay the foundation with your favorite writing implement – mine turned out to be the roller – and then add color, highlights, texture – or take your inspiration from ancient palimpsest manuscripts and layer more writing on top.
~*~*~*~*~*~*~*~*~*~*~*~*~*~*~*~*~*~*~*~*~*~*~*~*~
Katja Blum is a writer and translator from Tulsa, OK. As an artist, she started with yarn, fabric and papier mache (rarely together), branching out into collage and other paper arts about ten years ago. Her latest obsession is making soft stuffies and art dolls – to the delight of her toddler. She also likes to find creative solutions for ugly or broken things around the house – to the delight of her husband.
You can see more of her work with fiber, paper and words at thewaywardsheep.com
~*~*~*~*~*~*~*~*~*~*~*~*~*~*~*~*~*~*~*~*~*~*~*~*~
.
.


Recent Comments