~ * ~
This article is written by Sandra Parés
I love mixed media because it allows me to create my own decorations and customize to my personal style. Today we will see how we can make our own washi tape in an easy and simple way to incorporate it into our scrapbooking or mixed media projects.
The supplies I will use are the following: masking tape or repositionable and transparent tape (with transparent tape, at the end our tape will have more transparency), some Silks Acrylic Glaze , some permanent markers like Promarker, acrylic paint, heat gun, templates, some stamps, black permanent ink like Stazon, paper figures punched and 1 piece of baking paper.
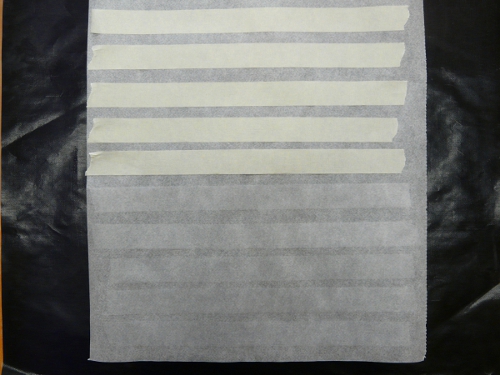
Before we start, we have to prepare our tape. We cut a piece of baking paper and paste it a few strips of masking tape or repositionable tape. You will see that the tape isn’t paste good on the baking paper. The advantage is that we can work well with paints and, in addition, the tape retains good its adherence so then we can stick it right in our projects.
1st way
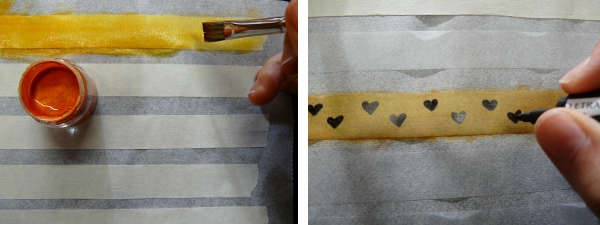
We choose a color of Silks Acrylic Glaze and with a brush we paint the whole tape to give it a basic background color. Silks Acrylic Glaze gives us a good transparency and they add a nice shiny appearance to the tape. When the paint has dried (Silks dry very fast) with a permanent marker we draw a continuous pattern in our tape. And our first whasi tape is ready!
2nd way
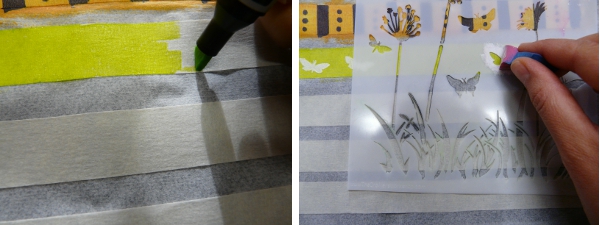
We choose a Promarker color to paint the background of the tape. The Promarker pen also paints with transparency so it is ideal for quick backgrounds in our handmade whasi tapes. When we have our background ready, we choose a template and we can stencil a pattern with acrylic paint throughout the tape. When it dries, we already have another type of whasi tape.
3rd way
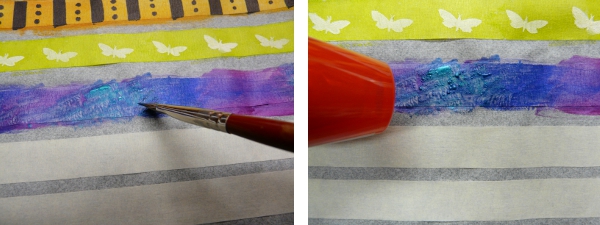
For me one of the easiest and funniest! This time we will use different Silks Acrylic Glaze to paint the background. We have to paint with a large quantity of paint in the tape, and we can mix the colors. It is important that we create paint lumps, I mean, we need areas where we have an accumulation of paint. Before the paint dries, we use the heat gun over the paint, we put the hot air very near the paint lumps. Then you will see that paint makes bubbles and when it dries (and it dries quickly) it has a very original texture.
4th way
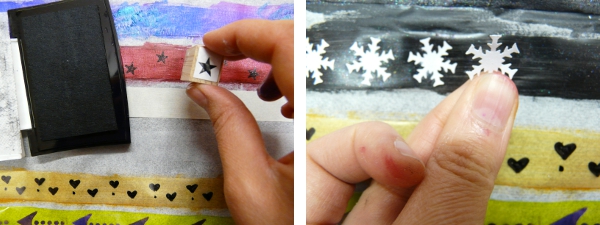
In this case we also do a background with paint or permanent marker. After it dries, we stamp a stamp with a permanent ink making again a pattern throughout the tape.
5th way
And in the last easy way to make a whasi tape, again we do a background with paint or permanent marker. And in this case we paste small paper figures (mine are made with die cutting shapes) in our tape with matte gel medium.
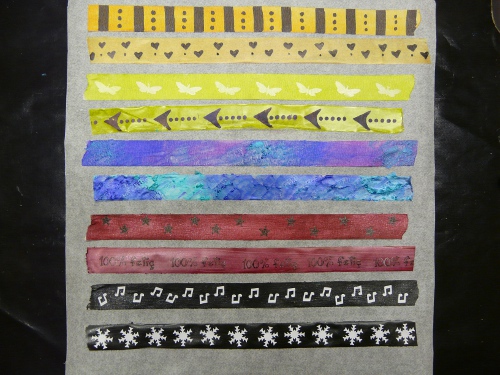
And here you can see the final result:
~*~*~*~*~*~*~*~*~*~*~*~*~*~*~*~*~*~*~*~*~*~*~*~*~
Author bio: Sandra Parés loves working with mixed media! The colors and textures leave her amazed and she enjoys creating and getting their hands dirty with paint and gesso! On her site My mixed media you can find a mixed media online store, mixed media workshops in Spanish, tutorials, ideas and mixed media techniques.
~*~*~*~*~*~*~*~*~*~*~*~*~*~*~*~*~*~*~*~*~*~*~*~*~
.
.


Recent Comments