Dr. Ph Martin’s Bombay India Inks

~ * ~

This article is written by Anjuli Johnson

Being an art supply junkie is something I think all of us reading this can relate to.  The act of creation can be fairly difficult without anything to create with.  We can’t make something from nothing.  So the quest to find different and creative ways or organizing different materials into art is a constant, never ending adventure, and if you’re anything like me, becoming proficient in using a few materials over and over again isn’t satisfying enough- new materials need to be found and experimented with until we become proficient in using them, and we continue to find new things to work with.

This past week my new material was Dr. PH Martin’s Bombay India ink set.

Sets of India Ink

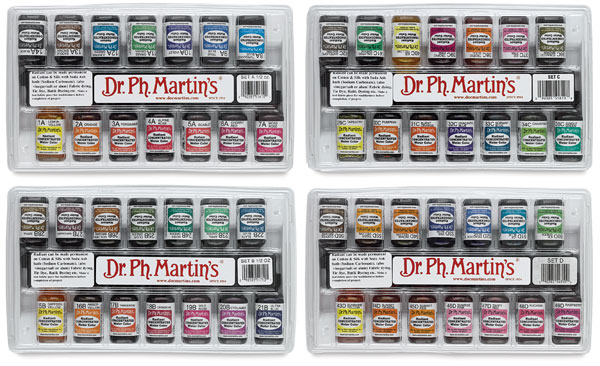
I used to think that India ink was only available in one color- black.  Nope, these different sets of inks come with as many as 12 colors, all vibrant and versatile.  I decided to try a few different techniques to see just how versatile they are.  Here are a few of the ones I tried.

India and Alcohol ink on clear acetate

Card

India Ink and Alcohol ink on clear acetate

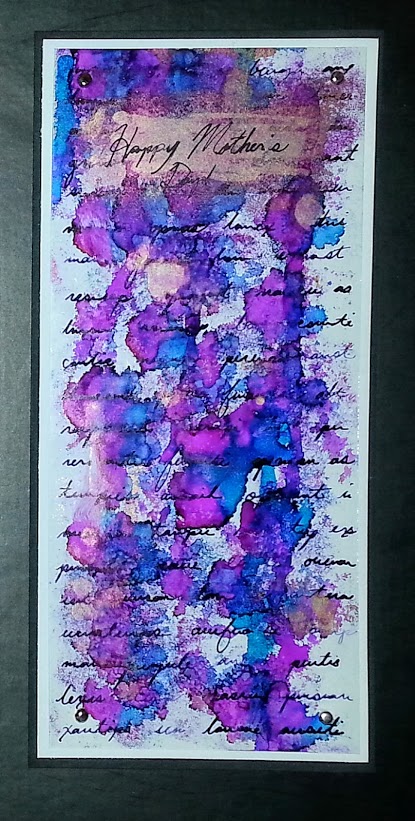
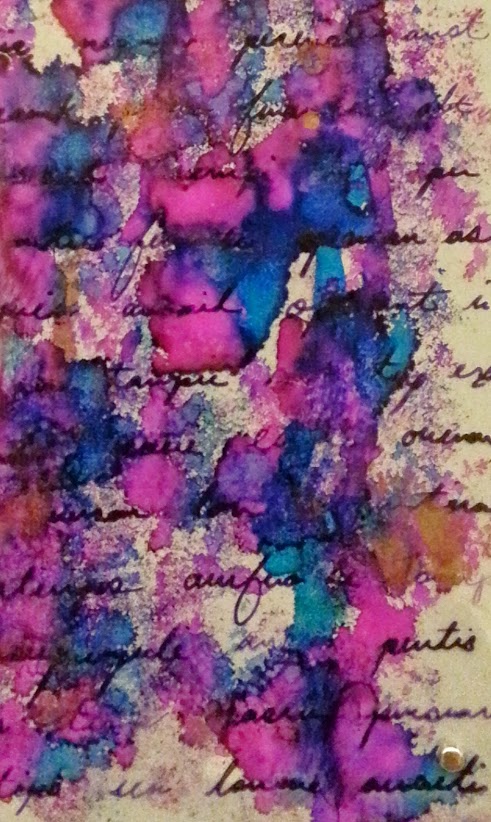
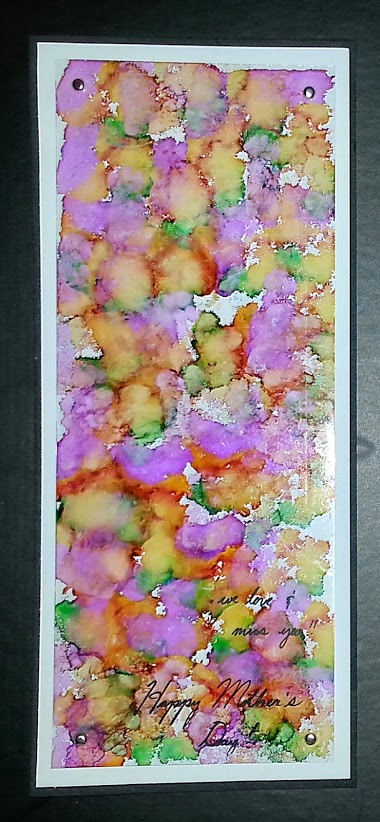
I made these cards for Mother’s Day.  Black and white cardstock with clear acetate attached to top with brads.  I colored the acetate using alcohol inks and india ink.  I tried it two different ways- india ink first, followed by alcohol ink, and vice versa.  It worked both ways.  Even thick drips of alcohol ink had no effect on the india ink once it was dry.  As long as I didn’t rub it really hard, the ink stayed fast.  I’m going to be using this technique a lot. 

Clay pendant

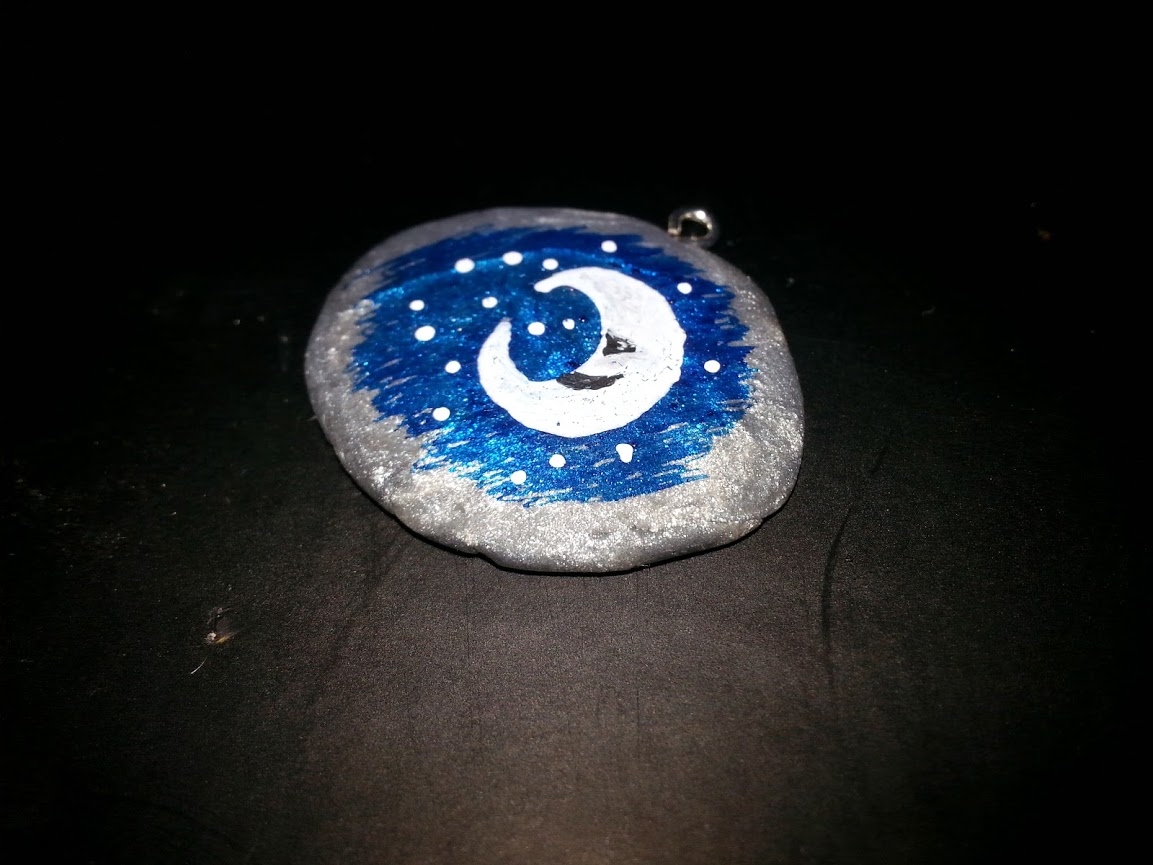
This is a really simple polymer clay pendant I made.  I baked the clay before I painted it, but once the ink dries, it’s permanent.  Anyone who makes polymer clay jewelry, charms, or even art journals- this adds another dimension to the possibilities open to you.

Sketch with white and colored inks on black paper

Sketch with white and colored inks on black paper

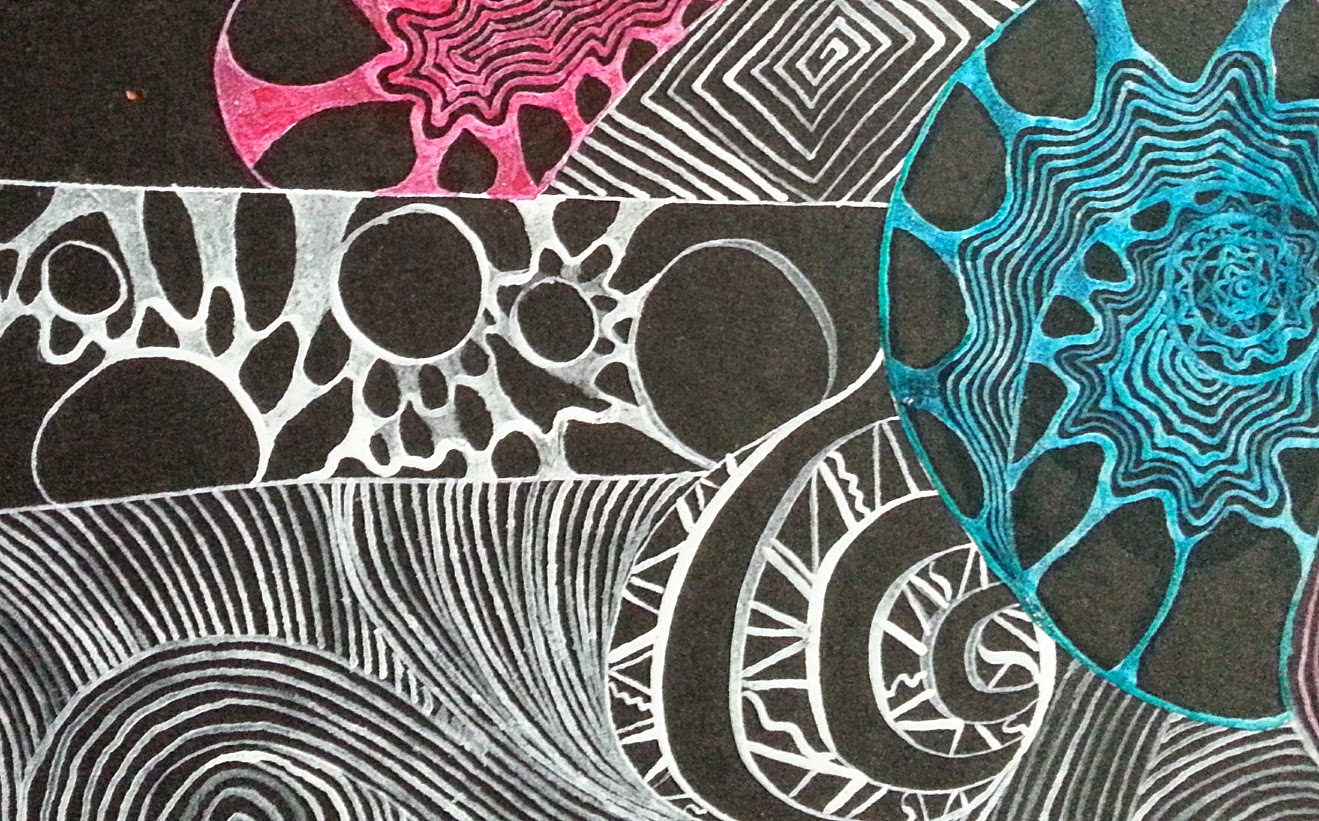
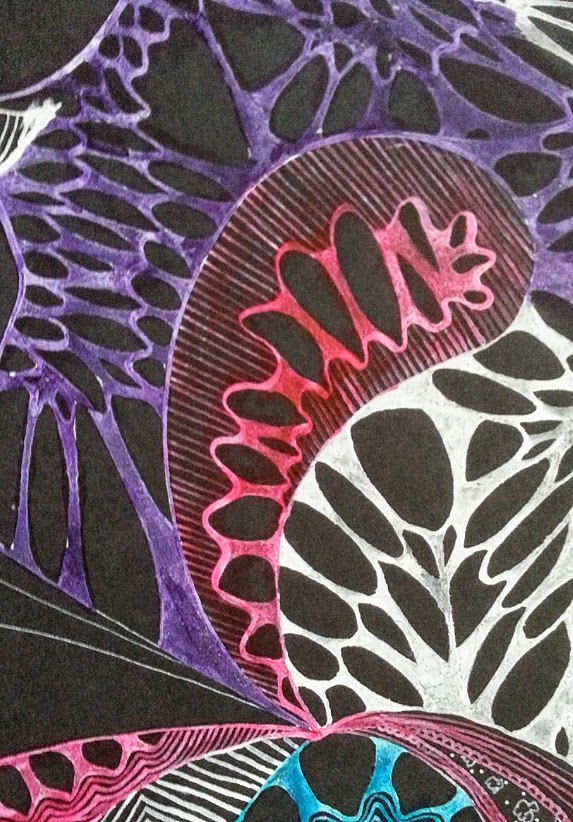
These are from a sketch I made in my black journal.  I was curious to see how these inks worked on black paper.  Though the colored inks soaked in and didn’t show that well, the white is amazing on the black.  You can even dilute it a little bit.  These inks are pretty intense, and adding a little water can make them last longer and go further without taking much away from their brilliancy.  Once I was finished with the white, I used some of the other colors on top so they would stand out.  A little more work, but it’s a way to be able to have all the colors stand out against a black background.  So fun!

Tree drawn directly onto encaustic wax

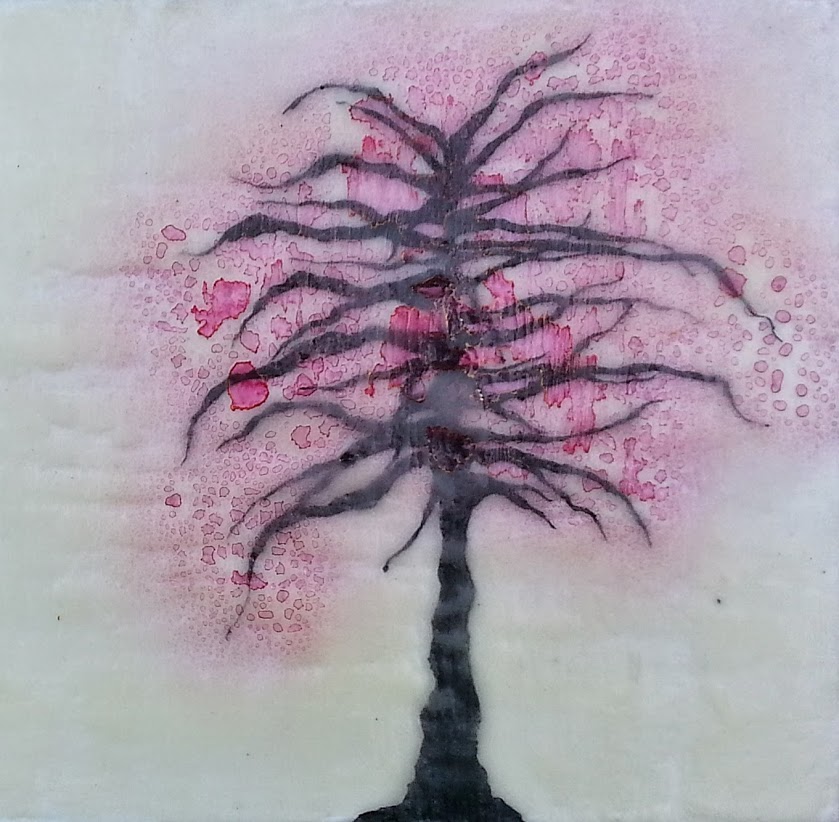
This is an example of a sketch directly onto encaustic wax.  You can sketch onto tissue or rice paper and add it on top of the wax, but I didn’t want to see the edges of the paper.  I used my calligraphy tips to sketch and color in the tree, then I added a couple layers of wax before I spritzed some diluted red ink onto the branches, as a way to add leaves without drawing them individually.  Once again, when the ink dries, it becomes permanent and you can leave it as a top layer, or use more wax layers on top.

So, these are some of the things I’ve tried this week with my new india inks.  I’ve found a few tutorials in addition to these techniques that sound amazingly fun. Here’s a quick list with links so you can try them yourself-

Gouache painting with India Ink- www.craftsy.com

Masking fluid resist- www.alenahennessy.com

Shellac sprayed with India Ink- www.littleblackjournal.com

India Ink with bleach- arteascuola-miriampaternoster.blogspot.ca

Watercolor and India ink- www.youtube.com

So, now you have another supply set to add to your growing list of must-try art supplies.  Go have some fun!

~*~*~*~*~*~*~*~*~*~*~*~*~*~*~*~*~*~*~*~*~*~*~*~*~

Anjuli Johnson is a Mixed Media Artist from Raleigh, NC.  She began her art career as a scrapbooker, and it’s been an evolutionary process ever since.  She loves all things mixed media- paper, paint, pens, wire, gears, clay… the list goes on and on.  She is constantly trying to push through her fears to discover and develop her talents, meet new people, and learn from those around her.  To see more of Anjuli’s art and techniques, check out her website at www.thefarpavilion.com, her blog at www.thefarpavilion.blogspot.com, and like her Facebook page TheFarPavilion

~*~*~*~*~*~*~*~*~*~*~*~*~*~*~*~*~*~*~*~*~*~*~*~*~

.

.

Encaustic and Glass Mixed Media Mobile

~ * ~

This article is written by Anjuli Johnson

Every once in a while, I slip away from my usual style of work and am inspired to create something drastically different from anything I’ve ever done before.  Whenever this happens, it’s always very exciting and terrifying at the same time.  I think one reason I tend to stay within my practiced range of techniques is that I know what I’m doing- doing something different means a necessary amount of experimentation and trial and error, which may work, or it may not.  Terrifying though it may be, it’s so important to experiment with new techniques, because obviously that is how we learn and develop our artistic talents, especially if you are self taught.

I have worked with encaustics before, but never on fabric, so I knew bringing my mobile idea to fruition was going to be tricky.  I used brocade as my base, not only for its beautiful colors and designs, but because I could leave the edges frayed or burn them smooth.  You can see I chose frayed for some, and smooth, burned edges for others.

I cut 2*2 inch squares of glass for inside my encaustic pieces and random broken pieces to hang from them.  Alcohol ink is what I used to give them a stained glass effect.  You need to use Krylon acrylic coating as a sealant so the ink doesn’t smear.  I used the cut glass squares as a template to stitch squares into my layers of fabric.  I cut out the squares of fabric, leaving an edge that the glass would sit inside once I finished working with the wax.

There are some things to be aware of if you’re going to attempt a similar project- first, the surface you are working on.  Make sure that it’s clean.  My art table is covered with paint drips and old glue, so I improvised another surface to work on.  The other thing is that for my squares of stitched fabric, I wasn’t painting on just one side as I would do when painting on wood.  Both sides of my pieces would be seen in this mobile format, so I knew I would be painting with wax on both sides.  If you’re not careful, working on one side can cause the wax on the opposite side to stick to the surface of your table and peel away.  I found it easier and less messy to work until I was nearly finished adding all my wax and embellishments on one side, and then begin work on the other side.  You need a heating tool to heat the wax between layers so they fuse together- when I finished working on one side fusing the wax, I would lay it on the other side to begin painting, and hold it loosely in my hand to fuse it rather than lay it on the table to fuse it.  This keeps the wax on the fabric rather than peeling away and sticking to the table.  Be careful using your heat gun while you do this- you don’t want to burn yourself.  But I was able to do this quite easily and it worked much better.  Of course, encaustic is a very forgiving medium.  If something goes wrong, don’t fret.  There are always ways to fix mistakes or mess ups, so it’s really the perfect medium for experimentation.

I used around 6-7 layers of wax on each side, and it’s with the last couple that I added most of my embellishments.  (You can use as many as you would like, as long as you fuse between each layer.)  I used stamped and drawn images on rice paper, Tim Holtz patterned tissue paper, rub-ons, metal objects like keys and gears, and india ink stamped and drawn right onto the surface.  You’ll need to add a layer

of wax over any paper or metal embellishments you add, but if you are stamping or drawing with india ink, you can let it dry on the top layer without needing to add any more.

There are countless encaustic techniques you can use on a project like this.  One of my favorite resources is a book called “The Encaustic Studio” by Daniella Woolf. Of course, there are seemingly endless resources on pinterest and youtube, as well.  Check them out, but as I said before, don’t be afraid to experiment and try new things.  They may work, they may not, but I have found that any art experiments you try are well worth the risk!

My biggest risk was building my own mobile frame- fun, but tough.  I’m definitely going to need to practice my mobile-making skills.  The best part was adding the       wire around the glass and the frame- the swirls of dark metal give the whole piece a rather whimsical quality.

So, that’s my venture into the unknown!  I made mistakes, fixed them, had to scrap a few of my original ideas when they didn’t work, but I’m pretty happy with how everything turned out.  Not only that, but I feel like I have a little more courage stored up for the next random idea that pops into my head.  What new things are you going to try this week?


Each of us must face our fears and try new things if we’re going to continue to grow as artists.

~*~*~*~*~*~*~*~*~*~*~*~*~*~*~*~*~*~*~*~*~*~*~*~*~

Author bio:  Anjuli Johnson  is a Mixed Media Artist from Raleigh, NC.  She began her art career as a scrapbooker, and it’s been an evolutionary process every since.  She loves all things mixed media- paper, glue, paint, canvas, pens, wire, gears… the list goes on and on.  She is constantly trying to push through her fears to discover and develop her talents, meet new people, and learn from those around her.  Check out Anjuli’s Facebook page to learn more about her.

~*~*~*~*~*~*~*~*~*~*~*~*~*~*~*~*~*~*~*~*~*~*~*~*~

.

.

Creativity and Inspiration throughout 2013

~ * ~

What an amazing year 2013 has been! As I run back through all of our tutorials, guest artists and projects, I just continue to marvel at the wonders and joy that mixed media art has brought us! This year also saw the start of the Mixed Media Tips videos, along with two Online Tutorials and ONE book published! Just amazing!

So, to put all of this wonderment into one place, I present to you…

The Creativity and Inspiration of 2013

Here is the best and the most inspiring events and articles on Mixed Media Art throughout 2013!

Online Tutorials and Videos

A summary of our Mixed Media Art Online Tutorials

  • In April we featured our Creating Layers in Mixed Media Art tutorial and gave away the three canvass featured on the tutorial
  • Our 4th birthday celebrations featured the Postcard Art Tutorial, where we created easy-to-post pieces of art and 16 of them were posted to members of our community, around the globe. You are still welcome to share the postcards you have created at the bottom of the tutorial.
  • We attacked our “Art Envy” with the Wish Art Journal Layout tutorial
  • Kate Palmer also joined us to share one of her Layering Mediums Art Journal Technique

Mixed Media Artists

Our Famous mixed media artists

We had a wonderful collection of mixed media artist with is across the last 12 months, including:

If you would like to see your story and artwork featured on Mixed Media Art, we are always looking for artists and crafters to share your work, so send a quick email to Michelle and let her know!
~ * ~

Reviews

2013 has seen the continuation of product and book reviews, and it has been our delight to bring you:

Mixed Media Art Tips Videos

Michelle has had lots of fun this year, bringing you the start of the Mixed Media Art Tips Videos – there is just something about video that brings Michelle’s tips to life! And while it takes a lot more work than just taking photos, the effort that goes into editing and uploading videos is certainly worth it.

The Tips Videos include:

Projects and Inspiration

We have features so many projects and tutorials from a range of artists and crafters, across the spectrum of the mixed media genre. It has taken ages just to pull them together, all in one place for you to have a look through!

Art Journaling

Our art journaling has certainly reached new levels across 2013 – it is such a great way to create small, portable pieces of art and it a place for trying new techniques or reflecting on your own thoughts and creative process.

Guest Artist Projects

Handmade & Altered Books

Other Mixed Media Gems

Inspiration


~ * ~

So there you have it! 2013 in review – all 46 articles!

We would LOVE to hear about your favourite project or artist – please leave a comment below!

.

The photo collages here were created with Shape Collage