Art Journaling with Imagine Craft Irresistible Sprays & Stazon inkpads

~ * ~

This article was written by Melanie Statnick

Art Journaling with Imagine Craft product Irresistible Sprays & Stazon inkpads

Art Journaling with Imagine Craft product Irresistible Sprays & Stazon inkpads

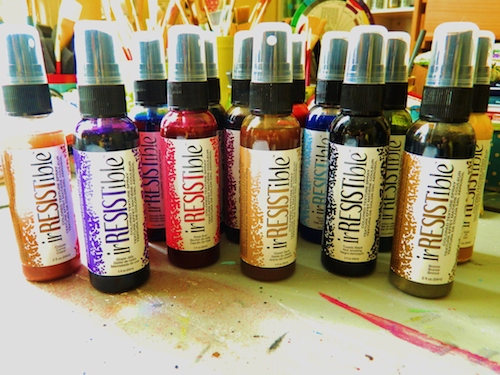
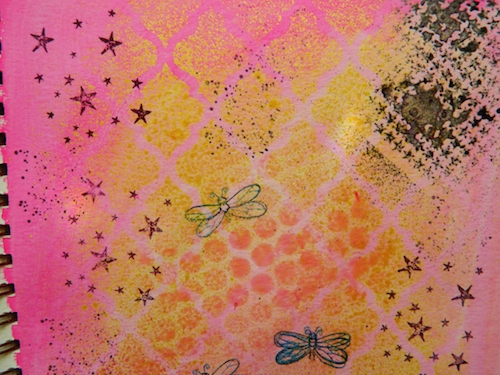
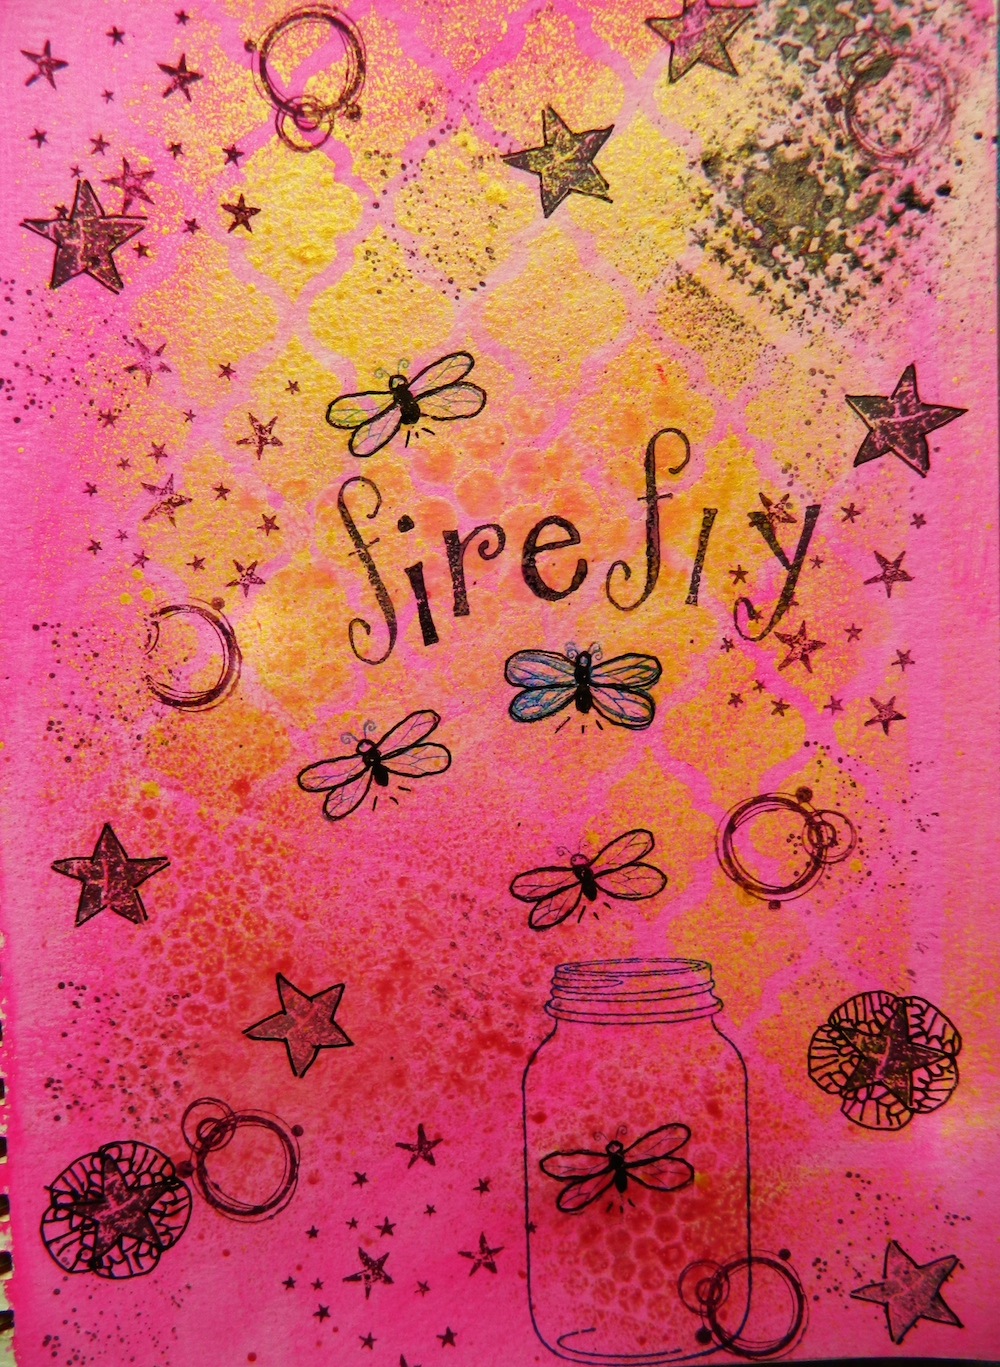
I had a chance to play with Imagine Crafts product line of irRESISTible colored texture spray.  I have to say I’m loving all the juicy bright colors I have in my collection. These are some new colors and today I used a few that blended well together in a palette. Rose bud, Angel pink and Gold. With the metallic sprays you need to shake well before spraying.

Art Journaling with Imagine Craft product Irresistible Sprays & Stazon inkpads

Art Journaling with Imagine Craft product Irresistible Sprays & Stazon inkpads

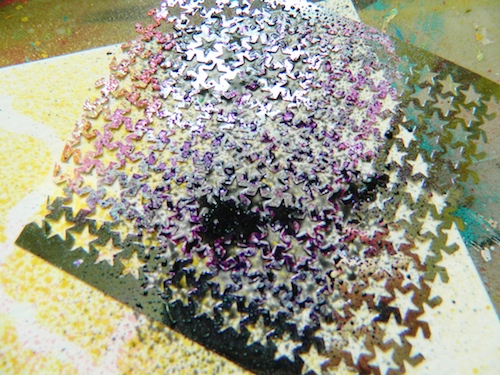
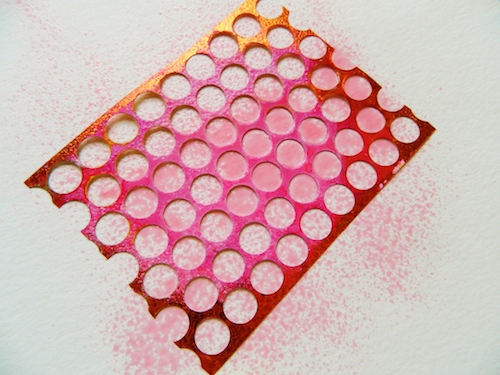
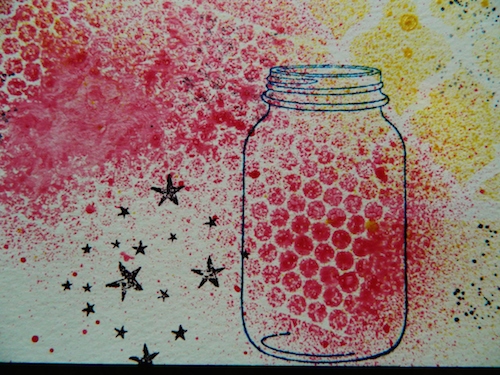
Lay the stencil down on your journal surface and spray approx.12 inch away from the paper. To get a speckled look hold spray father and to achieve and more saturated heavy texture spray closer. Because this is acrylic it dries fairly quickly and I recommend washing off your stencil after spraying.

Art Journaling with Imagine Craft product Irresistible Sprays & Stazon inkpads

Art Journaling with Imagine Craft product Irresistible Sprays & Stazon inkpads

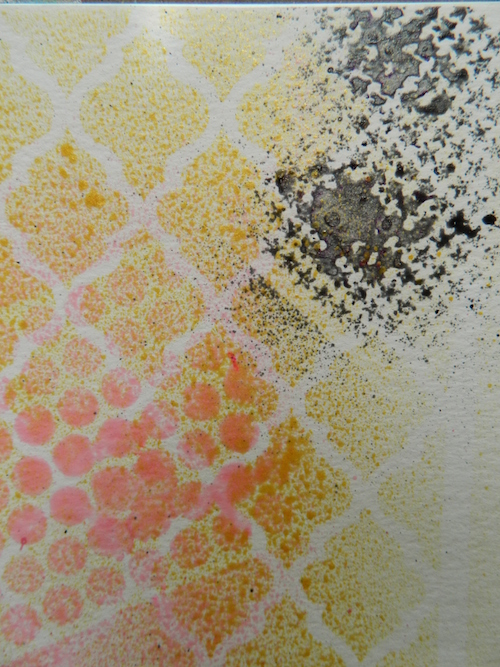
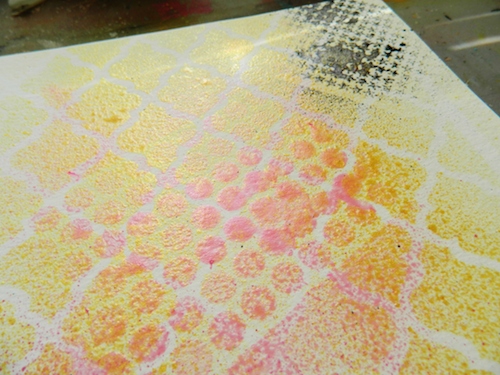
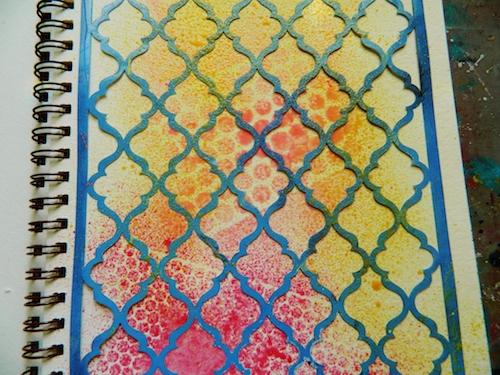
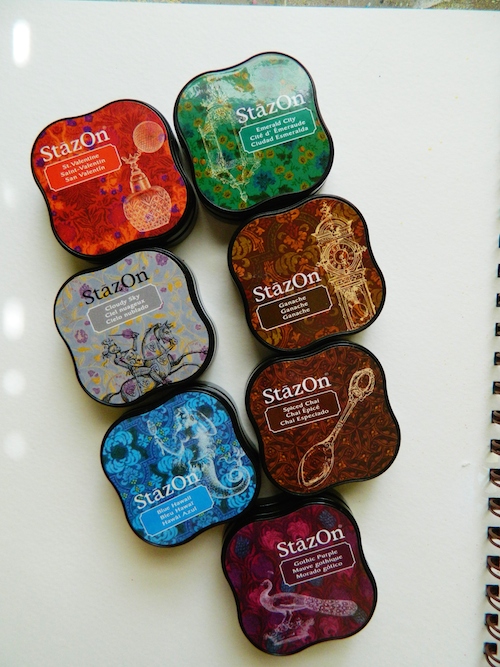
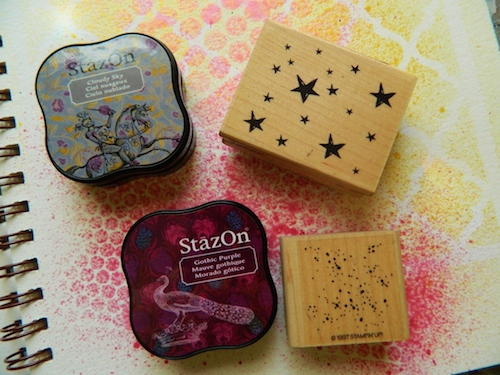
I must admit I was getting excited over the result in the sprays blending so well. I found that none of the spray ran onto another color. I did not dry in between coats. The colors remained bright, juicy and added fantastic texture coverage. I wanted to add some stamps to my page using Stazon. Stazon is not my go-to ink pad. I have found that the ink makes my stamps sticky and has a light odor to it.  However they are solvent ink and come in some yummy new colors. Here I used Gothic Purple, Cloudy Sky and Blue Hawaii. Aside from the brilliant colors the pads seem to come very wet which is a benefit. This allowed for maximum ink coverage. I also like the design of each case. The images give them just a little something to catch your eye. They are also stackable for those of you who like to keep order in the craft room.

Art Journaling with Imagine Craft product Irresistible Sprays & Stazon inkpads

Art Journaling with Imagine Craft product Irresistible Sprays & Stazon inkpads

Art Journaling with Imagine Craft product Irresistible Sprays & Stazon inkpads

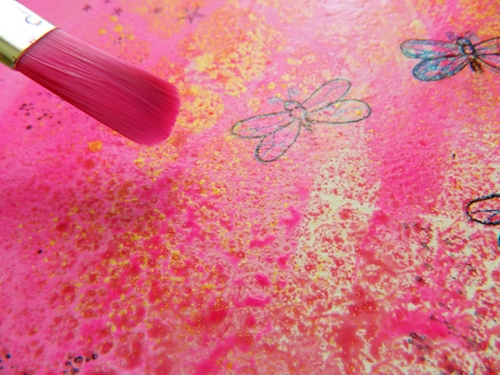
After adding the irresistible texture spray and my stazon inked stamps I wanted to see how the sprays provided a resist.  I added my watercolor to the page and while it was still wet I gently rub off some excess color. The result was beautiful.  I encourage you to try irresistible texture spray in your project for yourself and play with this delightful product.

Art Journaling with Imagine Craft product Irresistible Sprays & Stazon inkpads

Art Journaling with Imagine Craft product Irresistible Sprays & Stazon inkpads

Art Journaling with Imagine Craft product Irresistible Sprays & Stazon inkpads

~*~*~*~*~*~*~*~*~*~*~*~*~*~*~*~*~*~*~*~*~*~*~*~*~

Author bio:
Melanie Statnick is a published artist/writer out of North Carolina. Melanie creates art daily from her private studio. Her style is happy and whimsy. Statnick’s artwork can be found in art galleries and shops extensively in NC with international private collections. Learn more about Melanie view her website at: www.melaniestatnickart.com

~*~*~*~*~*~*~*~*~*~*~*~*~*~*~*~*~*~*~*~*~*~*~*~*~

.

Painted Background on Canvas

Here is a step by step guide to creating the background used on this Mixed Media Collage on a 4″ x 4″ mini canvas.

IMG_0408

The mini canvas was bought from an arts supply store for less than $1. The two paints chosen are a purple and a bright maroon (Chromacryl Students Acrylic – Violet and Jo Sonjas Artist Gouache – Red Violet).

IMG_0347

The purple paint was used first, starting from the top left hand corner and the bottom right corner, slowly working with a barely damp brush and moving the paint inwards.

IMG_0348IMG_0349IMG_0351

To further fade the paint, a slight amount of water was added to the brush and the paint was watered down along the middle. Then with some paper towel, a small amount of paint was blotted off. Repeating this process improved the fading of the paint. When you are happy with the effect, allow that layer of paint to dry (a heat gun helps to speed the process along).

The maroon paint was then added in a similar way – apply the paint along the middle, the add a wetter brush to thin it out and blend it back into the purple paint. Blot with paper towel. Allow to dry.

IMG_0359IMG_0362

Now we are ready to add some visual texture to the canvas. As this surface is tricky to stamp onto directly, the stamping is done onto tissue paper, then added to the canvas. Stamping needs to be done with an ink that won’t run when wet. Staz-On is a great ink to use in this application (Tsukineko StazOn Solvent Inkpad, Jet Black) Pigment inks are water based and will not work for this technique.

IMG_0361

Take the stamped tissue paper and tear out the piece you want to add. Tearing the edges gives a feathered edge that blends into the background better than straight, cut edges. A vanish was used to adhere the tissue paper to the canvas. Gel medium or a runny glue will also work. Carefully apply the glue or vanish onto the back of the tissue paper and give it a few moments to soak in. Also apply a layer of glue onto the canvas. Very carefully lay the wet tissue paper onto the canvas. Smooth out the tissue paper with your finger nail, to remove any bubbles or excessive glue. Be very careful here or the tissue paper will tear. This does add an interesting effect and won’t completely ruin your canvas,but it is very annoying. Set aside to fully dry. Allow to air dry and resist the temptation to use your heat gun.

IMG_0368

Now your canvas is ready to decorate.

IMG_0369

Happy creating!

.