Mixed Media Art in the Round

~ * ~

This article is written by Melanie Statnick

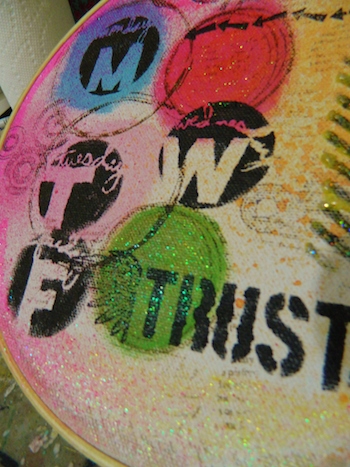
One of the things I like most about creating mixed media art is the numerous amount of different surfaces you can use to paint or alter. I thought the embroidery hoop was a fantastic idea and it steps away from the average square shape of the canvas.

using embroidery hoop as a framed canvas

using embroidery hoop as a framed canvas

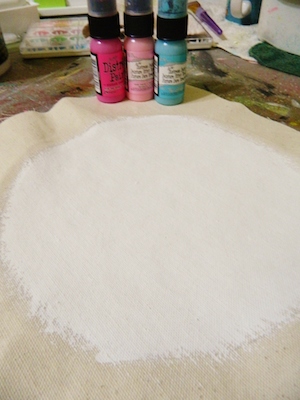
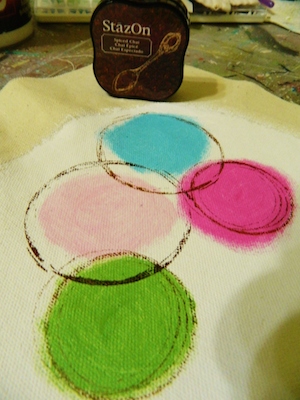
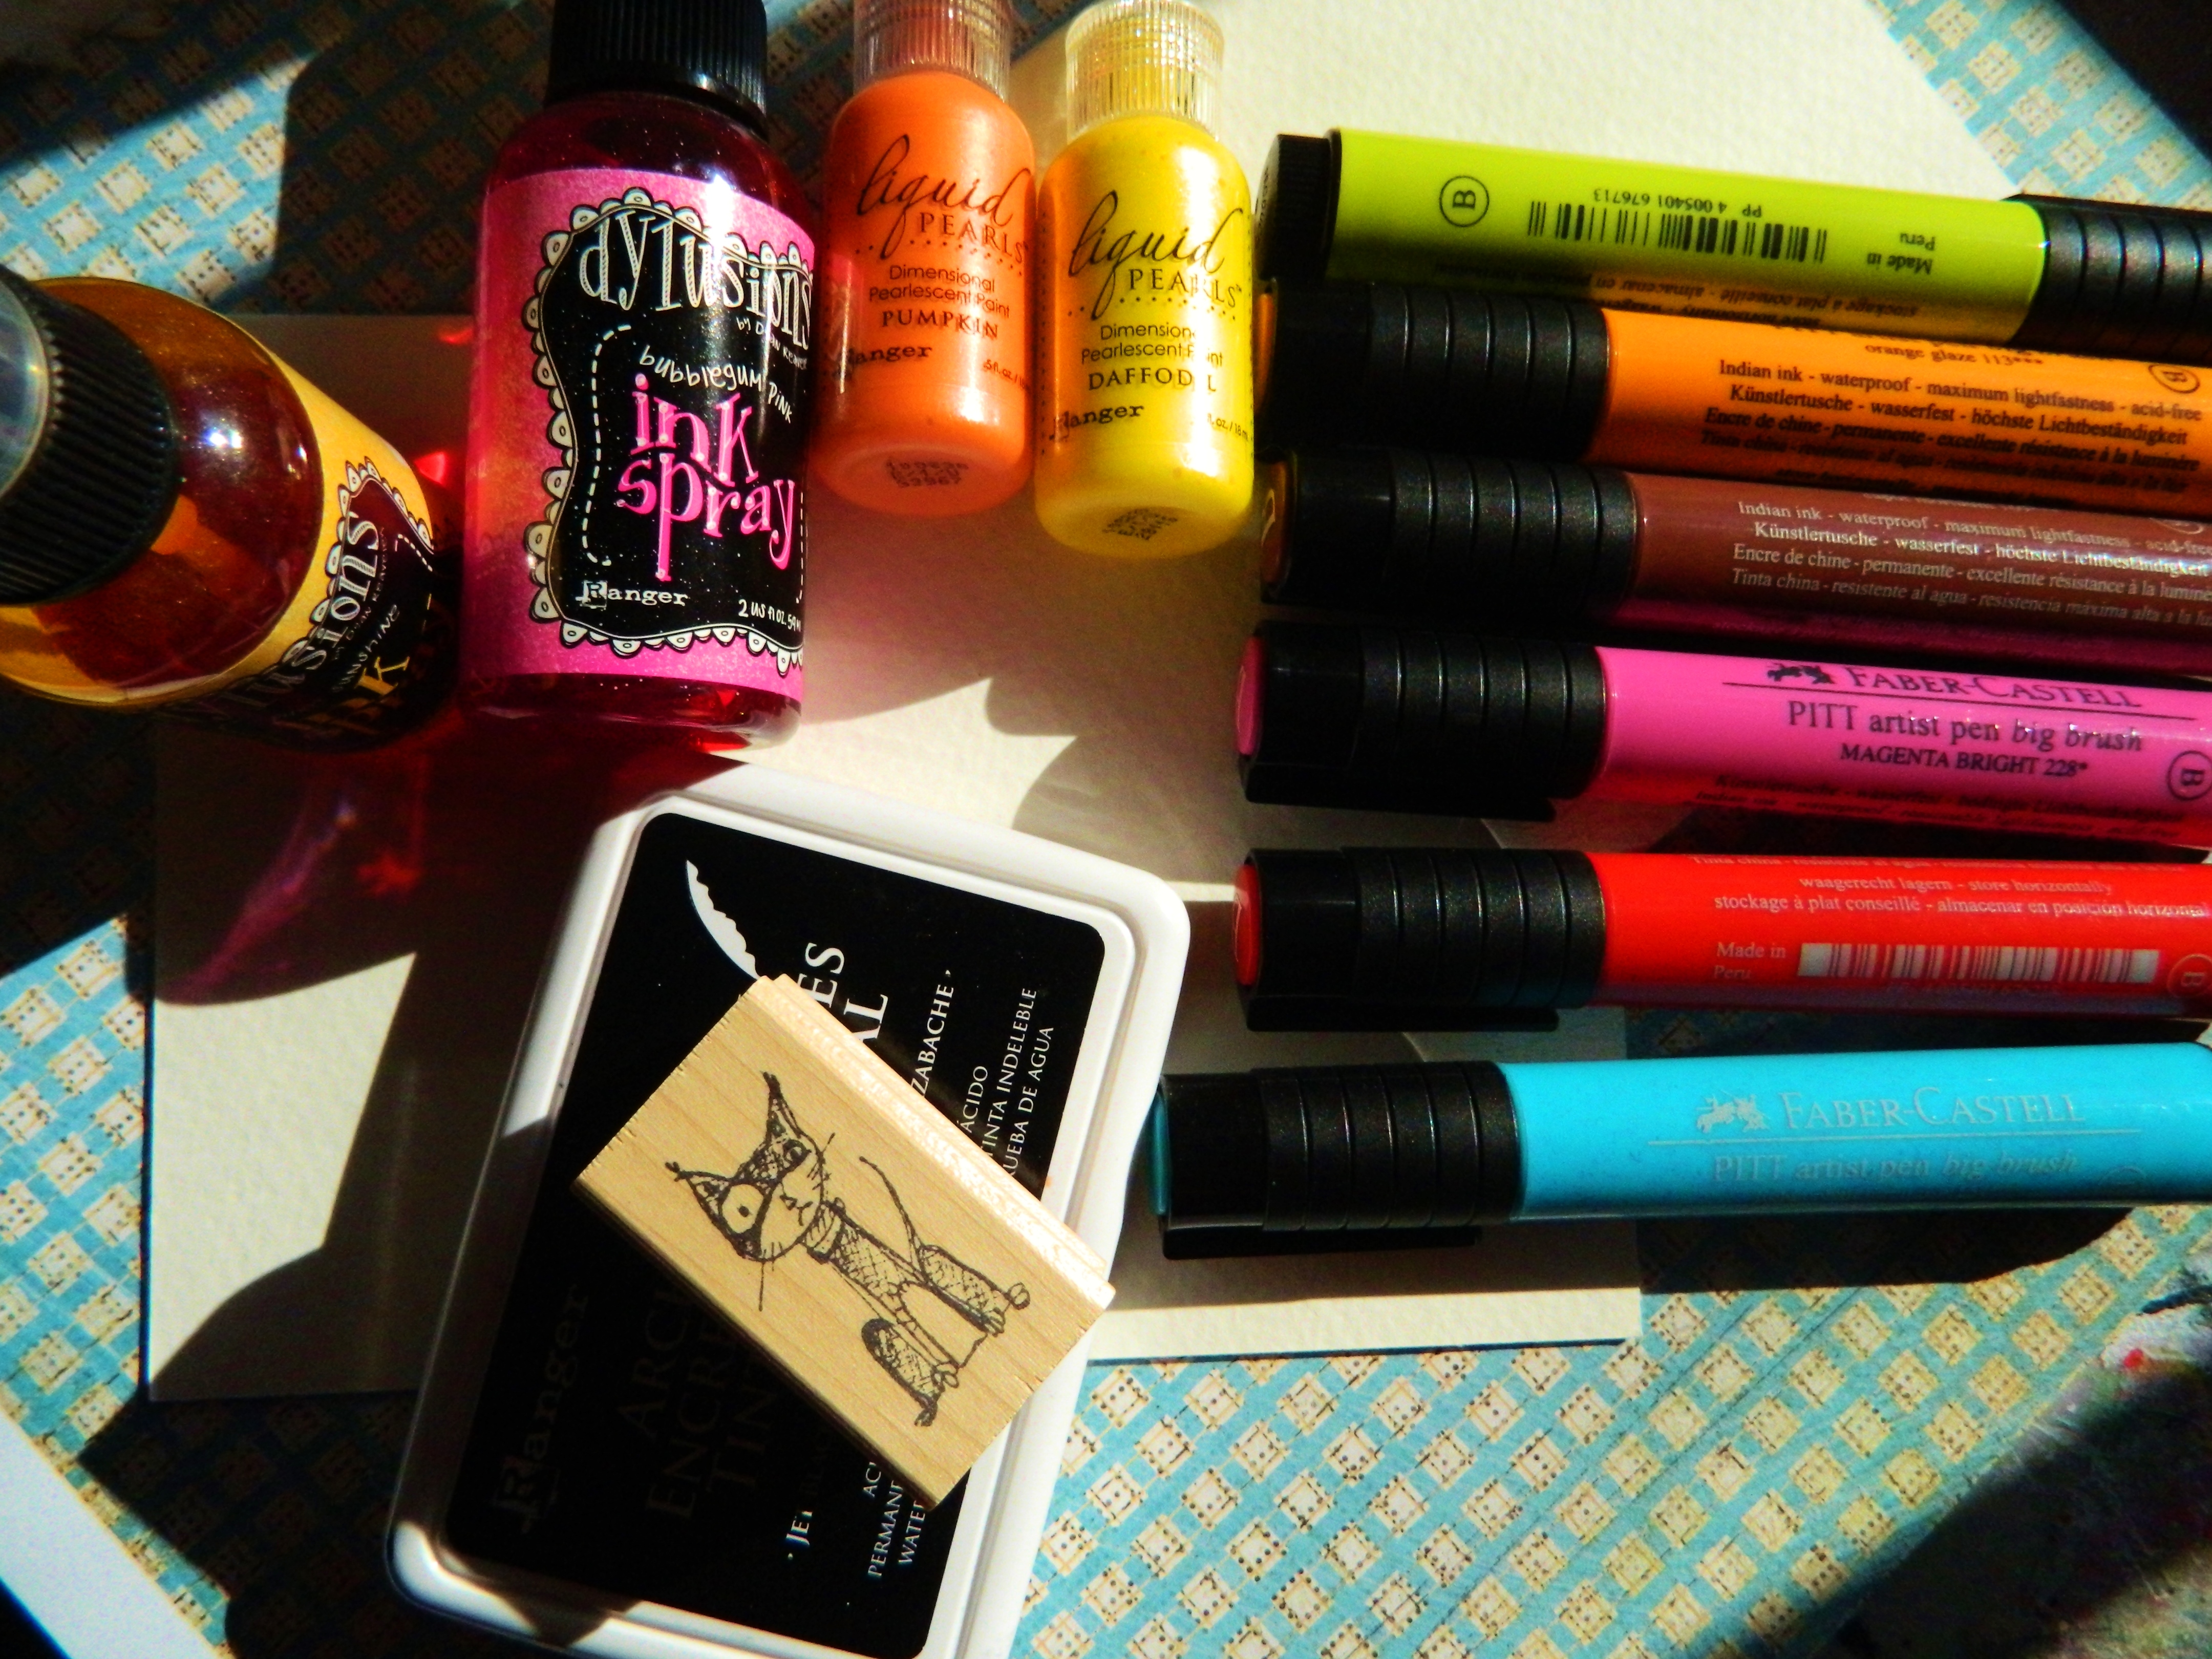
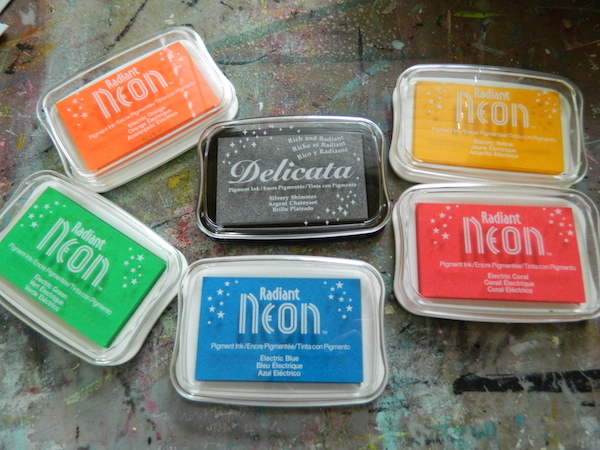
Using a loose sheet of canvas fabric that can be found in most craft stores, I found this in with the scrapbook paper. Trace the inside hoop using a pencil. Gesso the inside of the circle and dry well. Paint shapes with acrylic paint, here I used Distress paint dabber, and I stamped images with Stazon ink pad.

using embroidery hoop as a framed canvas

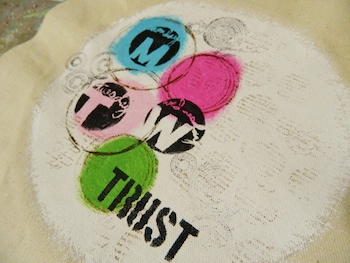
Pick your favorite stencil and stencil in images and/or write words. Because your surface is primed with gesso you can accomplish the same effects as you would on a regular square canvas.

using embroidery hoop as a framed canvas

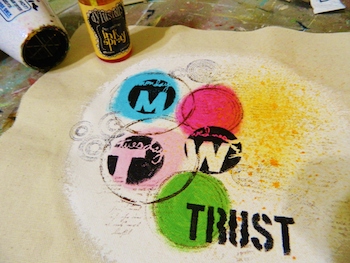
Dry well and spray with a matt finish. Flip your artwork over to the back side match the gesso circle you made. Push smaller hoop through the inside. Cut remaining fabric off.

using embroidery hoop as a framed canvas

You can see more about this Julie Fei-Fan Balzer’s Weekly Circles stencil here

~*~*~*~*~*~*~*~*~*~*~*~*~*~*~*~*~*~*~*~*~*~*~*~*~

Melanie Statnick is a published artist/writer out of North Carolina. Melanie creates art daily from her private studio. Her style is illustrative and whimsy. Melanie’s artwork can be found in art galleries and shops extensively in NC with international private collections. Learn more about Melanie view her website at: www.melaniestatnickart.com

~*~*~*~*~*~*~*~*~*~*~*~*~*~*~*~*~*~*~*~*~*~*~*~*~

.

.

Handmade Greeting Card

~ * ~

This article is written by Melanie Statnick 

Handmade greeting card using watercolor paper

Greeting cards are so fun and quick to make. My mum and I would send cards to each other all the time. I really want to get in the habit of snail mail again.  I love to send gifts, happy mail, post cards and handmade cards.

Handmade greeting card using watercolor paper

I hand folded 140lbs cold press watercolor paper into a card shape. Opened to lay card flat and spray with orange and pink Dylusions ink spray. These are my favorites. Air dry or dry with heat gun.  Cut pink card stock paper to smaller size to center in the front of the card and glue. Stamp all four sides of card stock. Stamp image of 2” art squares. Glue squares to cardstock.

Handmade greeting card using watercolor paper

Stamp your greeting on top and bottom of watercolor card. Using Pitt Pen Big Brush Markers color in the stamped images. Add Stickles in your favorite colors and washi tape to the edge.

Handmade greeting card using watercolor paper

*stamp can be found at Rubbermoon.com

~*~*~*~*~*~*~*~*~*~*~*~*~*~*~*~*~*~*~*~*~*~*~*~*~

Author bio: Melanie Statnick is a published artist/writer out of North Carolina. Melanie creates art daily from her private studio. Her style is happy and whimsy. Statnick’s artwork can be found in art galleries and shops extensively in NC with international private collections. Learn more about Melanie view her website at: www.melaniestatnickart.com

~*~*~*~*~*~*~*~*~*~*~*~*~*~*~*~*~*~*~*~*~*~*~*~*~

.

.

Radiant Neon Ink with Delicata Ink

~ * ~

This article was written by Melanie Statnick

Radiant Neon ink pads, created by Imagine Crafts, are bright, bold and juicy. They are also opaque ink and fade resistant and can be embossed.

Stamping with Radiant Neon inks

Stamping with Radiant Neon inks

I created a few cards with them on white and black card stock to show how the neon ink affects different backgrounds. Personally I’m a fan of the neon on the white the best.

Stamping with Radiant Neon inks

Stamping with Radiant Neon inks

Stamping with Radiant Neon inks

Radiant Neon ink colors can be blended together. I wanted to see how brilliant the silver looks of the Delicata ink pad. I used some chip board pieces and added the radiant neon ink in my favorite colors and then blended the silver ink over top. Do this while they are wet. You can use the delicate ink alone and let this ink air dry for best results.

Stamping with Radiant Neon inks

Stamping with Radiant Neon inks

Stamping with Radiant Neon inks

~*~*~*~*~*~*~*~*~*~*~*~*~*~*~*~*~*~*~*~*~*~*~*~*~

Melanie Statnick is a published artist/writer out of North Carolina and you can see more of her work on her website at www.melaniestatnickart.com

~*~*~*~*~*~*~*~*~*~*~*~*~*~*~*~*~*~*~*~*~*~*~*~*~

Disclosure: These products have been provided by Imagine Crafts, for the purpose of review. All opinions are that of the MixedMediaArt team.
.

.

Mini ArtBooks: Matchbook-styled!

This article was written by Martice Smith II 

Create Mini ArtBooks: Matchbook-Styled!

No-sew, mini artbooks…matchbook-styled!

Martice Smith II shows us a fun twist on the classic matchbook style design. Follow along as we create beautiful, miniature artbooks with a variety of decorative cardstock, sketchbook papers and a stapler. At least half a dozen in less than 30 minutes!

Gather supplies


Gather supplies and tools for Mini ArtBooks project

  • cardstock or decorative papers (for this project, I’m using paper from The Paper Studio®, Prima Marketing, Inc., and Crate Paper, Inc.)
  • blank sketchbook paper
  • ruler
  • pencil
  • bone folder
  • stapler
  • scissors (optional)
  • variety of stamps (optional) (I’m using the alphabet stamp set from Studio G and my own, handmade stamp)

Cut the cardstock and sketchbook papers, to size

Measurement for artbook cover (cardstock): 4.5 inches long by 2 inches wide

Measurement for blank sketchbook paper: 2 inches by 2 inches

Fold up one edge


Fold up one edge of cardstock paper. Crease fold.

Decorative side facing down, fold up one of the edges about 1/2-inch.

Crease with bone folder.

Add paper


Add sketchbook paper. Use paper clip to hold paper in place.

Gather the pieces of blank sketchbook paper and tuck them inside the fold. (Tip: to keep the papers nestled together, use a paper clip.)

I used a variety of paper types. For example, some of my mini artbooks contain handmade paper, charcoal and regular sketchbook papers. I was able to fit 6-7 sheets of paper in each matchbook-style mini artbook.

Lightweight paper works best for this project. If you decide to use heavier paper, you will need to add less paper; maybe 3-4 sheets instead of 7.

Staple the fold


Staple the folded edge

Staple the fold 1/4-inch up from the folded edge.

Fold the center


Fold opposite end of cardstock cover to finish the mini artbook.

Take the other end of the cover over the blank sketchbook paper and line it up with the bottom edge of the fold. Crease with bone folder.

Tuck this same edge under the 1/2-inch piece of stapled cardstock to form the matchbook-styled artbook.

Since these are so easy and quick to make, why not make a dozen of ’em?! They look really nice in a big pile, ready to share with friends! Give them away as small gifts or make some out of collage papers and add them to your art journal when you’re on the go.

Stack of Mini ArtBooks with variety of cardstock covers

*Optional: use alphabet stamps to add a personal sentiment, rub-on stickers for contrast and distress inks to create a worn-out look. The possibilities for these mini artbooks are endless! Use your imagination to make them uniquely yours. Have fun!

Add embellishments to your Mini ArtBook for a more unique look

~*~*~*~*~*~*~*~*~*~*~*~*~*~*~*~*~*~*~*~*~*~*~*~*~

Author bio:

Mixed media artist and designer, Martice Smith IIMartice Smith II is creative director of Martice Smith II – Illustration & Design Studio, based in Kansas City, Missouri and owner of Uneek Art Boutique. She established herself as a freelance Illustrator and graphic designer after receiving her Bachelor of Arts Degree. Her stunning illustrations reveals her love for fashion, typography and wildlife- using a combination of analog and digital techniques.

Martice also contributes as an article writer for the Creating Mixed Media Art website.

You can see more of her work via her Facebook page or her blog. She invites you to join her monthly newsletter, Uneek Art Letter, for art biz tips, advice and free digital goodies!

~*~*~*~*~*~*~*~*~*~*~*~*~*~*~*~*~*~*~*~*~*~*~*~*~

.

.