~ * ~
This article is written by Shari Welch
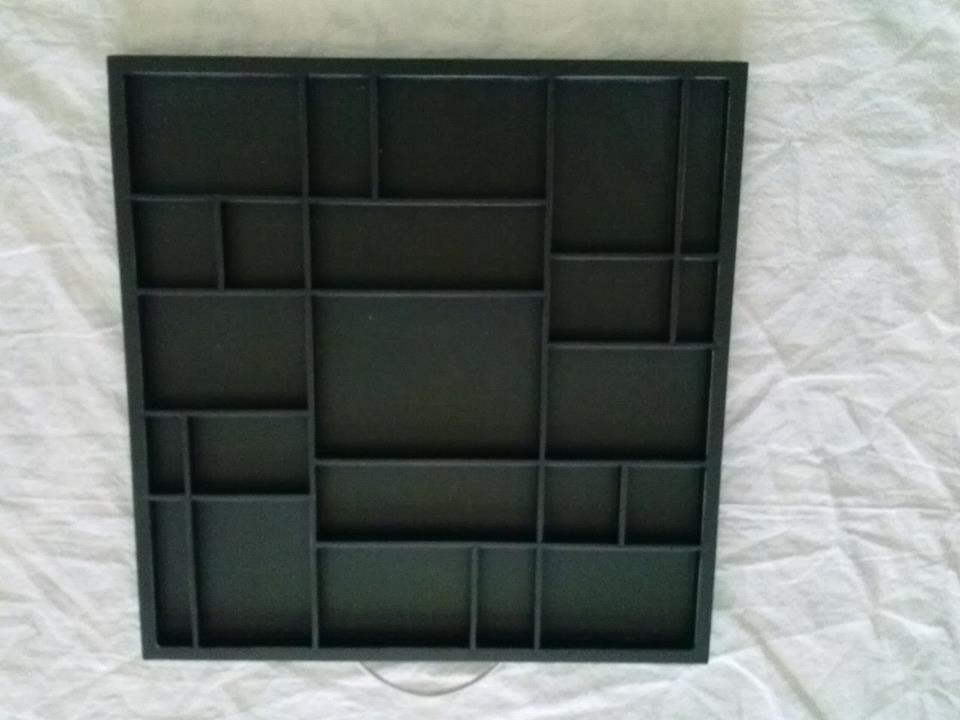
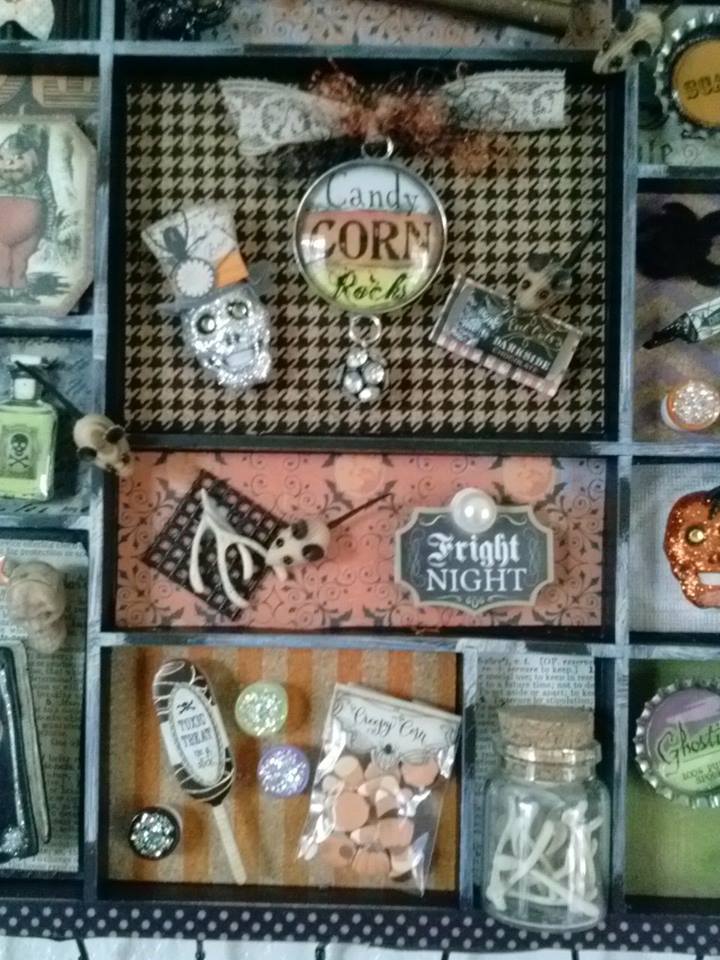
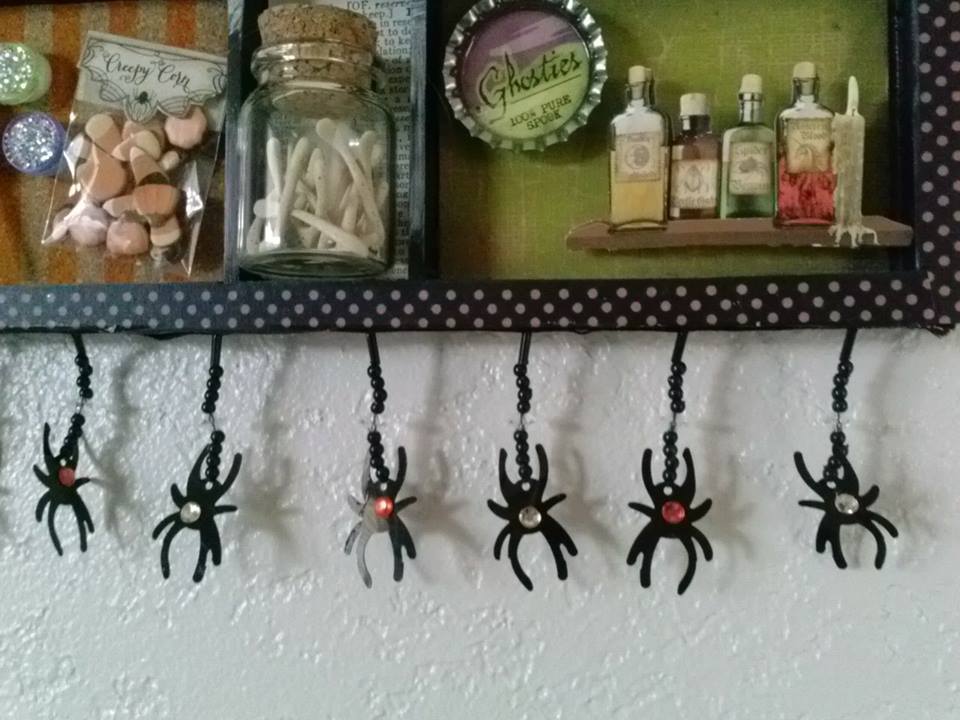
Type cases or printers trays were manufactured from around 1890 to the 1960’s. They are wooden trays divided into sections to hold the various letters of a typeface for print. All type cases were finished by hand and were fitted with a hanger. They were well constructed because metal type is heavy. The trays were stored in vertical racks, grouping the different type styles into families. Today artists take advantage of the unique frames to create one of a kind pieces of art.

There are many printers trays out there. They come in different sizes, colors, shapes, and number of sections. You can find them at craft stores and online.
I was excited to share this project because there truly is not much skill to it. It is mostly a matter of layering different elements. You can create one that is very simple or more detailed. I will be demonstrating some mixed media techniques you may want to try to take it to the next level.
Lets get started!
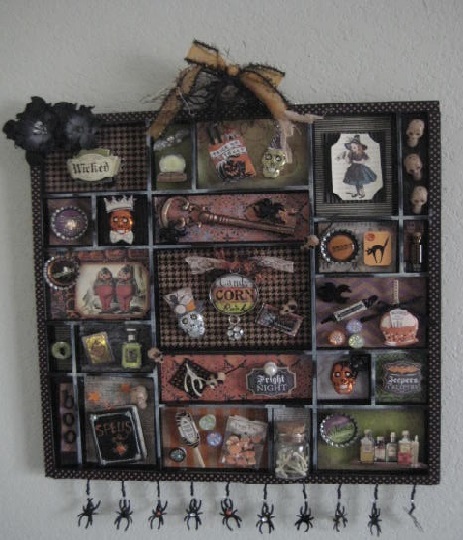
With Halloween just around the corner, I decided to create a Halloween themed printers tray. I absolutely can not get enough of Halloween.
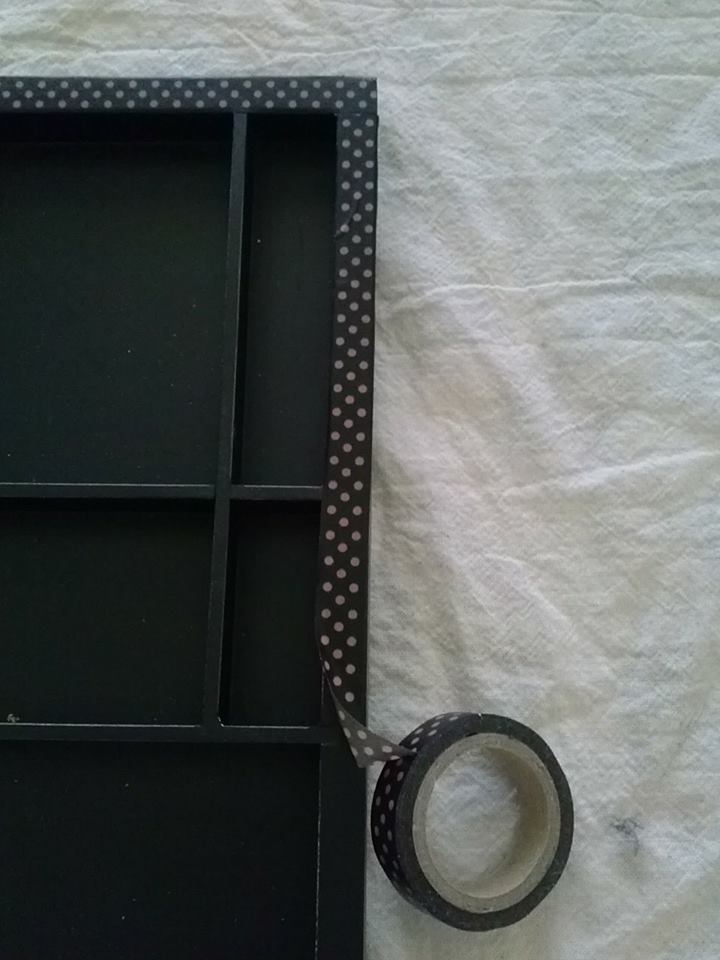
I chose a tray that was already black (as I was going to paint it black anyway) and had a lot of sections. I used washi tape to decorate the edge of the frame.
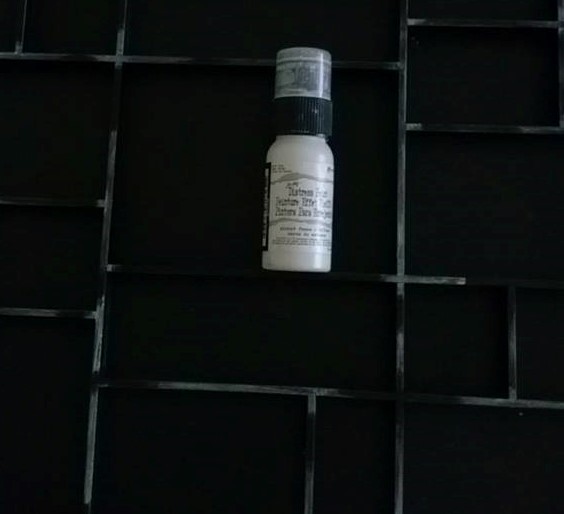
Next,to give it some interest, I used Tim Holtz distress paint (picket fence) to define some of the edges of the sections.
I picked out a few interesting coordinating papers and printed cork sheets to fill up the backgrounds sections.
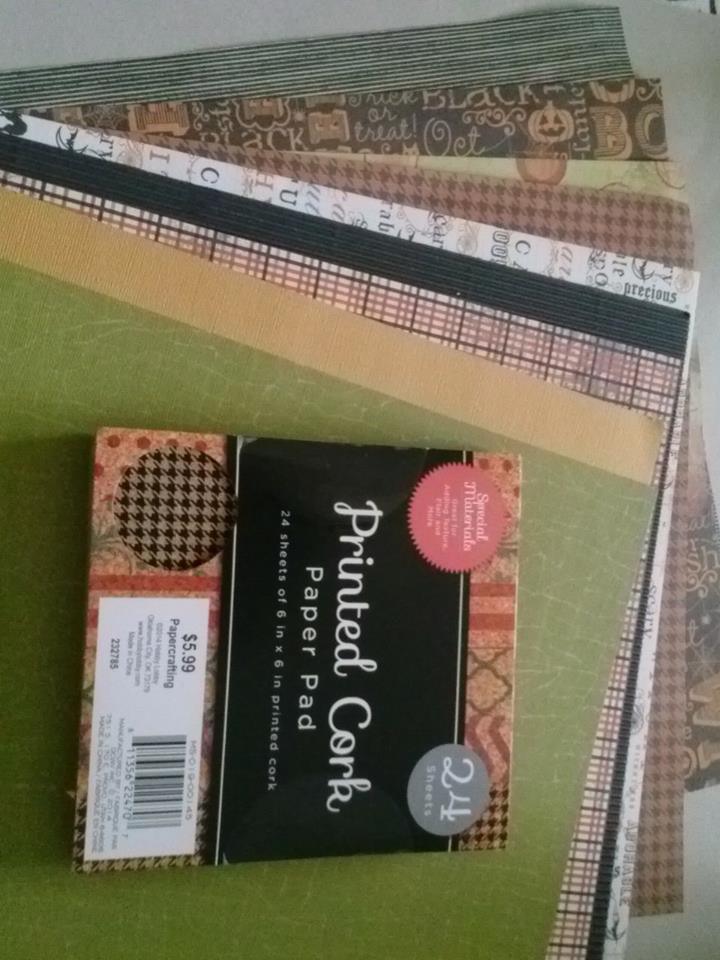
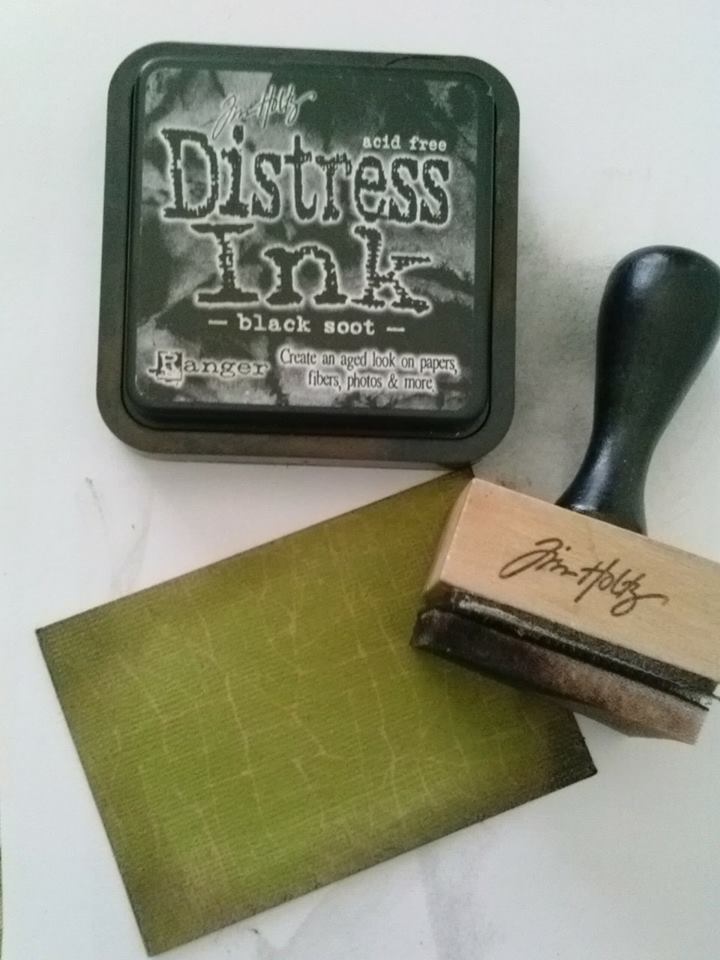
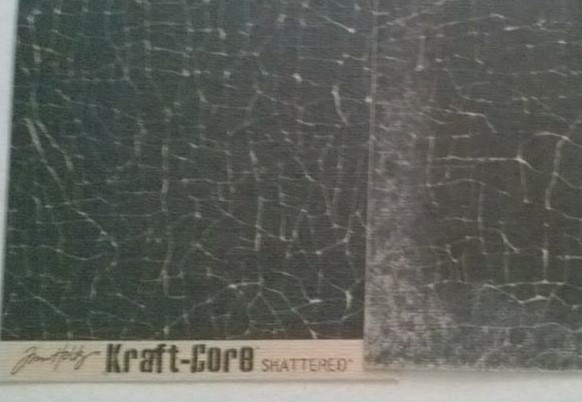
Next came distressing a few of the papers edges using Tim Holtz distress ink (black soot) and sandpaper on Tim Holtz Kraft core paper. Note: Kraft core will hold up to sanding, tearing, embossing, distressing.
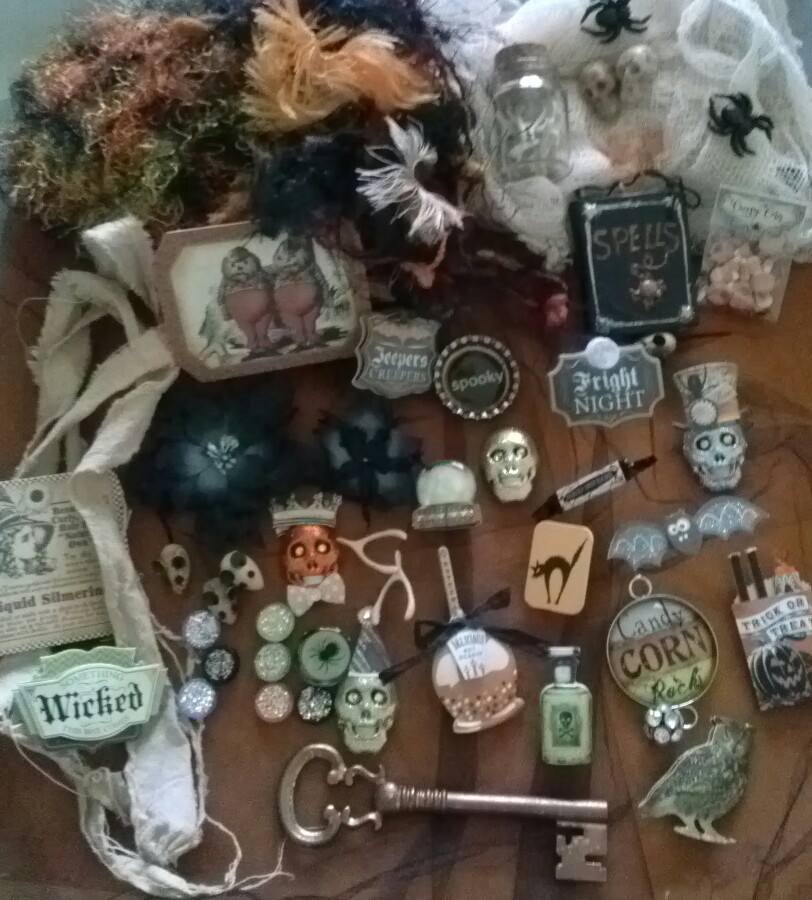
The fun really starts as you figure out what you want to put in the tray. You can add items from a trip, little bits and pieces of things you love, collections, photos, I could go on and on.
IMPORTANT:
One thing I can’t stress enough is that to lay everything out before you glue anything down. Not the background, the type, charms, nothing. I moved elements around a few dozen times or more before they found their permanent homes. I also glued down one section at a time after I was happy with the placement.
Helpful hints: Consider using 3D foam adhesive pieces to help your items look as if they are coming off the page. To age lace or ribbon you can soak them for a few hours in tea. I used Aleene’s tacky glue for the backgrounds and Weldbond glue for attaching my treasures.
Now it’s your turn to create your one of a kind piece of art.
~*~*~*~*~*~*~*~*~*~*~*~*~*~*~*~*~*~*~*~*~*~*~*~*~
Shari Welch is a mixed media artist living in Denton Texas. She is known for using reuse and recycle materials in her artwork. She volunteers for SCRAP Denton where she is on the education committee, teaches workshops, art camp, and performs art demos. She is passionate about mixed media art and enjoys helping others discover their creativity.
You can follow Shari and see her mixed media art at facebook.com/my.altered.life and on her blog Shariwelch.blogspot.com
~*~*~*~*~*~*~*~*~*~*~*~*~*~*~*~*~*~*~*~*~*~*~*~*~
.
.


Recent Comments