Magnetic Chalk Board

~ * ~

This article is written by Gloriann Irizarry

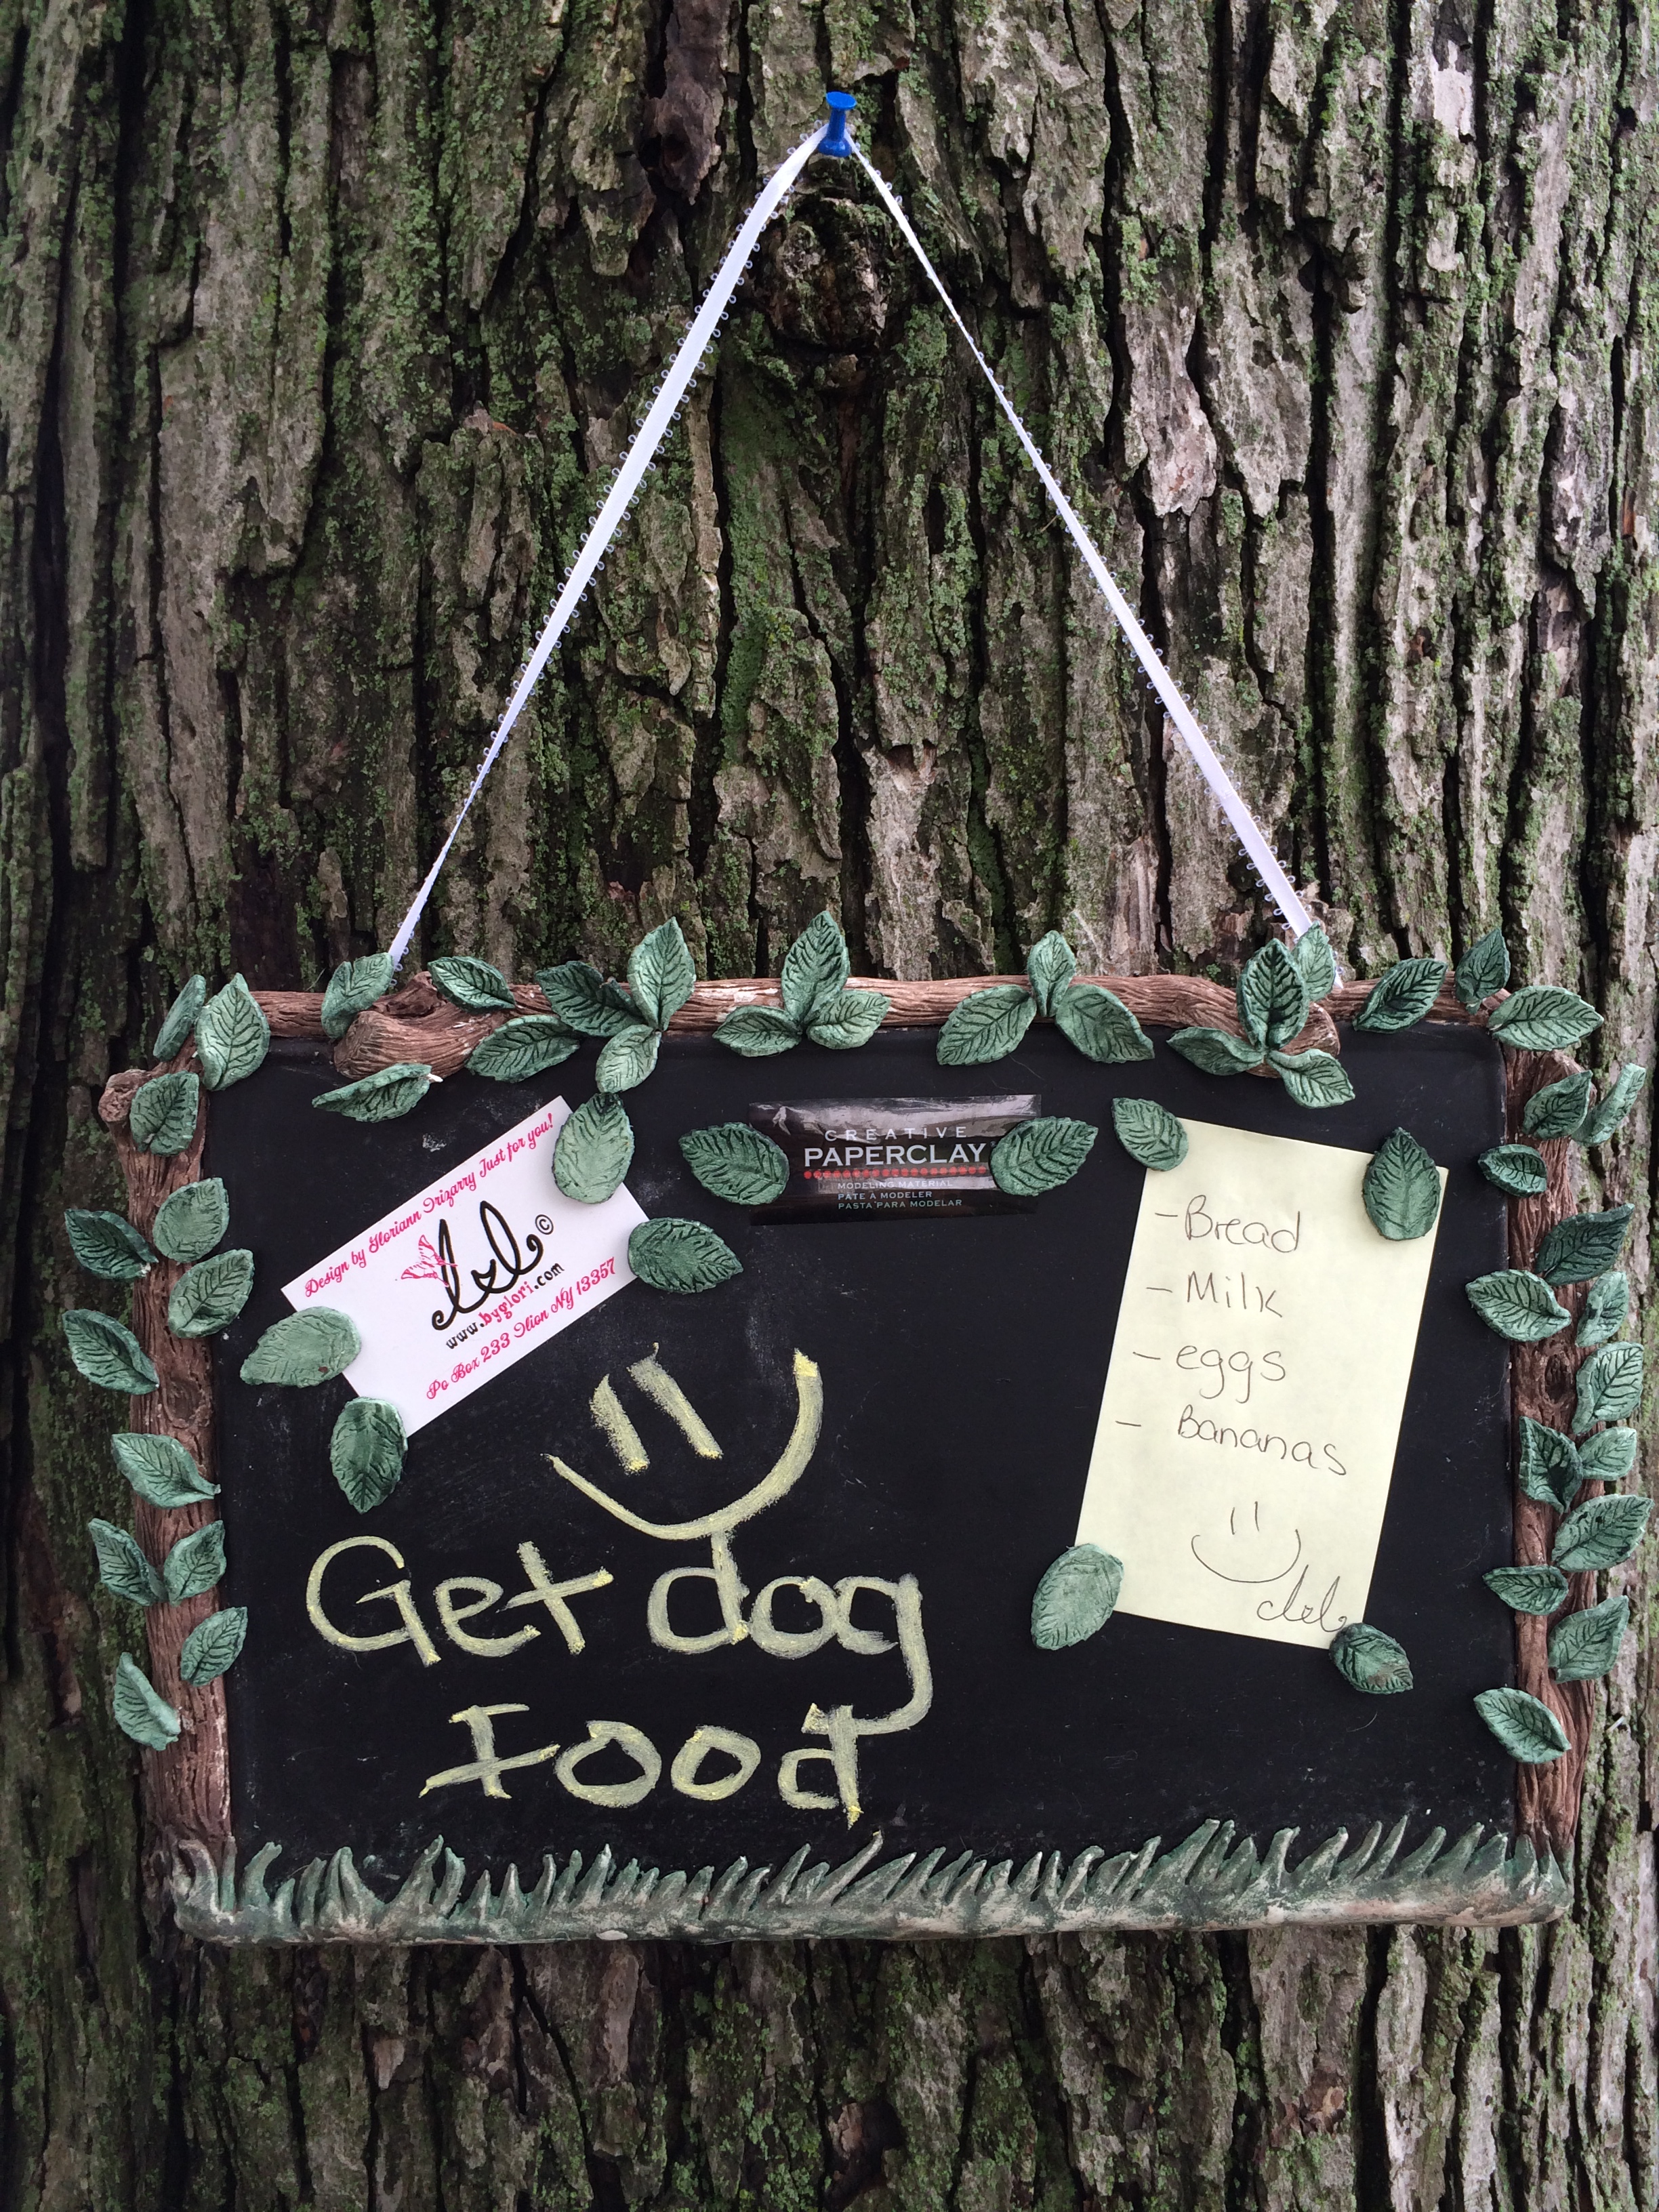
Hi my dear friends, followers and collectors. I been a little absent minded lately so I wanted to create a piece that will help me out getting a little organized. What’s better than a bulletin board. Not any ordinary board but a multi uses one.

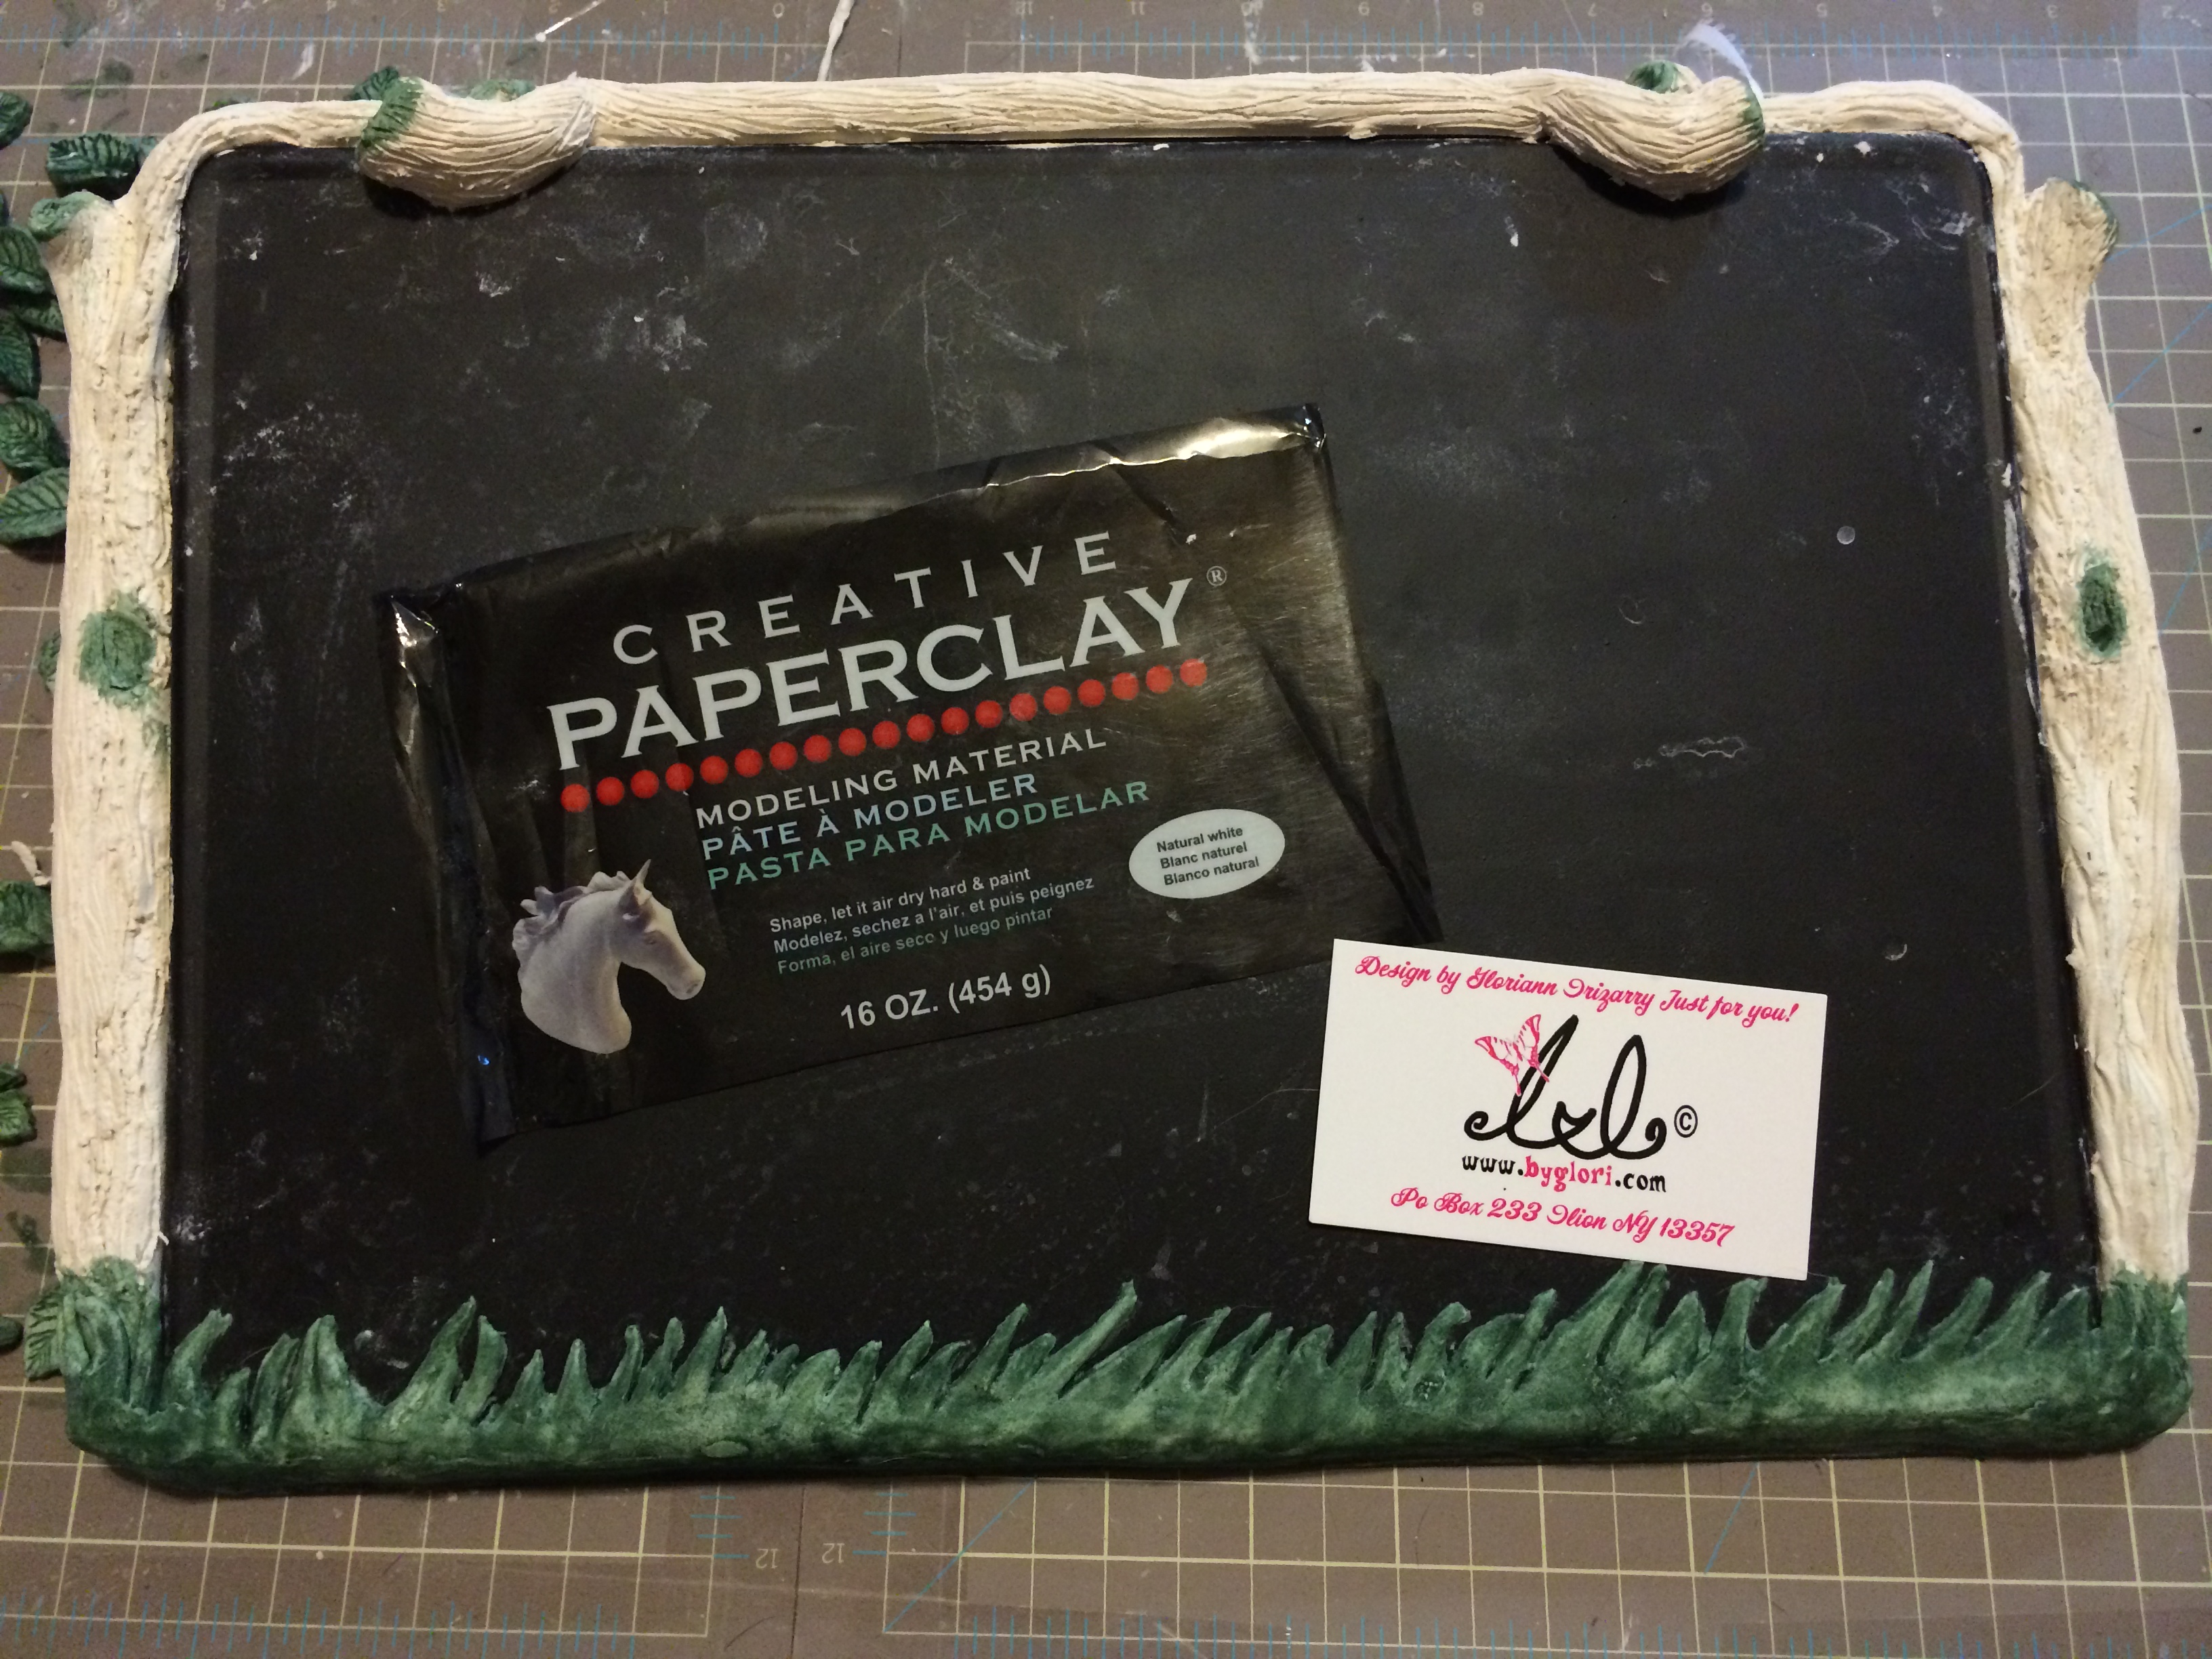
Yes a great Magnetic Chalk Bulletin board. Here I will now show you how to make your own OAK board.
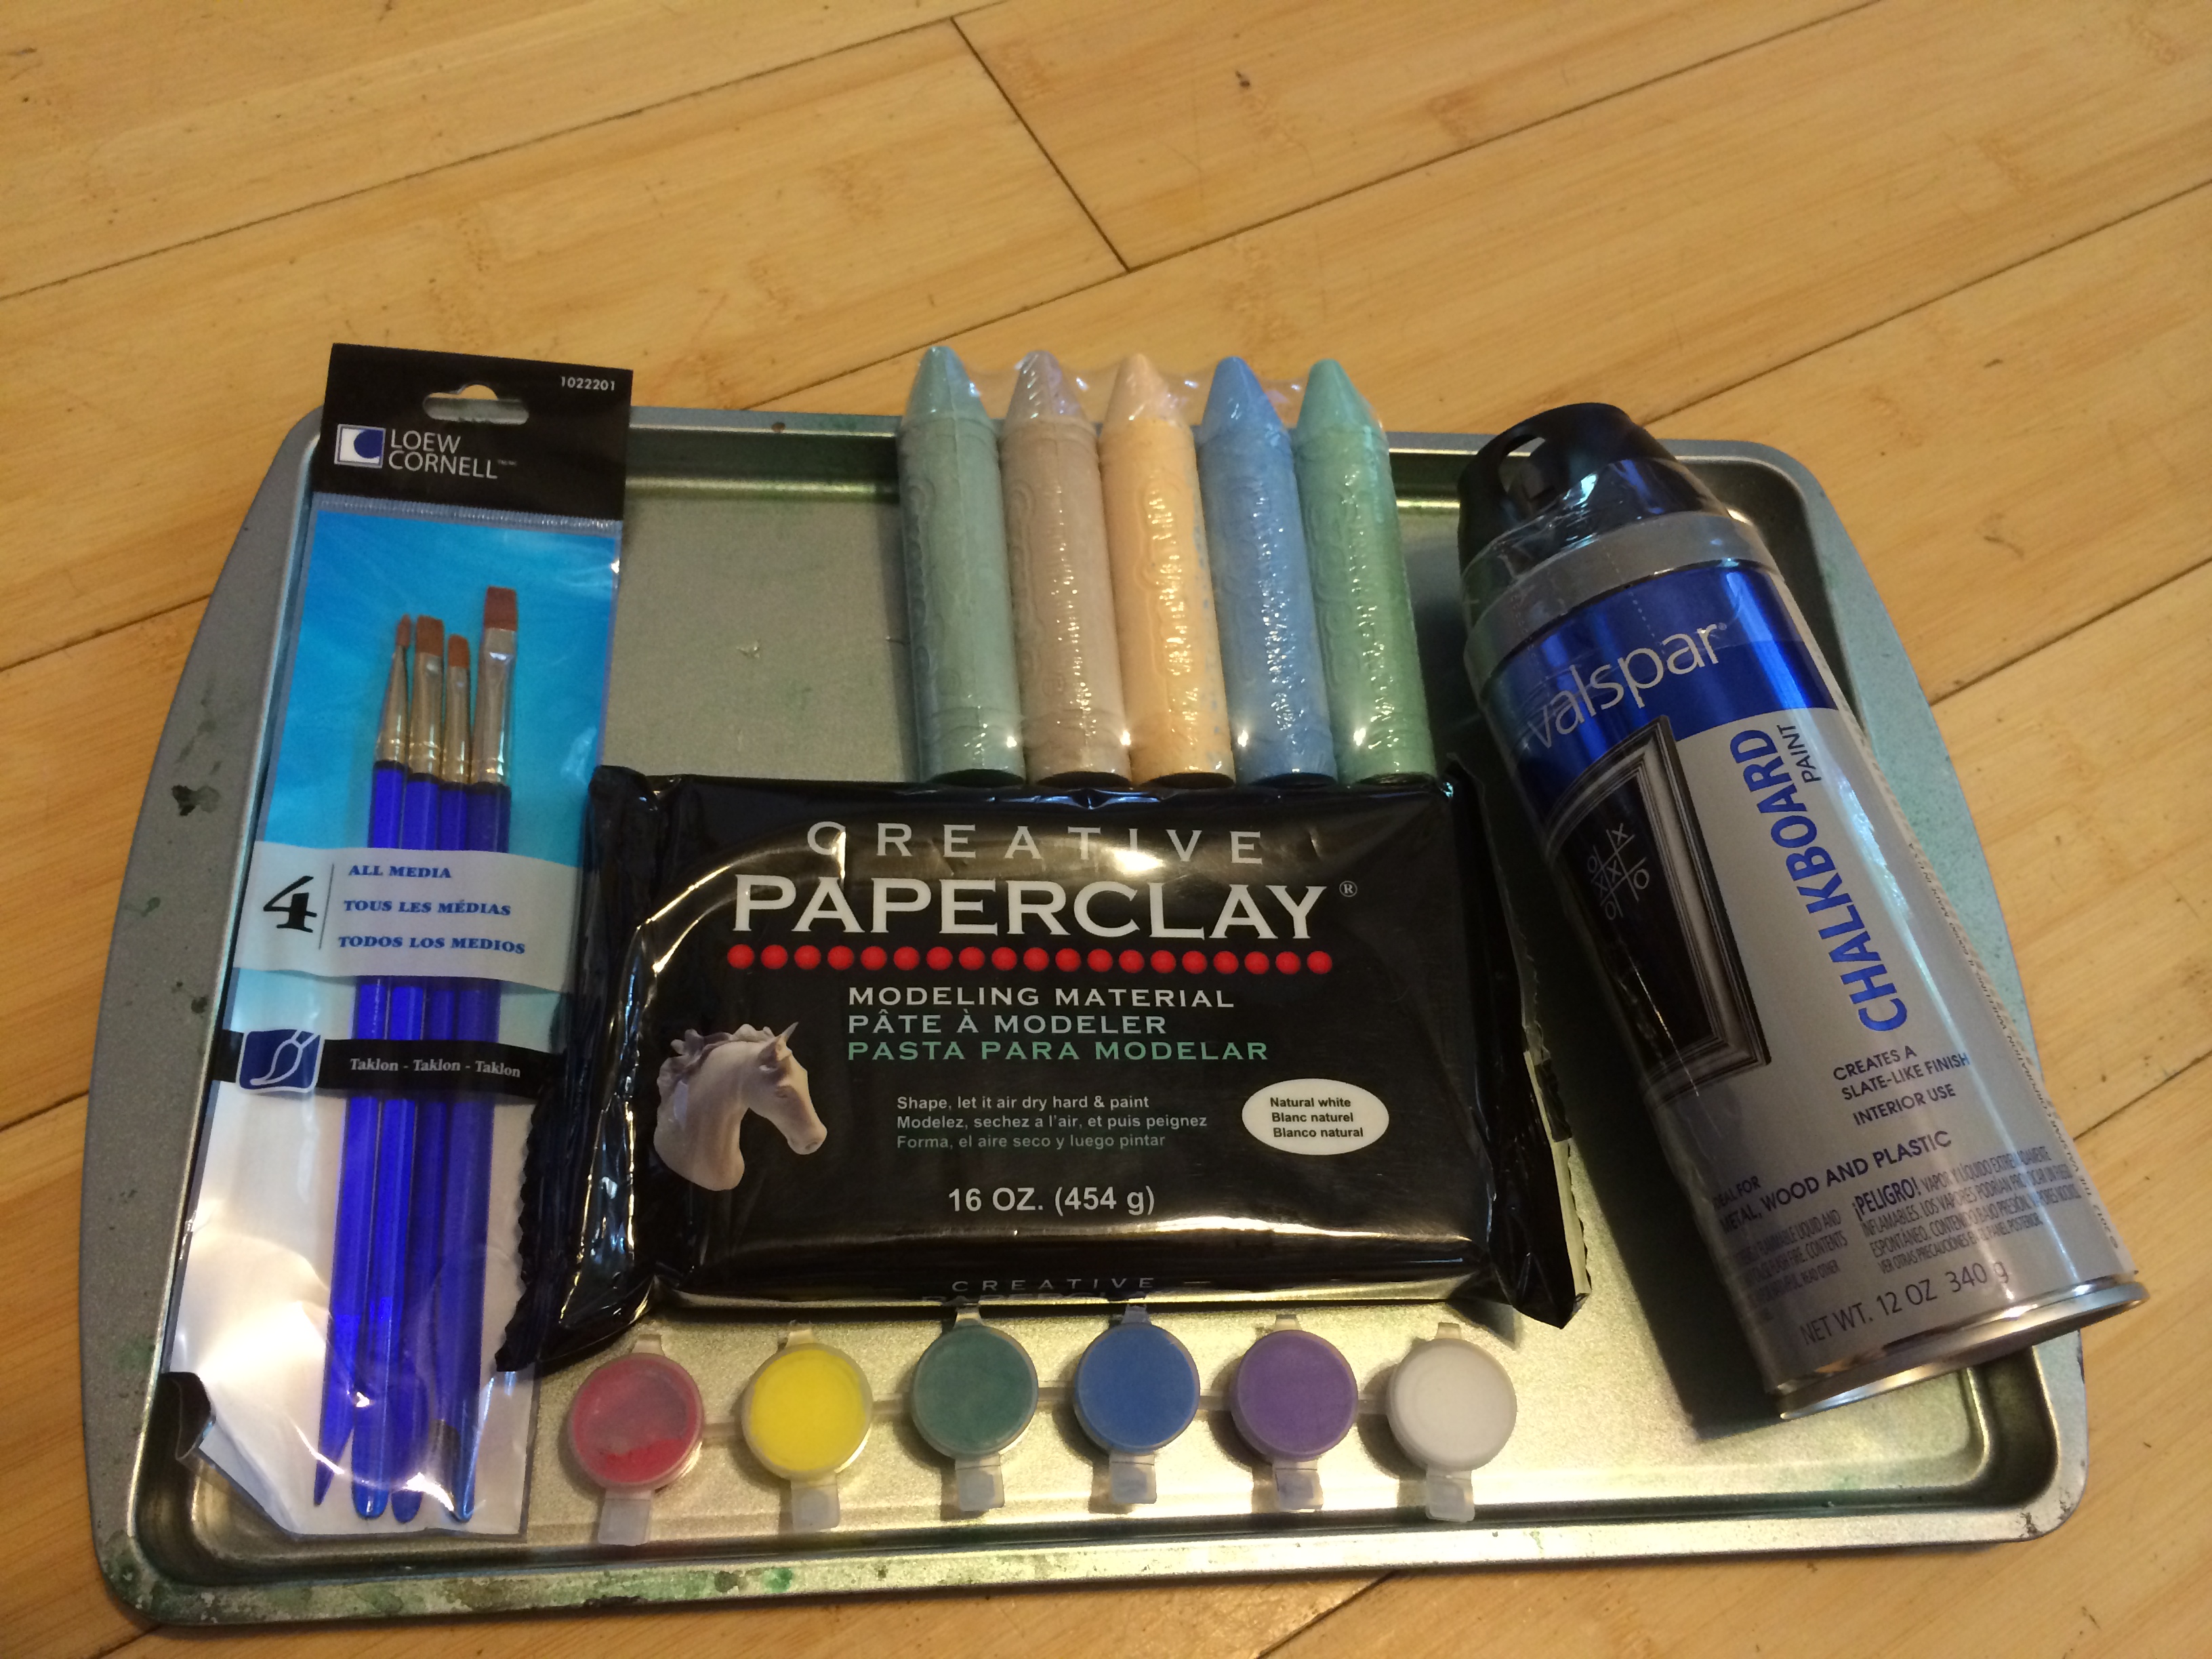
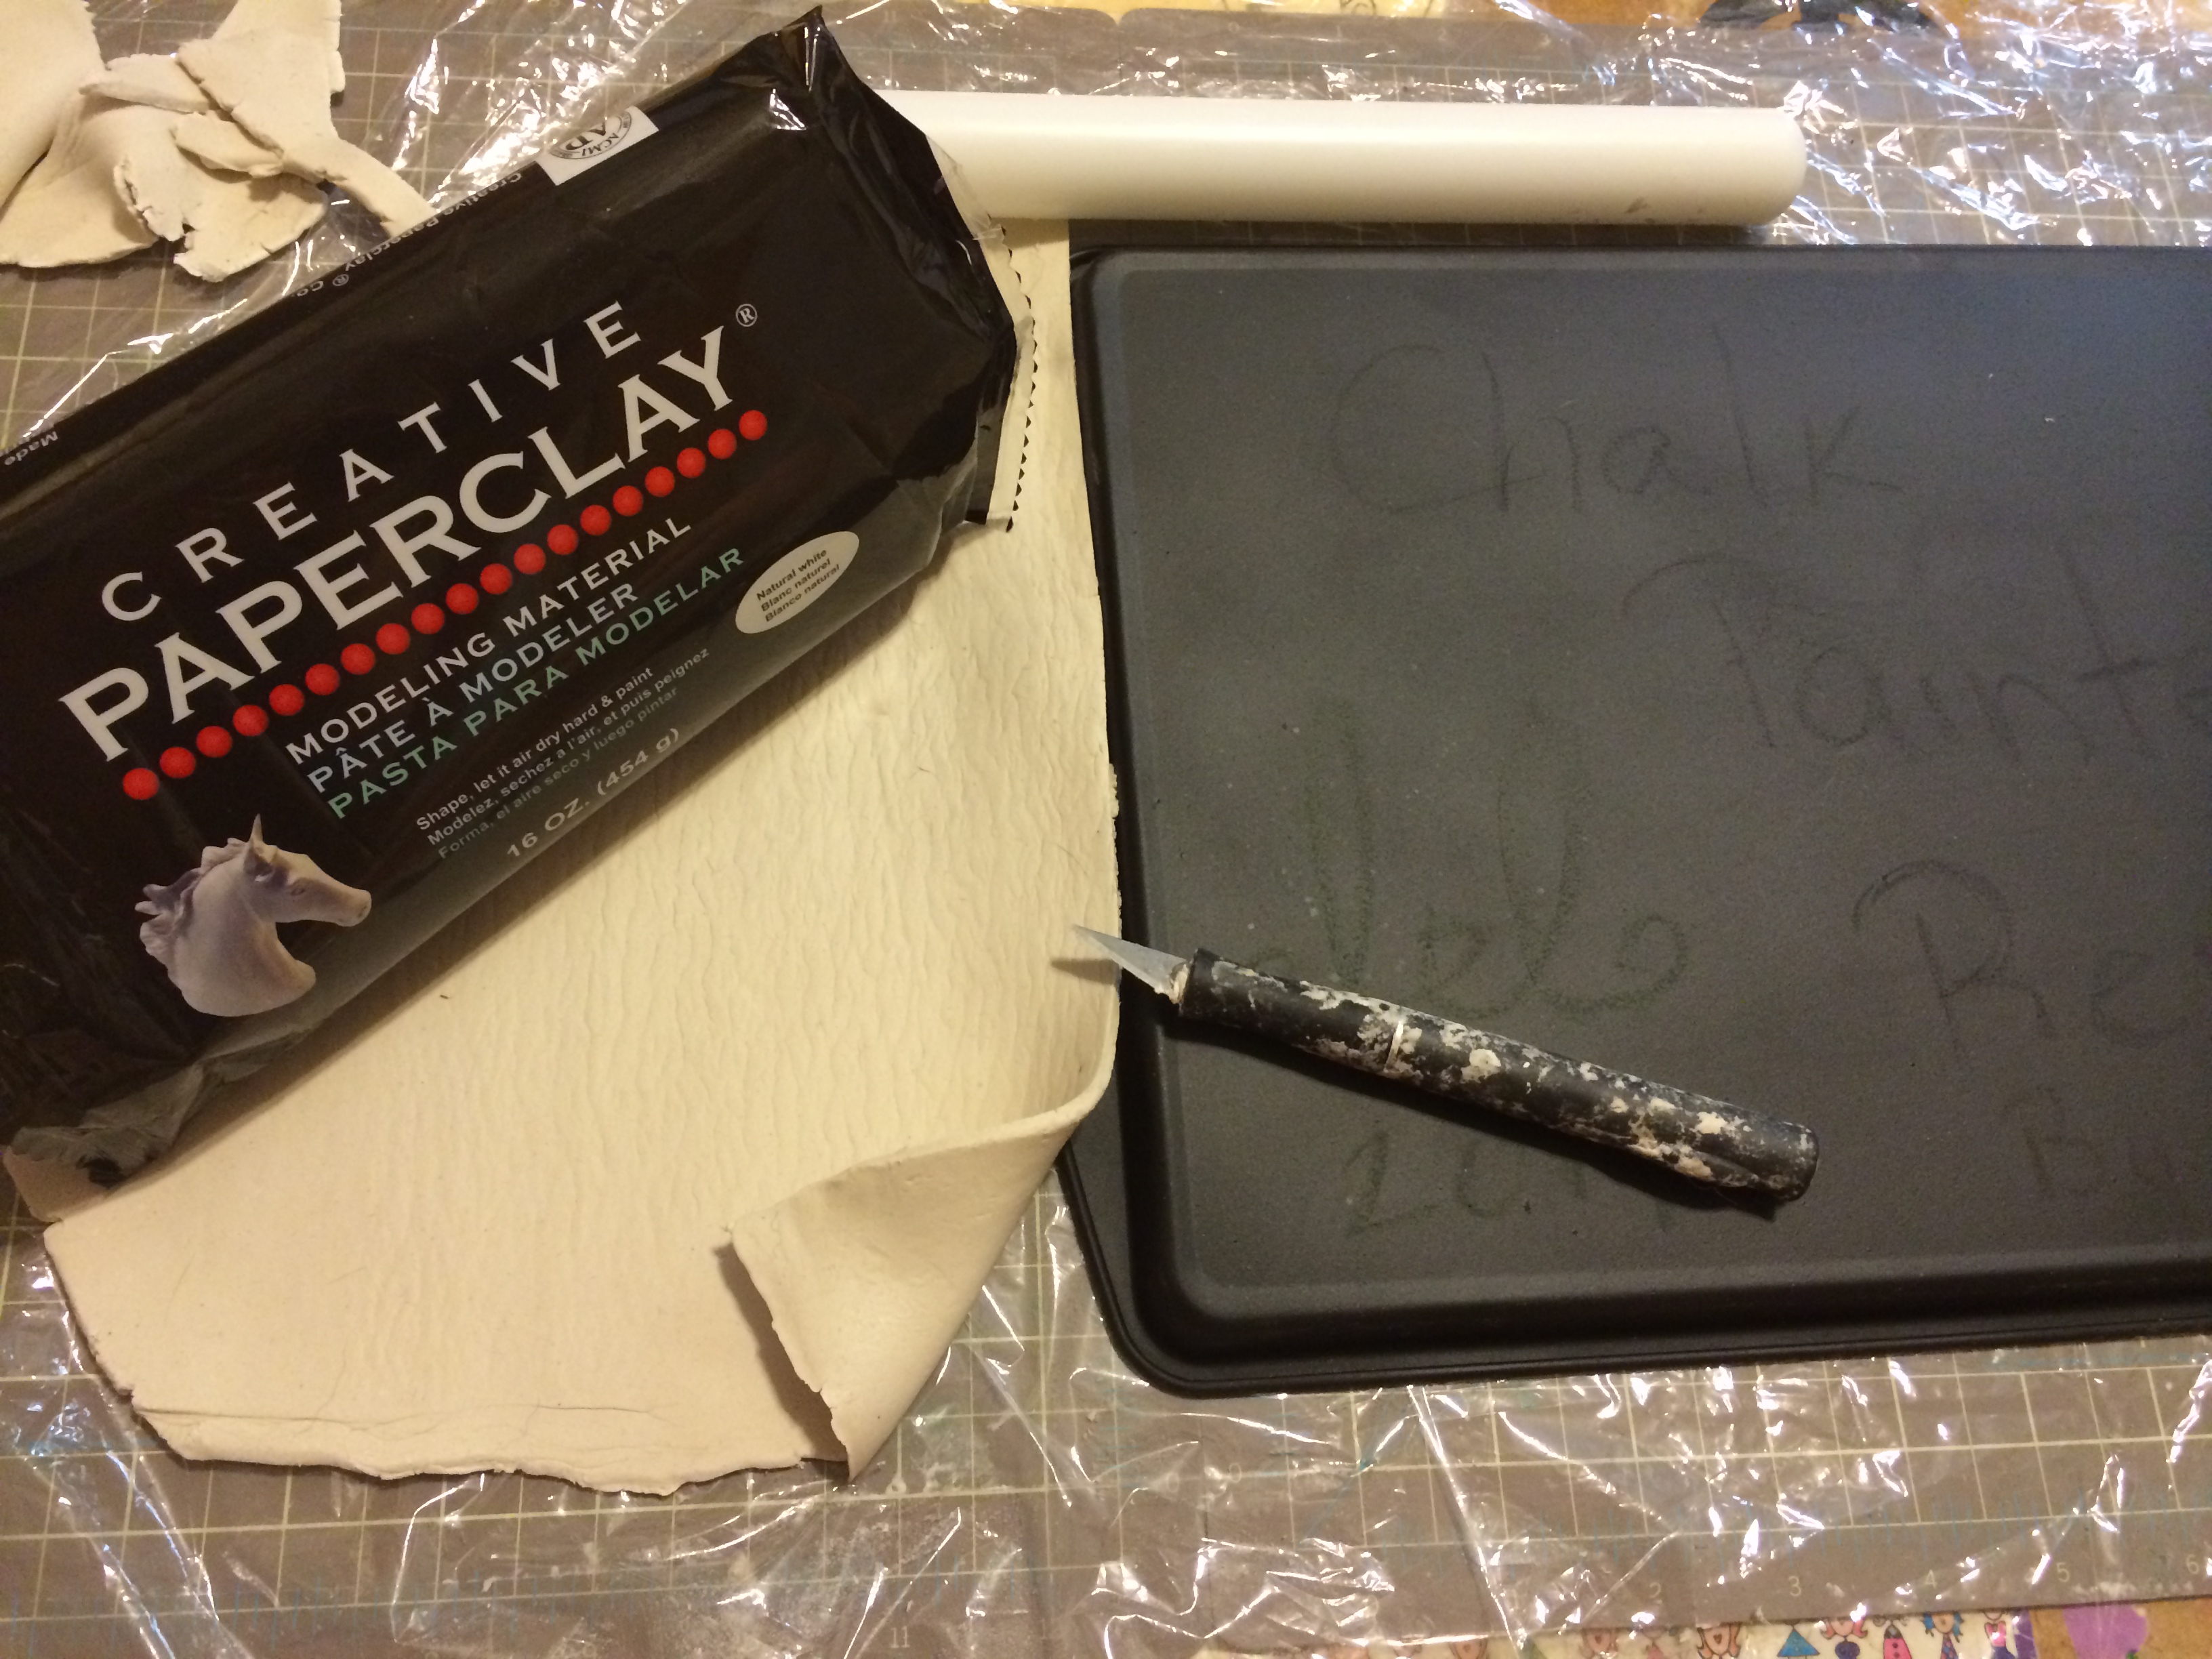
create your own chalkboard with a paper clay boarder

Materials

Creative Paperclay 16 0z

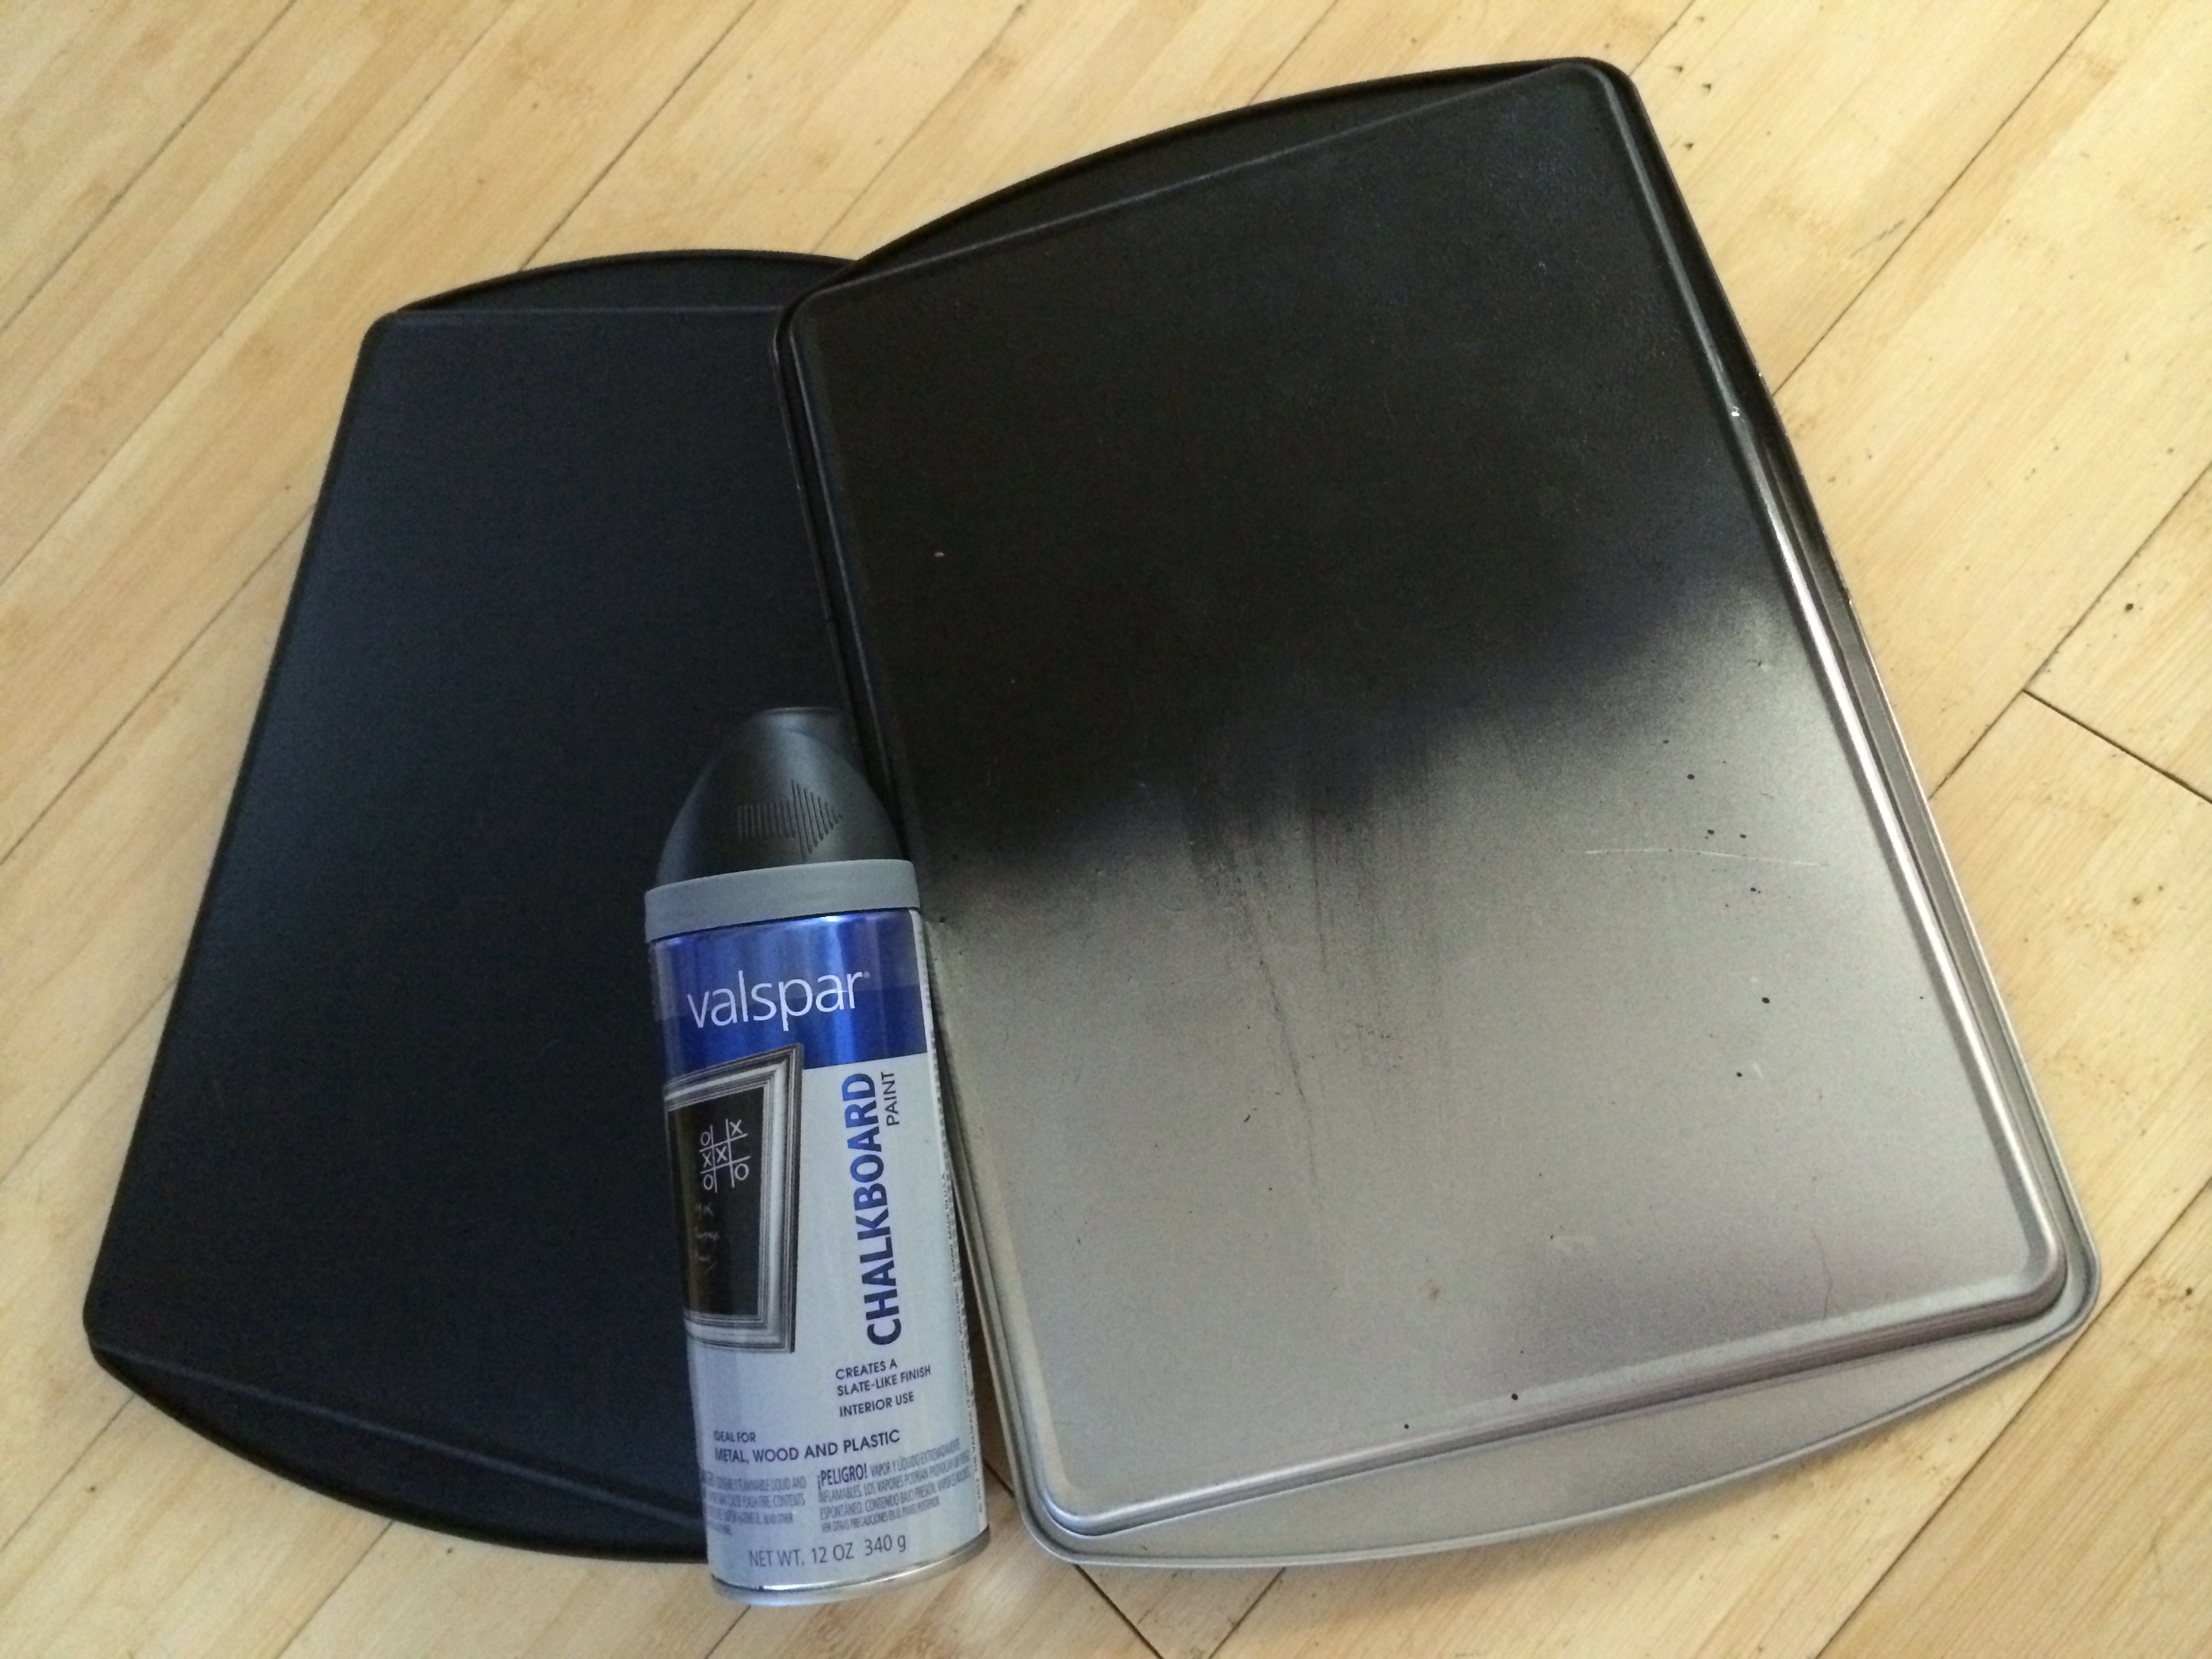
Cookie baking sheet ( I found mine at the dollar Store)

Chalkboard Valspar Paint

Acrylic paints

Paint Brushes

Super Strong Magnets

Fast Grab Tacky Glue

Leaf Cutters

Creative Paperclay board

Creating your own Magnetic Chalk Board

I started this project by spraying the can of the Chalkboard spray paint all over the back of the baking cookie sheet and let it dry. For a better chalk writing, I spray 2 coats of the paint.

Creative Paperclay board

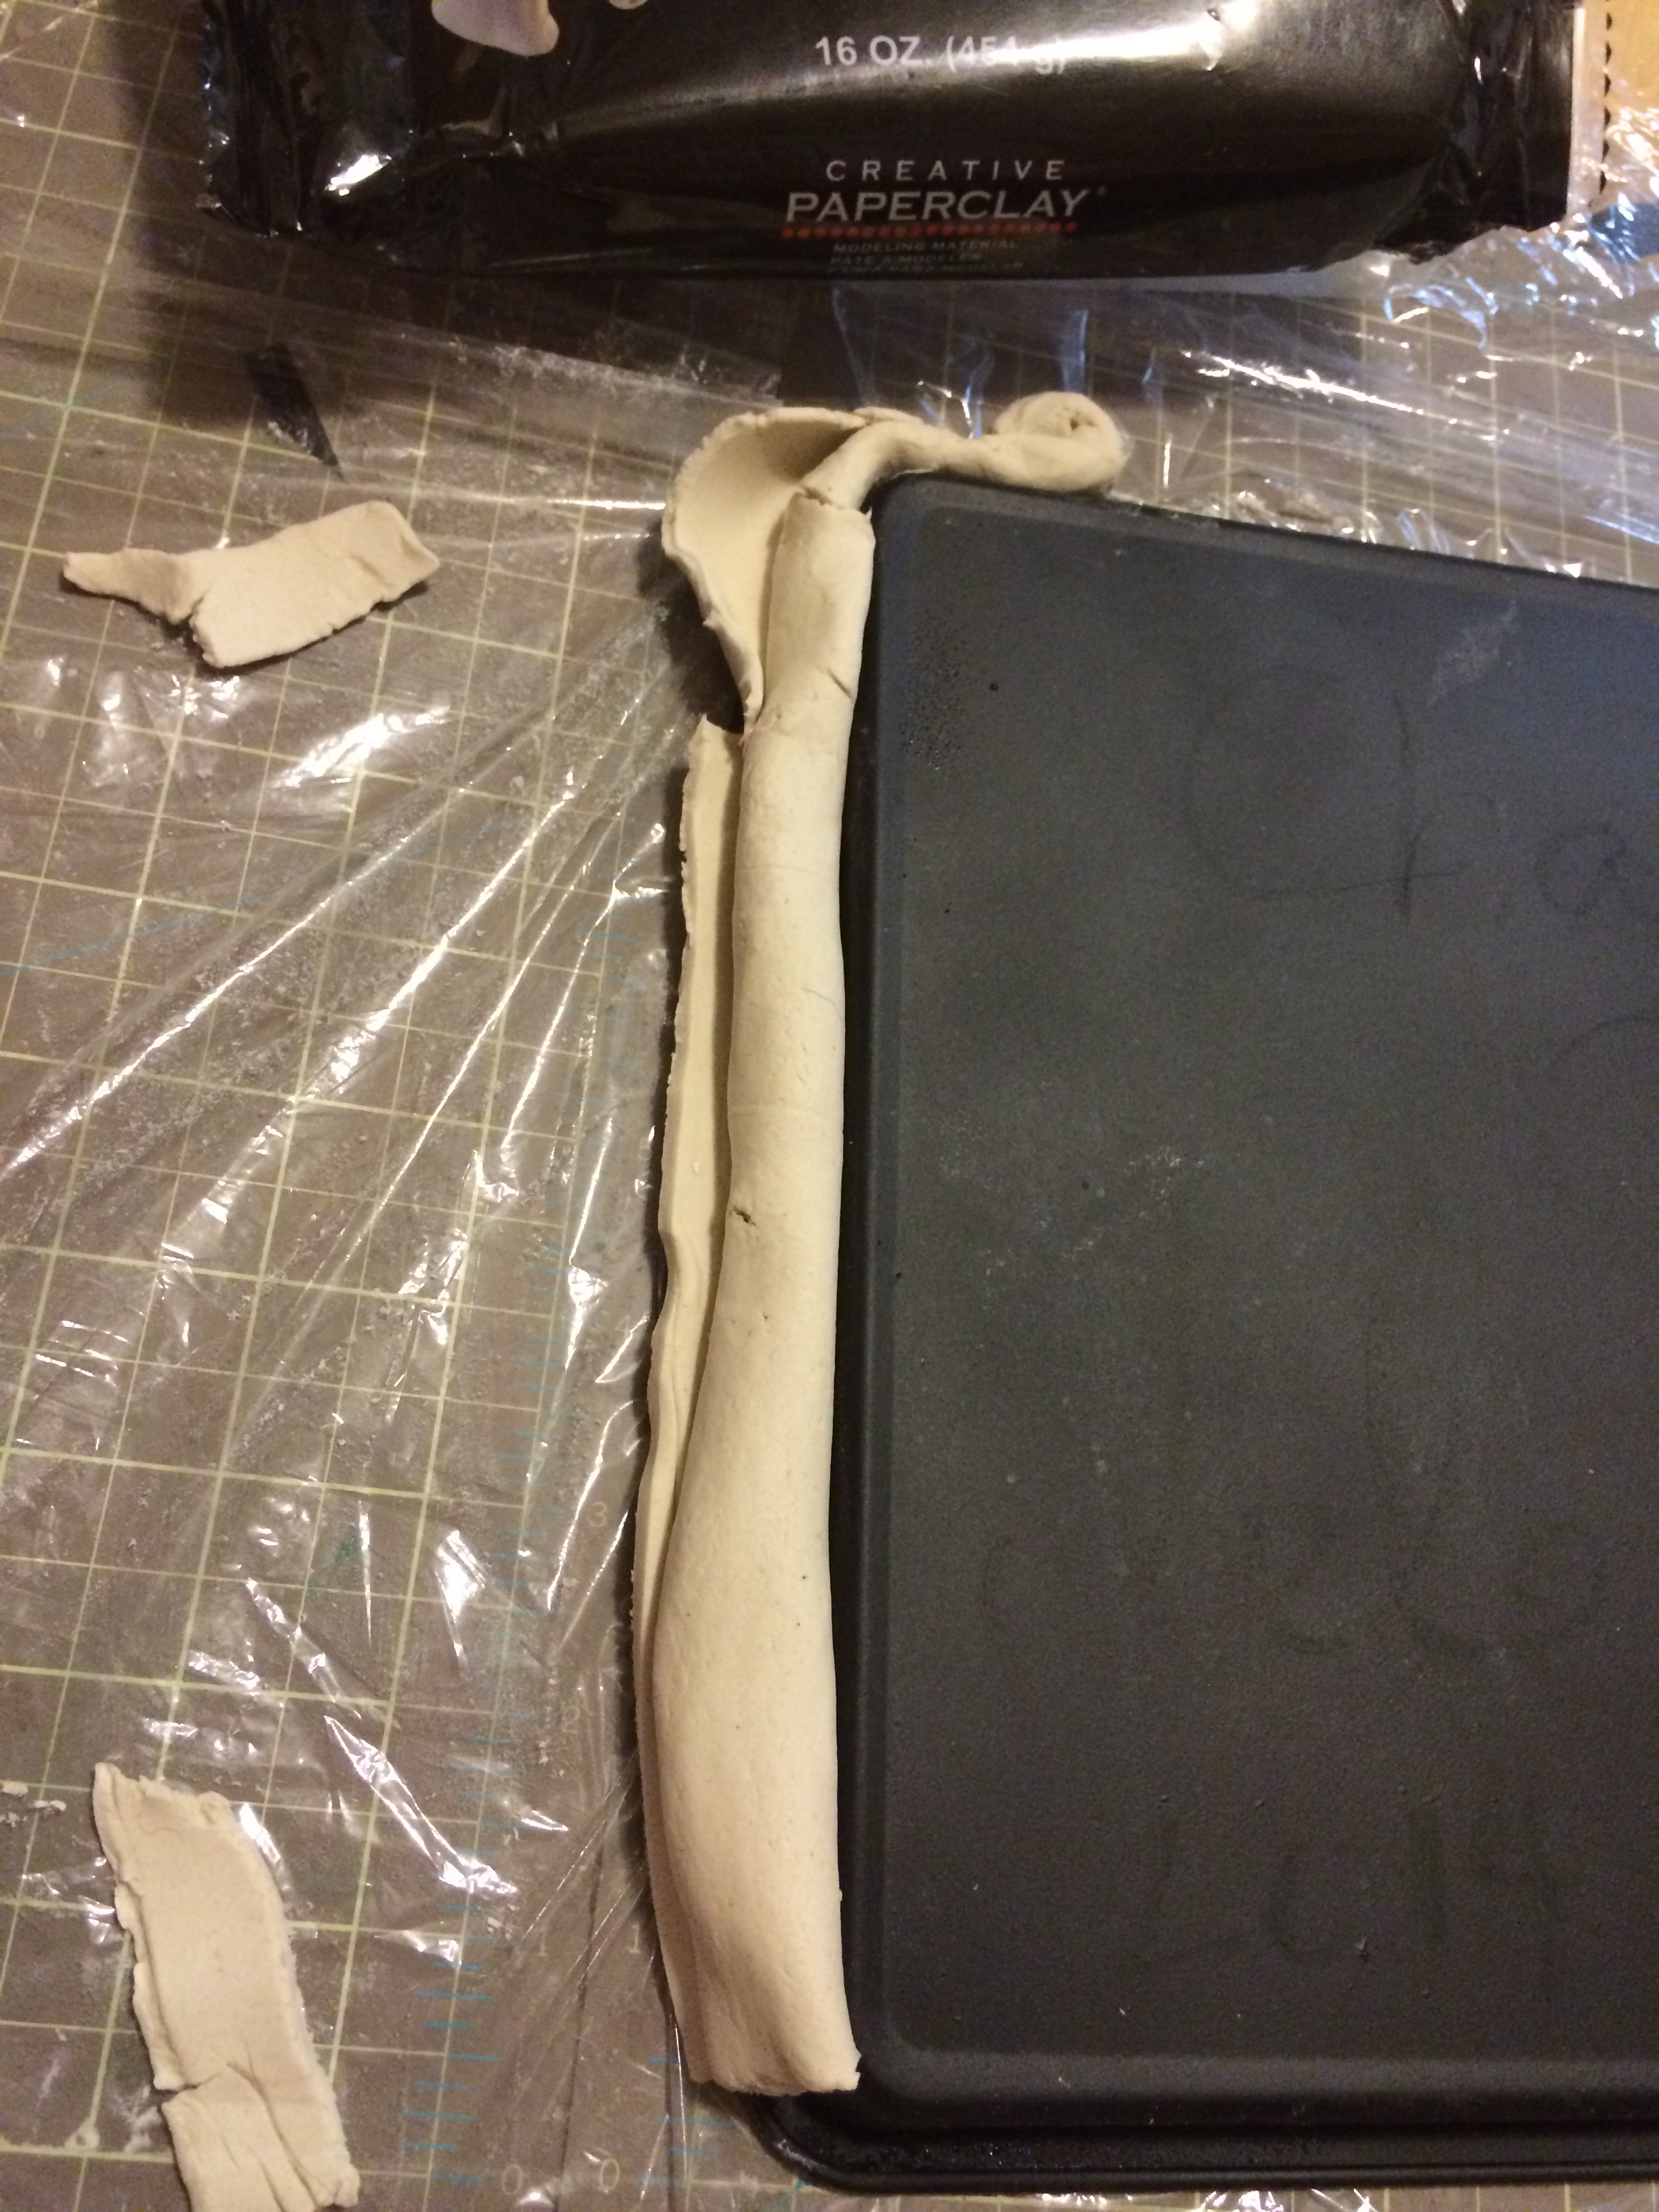
To get this project going I rolled a big clay sheet manually to a ¼ in thickness.

Creative Paperclay board

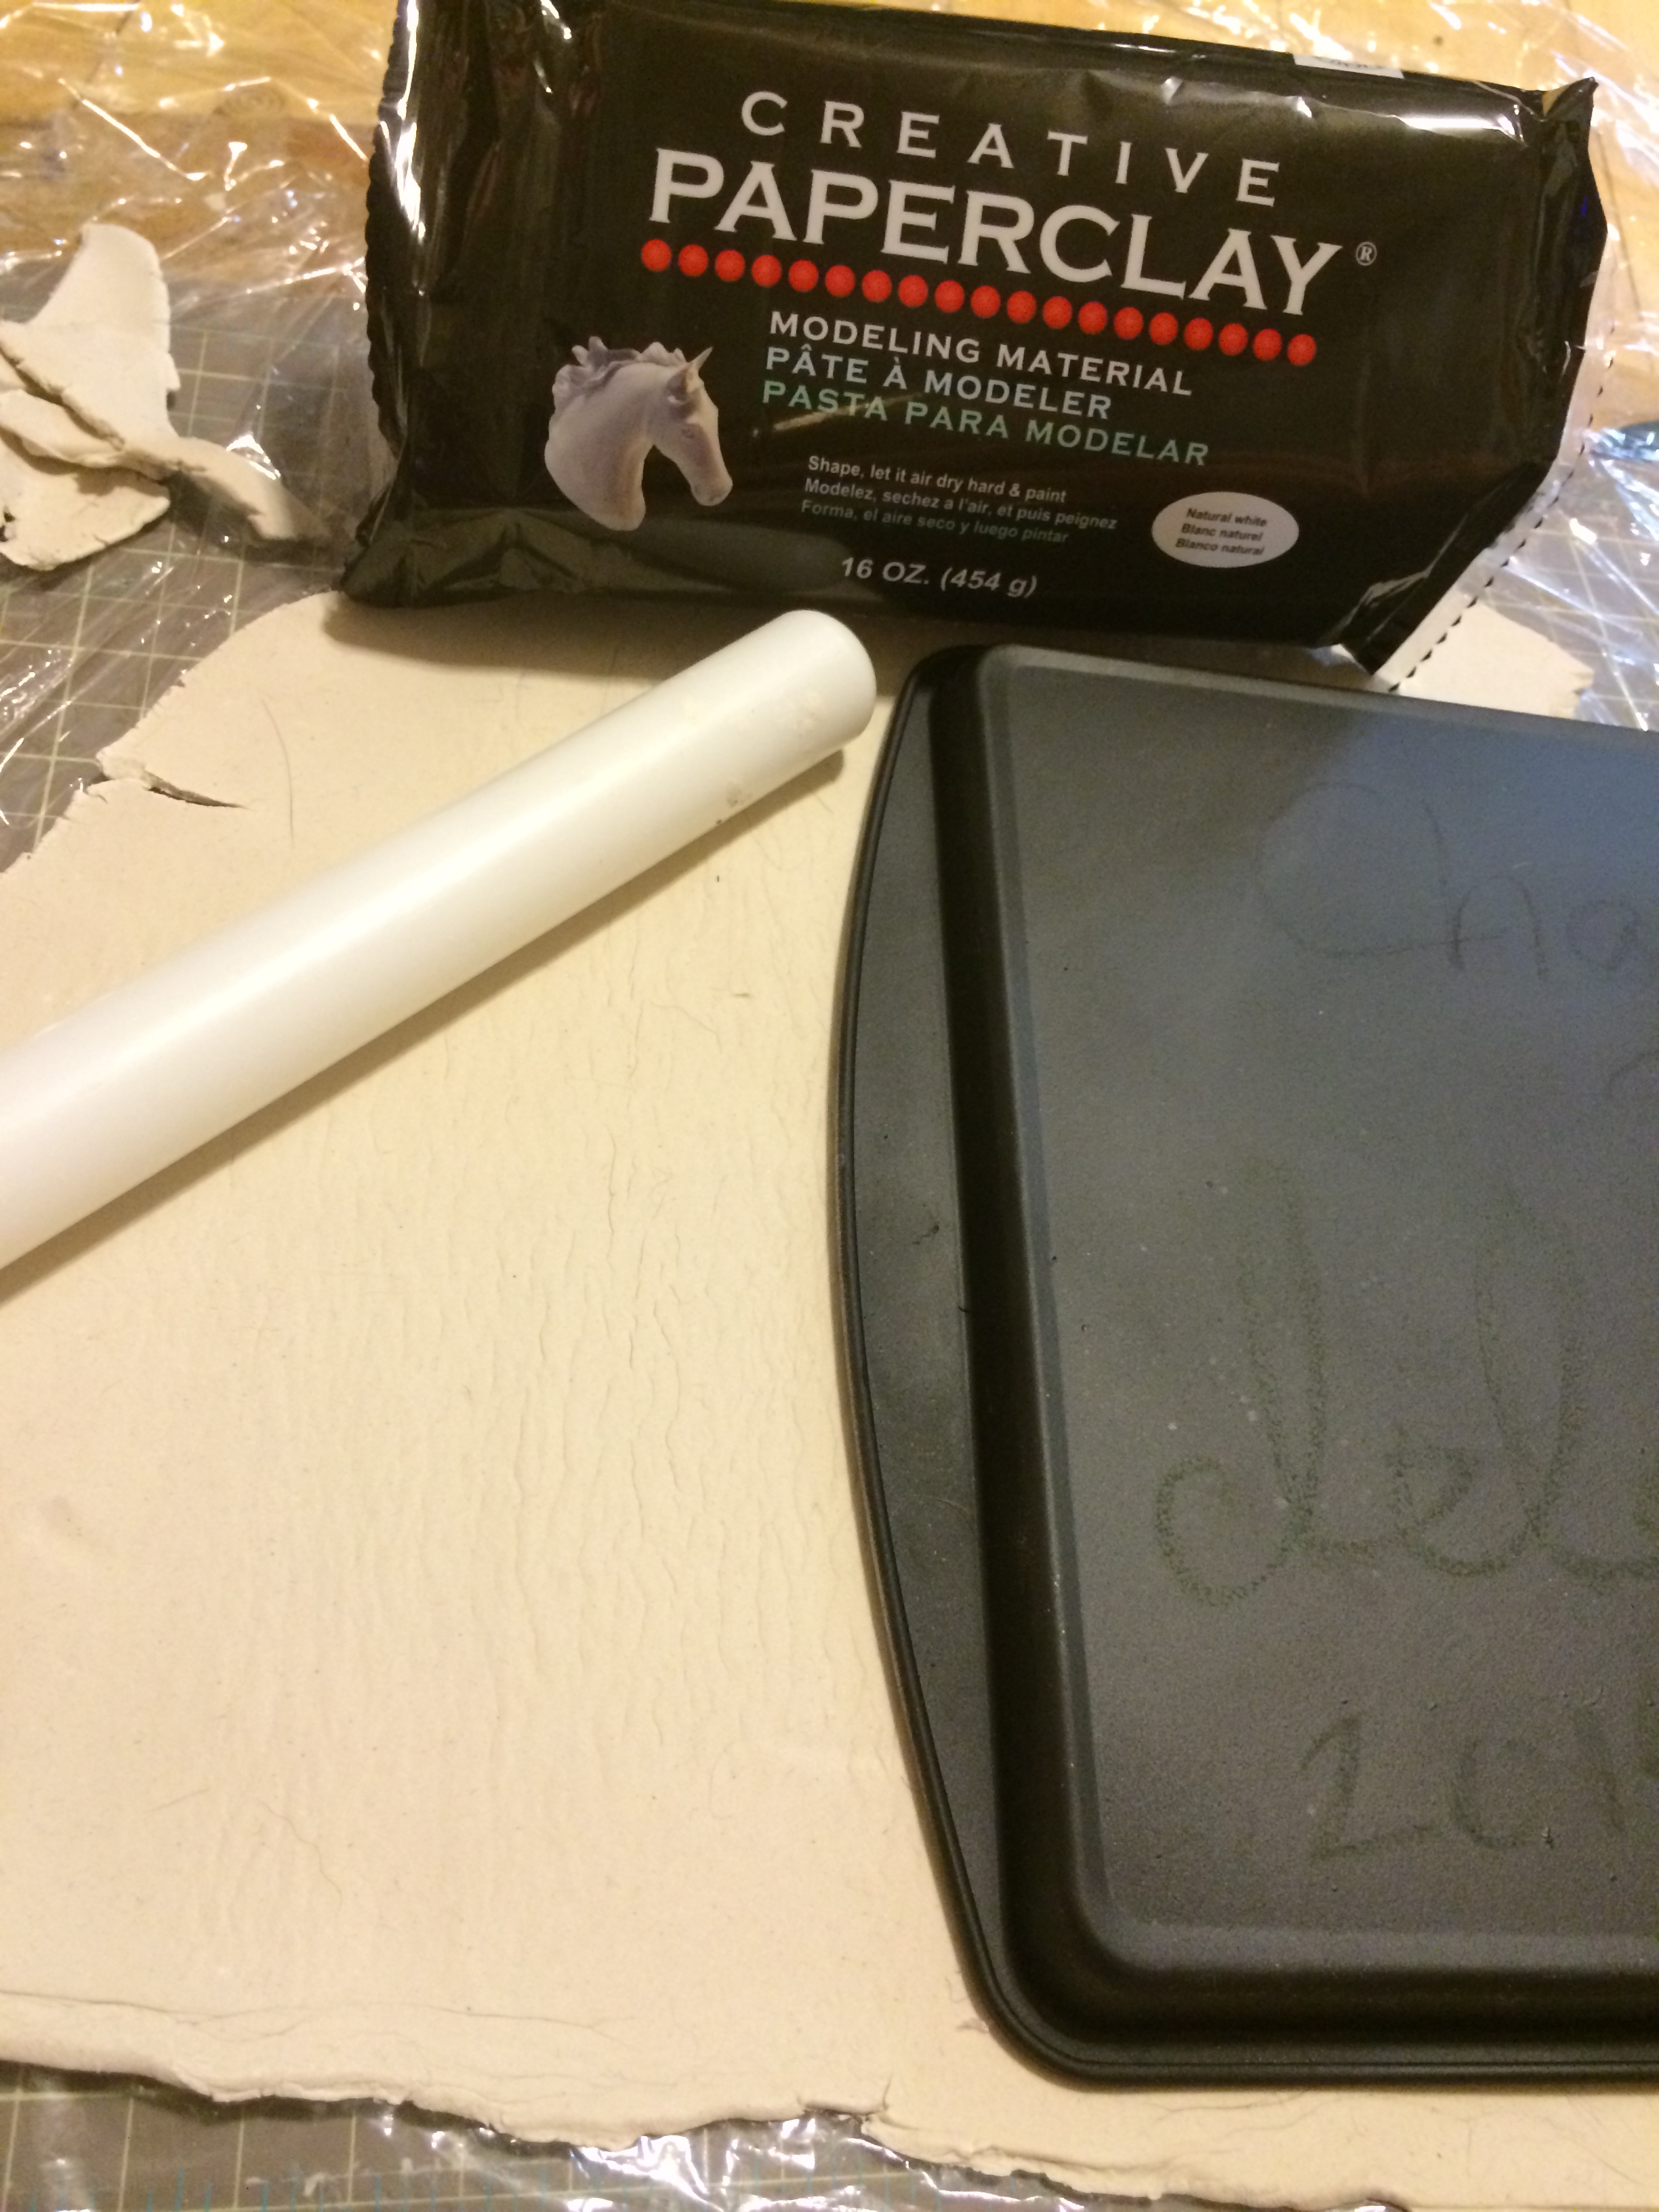
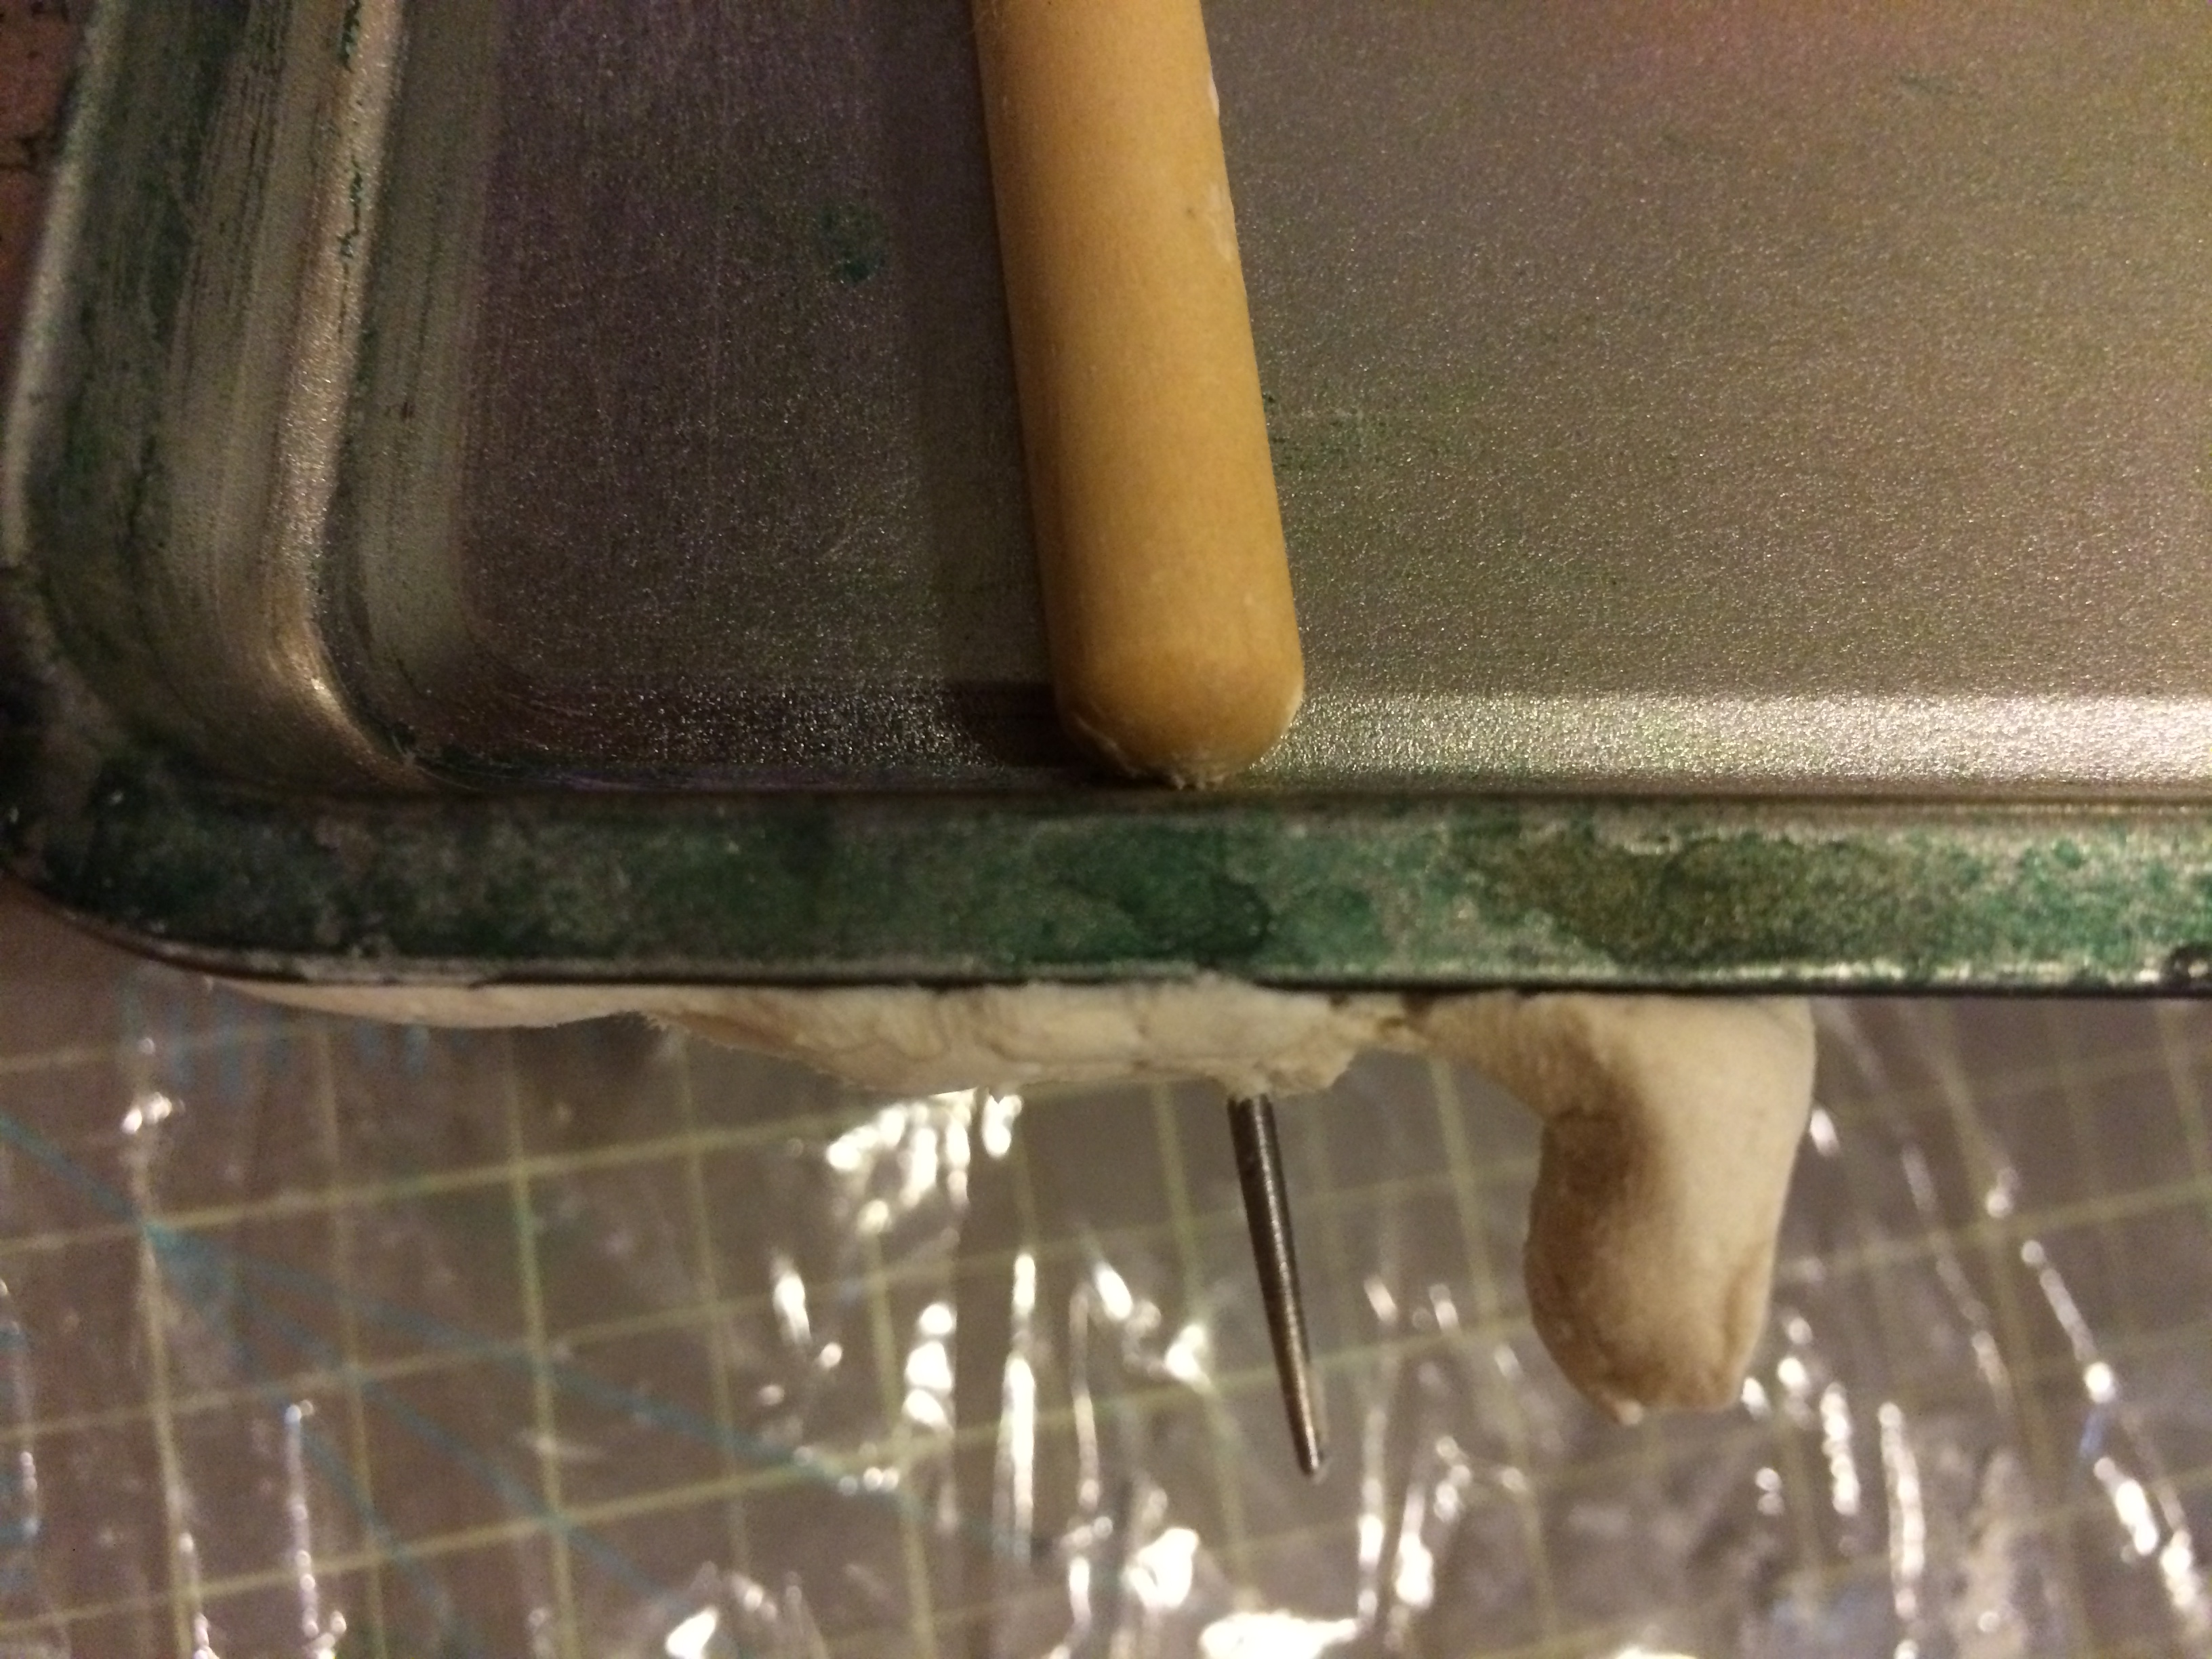
I pre drill 2 holes one on each top corner of the cookie sheet. So I can thread a ribbon to hang the board up. Now use your Xacto or hobby knife to cut a big rectangle that will cover both sides of the cookie sheet.

Creative Paperclay board

Roll the clay sheet you just cut so we can start to create the trunks for the trees that will be covering the frame of this Magnetic Chalk board

Creative Paperclay board

I use a needle tool to draw and create the wood grain effect for the tree.

I will do the same procedure with the other side tree.

Creative Paperclay board

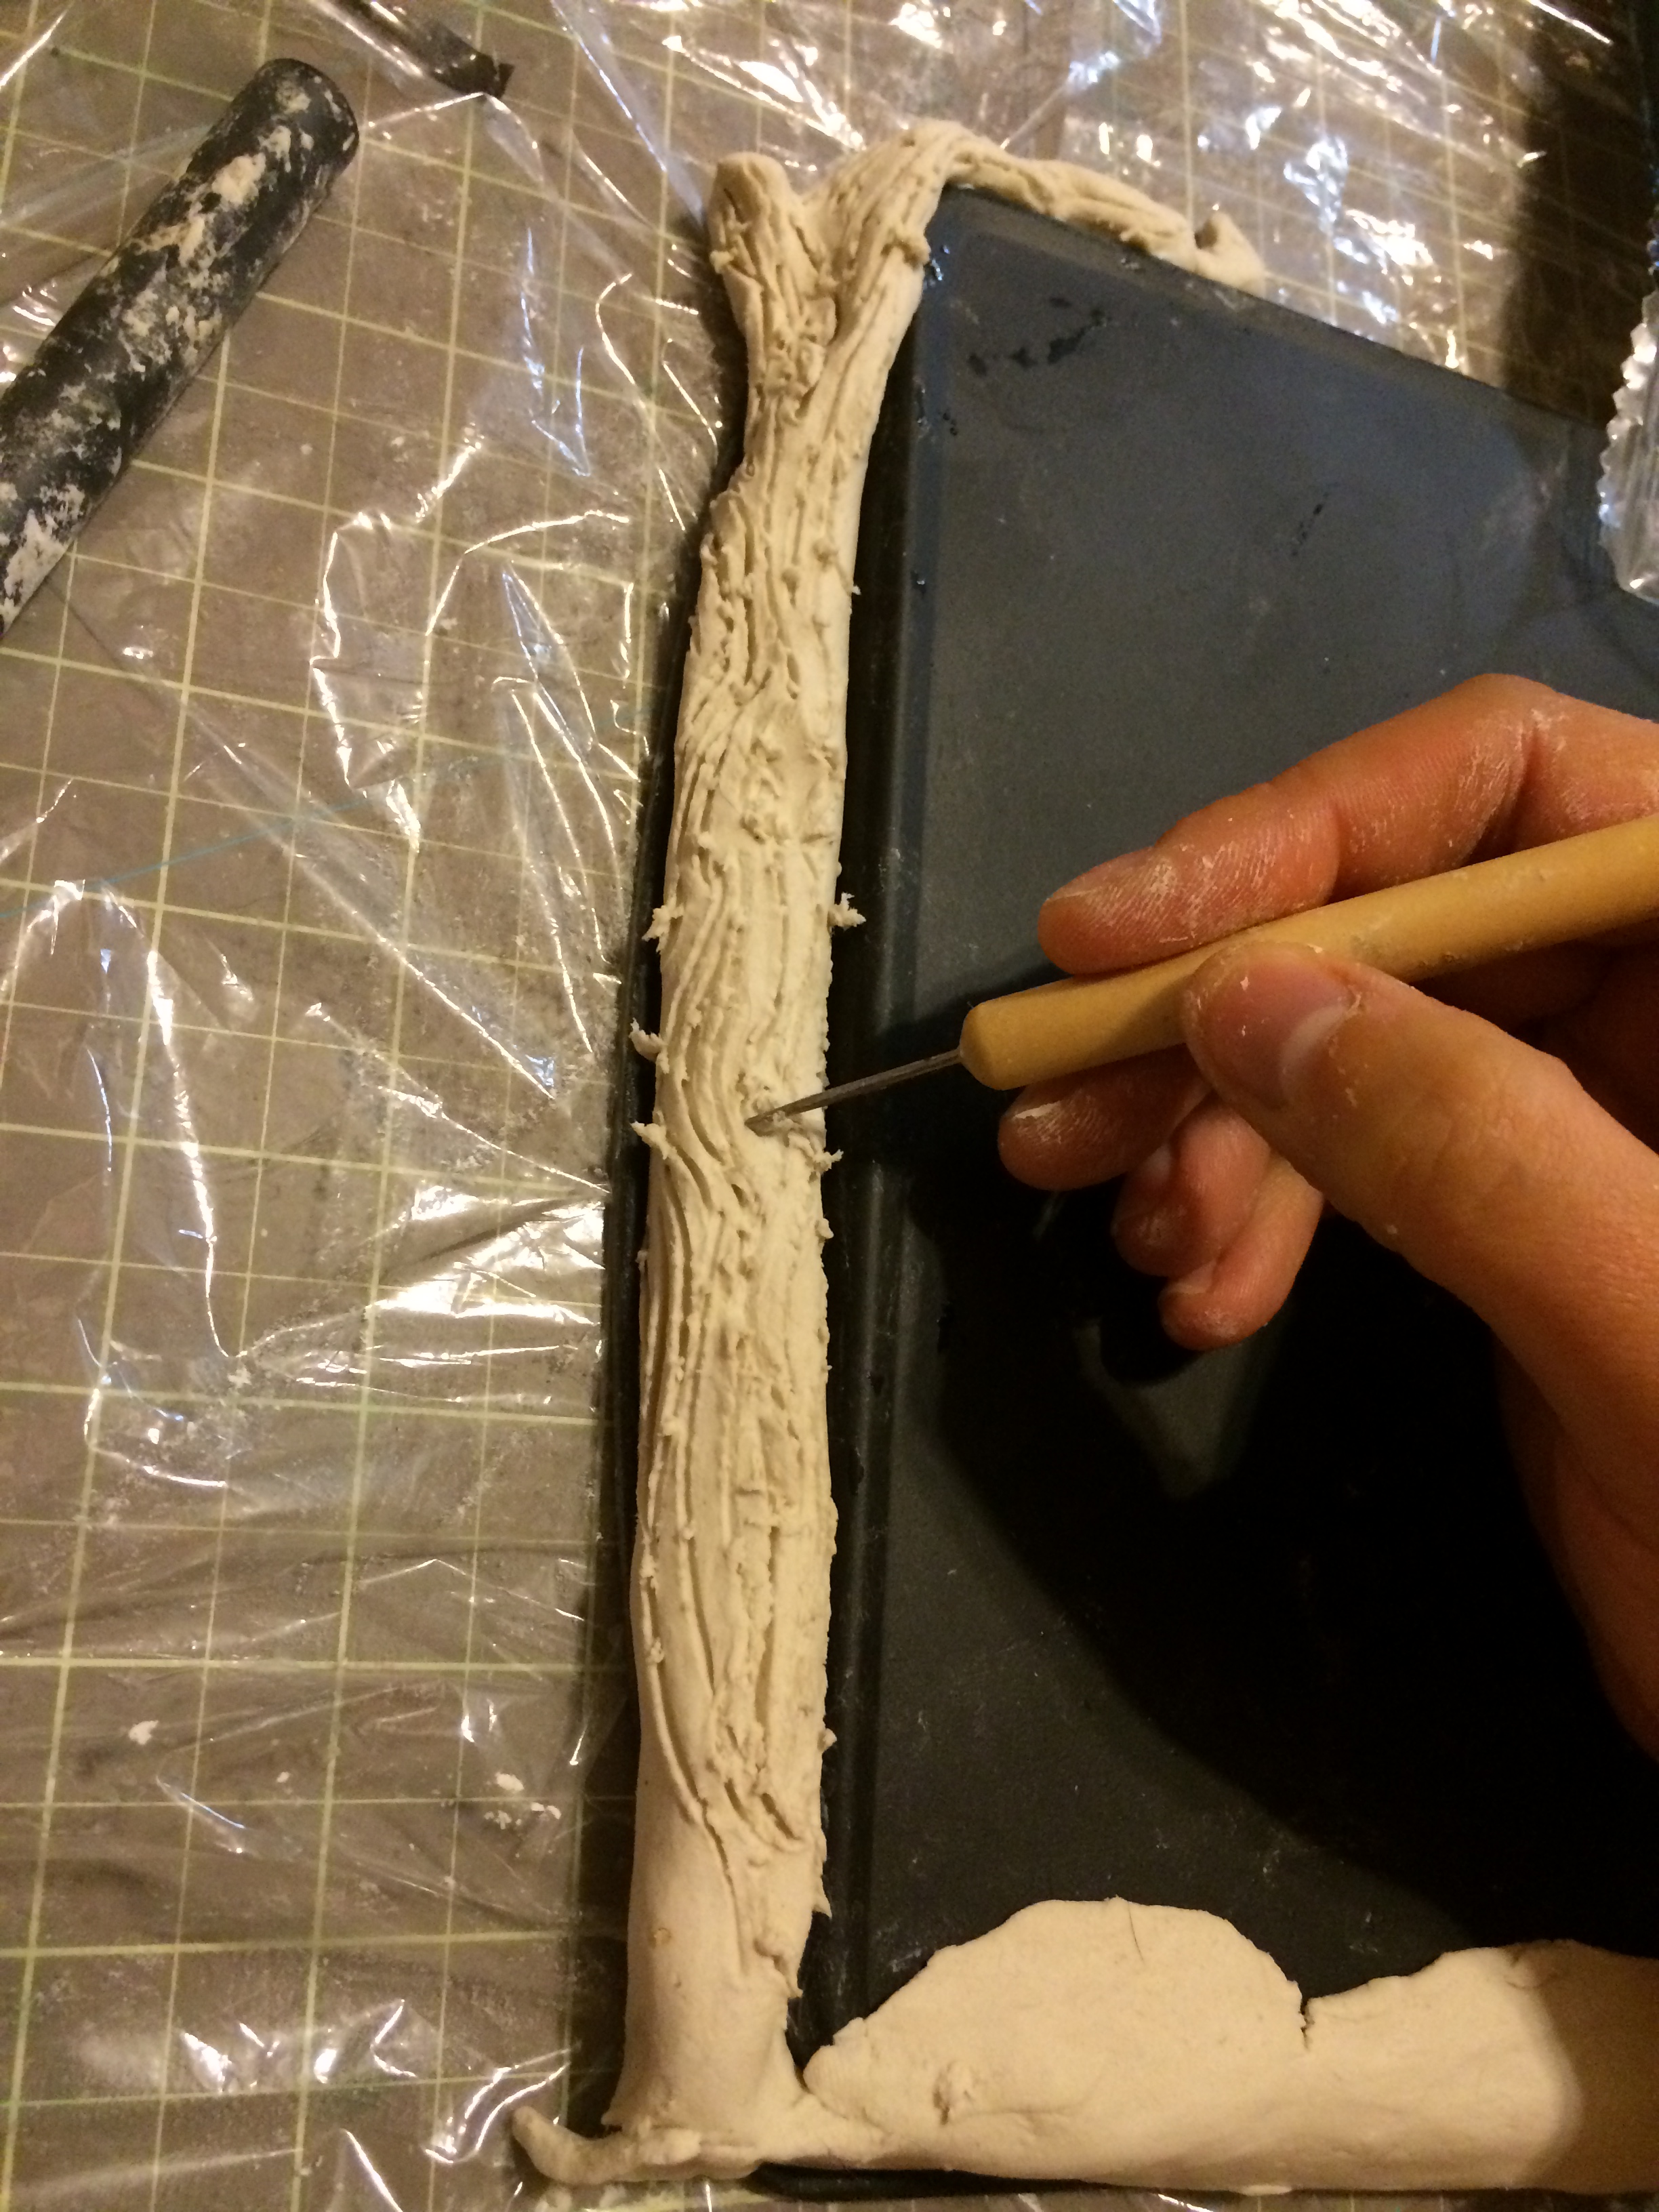
Since nature is so beautiful to begin with the wood grain don’t have to be perfect. Feel free to draw lines along the trunk.

Creative Paperclay board

I carry the trunk all over the top and draw more wood grain lines.

Creative Paperclay board

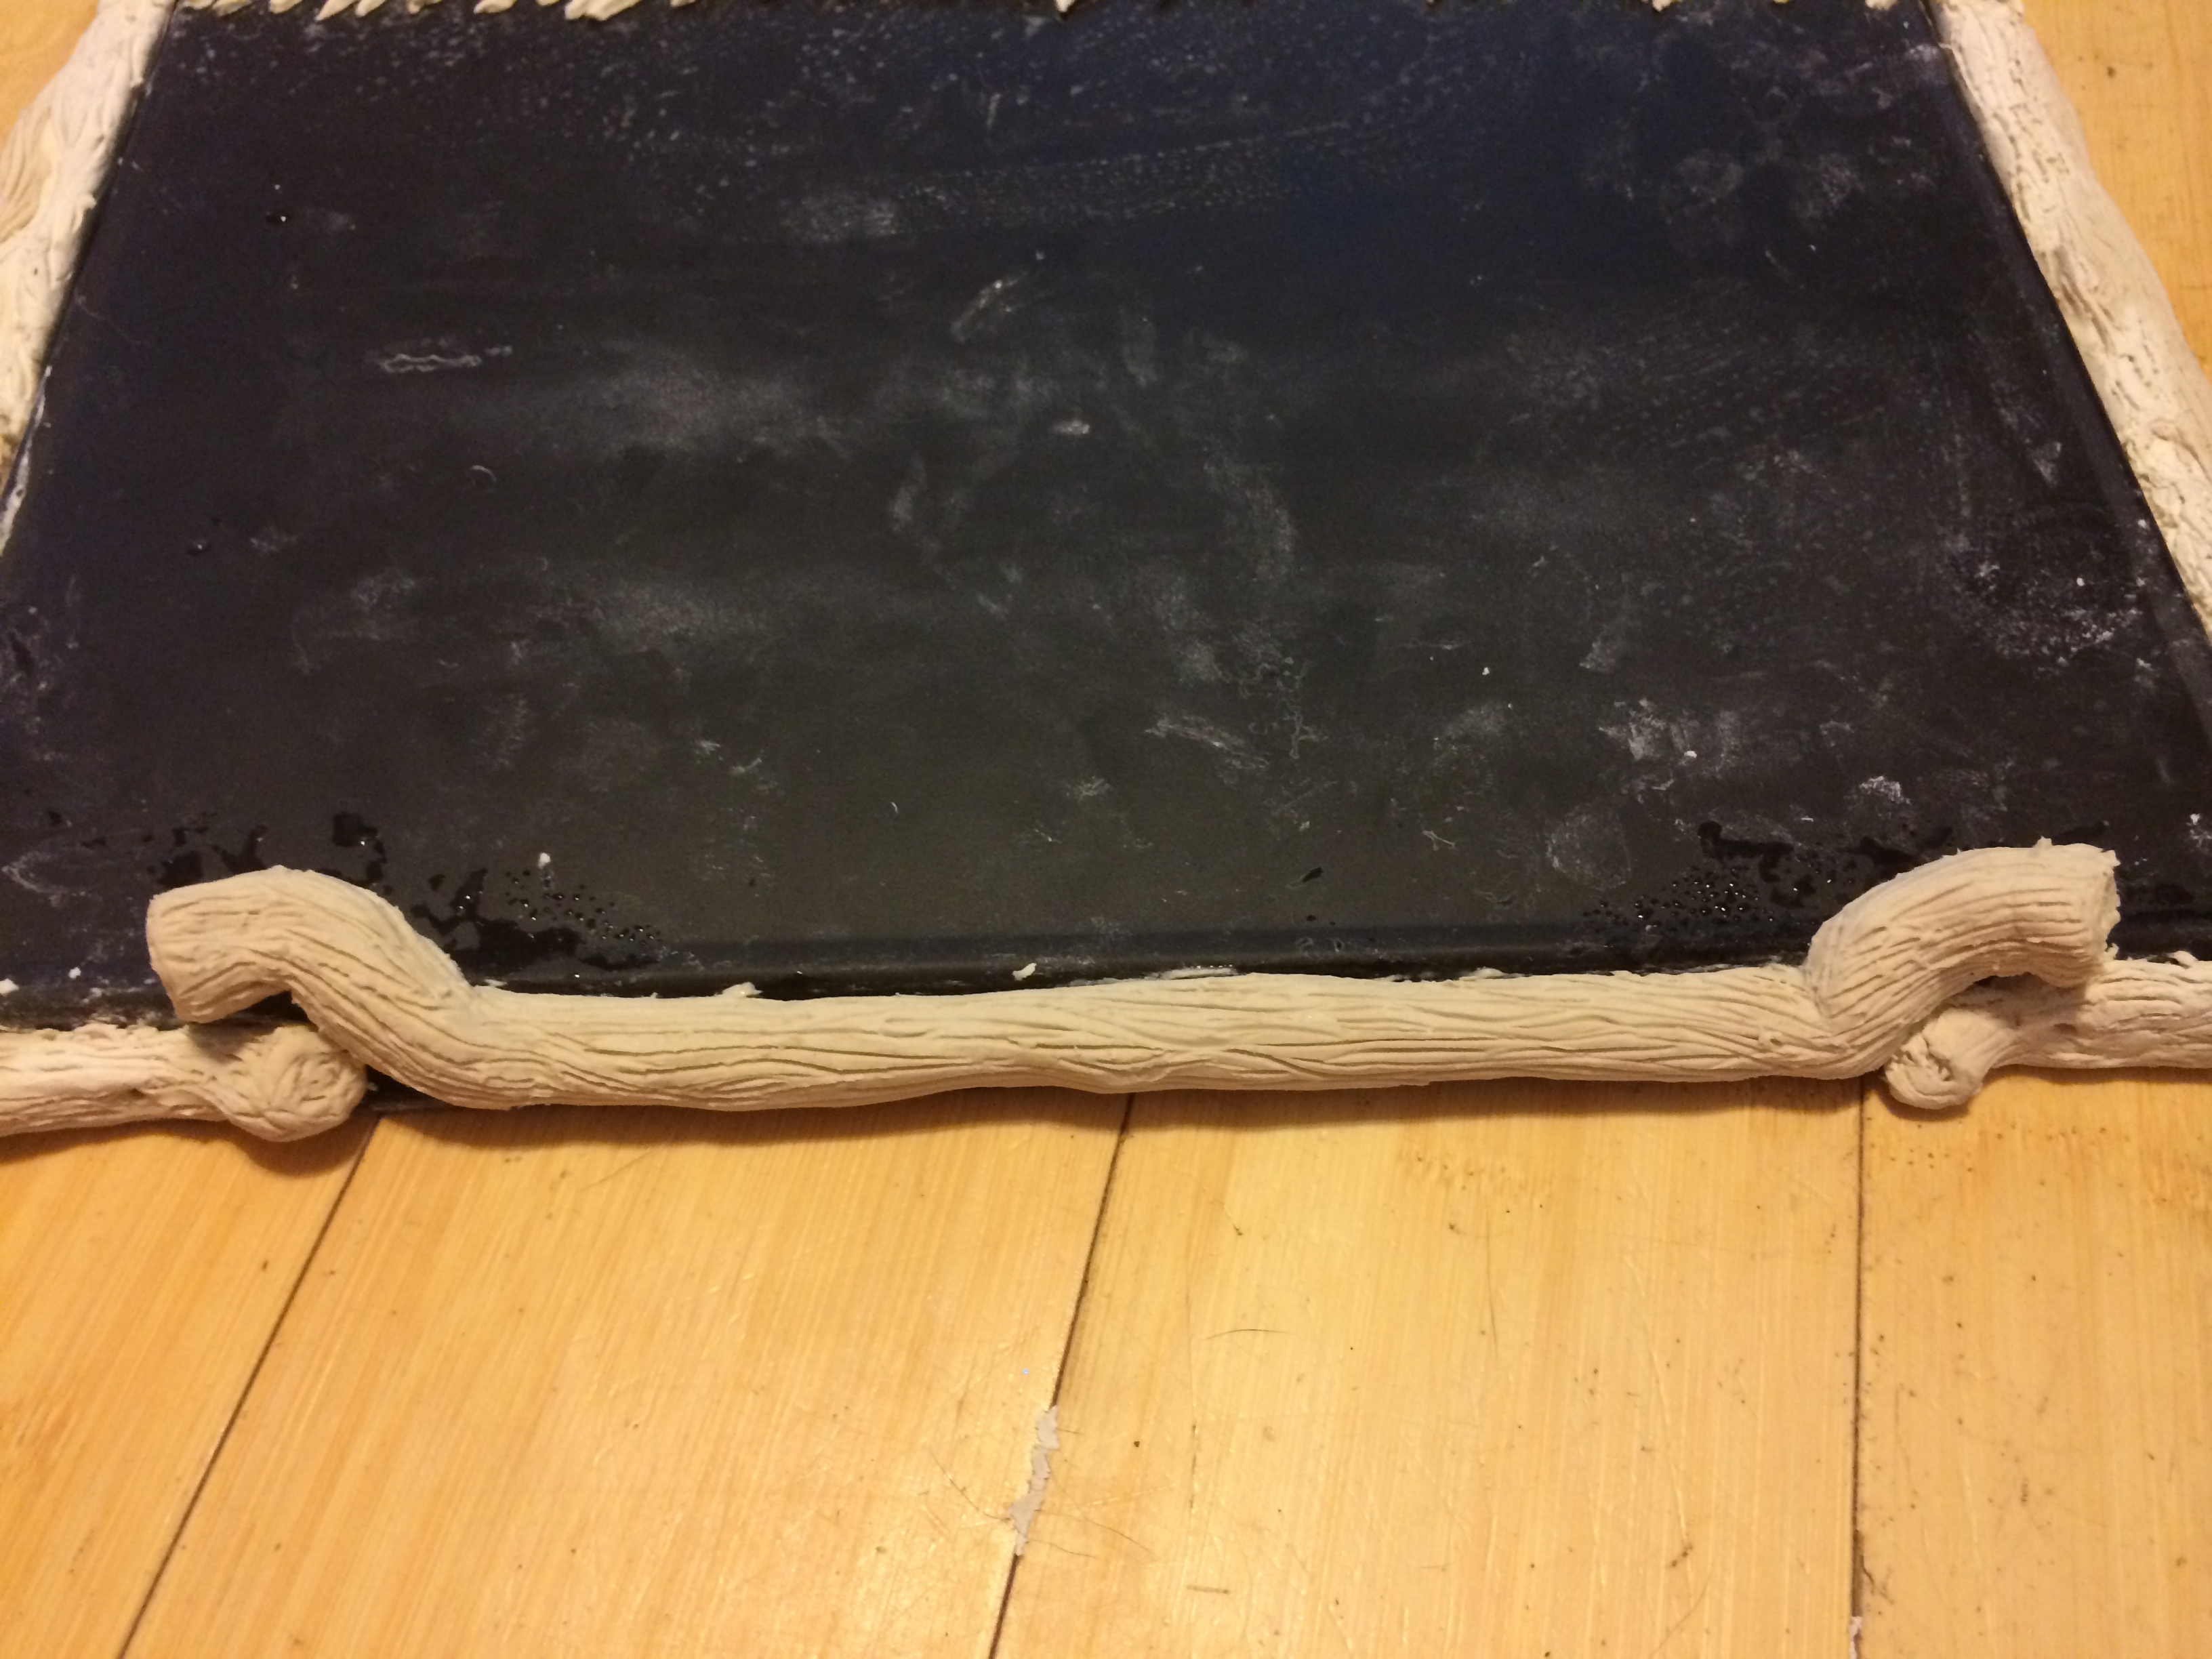
I dint wanted to be all flat so I give the over lapping trunk effect to give more interest to the piece.

Creative Paperclay board

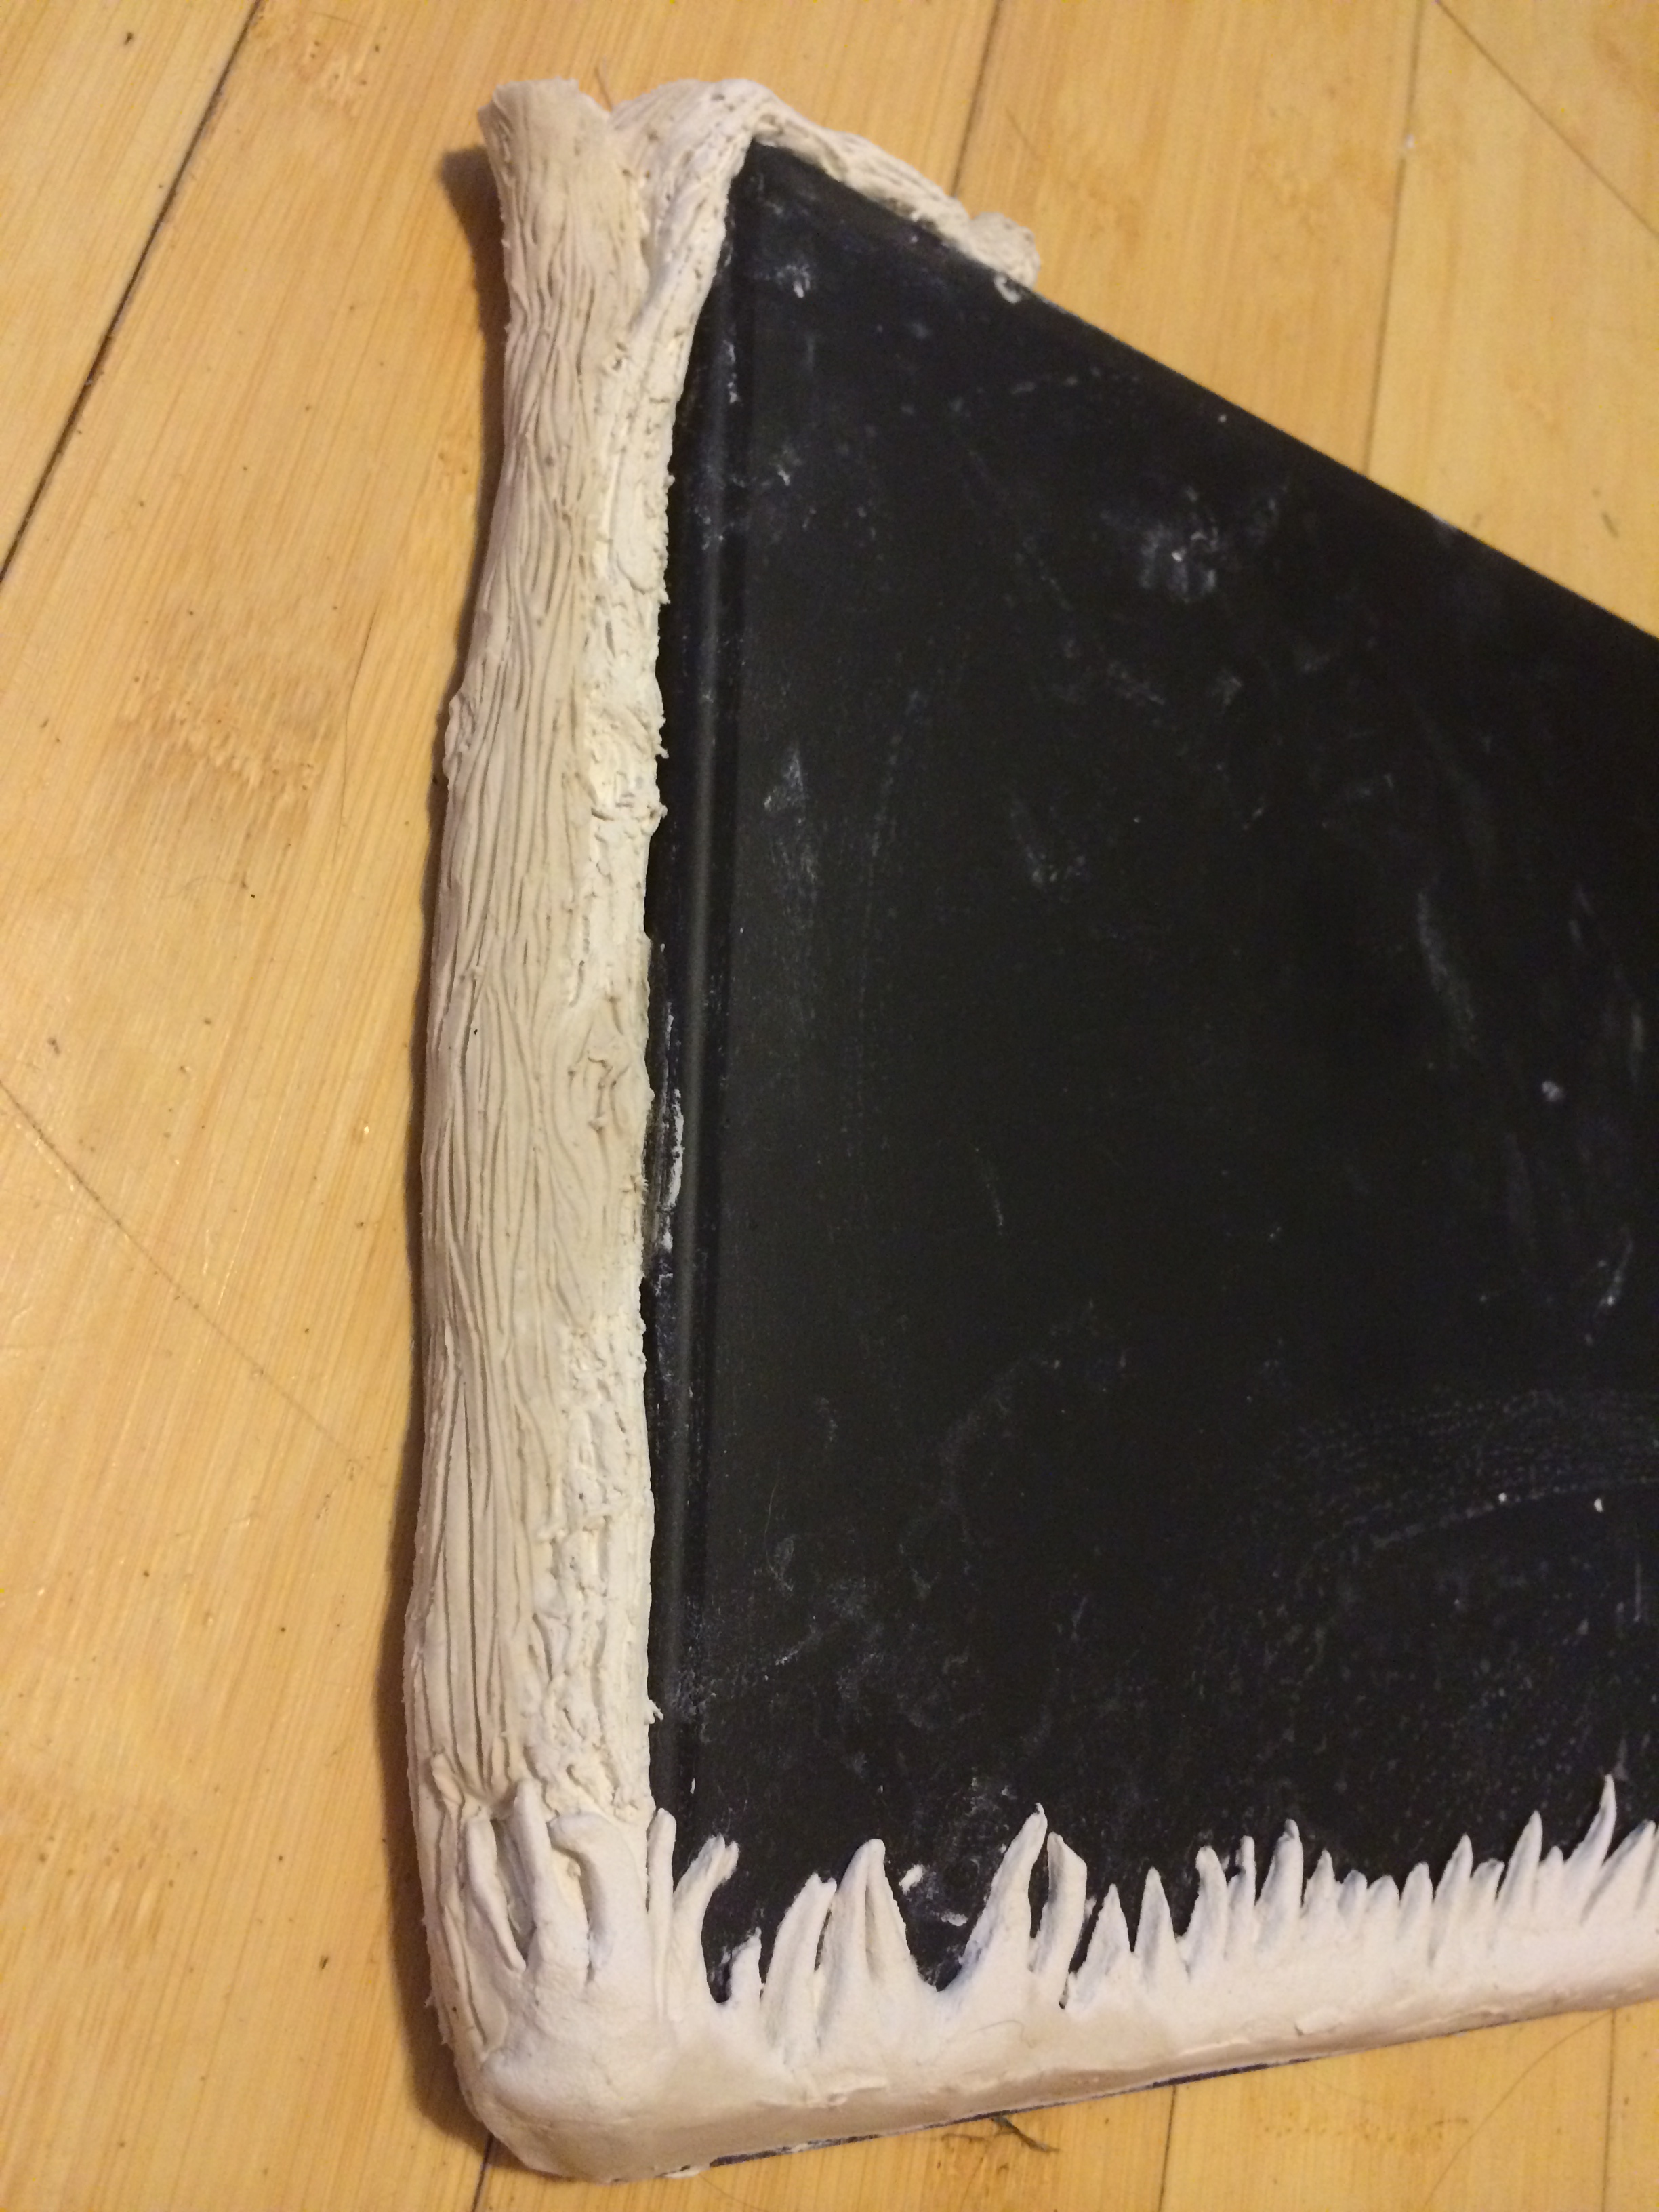
Before the completed top wood trunk dry, I use my needle tool to pierce the pre drilled holes in the clay and let it dry.

Creative Paperclay board

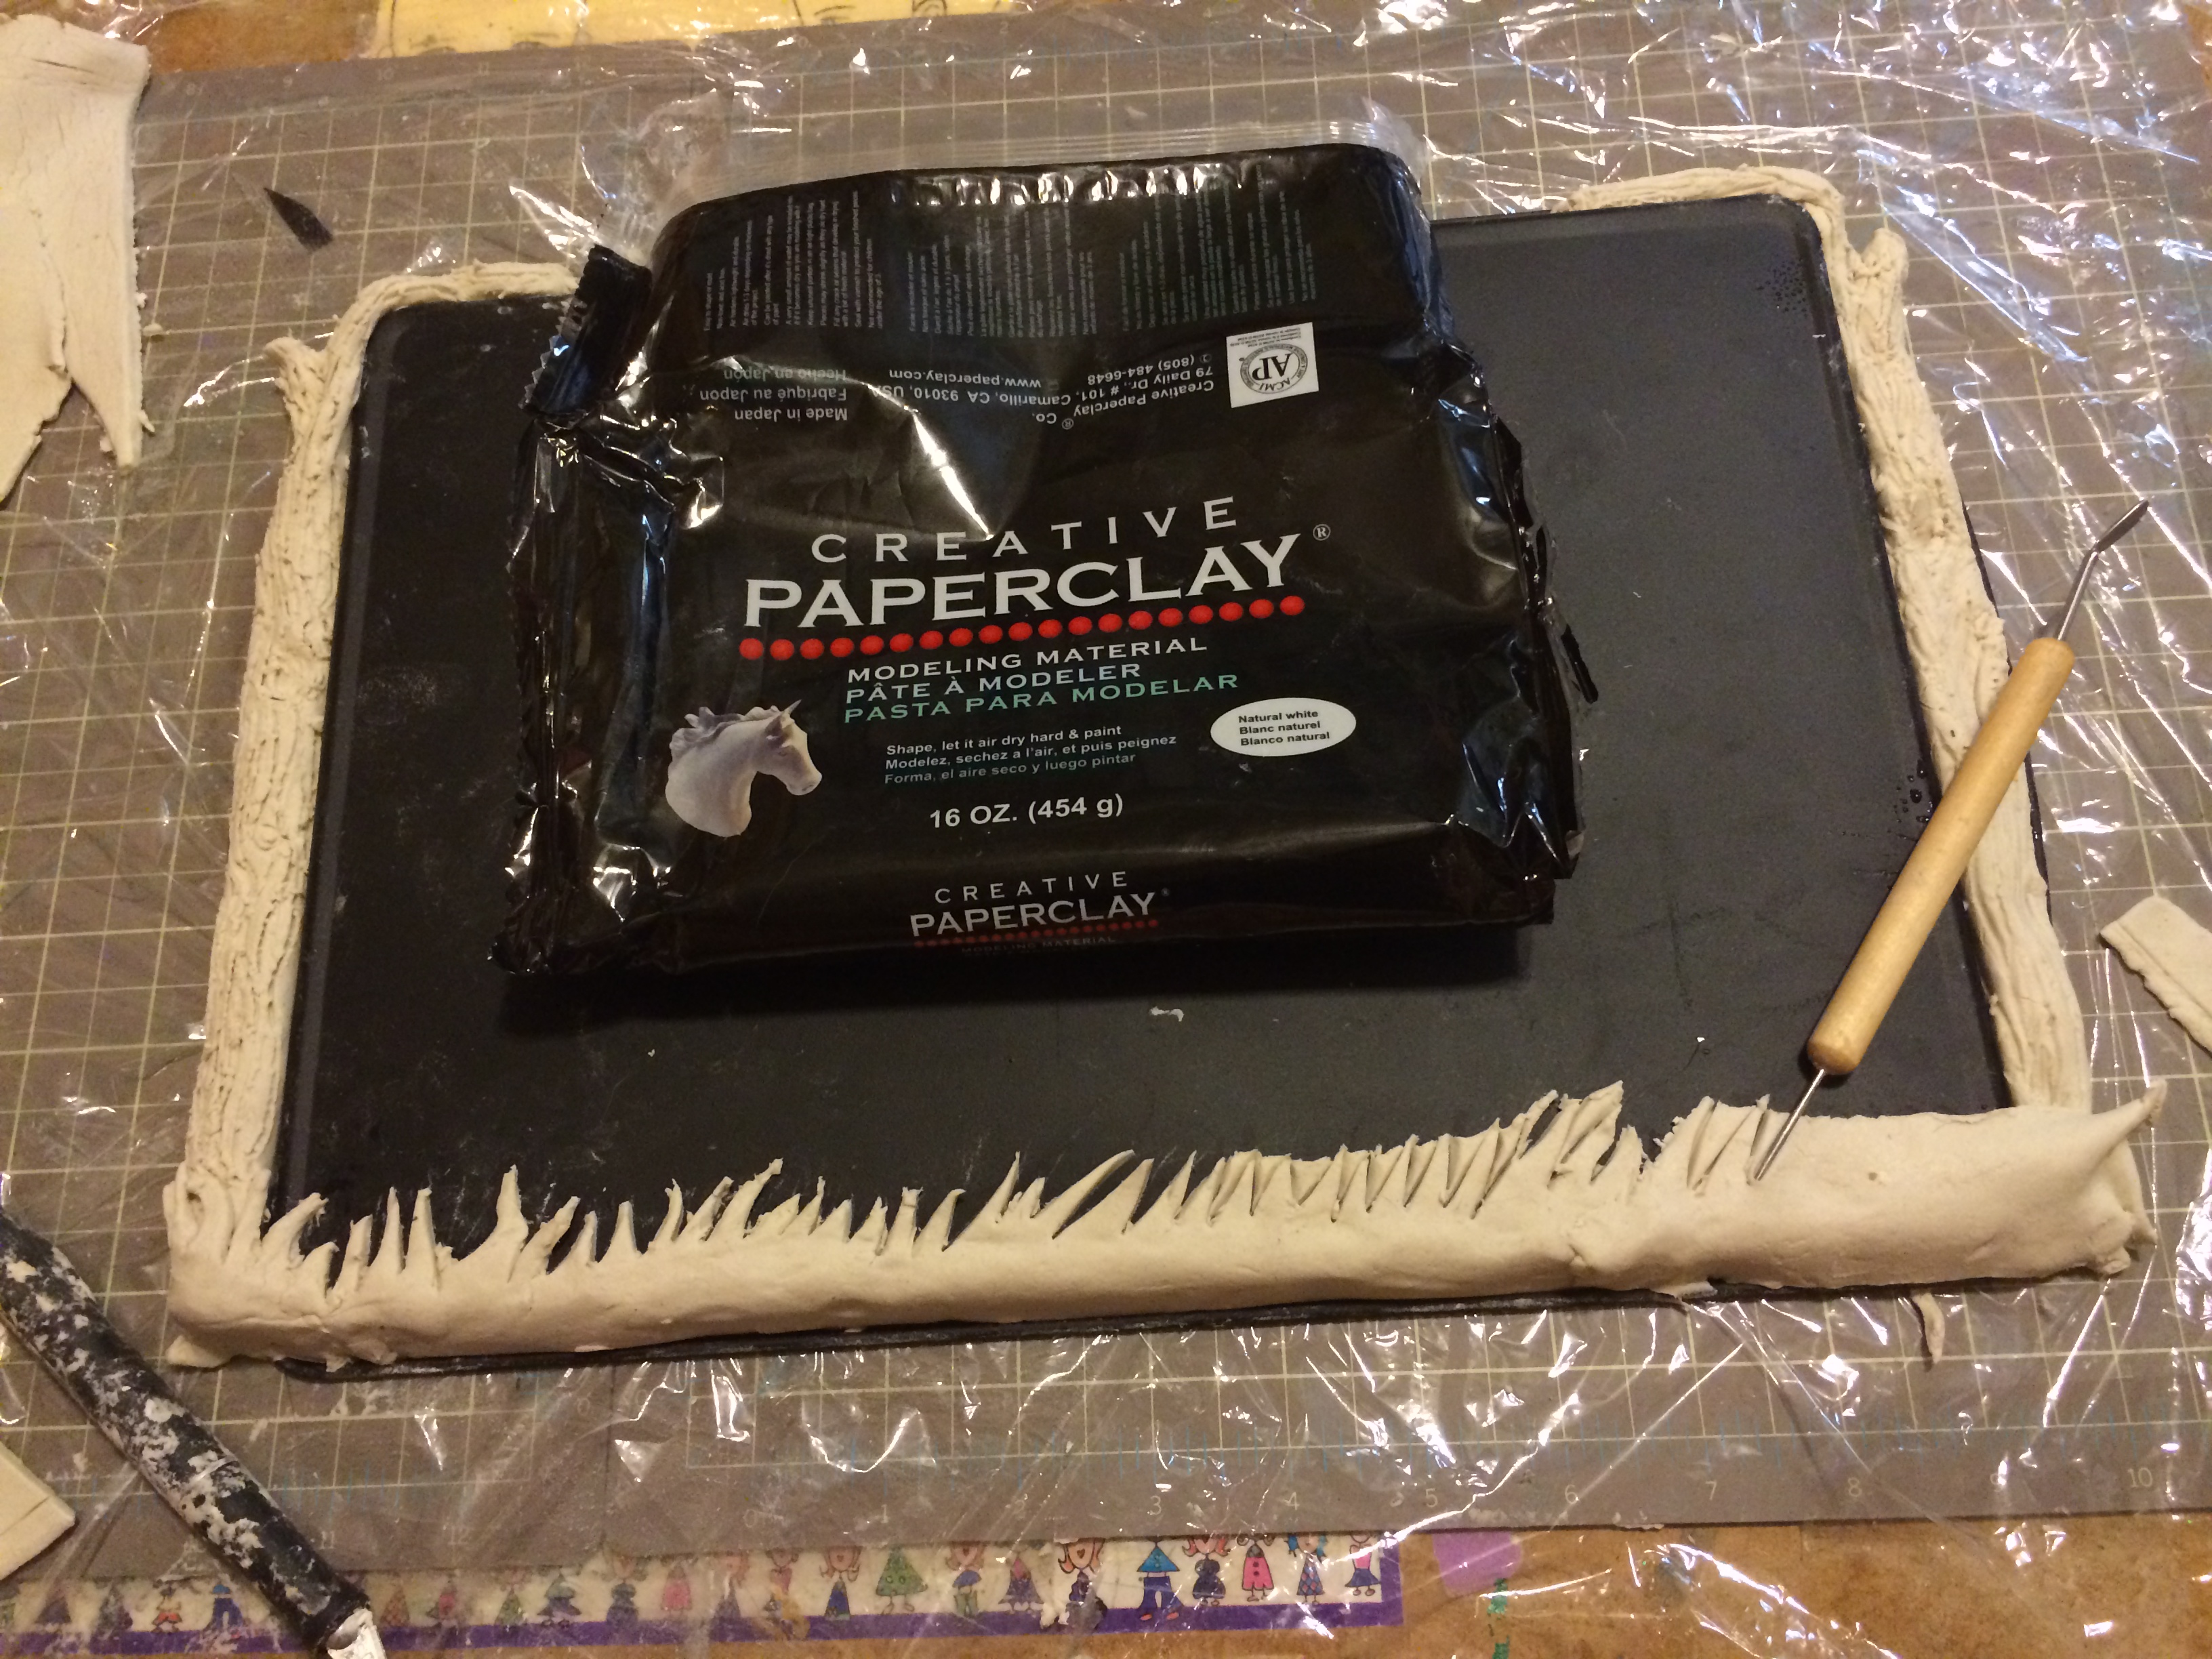
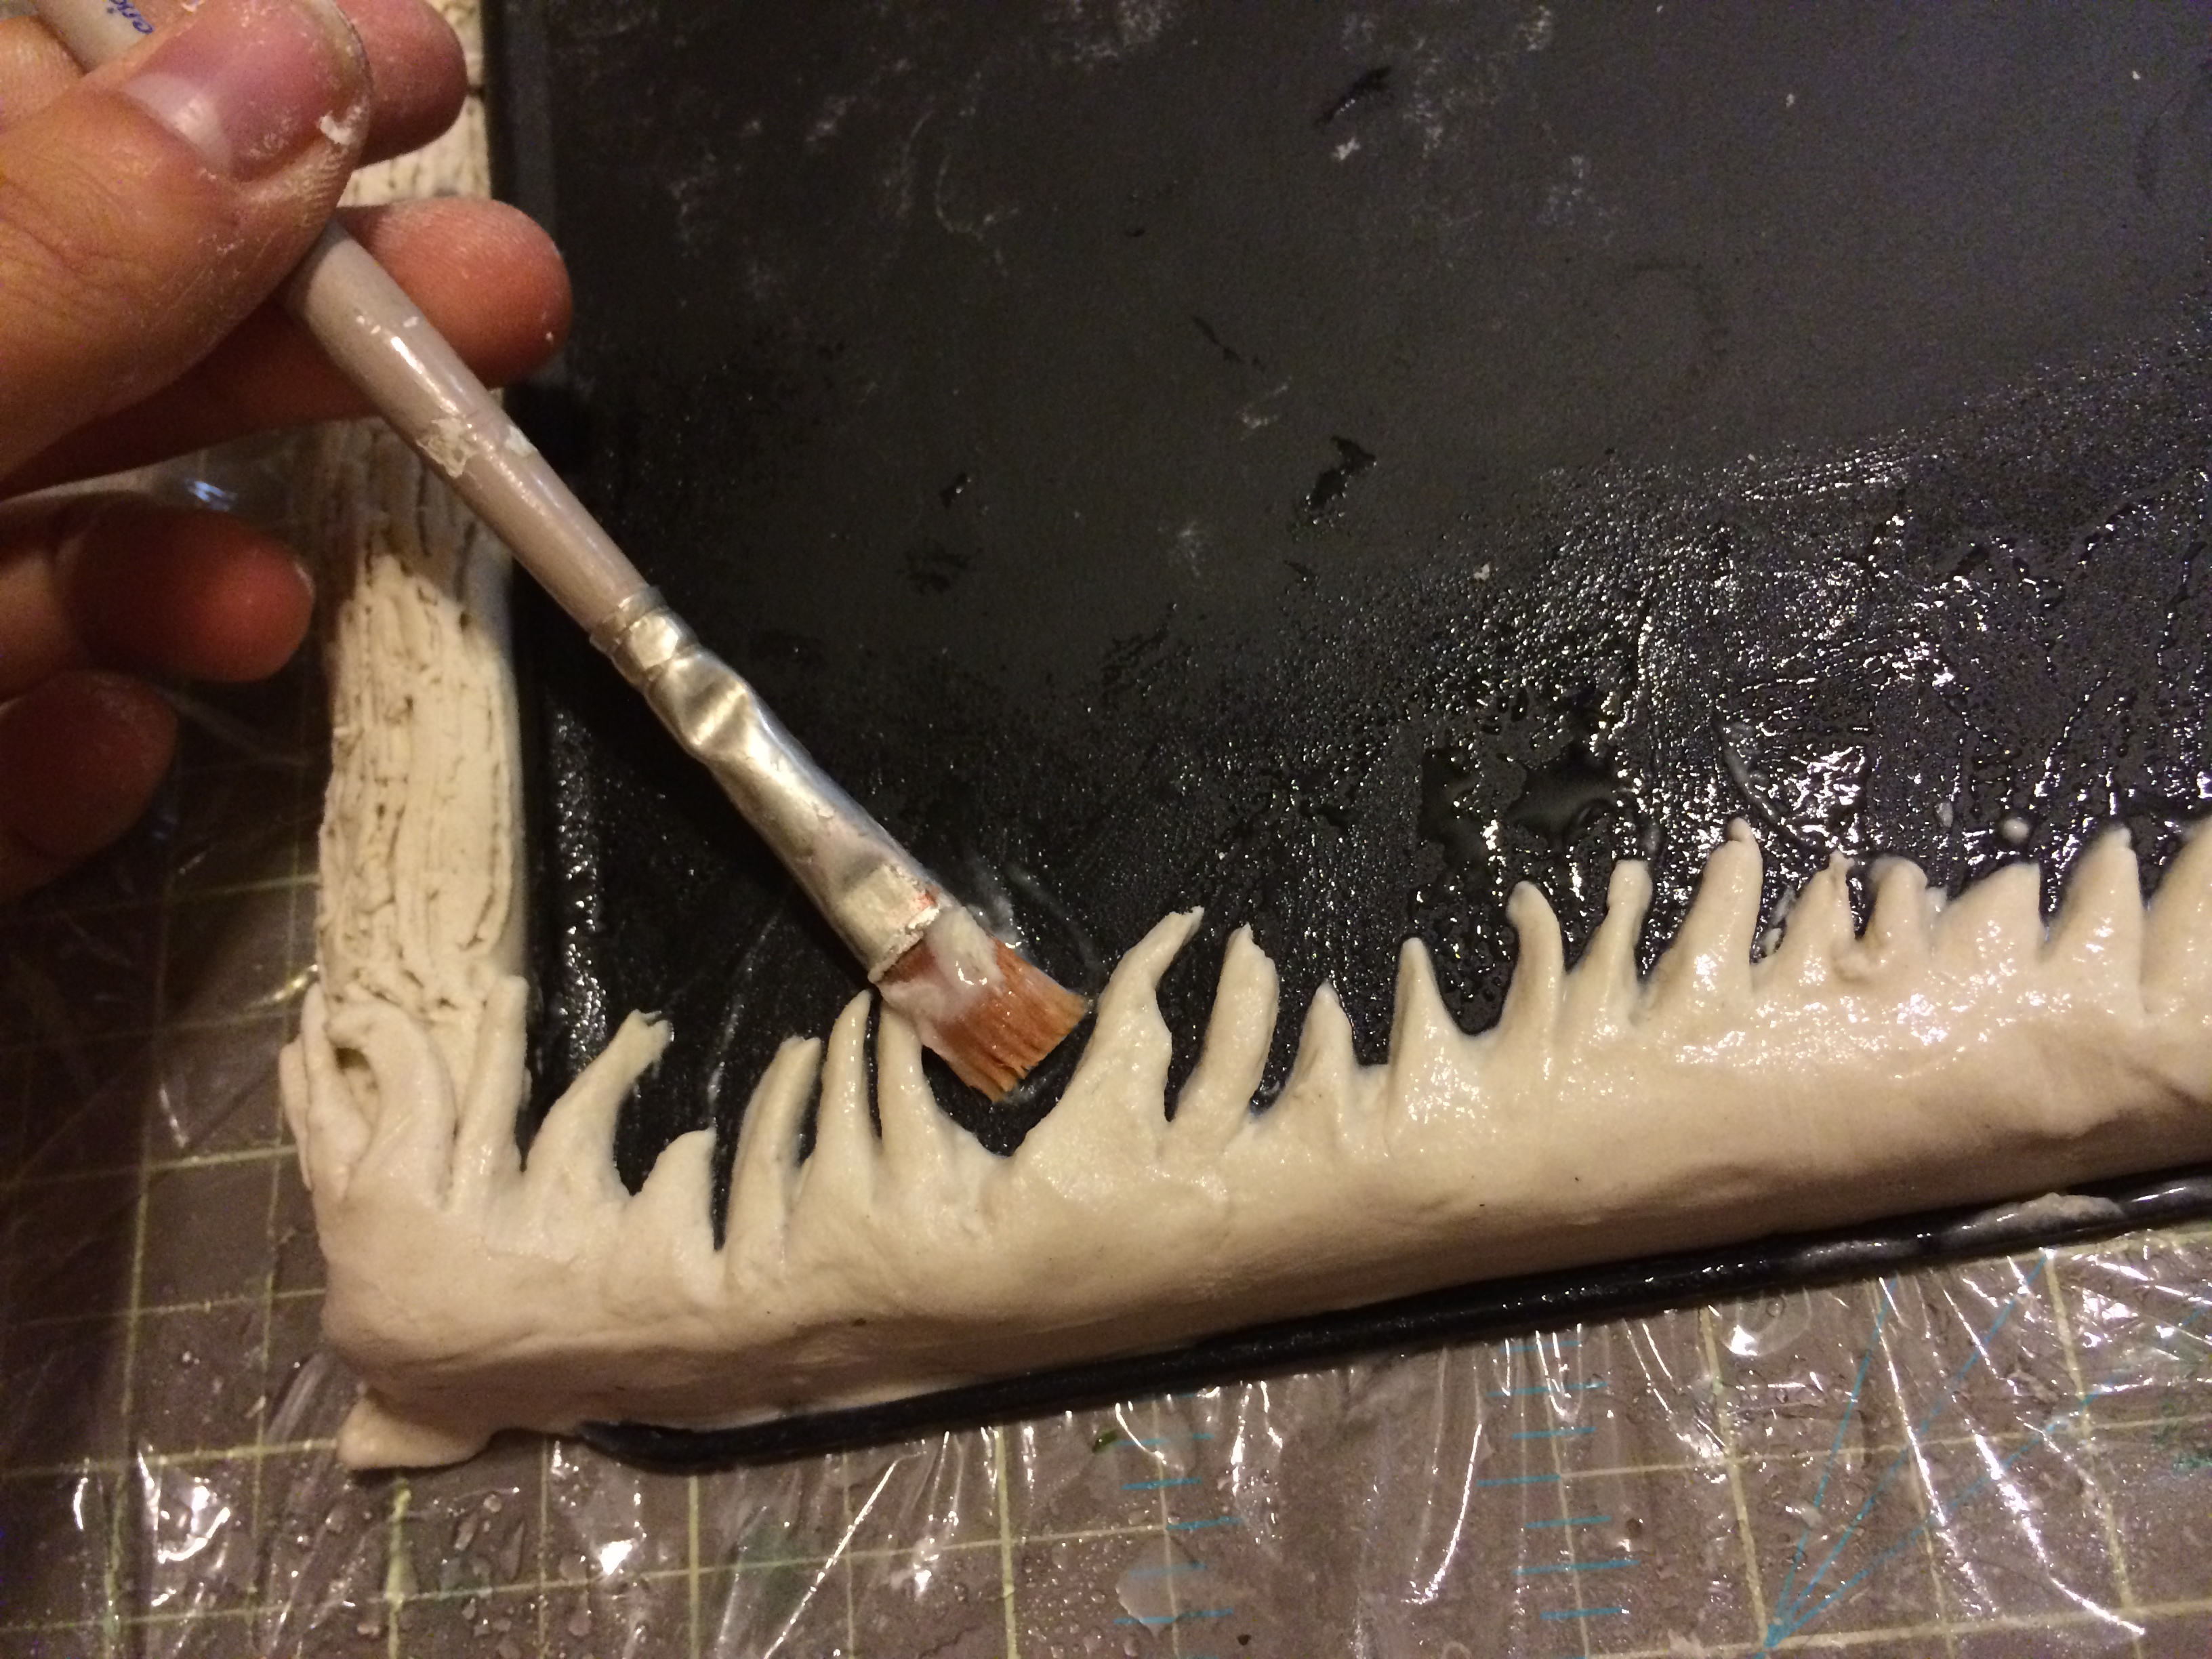
I wanted to add a nice grass effect to the lower portion of the board. I did this by rolling a Creative Paperclay sheet to a ¼ in thickness. Place it on the bottom and with my needle tool cut the grass off.

Creative Paperclay board

Spray it with water so we can then soften it with a soft wet brush and set aside to dry.

Creative Paperclay board

It is Painting time!

Creative Paperclay board

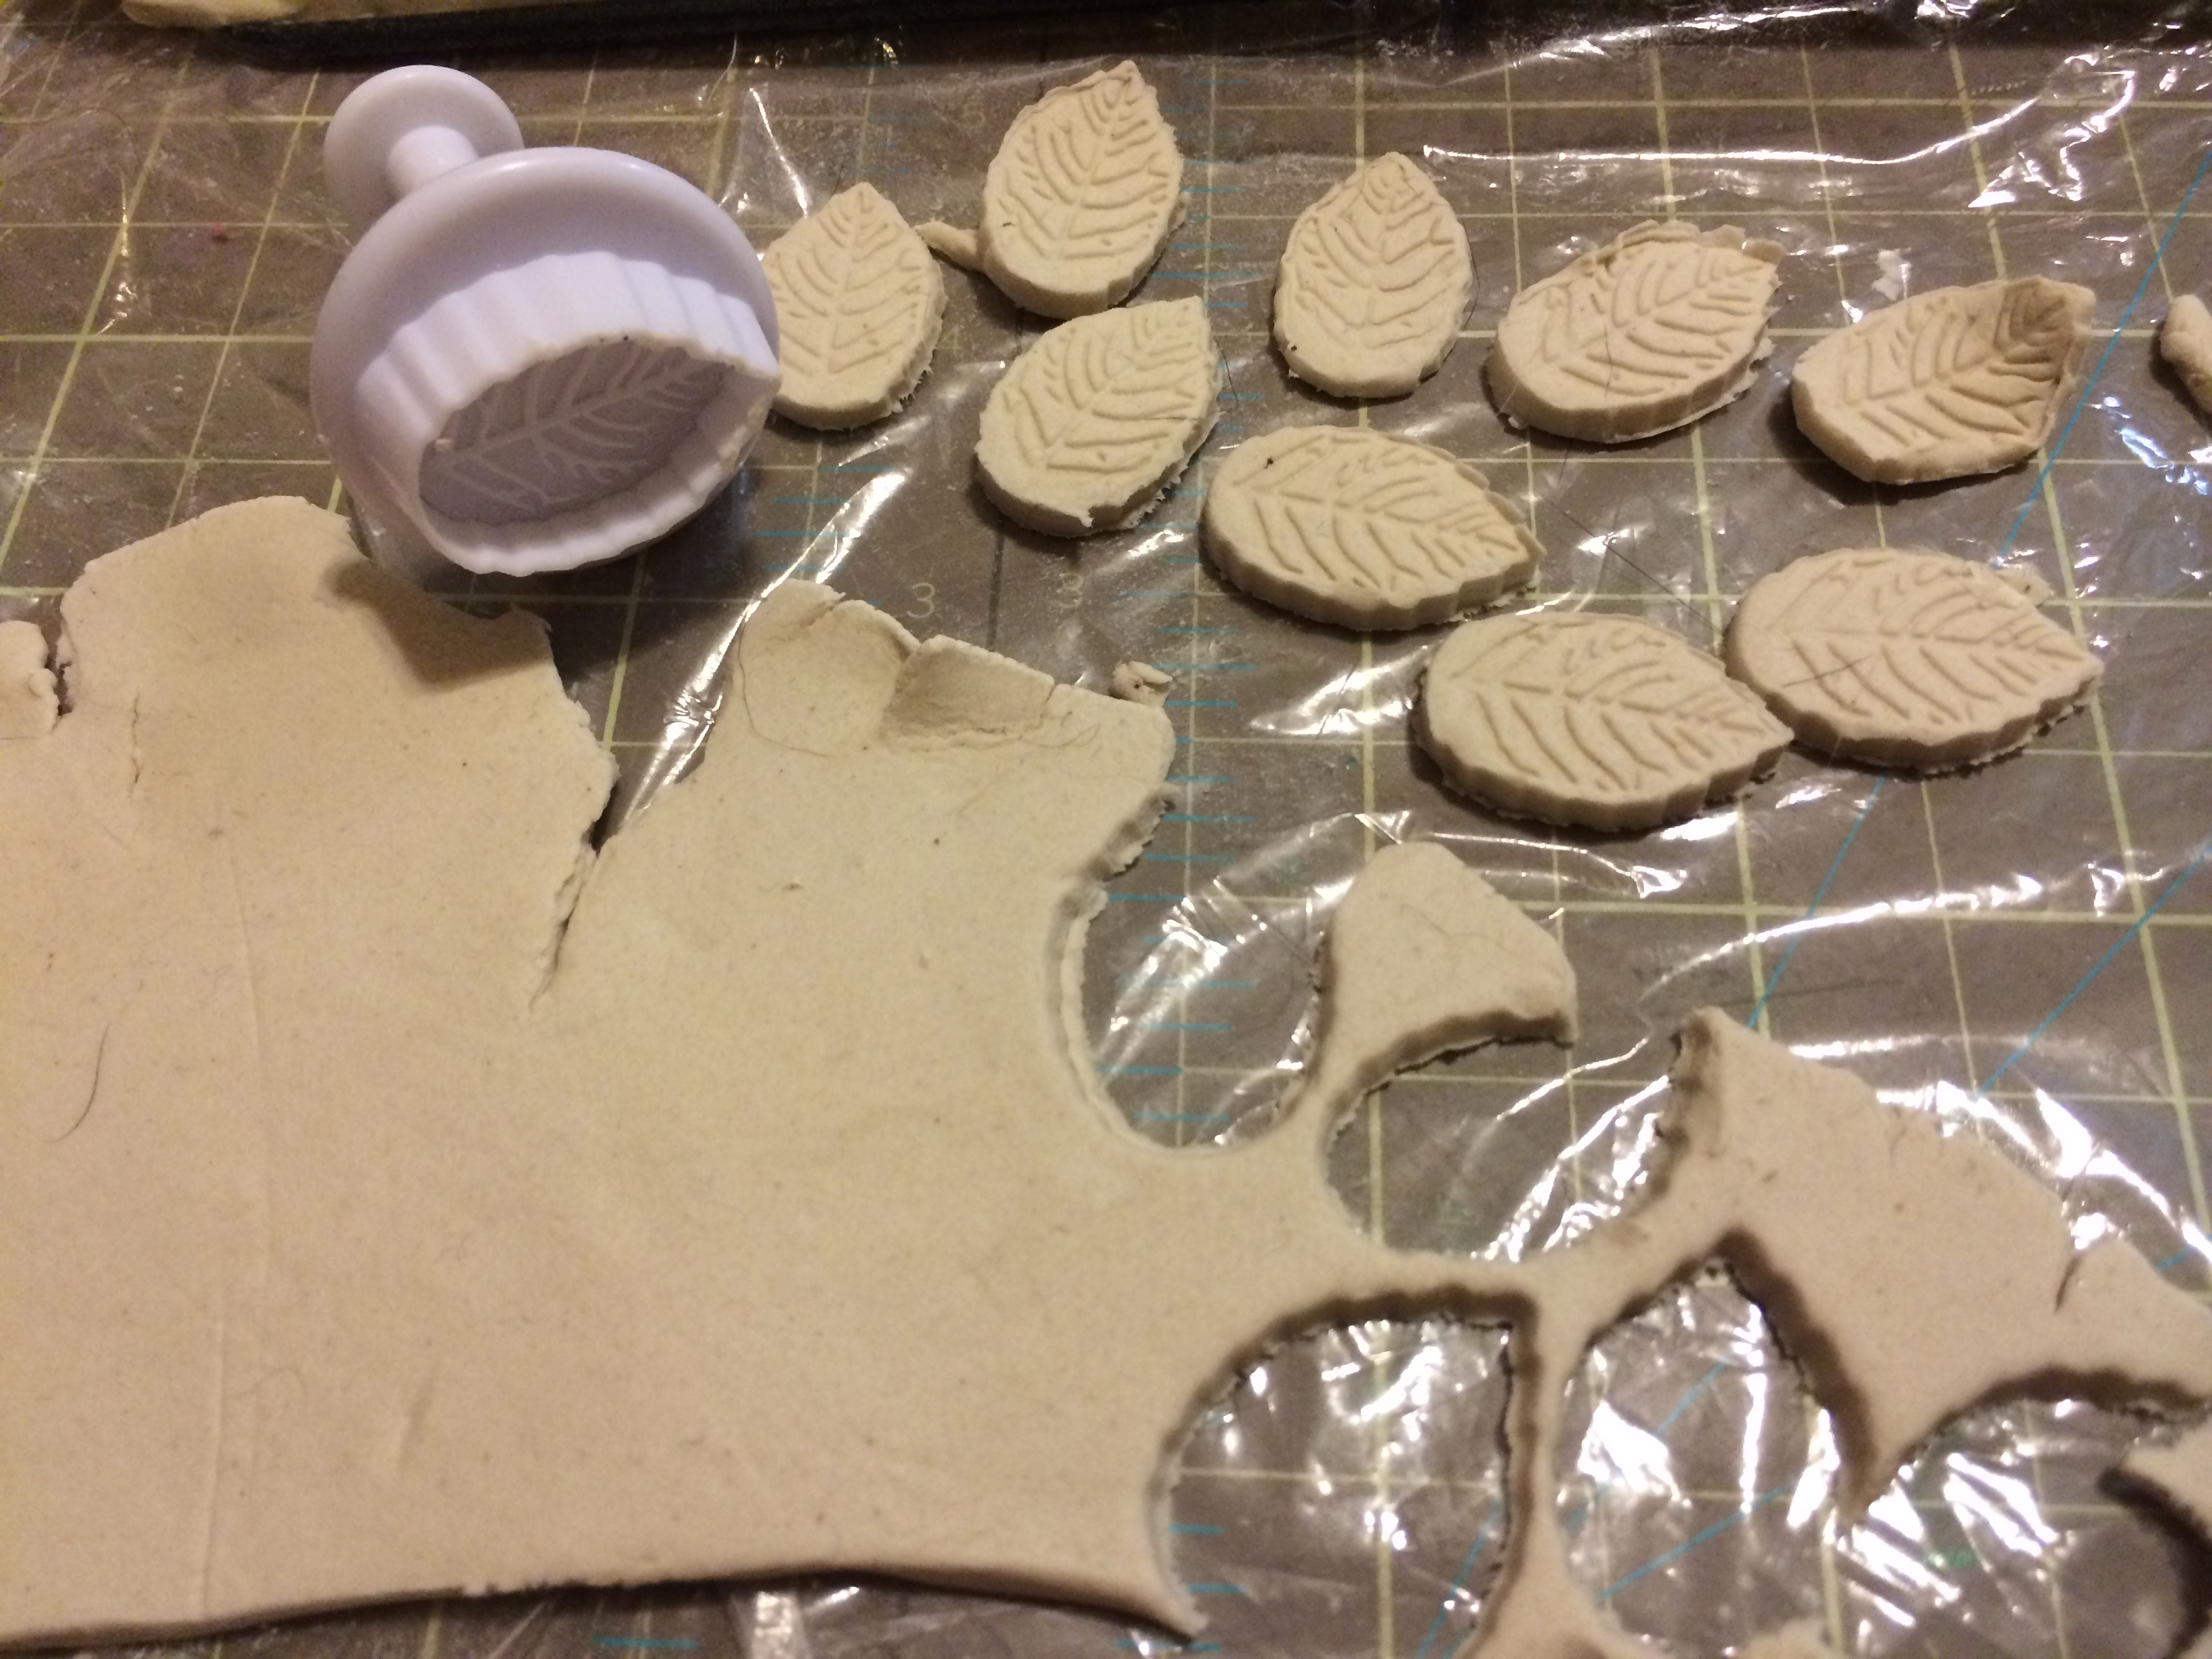
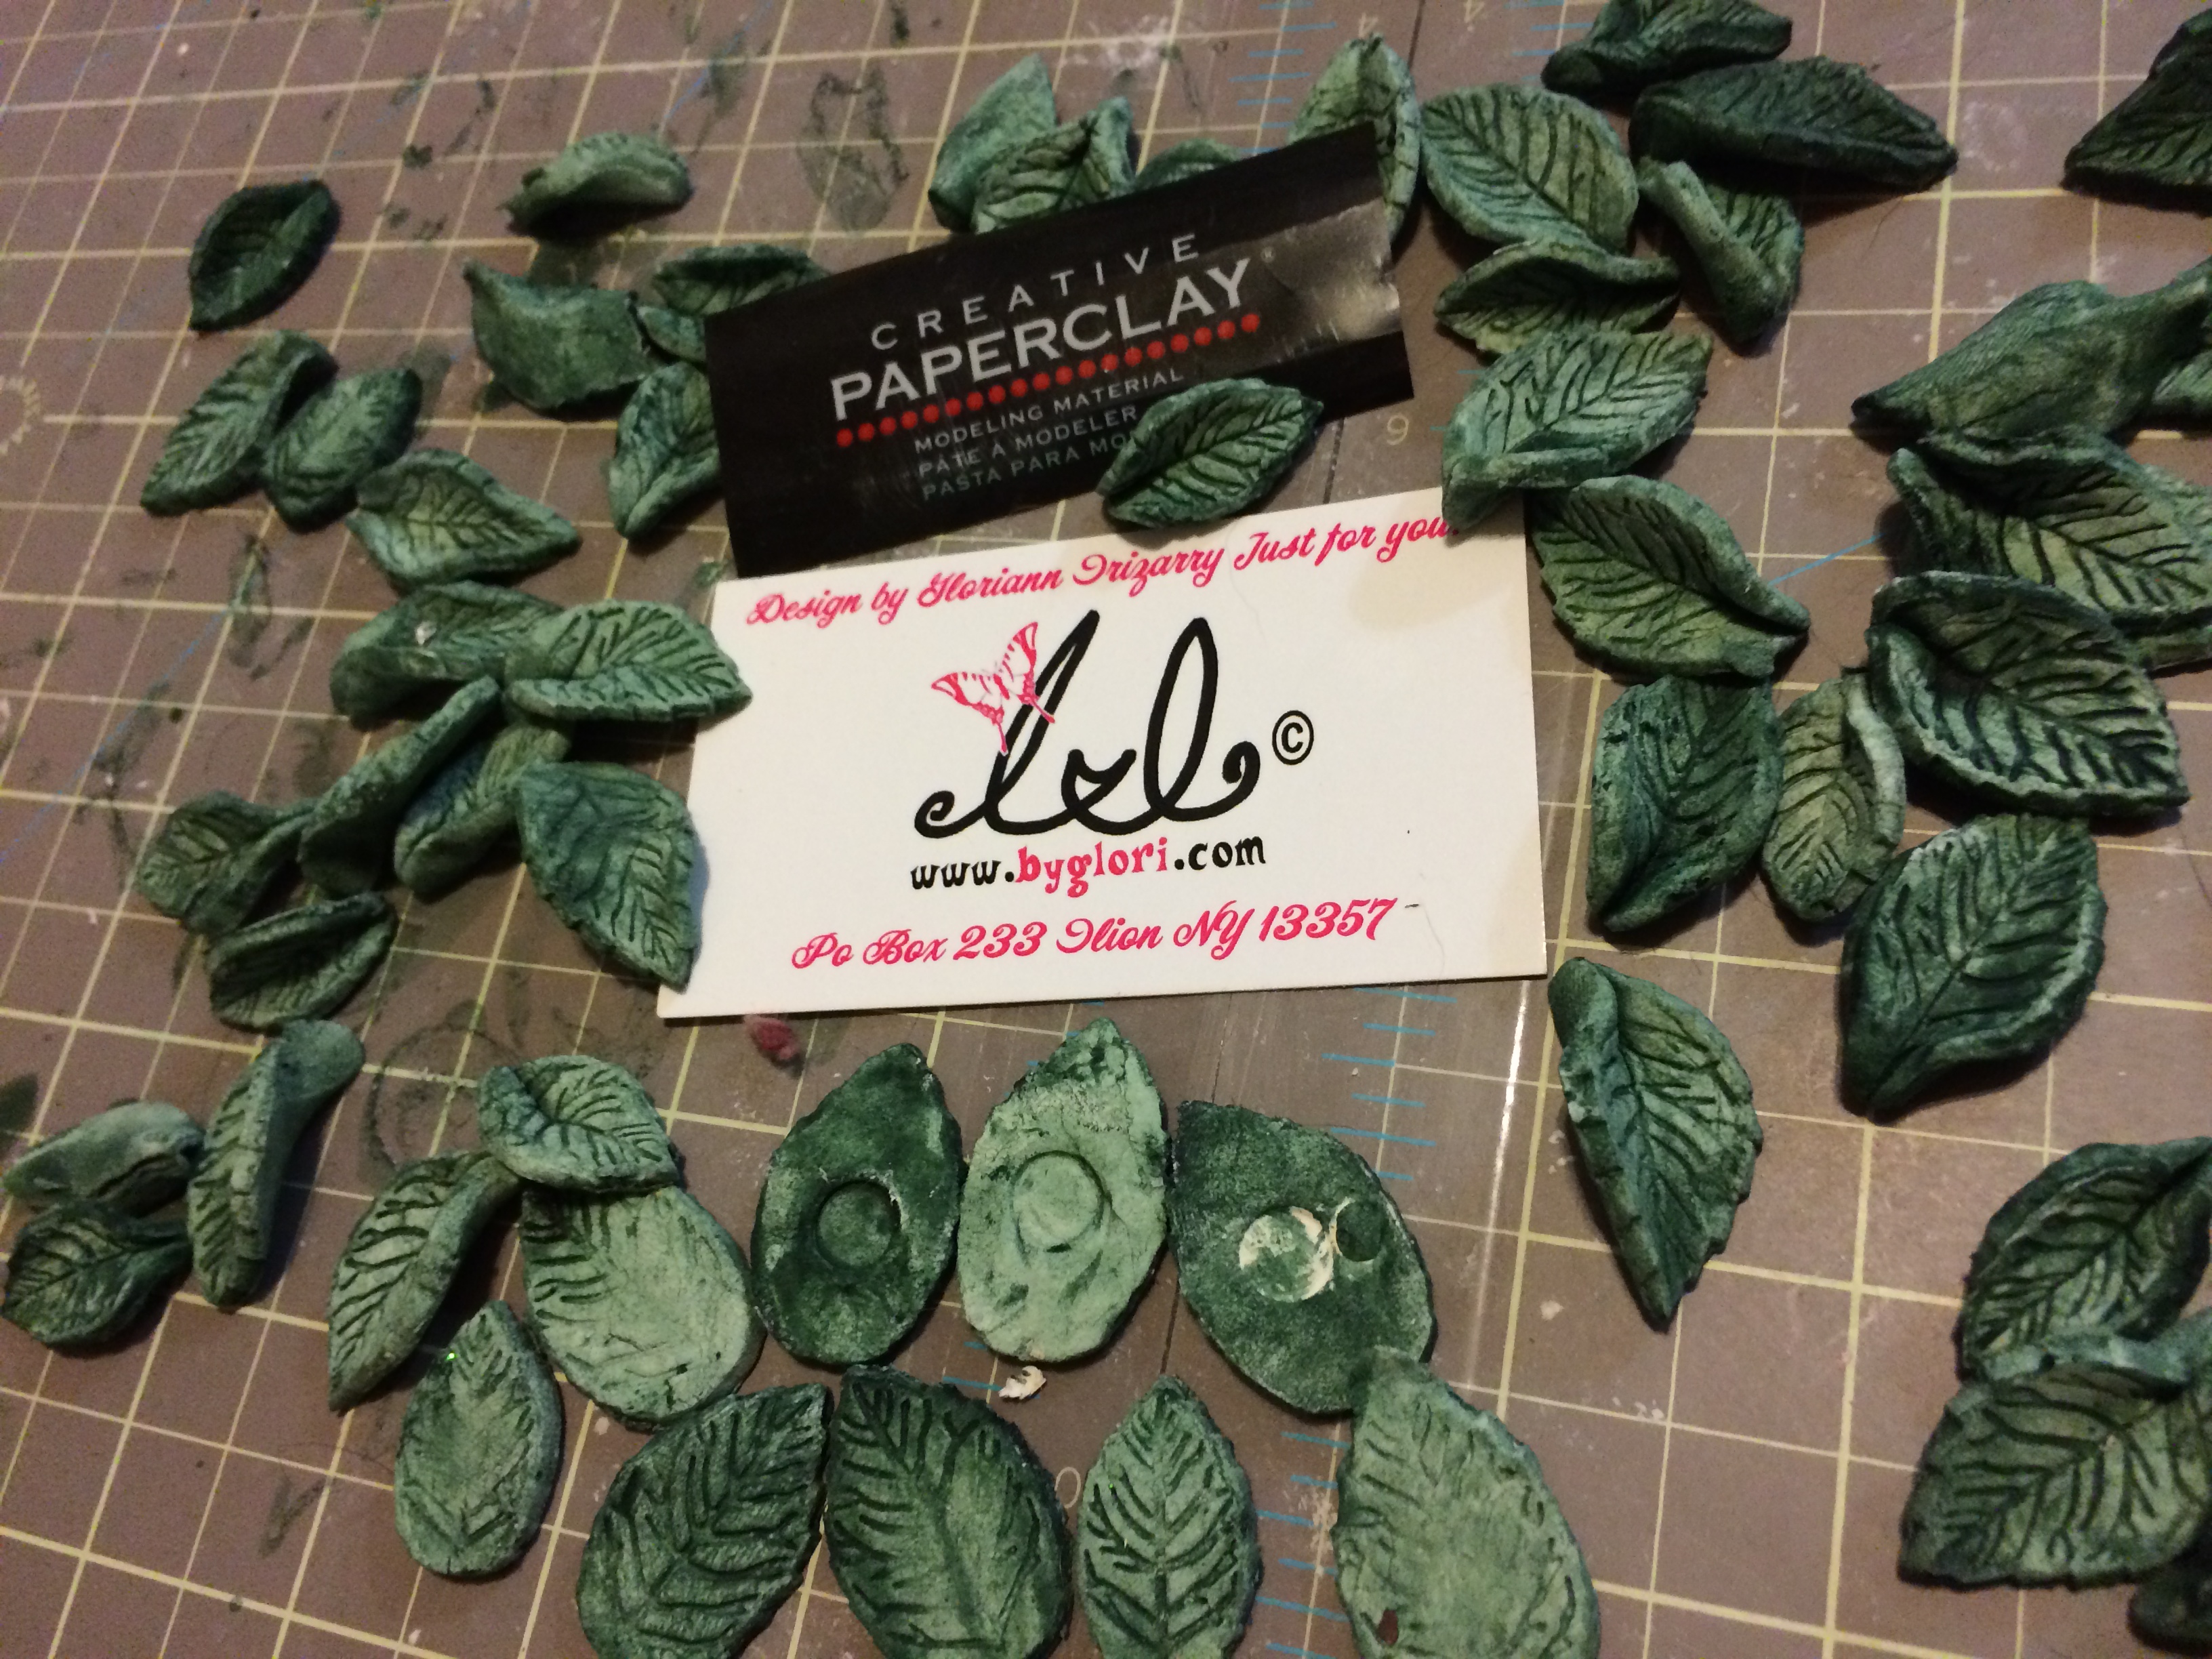
To create the leaf for decoration I rolled again some Creative Paperclay to a ¼ thickness.

Once it is rolled, I let it dry a little not much.

Creative Paperclay board

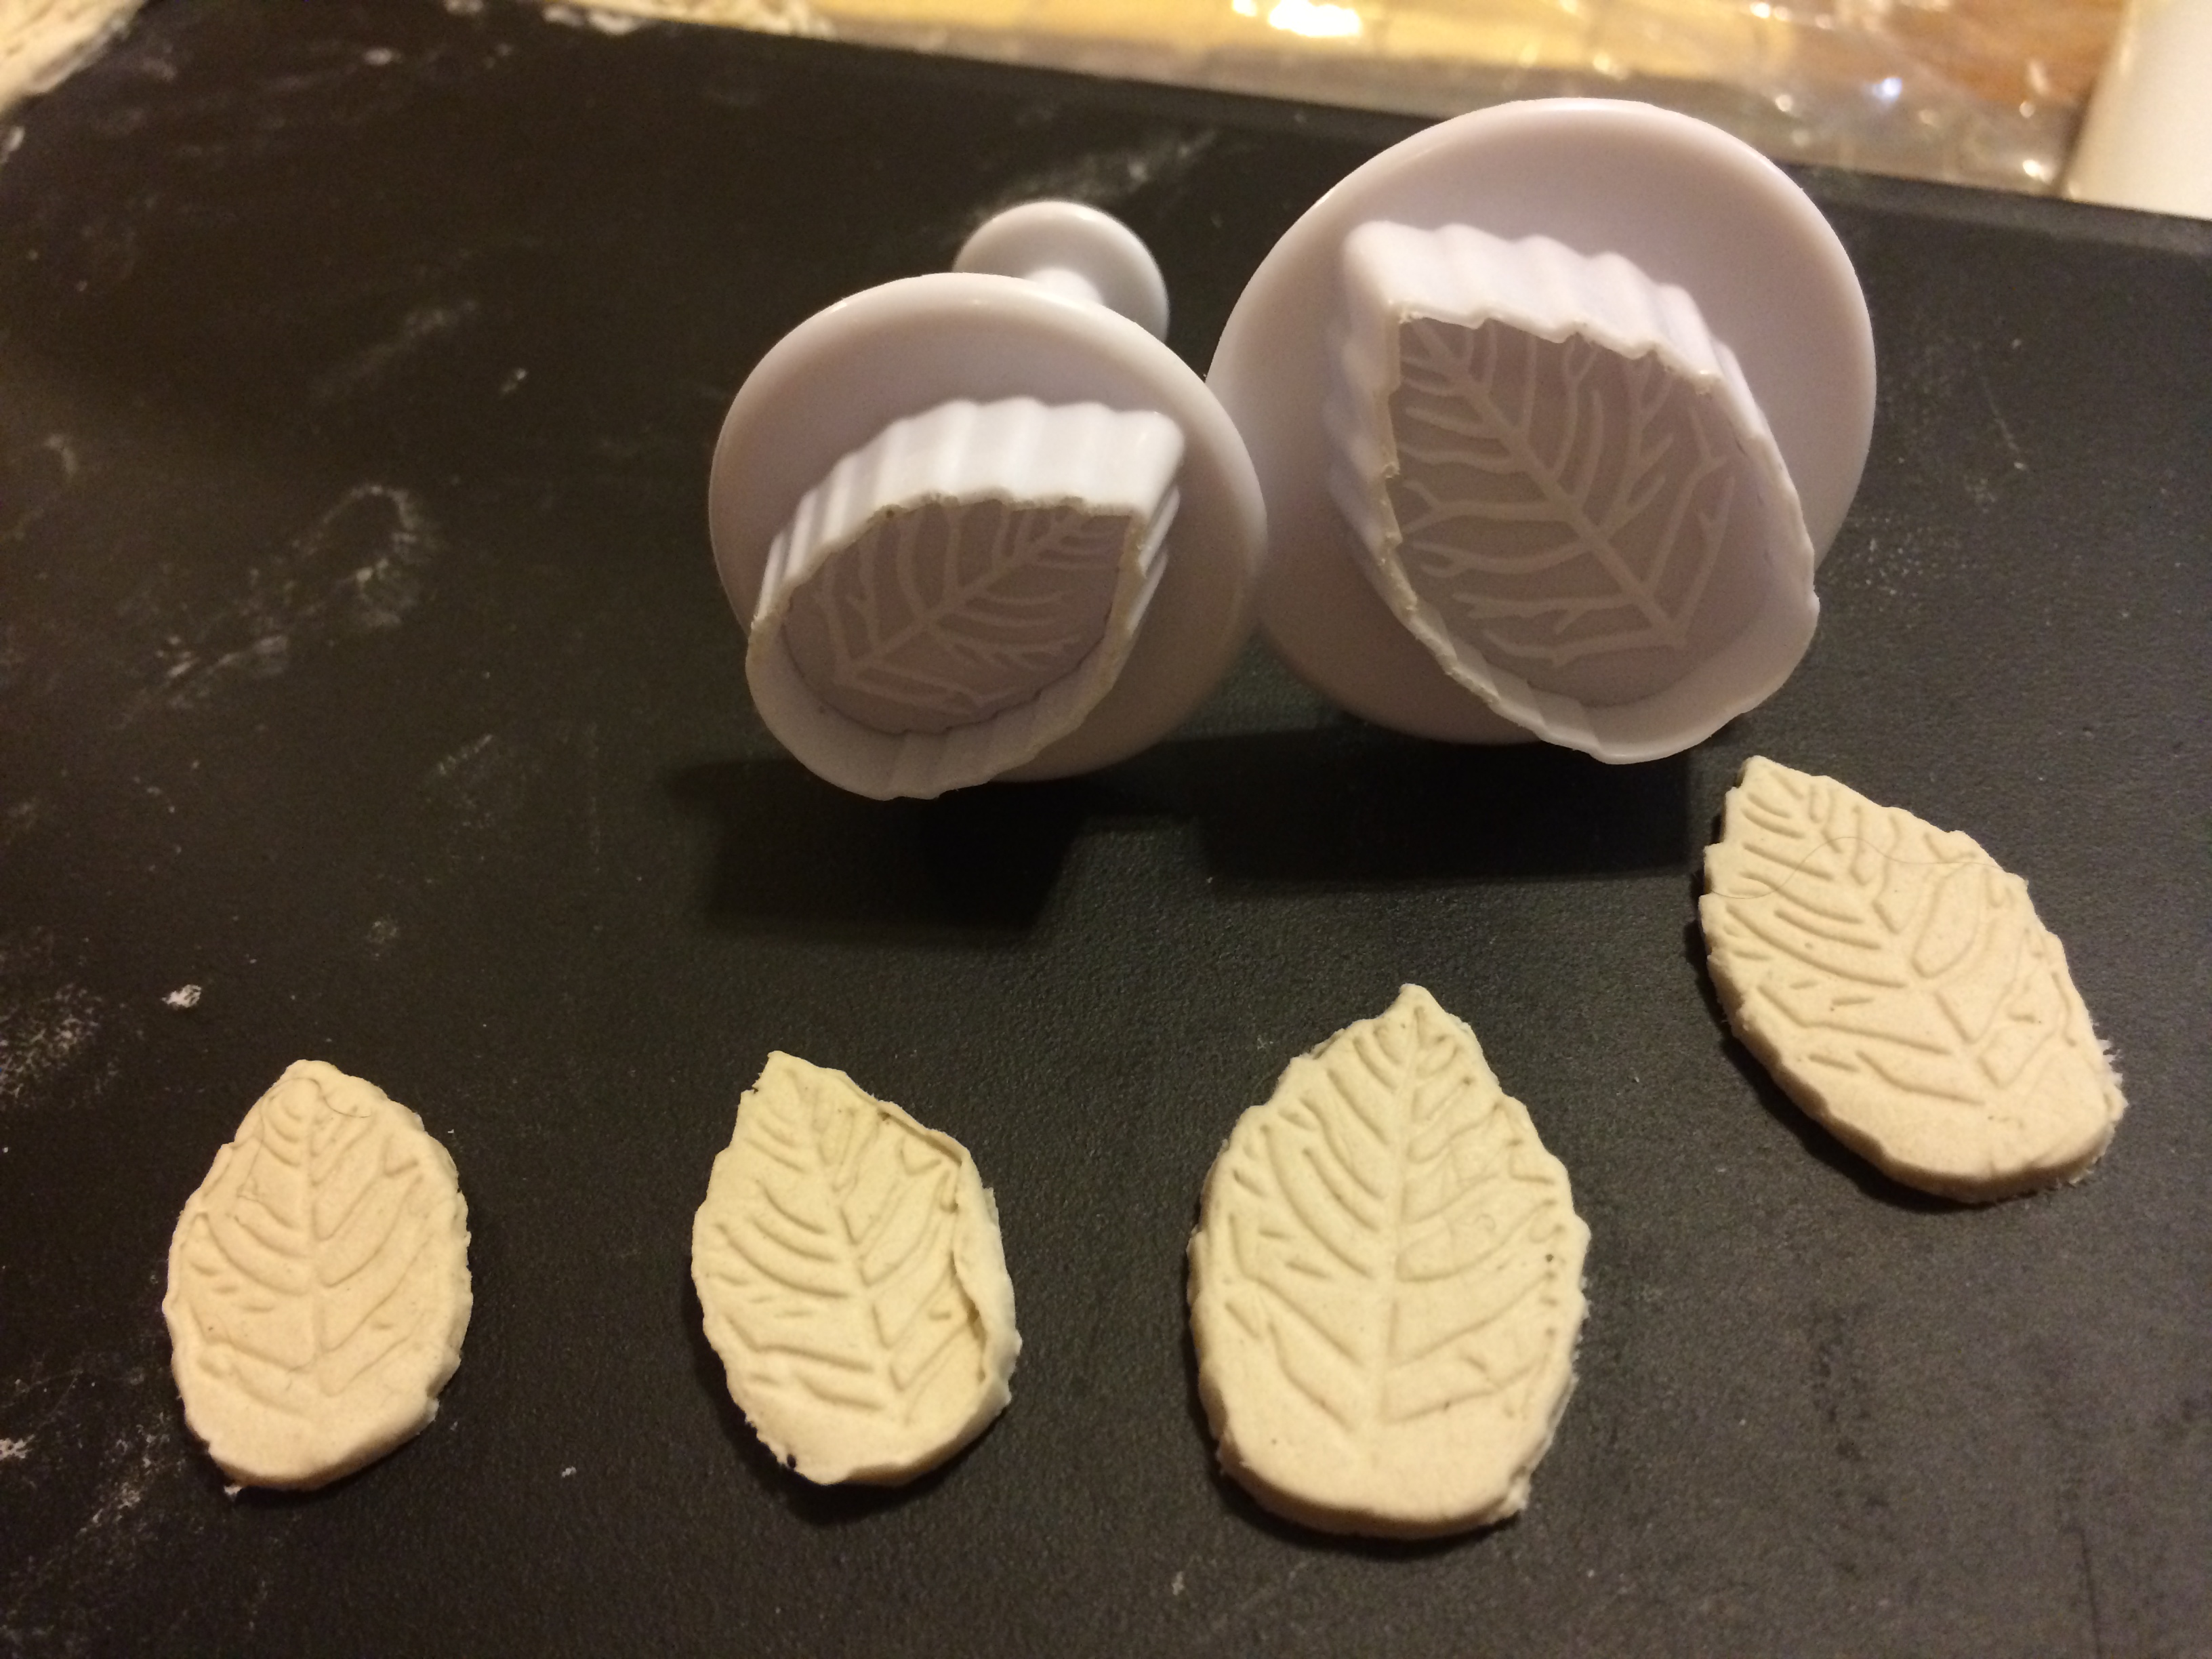
Grab your favorite leaf cutters and start stamping away.

Creative Paperclay board

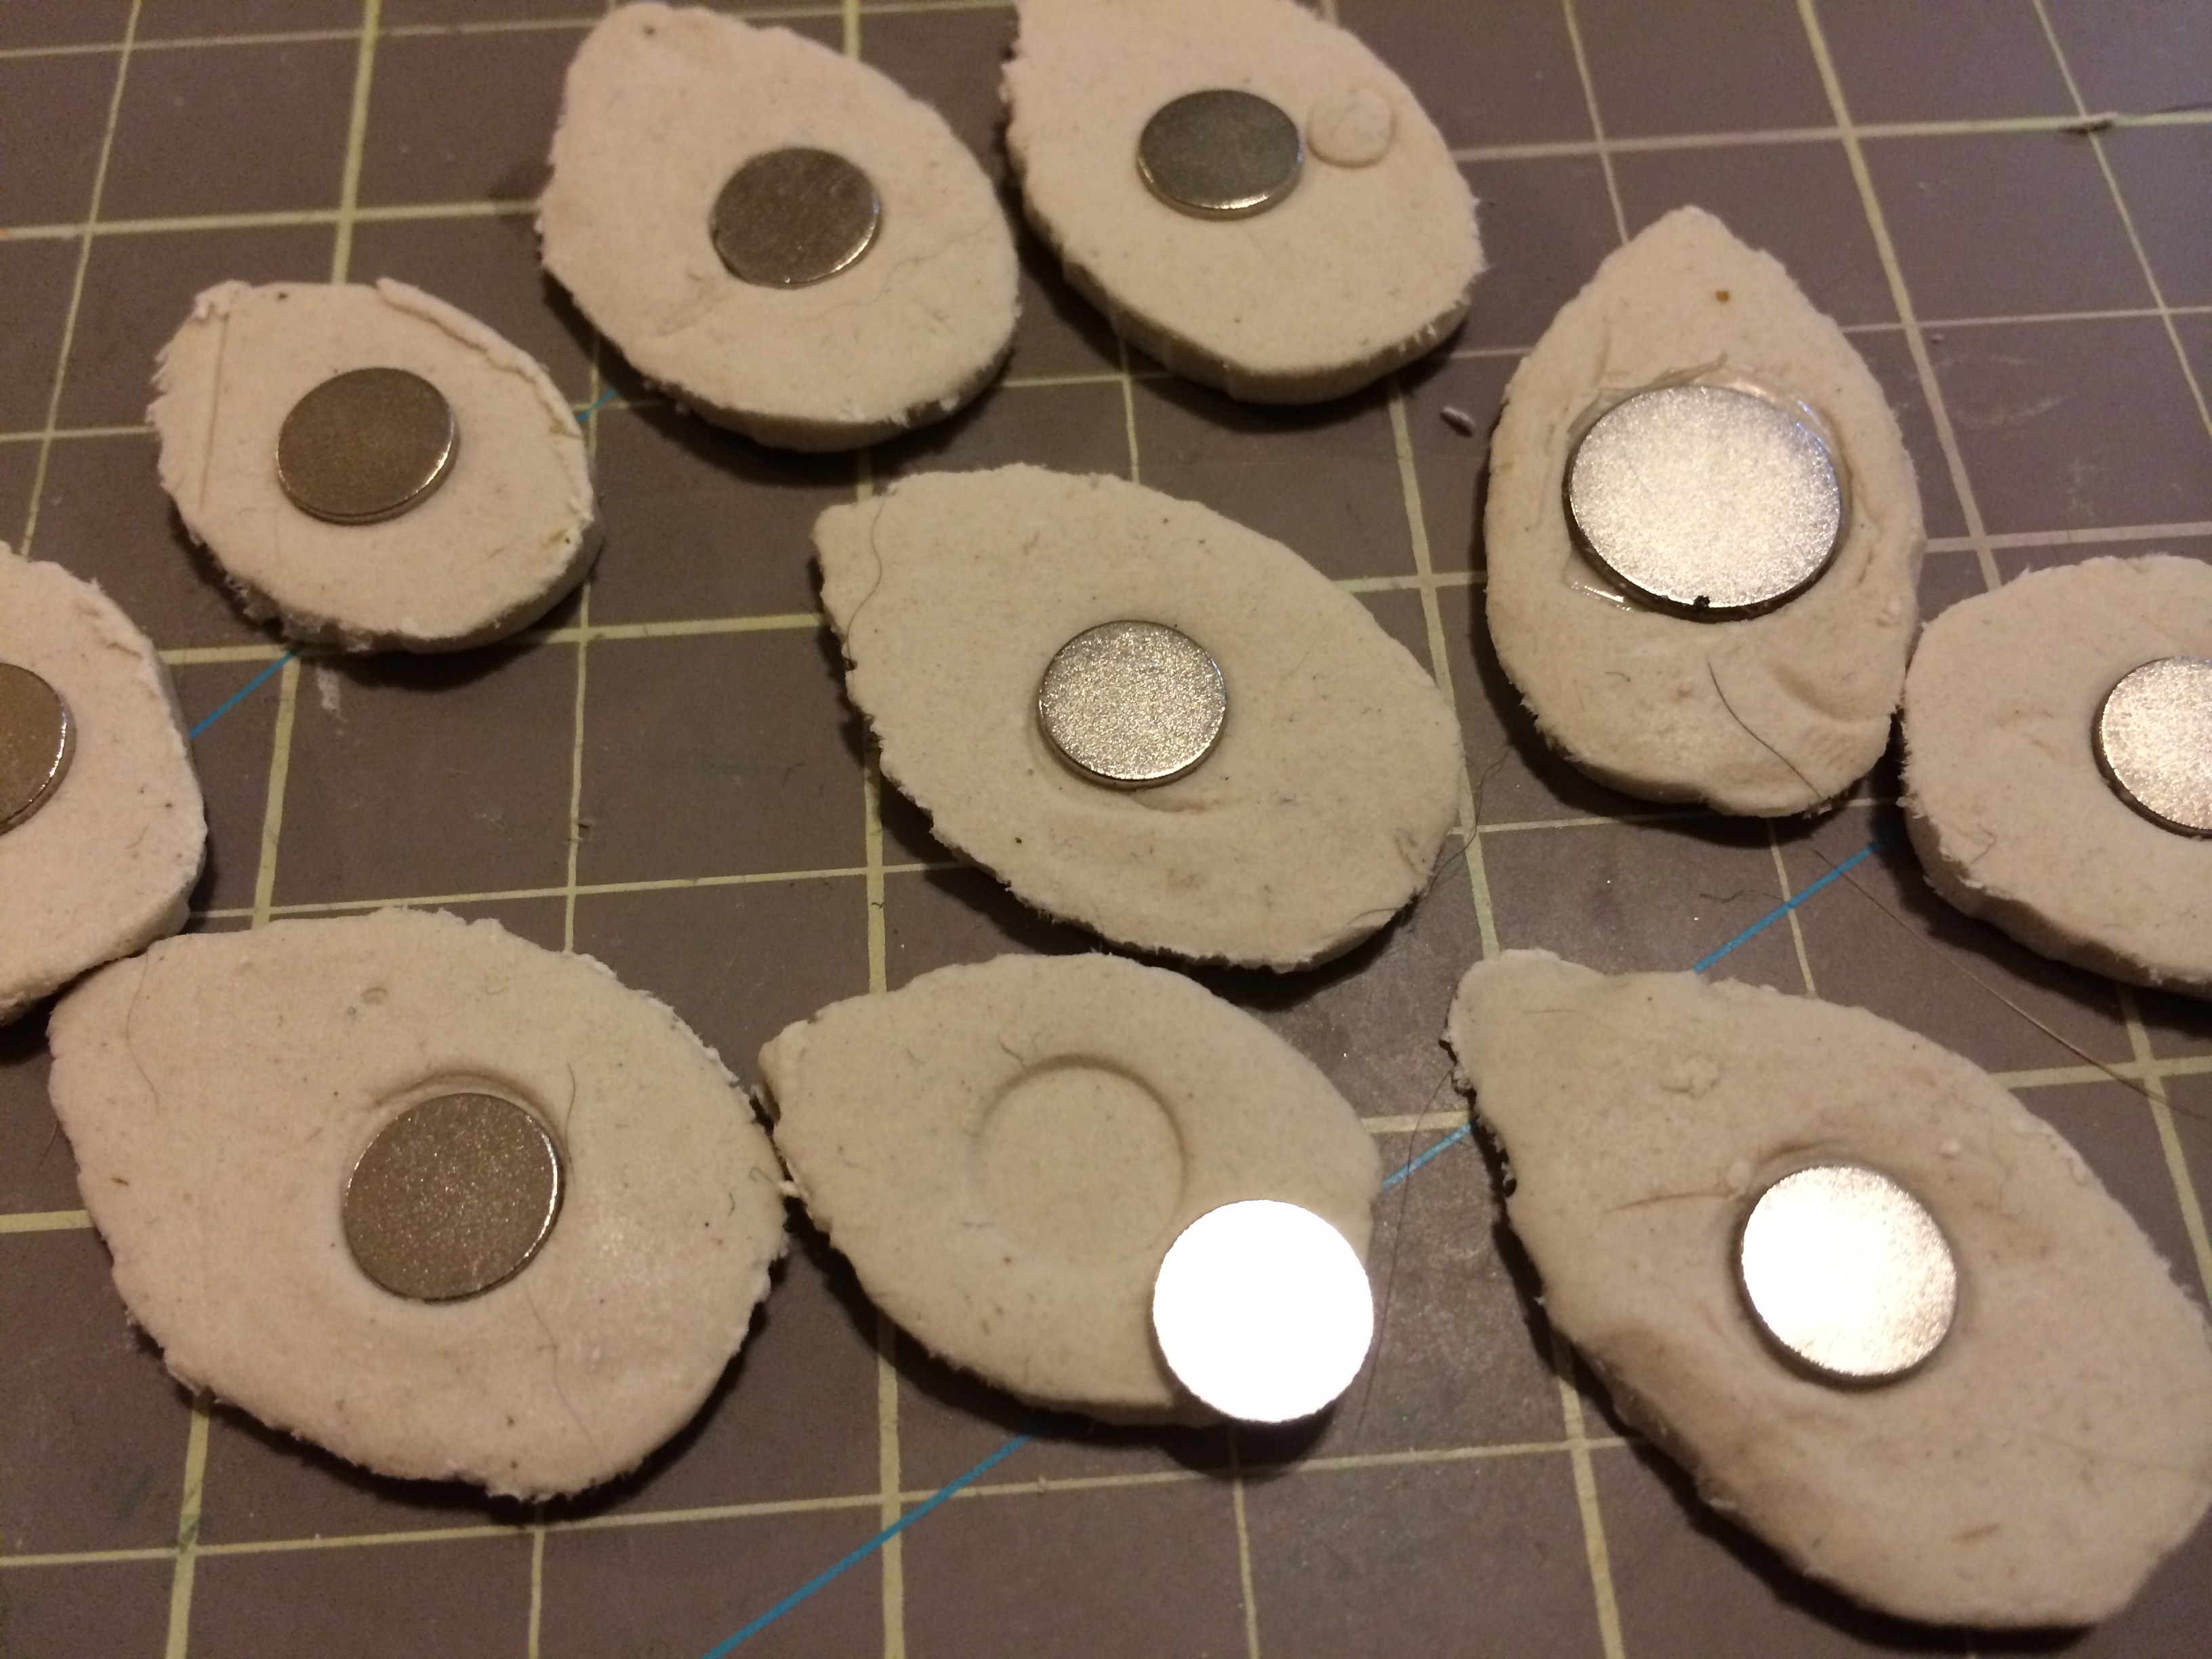
I wanted the magnets to be flush to the board so before they fully dry I pressed the magnet to each leaf that will become a magnet.

Creative Paperclay board

I water the acrylic paint down and started brushing the grass bottom

Creative Paperclay board

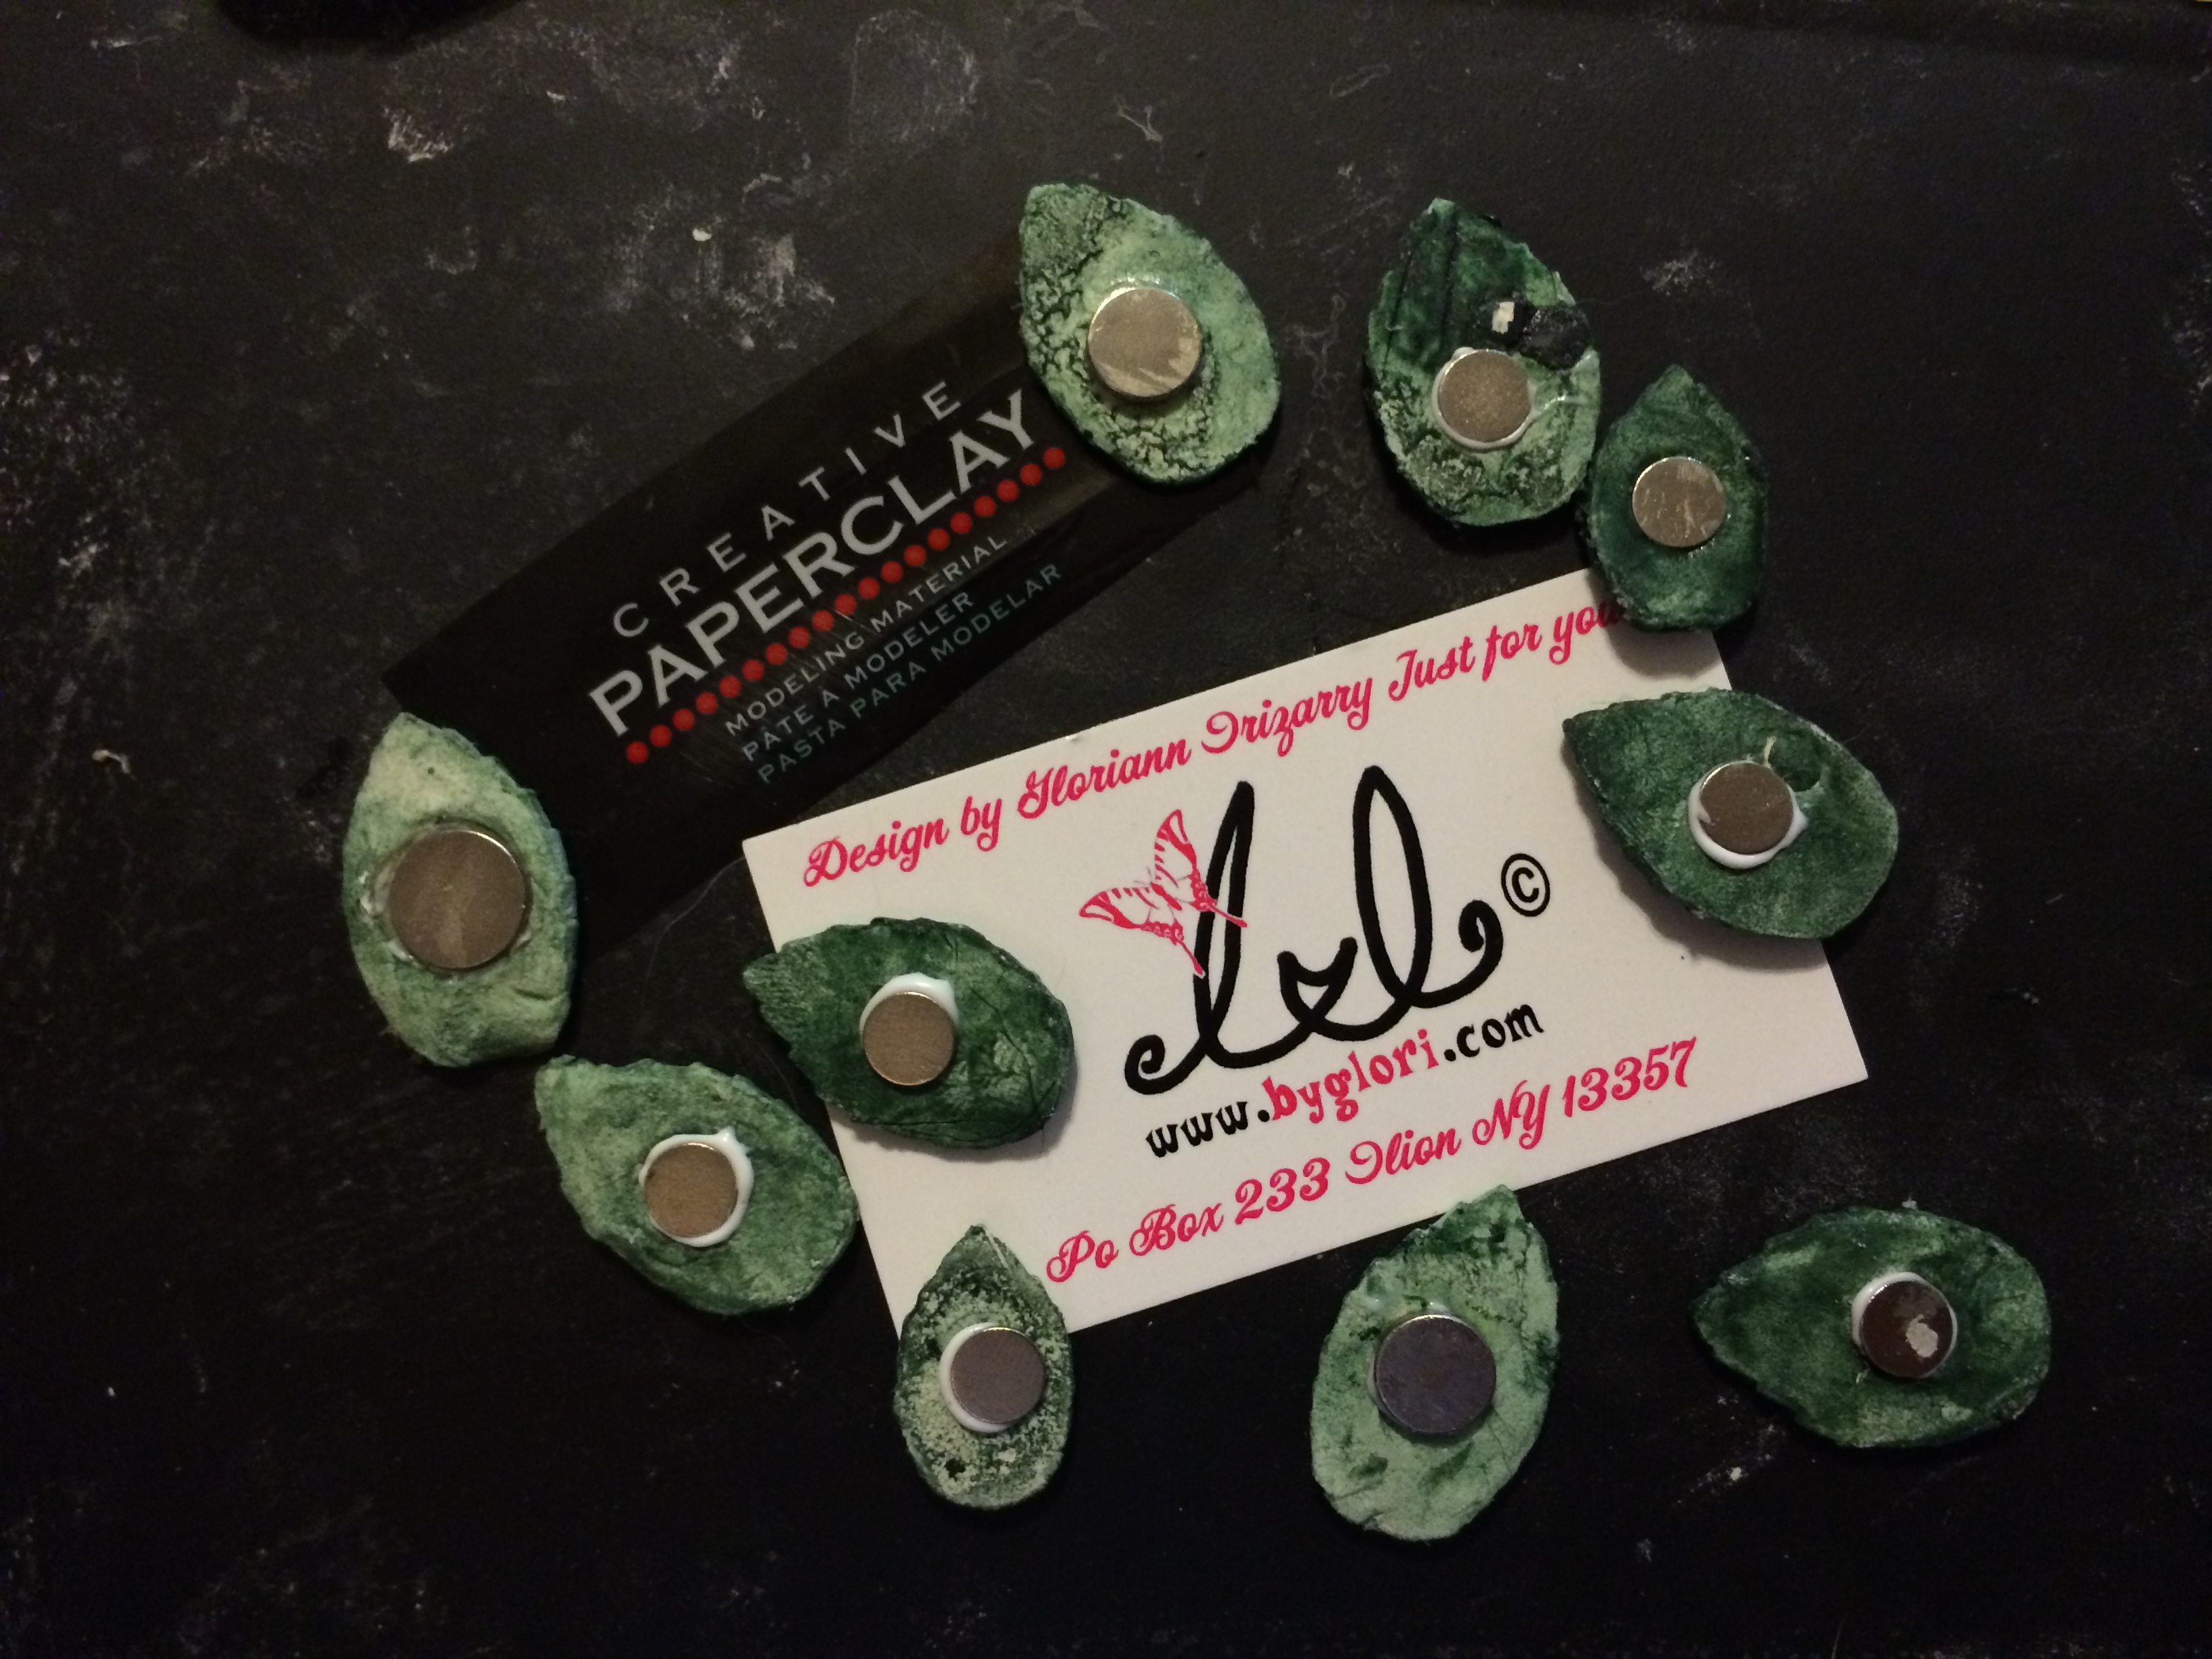
Also painted the leaf and set aside for them to completely dry.

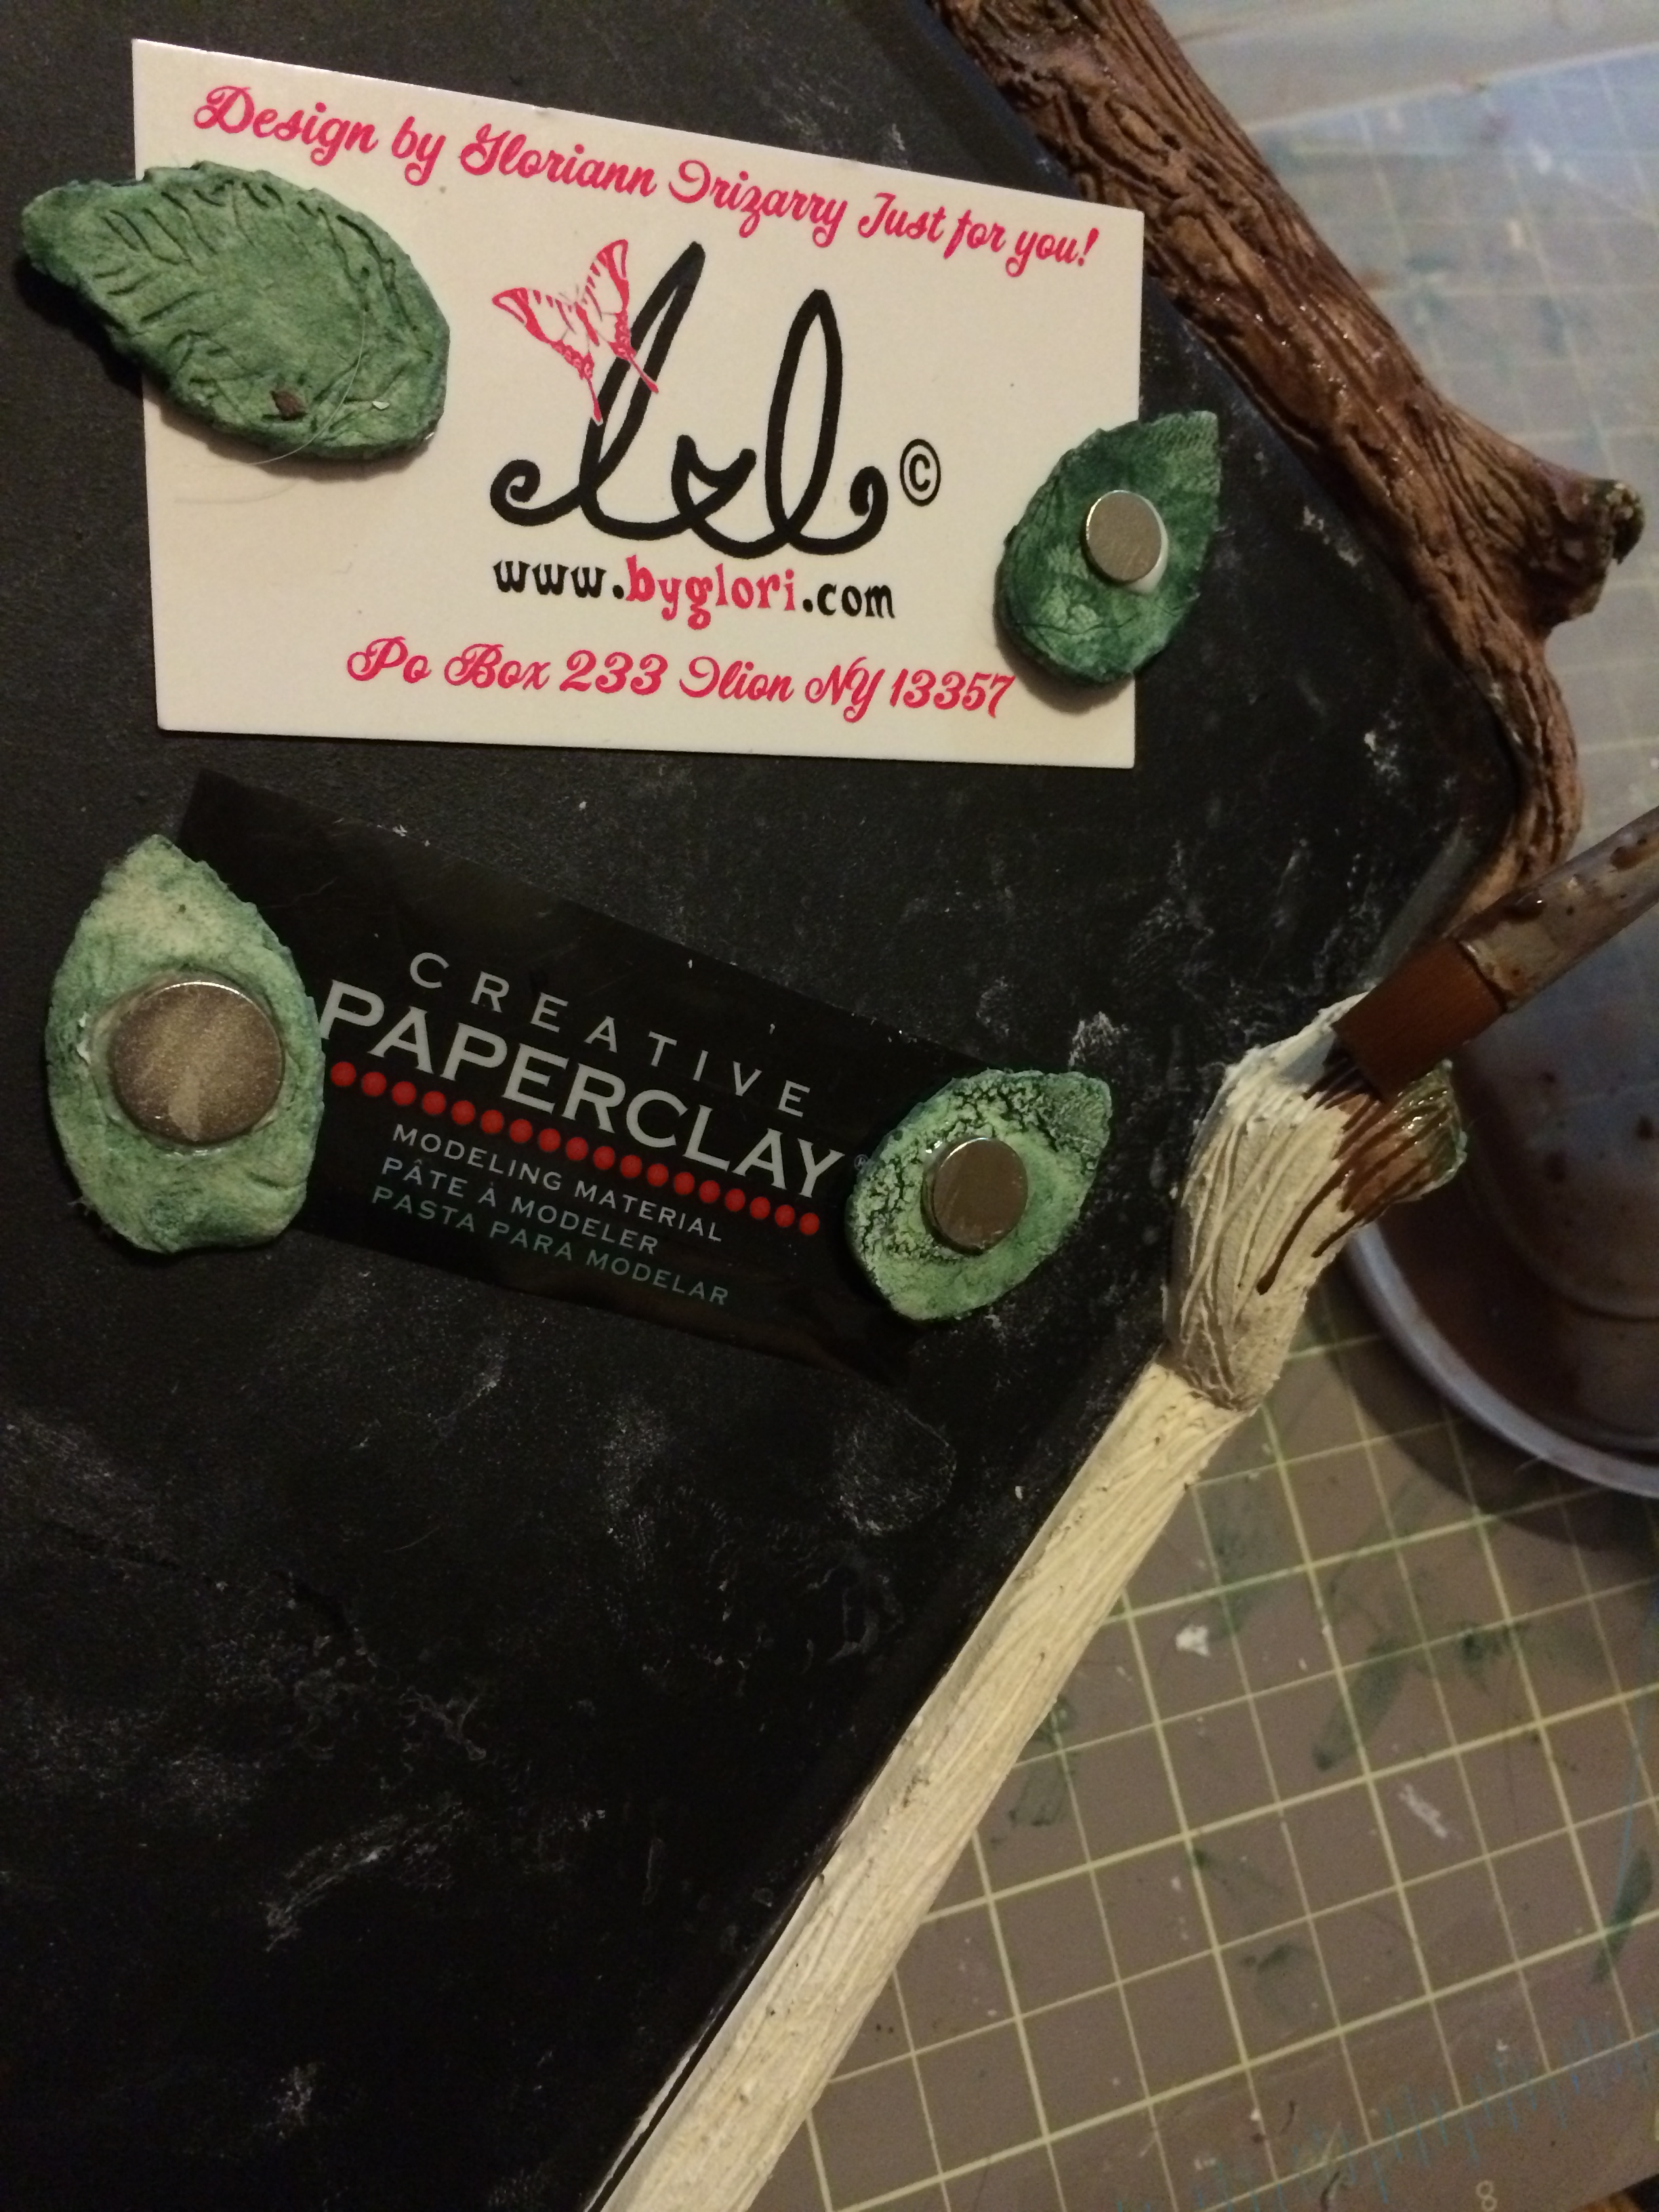
Once they dry, I used my Fast Grab Tacky Glue and glued the super strong magnet to the leaf I had chosen to be the magnetic holder.

Creative Paperclay board

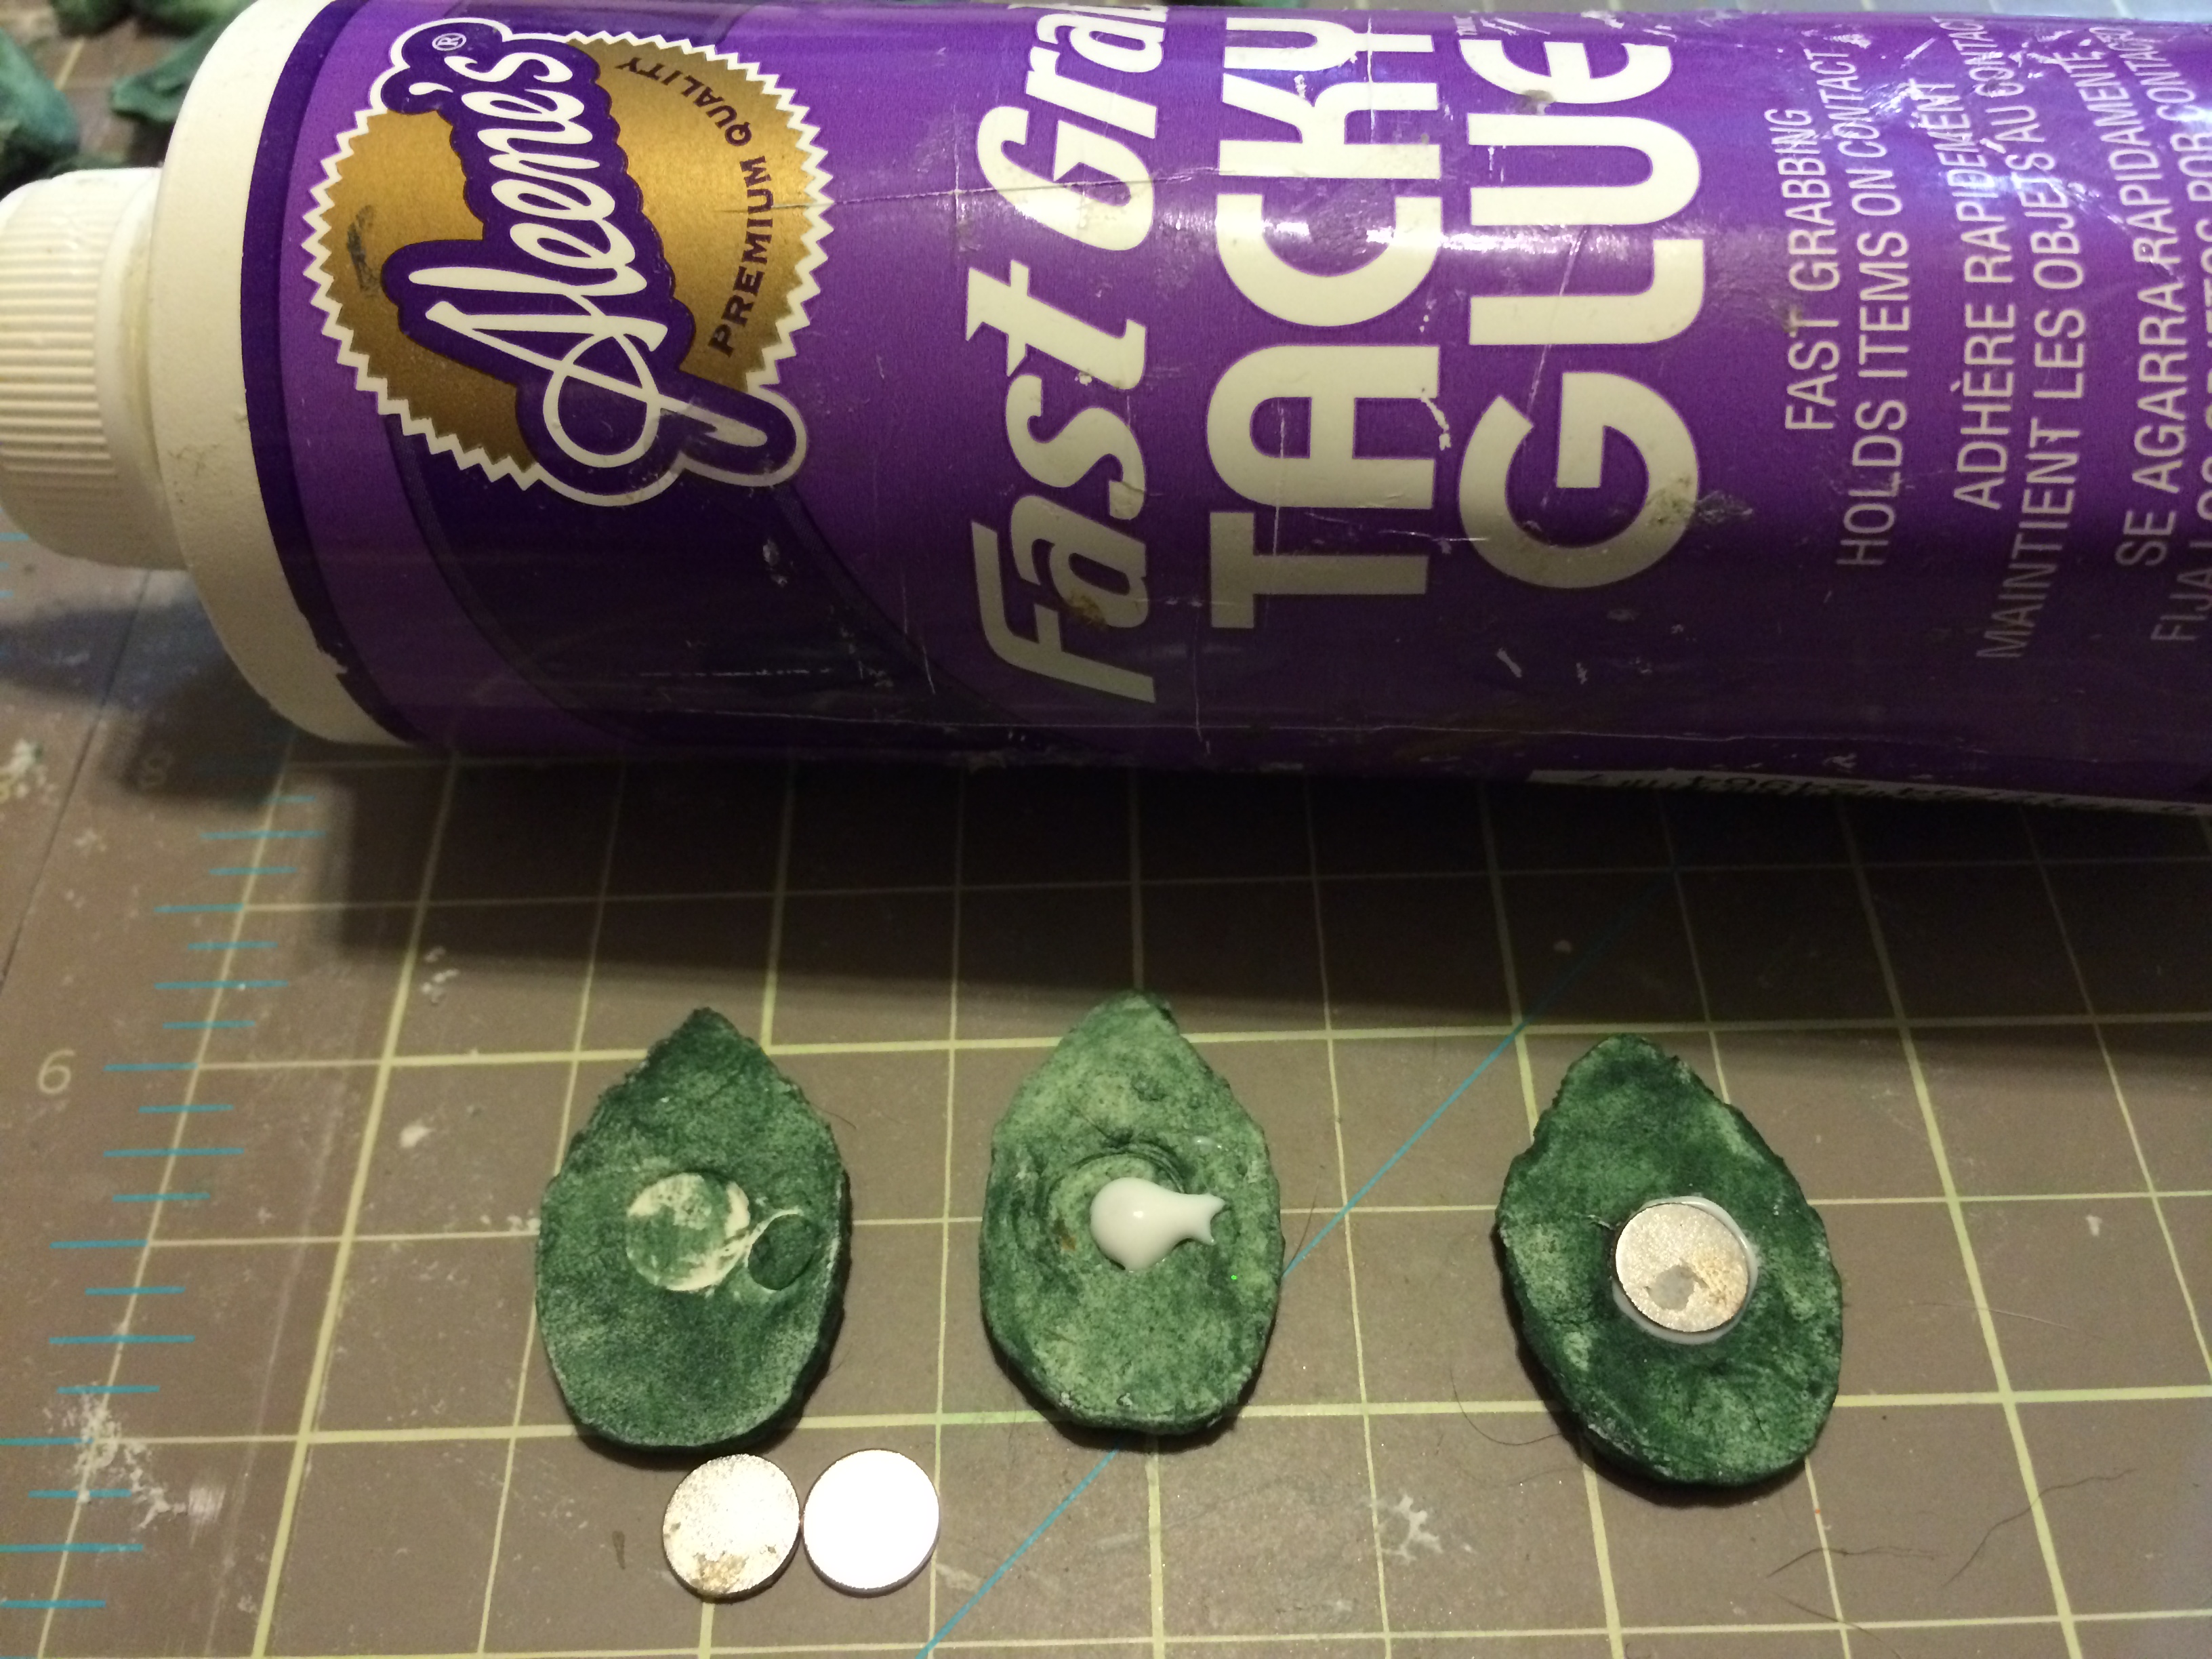
I set the magnets to dry backward on the magnetic board so they will hold while the glue dries.

Creative Paperclay board

To paint the tree trunk, I water down the brown acrylic paint and brush it lightly to the dry trees.

Set aside for the paint to completely dry.

Creative Paperclay board

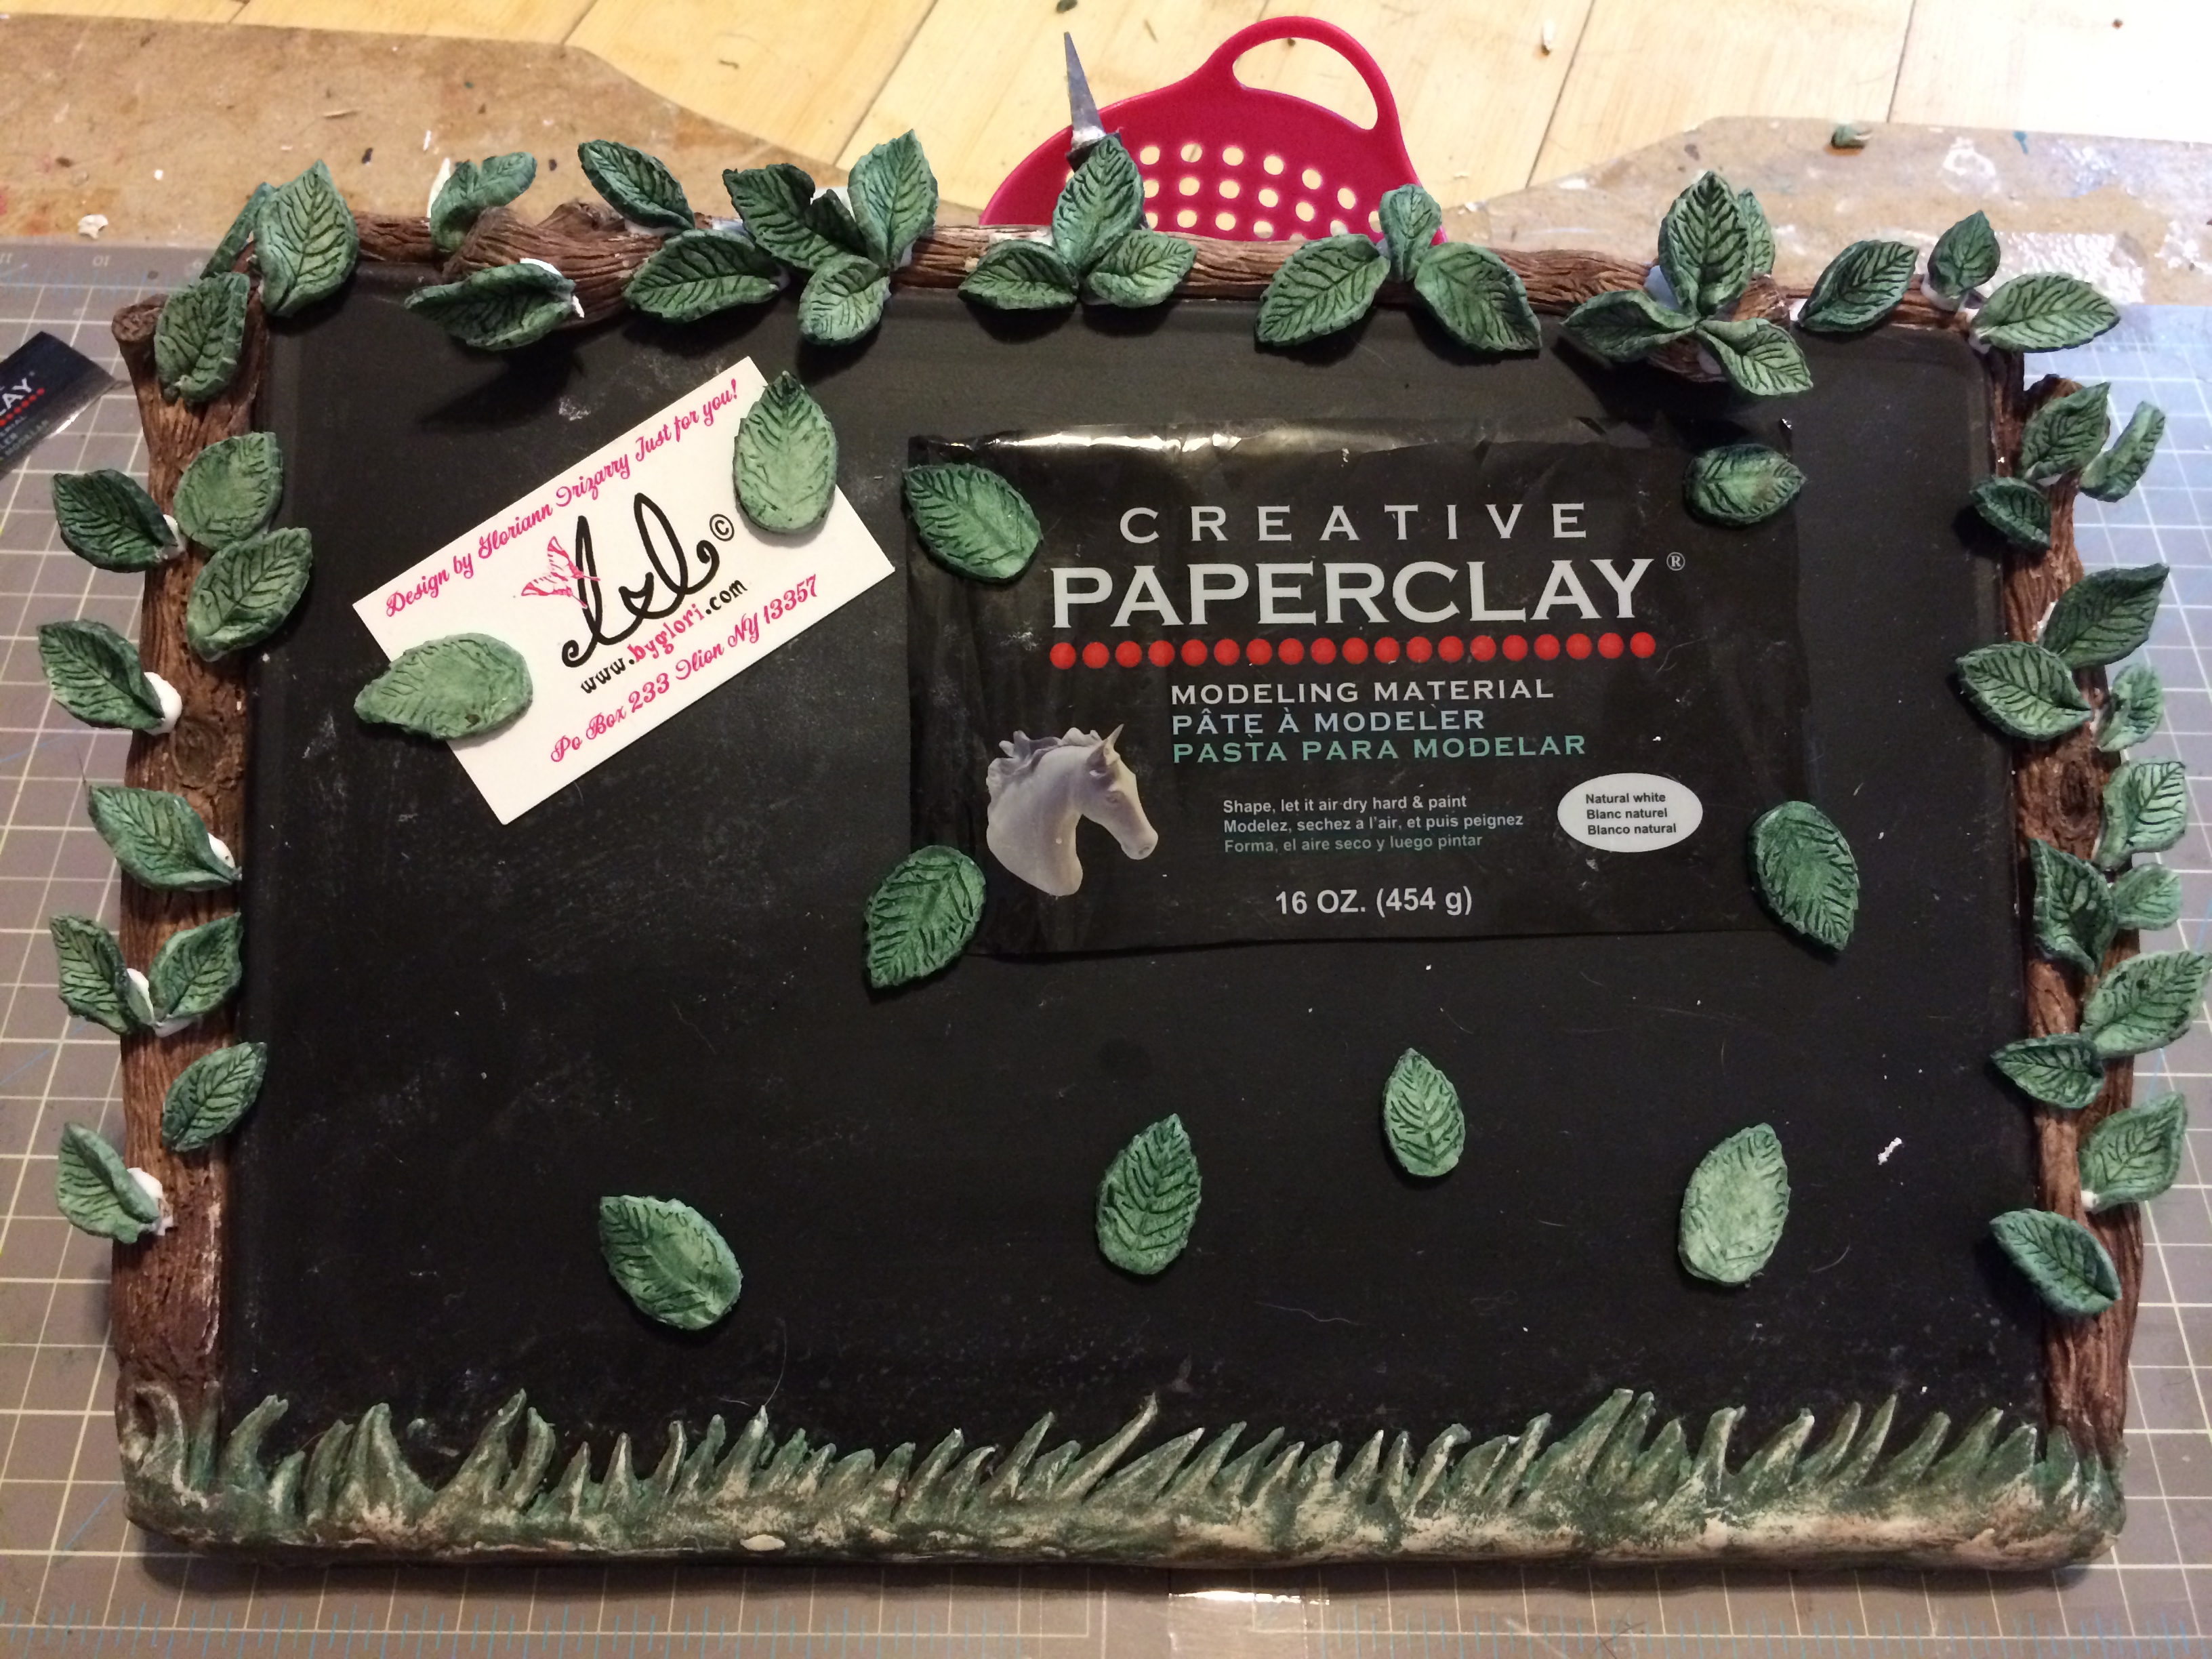
Once the paint had dry, it is time to glue some of those leaf we had work on.

Use your favorite adhesive. Mine is Arleenes Fast Grab Tacky Glue.

Grab each leaf and one by one place a glue dab to the leaf and place it to the tree trunk. Alternate positions to make the leaf look natural while they flow on the Magnetic bulletin Chalk board.

Creative Paperclay board

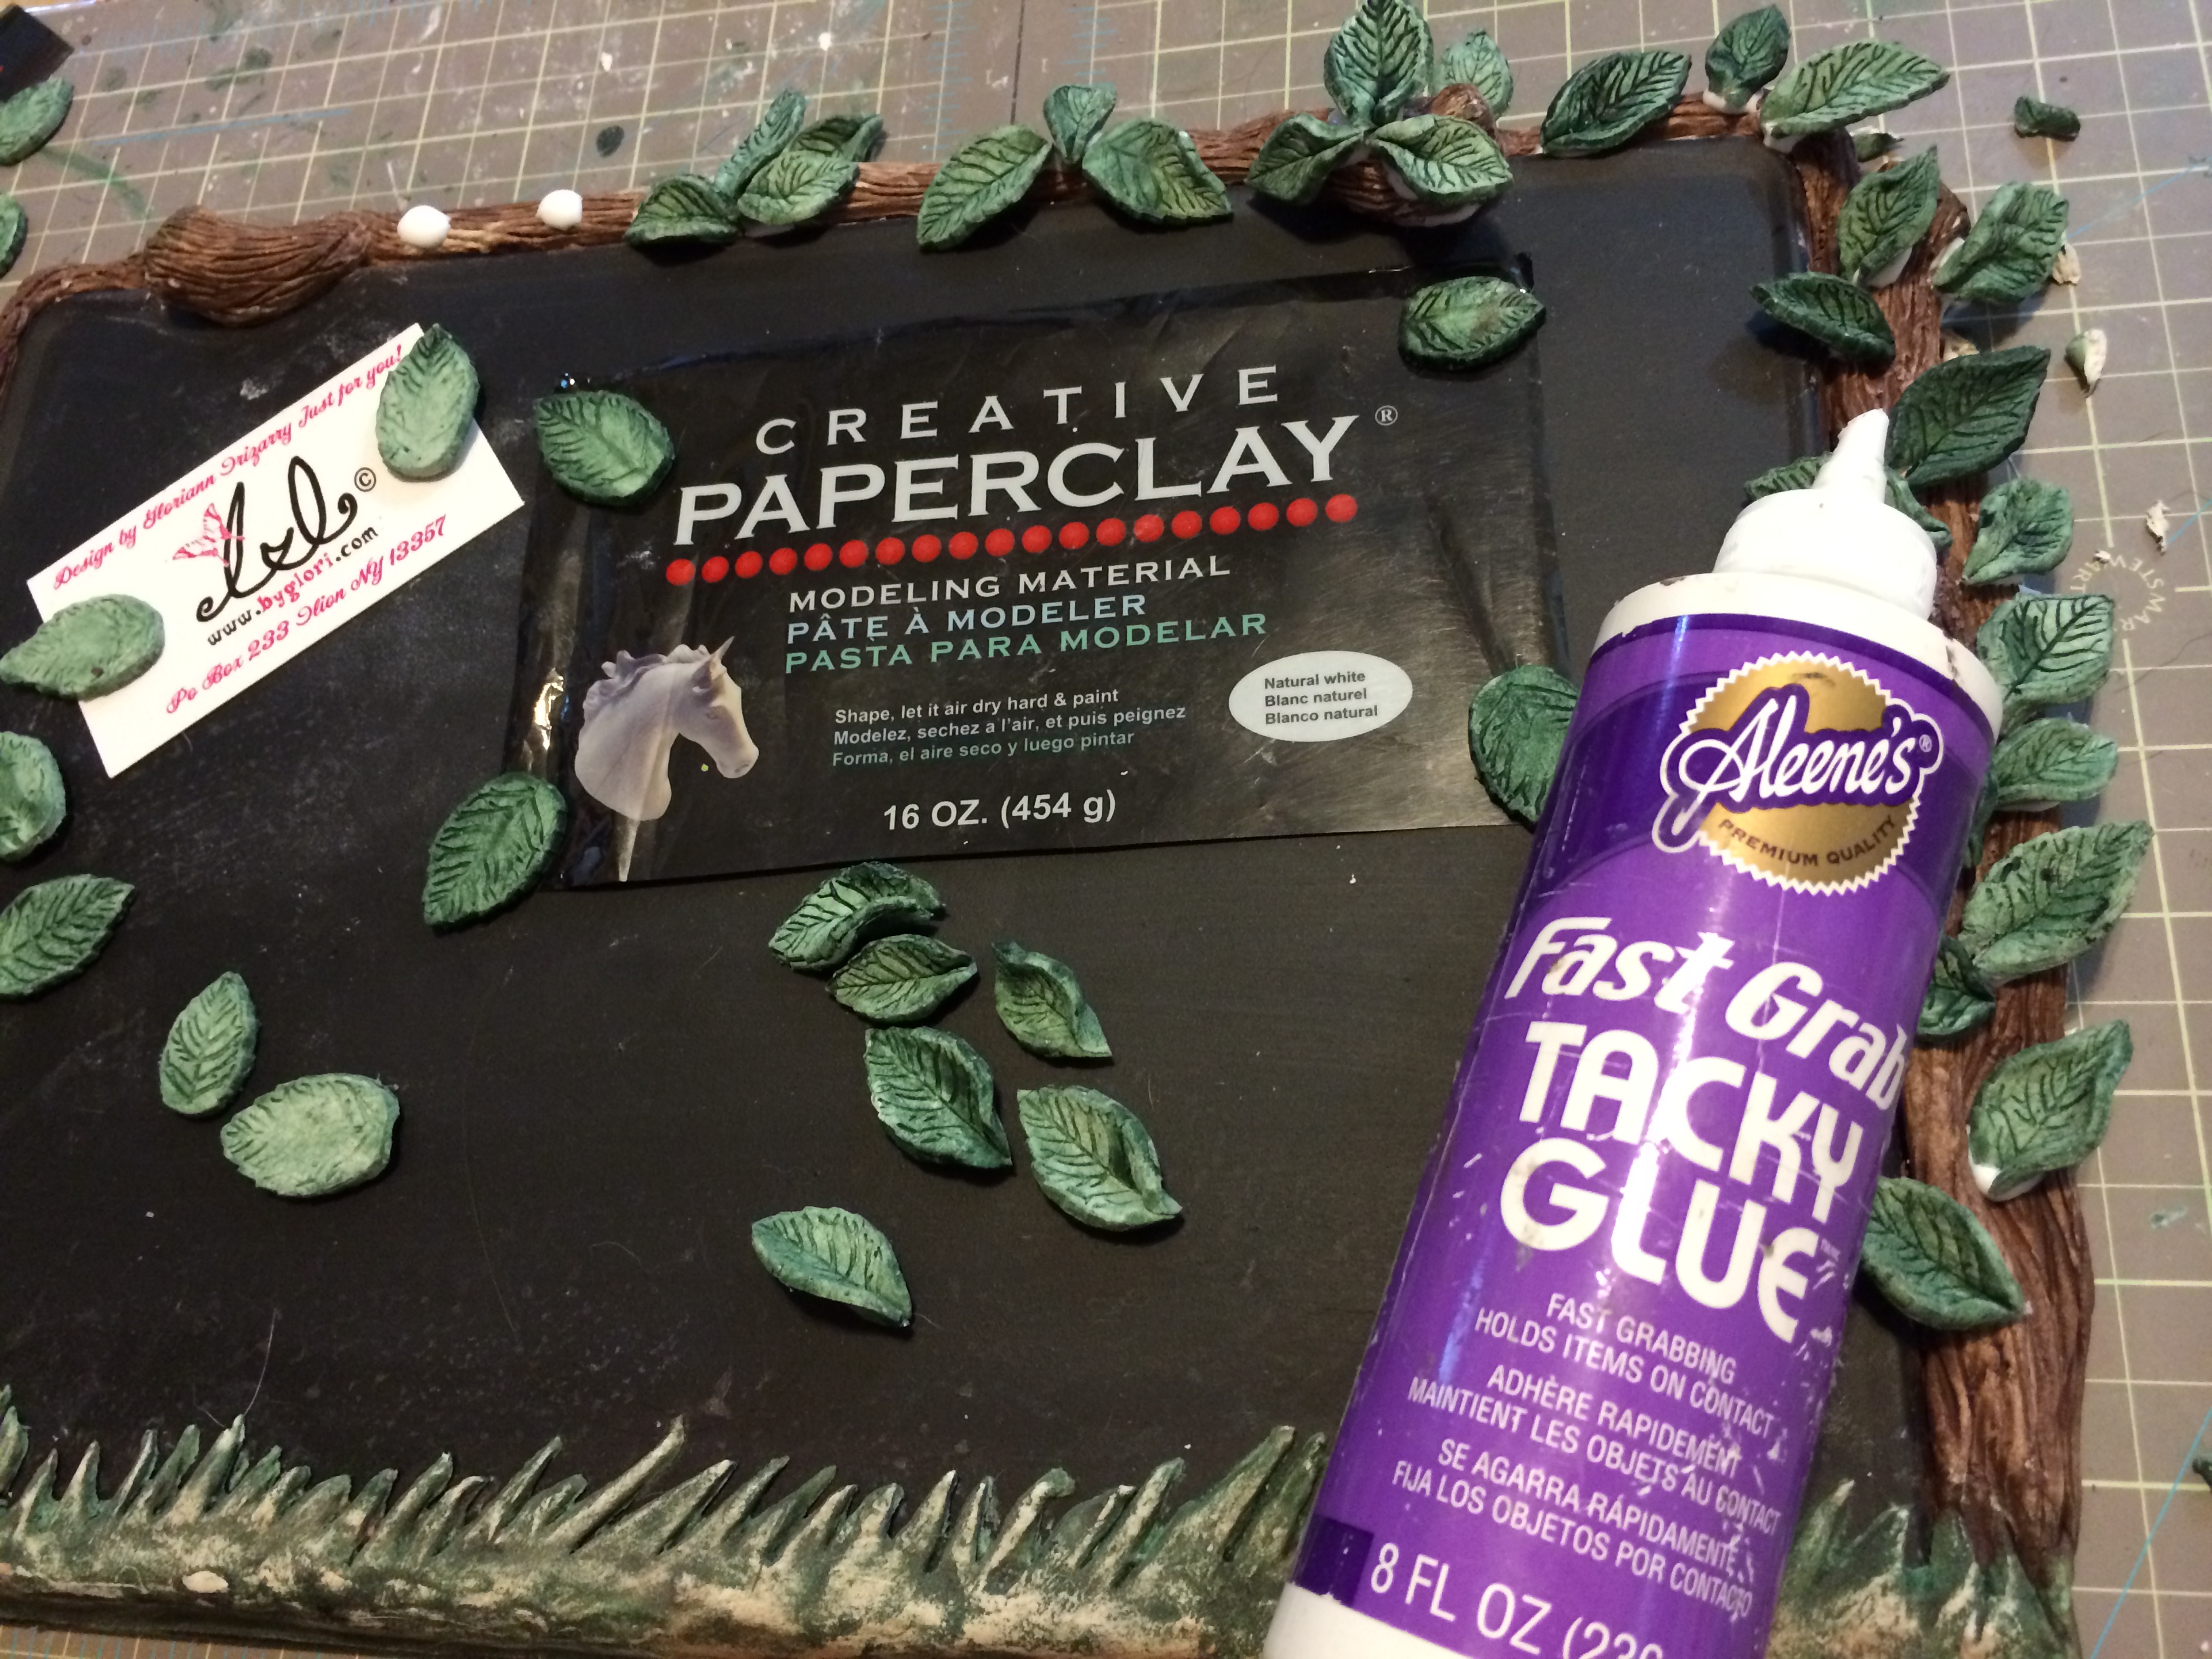
Now it is the time for you to check and see if you like the leaf placement. If you are satisfied, all you need to do is set aside for the glue to completely dry.

After the glue dry get you favorite sealer and brush it on the piece to help it stand the test of time. I choose matte to keep the natural look and keep it looking beautiful.

Creative Paperclay board

With the help of a needle you can tread a ribbon cut to size to proudly hang your master piece.

Creative Paperclay board

Now your new Magnetic Bulletin chalk board is ready to be hang. Feel free to write, pin or stick all your reminders.

I hope this help and allow you to keep track of your events. Please email , post or comment down any question you might have.

Sincerely,

Gloriann Irizarry

~*~*~*~*~*~*~*~*~*~*~*~*~*~*~*~*~*~*~*~*~*~*~*~*~

My name is Gloriann Irizarry. I was born and raised in the beautiful Caribbean island of Puerto Rico. Ever since I can recall, I always had my hands on crayons, scissors and paper. My parents knew from the start how much I love to create!

As a mother of three young wonderful daughters, I find myself working, caring for my family, and taxiing kids from here to there for various sporting events.  I have to say I’m never bored!  I enjoy every little moment I spend with my girls, but will always continue to work time to create art into my daily schedule as that means doing what I love the most. My girls are learning the joys of creating also!

I love to sculpt and will never stop creating. I was born this way and for that I thank GOD every day. Art has been a great way to be creative and to express myself.  I like to keep my hands busy creating – whether it is unique jewelry, art dolls, oak sculpture figures, fairy wings for all your project needs, or even wigs and clothing for your sculptures.  I love all the variety in art! Why? because ART is so rewarding. Seeing your creation take form is an awesome feeling.

You can see more of my work on my website – ByGlori

~*~*~*~*~*~*~*~*~*~*~*~*~*~*~*~*~*~*~*~*~*~*~*~*~

.

.

Paperclay Hand Sculpted Elf Fairy Throne

~ * ~

This article was written by Gloriann Irizarry

Gloriann Irizarry has created this amazing paper clay fairy throne with vines and roses

Hi my dear friends. It is Gloriann Irizarry once more with a nice one of a kind tutorial. I notice how much my little girls love to play with theirs dolls and letting their imagination go to far away magical lands. This gave me an idea. Why not make a Magical Throne.  Yes something really mystical and beautiful.

Well I created another Paper clay tutorial. It will include the full instructions and easy steps to follow to  complete this project.

Materials

1 Foam board

Ruler

Xacto Knife

Eraser

Pencil

Scissors

Hot glue gun and refills

Mulberry paper roses

2 Bags of Creative Paperclay Material

Clay roller

Ivy leaf cutter

Water spray bottle

Acrylic paints ( Dark brown, Pearl hunter green, Gold and black)

Paint brushes

Embossing tool also know found on nail art to add small details

Cotton Balls

These are some of the materials I use but feel free to add more items is you prefer to.

Instructions for Paperclay Fairy Throne

Gloriann Irizarry has created this amazing paper clay fairy throne with vines and roses

I like to start the creative process with a sketch out. This will give me a guide to how the final project should look like and allow me to get the measurement just right before the final piece is complete.

Gloriann Irizarry has created this amazing paper clay fairy throne with vines and roses

I used the sketch and create a template following the doll measurements so the throne will fit her just right once the sculpture is complete. Trace the pieces down to your foam board and carefully cut with a sharp Xacto knife blade. Line them up for easy assembly with the hot glue.

Gloriann Irizarry has created this amazing paper clay fairy throne with vines and roses

Use the hot glue gun to piece them up. I like the hot glue due to be stronger and faster bond for the foam boards.

Gloriann Irizarry has created this amazing paper clay fairy throne with vines and roses

Fell free to use has much glue that you want. This is going to be out armature so do not worry about drips or over glued seems.

We  are  going to cover all of the foam board later with the Creative Paperclay.

Gloriann Irizarry has created this amazing paper clay fairy throne with vines and roses

Once the hot glued item is all dry and you had confirm the armature has all the dimensions and measurements just right  I start by rolling our the Creative Paperclay material out ins a 1/4 thickness sheet. I used my really big roller to complete this project faster but the smaller roller will also work  just make many smaller sheets and layer the foam board little by little.

Gloriann Irizarry has created this amazing paper clay fairy throne with vines and roses

Make sure the entire foam armature is entirety cover from head to feet with the 1/4 thickness sheet of the Creative Paperclay. Use your scissors to cut any clay excess and your water spray to smooth the out.

Gloriann Irizarry has created this amazing paper clay fairy throne with vines and roses

Once the entire Throne is all covered with the first layer of 1/4 Creative Paperclay sheet layer carefully to dry. Yes the piece will be heavy and fragile due to the clay  moisture so make sure it is carefully placed in a safe spot and wait for the clay to be completely dry.

During the winter I lay my sheet in front of the heater vent so the warm air will dry the whole first layer.

Gloriann Irizarry has created this amazing paper clay fairy throne with vines and roses

Once the first layer is all dry and the chair is much lighter you will know it will feel a little more stronger and sturdier than when it was wet. Still handle the piece with caution since the clay sheet was only 1/4 thick and we are going to add another 1/4  wet sheet over it. This will get the first layer a little soft. Work the second coat all over the first layer from head to feet once more.

Gloriann Irizarry has created this amazing paper clay fairy throne with vines and roses

Don’t let the second coat completely dry. Mist the Throne with the spray water so it is a lot easier to add the final details to the piece.

The ivy vines are fairy easy to make.  I rolled the clay to the same 1/4 thickness and cut stripes out in different lengths. You probably wonder why cut stripes but aren’t the vines round?  Well I prefer to have round for the vine look but have a a flat back to adhere them easier to the Throne and achieve the natural look without being worry of the peeling off once the clay dries.

The flat clay sheets I cut will average 3/4 inch and 1/4 thickness. Fold them in half  on the short end . From 3/4 inches x 8 inches long will end up being 3/8  x8 inches long.  Completely moist the flat portion and attach it to the Throne from the flat part. Leave the rounded curve exposed to the front view. You will end up with a very secured vine to the Creative Paperclay  to the Throne.

Gloriann Irizarry has created this amazing paper clay fairy throne with vines and roses

Make sure to be very gentle at this stage because the moisture from the second Clay sheet has made the piece heavier once more and very susceptible to breakage if not handled carefully.

Not to worry and make sure you don’t have to touch it too much, place the Throne in a cheap one dollar oven tray. That way you can rotate it without leaving finger marks or breaking a leg off and since the tray is only a dollar you can dispose of it or save it for your next project.

Remember to keep the entire Throne wet by mist the water all over it. This way you can add the wood details one the whole vines are attached. Use your favorite tool to complete this wood detail by carving the grain. I prefer the round embossing tool. Why? Simply they come in different sizes and I can alternate them so it look natural and not plain. Carve little by little with the tool and clean it every so often with a paper towel to be able to get clean groves and the grain pattern to look more natural. You can use a visual reference to get the grain to flow beautifully. This will be noticeable at the last paint coat.

Gloriann Irizarry has created this amazing paper clay fairy throne with vines and roses

I start the first coat with the dark brown acrylic paint. Cover the entire piece vines and all. This will be the base color anyway and the details will be added in the later coats.

Gloriann Irizarry has created this amazing paper clay fairy throne with vines and roses

I used wet cotton balls to clean off some of the base coat. Doing this will reveal the wood grain detail and made the wood look age and natural. You will repeat this process of wetting the cotton ball and clean the Throne until you feel you had achieved the right aged look. Once the cotton ball is too saturated in paint use a new wet cotton ball.

Gloriann Irizarry has created this amazing paper clay fairy throne with vines and roses

For the vines I use a water down Pearl Hunter Green color. Do not over saturate the paint  brush. You don’t want the vines to look like an old cartoon. To make these look aged moist the brush and dab any excess paint and little by little stroke the vines until you like how they look.

Gloriann Irizarry has created this amazing paper clay fairy throne with vines and roses

Do the same on the base. You can use the paint brush or a wet cotton ball over one coat of green,  one  coat of brown and one coat of black acrylic paint dabbed one over another this will create the effect of a moss aged look.

Gloriann Irizarry has created this amazing paper clay fairy throne with vines and roses

I like to place the vine leaf on top freely before I decided where I will be placing the final glue. But before I do that placement I will show you how I painted them the fast Glori’s way.

It might look overwhelming to think “OMG I have to paint over 100 individually pieces one by one?”

Well My answer is: Nope, Their is ALWAYS a better and easier way.

I really don’t have the luxury of time. Having a full time Office  job, also being a mom and wife  it makes my crafting time very limited. I had put that conflict to work for me. Yes, It has me always developing new time saving techniques all the time.

Gloriann Irizarry has created this amazing paper clay fairy throne with vines and roses

I cut or punch out all my Creative Paperclay  Ivy leaves out of 1/4 thickness clay sheet. Let them fully dry to a light crispy feel. This is essential to the next step.

In a ziplock bag add the leaf-colored acrylic paint. Completely mix the paint with some water and create a very thin wash. You will end up with a light watery inky green color. Now the fun begins. Fill the Ziplock bag with all those tiny leaves.

Make sure you do this in a very short time. Remember they are made out of a thin sheet of paper clay and they will get soft once more if they are exposed to the water for a long time.

Carefully mix the leaves with the watery inky green paint, rotating the bag and lightly shaking them all over. Look at the bag to make sure the water had mix in with all the pieces.

When all of the leaves are painted, use scissors made a small cut on the corner of the bag to drain all the excess paint off.

Carefully remove the leaves and place them over to dry over a baking sheet. Let them to dry over night.

Gloriann Irizarry has created this amazing paper clay fairy throne with vines and roses

For the second coat I wanted the veins of the leaves to really pop. So you can repeat the Zip lock bag trick but this time with a darker but watery tone . Now once removed from the bag, place them facing up over a washcloth. This will ensure the watery black-green will pool over the veins and once dry you will notice the veins.

Gloriann Irizarry has created this amazing paper clay fairy throne with vines and roses

In this photo you can see to the left is the final leaf, the middle leaf is the with the first green coat only and the right is the naked Creative paperclay cut.

Gloriann Irizarry has created this amazing paper clay fairy throne with vines and roses

Before placing the leaves onto the throne I added one more layer of a very, very watered down black paint all over to make the wood grain look even more natural . I like how the black pool inside the grove and when it dry gives the effect of an aged magic forest tree trunk.

Gloriann Irizarry has created this amazing paper clay fairy throne with vines and roses

I apply the watered down black paint the back  too.

I will now decided where I want the leaves to go. Glue every single one carefully.

Once the hot glue is strong you can seal your piece with your favorite clear sealer and wait to dry.

Wait for the sealer to be fully dried and add the Mulberry paper roses to the Elf Fairy Throne.

I purchase 4 different blooming stages of the flowers, so the piece will have a real mystical and magical feel.

I started to glue the rose buds to the top and in the mid section, then I glue the second open rose bud. Lower little by little to the fully open roses. I added the old roses one to the top of the Throne,  2 on each hand reach and one to the button right of the Throne leg.

One the back only one right on the center to make the rose pop.

Gloriann Irizarry has created this amazing paper clay fairy throne with vines and roses

Gloriann Irizarry has created this amazing paper clay fairy throne with vines and roses

Gloriann Irizarry has created this amazing paper clay fairy throne with vines and roses

Gloriann Irizarry has created this amazing paper clay fairy throne with vines and roses

Gloriann Irizarry has created this amazing paper clay fairy throne with vines and roses

~*~*~*~*~*~*~*~*~*~*~*~*~*~*~*~*~*~*~*~*~*~*~*~*~

My name is Gloriann Irizarry. I was born and raised in the beautiful Caribbean island of Puerto Rico. Ever since I can recall, I always had my hands on crayons, scissors and paper. My parents knew from the start how much I love to create!

As a mother of three young wonderful daughters, I find myself working, caring for my family, and taxiing kids from here to there for various sporting events.  I have to say I’m never bored!  I enjoy every little moment I spend with my girls, but will always continue to work time to create art into my daily schedule as that means doing what I love the most. My girls are learning the joys of creating also!

I love to sculpt and will never stop creating. I was born this way and for that I thank GOD every day. Art has been a great way to be creative and to express myself.  I like to keep my hands busy creating – whether it is unique jewelry, art dolls, oak sculpture figures, fairy wings for all your project needs, or even wigs and clothing for your sculptures.  I love all the variety in art! Why? because ART is so rewarding. Seeing your creation take form is an awesome feeling.

You can see more of my work on my website – ByGlori

~*~*~*~*~*~*~*~*~*~*~*~*~*~*~*~*~*~*~*~*~*~*~*~*~

.

.