Review of Janelle Nichols’ “Little Birdie” Online Class

~ * ~

This article is written by Ann Strecko Koeman

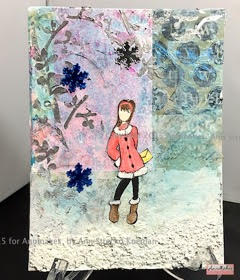
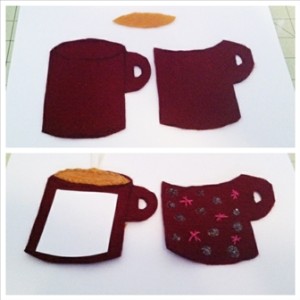
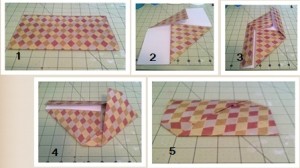
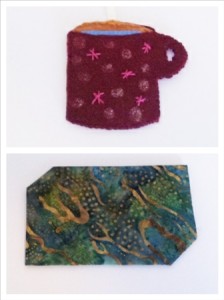
A while ago I got the opportunity to review Janelle Nichol’s Mixed Media class: Little Birdie. The class is available at “Skillshare”.  Being an avid maker of all things, and a lover of learning new techniques I was very much looking forward to testing out this new to me format. I can honestly say that I was pleased.

Ann’s project

For one thing, going on the Skillshare website was easy.  Second,  finding the class by Janelle was simple.  All that was required of me were a few clicks on the keyboard. Easy peasy! The hard part came when I began to doubt my own abilities to create something as pretty as the teacher herself had made. However, it did not take long for the soothing voice of the teacher to ease my concerns.

Janelle takes the time to explain all the steps involved in making the project. She gives a lot of information and goes into quite a lot of detail on how to accomplish each step. My favourite aspect of taking the class was the ability it gave me to stop, pause, go back to any part of this video class.  As my own life got quite busy all of a sudden. I needed to take a long break from completing the class.  However, when I returned I was able to just replay the video and begin anew.

Ann’s 2nd project

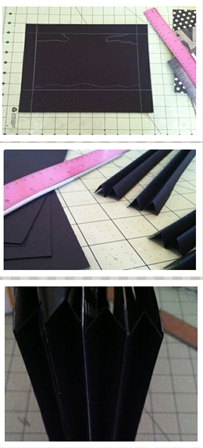
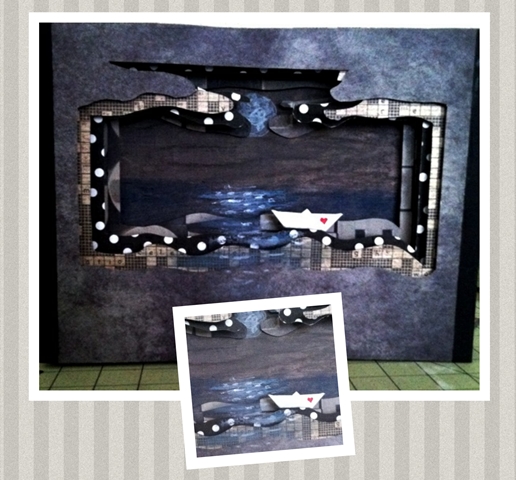
I enjoyed taking a class in this format because of the flexibility it allowed. I also appreciated the extensive notes and lists that accompany the class. It was a pleasure for me to create two projects over on my Youtube channel Annmakes that were due in part to the influence I got from taking Janelle’s class. The links to the two examples I made are here:


You can view the introduction to the Little Birdie class on Skillshare here.

~*~*~*~*~*~*~*~*~*~*~*~*~*~*~*~*~*~*~*~*~*~*~*~*~

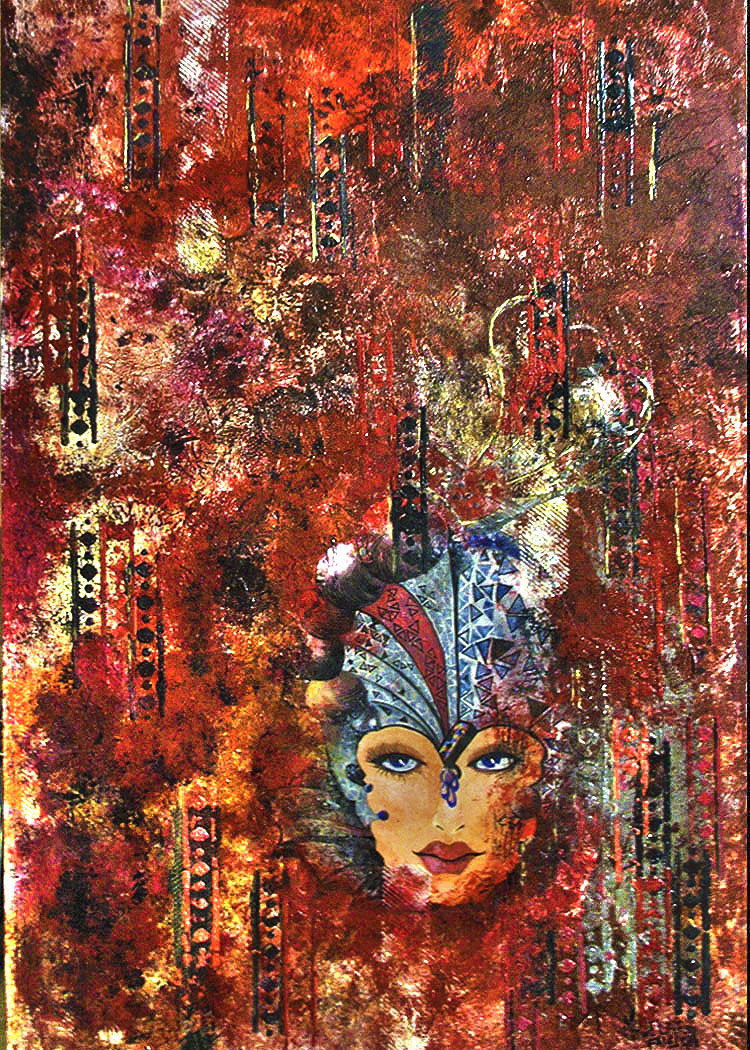
Ann loves to collect and organize as many tools and supplies as possible because she is always making things.  Incredibly she finds a use for most of her collections.  She enjoys making Mixed Media Art because it allows her to use all her skills and collections.

~*~*~*~*~*~*~*~*~*~*~*~*~*~*~*~*~*~*~*~*~*~*~*~*~

Disclosure: Access to this course was supplied by Janelle Nichols for the purpose of review. All opinions are that of the MixedMediaArt team. Some links on this page may be affiliate links and any purchases help to support the ongoing work by MixedMediaArt. 
.

.

Making Gift Card Wrappers

~ * ~

This article is written by Katja Blum 

It took me a while to like gift cards. In my family, gift cards, certificates and all kinds of “pick your own” gift promises were seen as an afterthought, proof that the giver didn’t remember until the last minute or put much thought into your gift. I don’t think that’s true. In my mind, a gift cards says “I think you deserve a treat, please pick exactly what would make you smile right now”. Whereas very sensible and frugal people might use a check or cash to do sensible and frugal things, a gift card is fun. It doesn’t look like “real” money, and it’s perfectly okay to spend it on something entirely frivolous.

Hurray for gift cards – but let’s be honest: Sometimes we do buy them at the last moment. So here are a few ideas for some mixed media flavored presentation ideas for holiday gift cards.

General tip: You shouldn’t glue, staple or otherwise directly attach a gift card to anything, because you might damage the strip on the back. Many cards come with a small envelope anyway.

If you have a day

If you still have a day, anything is possible! How about making a collage or mixed media painting and using the envelope as part of the background? Just affix it to whatever paper or canvas you are using and paint, stencil and decorate right over it. Just make sure you have the flap facing out, so the card can be inserted and removed without ripping the envelope off the painting. And don’t glue the flap shut with gel medium. Or make your own simple card pocket by gluing a piece of paper, card or fabric to the piece on three sides, leaving the top open. While painting, you can slip a piece of freezer paper into the pocket to avoid pasting it shut.

If you have a few hours

I like felt ornaments. They are easy to make – and felt can be decorated with anything. The coffee shop card I’m giving this Christmas is going in a little mug ornament, which I plan to slip on the recipient’s tree, so she can find it later.

Gift Card Wrappers

  1. Cut out the mug shape and oval “coffee”. Use the shape as a template to cut out the mug again, but without the top. This will be the pocket for the gift card. You can do this with any shape. If you want to make a snowman, for instance, just cut out the bottom snow balls. Or you could cut out your ornament and put a rectangular pocket on the back – but I like the card peeking out in the front.
  2. If your ornament is a bit on the big or your felt is on the thin side, you can make it less floppy by gluing a piece of cardstock to the base ornament.
  3. Sew the coffee to the bigger mug shape, also attaching a ribbon loop for hanging, and decorate the front pocket – beads, embroidery, paint, glitter glue … The back of the pocket won’t be visible later, so it doesn’t have to be super neat.
  4. Sew the front pocket to the mug base. If, like me, you are not very good at sewing, thin thread in a similar color and a regular sewing needle works best, as your stitches will not be very visible.
  5. Place the card in the pocket. Give away.

If you have an hour or less

The second item on my art to-do list for 2015 is “Learn origami”. I’m fascinated by the possibilities, especially in combination with fabric. If you are really pressed for time, a simple origami envelope can be folded in minutes. Almost any kind of rectangular paper works for the envelope here – and you can, of course, decorate it as much as time allows. Using a piece of fabric gives an unexpected twist – lightweight to medium fabrics work best, my favorite is quilting cotton.

The fabric needs to be stiffened to hold the creases better. You can spray it with a thin coat of varnish or laundry starch. The one thing I always have in the house is white glue, so I dunked the fabric rectangle in a solution of two parts water and one part white glue. Smooth the fabric out on a sheet of freezer paper or plastic. It will peel off when dry. The fabric is going to be stiff, but can still be decorated with needle and thread, if desired.

I used paper to demonstrate the folding steps – a rectangle of about 8″ x 11.5″ makes an envelope big enough for most cards.

Gift Card Wrappers

Folding instructions:

  1. Fold the paper in half, make a sharp crease and unfold.
  2. Fold the top right and bottom left corners down to the center crease.
  3. Fold the top left and bottom right sides inward so that they meet the vertical triangle edges.
  4. Turn the paper 90° and fold the right side down to meet the bottom edge. Tuck the edge into the flap at the bottom.
  5. Fold the left side to the top edge and tuck it into the flap as well.

Slide the gift card into the slit in the center. The envelope has two layers of folds. Slip the card into the bottom layer, because the short sides are open in the layer above.

Gift Card Wrappers

Enjoy giving a gift card to someone special this holiday season!

(Oh, and just in case this article is giving my family some festive ideas – remember the mantra, guys: books, crafts, coffee!)

~*~*~*~*~*~*~*~*~*~*~*~*~*~*~*~*~*~*~*~*~*~*~*~*~

Katja Blum is a writer and translator from Tulsa, OK. As an artist, she started with yarn, fabric and papier mache (rarely together), branching out into collage and other paper arts about ten years ago. Her latest obsession is making soft stuffies and art dolls – to the delight of her toddler. She also likes to find creative solutions for ugly or broken things around the house – to the delight of her husband.

You can see more of her work with fiber, paper and words at www.thewaywardsheep.com

~*~*~*~*~*~*~*~*~*~*~*~*~*~*~*~*~*~*~*~*~*~*~*~*~

.

.

Focal Points in Mixed Media Art

~*~

This article was written by Madeline Faiella

Emergence

We talked about telling a story with mixed media art and now let’s talk about adding texture.

Emergence

I chose this piece to explain the process because it’s easy to see what I did.  This piece is 3 feet tall and 2 feet wide but try it on a smaller surface if you like.  The surface I used is actually a court room board that an attorney let me have to which I added a base of white paint and gesso.  It’s great when you can re-use something.

The face in this piece is done on paper, painted with acrylic and attached to the base with gesso.  I applied gesso and molding paste in layers across the base surface and around the face in light, graduated layers using a wooden stick.  It’s vital that the edges of the face “live” within the background so lighter layers are better.  Sometimes I add color to the gesso and/or molding paste but in this case I started with clear and let it dry thoroughly.  When applying many layers, drying is very important.  This piece took a while to complete because the humidity here in South Florida can make it very difficult for drying even with the air conditioner on.  Leave your piece to dry overnight between layering to ensure that it’s very dry.

Layer after layer I created my piece with careful planning yet enough spontaneity to keep it free.  I used a trowel and molding paste colored to my desired color and ran it over stencils, burlap and other means of textural items.  Keeping the colors in mind, step back from your work each time you add another layer or item.  Build layer by layer.  The bags that hold oranges make a great textural tool.  Be creative and see what’s around your studio.

Try new things, keep it layered and have fun.  Happy arting.

~*~*~*~*~*~*~*~*~*~*~*~*~*~*~*~*~*~*~*~*~*~*~*~*~

Madeline Faiella is the owner of Madeline Faiella Designs, LLC.  She is a “tradigital” artist.  She works traditionally and digitally in Photoshop and Adobe Illustrator.  Her work is featured on home décor, electronic devices, stationary, fabric and more.  Her arsenal of tools is broad and her work varied.  She is licensed, published, appeared on TV and radio and has written continuing columns for the art and creative community.  She has a line of non-toxic acrylic paint “Art Jacket” with Earth Safe Finishes.  Her art education hails from The School of Visual Arts in Manhattan and the many years she absorbed cultural enlightenment globe-trotting during a 23 year singing career.  She’s been drawing, sewing and making since she was a child. See more of her work at www.madelinefaiella.com

~*~*~*~*~*~*~*~*~*~*~*~*~*~*~*~*~*~*~*~*~*~*~*~*~

.

.

Handmade mixed media books – a tunnel book

~ * ~

This article is written by Katja Blum

My son Sam introduced me to bookmaking. He makes lots of books with his speech therapist and loves the process maybe even more than the result. His books can be anything he wants – he can cut, glue, draw, paint, glitter and write. What’s not to love?

One of my favorite types of handmade books is the tunnel book.

These three-dimensional books consist of several pages with cutouts of decreasing size. The pages are connected with accordion hinges on both sides. Because of the flexible connection, the pages can consist of many different materials from thick watercolor paper to cardboard. One of my personal favorites is foam board, because it is so easy to hang things from to “ceiling” of the cutouts – and because the book will be very sturdy and not prone to warping.

Making a tunnel book is simple. Design the cutouts of your pages according to the picture or story you want to create. Remember that each cutout will be smaller than the one before, so any designs around the edge of the first page should be on the smaller side, so that you leave enough room for the others.

If you want to create elaborate figures or landscapes in your cutouts, you can always add them later (especially if you use thick, hard to cut materials). Just cut your designs out of decorated paper and leave little paper tabs where you would like to attach them to your cutout frame.

You need two accordion hinges per book page – minus one page. So, if your book has five pages, you need eight hinges.

Cut strips of sturdy paper of the same length as the sides of your book pages you would like to attach. Fold the strips lengthwise into an “M” shape. Folding is easy, if you score the fold lines using a ruler and a bone folder, a butter knife blade or the tip of a knitting needle.

Steps for making a tunnel book – cutouts and hinges

Design, decorate and cut out your book pages and attach the accordion hinges. You can always add more decorations and elements later, as the pages remain pretty accessible.

In the example here, I wanted to highlight several decorative papers I had collected, so I simply covered my book pages with the papers, cut them and added some details.

A finished tunnel book with decorative papers

Tunnel books are fun to play with and add to. Sam likes books about animals. What do you want your book to be?

~*~*~*~*~*~*~*~*~*~*~*~*~*~*~*~*~*~*~*~*~*~*~*~*~

Katja Blum is a writer and translator from Tulsa, OK. As an artist, she started with yarn, fabric and papier mâché (rarely together), branching out into collage and other paper arts about ten years ago. Her latest obsession is making soft stuffies and art dolls – to the delight of her son. She also likes to find creative solutions for ugly or broken things around the house – to the delight of her husband.

You can see more of her work with fiber, paper and words at www.thewaywardsheep.com

~*~*~*~*~*~*~*~*~*~*~*~*~*~*~*~*~*~*~*~*~*~*~*~*~

.

.