Focal Points in Mixed Media Art

~*~

This article was written by Madeline Faiella

Emergence

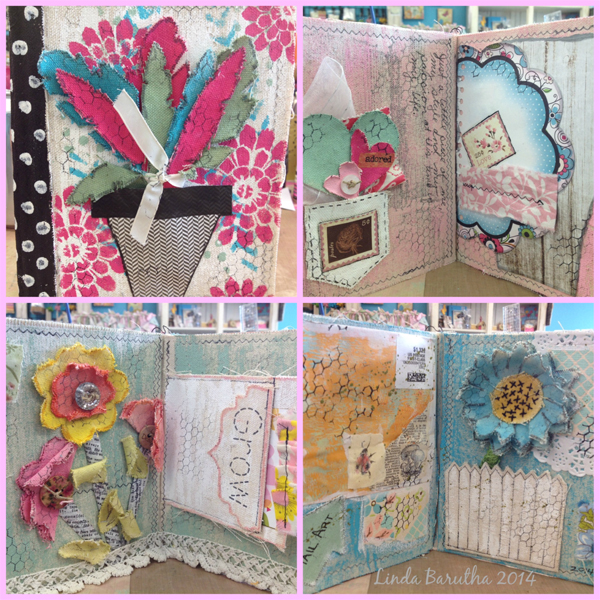
We talked about telling a story with mixed media art and now let’s talk about adding texture.

Emergence

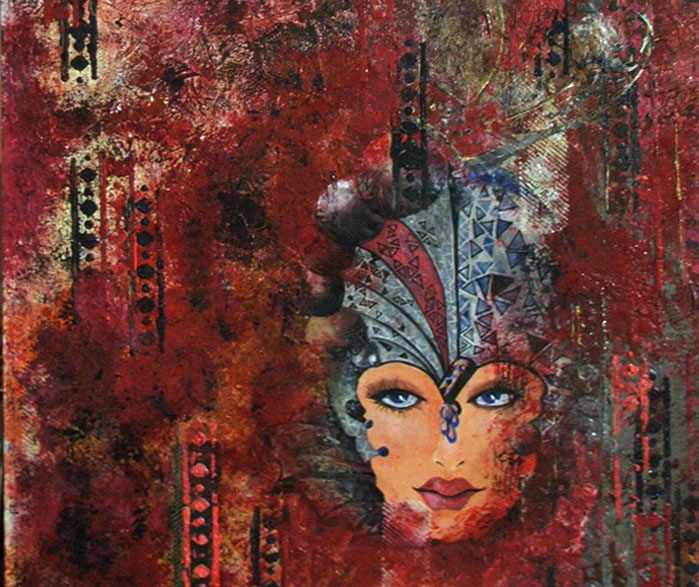
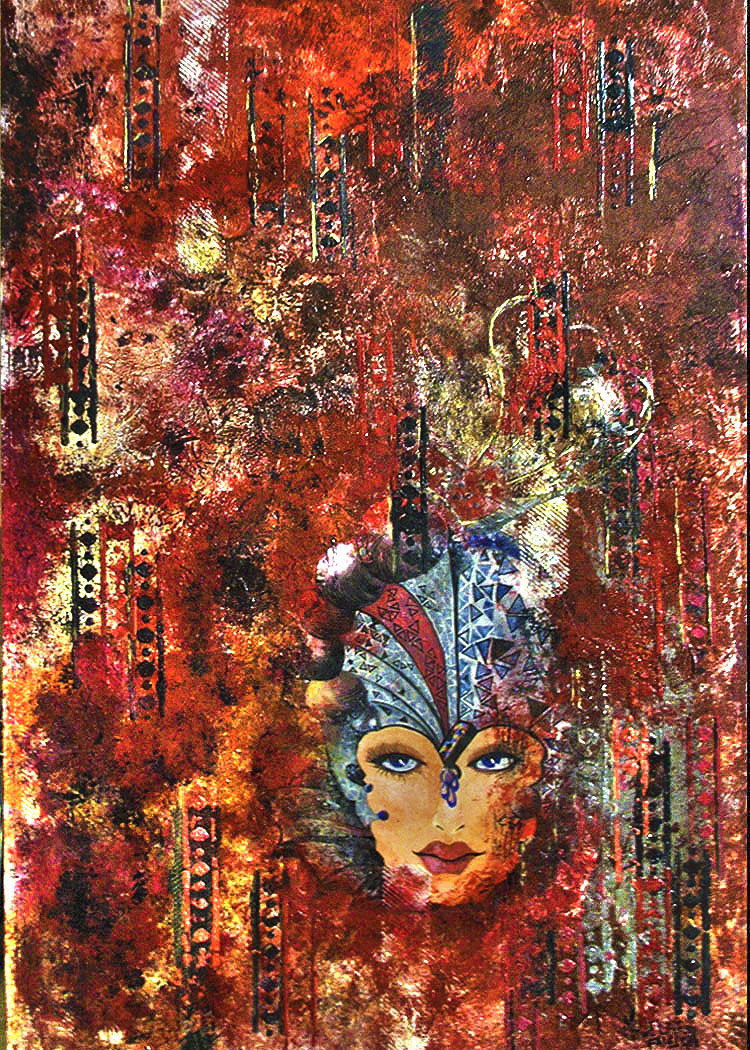
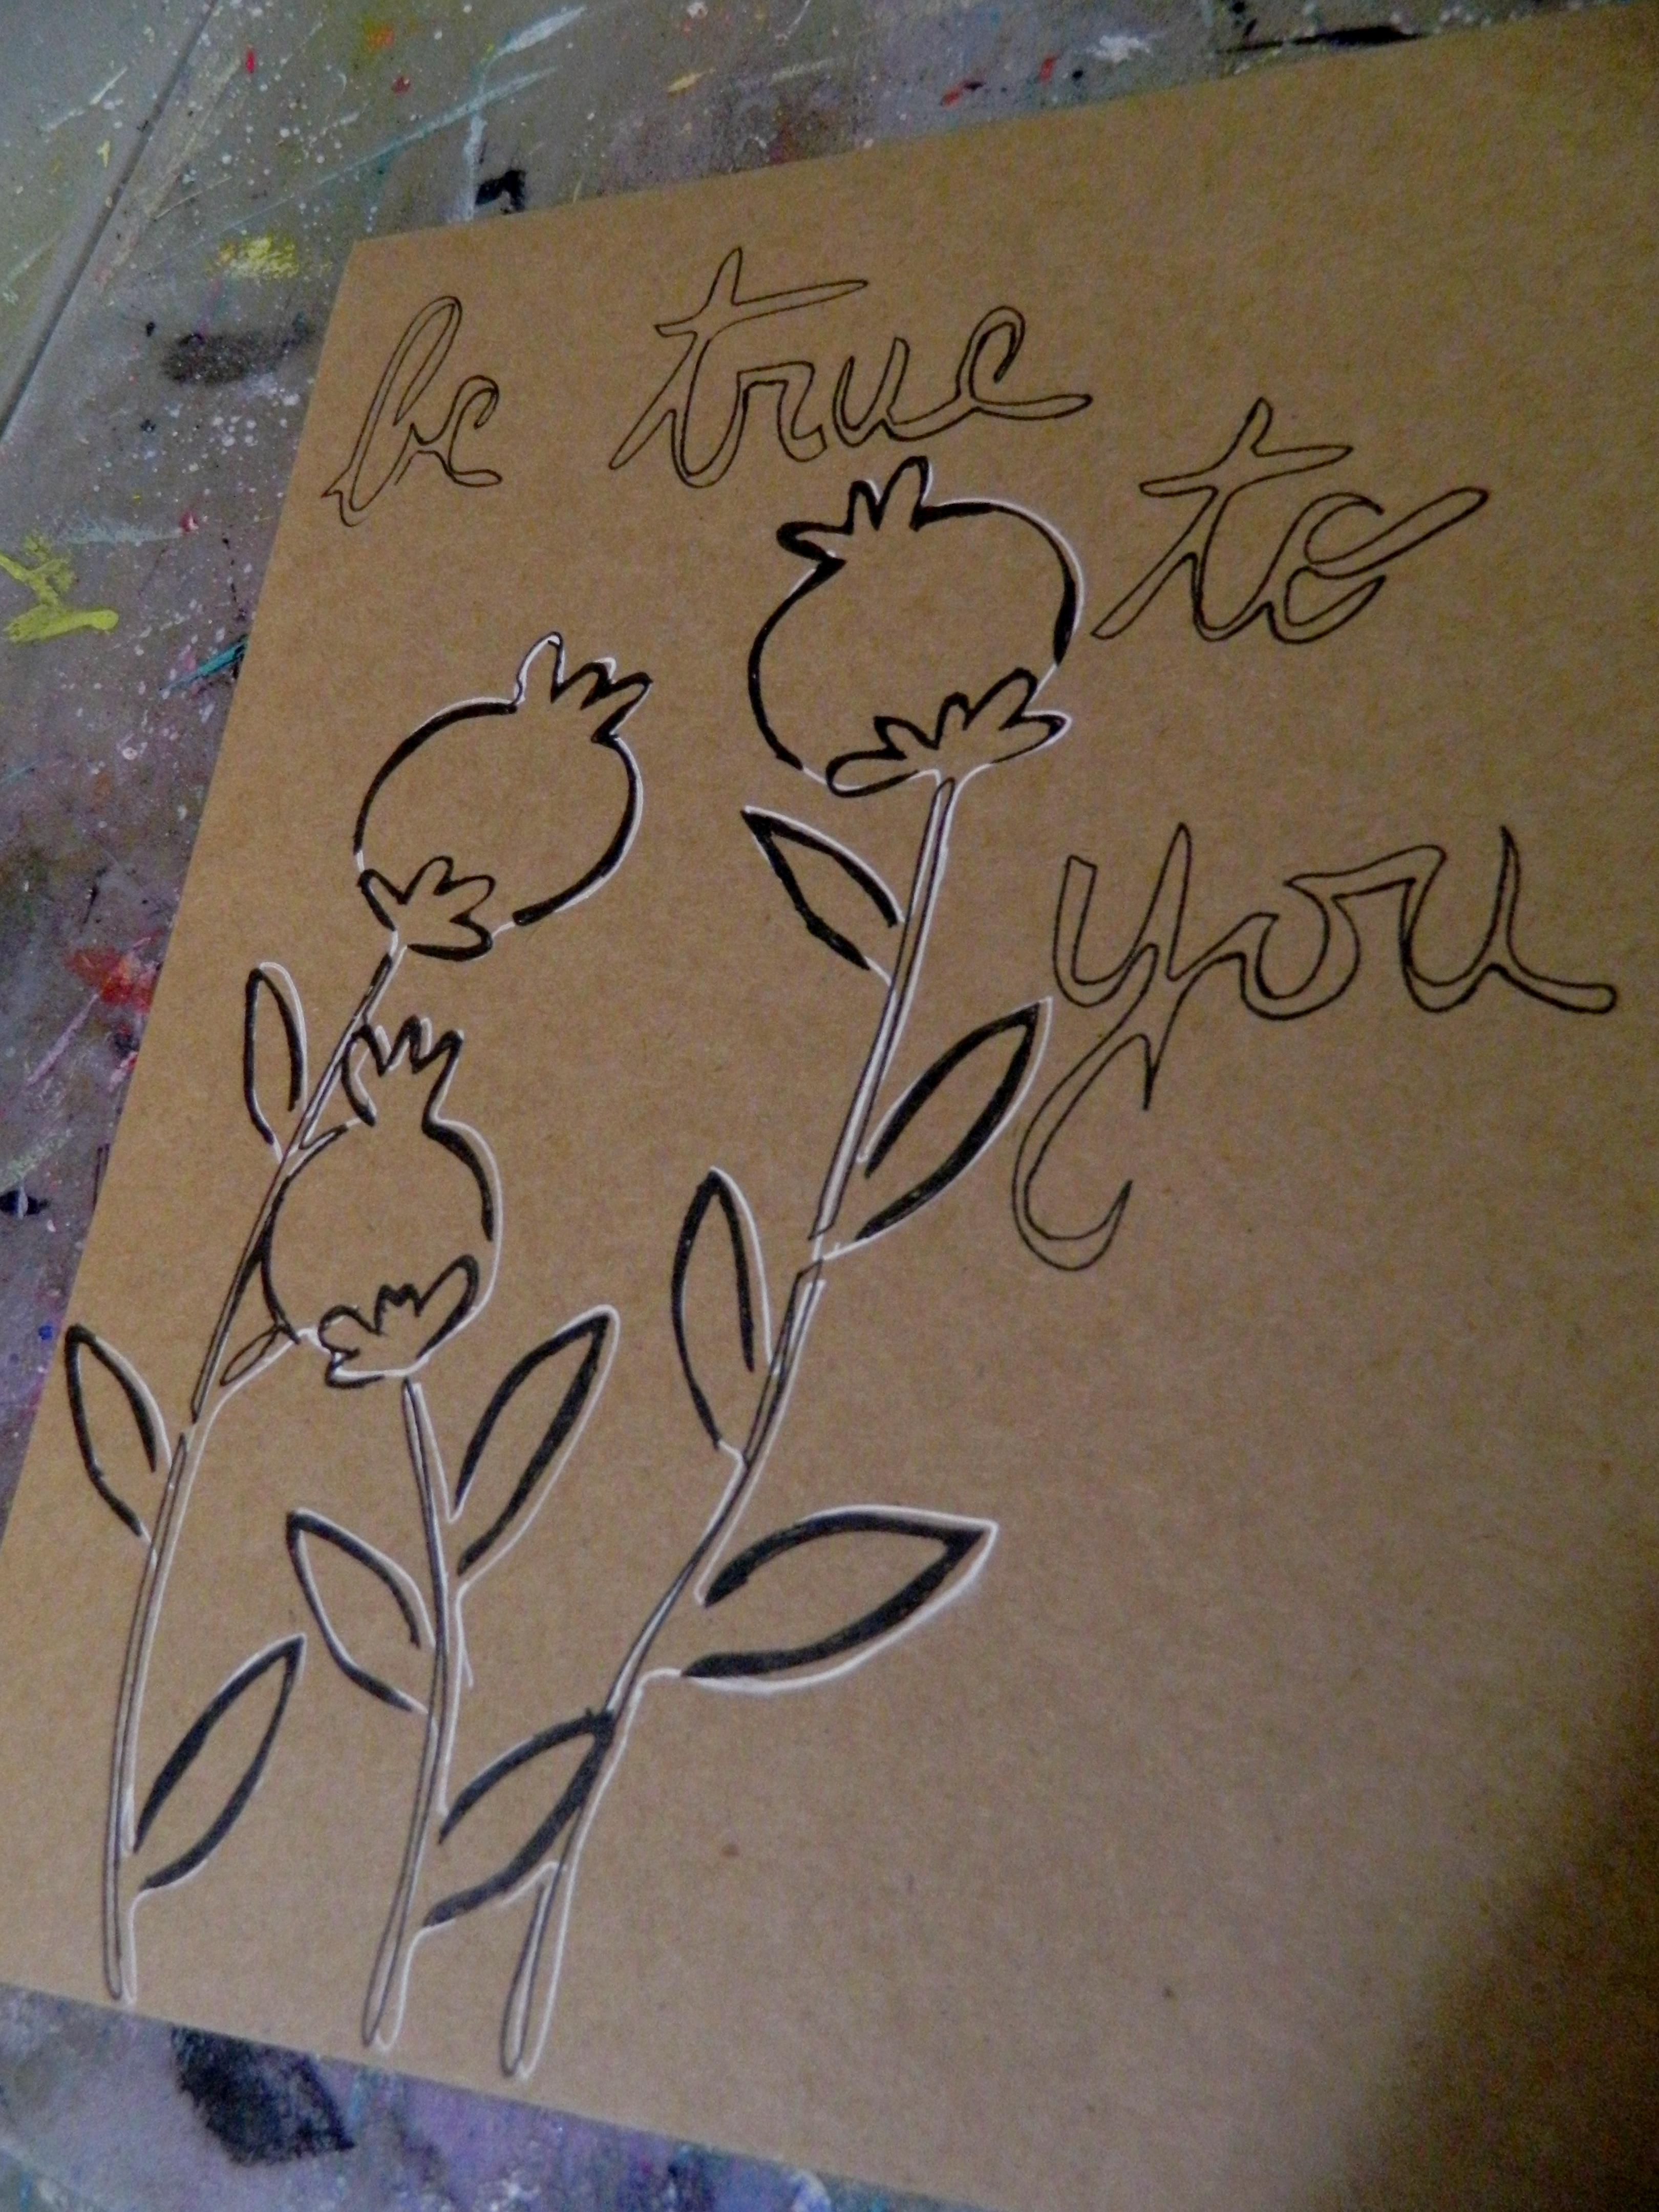
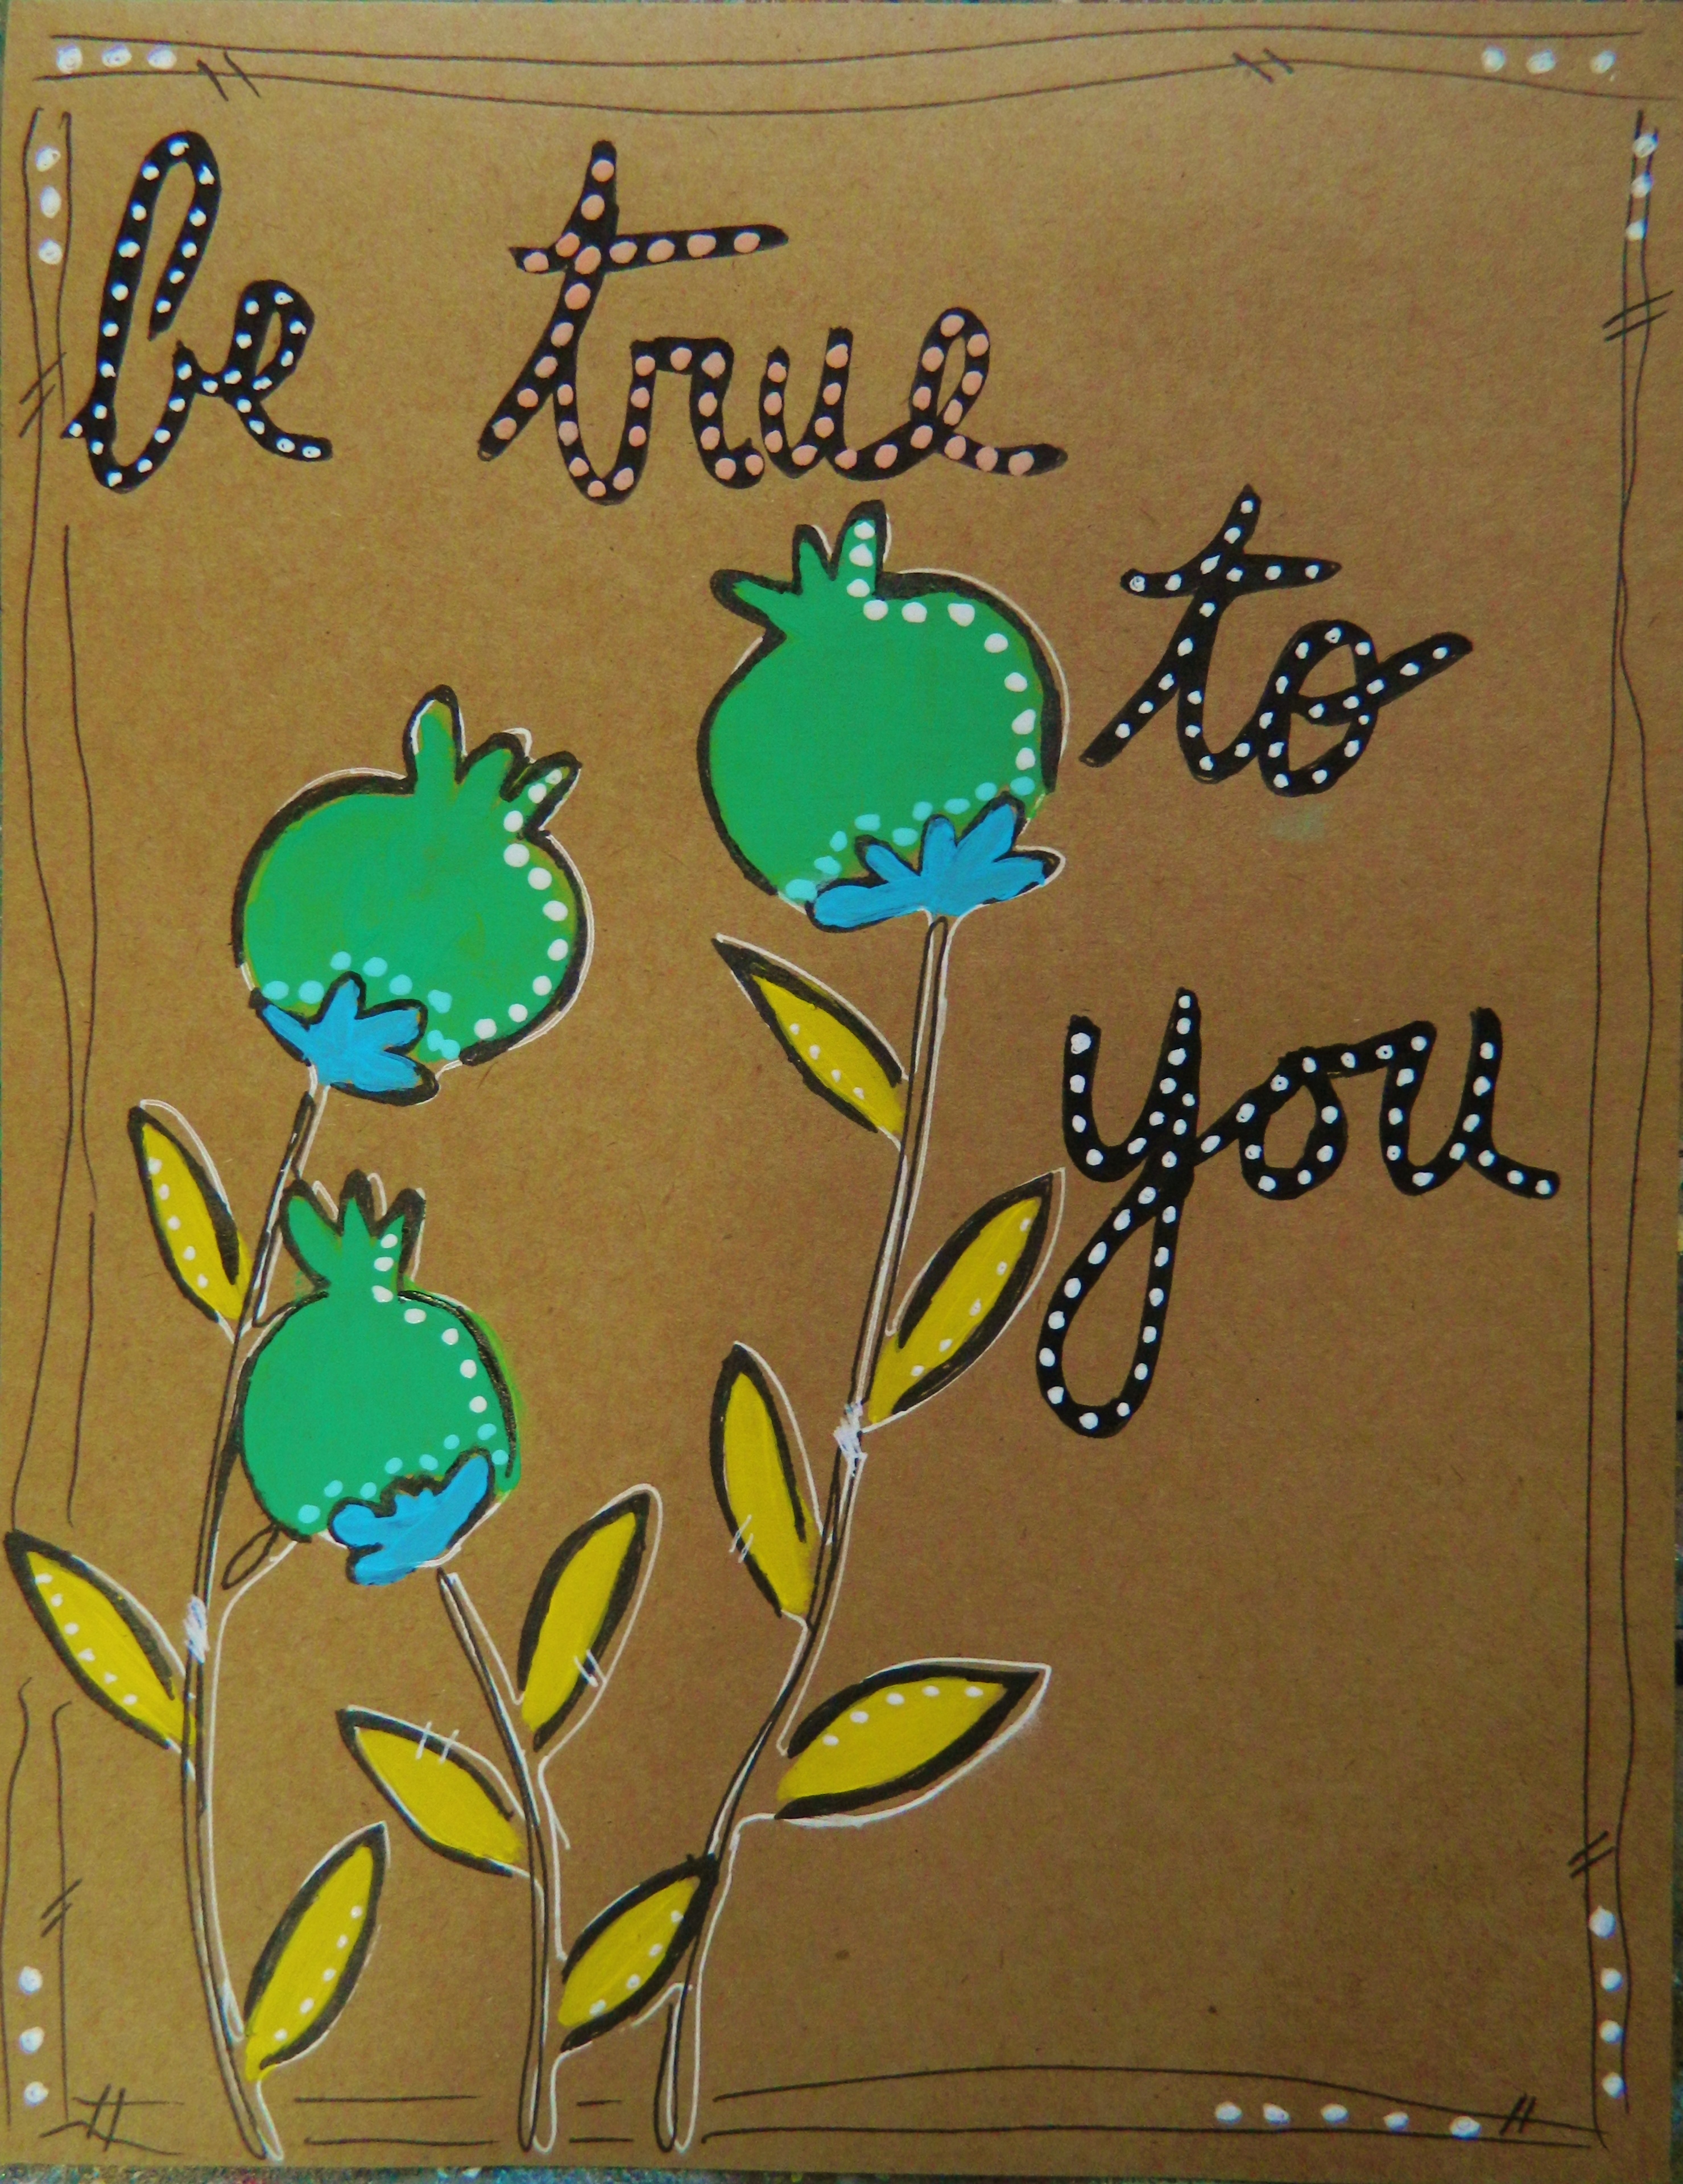
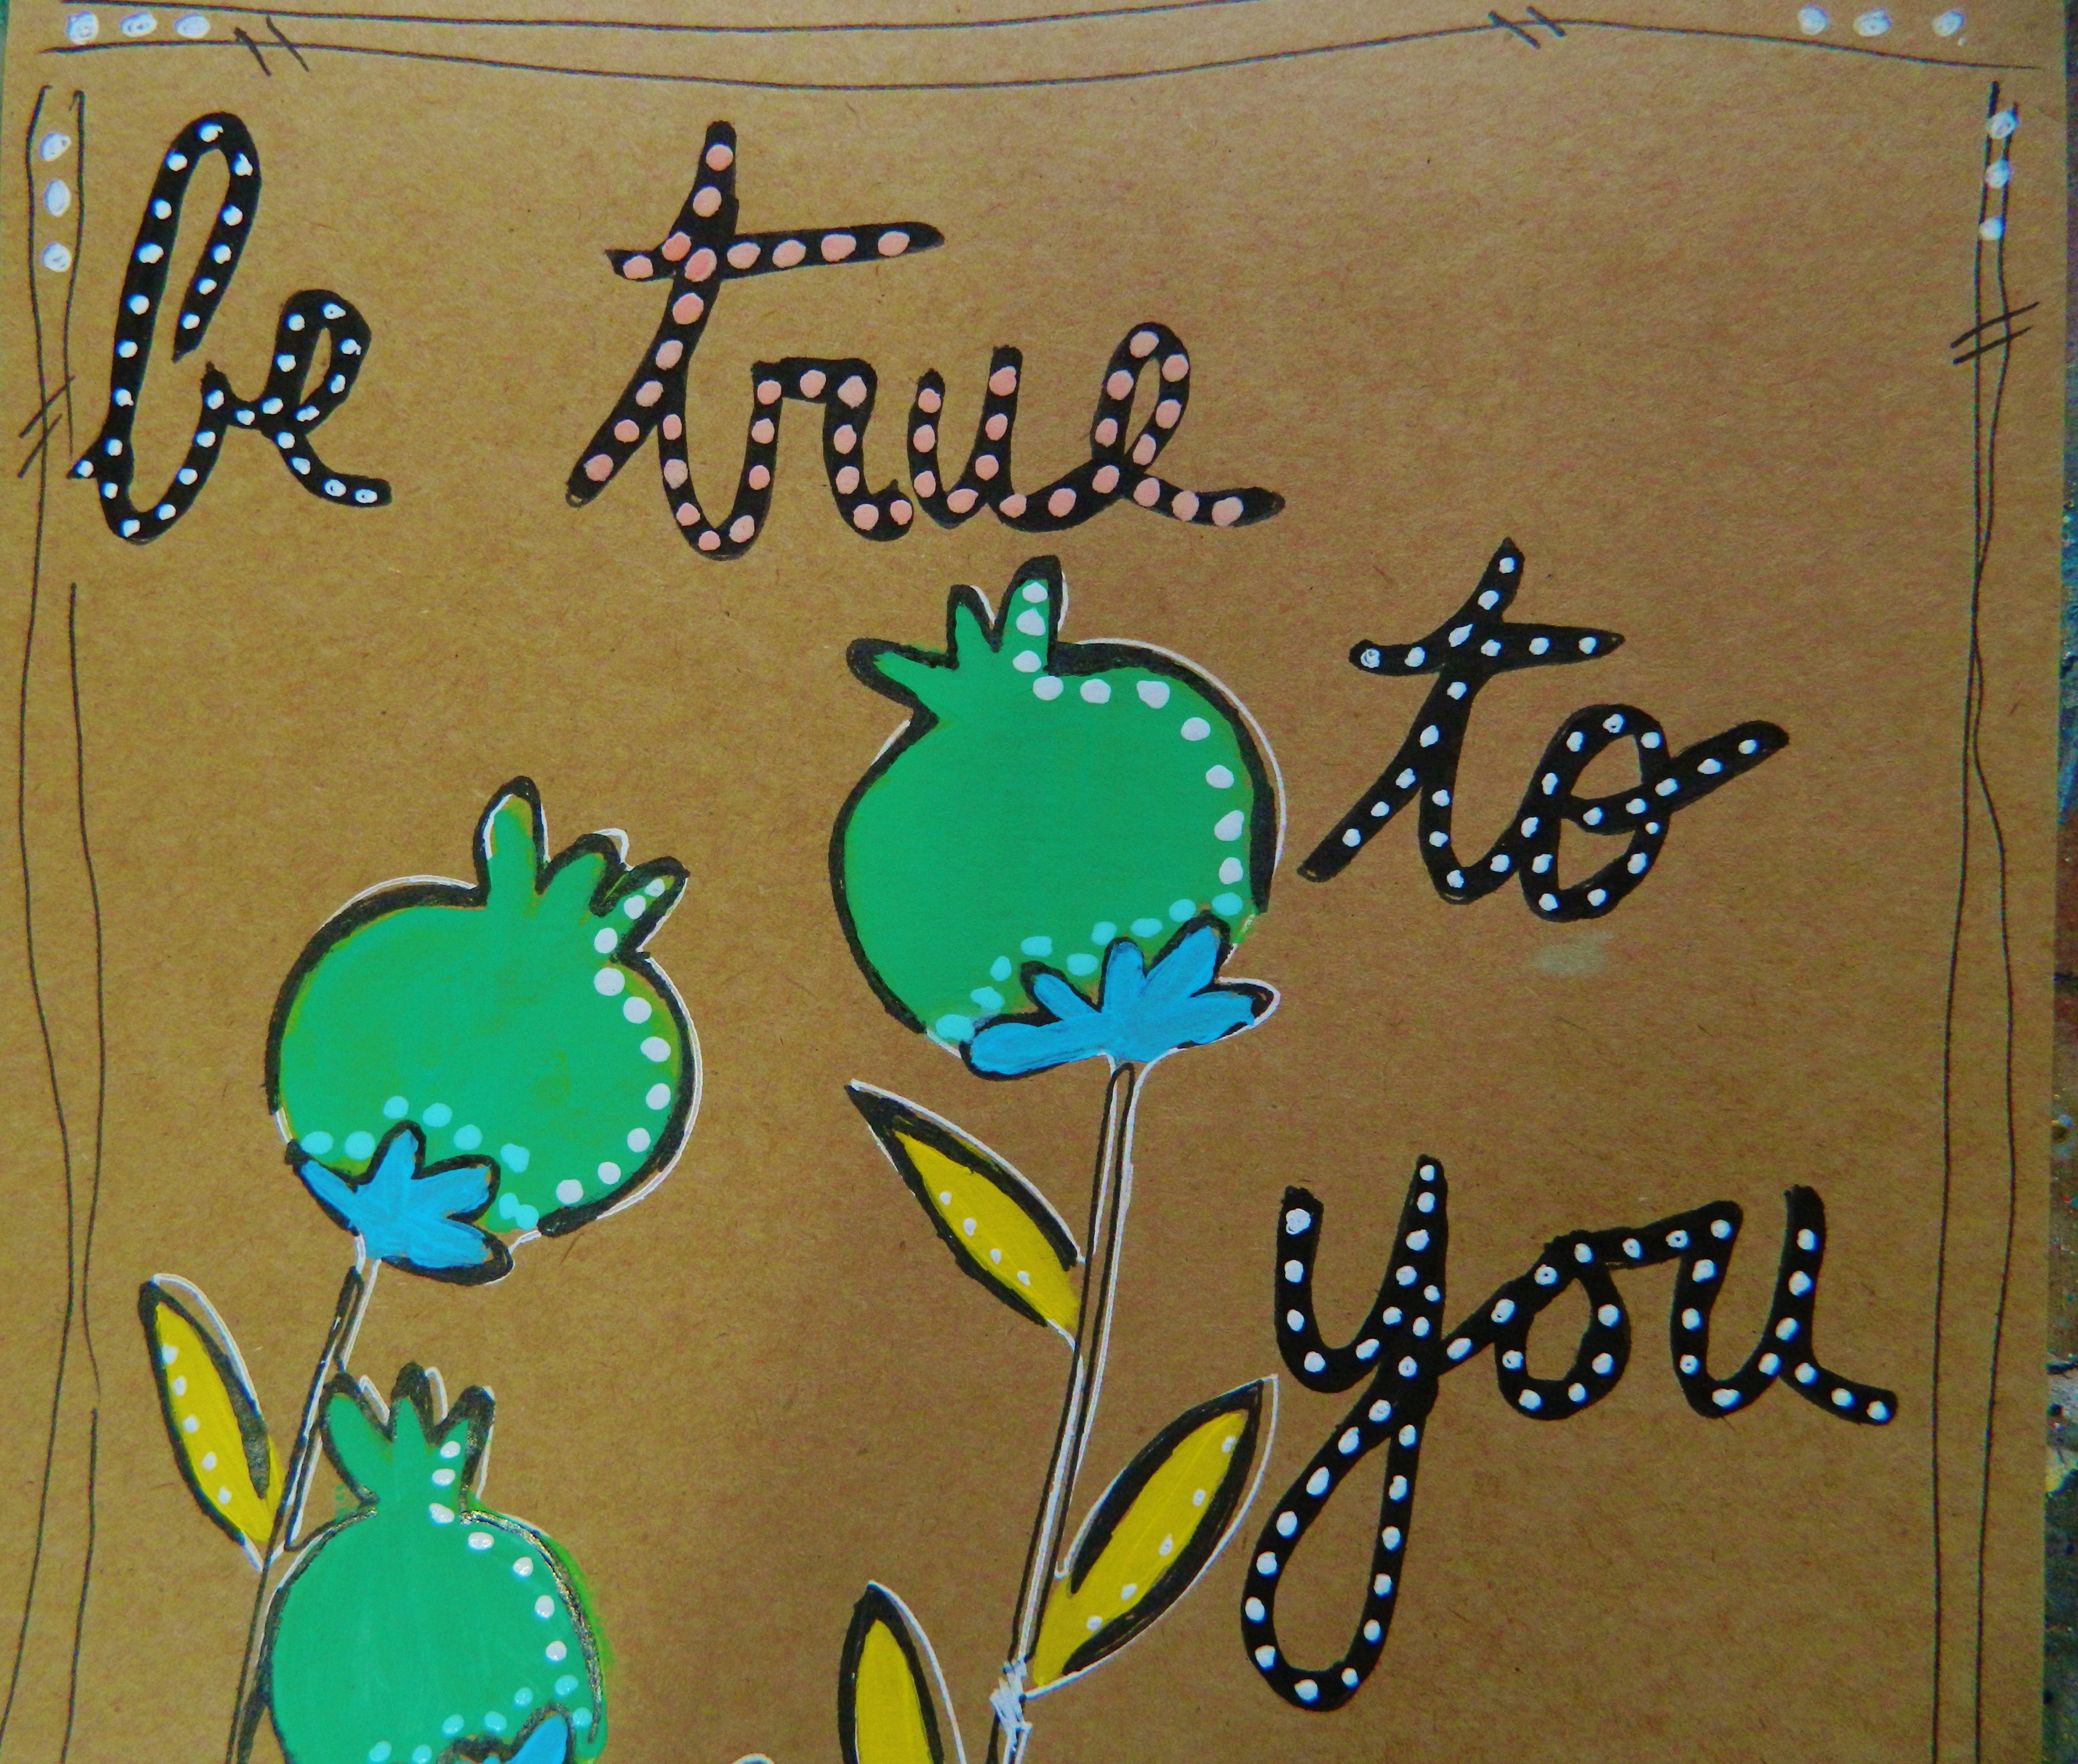
I chose this piece to explain the process because it’s easy to see what I did.  This piece is 3 feet tall and 2 feet wide but try it on a smaller surface if you like.  The surface I used is actually a court room board that an attorney let me have to which I added a base of white paint and gesso.  It’s great when you can re-use something.

The face in this piece is done on paper, painted with acrylic and attached to the base with gesso.  I applied gesso and molding paste in layers across the base surface and around the face in light, graduated layers using a wooden stick.  It’s vital that the edges of the face “live” within the background so lighter layers are better.  Sometimes I add color to the gesso and/or molding paste but in this case I started with clear and let it dry thoroughly.  When applying many layers, drying is very important.  This piece took a while to complete because the humidity here in South Florida can make it very difficult for drying even with the air conditioner on.  Leave your piece to dry overnight between layering to ensure that it’s very dry.

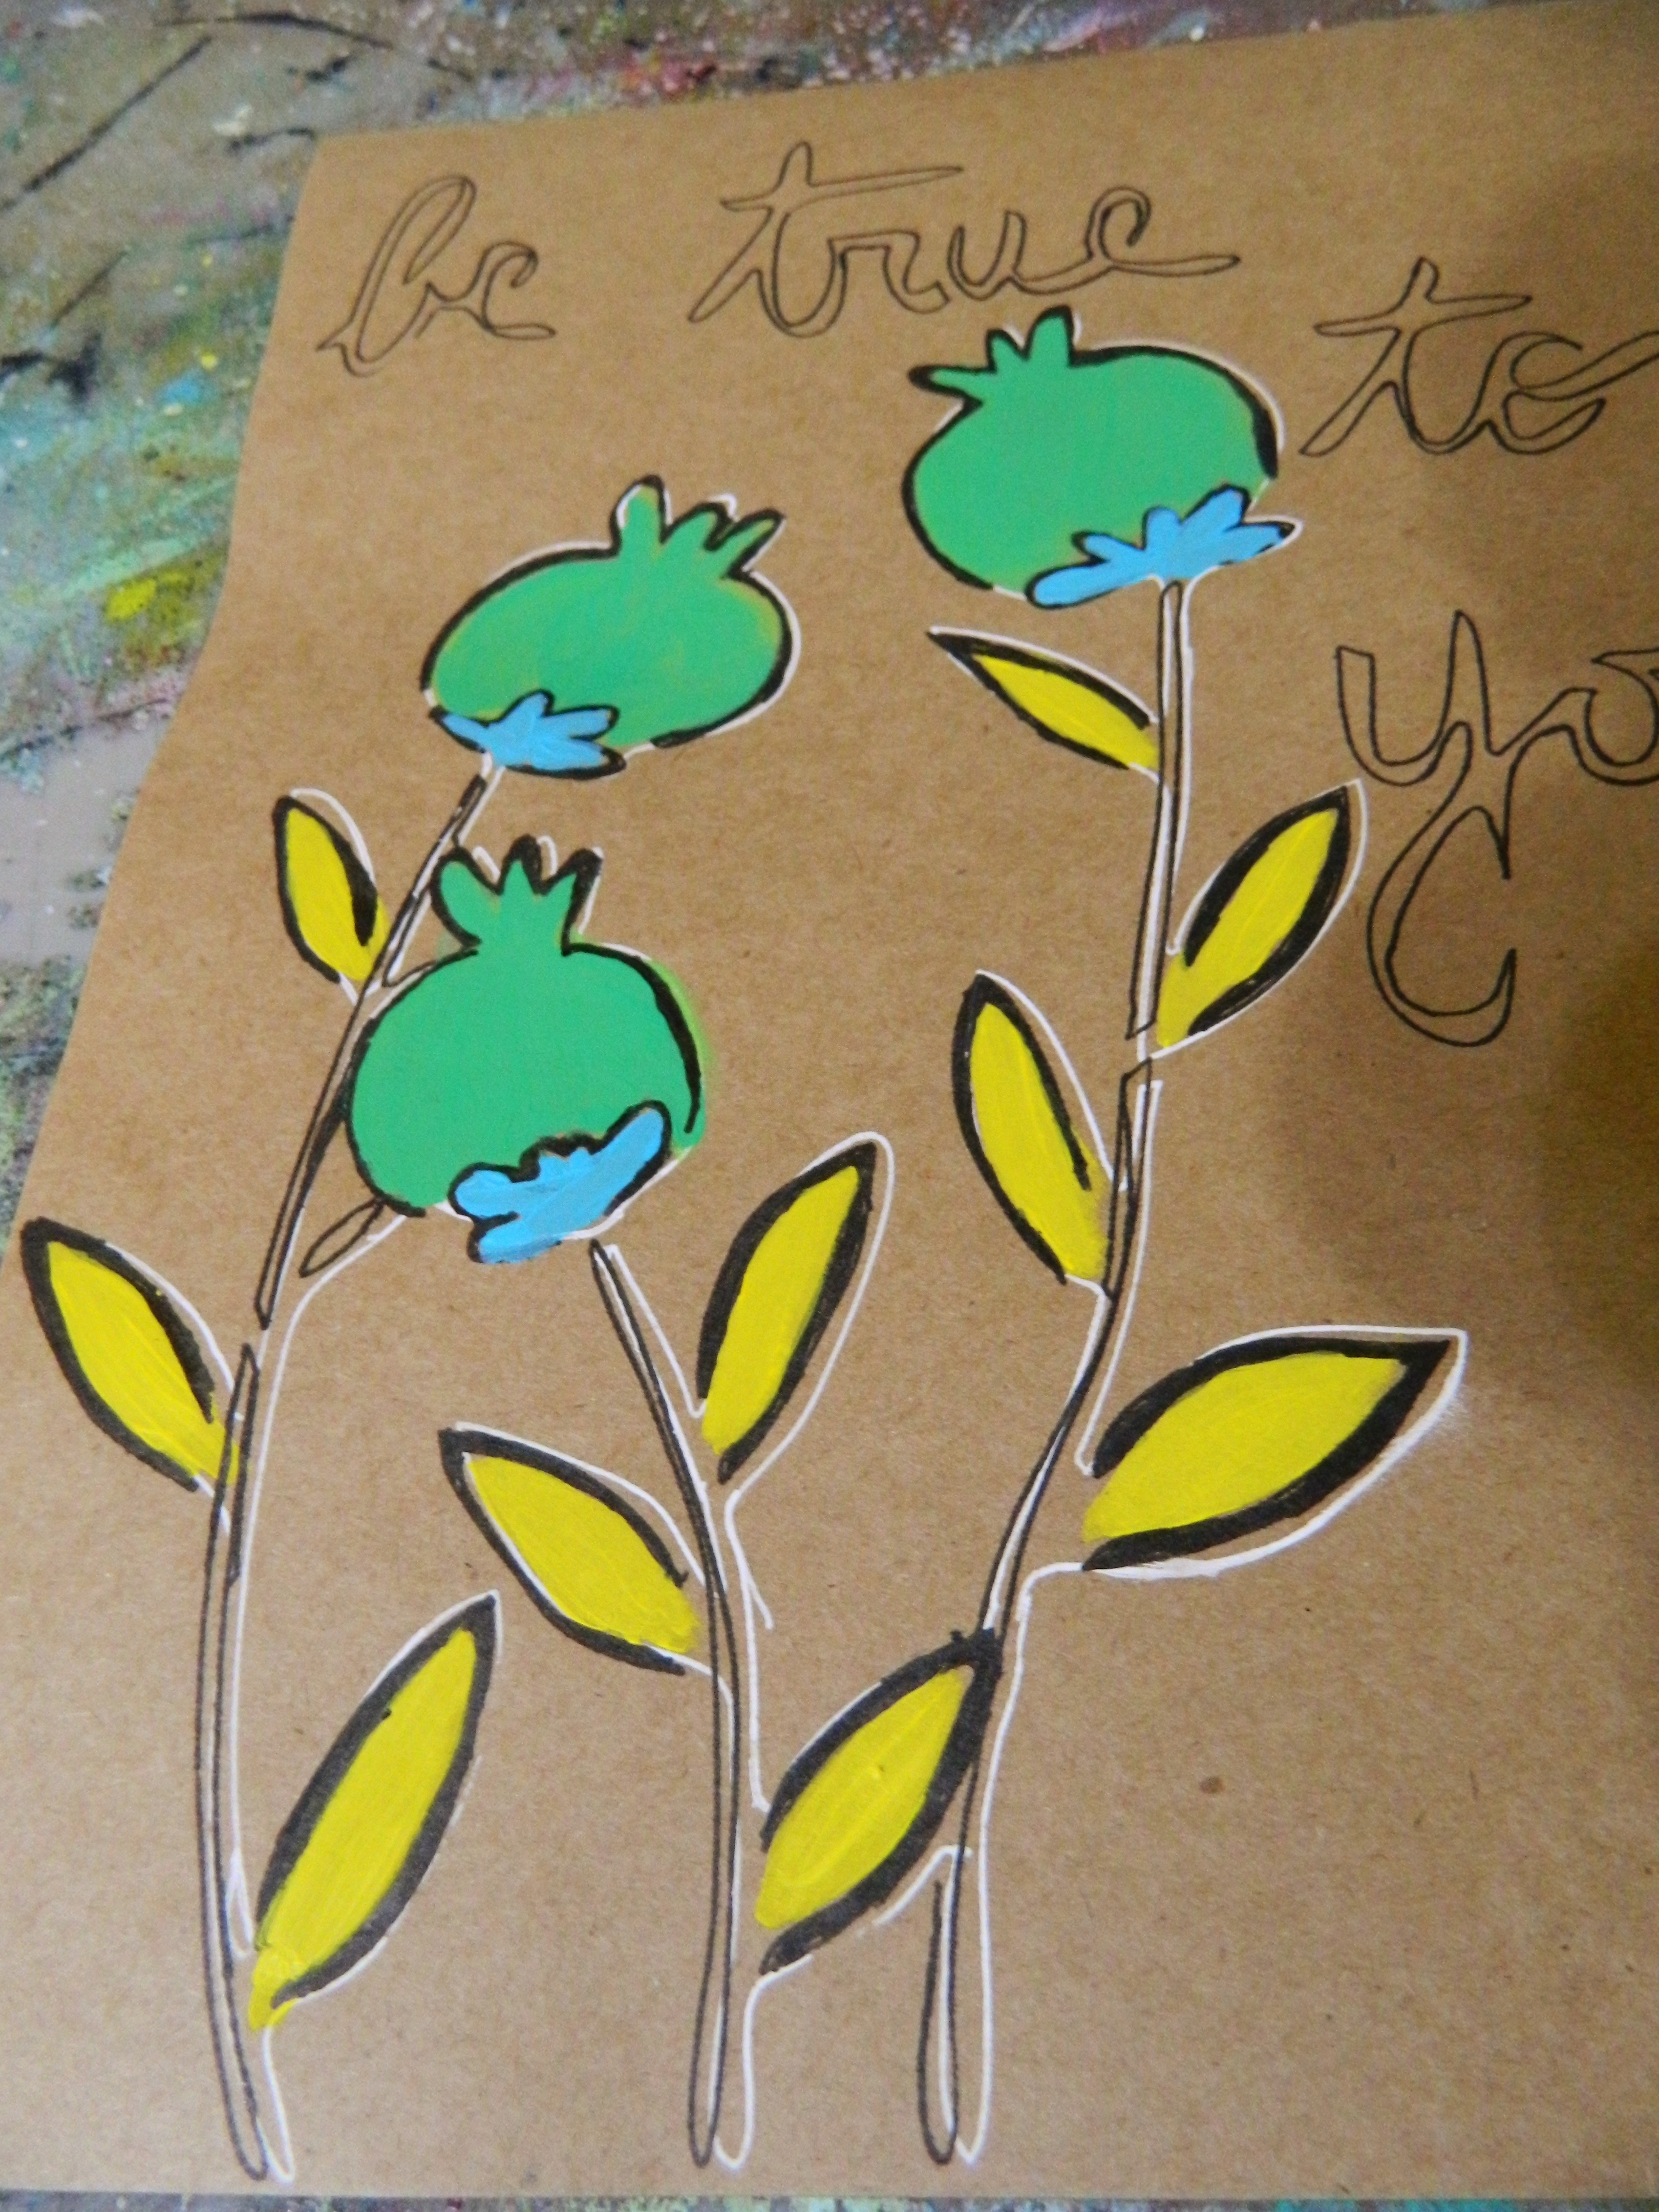
Layer after layer I created my piece with careful planning yet enough spontaneity to keep it free.  I used a trowel and molding paste colored to my desired color and ran it over stencils, burlap and other means of textural items.  Keeping the colors in mind, step back from your work each time you add another layer or item.  Build layer by layer.  The bags that hold oranges make a great textural tool.  Be creative and see what’s around your studio.

Try new things, keep it layered and have fun.  Happy arting.

~*~*~*~*~*~*~*~*~*~*~*~*~*~*~*~*~*~*~*~*~*~*~*~*~

Madeline Faiella is the owner of Madeline Faiella Designs, LLC.  She is a “tradigital” artist.  She works traditionally and digitally in Photoshop and Adobe Illustrator.  Her work is featured on home décor, electronic devices, stationary, fabric and more.  Her arsenal of tools is broad and her work varied.  She is licensed, published, appeared on TV and radio and has written continuing columns for the art and creative community.  She has a line of non-toxic acrylic paint “Art Jacket” with Earth Safe Finishes.  Her art education hails from The School of Visual Arts in Manhattan and the many years she absorbed cultural enlightenment globe-trotting during a 23 year singing career.  She’s been drawing, sewing and making since she was a child. See more of her work at www.madelinefaiella.com

~*~*~*~*~*~*~*~*~*~*~*~*~*~*~*~*~*~*~*~*~*~*~*~*~

.

.

Collage Bubble Fix

~ * ~

This article is written by Vicki Ross

What is a Collage Bubble? We all get ‘em, we all hate ‘em, but what are you gonna do with ‘em?

Simple, really. I worked with an xActo knife so many years during the pre-computer paste-up graphics days that I would wear mine behind my ear like some people do a pencil. Really!

So, suffice it to say, I have pretty good knife skills. This short video will explain my way to fix bubbles in your collage work. You don’t have to fix them, but if they seem problematic with what you intend the finished product to look like, you can fix in a few short minutes.

collaged mixed media can often result in bubbles

Because of the aforementioned knife skills, I did not use a cutting mat under my page. This striped paper is wallpaper, probably washable, and pre-pasted. However, with a generous coat of matt medium on both the wallpaper and the journal page, I still ended up with bubbles (note: not all the wallpaper I experimented with did this). SO, even though you are cutting just through the wallpaper, you might want to put that cutting mat under the page.

I’m just sayin’.


All images © V.N.Ross

~*~*~*~*~*~*~*~*~*~*~*~*~*~*~*~*~*~*~*~*~*~*~*~*~

Vicki Ross is focused on sharing her journey to art and how life events can shape us through creativity. www.Axully.com Vicki has always been involved deeply in the creative arts, from professional soft crafts publications (knitting/crochet/needlework) to French Hand-sewing, stencilling to macramé, oil painting to encaustics. Whatever your leaning, she believes in the healing power of creating.

You can see more of Vicki’s work at VickiRossArt or via blog posts at Axully – Solid. Useful. Beautiful

~*~*~*~*~*~*~*~*~*~*~*~*~*~*~*~*~*~*~*~*~*~*~*~*~

.

.

For the Love of Kraft Paper

~ * ~

This article was written by Melanie Statnick

Creating artwork on Kraft paper

When I first saw photos on blogs from artists using Kraft paper for artwork and journaling pages I had to play with more of it myself. There are 1000 of great project you can use Kraft paper for. It’s very “Crafty”. From paper flowers, banners, cards, to table clothes and runners. The list goes on.

Creating artwork on Kraft paper{alternative description

A mini project I created to later place on a canvas, was taking one my favorite stencils and outlining it using white gel pen or you can use a white chalk pencil. This can be a very bold first move if you are nervous about the permanence of the pen. I skipped using a pencil because I’m not worried about making a mistake here. I will be adding acrylic paint directly to the paper and I felt that the paint brush line would “cover” my mistakes. (Never be afraid to make mistakes, it is how we All learn)

Creating artwork on Kraft paper{alternative description

This stencil has two pieces to it. The outer edge of the poppy pod that creates the general shape and the inner piece of the pod that adds the detail. It’s so versatile. You can use one or the other or both. I layered this piece again with the inner stencil part using a Pitt Pen in bold black. I painted this with acrylic paint and added the words that also come with this stencil.  I used layers with mostly a dry brush because I found that too much wetting of the paper can cause buckling. So I used clear gesso as a sealer/primer on pieces after this one.

Creating artwork on Kraft paper{alternative description

I used the puffy gel pens over this in small dots and circles and sharpened the edges with the Pitt marker.

Creating artwork on Kraft paper{alternative description

I found this to be a delightful and easy little project. So many of us have busy days filled with work ,family and unexpected issues, that we don’t often have time to create large master piece s. This is just one of many things you can create as a journal page or as one piece.

~*~*~*~*~*~*~*~*~*~*~*~*~*~*~*~*~*~*~*~*~*~*~*~*~

Author bio: Artist Melanie Statnick is a Published Artist/Writer out of North Carolina who writes and creates art daily from her private studio. Melanie is also the host of her own program via video and local PBS named The Brush & Pen  a NCC production. Statnick’s artwork can be found in art galleries extensively in NC with international private collections.

~*~*~*~*~*~*~*~*~*~*~*~*~*~*~*~*~*~*~*~*~*~*~*~*~

.

.

Get Your Mixed Media Creative Mojo ON!

~ * ~

This article is written by Gail Green

Mixed Media is all about experimenting with interesting (and often unusual) combinations of materials, mediums and techniques. Color, texture, images, phrases, dimension and our own unique interpretation and story make our pieces come alive. It is also about the unexpected. And THAT’S what drives us creatively!

However, that doesn’t’ mean Mixed Media Artists need to spend hours creating unique components to use in their creative projects. While attending the Craft and Hobby January trade show (CHA Show) and a few other recent trade shows, I’ve discovered some really awesome new products and product lines that either help us feel the mojo or do the tedious time consuming parts for us…allowing us the freedom to just be CREATIVE!

This article will be the first of several product reviews.

Do you love the look of Shabby Chic? Do you love the look of stitched canvas and embellishments? I know I do! Fortunately, I found the PERFECT line of canvas products at the CHA Show when I stopped by the Linnie Blooms booth! Owner and founder Linda Barutha was EVERYWHERE at CHA. I’m so glad I kept running into her because it offered us lots of opportunities to chat about her product line. Her products are amazing!

Here is Linda Barutha and just a sampling of her array of products (Photo used with permission, Linda Barutha, Linnie Blooms)

Simply put, Linnie Blooms products include canvas shapes (trees, hearts, leaves, stars, and much more) and canvas items like journals, bookmarks, envelopes and tags with a stitched component already added to them. How cool is this?! They are all ready to paint, sponge, spritz, stamp or stencil. These pieces are also very sturdy so they can hold up to lots of techniques, as well as for their intended use. It’s easy to attach embellishments by sewing or gluing because they have a secret in between the canvas layers that prevents glue drip –through…and also makes these products TOTALLY unique! This is definitely a new twist on the concept of re-purposing because recycled encyclopedia pages are part of the Linnie Blooms multiple layer canvas products.

A Mixed Media Art Journal project (Photo used with permission, Linda Barutha, Linnie Blooms)

I personally love all the projects, but the journal is TO DIE FOR! The pages inside include pockets, tabs, stitched edges. They just cry and beg to be transformed into a Mixed Media Art piece!

In addition to all the canvas items, Linnie Blooms also offers other products, including some very interesting stencils. Unlike most stencils, Linda also includes the “knock outs” (or inside cut sections) so mixed media artists can use both the negative space stencils for techniques like sponging, stippling, stamping, etc. AND the positive space “knock outs” to create masks for those same techniques…but with obviously different results! Plus, the shapes are so unique, they can be used very interpretively in multiple ways and combinations.

This photo shows a stencil with all the different components…both stencil and knock outs! (Photo used with permission, Gail Green)

As if that weren’t enough, Linda has also come up with fun stamps and phrases to use on the canvas pieces, as well as on traditional cardstocks for card making. For example, create a card on cardstock and then….insert it into an over-the-top-cool canvas envelope that has been turned into a Mixed Media work of art! Did you know that rubber stamping originally started as a way to decorate mail and envelopes? Now that you do, isn’t this a perfect way to go a little retro and celebrate the roots of stamping? After all, Mixed Media Art is ALL about TOTAL fun and creativity!

Linnie Blooms Canvas Bracelet is the perfect start to a Mixed Media project!(Photo used with permission, Gail Green)

You can find out more about Linnie Blooms by visiting their website www.linnieblooms.com. But know they are a lot like potato chips. You will never be able to just have one!

~*~*~*~*~*~*~*~*~*~*~*~*~*~*~*~*~*~*~*~*~*~*~*~*~

Gail Green is a Chicagoland crafty book author and feature article writer/columnist for Scrap & Stamp Arts magazine. Known as the “designer in the hat” and creator of the Sweet PETatoes® art brand, Gail has licensed her illustrations on products in multiple global markets, including her own line of rubber stamps with Impression Obsession. For more information, please visit her ETSY store sweetpetatoes.etsy.com or blog gailgreen.blogspot.com for fun adventures with Ollie, Gail’s crafting parrot and his pet doggie, Lacy Lulu.

~*~*~*~*~*~*~*~*~*~*~*~*~*~*~*~*~*~*~*~*~*~*~*~*~

Disclosure: These products were supplied by Linnie Blooms for the purpose of review. All opinions are that of the MixedMediaArt team. Some links on this page may be affiliate links and any purchases help to support the ongoing work by MixedMediaArt. 
.

.