Altered Steampunk Bird

~ * ~

This article is written by Barbara Rankin 

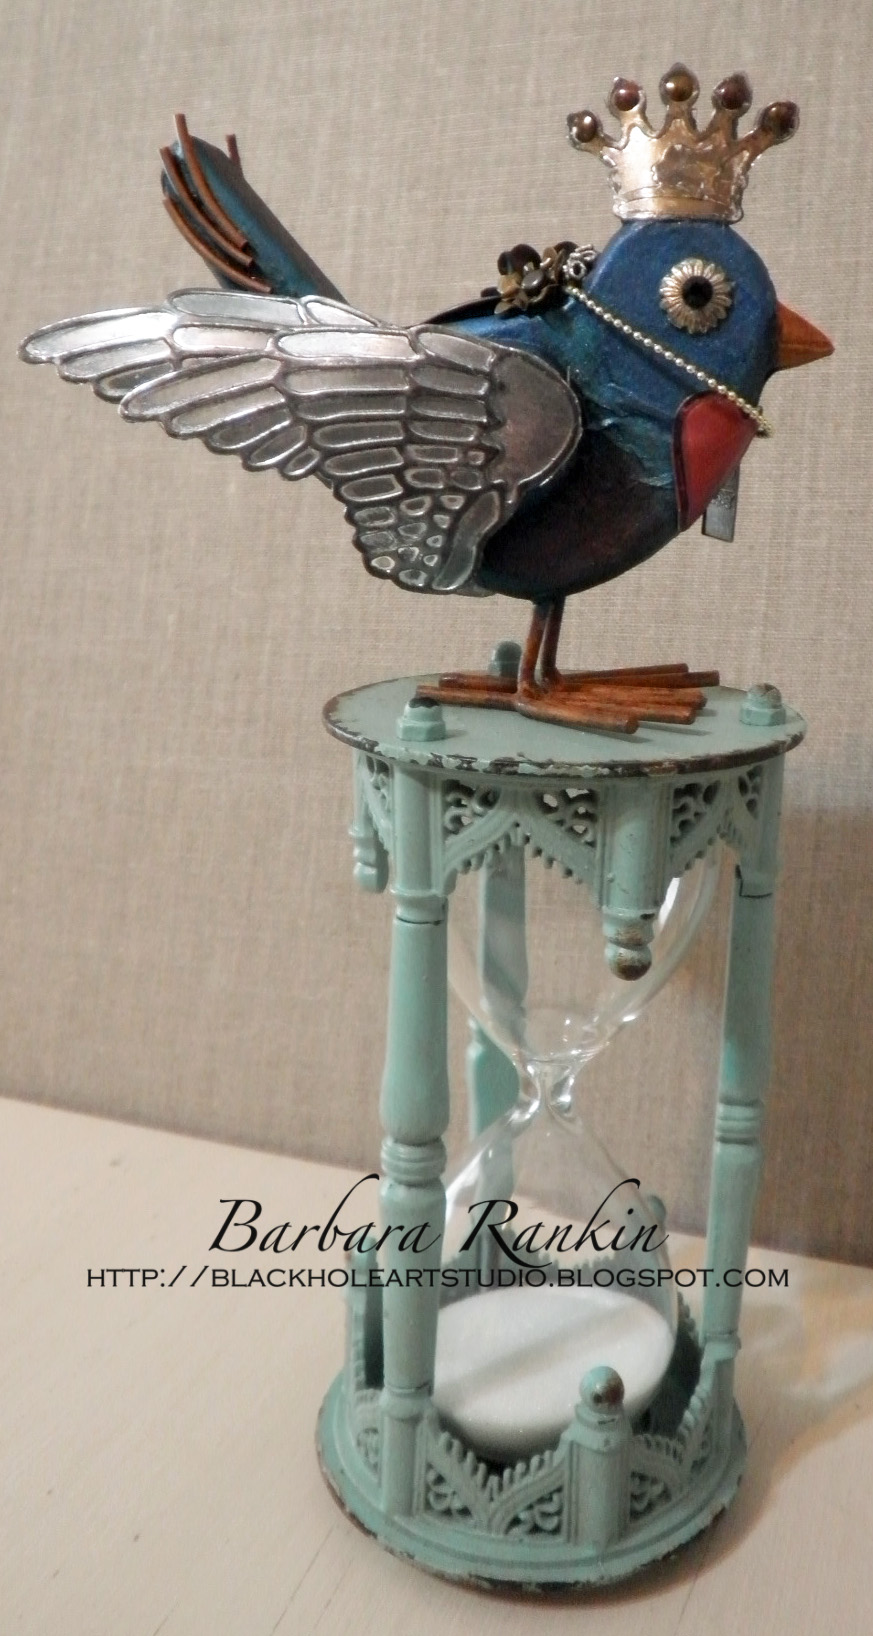
Barbara shows you how to take a wooden bird, a simple coffee filter, some jewelry findings, and die cuts, then combine them with ColourArte Silks Acrylic Glazes and other mixed media, to alter this sweet little steampunk-style home décor piece.  These techniques can be used for any project and will help you have a better understanding of how to apply them in your art.

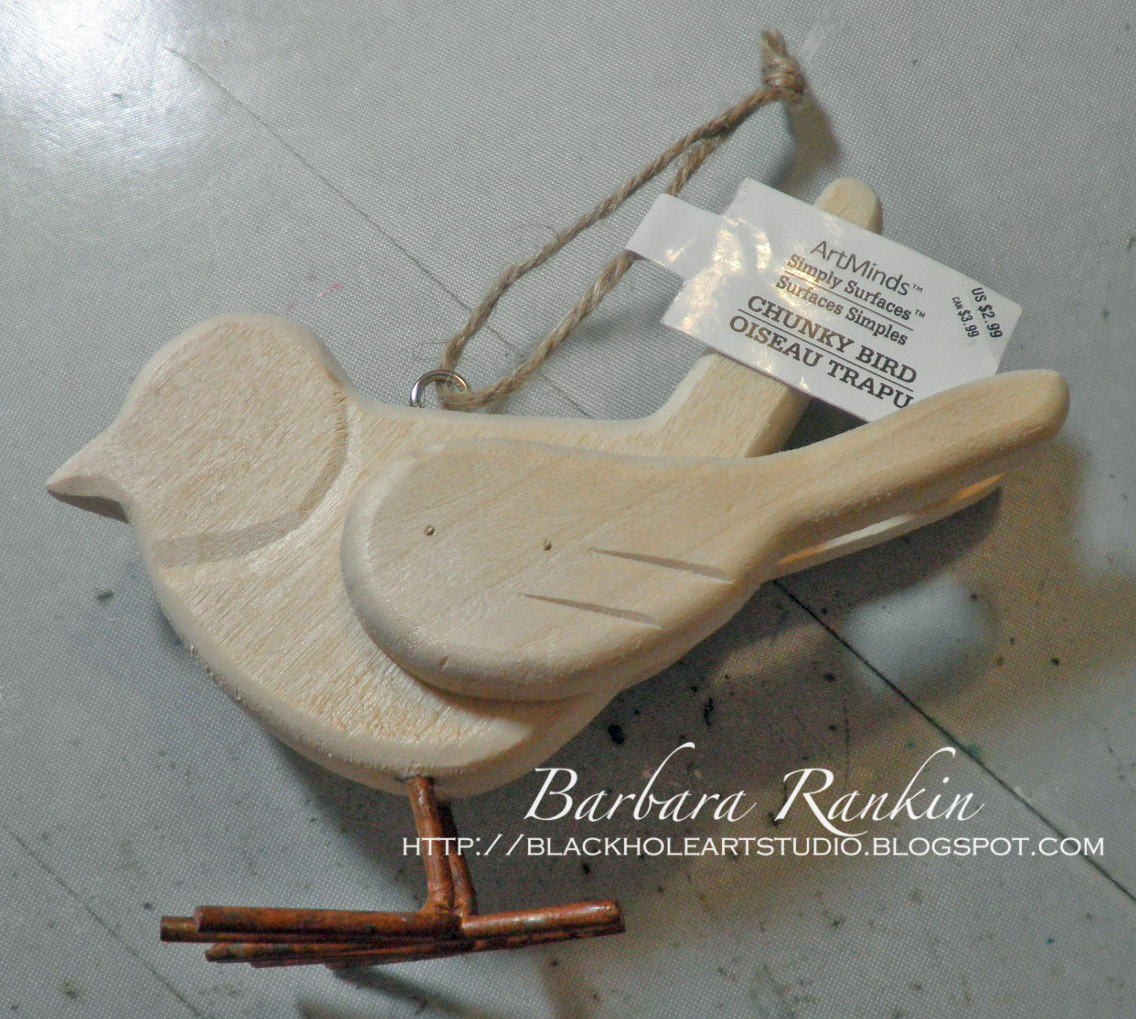
This little wooden bird is going to take on a new life in Steampunk world.  I found this little guy by Art Minds in my local craft store.

bare wood bird

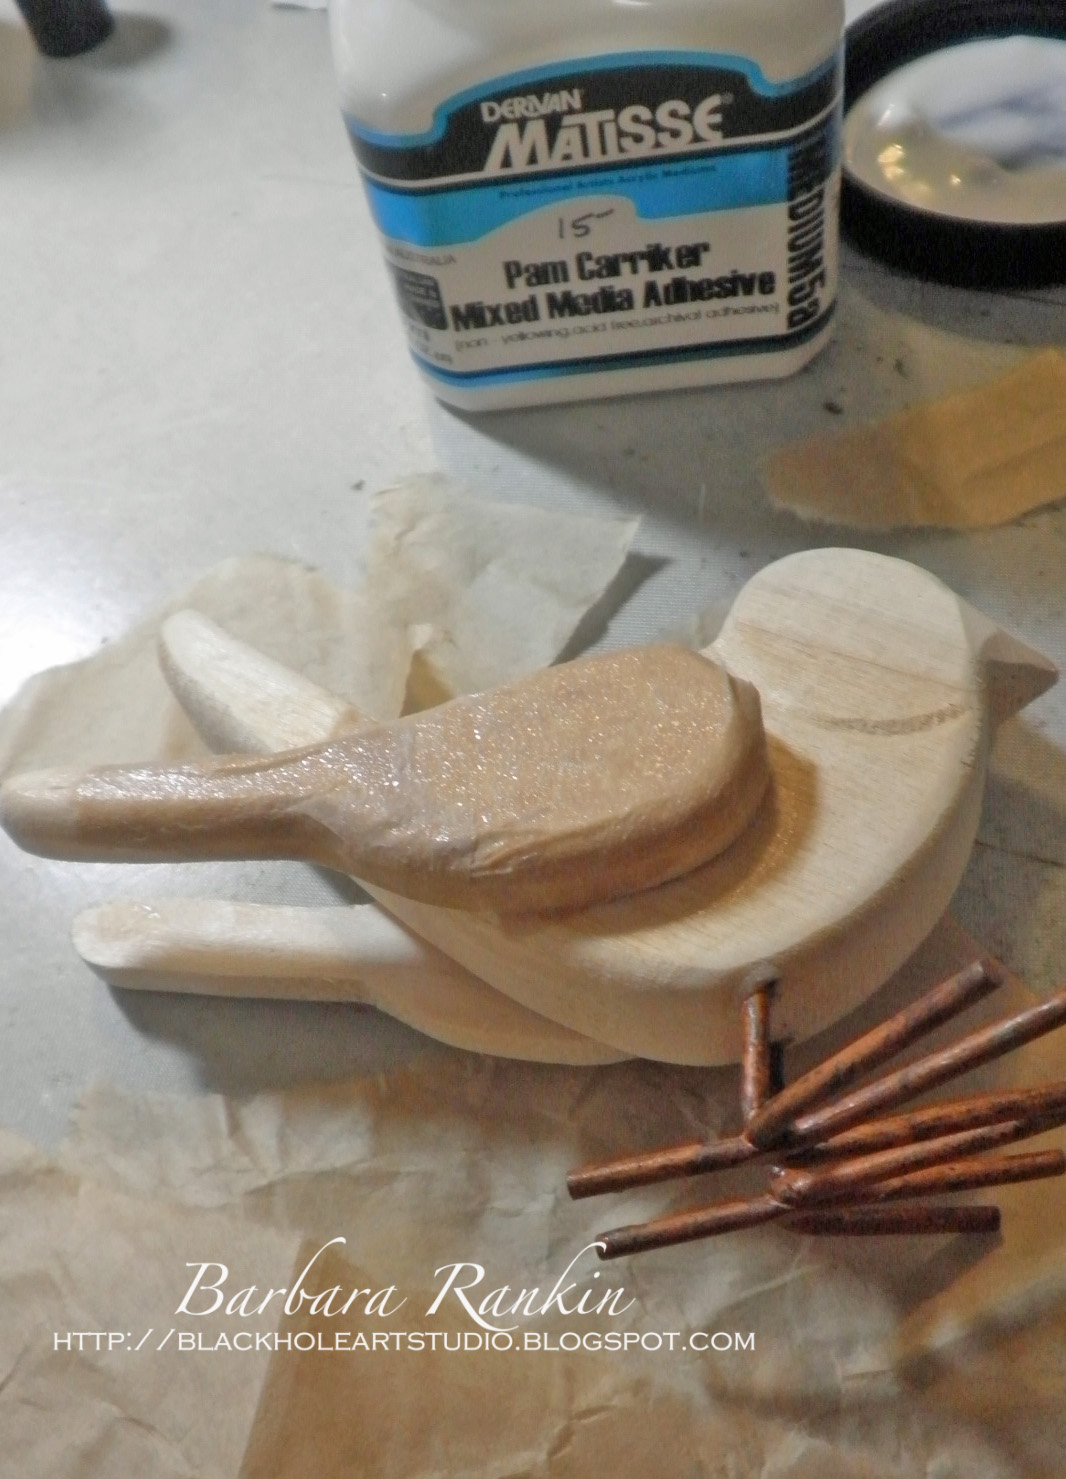
Remove the screw eye first.  Tear a coffee filter into strips and adhere to bird with Mixed Media Adhesive.

coffee filter adhered to bird’s wing

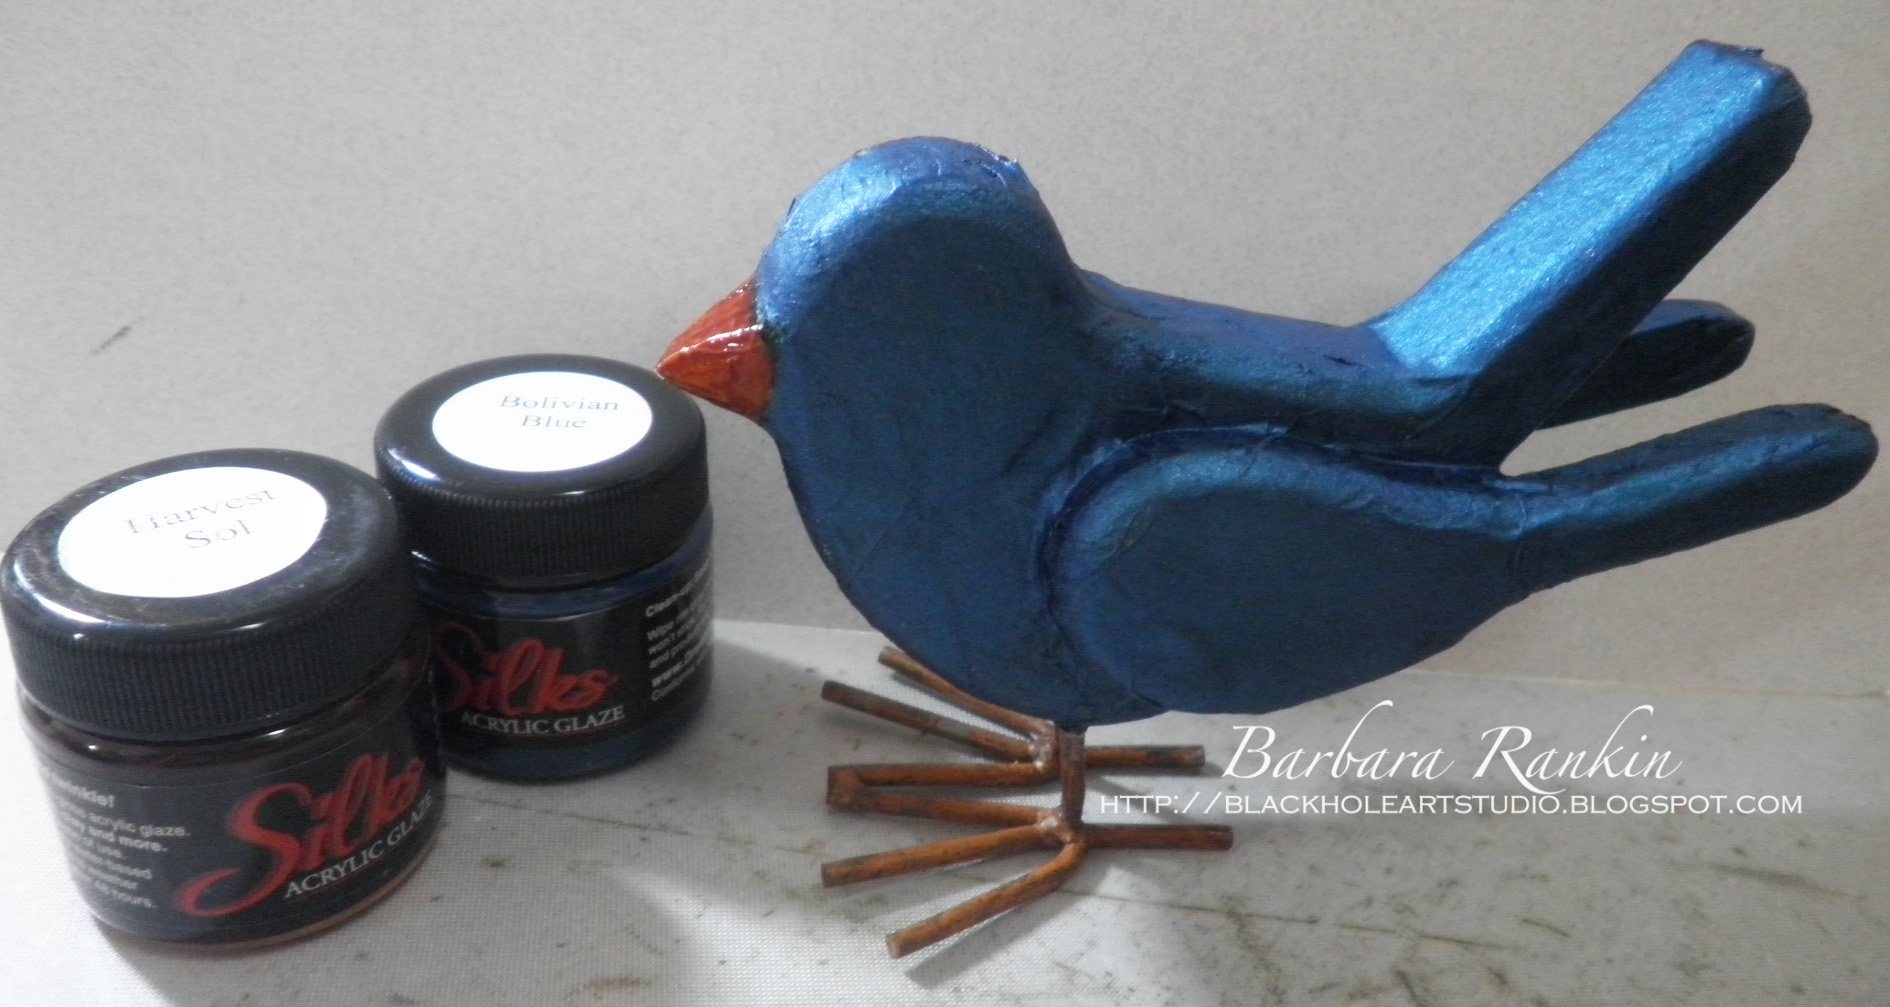
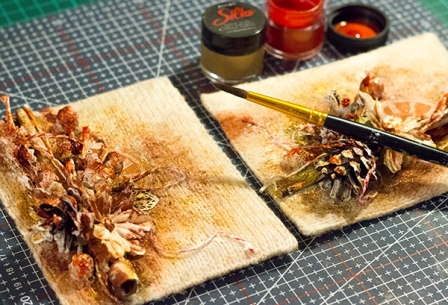
Paint bird with ColourArte Silks Bolivian Blue and beak with Silks Harvest Sol (mixed with a bit of Silks Mango Mama)acrylic glazes. [www.colourarte.com]

painted bird with Silks paint jars

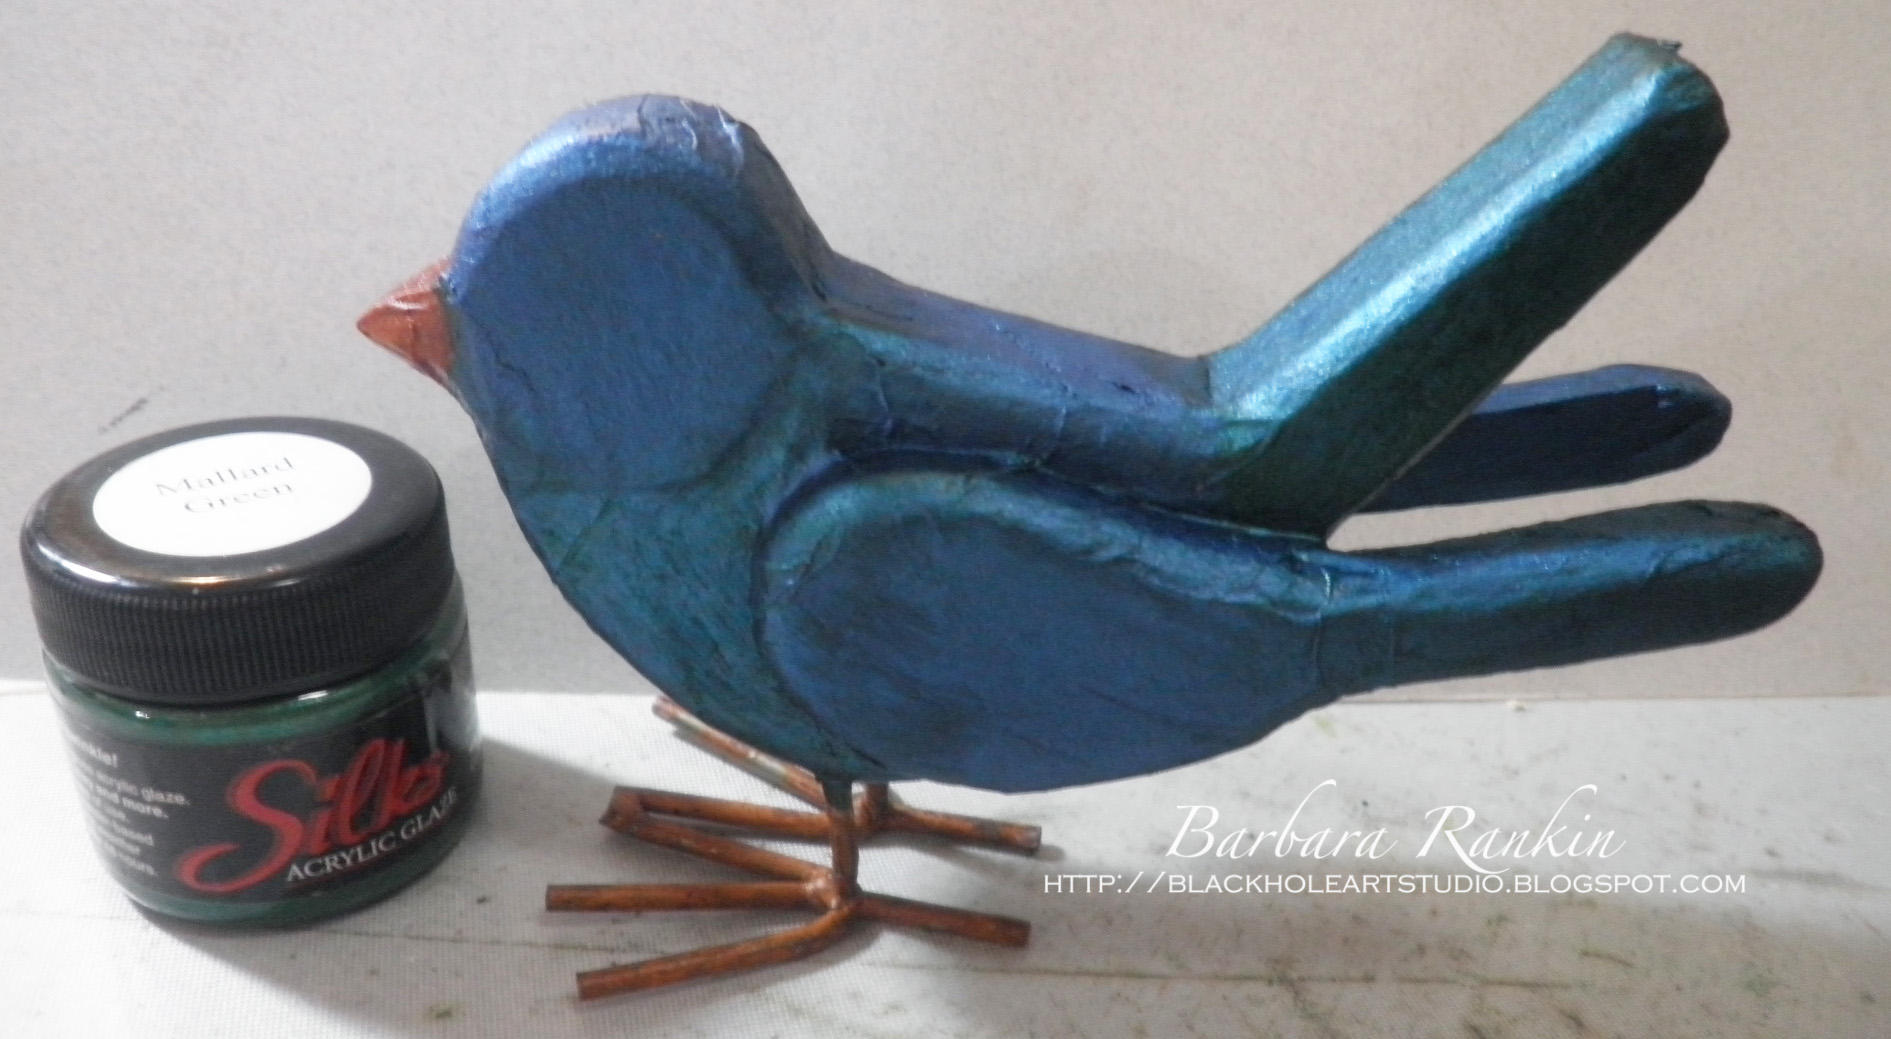
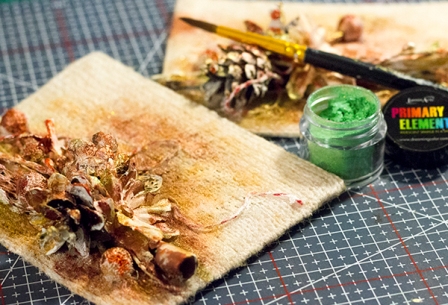
Add a wash of ColourArteSilks Mallard Green to the breast, tail and wing feathers for a bit of highlight.  It is subtle but effective.

birdand Silks paint jars

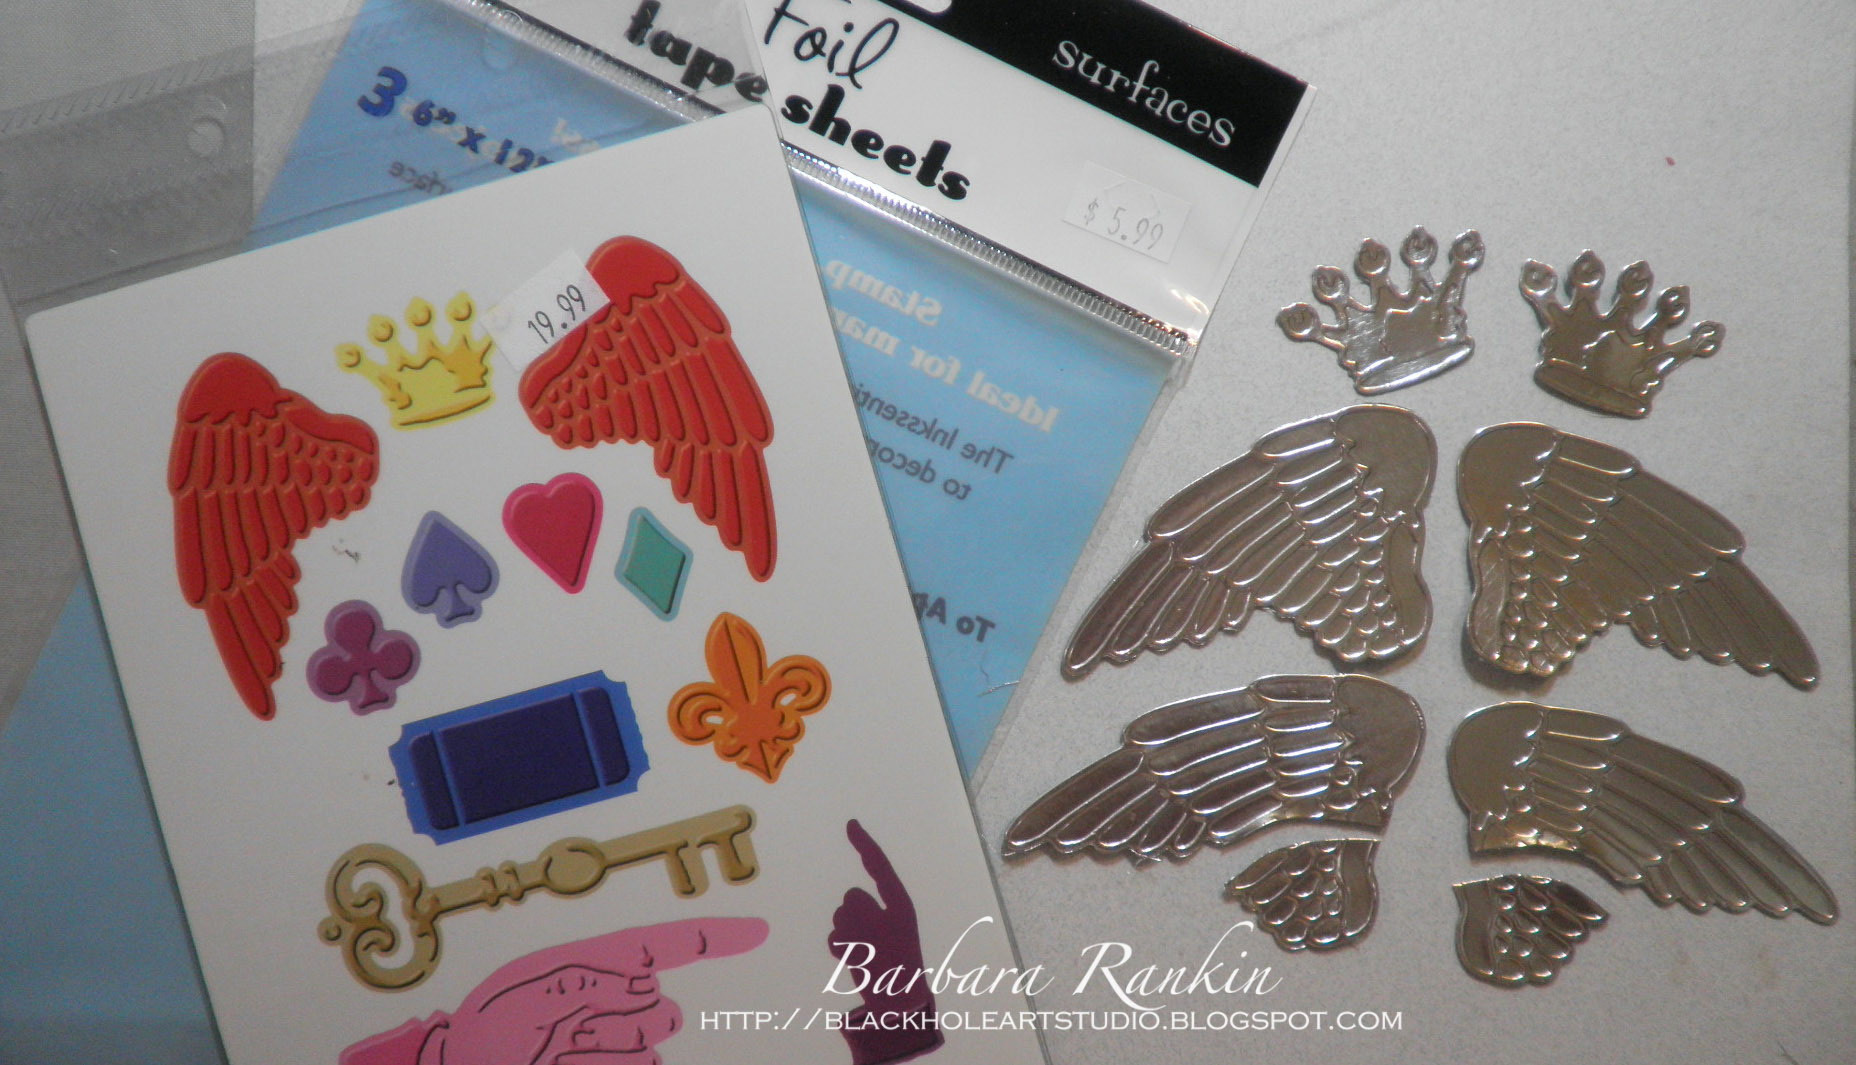
Adhere a 6” x 7” piece of Ranger foil tape to a sheetof silver metallic cardstock. Die cut four wings and two crowns with the Cuttlebug Cut N’ Boss folder. I also cut out two hearts, not shown in photo. Trim lower portion of one of the wings for each side, as shown.

photo of metal foil covered cardstock and diecuts

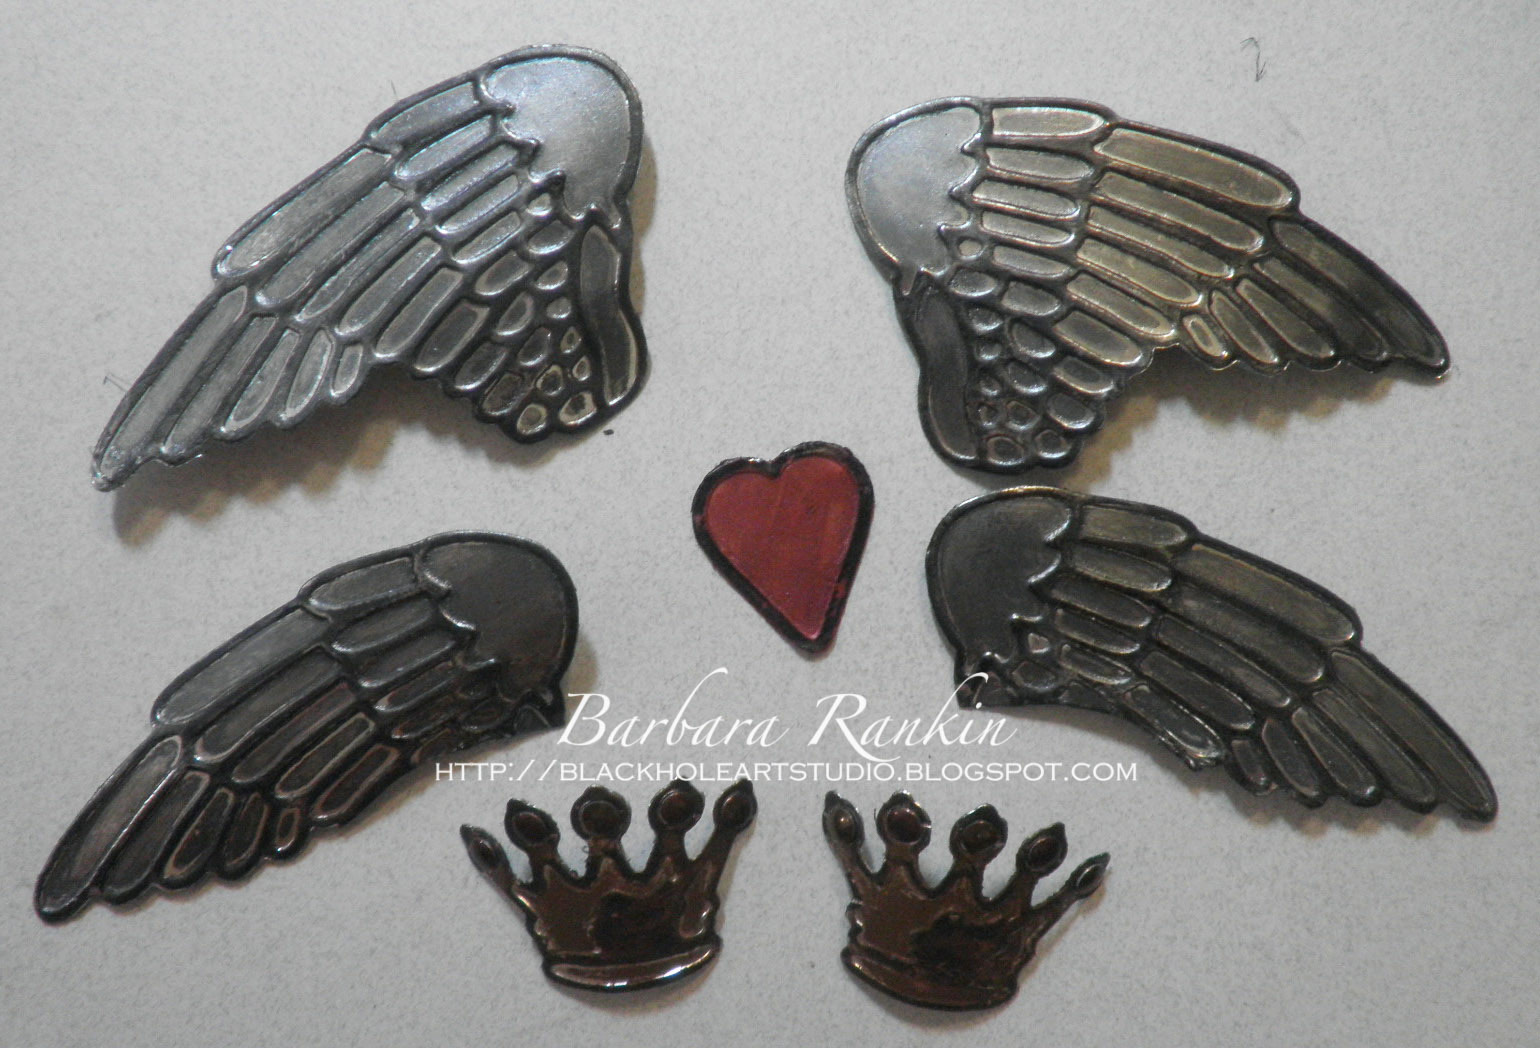
Apply DecoArt Metallic Lustre Iced Espresso to crowns and Black Shimmer to wings.  Add ColourArte Silks Rusty Mauve to one heart, thenhit high spots with black archival ink (Noir Black Palette Hybrid ink used).  Add metal bling to crowns and shape crowns and wings with fingers.

photo of painted metal foil covered cardstock and diecuts

Begin adding embellishments to the bird.  Adhere two wings to each of the bird’s wings, layering one over the other.  Join the two crown pieces, shape and adhere to the bird’s head.  Add jewelry finding with black gemstone on each side of head for eyes.  Add curved tubular beads to each side of the bird’s tail feathers.

adhereddie cut wings, crown, eyes, flowers

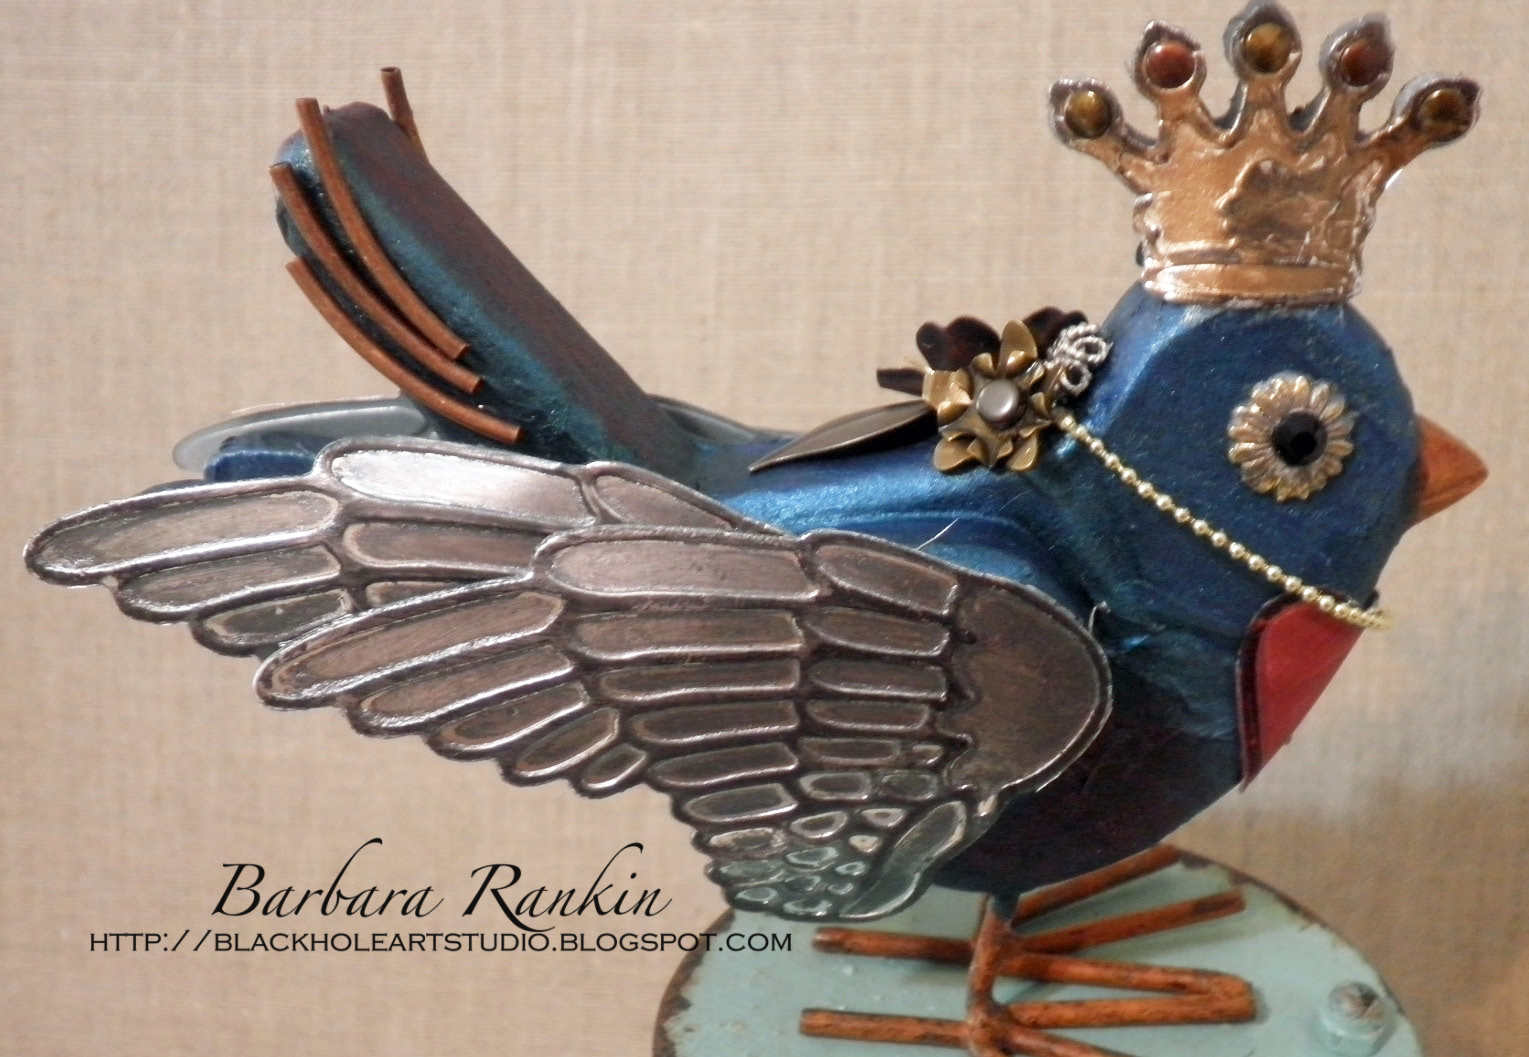
Glue tiny bead chain with “Seeds” charm around bird’s neck, gluing bead chain together on top.  Cover the glued join with Tim Holtz’s Ideaology metal flowers and leaves.

photo of bead chain with “Seeds” charm around neck and metal flowers

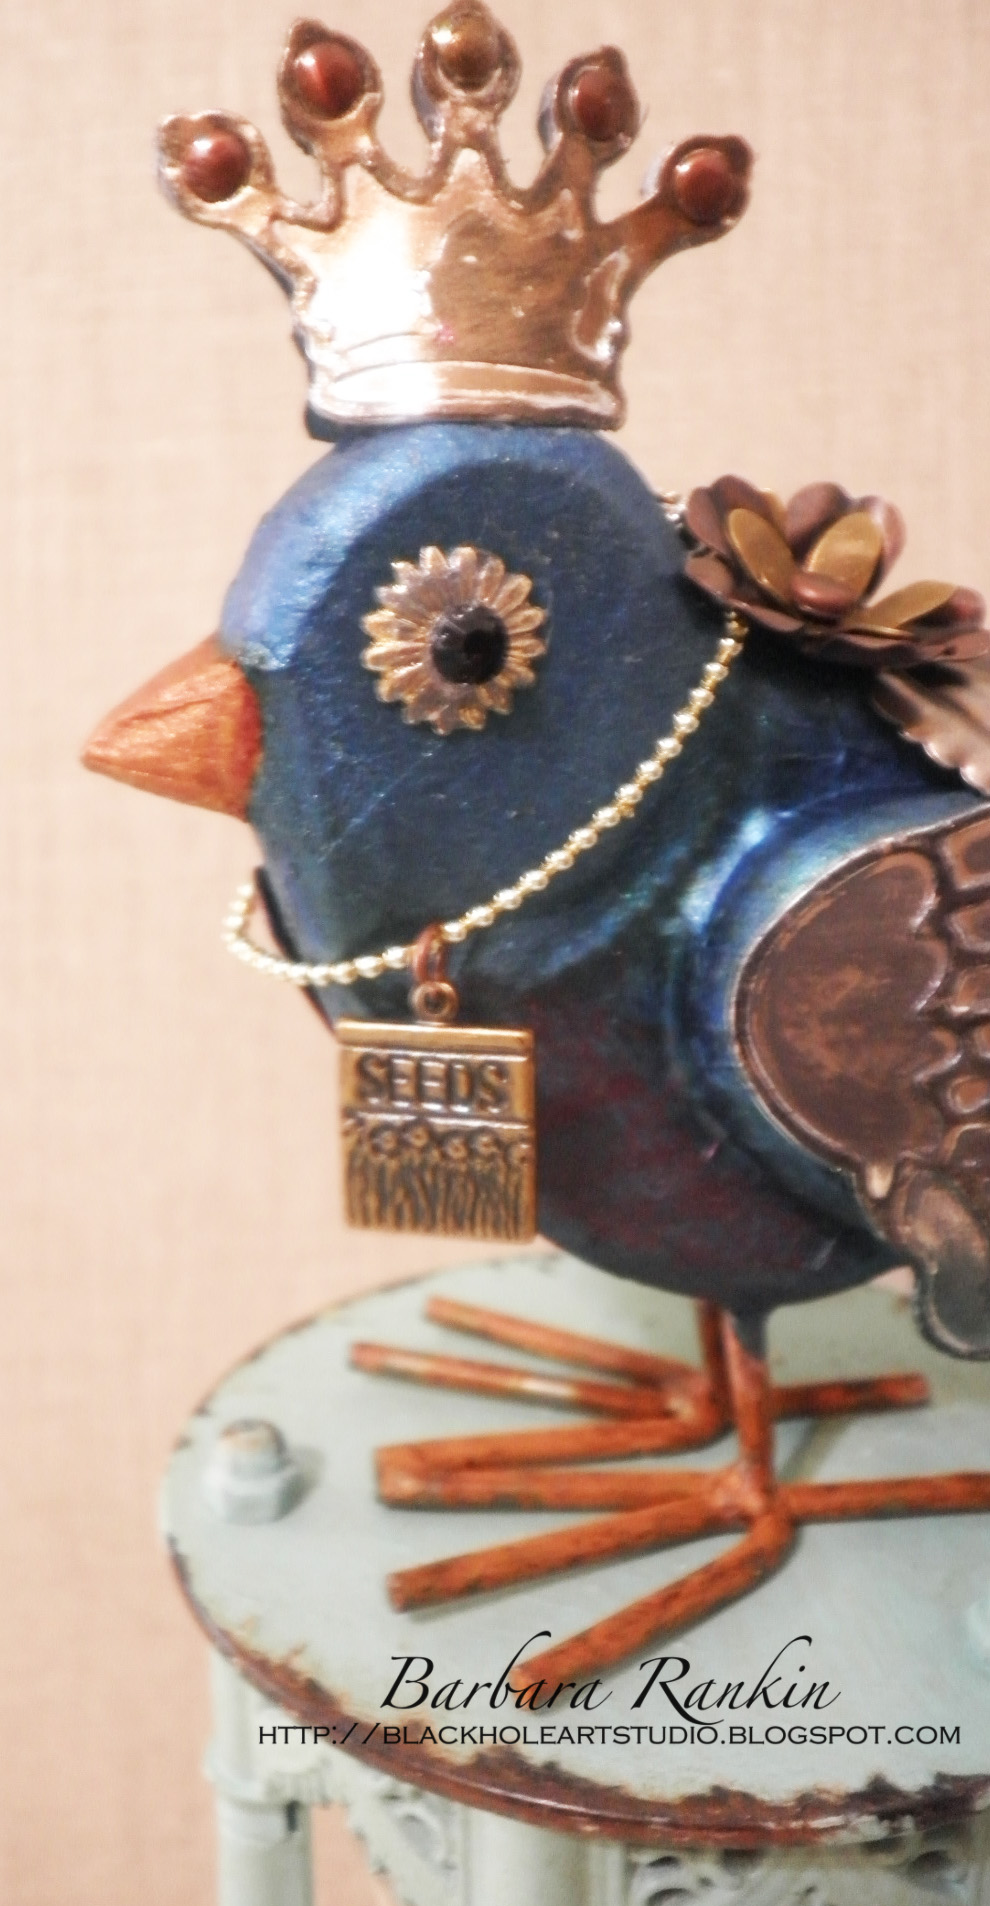
Here are two side views of the finished altered bird.  Isn’t he adorable!

right facing bird finished

~*~*~*~*~*~*~*~*~*~*~*~*~*~*~*~*~*~*~*~*~*~*~*~*~

Barbara is a mixed media artist who loves to teach.  She loves to learn new techniques and to share her knowledge with other artists.   She is a contributing artist in a book:  Make it in Minutes: Mini Albums, and has been published in several paper and online magazines.  She is currently on fourdesign teams, ColourArte, Sin City Stamps,Altered Pages, and Gina’s Designs.  She has served as a design team member for The Robin’s Nest and Creative Paperclay®, as well as guest designer for Craftwell USA, Unruly Paper Arts, and Gina’s Designs.

She lives in the Memphis, Tennessee area with her very supportive husband of 32 years, and her two Yorkies, Chloe and Zoe.

You can see more of Barbara’s work on her blog at Black Hole Art Studio or via Facebook – Black Hole Art Studio

~*~*~*~*~*~*~*~*~*~*~*~*~*~*~*~*~*~*~*~*~*~*~*~*~

.

.

Elena Lishchenko’s Christmas Cards

~*~

This article is written by Elena Lishchenko

Hello everyone! Today I would like to show you my new Christmas cards.

Elena Lishchenko's Christmas Cards

Supply list of ColourArte products:

  • Primary Elements Artists Pigments:
  • PE-167 Golden Nugget
  • Single-Jar-Pigment “Emperor’s Gold”
  • PE-175 Honey Amber
  • PM-006 Pure Mica Minerals Indian Copper
  • PE-591 Lucky Apple

Silks Acrylic Glaze:

  • SLK-104 Emperor’s Gold
  • SLK-179 Jasper Red
  • SLK-120 Spicy Tomato

I started with two pieces of cardstock. I cut two pieces from my old sweaters and sew them.

Elena Lishchenko's Christmas Cards

For my Christmas composition I use cinnamon and beautiful embellishments from the forest.

Elena Lishchenko's Christmas Cards

Next two steps – add traditional scrapbook embellishments from my stash.

Elena Lishchenko's Christmas Cards

Elena Lishchenko's Christmas Cards

Cover them with white gesso.

Elena Lishchenko's Christmas Cards

Now it’s time to playing with amazing “Primary elements”. First I lay on Pigment “Emperor’s Gold” with wet brush.

Elena Lishchenko's Christmas Cards

Apply  PE-167 Golden Nugget, PE-175 Honey Amber, PM-006 Pure Mica Minerals Indian Copper with dry brush.

Elena Lishchenko's Christmas Cards

Add SLK-104 Emperor’s Gold, SLK-179 Jasper Red, SLK-120 Spicy Tomato with dry brush. I want just add some accents, so I add a little touches.

Elena Lishchenko's Christmas Cards

I can’t stop and I decide to use PE-591 Lucky Apple, because it’s one of traditional colors of Christmas.

Elena Lishchenko's Christmas Cards

Finally I add some more Christmas decorations.

Elena Lishchenko's Christmas Cards

Close-ups:

Elena Lishchenko's Christmas Cards

Elena Lishchenko's Christmas Cards
.

.

Book Review: Creative Girl – Mixed Media Techniques for an Artful Life

~*~

This article is written by  Teresa Abajo

Hello! Teresa Abajo here and I will be reviewing Danielle Donaldson’s book Creative Girl – Mixed Media Techniques for an Artful Life. It was published in 2015 by North Light Books, who bring us a number of other wonderful art related titles.

book review

Danielle Donaldson is a graphic designer and has focused her artistic efforts on watercolour and graphite drawing techniques. Her work is wonderfully colourful, with lots of details she adds with pencils and markers.
The introduction invites us to discover our very own creative happy place by organising our time, personalising the process, creating stashes and sorting supplies. Throughout the book, the emphasis is on staying active creatively – never on productivity or creating to a particular standard.

We start (as many art books do) with a list of all of the supplies Danielle uses to create. I’m happy to say there aren’t too many specialised materials required. In fact, you’ll likely find you already own most items, or can substitute with the brand you already use. There are many household items she uses too – things like glass jars, salt, pins and old books.

book review

In the first chapter, Danielle talks about where much of her crafting takes place – on her couch surrounded by distractions I for one would find too much to bear! She puts together handy little stash stations containing creative tools and materials and she indulges in small snippets of creative time throughout the day. Again, the emphasis is on crafting often, rather than crafting for long periods of time. I found I could very much relate to that – I certainly find it easier to steal moments from my day rather that schedule a huge block of time for crafting. Organisation is key, and Danielle explains how she uses and collates Inspiration Folders.

The next couple of chapters focus on watercolour specific techniques and contain lots of ideas for mini projects and art exercises.
In Chapter 5 Danielle covers developing your own signature style – putting ‘you’ into your art work. She walks us through the creation of various girl figures in very simple, well photographed steps. Here’s where I am with these lessons:

book review

The next part of the book gives us lots of examples of “hot mess solutions” or how Danielle fixes components of her work with which she isn’t happy. Cover ups, work arounds, walk aways, let it go – simple self explanatory terminology.
The last part of the book has a beautiful gallery of Danielle’s work. Now that I’ve read her book I feel inspired to deconstruct a piece and have a go at replicating the components that appeal to me.

Creative Girl – Mixed Media Techniques for an Artful Life is part drawing and watercolour play manual and part realistic guide for those of use wanting to inject a little more art into our daily lives. It’s a beautifully presented book, written in simple and encouraging language and I’m sure you’ll be as thrilled as I was to add it to your craft library.

.

.

Using Nature as a Substrate

~ * ~

This article is written by Sandee Setliff

Looking for something different to use in your art? Then why not try substrates nature has provided for you.

Displaying art on a bark substrate.

Substrate is just a fancy word for the underlying material on which you choose to work on, like paper, canvas, wood or in my case…a piece of bark that had fallen off a tree.

Sometimes my art starts with a walk in the woods, picking up bits and bobs from nature that inspire me. It can be a shape, or perhaps a texture that captures my imagination or just something I like to collect, like leaves and bark.

I brought home this odd shape piece of bark and it sat in my collection bin for awhile before I finally knew what to do with it, for you see, the pieces need to speak to me too. Originally I was going to do this piece on a large leaf but when I began to plunder around in my bin, the bark remnant stood out, like it was calling to me. I already had painted my (self portrait) caricature of an artist, cut out the butterfly and laid out a twig to use, all that remained was printing out a daily affirmation and arranging my elements on the bark to see if everything fit.

Arranging the elements on the substrate to be glued down

Tip:

Once I had arranged everything I began the gluing process. Gluing on an uneven surface can be a bit tricky and one of my go to glues is from Helmar called Liquid Scrap Dots because it conforms to the bumpiest, roughest surface you can imagine and creates a smooth base for even the thinnest of papers.

Using specific glues for specific needs will make the project easier to complete and will make your work more professional.

The last thing to keep in mind is that when using nature for your art also means that the art work will not be permanent but can decay over time unless you preserve it.

~*~*~*~*~*~*~*~*~*~*~*~*~*~*~*~*~*~*~*~*~*~*~*~*~

A little about Sandee Setliff:

Since childhood, I am happiest when I have paint and glue on my hands! Playing with new products and getting messy is time well spent in my book. I create a variety of mix media signs, cards, and altered art, and my creative style ranges from cute and fun to clean and simple which I sell in a local gallery called the Art MoB. My latest passion is art journaling, typography and making hand made paper.  When I am not crafting, I am photographing wildlife and hiking through our lovely North Carolina mountains.

inthehillsofnorthcarolina.blogspot.com

www.facebook.com/Sandees-Artful-Words

www.youtube.com

~*~*~*~*~*~*~*~*~*~*~*~*~*~*~*~*~*~*~*~*~*~*~*~*~

.

.