Clock Work Inspiration Canvases

~ * ~

This article is written by Peg Rounds

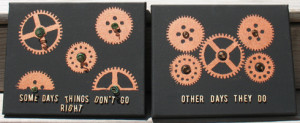
Some days just don’t go right and other days do

There are some days that everyone has things that just don’t go right.  I know I sure do, but I sometimes need to make it a point to stop and think that every day isn’t like those days.  I decided to create these inspirational canvases so that I can see them and remember that there will be good days and not so good days, too.  These are really fun to make and can be done with any inspirational reminder that you may need so be sure to make some of your own and place them where you can see!

Begin by painting the canvas with a base coat.  This will be the paint color that shows through.  Allow it to completely dry.

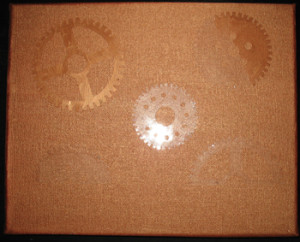
Next, die cut a piece of acetate with a die cut machine to create the stencil pieces that you will be placing on the canvas.  Spray each piece with Easy Tack by Krylon so that they can be easily removed.  Place them in position on the canvas.

Die cut acetate to create a stencil

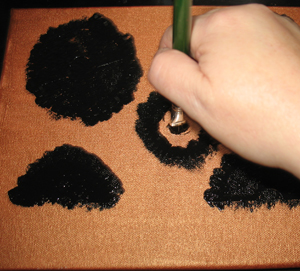
Dab paint, using a second color of paint, into the open areas of the stencils so that the paint gets into the smaller areas.

This is the second step to painting the canvases.  First use a dabber brush to dab paint into the open areas of the stencils after they are applied.

Now, paint straight brush strokes across the entire canvas from top to bottom to cover it.

Allow the paint to dry and carefully lift upward on the edges of the stencils to remove them.

Lay those aside and begin the work on the spiral pieces that will be the inside springs.

Start with a piece of jewelry wire.  The length will depend on how large you will want the spiral,

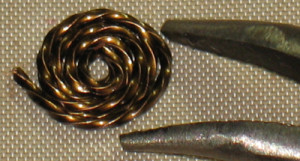
Curl one end of the wire using a pair of pliers,

Create a loop in the end of a piece of jewelry wire.

Continue to wrap the wire until you have all of it wrapped into the spiral.  As you work each new wrap should lay beside and against the last one.

Wrap the jewelry wire so that it creates a spiral

Take the pliers and grasp the center of the wire and lightly pull it up and outward to create the pieces that have sprung.

Pull the center of the spiraled jewelry wire out.

Age the coils by applying a patina to them.

Allow them to dry slightly and sand them with a fine sand paper to shine them up a little.

Create the second canvas in the same way, but when creating the coils do not pull the centers outward or patina them.

Finish both of the canvases by adding the inspirational message using wooden letters and attach everything with glue.

~*~*~*~*~*~*~*~*~*~*~*~*~*~*~*~*~*~*~*~*~*~*~*~*~

Peg Rounds has been seriously creating many types of art since 2007.  Her focus has become mixed media, card making and jewelry making.  She is often found on social media sites pegscraftingcorner where she enjoys sharing all that she has created.

~*~*~*~*~*~*~*~*~*~*~*~*~*~*~*~*~*~*~*~*~*~*~*~*~

.

.
Positive Thoughts for your Side Table

~ * ~

This article is written by Shari Welch

Everyone needs a little positive thought to start your day. I created this pretty little art block of positive thoughts to jump start my mornings. You can make this easy project in a few hours once you have all your materials on hand.

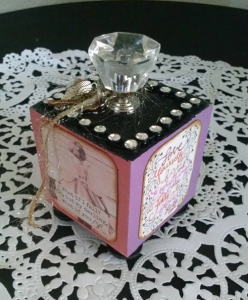
Positivity Art Block Final Product

Shari Welch creates a lovely DIY art block to keep beside her bed

Materials

  • Wooden block
  • Inspirational words
  • Drawer pull
  • Wood pieces for feet (optional)
  • Fibrous string
  • Embellishments
  • Diamond mesh ribbon
  • Americana multi-purpose® paint
  • DecoArt® glamour dust
  • Distress ink
  • Aleenes® tacky glue
  • E-6000® glue

Let’s get started!

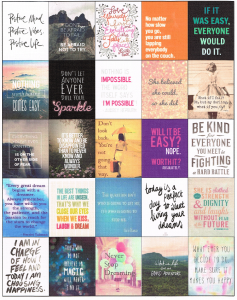
1. You will need to find images that will fit on your art block.
To save time you can use online companies that sells images you can download and use right away. If you are using images you find on the internet make sure that they are truly intended for free use and are not copyrighted.

sheet of images for the positivity block

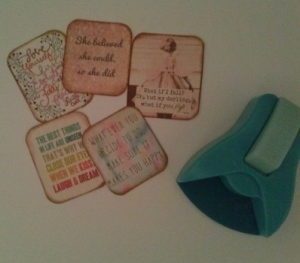
2. Cut out your images. I used a corner punch to make my edges rounded.
Define the edges with Distress ink.

Images used for the positivity block

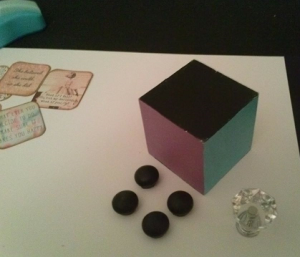
3. Paint the art block and the feet. I choose to paint each side a different color to coordinate with my images. You can use a hairdryer to speed up the dry time. Glue the feet on the block using E6000.

Materials for the project

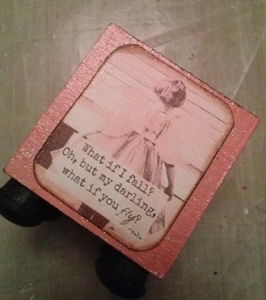
4. Glue your images on the block with tacky glue. When Dry you can accentuate around the sides using the glamour dust. I added it around the images and not on the entire image. I did paint the entire top with glamour dust because I liked the look. Feel free to use your creativity.

single image on the positivity block

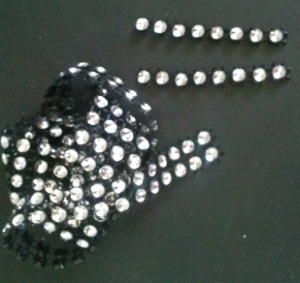
5. Cut the diamond mesh ribbon to fit the block and glue with tacky glue.

diamond mesh ribbon for embellishement

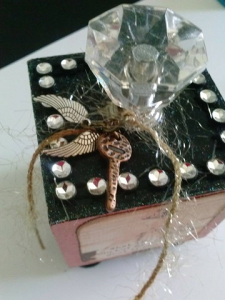
6. Tie your embellishments on the fibrous ribbon and then onto your drawer pull.

positivity box top view

~*~*~*~*~*~*~*~*~*~*~*~*~*~*~*~*~*~*~*~*~*~*~*~*~

I have been creating art for as long as I can remember. I studied graphic design in Portland,Oregon before moving to Denton, Texas and putting all my focus on mixed media art. In addition to being an article writer for mixed media art, I am on the Creative Paperclay®Design team, The Robin’s Nest ®Design team and a blogger for DecoArt®. I strongly believe in giving back. I volunteer at Scrap Denton Creative Reuse Center where I teach workshops, art camps, and perform art demos. I am very passionate about mixed media art and helping others discover their creativity.

You can follow my journey on my facebook page My Altered Life and  My Altered Life’s blog page

~*~*~*~*~*~*~*~*~*~*~*~*~*~*~*~*~*~*~*~*~*~*~*~*~

.

.
Where do Your Ideas come from?

~ * ~

This article is written by Ann Strecko Koeman

As an artist I am often asked “where do you get your ideas?”. I usually smile and politely reply “all around me”.  To the non-artist this seems like a flakey answer, or that I don’t wan’t to share some secret and mysterious portal of inspiration that only artist types have access to.  In other words I feel like Hermione in the Harry Potter series of books, who has magical powers but must live within the mogul world!  However, as lame as my answer sounds it is the truth.  Creatives get their inspiration everywhere, and anywhere.  Inspiration strikes when you are living, working, playing, and even sleeping.

where do mixed media ideas come from?

Personally I find that I get ideas all the time just by living and acting.  If I am ill or depressed and not moving I do not feel the same level of inspiration as when I am well but I still am open to any ideas.  Which is why I try to always have pen and paper near by to jot down any ideas I get.  As some of you are reading this you may be thinking “now, really, where do you get your inspiration?”.  For you, I am including a list of inspirational starting points.

From my every day life and interactions with my family.

A song playing on the radio.

Something I  overheard while eating out at the restaurant.

Seeing children playing outside.

The woods behind my house.

Flipping through catalogs and magazines

where do mixed media ideas come from?

Tossing the junk mail into the recycling bin.

While watching a movie.

Surfing the internet, browsing through websites, Pinterest etc.

Looking through my vast collection of books (not just the art ones)

Cleaning around my house (ok I don’t do that very often)

Talking with other creative people.

Talking with my husband (get it, he’s not creative or so he  says).

Purging a closet.

While shopping (favourite one).

Walking around my neighbourhood.

Chatting with my neighbours.

Reading old magazines while waiting at the Doctor’s office.

Doodling while waiting at the Doctor’s office.

Checking out all the new products for pets in the shop while waiting for our cat to be seen by her Vet.

The people waiting in line at the post office.

My drive to and from home.

Packaging.

Artwork by other artists.

How- to leaflets in the department stores, and craft stores.

The hardware store.

Shovelling snow.

Waiting for my car to warm up in winter and cursing at the ice I have to chip off the windshield.

The new design on the paper coffee cup I just bought from the drive thru to warm up my frozen fingers from doing the previous.

My garden, any time of year.

The wildlife and the neighbour’s pets.

Taking a class.

Writing a blog post.

Attending a trade show.

The thrift store.

where do mixed media ideas come from?

Whatever it is that I am doing I stay open to any ideas that come my way.  There are days where I get a bunch of ideas that amount to nothing.  On the other hand sometimes a simple thought will develop itself into a larger idea and snowball into a project.  On the days that I just feel void of any creativity I just start doing anything, I doodle, splash some ink on a surface, rearrange my basket of scraps, or pull out an all in one beginner’s crafting kit just to get me going. My best days are when I am overflowing with ideas and I just scribble them all down like a mad woman into my many notebooks for fear I will forget them.  I also take photos often of anything that inspires me if I don’t have that pen and paper or can’t put into words the idea I just got.

So, I could list so many more ways to find inspiration but I think I have made my point.  Look around with an open mind and listen, there just might be the next big inspiration whispering to you.

~*~*~*~*~*~*~*~*~*~*~*~*~*~*~*~*~*~*~*~*~*~*~*~*~

Ann is the Artist and owner behind Annmakes®, a blog about Mixed Media Arts and Crafting in general.  She is based in Canada just outside the nation’s capital of Ottawa, Ontario.  As the winters are long and cold there, she is bunkered down in her studio/office with a mug of coffee in the morning and a mug of tea in the afternoon, and wishes she did not have to leave until the Spring thaw!

~*~*~*~*~*~*~*~*~*~*~*~*~*~*~*~*~*~*~*~*~*~*~*~*~

.

.
Intuitive painting

~ * ~

This article is written by Melanie Statnick

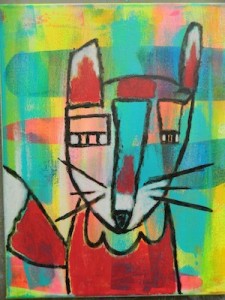
Intuitive painting is painting by how you feel. The process is free style and uses your creative instincts to guide you through your painting with minimal instructions. The intuitive approach to painting allows for what I call happy mistakes. There is room for error that you can turn into a whimsy painting with effortless ease.  The step by Step instruction will help you with the bulk of the workshop, but there are times when you have to go with your gut.  In this workshop you will build layers of paint using different tools to create different shapes in your background. Using the shapes in the layered paint you’ll begin to see a whimsy Character. I’ll teach you how to bring it out and then layer and paint again, to create a fun, whimsy one of kind piece of art.

Mixed Media inspired fox painting

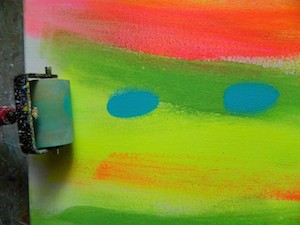
Start with a light paint colors first and apply a generous amount of paint directly to your 11x 14 canvas. Using your flat brush create bottom to top motion to spread the paint to your vertical surface. Use the same motion when you apply your other lighter colored paints like yellow, and pink. Rinse brush between colors and dry using your heat tool between layers. After you have applied at least three different colors of paint to your canvas turn your canvas horizontal. Apply a pea size amount of Teal directly to your canvas. Using your Brayer roller, roll over the paint in a side to side motion. The paint will spread in an uneven and grungy look. This will create a different shape than your flat brush.

Melanie and her Mixed Media inspired fox painting

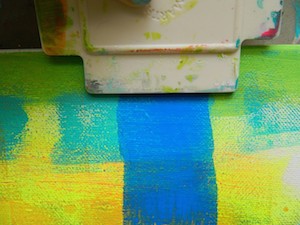
Keep your canvas in the horizontal position. Apply neon blue directly onto the canvas, using the large edge of the squeegee pull the paint in a bottom to top of canvas motion. Repeat this step with the dark yellow. Don’t forget to dry in between layers.

Melanie and her Mixed Media inspired fox painting

Melanie and her Mixed Media inspired fox painting

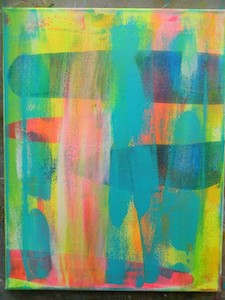
Your canvas should look something like this. You have created a painted layered background. Place canvas in vertical posing and using your flat brush and some of your lighter paint colors apply them to the spots on your canvas that are unpainted. Dry.

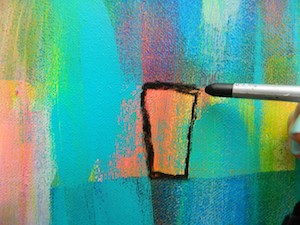
The next step is finding your character by intuitively looking for the shapes your paint strokes created. Wet your water soluble graphite pencil in 8B (very dark) and find your first shape by outlining it with the wet pencil. Take your time here to relax and become familiar with your piece. The shapes will start to pop out at you. Here I have found a nose.

Melanie and her Mixed Media inspired fox painting

Melanie and her Mixed Media inspired fox painting

I have found a nose, eyes and ears. I do not see the shape of the head or body yet. This may or may not appear to you. If this does not appear to you, you’ll have to free hand draw the head and body shape. This sounds intimidating but it’s not. If you feel more comfortable use a 2HB pencil to lightly free hand. Draw in the head and or body shape. There is no need to erase these lines the graphite pencil when wet will go over this line. I will draw in a tail, whiskers, and collar on my character. These are details that you should add in while you’re creating your head and body shape should you not already see them.  This step allows for creative freedom in owning your piece.  Be sure to dry the lines and shapes before the next step. This graphite will run and move around should you re wet it on your surface. Beware of this is the next step.

Melanie and her Mixed Media inspired fox painting

Melanie and her Mixed Media inspired fox painting

Melanie and her Mixed Media inspired fox painting

The character we have created will most likely not have traditional coloring should you be creating an animal. The next step is to paint in some of the areas using your Caran d’ache water soluble pastels.  This step is also intuitive as you go along. Here I have chosen to fill in the tail, body and ears. I have painted in only parts of the nose and face.  Wet the tip of the pastel like you did with the graphite pencil, and apply pastel directly to canvas in desired shapes.  If you are unfamiliar of what the color will look like once wet, use a scrap paper to test before you apply to areas of your canvas. Most are true to color.

Melanie and her Mixed Media inspired fox painting

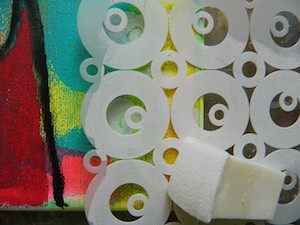
Once you have completed your animal/character the next step is to bring the painting together. Using a choice stencil we will randomly place the design around the canvas. Apply white paint using a makeup wedge or stencil brush. Pour a pea size amount of paint onto your palette. Place the stencil in the desired area of your canvas background, carefully avoiding your character. Use your hand to hold stencil still while you apply the paint over the stencil. Repeat this step using other desired stencils until you reach the look you like. This is another creative and intuitive process.

Melanie and her Mixed Media inspired fox painting

Melanie and her Mixed Media inspired fox painting

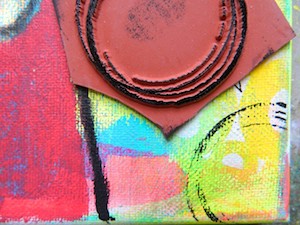
Your piece should look similar in process like the picture shown above. Now we’ll apply the cling mount/rubber stamps to the piece. This is similar in process to the way we did the stenciling. The canvas has a natural bow in the center. When you place your stamp inked in the desired spot you will need to place your free hand under the canvas were you about to stamp for support. This will ensure a more full images of the complete stamp. I prefer a more lose grunge look of a half stamp or just using the corner of your stamp. If this is our preference also, then proceed stamping around your character/animal.

Melanie and her Mixed Media inspired fox painting

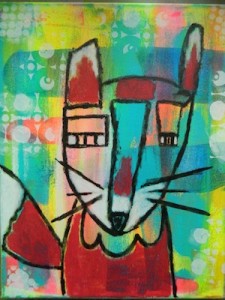
This is your final piece. I encourage painting the sides of your canvas. This makes the appearance on the wall more pleasant. The black paint is suggested.

~*~*~*~*~*~*~*~*~*~*~*~*~*~*~*~*~*~*~*~*~*~*~*~*~

Published Writer/Artist Melanie Statnick was raised in Ontario Canada. For over 12 years Melanie has called eastern North Carolina her home. Melanie continues as a self-taught artist and teacher of visual arts and an article writer for Mixed Media Art co Melanie’s work can be found extensively throughout North Carolina with private collections abroad.

Melanie’s successes include written publication of articles in Interactive Artists Magazine, Publication in Somerset Studio magazine, Altered Arts magazine, and 2013 edition of Wilson Woman Summer issue.  Melanie’s awards are 1st place in viewer’s choice in Washington NC and 2nd place magazine cover choice with Altered Arts magazine. In 2015 you can find her work in Dawn DeVries Sokol book “A World of Artists Journal Pages”.

You can follow Statnick on her website at: www.melaniestatnickart.com

~*~*~*~*~*~*~*~*~*~*~*~*~*~*~*~*~*~*~*~*~*~*~*~*~ [center]
.

.