Funky Calligraphy: Adventures in Hand Lettering

This article was written by Martice Smith II

Funky Calligraphy: Adventures in Hand-Lettering


Funky Calligraphy: Adventures in Hand Lettering, Tutorial by artist Martice Smith II

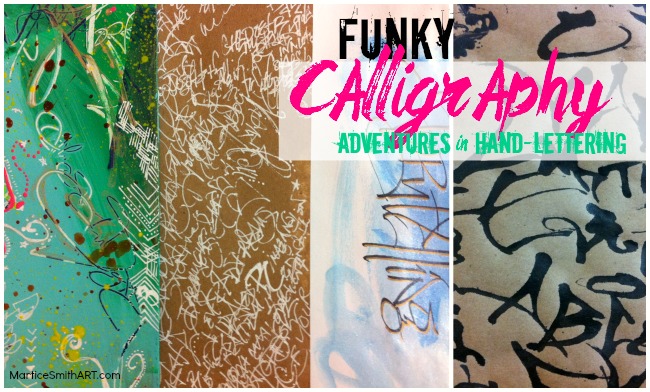
My graffiti-style lettering is a fun mixture of bold, expressive calligraphy with a whimsical, urban vibe. It’s what makes my handwriting so recognizable and unique.

Sometimes, I prefer my letters to look imperfect and scribbly. It’s important to me that my spirit, at the moment, transcends into my artistry.

Today, I’ll be your guide for a quick adventure on finding your “voice” within your hand-writing.

So, where do I find inspiration? Literally, everywhere!

Look around you…the world is your oyster. Take an adventure!

I challenge you to look at your surroundings differently. Here are a few places of inspiration I like to start with:

  • graffiti murals / graffiti on trains
  • billboards
  • food packaging
  • tribal symbols and jewelry
  • kids’ writing
  • Expand your powers of observation. Photograph interesting walls and surfaces, print them out and add to a visual journal. Doors, facades, an vintage signage are my favorite things to look for!
  • Flip through architecture catalogs and fashion magazines for contemporary design inspiration.
  • Look at brand packaging. Notice how the typefaces exude various emotions for you.

Now that you’ve been inspired, let’s play!

Here are some basic supplies to get started with lettering: 


Funky Calligraphy; supplies to gather

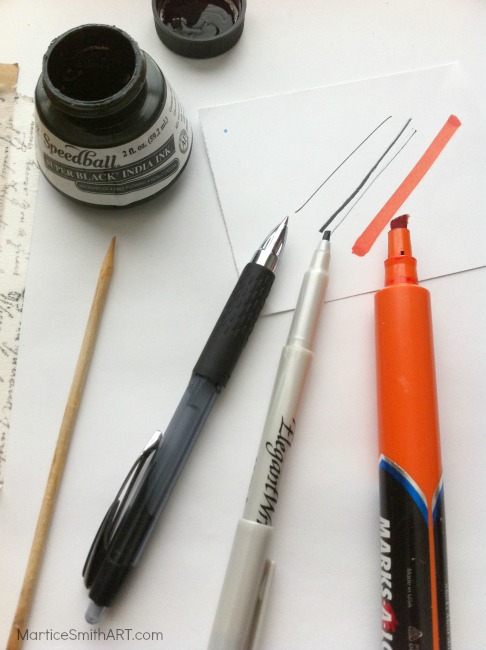
  • Speedball’s Super Black India Ink (waterproof, free flowing, and contains a deep opaque pigment. It’s one of my favorites!)
  • skewer or toothpick
  • assortment of markers and fine point pens (include a chisel-tip marker / calligraphy pen)
  • paper

Funky Calligraphy and graffiti; step-by-step process by Martice Smith II

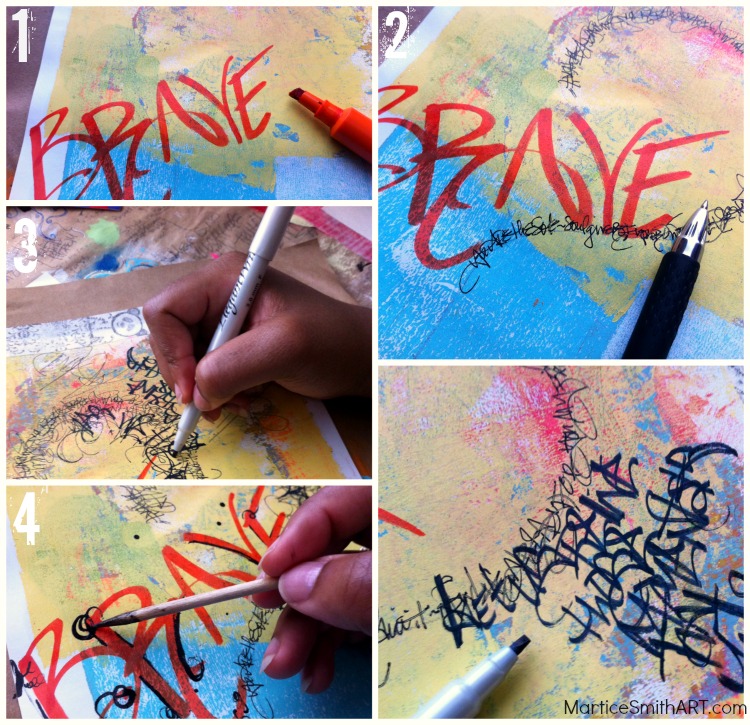
  1. First, grab your biggest chisel-tip marker or calligraphy pen. Write large letterforms and work randomly across the page.
  2. Next, use a pen with a smaller point. Try writing a phrase in a circular shape. Rotate the page for smoother writing. Allow the words to look like a series of marks. It’s OK to leave some words illegible. By layering letters and strokes you create interesting effects and backgrounds.
  3. Exaggerate letterforms and lines – make them your own! Vary their size by alternating your thicker, chisel-tip markers with fine point pens.
  4. Finally, draw scribbly flourishes with a toothpick or skewer dipped in India ink. (Do this part last to allow the ink to dry without being disturbed.) Set aside to dry for a few minutes. Spray varnish to seal the surface.

Your creative design potential is limitless if you think beyond traditional calligraphy methods. Take a playful approach, forget about the “rules” and allow your imagination to soar!

Think about this:

What kinds of fonts make you feel happy? Do they happen to be skinny, thick, bold or a mixture of all three?

What about fonts that help a product look timeless and fresh?

Analyze the differences of vintage style vs. a more kid-friendly look. What would they look like combined? Try it!

Remember, the key to developing your own style is to allow yourself to play and experiment.

JOIN the fun!

If you want to learn more about expressive, free-style hand lettering, be sure to sign up for Martice’s newsletter. Be the first to know about her upcoming mini-workshops, featuring in-depth handwriting techniques.

~*~*~*~*~*~*~*~*~*~*~*~*~*~*~*~*~*~*~*~*~*~*~*~*~

Mixed-Media artist, designer, and instructor Martice Smith II

Martice Smith II is creative director of Martice Smith II – Illustration & Design Studio, based in Missouri and owner of Uneek Art Boutique. She established herself as a freelance Illustrator and graphic designer after receiving her Bachelor of Arts Degree. Specializing in mixed-media illustrations, Martice’s love for fashion, typography and wildlife are infused with a combination of traditional and digital art techniques.

~*~*~*~*~*~*~*~*~*~*~*~*~*~*~*~*~*~*~*~*~*~*~*~*~

.

.

Encaustic and Glass Mixed Media Mobile

~ * ~

This article is written by Anjuli Johnson

Every once in a while, I slip away from my usual style of work and am inspired to create something drastically different from anything I’ve ever done before.  Whenever this happens, it’s always very exciting and terrifying at the same time.  I think one reason I tend to stay within my practiced range of techniques is that I know what I’m doing- doing something different means a necessary amount of experimentation and trial and error, which may work, or it may not.  Terrifying though it may be, it’s so important to experiment with new techniques, because obviously that is how we learn and develop our artistic talents, especially if you are self taught.

I have worked with encaustics before, but never on fabric, so I knew bringing my mobile idea to fruition was going to be tricky.  I used brocade as my base, not only for its beautiful colors and designs, but because I could leave the edges frayed or burn them smooth.  You can see I chose frayed for some, and smooth, burned edges for others.

I cut 2*2 inch squares of glass for inside my encaustic pieces and random broken pieces to hang from them.  Alcohol ink is what I used to give them a stained glass effect.  You need to use Krylon acrylic coating as a sealant so the ink doesn’t smear.  I used the cut glass squares as a template to stitch squares into my layers of fabric.  I cut out the squares of fabric, leaving an edge that the glass would sit inside once I finished working with the wax.

There are some things to be aware of if you’re going to attempt a similar project- first, the surface you are working on.  Make sure that it’s clean.  My art table is covered with paint drips and old glue, so I improvised another surface to work on.  The other thing is that for my squares of stitched fabric, I wasn’t painting on just one side as I would do when painting on wood.  Both sides of my pieces would be seen in this mobile format, so I knew I would be painting with wax on both sides.  If you’re not careful, working on one side can cause the wax on the opposite side to stick to the surface of your table and peel away.  I found it easier and less messy to work until I was nearly finished adding all my wax and embellishments on one side, and then begin work on the other side.  You need a heating tool to heat the wax between layers so they fuse together- when I finished working on one side fusing the wax, I would lay it on the other side to begin painting, and hold it loosely in my hand to fuse it rather than lay it on the table to fuse it.  This keeps the wax on the fabric rather than peeling away and sticking to the table.  Be careful using your heat gun while you do this- you don’t want to burn yourself.  But I was able to do this quite easily and it worked much better.  Of course, encaustic is a very forgiving medium.  If something goes wrong, don’t fret.  There are always ways to fix mistakes or mess ups, so it’s really the perfect medium for experimentation.

I used around 6-7 layers of wax on each side, and it’s with the last couple that I added most of my embellishments.  (You can use as many as you would like, as long as you fuse between each layer.)  I used stamped and drawn images on rice paper, Tim Holtz patterned tissue paper, rub-ons, metal objects like keys and gears, and india ink stamped and drawn right onto the surface.  You’ll need to add a layer

of wax over any paper or metal embellishments you add, but if you are stamping or drawing with india ink, you can let it dry on the top layer without needing to add any more.

There are countless encaustic techniques you can use on a project like this.  One of my favorite resources is a book called “The Encaustic Studio” by Daniella Woolf. Of course, there are seemingly endless resources on pinterest and youtube, as well.  Check them out, but as I said before, don’t be afraid to experiment and try new things.  They may work, they may not, but I have found that any art experiments you try are well worth the risk!

My biggest risk was building my own mobile frame- fun, but tough.  I’m definitely going to need to practice my mobile-making skills.  The best part was adding the       wire around the glass and the frame- the swirls of dark metal give the whole piece a rather whimsical quality.

So, that’s my venture into the unknown!  I made mistakes, fixed them, had to scrap a few of my original ideas when they didn’t work, but I’m pretty happy with how everything turned out.  Not only that, but I feel like I have a little more courage stored up for the next random idea that pops into my head.  What new things are you going to try this week?


Each of us must face our fears and try new things if we’re going to continue to grow as artists.

~*~*~*~*~*~*~*~*~*~*~*~*~*~*~*~*~*~*~*~*~*~*~*~*~

Author bio:  Anjuli Johnson  is a Mixed Media Artist from Raleigh, NC.  She began her art career as a scrapbooker, and it’s been an evolutionary process every since.  She loves all things mixed media- paper, glue, paint, canvas, pens, wire, gears… the list goes on and on.  She is constantly trying to push through her fears to discover and develop her talents, meet new people, and learn from those around her.  Check out Anjuli’s Facebook page to learn more about her.

~*~*~*~*~*~*~*~*~*~*~*~*~*~*~*~*~*~*~*~*~*~*~*~*~

.

.